Remember when John mused about who would win the bathroom race (he wanted to frame out the mirror and I was on the DIY window shade train) here? Well, chugga chugga, baby. Momma won.
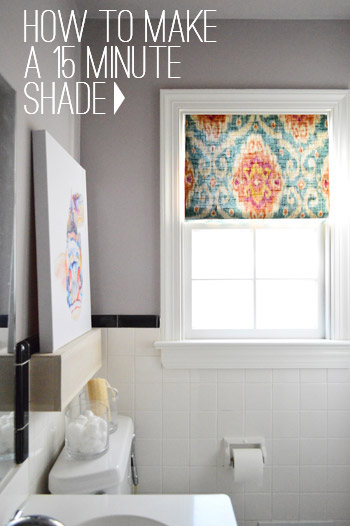
We got the fabric at an outlet called Mary Jo’s a while back (here’s an affiliate link to it on amazon for folks in other areas). We threw Clara a wormy birthday party with her two favorite colors – pink & orange – so when it came to picking out the fabric for the hall bathroom, where we log some serious potty and bath time with her, I couldn’t resist adding some fun with the bold patterned fabric that featured a few of Clara’s favorite colors. Especially since so much of the room is such a safe/neutral tone (lots of white tile and trim + gray walls with a soft plum undertone), so it’s fun to bring some pops of color with the turquoise knobs that we added to the vanity, some colorful art, and our new window shade.
As for the process, it was a semi-similar system to the shade I recently made for the kitchen – except even simpler. Yup, this baby was an $8, fifteen minute curtain (the kitchen one took about an hour). There was still no sewing machine involved, but this time there was also no pinning and less fabric (I only needed half a yard) – so it took a lot less time. You ready for the breakdown? I thought it would be fun to do a minute by minute rundown, so here we go.
Minutes 1 – 3: Make A Paper Template
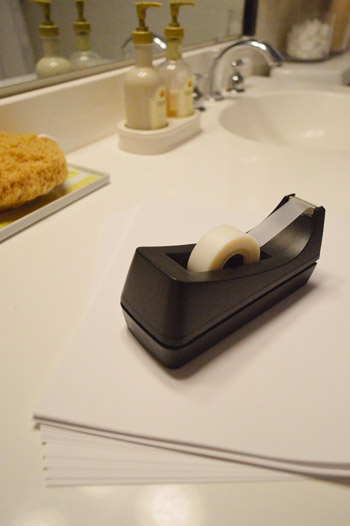
I broke out six pieces of cardstock and the tape to make a quick paper template for the exact width and length of the window.
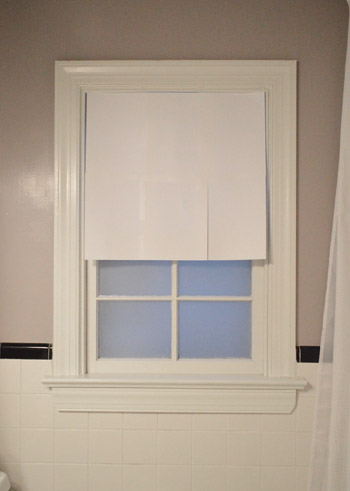
Then I taped it up in place. Sometimes it just helps to visualize things before committing to a certain size/shape.
Minutes 4-5: Cut Your Fabric
Next I carefully placed my paper template on my fabric (so the pattern was centered) and cut it out with an inch border on each side and the bottom with a wider border along the top (3″) since that extra fabric would be used to mount it at the top.
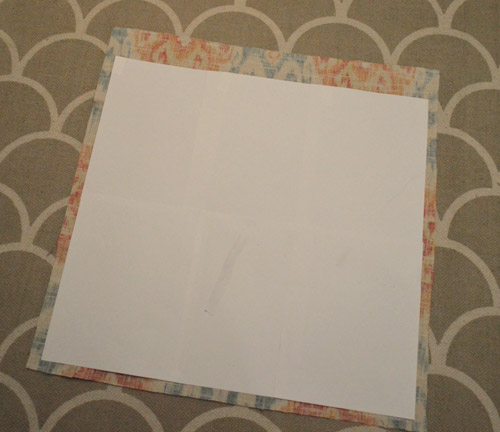
The reason I cut the fabric to just be an inch wider on those three sides was because that’s the width of my hem tape, so once it was hemmed I knew I’d end up with a shade that was exactly the width of the paper template, which perfectly fit our window.
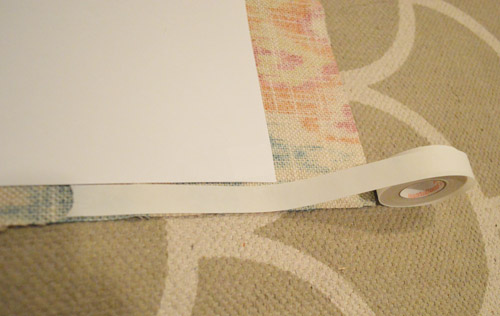
Minutes 6-8: Hem Your Fabric With An Iron
Then I just hemmed all of the sides with no-sew iron on tape (I like heavy duty Heat N Bond). Oh and there’s a little video tutorial on how to use no-sew tape here for anyone interested.
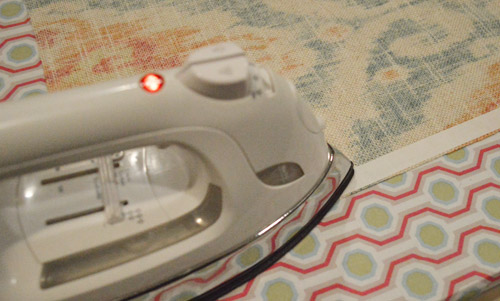
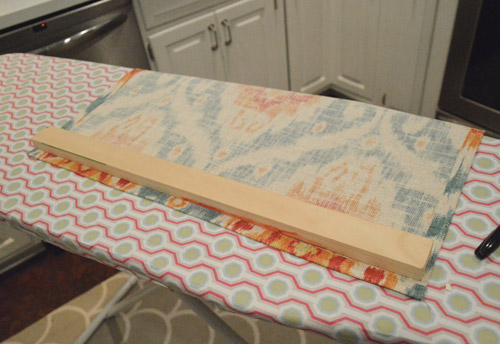
Minutes 9-11: Attach Wood Piece
After all four sides were hemmed and the fabric was now the same width as my paper template and two inches taller on the top for mounting reasons, we got a piece of 1″ x 2″ scrap wood from the basement and cut it to be a tiny bit narrower than the width of the fabric.
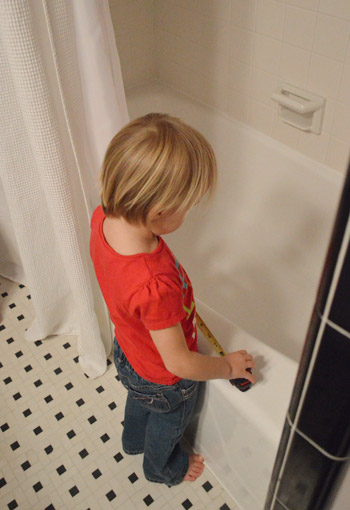
Meanwhile, Clara ran off with the measuring tape and was found “helping us measure the tub.” Thanks, girl!
Minutes 12-15: Screw Shade To Window Frame
You can see from this photo that we secured the fabric to the piece of wood. I used a staple gun to attach it so it would be firmly held in place once the wood piece was screwed directly into the top of the window (just like you’d hang an inside mount shade). And see that rolled bottom edge in John’s left hand in the picture below?
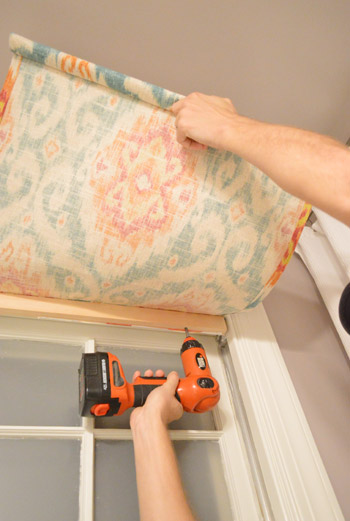
I also grabbed a scrap dowel that we had in the basement and cut it to the same slightly-narrower-than-the-width-of-the-shade size and rolled it into the fabric at the bottom of the shade to create a nice finished bottom edge with a bit of weight to it so it would hang nicely. I secured that rolled edge with a few stitches in a few places (no sewing machine came out, so it was just a minute of “tacking” the fabric in a few spots to hold that tight curl around the dowel). That’s optional though, because the shade in the kitchen doesn’t have a dowel at the bottom and it still looks clean and straight. Maybe I was just in a dowel mood?
Then, like a finely cooked steak, that baby was done. And since the entire window is also frosted (see how we did that last week), there’s privacy but light still streams in – so it doesn’t feel dark. I love how the colors in the fish canvas not only tie into the gray-plum walls but are also echoed in the window fabric. I mean if you can’t have fun with fish art and some bold window fabric in the bathroom, where we can you have fun with it? #fishcanvas4eva
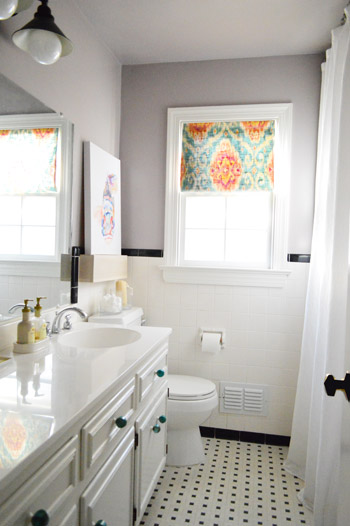
Update: We’ve had a few “but how do you wash your DIY window shade?” questions, so here’s that answer for ya: just like any other store-bought roman shade or blind, it’s not washable, but we didn’t have any issues with the white Ikea shades that we had for over four years in our first house (which couldn’t be washed). If you really wanted to be able to wash yours, maybe you could connect it at the top to the wood mounting piece with washable velcro instead of stapling it?
It still looks a little undone in here since we have to frame out the mirror and I’m planning to bring in a few more pops of color to tie in the curtain, but it’s getting there. The sweet thing is that the other side of the bathroom has some nice bright colors that balance things out pretty well already.
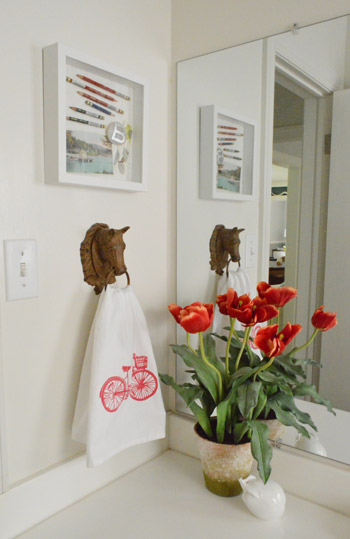
And the room as a whole is definitely looking a lot more “us” than when we started…
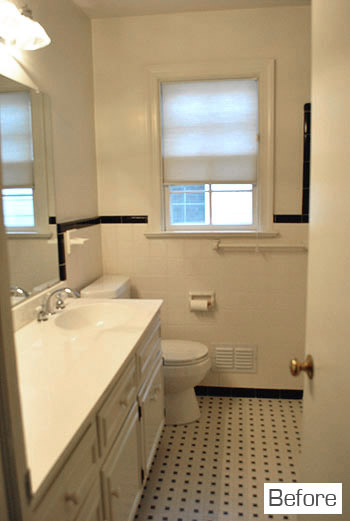
So if you have a basic looking bathroom, a half-yard of colorful fabric, and a few bright accessories you can hopefully spice things up without a total gut job. A cheerful little patterned curtain isn’t even a giant commitment since it’s so easy to switch out down the line. Oh and did you notice how I colored my brassy doorknob black in the photo below thanks to a little one-second photoshop work? Hah! Someday I’ll actually spray him for real.

Here’s the updated bathroom list:
rehang the shower curtain at ceiling height
trim out the unbalanced window(more on that here)switch out the light fixture(more on that here)add some meaningful art(more on that here)build in a shelf over the toilet for some leaning art(more on that here)paint the walls a fresher color to help the original tile pop(more on that here)upgrade the vanity hardware(more on that here)
frost the window(more on that here)make a bold fabric shade for the window- frame out the mirror over the vanity for a less builder-basic look
- ORB that brassy gold doorknob
- paint the whitewashed shelf in a solid white tone (since the room is coming together more & we’re feeling that now – we’ll keep you posted!)
- add finishing touches/accessories and dish out a budget breakdown for you guys
Psst- Wanna know where we got something in our house or what paint color we used? Just click on this button:


Pia Bineau says
Excellent taste in clothing… our daughter has that shirt as well :)
Oh, and the bathroom? Not too shabby either ;) Keep up the great work… love stopping by and seeing the updates!
Regards,
Pia
Carli says
LOVE this project! Been meaning to make a few window coverings myself! Might just start with something like this :) Thanks for sharing!
Eva says
I’ve done a no-sew blind like that, but I used a supsension rod to keep it in place. Looks exactly the same, but I can easily take it down for a wash. I I don’t know if you did, but I recommend pre-washing the fabric before making the blind, as most fabrics shrink a bit in the first wash.
Robin says
looks great! I am a big fan of shades in small rooms because they consume so little space.
Another way to attach it would be to use a tension rod. You would have to sew a rod pocket (just one straight seam). That way you can take it dow to wash it, or change it out when you find another fabric.
Katie says
I love the shade. Thanks for the great idea. How did you attach it to the window?
YoungHouseLove says
We used that piece of scrap wood that we mentioned stapling the fabric to at the top and just screwed straight through it and into the top of the window to hold it in place. There’s more of a description with a picture of us attaching it in the post (so you can see how the fabric flaps over the front and hides the wood/screws) if that helps :)
xo
s
Elizabeth@ Food Ramblings says
beautiful shade– love the pop of color!
Peggy McKee says
I’m wondering why the central “diamond” wasn’t centered horizontally–a design choice? Something dictated by amount for fabric available?
To my eye, not having the central diamond centered horizontally as well as vertically, makes the side diamonds look uneven. I think this is partly because the coloring of the diamonds is also not symmetrical. But maybe this is what you were aiming for?
YoungHouseLove says
I just wanted the pattern to be centered left to right, so I could have put it smack in the middle top to bottom but I thought that might be too perfect and might look like a big placemat or something. Haha! To each his own though, some folks like things centered both top to bottom and left to right, so there’s no “right answer” – just do whatever you like!
xo
s
Dawn says
Call me observant. Even though you painted a while ago, I just noticed how nicely the grey-plum helps blend in the black tile. It was the before picture that got me. I thought, “I don’t remember them saying they took that down.” Had to scroll back up to the after to see how great it looks!
YoungHouseLove says
Thanks Dawn!
xo
s
Ada (new york) says
Wow that fabric goes GREAT with the fish art! Bravo!!! The bathroom looks serene and yet awesomely lively!
YoungHouseLove says
Aw thanks Ada!
xo
s
Karen says
Love the colors in the fabric, I’m just wondering how you’ll ever wash that when it needs it. Using a tension rod would have accomplished the same look and not been so permanent.
YoungHouseLove says
Oh yes, just like any other store-bought roman shade or blind, it’s not washable – but we didn’t have any issues with the white Ikea shades that we had for over four years in our first house (which couldn’t be washed). If you really wanted to be able to wash yours, maybe you could connect it at the top to the wood mounting piece with washable velcro instead of stapling it or just use a tension rod like you mention (although you’d have to sew a rod pocket or use ring clips).
xo
s
Terri says
We’re officially referred to as T-dizzle, B-dizzle and G-dizzle around here. That is as far as our street cred goes. The rest is nerd city including my husband and son reading the Hobbit at bed time.
BTW…love the book! Next time you’re in Brevard, I’ll trade you some yummy bakery goods from Braken Mountain Bakery for an autograph!
YoungHouseLove says
Aw thanks Terri!
xo
s
Jen says
We have 3 children and have to have a stool in each washroom. Instead of something plastic or plain, I’ve decided to go with the basic pine wood one from Ikea and then paint it a bold color. The kids love it and it adds a splash of color to the bathroom. I was thinking a cool orange would look great in Clara’s washroom. :D
Tam says
Do you use scissors to cut your fabrics for projects, or do you use a rotary cutter? Just wondering….I seem to have trouble cutting straight!
YoungHouseLove says
I use scissors but I went to art school so I have worked for years on drawing straight lines and getting straight cuts. If it doesn’t come easily you can always use something like masking tape laid around the edge of the fabric to make a straight edge that you can follow with your scissors. Hope it helps!
xo
s
Sal from Australia says
I just did this today in our separate toilet to cover up the stained built in mesh vent above the window. It took me so much longer (the iron on hemming tape and I had some early disagreements) but we got there in the end. Also, I snapped up a vertical magazine holder which holds (hides!) the toilet cleaner and air freshener that have been permenantly back lit against the window for the past 7 years. Thanks for the inspiration!
Mary says
Hi! I am still unclear on the placement of the dowel and how you sewed it to the existing fabric. Is this something that should be inserted before the iron-on hem tape?
YoungHouseLove says
I hemmed all four sides so they were finished and wouldn’t fray, then I stapled the top part to the wood brace piece, and screwed through the bracing piece and into the top of the window frame. As for the dowel on the bottom I rolled the hemmed fabric bottom around them and tacked the fabric with a few hand stitches to hold the roll of fabric in place around the dowel. Hope it helps! That one picture of John hanging it shows the rolled bottom of the shade (it’s totally optional since it would work with just a hemmed bottom and no dowel as well). Hope it helps!
xo
s
Alicia M says
Awesome work! And so simple! I’m currently updating our bathroom and love this idea. We recently replaced all the windows, window casings, etc in our house ($$$ yikes!) and my husband would KILL ME DEAD if put holes in the new woodwork. SO… my question is, do you think it would work to hang the curtain with Command strips? Of the velcro-like-picture-hanging kind? I’m assuming it’s pretty lightweight, but just wanted your thoughts. Thanks!!
YoungHouseLove says
Oh yes, I think Command strips could work!
xo
s
cassy says
quick question– where did you get such a long shower curtain? I would love to do this in my bathroom, just need to find a long enough curtain and liner!!
Any Help??
thanks!!
Love your little burger pup! Looks like mine :)
YoungHouseLove says
Amazon.com!
xo
s
Jenny says
what a cute bathroom! and thank you for the tutorial, love that idea!
question: where did you get that adorable bike hand towel?
YoungHouseLove says
That was from jossandmain.com a while back (a gift I got for bike-loving John). It’s actually a dish towel but it works for wiping hands too!
xo
s
Nicole S. says
Great idea! I also need to frost our bathroom window but was a little disappointed at how “naked” it would still look. This seems like a great solution, pinning and then off to fabric hunt and probably in the far away future actually complete the shade! ;)
Janna Knight says
Would a tension rod have worked ok to hang the shade? No drilling! :)
I’m going to give it a try.
YoungHouseLove says
Oh yes, I think that could work too! You’d just have to attach the fabric to the rod in some way (might mean more sewing/hem tape to make a pocket for the rod).
xo
s
sally says
LOVE this project!
I’m going to do the tension rod idea too – just have to get out in the freezing cold to a fabric store.
Question – I’d like to make the bathroom window, which is pretty high up, more private (well, at 5’2″, I don’t care, but my 6’3″ husband does!), so would use the privacy film,but it’s a single pane window that you crank open, so the screen is the most interior section, if that makes sense. Would you still use that film if the the window might be open sometimes, and therefore exposed to the element?
YoungHouseLove says
Oh yes, I think it should still work! Good luck!
xo
s
sally says
Thanks!
caitlin says
I found this fabric on Etsy!!! Ikat Teal Designer upholstery fabric
rose e. says
just curious why you decided to mount this curtain on the inside of the window, as opposed to the kitchen one, which is higher? i have a bathroom that needs a window treatment on a very small window. what are your thoughts on hanging curtain panels (on both sides of the window) on a bathroom window?
YoungHouseLove says
If there’s lots of blank space I go wide (kitch) but if it’s a small area without much space to cover I do fitted :)
xo,
s
Rachel P says
Where did you get the fabric?? I love it!!
YoungHouseLove says
We got it at a fabric store called MaryJos near Charlotte, NC!
xo
s
Jackie says
You could also use a tension rod, so you don’t screw into your window frame. Super cute!!
Kelly says
Love your bathroom! I love that with just a few inexpensive items you gave your bathroom a whole new make over! We are a family of 5 and I have an in home day care and we have ONE bathroom! I am always trying to make it look better without gutting the whole thing (for now). One promblem we have our window is IN the shower/tub and is not frosted. For now we have an ugly piece of plastic shower curtain over it. Any ideas on something better?
YoungHouseLove says
You can buy frosting film at a place like Home Depot and apply it yourself pretty easily! I would try that!
xo
s
Hilary says
So I noticed that you have an ORB light fixture and regular silver faucets. Does that bother you at all? Do you ultimately in your new home hope to have all bathroom fixtures match? I ask this not as a critique, but because we’re in the same boat! We prefer ORB and our house currently has silver faucets with a mixture of either ORB light fixtures or really old, ugly ones that we’ll change out, but not sure in terms of having the finishes match. If that makes sense! Obvs it’s easier to change out/spray paint lights than faucets! Just curious how you all look at matching the various fixture finishes in bathrooms. Don’t even get me started with also considering towel and toilet paper holders and curtain rods! Thanks! :)
YoungHouseLove says
I like the idea of layered metals, so an example would be that in the living room we have ORB curtain rods and ORB sliding door handles but silver lamps and a silver mirror. As long as each finish occurs a few times it looks intentional instead of something looking mismatched – so ideally in a bathroom you could use silver in the mirror and knobs or in the faucet and some of the accessories (soap pump) and then do ORB somewhere else (ex: light and hardware or accessories) and all it will hopefully layer in there nicely.
xo,
s
Jennifer Kundert says
Is your cute little red and white bicycle towel from Mackinac Island, MI?
YoungHouseLove says
That’s actually something I found on jossandmain.com (it’s technically a dish towel but works as a hand towel too).
xo
s
bean says
beautiful. i bought fabric to do this in my bathroom. do you have to:
– prewash fabric in case you wash it so it doesn’t shrink later? (i bought thicker outdoor fabric)
– worry about steam from shower undoing the tape hem?
i’m debating a real sew job (disaster imminent) or easy tape hem (doable).
thank you!
YoungHouseLove says
Yes, I would prewash it (assuming it’s washable) and then I’d use the heavy duty hem tape (shower steam shouldn’t stand a chance against that, since it even holds up when laundered).
xo
s
lyn says
The whole thing about a shade is being able to raise and lower it, any idea on how to incorporate that?
YoungHouseLove says
I’d search Pinterest for lots of tutorials on using cheap plastic blinds and gluing fabric to them so they open and close. Little Green Notebook did an awesome one once!
xo
s
Susie Burrows says
To solve the washable problem…. make the bottom 3″ and hem it with an opening to slide the dowel into.
The top can be longer with an opening large enough for a bigger or even closet sized dowel. Use those little holders that just screw into the inside of the frame and set the dowel into it.
You might have to paint the dowel the same color as the window because a tiny bit of it might show.
Sae quik easy shade but………WASHABLE>
YoungHouseLove says
Smart!
xo
s
Casandra Moreno Lombera says
Love this easy DIY curtain and bathroom transformation project! Thanks for showing us how.
Victoria Braaaddford says
What brand and pattern is the valance fabric?
Thanks!
YoungHouseLove says
I think it’s Iman fabric? If you search Iman fabric I think it comes up on google.com.
xo
s
Kimberlee says
Beautiful fabric. Where did you get it?
YoungHouseLove says
I think there’s a link and some info about it in this post?! It’s called Iman I think.
xo
s
Darlene says
Very nice. And what a cutie she is!
Miss Manitas says
Lovely idea!!
Jodi says
How much of the fabric did you use for this? The full two yards? Our bathroom renovation that we’re working on is the exact same bathroom size and set up! Can’t wait to do this ! Thanks!
YoungHouseLove says
I didn’t need that much – maybe just a yard? I’d measure out the size of your window and guestimate how long you want it and see how much fabric you’ll need with hems, etc.
xo
s