Over the weekend we wrapped up our how to hang drywall adventures in the laundry room. It was a humbling experience, but we’re feeling nothing short of glorious about how it turned out. In fact Sherry and I spent a few minutes doing this in there on Sunday.

Project Completion Euphoria. It’s a real thing. And it can make a grown man twirl.
Doing Our Research
We’re not ready to put “pro drywaller” on the ol’ resume quite yet, but I do think we’ll go into our next drywallstravaganza with a lot more confidence. We devoured YouTube videos and online tutorials for about an hour one morning, and quickly learned that there seem to be just as many variations on proper technique as there are opinions (reminder to self: never read YouTube comments). We finally decided to generally follow this video, since it was clear and seemed consistent with the most common advice. So this post will show you the process we went with, and what techniques seemed to be the most effective for us. We even threw in a couple of videos for you (although none of them have our Sound of Music reenactment).
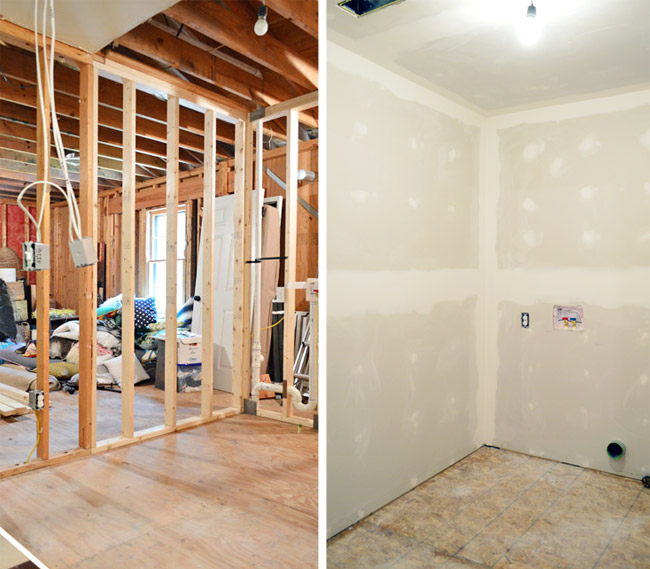
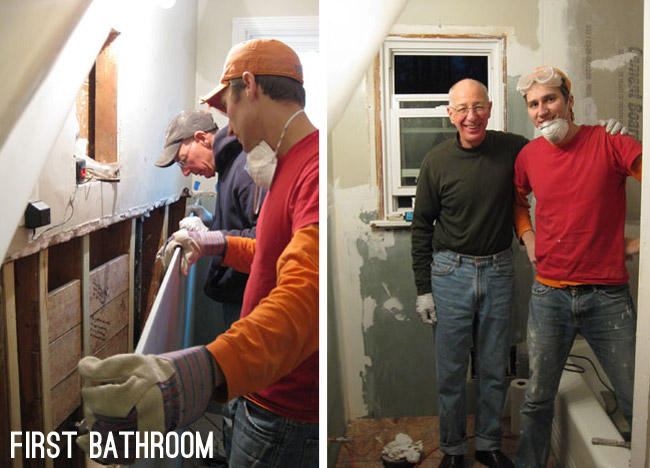
Before we started this reno, I was quick to tell Sherry that my vote was to heavily consider hiring out the mudding/taping of the drywall. It’s just a skill we have limited practice with (patching a hole here and there mostly) and it really is an art when you watch the pros. My biggest encounter to date was 5 years ago during our first bathroom gut job, but it was just doing a handful of seams. Somewhere along the line, I felt my opinion starting to shift, and as we decided to take on more of this renovation ourselves, I realized this would be a good room for us to build our drywall finishing skills. There would be lots of seams to practice on and if they didn’t turn out so hot, we would have various items like baseboard, crown molding, cabinets, appliances, and backsplash tile blocking some of them – and it’s not like it’s a major gathering spot (like a kitchen or living room for example).
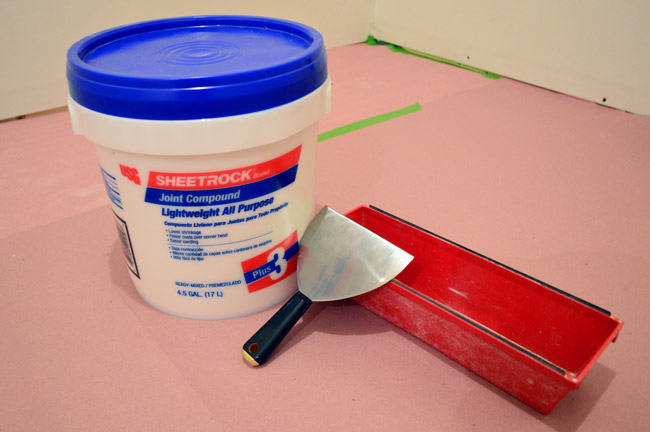
Materials To Tape, Mud, And Sand Drywall
So let’s start with our materials, most of which should be available right in the drywall section of any home improvement store:
- Rosin paper or some other paper to protect your floor from drops, splatters, and dust (even if it’s just sub-floor, you don’t want it to get bumpy from dried joint compound)
- Joint compound (i.e. Mud) – I used this based on reviews I read that warned against the “UltraLightweight” stuff. I heard you want 1 gallon for every 100 square feet of drywall. For me that meant 4 gallons, but we ended up using closer to 5.
- Mud Pan
- Drywall Knives in various sizes – the one pictured is a 6″ knife, but we also used 8″, 10″, and 12″ ones (although the last was probably overkill)
- Corner Trowel (not pictured) – this helps you get into corners and was awesomely helpful (it’s in one of our videos below)
- Drywall Tape (not pictured)
- Bucket of Water (not pictured)
- Work Light (optional, not pictured)
- Stepladder (not pictured)
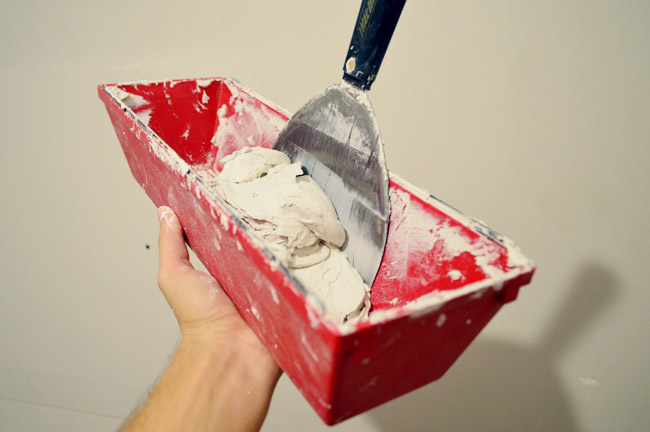
The mud pan is not only a handy way to not have to lug the whole bucket around with you, but it also has some metal edges so you can keep your knives clean and scraped off throughout the process.
Mudding Over The Screws
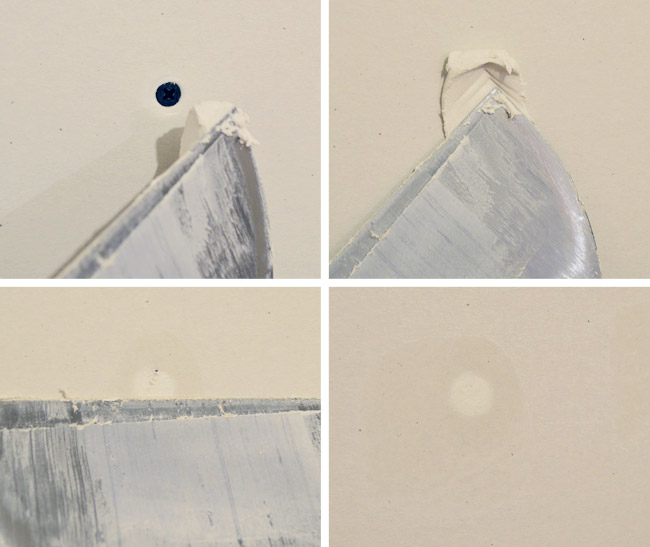
We started with the easy step: covering the screw heads. Having used a drywall counter-sink bit during installation, our screws were already set into the drywall slightly (kinda dimpled in there) making it quick and easy to slop on a bit of mud and scrape it flat.
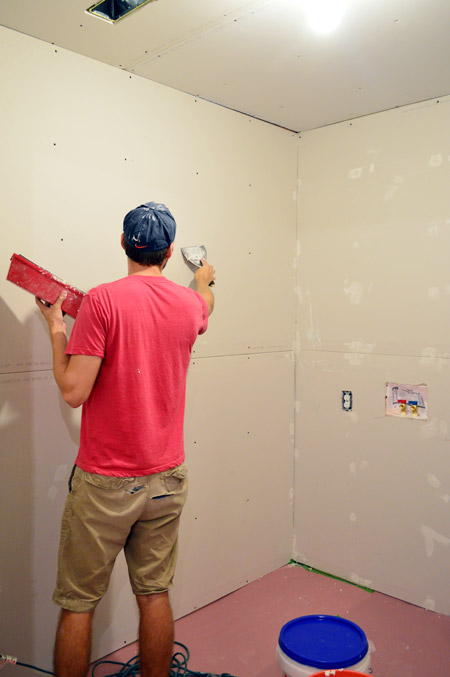
There were lots of screws to cover, but Sherry took two sides along with the hallway and I got the other two and the laundry room ceiling so it went pretty fast that way.
Taping The Drywall Seams
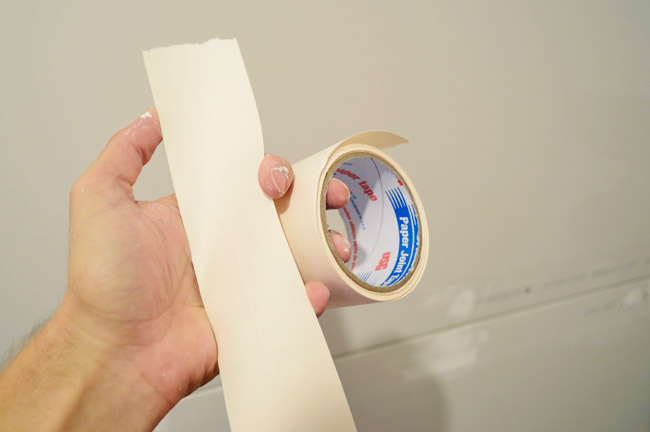
Next up was taping the joints or seams between sheets of drywall. There’s mesh tape that has an adhesive built in, which we’ve used before and found tough (if you sand too much, the mesh texture comes through easily), so we chose to use paper tape this time, which requires a bed of mud to stick to the wall. That application method was an extra step, but almost all of the pro tutorials that we watched used it, and it ended up being a lot easier to work with in our opinion (we didn’t have that mesh-showing-through issue – so it made for a smoother result).
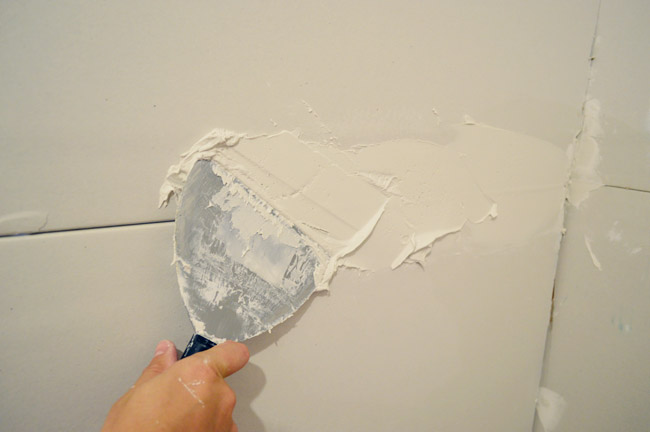
First I applied my “bedding layer” on the horizontal seams. The drywall boards taper slightly on the edges, so this whole process is meant to bridge the gap between boards and flatten the taper. Once I got a decent layer of mud applied, I dragged my 6″ blade across it to smooth it out.
Once it was smooth, I took my piece of tape (already ripped to the length of the seam) and lightly pressed it into the layer of mud. It takes just a soft tap for it to stick to the mud. Note: I saw some tutorials suggest wetting the tape first. I tried this once and didn’t find it any easier, just messier, so I worked with mine dry.
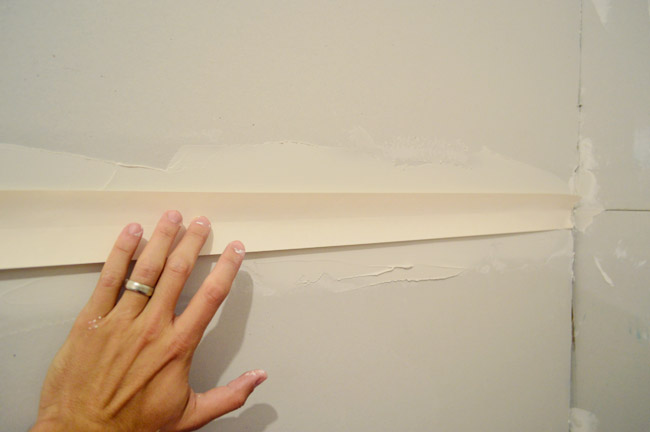
Once lightly adhered across the seam, I dragged my 6″ knife across the seam with a little bit of pressure to smoosh it down into the mud. It helped to start in the middle of the wall and work out to one corner and then repeat that on the other side. Since the tape may drag when you first start, it helps to put a finger on it to keep it in place when you first pull your knife across it.
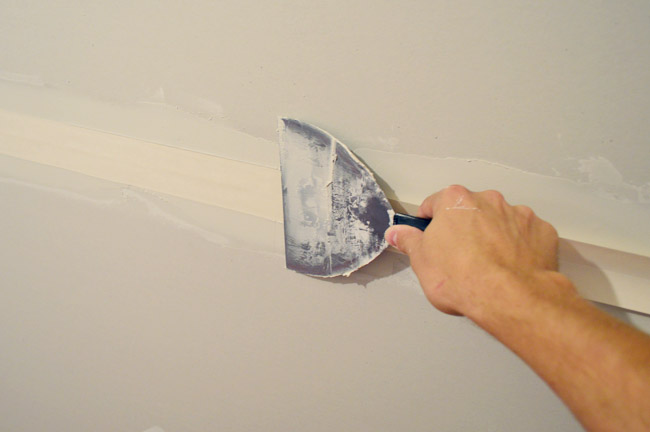
With the tape embedded, I then used a slightly larger knife (an eight incher) to put and smooth another layer on top. By using a larger knife it helps feather out the edges so they blend more seamlessly with the wall, all while disguising the taper of the boards.
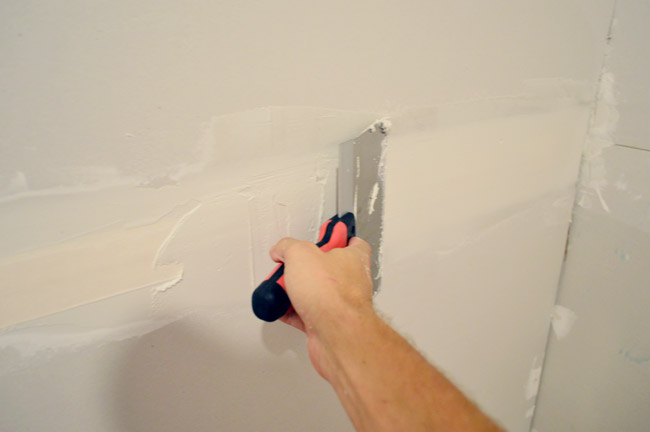
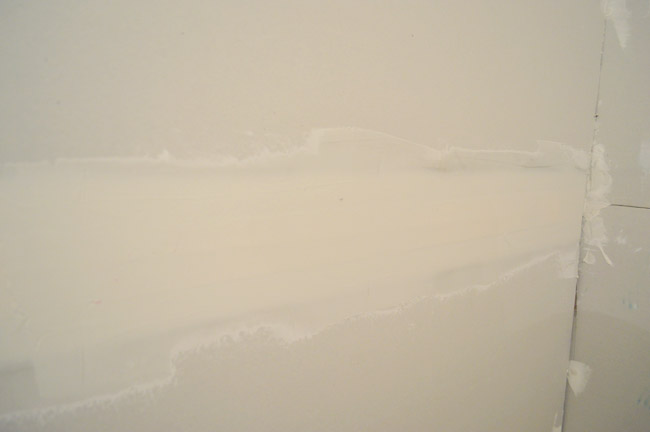
Here’s my horizontal seam after my first round. It actually wasn’t that hard at all, so it had me thinking I could do this all day…
Taping The Corners
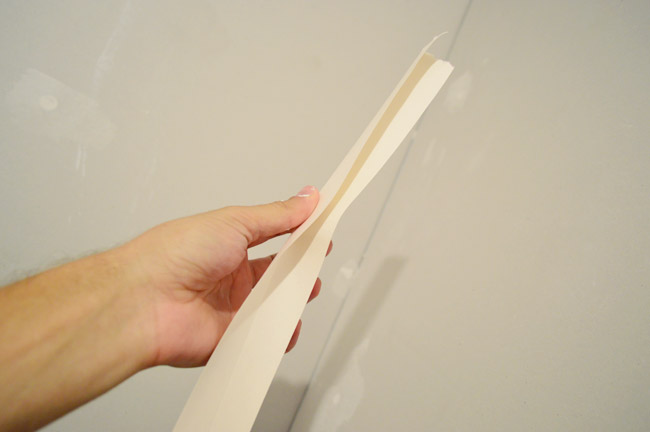
… and then came the corners. The added corner element definitely made them more of a challenge. I wouldn’t rate this step as a “panic and throw things and curse the DIY Gods” undertaking, but I think a “you have to concentrate more and it takes more time” descriptor is fitting for this part (I’d call it a 6 on the DIY difficulty scale, while the flat seams are a 2). The process started off pretty much the same as the flat seams. I could even use the same tape, since it comes pre-creased for corner applications.
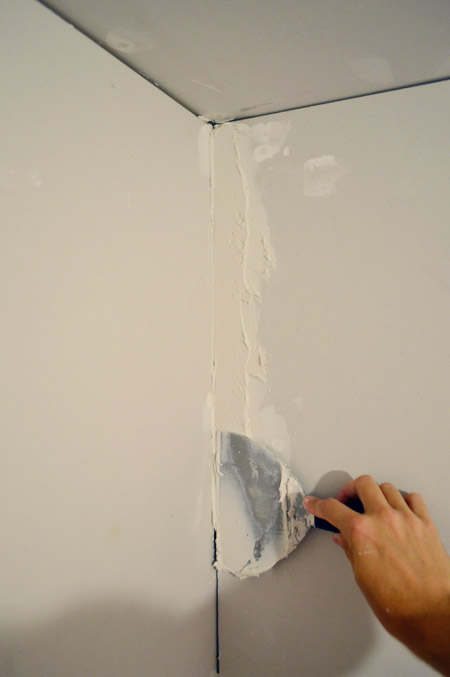
Just like before, I applied a bedding layer first – which involved running my mud-filled knife down each side of the corner.
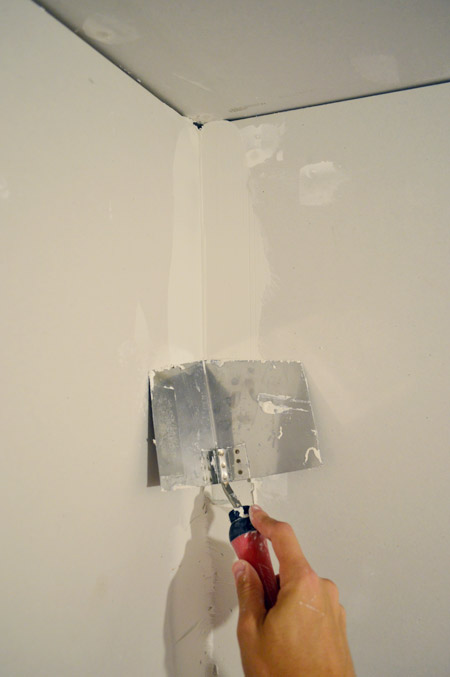
Once both sides of each corner were covered with a fair amount of mud, I broke out my corner trowel to smooth it out. The corner trowel is a lifesaver when it comes to getting a sharp angle in the corner and smoothing both walls simultaneously.
Then on went the tape with a light tap, just to keep it in place.
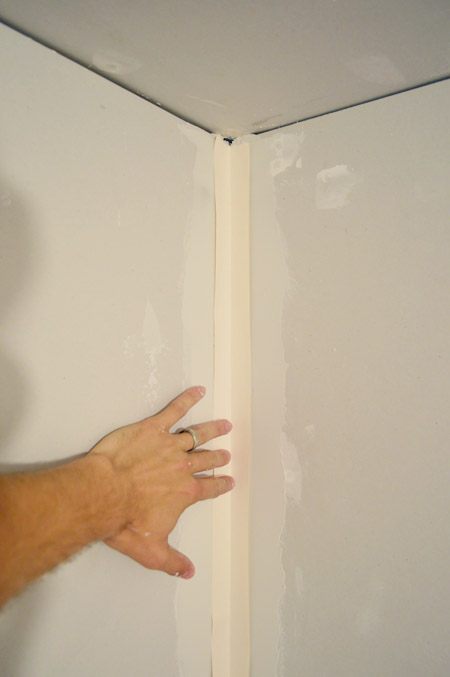
Next I pressed the tape into the mud with another swipe of the corner trowel. Since it was hard to get my finger and the trowel in the top corner (to keep the paper from dragging), I found it sometimes helped to dip my trowel in water first to glide along the tape more smoothly.
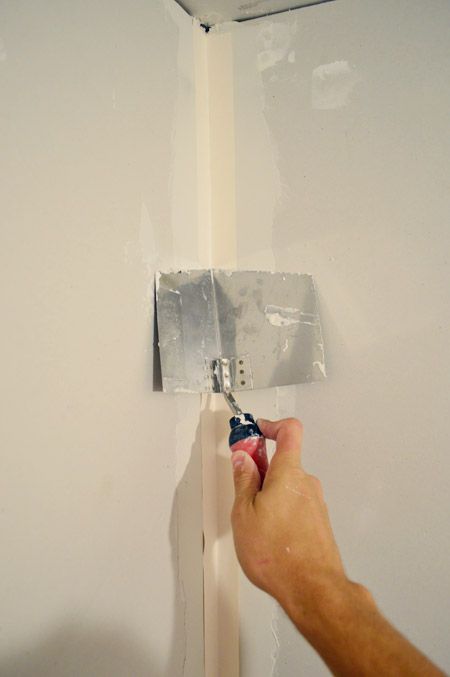
The corners ate up a lot more time than the flat seams since we had four vertical corners in the room, four horizontal corners around the ceiling, plus nine more around the doorways in the hall. But hey, at least we had 17 corner seams to practice on! Note: I’ll explain in a little more detail what else was challenging about the corners in a second, complete with a video to show you what ended up working nicely, so stay with me.
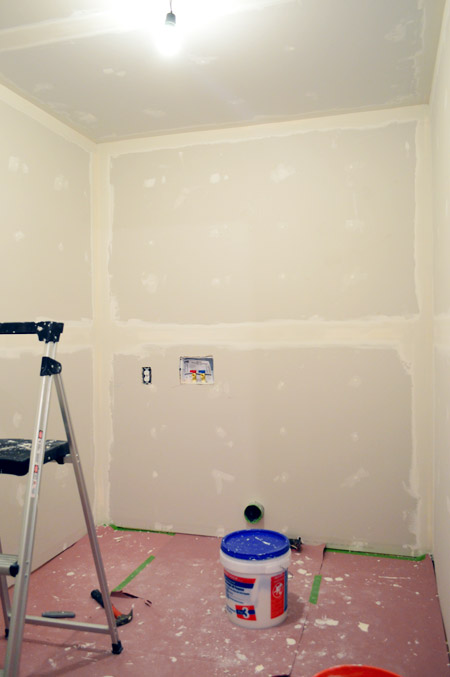
Oh and I thought it would be helpful to mention that my first round of mudding took longer than the 12-24 hours to dry that most tutorials suggested (Sherry started a second round after 24, but noticed it was pulling some damp mud up in a few areas so we decided to wait one more day).
Appling A Second Coat Of Mud
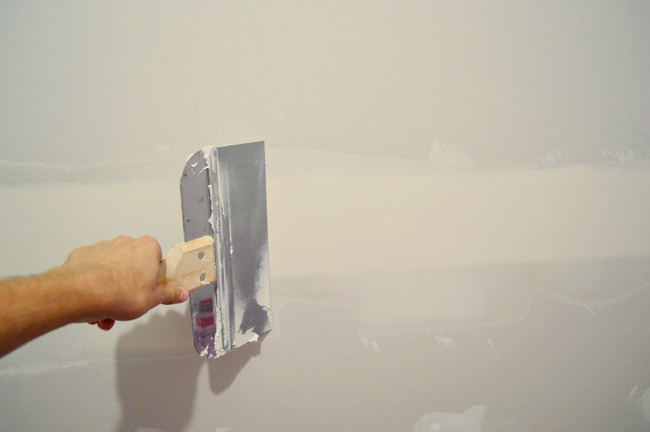
Once everything was dry (you can tell because the mud will be one consistent color) we put another coat on our seams, this time using a slightly larger 10″ knife to further spread the edges out a bit.
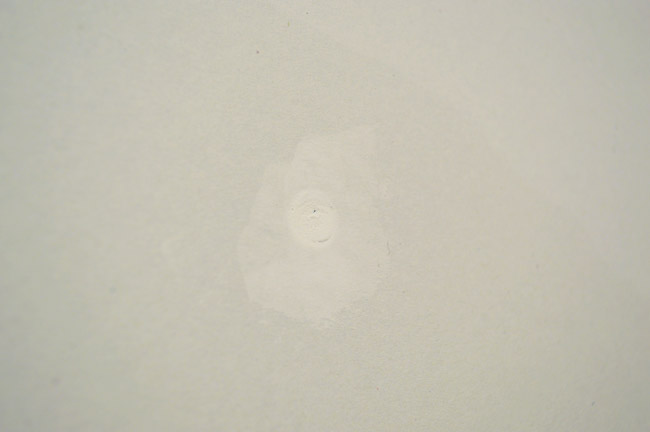
We also tackled another layer of mud on our screw holes together, since you could tell our first pass had shrunk a little bit when drying.
With that done, it was time to face the corners again. I actually watched a few more videos with tips before beginning, which seemed to help – and I even made a video to show the technique that ended up working for me in the hopes of passing it along to you guys. I didn’t let Sherry record me until my third (and final) round of mudding, just to be sure I had a good handle on it – so forgive the time jump. It’s also on a ceiling crease, but it works the same way on vertical wall corners.
Note: You can also watch this video here on YouTube.
For those who can’t watch the video, I’ll do my best to explain it with photos. It started like I did the first time – slopping some mud on both sides of the corner with my 6″ trowel, followed by a pass with the corner trowel to smooth it out and wipe off excess.
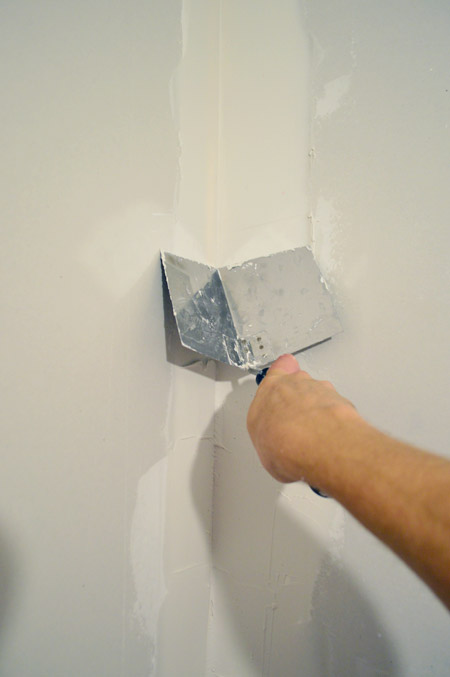
The issue is that the trowel edge tends to leave ridges where the excess is pushed out, but not smoothed down.
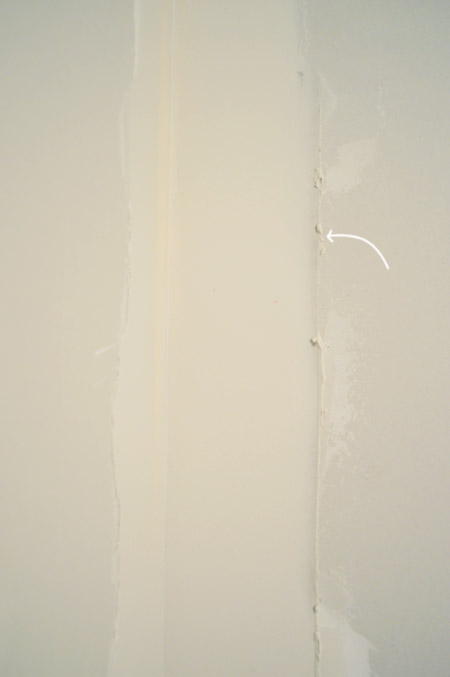
So to take care of those, I used my 6″ trowel to flatten them and feather the edge better. The challenge here is that you risk creating another ridge with the trowel (in the case of the photo below it would be the left corner), basically creating a vicious cycle of ridges that are left behind. But if you hold your 6″ trowel at a slight angle, that can help you apply pressure on the outside edge so you can eliminate the first ridge without making a new one (or at least a very big one). This takes some finesse, so forgive yourself if you don’t get it right away, but once it “clicked” for me it was a lot easier.
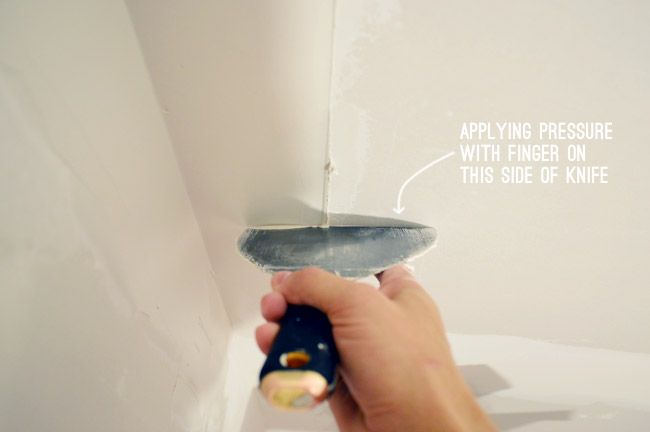
After eliminating (or greatly reducing) the ridge, then I went back and did one more pass with my corner trowel, just to be safe.
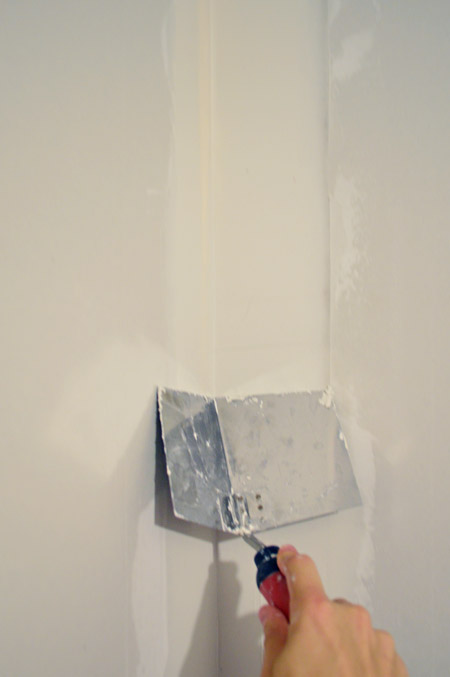
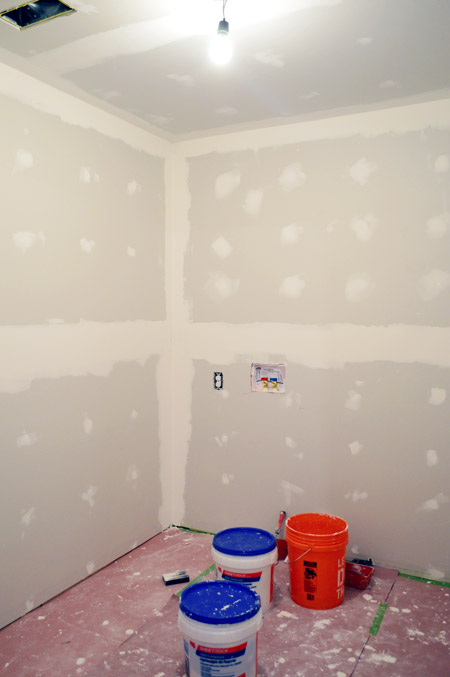
Here’s the room after two rounds of mudding. Fortunately, the second round was much faster since (a) we weren’t taping and (b) I was getting better at those corners (cue the Rocky music, guys).
Wet Sanding The Drywall
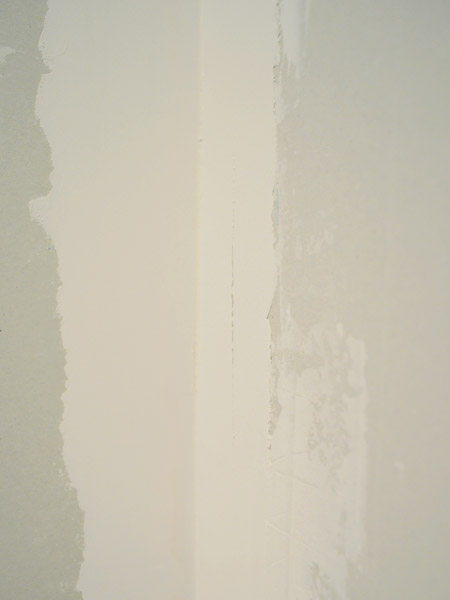
After 24 hours, it was sanding time. You can see in the photo below that my best efforts to smooth everything out with those trowels weren’t perfect and I still had some defined edges that needed to be smoothed out and blended into the wall better.
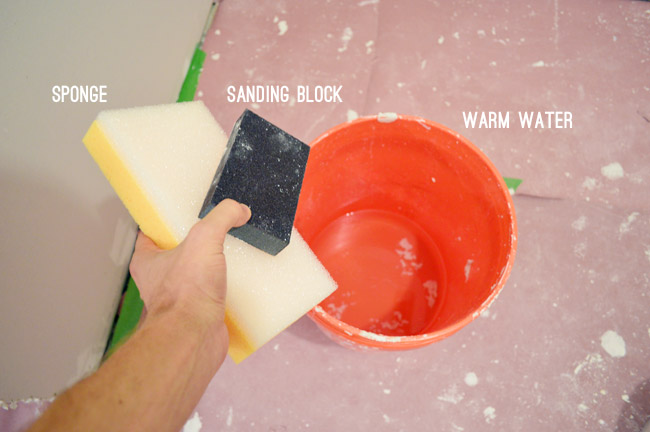
I was actually excited to try out the idea of “wet sanding” to help eliminate some of the dust that threatens to coat everything in a normal “dry sanding.” I’d heard people use everything from a sponge to a t-shirt for wet sanding, but I went with this sanding sponge that was sold alongside all of the other drywall sanding materials (since it has a coarser side for scrubbing). I also kept an 120 grit sanding block nearby for any tough spots.
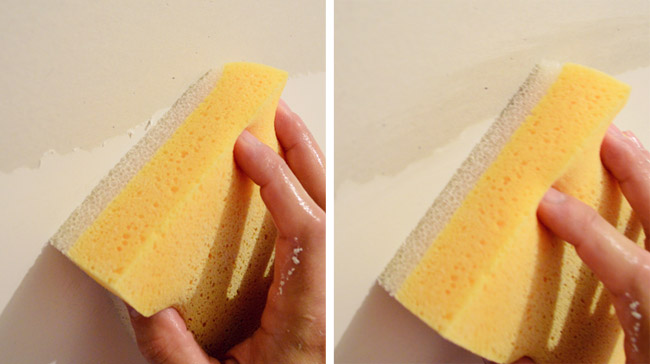
Well, I have to say I wasn’t very impressed with the damp sponge. It did the job, but it took a lot more effort than I had expected.
So I decided to try something different – which I explain in the video below – that ended up working really well.
Note: You can also watchi this video here on YouTube.
Again, if the video is a no-go for you. Here’s the gist – I used the 120 grit sanding block as a sponge, since it retained water AND had a little more scrubbing power than the plain sponge did.
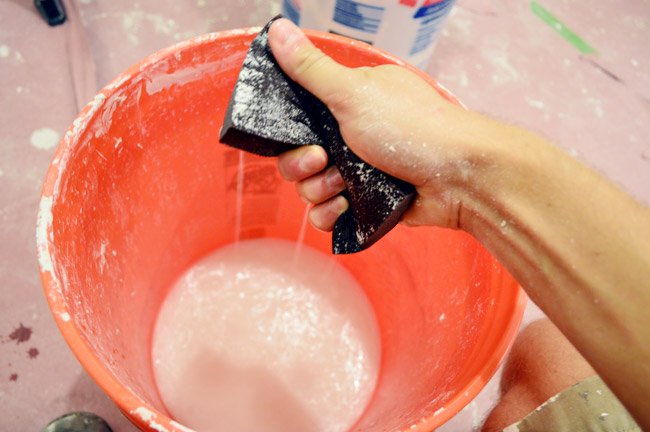
I didn’t want it very wet at all (that could rub off the drywall paper) but just damp enough to moisten the dried mud (and so that that the dust from sanding stuck to the surface of the block, which didn’t happen when it was bone dry).
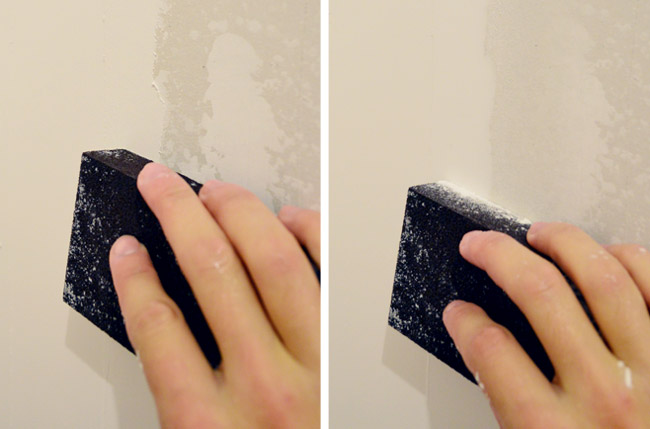
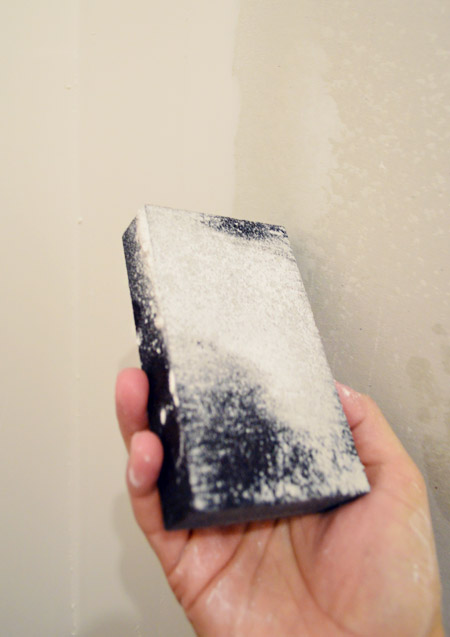
I wouldn’t call this method “100% dust free” by any means, since once the block got coated with a layer of dust it started to toss it around a bit. The difference was that the dampness caused the dust to just fall to the ground right below whatever I was sanding, rather than becoming a cloud in the room. Once one side of the block got covered, I turned it over to get a more time out of it before having to rinse it in my bucket (it took a bit of massaging to get the dust coat off).
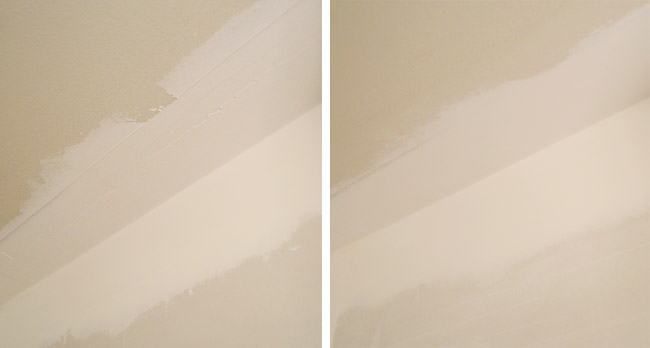
This step was a HUGE relief, because I was worried about a few corners where my application wasn’t as smooth as the others. Here’s one particularly rough spot and how well the wet-sanding step corrected my mistake.
Applying The Third (And Final) Coat Of Mud
Once the sanding was done, we could put our third and final finish coat on the walls. A bunch of tutorials suggested thinning out the mud a bit so that it goes on even smoother, so I dumped a little water in…
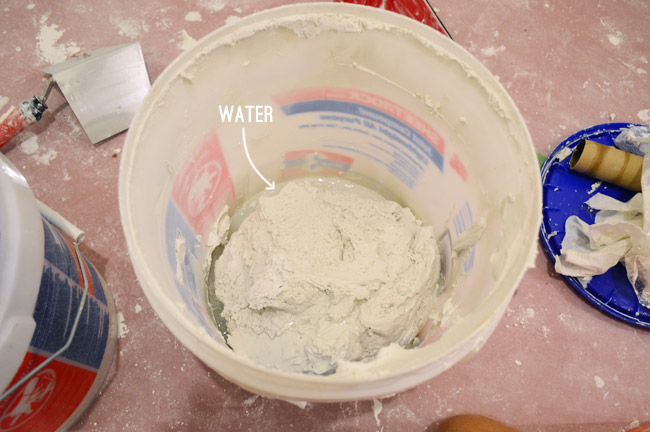
…and blended it with a paddle mixer. You can see I did this in an empty bucket, so we weren’t diluting our whole stash. It didn’t make it too much thinner, just about the consistency of mayonnaise.
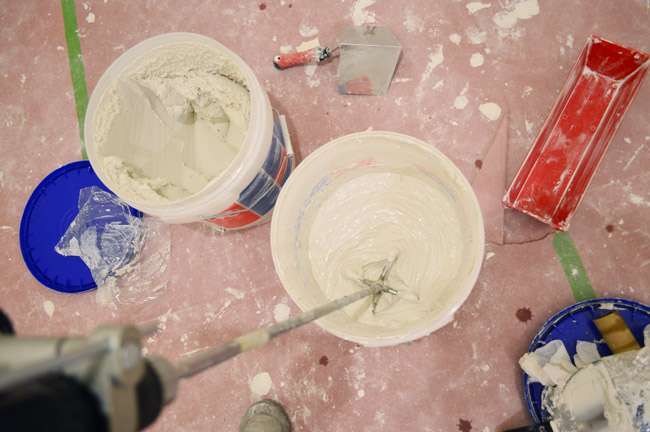
I’ll spare you pictures the photos of our third round of application and our second round of sanding (they were identical to the process I’ve already shown, and this post is already overloaded with pictures) – so let’s just jump to the after.
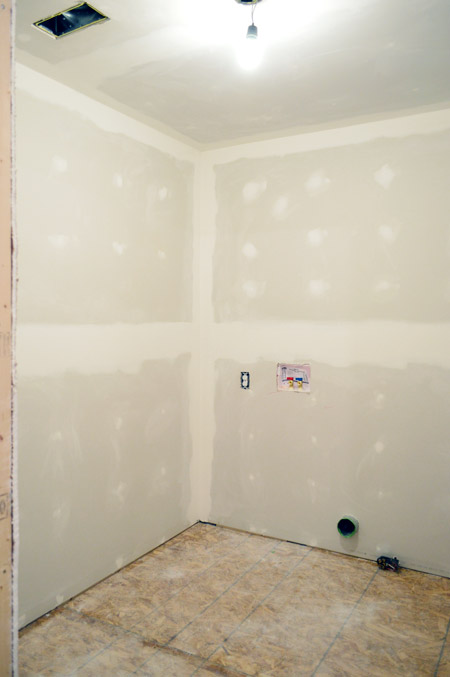
Priming The Room
Since that’s not the most exciting picture ever, let’s jump one step further to the primed room. We were so eager to see how our taping, mudding, and sanding held up to the test of being coated with primer that we jumped right on it yesterday. And it looks like a real room, guys! A space that didn’t exist a few weeks ago is there now – and everything is smooth! We feel like having people over to stand around and look at the walls with us. Is that a thing? No? Ok, we won’t.
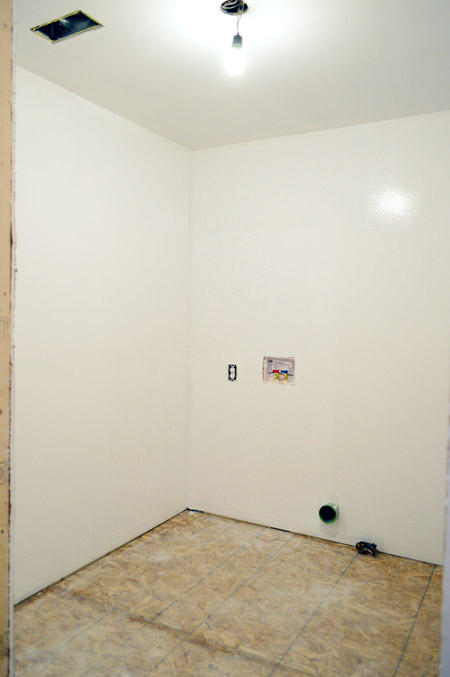
Here are a couple more before/afters for you. We’re really happy with how smooth the transition is in the hall too.
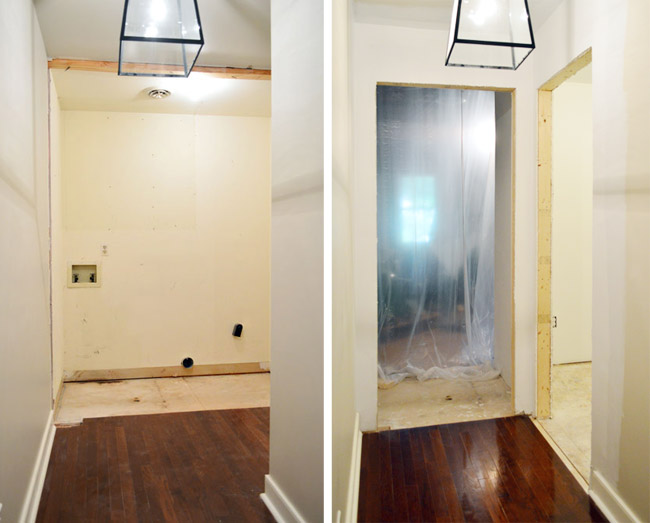
Here’s one last (waaay) before & after to show how this formerly dead end of the hallway has changed. It’s going to be funny to look back on old house tour videos and see a laundry closet there instead of a doorway.
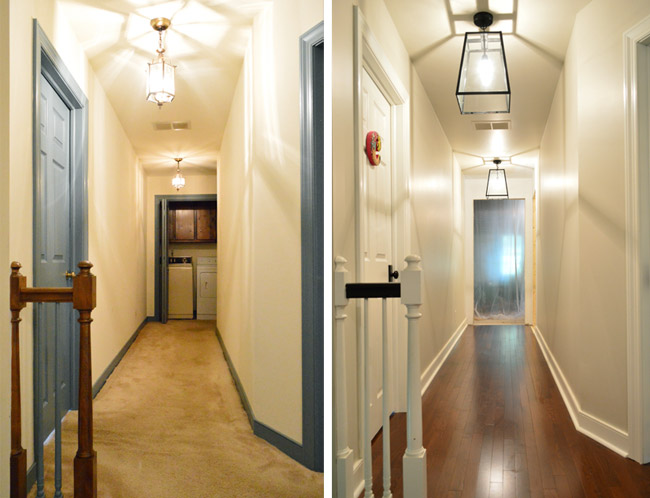
Next up is painting and then installing the floor (we picked tile! more on that soon!). After that we’re debating whether we should roll the washer and dryer back in (at least temporarily) just to have them hooked up again, or if we should hold out to get a few more things done without them in the room, like hanging the doors and adding the molding. Decisions, decisions…

Maureen @Altes Haus says
Sorry if you have already covered this somewhere, but will you be putting a color on the wall? Or, will you just leave it white? I am totally jealous of this laundry area, since mine is in my gross basement. :)
YoungHouseLove says
Oh yes, paint is next!
xo
s
Mary Beth says
Looks so tedious but it’s really coming along and the end result will be well worth it.
Here you are tearing down walls and I’m getting creative with breadboxes… HAHAHA.
check it out though – you guys should try this one out its such a smart way to hide devices and cords.
Because hey – maybe after this you will want a simple project?
LOL
MB
http://www.hystericallyeverafter.com
YoungHouseLove says
Really smart for hiding those cords!
xo
s
Stevie says
Looking great! I want to buy a fixer but I’m so intimidated by all of this. You guys rock!
Nan Lewis says
When I first read that you all wanted to hire out the mudding and taping I was shocked. I knew you all could do it. I’ve done it many times and while the corners are the hardest it isn’t anything that can’t be done with time and patience.
You did a wonderful job and can’t wait to see the finished product.
YoungHouseLove says
Thanks Nan!
-John
Amy says
Do your walls not have any texture? Like orangepeel, skiptrowel, etc?
YoungHouseLove says
Nope, ours are smooth walls (our last two houses had those too) but we hear it can be regional (someone said Texas houses almost always have texture).
xo
s
Tara says
I’m in Tucson Arizona and I’ve never seen a house here without textured walls. Our house has orange peel and I HATE it! It’s next to impossible to try and re-texture around a hole or something of that nature and have it match the original finish. I envy your guys’ wall smoothness! *Shakes fist of fury*
BornInaZoo says
Here on the shores of Lake Michigan, it’s difficult to find a drywaller that does smooth walls. I work in construction. The drywaller we use is amazing. He does the same prep work if he was doing smooth or texture … many don’t & use the texture to hide their sins.
He’s terribly expensive, but when I remodeled my living room 2 years ago I knew I wanted smooth walls & ceiling … He was my guy. Especially ceiling since there are no lights or anything on it. Kudos to anyone that has the patience to do that kind of work. #highfivejohn
Shell says
Looks great guys! We just finished that same process in our basement family room, office, and bathroom. Huge job but so glad we did it ourselves and saved some $$$. Today we start priming! Whoohoo : )
YoungHouseLove says
So exciting! High fives Shell!
xo
s
Heidi says
The drywall job looks great! Quick question though…what about wall texture? Around our parts, we spray texture on the walls and knock it down before priming. Are smooth walls the norm around there?
YoungHouseLove says
Yes, I think it’s regional, but most houses here tend to have smooth walls (all three of our houses here have had them).
xo
s
Kirsten D says
I have done that job twice once in hallway, and in a bathroom. Not a fun job but feels so good when it’s done. I would move the washer and dryer in before the doors and trim, then you don’t have to worry about banging them up (trim and doors) when moving them in. This is makin want to redo my laundry room.
Gina says
I actually gasped at the primed room! I totally wasn’t expecting that to happen at the end of this entry. Yay! So excited for you guys and it looks amazing!
http://imperfectlybuilt.blogspot.ca/
Melanie says
Your walls look gorgeous! I’m glad it was a good experience for you. While I’m glad we hired out our drywall for our basement (it was a HUGE room, 1200 sq. feet), it was also a repair (only the lower half of the wall, so the lower 4 feet) we were seriously worried about ‘matching’ the texture of the upper walls. We spent this weekend putting out old trim back on (it wasn’t ruined and is a lovely, stained hardwood)…this weekend will forever be known as ‘the grand test to my marriage via re-installing trim’. We had a water mitigation company remove our trim *carefully* (and they really did a great job, they only broke maybe two or three pieces total in the entire space)…but they only labled maybe 25% of the trim. So that was fun. Also…it expanded/contracted a little (it got wet)…so it didn’t fit *exactly* the same. Good times. We are about 80% done. Do you guys plan to try to re-use your trim?
YoungHouseLove says
So awesome that you could reuse most of your trim! We carefully removed the baseboard and door trim so we should be able to reuse that, but since we added the laundry room in a spot that was formerly just an open storage area, we’ll need to get more trim to complete that area.
xo
s
Kate says
We are having new tile installed in 2 bathrooms (hiring it done, cuz, well, we need to hire it done). The tile guy suggested using the same tile to make a 4″ trim around the walls instead of putting the wood trim back in. At first I balked, but then I thought about that. In a room with potential water, tile trim might be a practical and clean look. So we went with it and it looks great! My house styling is very traditional and I was afraid it might look too contemporary, but it doesn’t. It flows really well.
xo K
YoungHouseLove says
Sounds cool!
xo
s
Stardancer says
It’s real! There’s a room! With walls! Woooooo!!
YoungHouseLove says
THE HILLS ARE ALIVE….!
xo
s
susan says
Wow! Looks really smoooooooth (extra o’s) in there. You guys did a great job, congrats on avoiding hiring it out. Are you for hire?? :D
I hope you wore masks when sanding… I know you can’t really shoot a video with a mask on.
Can’t wait to see it painted out!
Cristine says
This looks awesome!!! And thanks for the great pictures of taping the seams. I’m going to have to tackle 2 seams that had a bad tape job originally, and I’d like to only fix it once! Looks professionally done! :-) Great job! Go ahead and invite your friends to stand around in the room and look at it… I would! :-) Hehe!
Chelsea Alexander says
We are in the midst of this same thing, except we hired it out. It’s costing us $400 (we provide materials) but by the time we bought all the tools we’d need to accomplish this ourselves, we’d be up to about half, and this is something we’d just rather hire out.
YoungHouseLove says
That’s a really good deal!
xo
s
Whitney says
Looks awesome, guys! I just have to say that great minds think alike when coming up with post titles – http://teamtreichler.blogspot.com/2014/08/walls-and-floors-and-lights-oh-my.html
Can’t wait to see the end result!
YoungHouseLove says
So funny!
xo
s
Reenie says
Ooooh ~ can’t wait to see what color. :)
Nicole S. says
I vote for roll the appliances back in, just to make sure everything works before you go any further.
Anele @ Success Along the Weigh says
This has been pinned so when we finally decide to insulate and drywall the garage, we can refer to this. We had water damage from a bad roof leak and the tape has pulled away in a few places. The thought of doing this scares me to death but I don’t want to wait until we think of possibly selling to tackle that project. The Mr is at Home Depot right now, I might tell him to pick up a few of the trowels you used to start stock piling supplies!
Thanks so much for sharing! :-)
Lauren says
Another great job, John and Sherry! I love that you’re continuing to take on newer, bigger, more daunting challenges outside of your comfort zone! It gives courage to the rest of us meeker folk. ;) Thanks once again for the detailed description of your process and looking forward to the tiles! :)
YoungHouseLove says
Thanks Lauren!
-John
Janelle @ Two Cups of Happy says
You guys did a great job – it looks so smooth! In our new house I can see a lot of drywall seams and I give them the side eye as I pass. Haha. I will put your tutorial to use some day I’m sure.
YoungHouseLove says
Perfect punishment for seams = side eye.
xo
s
Christina says
I would love to come over and state at your new walls with you. It’s totally a thing! We’ve tackled lots of dry wall in our fixer upper and there is nothing as beautiful and gratifying as looking at (and caressing) fresh drywall when you’ve been looking at studs. Great job guys!
YoungHouseLove says
Come over! Three is a party.
xo
s
Rose says
What about putting any trim and copboards just on the wall the washer and dryer are on first, moving them back in and then completing the rest? That way you are functional while you finish the rest…but then again I don’t know the whole layout so maybe that’s not so practical!
YoungHouseLove says
That would be awesome except we don’t have a clue what cabinetry we’re going with yet (wanted to pick the floor tile and wall color first, etc). We can definitely do the baseboard behind them before sliding them in though!
xo
s
Alex Trabue says
We are working on the same project. We just finished our dry wall this weekend. First time dry walling and I felt so proud. By far the most difficult home remodel project we have taken on. Yours looks great. Thanks for all the tips.
Jennifer says
Wow, that last of your hallway – what a difference! It looks so much brighter!
erin says
*claps, claps, claps* seriously that’s a huge undertaking. after reading all that…. I still wouldn’t do drywall. Patching holes is as far as i would go and i still don’t even feel that’s an easy job!
Samantha Izaks says
Question – what about waterproofing? Maybe it’s a bit different in the States to Australia but over here all wet areas have to be waterproofed.
YoungHouseLove says
Here if it’s a dry laundry room (no sink) it’s normal to use drywall along with tile or linoleum flooring (ours will be tile, just in case the laundry drips on the floor when we transfer it, etc). Oh and we have a drain built in under the washer in case it leaks that would safely route water out, so that’s on feature they recommend for extra security.
xo
s
Cathy C says
Ok, wait, backup… What?? A drain? Did I miss the talk about the drain? I’m getting ready to move my laundry upstairs so I would love more info about the drain… :)
YoungHouseLove says
The plumbers did that when they were here! It was part of the reason they had to break into the drywall in the ceiling of the garage, but they were in there rerouting the washer’s water line and other stuff, so while they were at it we had them add that. We don’t have a tutorial for ya since they did it all, but it was nice added security and the cost was minimal (you can read about the cost in the last laundry post, and see the drain peeking up from the floor in some older posts as well :)
xo
s
Michelle says
Hi guys! You may have covered this, but how did you go about painting your banister white? I would love to do this!
YoungHouseLove says
Here’s that post for ya: https://www.younghouselove.com/2013/11/stairs-and-stripes/
xo
s
Paige @ Little Nostalgia says
That hallway before and after is craaaaay, and you’re not even done yet! Mad props to you, J-Boom, for doing all of this yourself. Just watching the videos made my arms tired.
Samantha Izaks says
Oh ok thats for clearing that up Sherry. Practical all laundries here in Oz have a sink. Never heard of a dry laundry room until you just mentioned it. You learn something new everyday.
YoungHouseLove says
You’re so sweet, of course!
xo
s
Milky says
I’ve never heard of it either (we are downunder too). Where do you scrub dirty sneakers/soak stains/clean paintbrushes/bleach stuff/do tie dying??! :)
While I’m at it, I can’t imagine always drying all my clothes in the dryer like Americans do. Clothes dried in the breezy sunshine smell divine!! Especially the sheets, mmmmm…
YoungHouseLove says
Usually in the tub or the kitchen sink- although some laundry rooms have utility sinks, which we definitely plan on adding! That way we can clean brushes, muddy shoes, and all that stuff out in the “workshop.” And I hear you about line dried clothes – sometimes I lay things out on the daybed or in a windowsill to dry and it’s so nice. It even keeps the inside of cloth diapers looking whiter (the sun bleaches them!).
xo
s
Jen @ Jen Spends says
I’m hoping I can learn to do this well so my husband and I can tackle patching up our walls/ceiling after the plumbing is replaced in our bathroom. It’s such a great skill to know!
Julianne says
Congrats, guys on getting that part done! Mudding & taping was *my* contribution to our many renos and I know how tough it can be. You did a fantastic job and I even learned a few things that could have made my life easier during one of my many ‘pull-my-hair-out’ sessions, covered in mudding compound! Now I’m prepared for the next time…and will keep my hair in tact with your tips!! ;O)
Christine says
I’m excited to see what you decide in terms of cabinets and storage! We’re in the middle of a laundry reno and I went back and forth between wanting as many cabinets as possible to hide the mess and adding in some open shelving, hanging rods, etc. We’re also expecting a baby any day now, which I think might completely change how I use our laundry room and what storage I need! Thanks for sharing!
Clare says
This is very timely – I have just come back from holiday and we are about to tackle this exact task! I have looked at lots of contradictory tutorials on youtube but it is great to have your experience of it.
Just need to buy a corner trowel I guess.
Thanks!
YoungHouseLove says
I couldn’t imagine doing this without my corner trowel! Definitely makes things easier.
-John
Emily says
Anytime I hear or see the word “sanding” I cringe. I am a big DIYer, huge. But I loathe sanding. I have no clue why, it is in almost every project to ever exist. I do it kicking and screaming every time. I have never heard of the wet sanding. Maybe I wont hate it so much?
YoungHouseLove says
Definitely give it a try! The difference was huge for me.
-John
Kara says
You guys! IT LOOKS FANTASTIC!
:::virtually twirling around in there with you::: It’s totally a thing.
You make me feel like maybe I could actually attempt drywalling if I had to.
YoungHouseLove says
Twirl, baby, twirl!
xo
s
Keri says
Great job and I’m not surprised! You guys always do your research, follow all the steps and have a keen attention to detail. None of that half-assin’ ! :P
Andrea says
Looks great! I know it sounds funny, but I actually use the Mr. Clean erasers for “wet sanding” when I’m doing patch jobs. Not sure how it would work in such a big area, but it is so much cleaner than sanding and leaves a perfectly smooth surface behind.
YoungHouseLove says
Interesting! Has anyone tried that on bigger seams in a full-room job?
xo
s
Cathy says
I’ve done it–I buy cheap Dollar Store magic erasers (2/$1). Can’t say whether it ends up being more work like the yellow sponge was for John, but it definitely smooths nicely. This was not a full room job, however!
YoungHouseLove says
Thanks Cathy!
xo
s
Jackie says
That was helpful to read. Makes me a little less leery of discovering just how much mudding might be necessary once I remove some of our popcorn ceilings…
amysarshaw says
Good work! My husband and I did the drywall in our bathroom gut job and followed the same process more or less but I’m impressed/surprised y’all didn’t need to skim coat the walls to get them totally smooth/hide the joints. It was a necessary (very time consuming) step for us. Did you consider it? It did completely make our walls smooth and even with no evidence of holes or joints but it’s a bit of work! If we could skip it next time I’d be tempted :)
YoungHouseLove says
Are you in another country? I’ve heard people do that in places like Australia (the skim coat is necessary since they have plaster walls I think?). We didn’t see any tutorials with a full skim coat going on with drywall, so we didn’t even know that was a technique that some people used – so I’d definitely say that you could get away without them!
-John
amysarshaw says
No, we’re in Oklahoma :) That’s funny. I’ll have to ask my husband where he got the idea it was necessary… we did two coats of watered-down mud to skim the walls and ceiling with sanding in between. We do live in a hundred year old house though with very not straight anything so maybe that makes a difference. My husband is also kind of a super perfectionist (which does not mix well with the old crooked house) so that’s the most likely culprit ;)
Samantha Izaks says
Yep John. Most houses in Australia are brick thus plastered walls. When I get a spare moment I’ll take some pics & send them to you.
YoungHouseLove says
That would be great!
-John
Joseph@littlehouseblue says
I was watching The Show We Do Not Name *coughThisOldHousecough* and the drywallers they had were skim coating the walls. I had never seem that before. I wonder if it’s a regional thing.
Bethany says
I haven’t even read the post yet, but I am literally LOLing at my desk at your Sound of Music image :)
michelle says
A trick for the drywall screws is to go around with a hammer and beat each one a little bit giving each one little indents from the head of the hammer. The mud will cover each one really well after you do that.
YoungHouseLove says
Thanks Michelle!
xo
s
MsKayJ says
As a mom to a 5-year-old and a 6-month-old….I say get that washer and dryer hooked up ASAP! :) They can’t be that hard to shift around once you need to, right???
Marta says
Wow, that looks amazing. I am loving how this is looking. I can’t wait to see the door up, that is what I am most curious about. Thanks for the inspiration.
Marta
Robin says
I didn’t realize until you put the last two photos in there how this layout makes much more sense. Its funny how before the layout felt normal, but now with it like this you can’t imagine it being another way! So glad you can get some light down at the end of the hall, and great job on your drywall/taping/mudding.
Lisa says
My thoughts exactly. What a smart transformation!!! Makes so much sense. You need to invite the reader who suggested it (Leslie?) to visit you guys and have an in-person tour. What an amazing foresight she had!
And yes, you guys did a phenomenal job!!!! Congrats!
YoungHouseLove says
Yes! I keep imaginary toasting to Lesley! Cheers to her brilliant mind!
xo
s
Leesha says
Looks great! I was curious though, are you guys going to texture the walls at all? Every house around here has that ‘orange peel’ texture, but I have noticed that maybe that’s a regional thing?
YoungHouseLove says
Yup, totally regional. Here our walls are flat (they were in our last two houses as well).
xo
s
Susan says
Yes, the new laundry room is amazing, but what keeps hitting me square in the forehead (is that even an expression?) every time I see the hallway photo is the light flooding in from your “bonus room” window….I’m thinking a glass door to that room might be the way to go, or some other way of keeping that light flowing through your hallway.
Enjoying watching your progress, day by day!
YoungHouseLove says
Yes, that’s the plan! We checked a few out this weekend and think we have a winner!
xo
s
Crystal says
I would totally stand around and stare at your walls with you guys!!
Kate says
I’m so impressed by you guys! You come up with an idea and you execute it in a matter of weeks. On the other hand, I’ve been trying to redecorate my home office (just redecorate… not even moving/building walls!) for the past year and still haven’t finished. Sigh. Kudos to you! You’ve inspired me. I WILL FINISHED THIS ROOM!
Julie says
Great job! We are old people with old house love but definitely on the slow track for renovations. We have a bathroom gut job that we are steeling ourselves for and once again, you guys are helping us to be brave. Thanks for that.
Oh, and my vote is that you definitely do your moldings before putting the machines back in but doors could be done afterward, don’t you think?
Oh, and in Texas, yes to textured walls. Ugh. Our 1976 house has popcorn ceilings and gross textured walls. 12 years into living here and we still have popcorn ceilings to deal with. Oh well, raising the four kiddos has been a blessed distraction.
Allison says
I just wanted to pop in and let you know that I so enjoy these actual DIY projects and posts from you guys much more then some of the other “decorating” posts. This is actual useful information that I will be able to bookmark and make use of when we finish our basement, so thank you for that!