Over the weekend we wrapped up our how to hang drywall adventures in the laundry room. It was a humbling experience, but we’re feeling nothing short of glorious about how it turned out. In fact Sherry and I spent a few minutes doing this in there on Sunday.

Project Completion Euphoria. It’s a real thing. And it can make a grown man twirl.
Doing Our Research
We’re not ready to put “pro drywaller” on the ol’ resume quite yet, but I do think we’ll go into our next drywallstravaganza with a lot more confidence. We devoured YouTube videos and online tutorials for about an hour one morning, and quickly learned that there seem to be just as many variations on proper technique as there are opinions (reminder to self: never read YouTube comments). We finally decided to generally follow this video, since it was clear and seemed consistent with the most common advice. So this post will show you the process we went with, and what techniques seemed to be the most effective for us. We even threw in a couple of videos for you (although none of them have our Sound of Music reenactment).
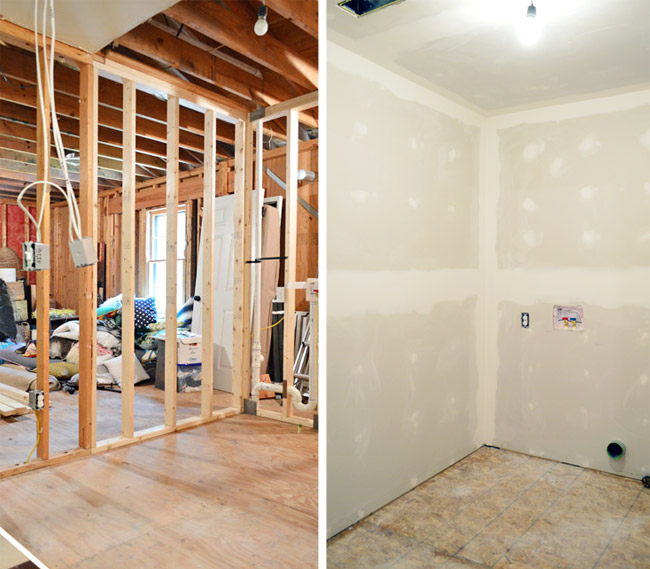
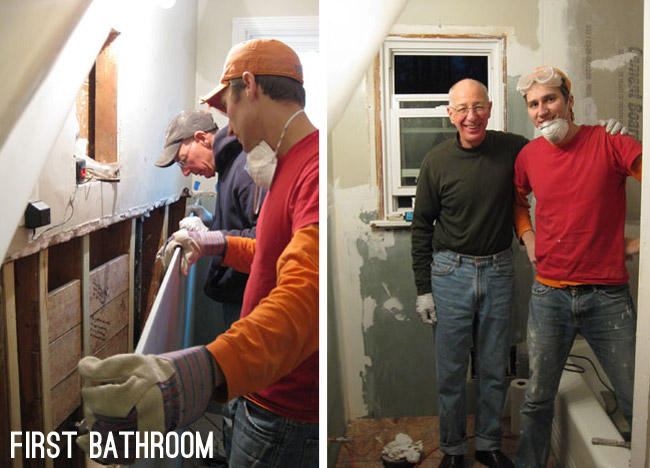
Before we started this reno, I was quick to tell Sherry that my vote was to heavily consider hiring out the mudding/taping of the drywall. It’s just a skill we have limited practice with (patching a hole here and there mostly) and it really is an art when you watch the pros. My biggest encounter to date was 5 years ago during our first bathroom gut job, but it was just doing a handful of seams. Somewhere along the line, I felt my opinion starting to shift, and as we decided to take on more of this renovation ourselves, I realized this would be a good room for us to build our drywall finishing skills. There would be lots of seams to practice on and if they didn’t turn out so hot, we would have various items like baseboard, crown molding, cabinets, appliances, and backsplash tile blocking some of them – and it’s not like it’s a major gathering spot (like a kitchen or living room for example).
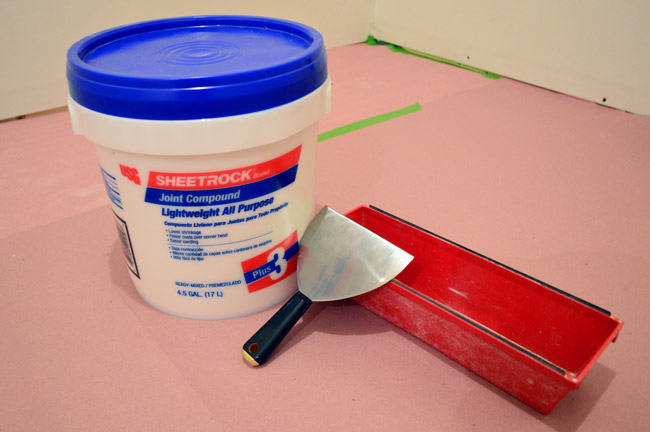
Materials To Tape, Mud, And Sand Drywall
So let’s start with our materials, most of which should be available right in the drywall section of any home improvement store:
- Rosin paper or some other paper to protect your floor from drops, splatters, and dust (even if it’s just sub-floor, you don’t want it to get bumpy from dried joint compound)
- Joint compound (i.e. Mud) – I used this based on reviews I read that warned against the “UltraLightweight” stuff. I heard you want 1 gallon for every 100 square feet of drywall. For me that meant 4 gallons, but we ended up using closer to 5.
- Mud Pan
- Drywall Knives in various sizes – the one pictured is a 6″ knife, but we also used 8″, 10″, and 12″ ones (although the last was probably overkill)
- Corner Trowel (not pictured) – this helps you get into corners and was awesomely helpful (it’s in one of our videos below)
- Drywall Tape (not pictured)
- Bucket of Water (not pictured)
- Work Light (optional, not pictured)
- Stepladder (not pictured)
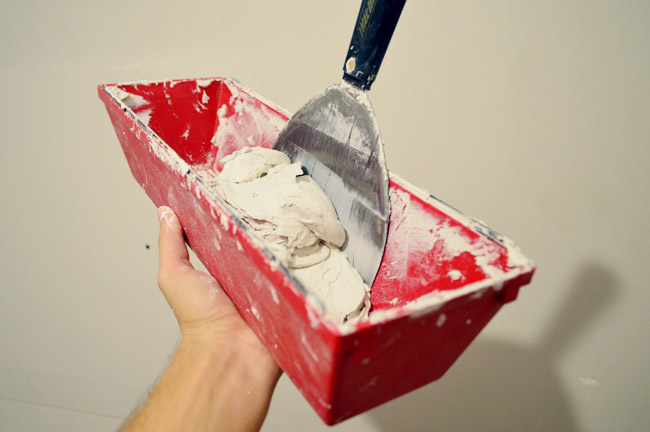
The mud pan is not only a handy way to not have to lug the whole bucket around with you, but it also has some metal edges so you can keep your knives clean and scraped off throughout the process.
Mudding Over The Screws
We started with the easy step: covering the screw heads. Having used a drywall counter-sink bit during installation, our screws were already set into the drywall slightly (kinda dimpled in there) making it quick and easy to slop on a bit of mud and scrape it flat.
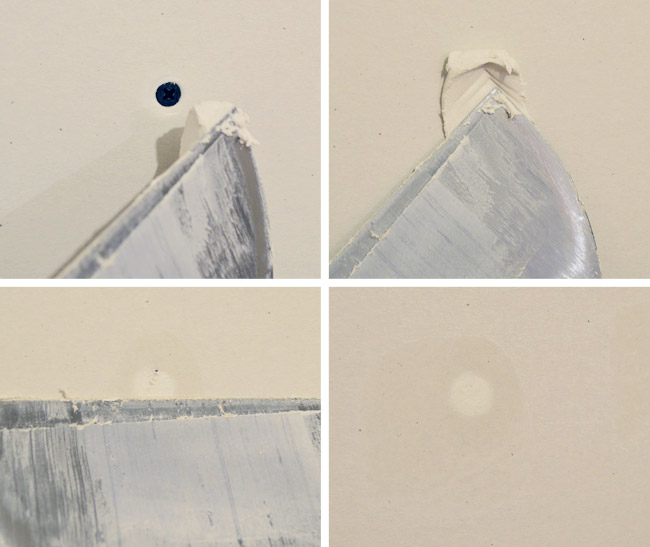
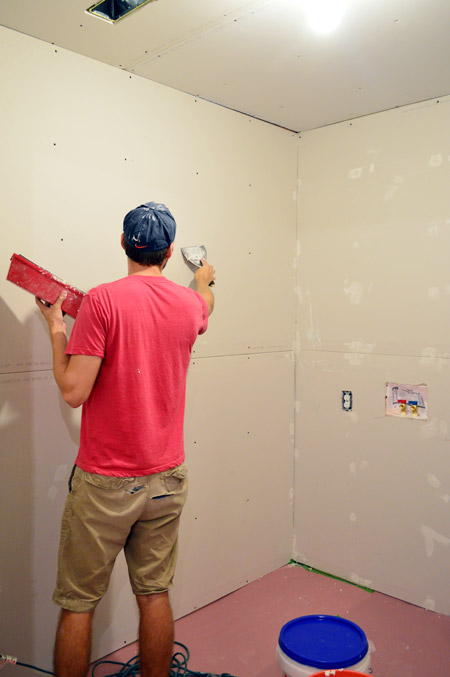
There were lots of screws to cover, but Sherry took two sides along with the hallway and I got the other two and the laundry room ceiling so it went pretty fast that way.
Taping The Drywall Seams
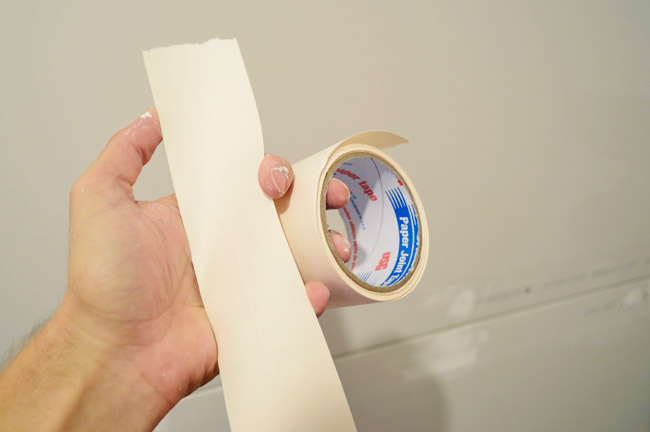
Next up was taping the joints or seams between sheets of drywall. There’s mesh tape that has an adhesive built in, which we’ve used before and found tough (if you sand too much, the mesh texture comes through easily), so we chose to use paper tape this time, which requires a bed of mud to stick to the wall. That application method was an extra step, but almost all of the pro tutorials that we watched used it, and it ended up being a lot easier to work with in our opinion (we didn’t have that mesh-showing-through issue – so it made for a smoother result).
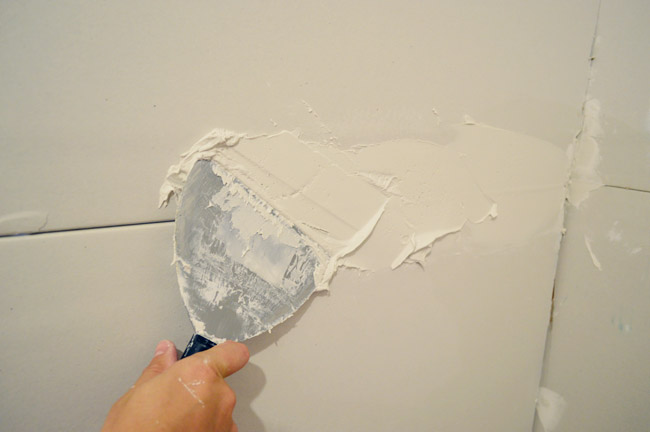
First I applied my “bedding layer” on the horizontal seams. The drywall boards taper slightly on the edges, so this whole process is meant to bridge the gap between boards and flatten the taper. Once I got a decent layer of mud applied, I dragged my 6″ blade across it to smooth it out.
Once it was smooth, I took my piece of tape (already ripped to the length of the seam) and lightly pressed it into the layer of mud. It takes just a soft tap for it to stick to the mud. Note: I saw some tutorials suggest wetting the tape first. I tried this once and didn’t find it any easier, just messier, so I worked with mine dry.
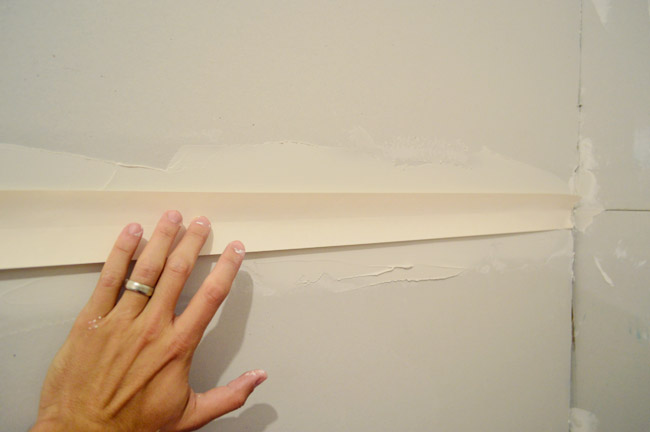
Once lightly adhered across the seam, I dragged my 6″ knife across the seam with a little bit of pressure to smoosh it down into the mud. It helped to start in the middle of the wall and work out to one corner and then repeat that on the other side. Since the tape may drag when you first start, it helps to put a finger on it to keep it in place when you first pull your knife across it.
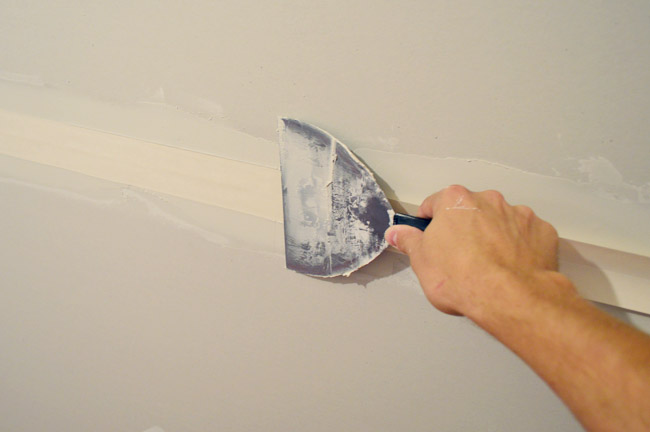
With the tape embedded, I then used a slightly larger knife (an eight incher) to put and smooth another layer on top. By using a larger knife it helps feather out the edges so they blend more seamlessly with the wall, all while disguising the taper of the boards.
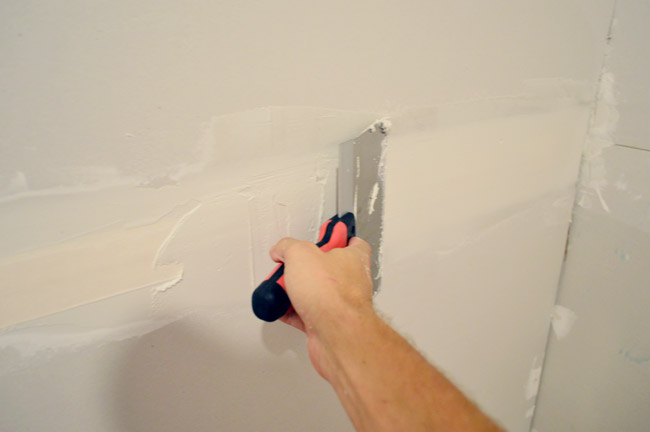
Here’s my horizontal seam after my first round. It actually wasn’t that hard at all, so it had me thinking I could do this all day…
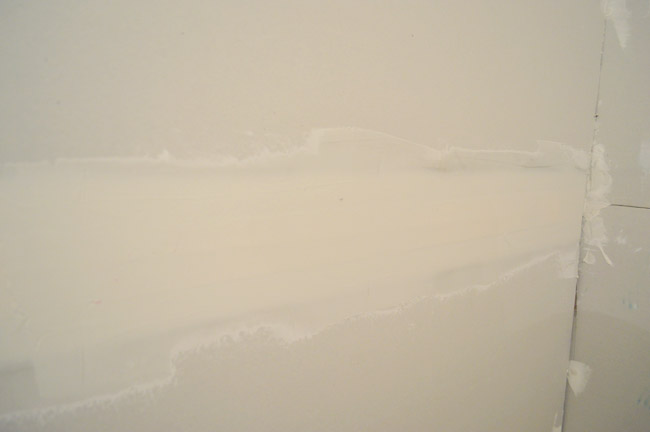
Taping The Corners
… and then came the corners. The added corner element definitely made them more of a challenge. I wouldn’t rate this step as a “panic and throw things and curse the DIY Gods” undertaking, but I think a “you have to concentrate more and it takes more time” descriptor is fitting for this part (I’d call it a 6 on the DIY difficulty scale, while the flat seams are a 2). The process started off pretty much the same as the flat seams. I could even use the same tape, since it comes pre-creased for corner applications.
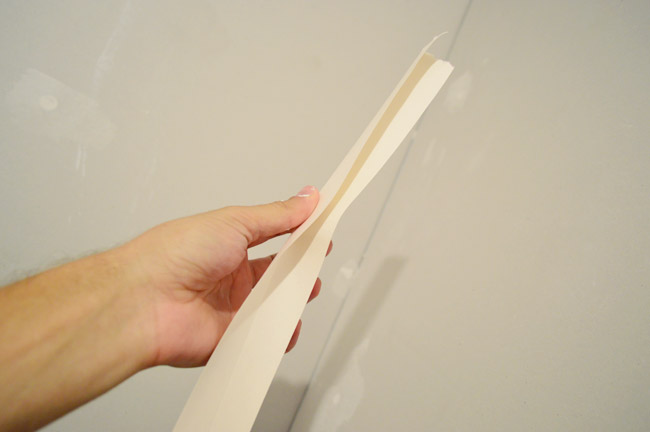
Just like before, I applied a bedding layer first – which involved running my mud-filled knife down each side of the corner.
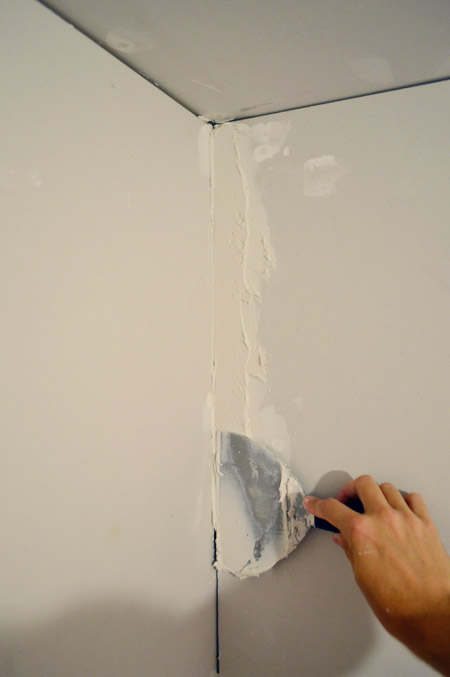
Once both sides of each corner were covered with a fair amount of mud, I broke out my corner trowel to smooth it out. The corner trowel is a lifesaver when it comes to getting a sharp angle in the corner and smoothing both walls simultaneously.
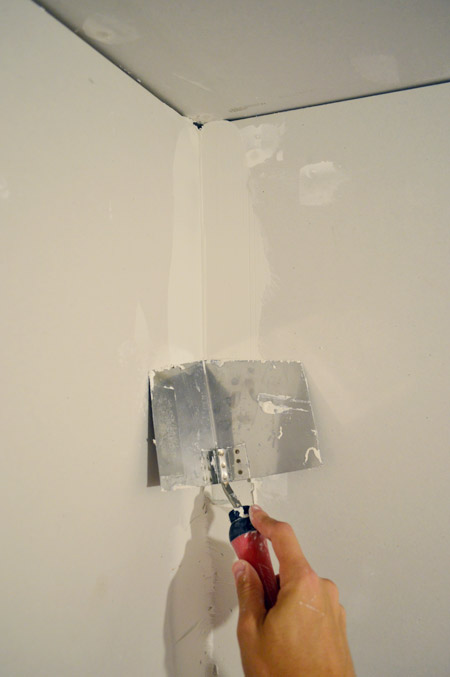
Then on went the tape with a light tap, just to keep it in place.
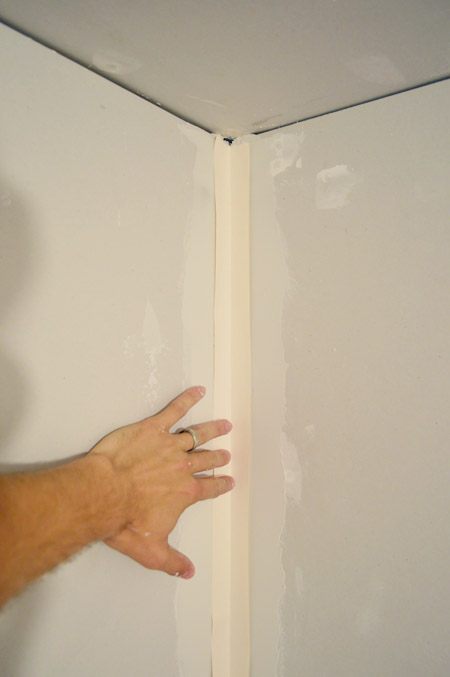
Next I pressed the tape into the mud with another swipe of the corner trowel. Since it was hard to get my finger and the trowel in the top corner (to keep the paper from dragging), I found it sometimes helped to dip my trowel in water first to glide along the tape more smoothly.
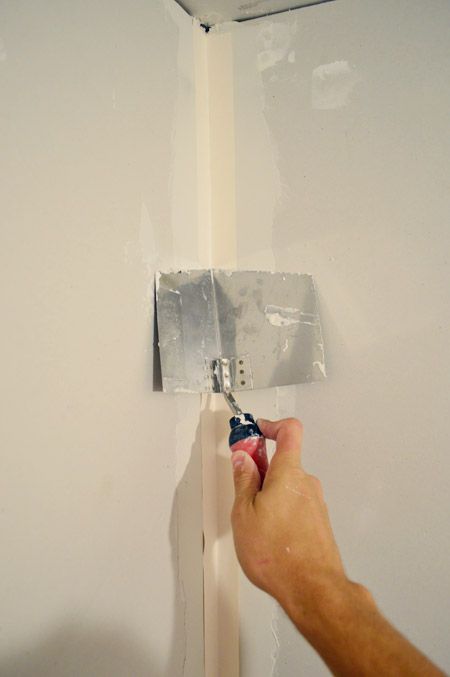
The corners ate up a lot more time than the flat seams since we had four vertical corners in the room, four horizontal corners around the ceiling, plus nine more around the doorways in the hall. But hey, at least we had 17 corner seams to practice on! Note: I’ll explain in a little more detail what else was challenging about the corners in a second, complete with a video to show you what ended up working nicely, so stay with me.
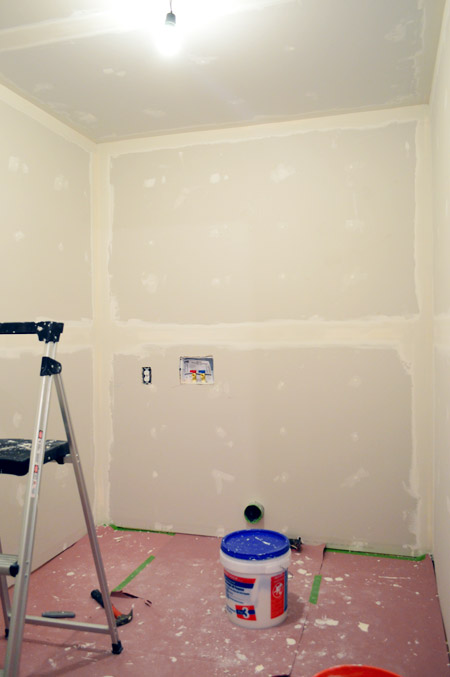
Oh and I thought it would be helpful to mention that my first round of mudding took longer than the 12-24 hours to dry that most tutorials suggested (Sherry started a second round after 24, but noticed it was pulling some damp mud up in a few areas so we decided to wait one more day).
Appling A Second Coat Of Mud
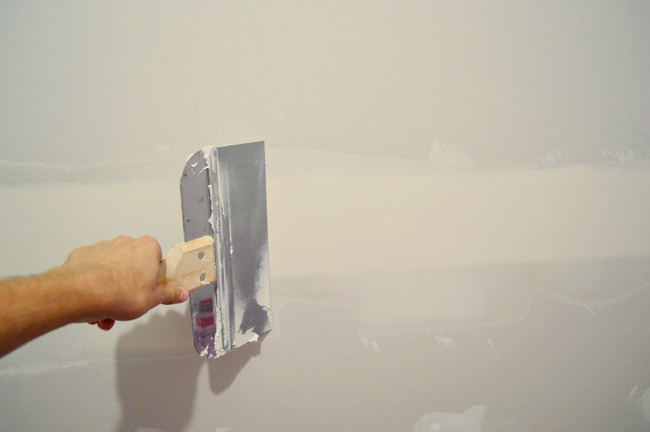
Once everything was dry (you can tell because the mud will be one consistent color) we put another coat on our seams, this time using a slightly larger 10″ knife to further spread the edges out a bit.
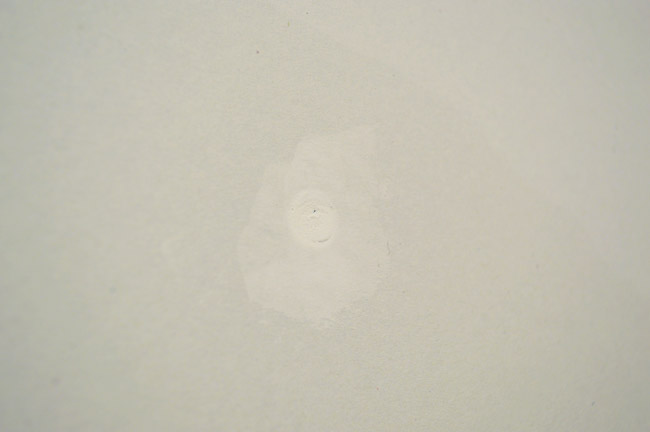
We also tackled another layer of mud on our screw holes together, since you could tell our first pass had shrunk a little bit when drying.
With that done, it was time to face the corners again. I actually watched a few more videos with tips before beginning, which seemed to help – and I even made a video to show the technique that ended up working for me in the hopes of passing it along to you guys. I didn’t let Sherry record me until my third (and final) round of mudding, just to be sure I had a good handle on it – so forgive the time jump. It’s also on a ceiling crease, but it works the same way on vertical wall corners.
Note: You can also watch this video here on YouTube.
For those who can’t watch the video, I’ll do my best to explain it with photos. It started like I did the first time – slopping some mud on both sides of the corner with my 6″ trowel, followed by a pass with the corner trowel to smooth it out and wipe off excess.
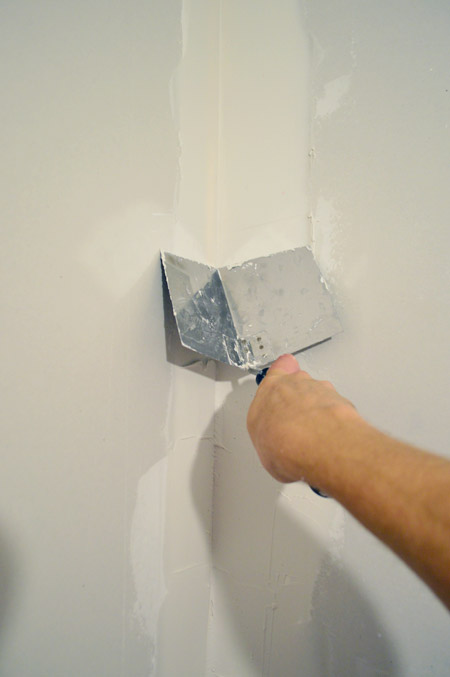
The issue is that the trowel edge tends to leave ridges where the excess is pushed out, but not smoothed down.
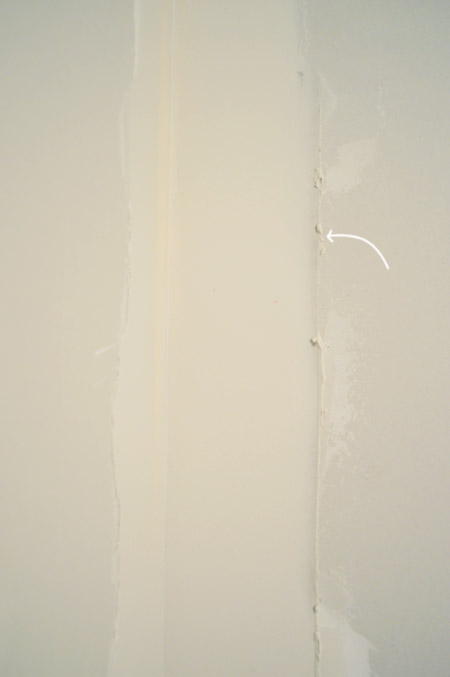
So to take care of those, I used my 6″ trowel to flatten them and feather the edge better. The challenge here is that you risk creating another ridge with the trowel (in the case of the photo below it would be the left corner), basically creating a vicious cycle of ridges that are left behind. But if you hold your 6″ trowel at a slight angle, that can help you apply pressure on the outside edge so you can eliminate the first ridge without making a new one (or at least a very big one). This takes some finesse, so forgive yourself if you don’t get it right away, but once it “clicked” for me it was a lot easier.
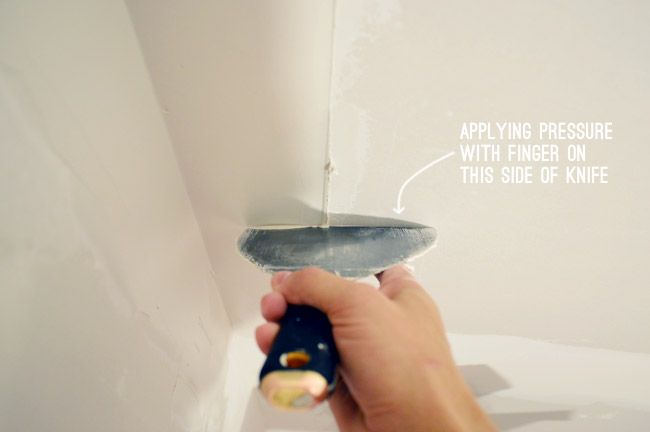
After eliminating (or greatly reducing) the ridge, then I went back and did one more pass with my corner trowel, just to be safe.
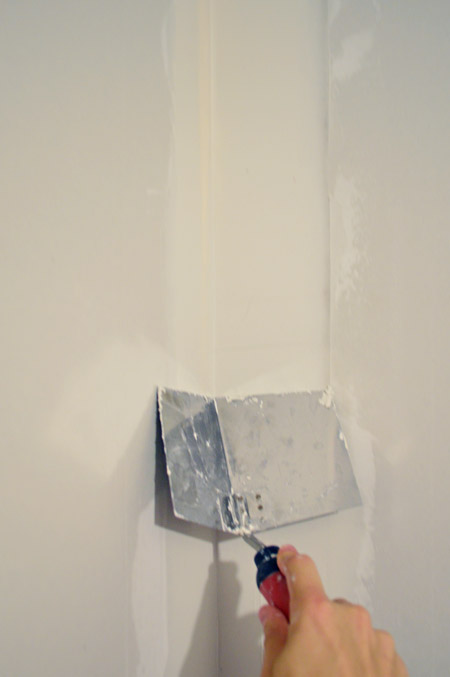
Here’s the room after two rounds of mudding. Fortunately, the second round was much faster since (a) we weren’t taping and (b) I was getting better at those corners (cue the Rocky music, guys).
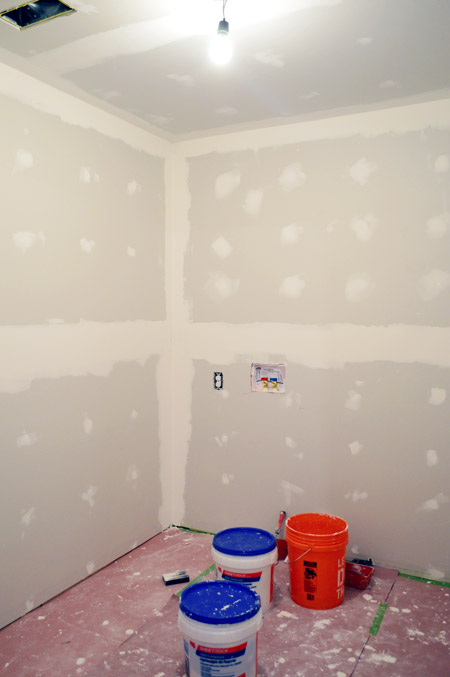
Wet Sanding The Drywall
After 24 hours, it was sanding time. You can see in the photo below that my best efforts to smooth everything out with those trowels weren’t perfect and I still had some defined edges that needed to be smoothed out and blended into the wall better.
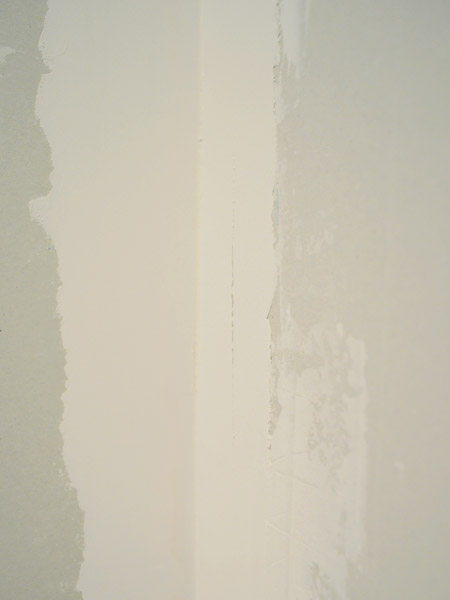
I was actually excited to try out the idea of “wet sanding” to help eliminate some of the dust that threatens to coat everything in a normal “dry sanding.” I’d heard people use everything from a sponge to a t-shirt for wet sanding, but I went with this sanding sponge that was sold alongside all of the other drywall sanding materials (since it has a coarser side for scrubbing). I also kept an 120 grit sanding block nearby for any tough spots.
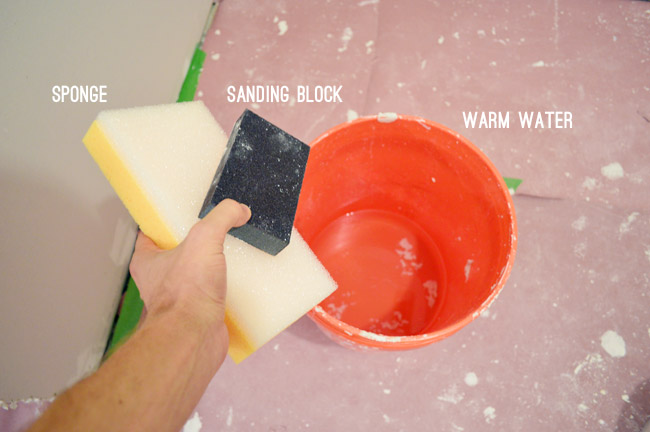
Well, I have to say I wasn’t very impressed with the damp sponge. It did the job, but it took a lot more effort than I had expected.
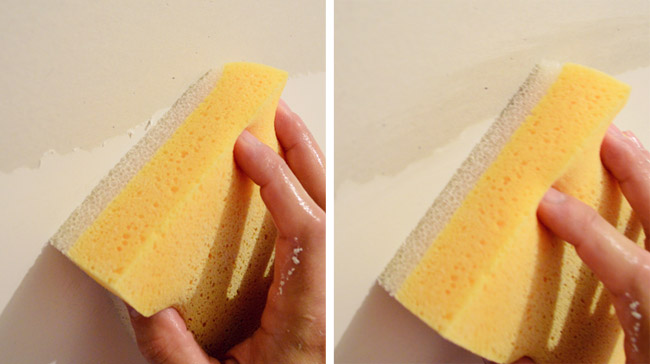
So I decided to try something different – which I explain in the video below – that ended up working really well.
Note: You can also watchi this video here on YouTube.
Again, if the video is a no-go for you. Here’s the gist – I used the 120 grit sanding block as a sponge, since it retained water AND had a little more scrubbing power than the plain sponge did.
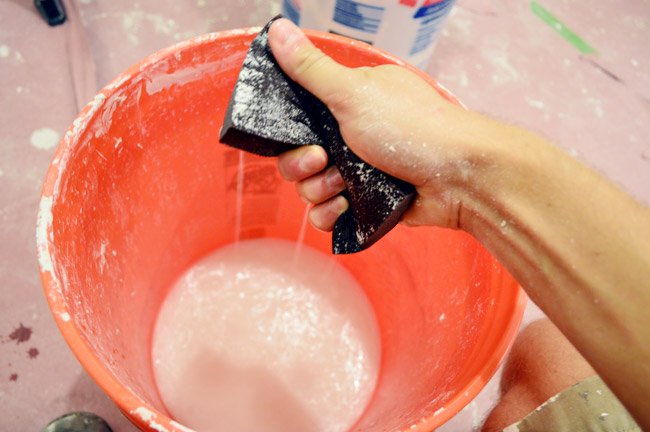
I didn’t want it very wet at all (that could rub off the drywall paper) but just damp enough to moisten the dried mud (and so that that the dust from sanding stuck to the surface of the block, which didn’t happen when it was bone dry).
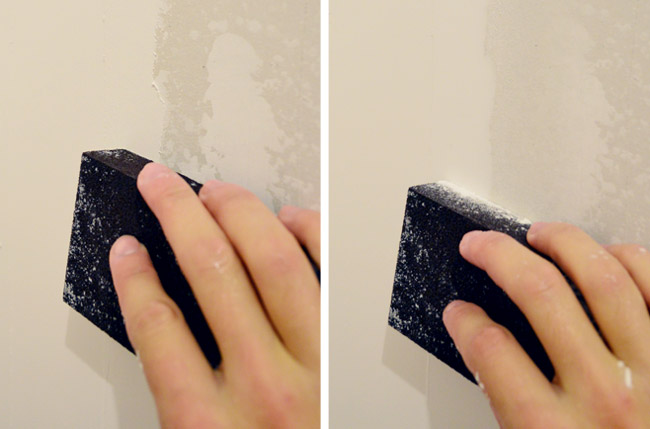
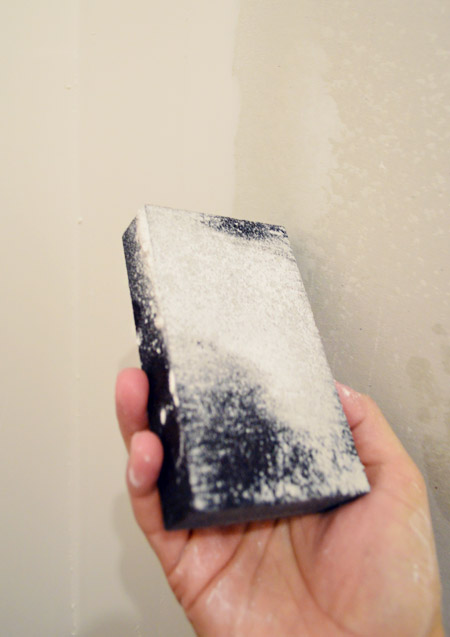
I wouldn’t call this method “100% dust free” by any means, since once the block got coated with a layer of dust it started to toss it around a bit. The difference was that the dampness caused the dust to just fall to the ground right below whatever I was sanding, rather than becoming a cloud in the room. Once one side of the block got covered, I turned it over to get a more time out of it before having to rinse it in my bucket (it took a bit of massaging to get the dust coat off).
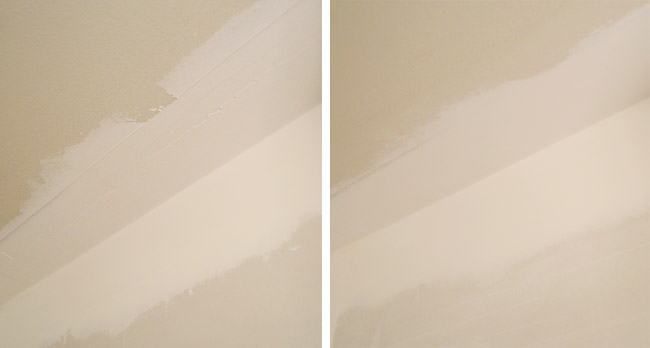
This step was a HUGE relief, because I was worried about a few corners where my application wasn’t as smooth as the others. Here’s one particularly rough spot and how well the wet-sanding step corrected my mistake.
Applying The Third (And Final) Coat Of Mud
Once the sanding was done, we could put our third and final finish coat on the walls. A bunch of tutorials suggested thinning out the mud a bit so that it goes on even smoother, so I dumped a little water in…
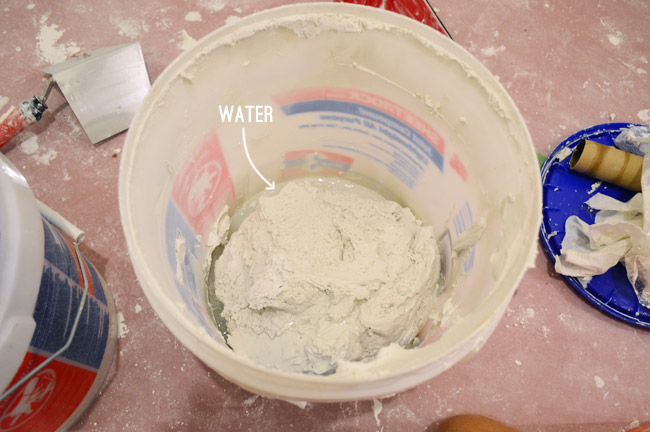
…and blended it with a paddle mixer. You can see I did this in an empty bucket, so we weren’t diluting our whole stash. It didn’t make it too much thinner, just about the consistency of mayonnaise.
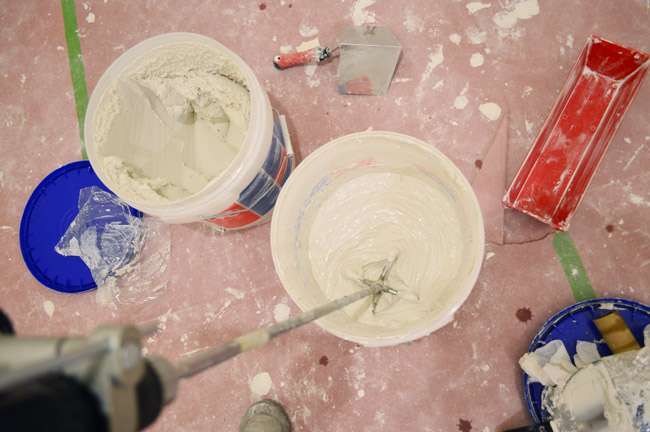
I’ll spare you pictures the photos of our third round of application and our second round of sanding (they were identical to the process I’ve already shown, and this post is already overloaded with pictures) – so let’s just jump to the after.
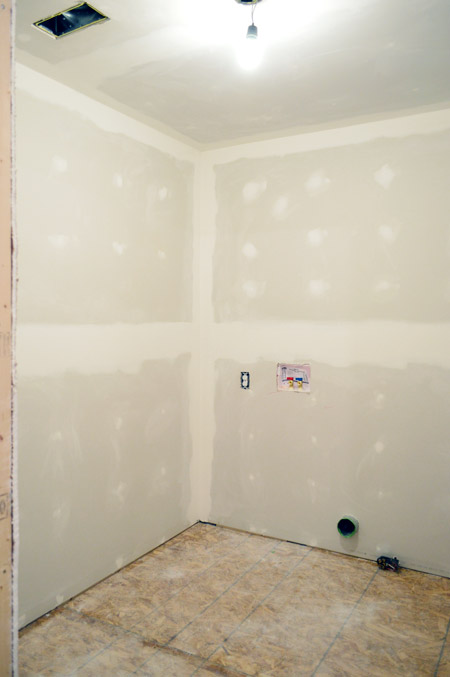
Priming The Room
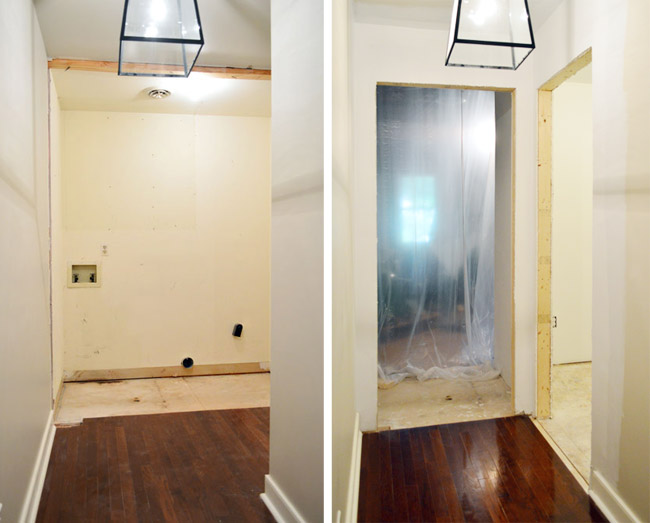
Since that’s not the most exciting picture ever, let’s jump one step further to the primed room. We were so eager to see how our taping, mudding, and sanding held up to the test of being coated with primer that we jumped right on it yesterday. And it looks like a real room, guys! A space that didn’t exist a few weeks ago is there now – and everything is smooth! We feel like having people over to stand around and look at the walls with us. Is that a thing? No? Ok, we won’t.
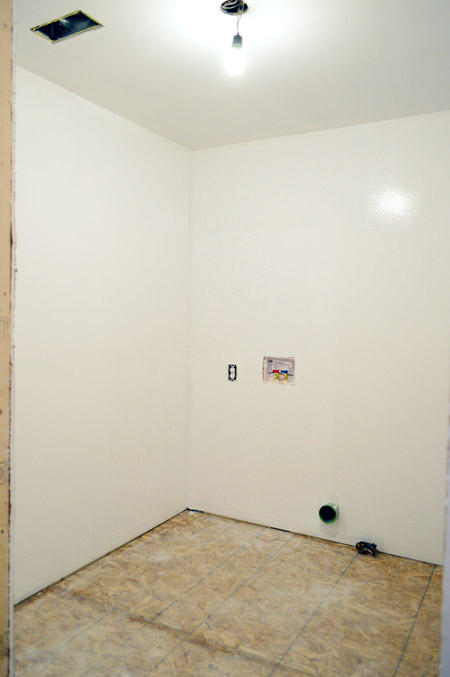
Here are a couple more before/afters for you. We’re really happy with how smooth the transition is in the hall too.
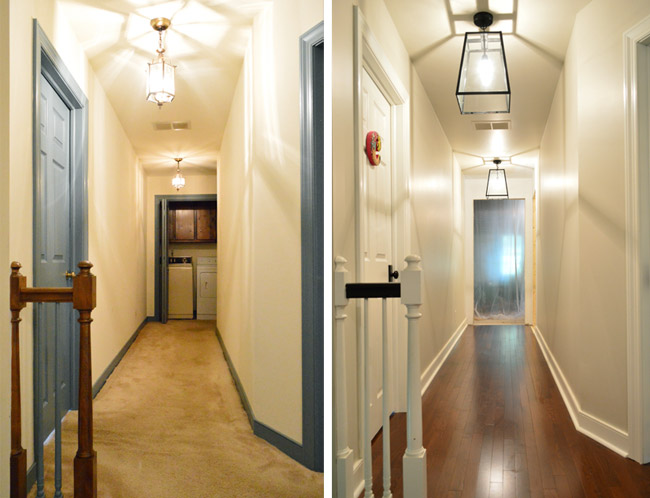
Here’s one last (waaay) before & after to show how this formerly dead end of the hallway has changed. It’s going to be funny to look back on old house tour videos and see a laundry closet there instead of a doorway.
Next up is painting and then installing the floor (we picked tile! more on that soon!). After that we’re debating whether we should roll the washer and dryer back in (at least temporarily) just to have them hooked up again, or if we should hold out to get a few more things done without them in the room, like hanging the doors and adding the molding. Decisions, decisions…

Chase says
Fantasticness!! You should be very proud of your hard work. It looks great!!
GumTreeGirl says
Thank you for making tutorials that aren’t scary. It gives me hope that when we move out of our apartment into a fixer upper that we will be able to make it feel like us.
Kim R says
Drywall Question: We added on a new kitchen about 5 years ago. (Yes, my “hey, time to get on that” is broken.)
So, new drywall+primer+paint, and occasionally, I find a little circle beneath the paint that I’m guessing was a drywall screw that didn’t get flush with the wallboard. Would there be any way to get it flush? I don’t know if I’d have to sand it, rescrew and repaint or what? I know you’re not drywall experts, but you probably know more than I do. I think at this point, it falls under, “probably only you will notice this, Kim” but maybe not.
YoungHouseLove says
Oh yes, nail pop (or screw pop) is a thing I think! I would try to screw them in if you can, and then spackle, sand, spackle, sand, and prime/paint. Should make them invisible!
xo
s
Jen says
I cannot emphasize PRIMING!! Our previous home owners did not prime and the paint peels off the walls everywhere they mudded. So in order to paint our walls I need to peel the paint, mud and sand where the paint met the mud. Then prime the walls. And they used that annoying mesh tape which is just fun to remove. :) PRIME! PRIME! PRIME! All that mudding and sanding is for naught if you don’t prime your wall! Okay, my rant is over. Great job and explanation!
YoungHouseLove says
Oh no!
xo
s
Patti says
Great job “spackling” as we used to call it. (Btw, do you know there is a makeup primer called “spackle”? It works great, does just what it sounds like, but I digress…) Spackling is the toughest DIY job in my opinion. I’m totally intimidated by it but you made it look easy! Love how this entire project is coming along!
YoungHouseLove says
So funny about the spackle makeup!
xo
s
moni says
Wow! nice job. I do have a question, if you guys have a dry laundry room (no sink) where does the water from the washer drain into?
YoungHouseLove says
There’s a water line from the old location of the washer that we got relocated, so I think maybe the drain taps into that?
xo
s
amy says
It’s great that you guys have relocated the laundry! Looking good!
One question – are you going to do any tiling on the back wall? I remember that was part of your original plan but you haven’t mentioned it in a while.
YoungHouseLove says
Yes, accent tile will go up above the washer & dryer (below the cabinets we’ll hang). Can’t wait!
xo
s
Lynne says
I can only imagine how accomplished you feel after this – it looks amazing! All I did over the weekend was hang up some Ikea blinds, and I can’t get enough of raising and lowering them, thinking ‘I did that!’
I recall you got a letter from the kids? grandkids? of your house’s former owners. Well, at a party this weekend I met a woman who had grown up in my parents’ current house! My parents did a big reno when they bought the house, and she said she snuck inside once while it was under construction to check out the changes. It was so cool hearing her stories about the house’s history!
YoungHouseLove says
That’s so cool!
xo
s
Catherine says
This has been one of my favorite projects of yours! I’ve been with you guys since house 1! I love how you had your plan but then were open to the suggestions of your readers and then BAM totally rocked everybody’s socks off with your room building speed. I’m sure it doesn’t feel so fast to you guys, but I’m so glad you are taking us along for the ride. The light in the hallway looks awesome – can’t wait to see the glass door.
YoungHouseLove says
Thanks so much Catherine!
-John
Christie says
This is a lifesaver! I was just about to look up a tutorial on how to do this. We are adding a door in the doorway down to our basement, which never had one before! Thank you so much for all the detailed instructions and the comments on what works and what doesn’t work!
Meg M says
I read every post y’all put up, and I normally don’t comment, but I had to leave a note on this one. I am super impressed with this step of the project! I find getting things all smooth to be one of the hardest things I have ever tried! Y’all are welcome to come visit in Southern California, and while you’re here maybe you could help me fix my botched patch job on my plaster walls! Haha! Great job; y’all blow me away!
YoungHouseLove says
Thanks Meg!
xo
s
Ms. Weatherbee says
Wow great work! I would love to get hands on with a project like that, but I don’t have any space to renovate. Anyone have any ideas on where to learn and practice these skills if you are not doing a DIY project on your own home?
YoungHouseLove says
Sometimes home improvement stores or tile shops have free project classes like how to tile or drywall right in the store for you to build your skill set!
xo
s
Lil says
That looks amazing! You should totally have people over to ooh and aah appropriately…even if it’s just your parents or besties! Of course, you always have us! Oooh! Aaah!
You’re totally make me feel like we could tackle that bathroom…
Jill says
Don’t hang the door before you put the machines back in. It is a bear to get those through doorways, and you’ll scrape the hell out of your pretty new door jam.
Lynn says
Can’t wait til you get to the decorating stage!! I had to skip to the last pic before reading! :)
I am actually looking forward to seeing the frosted glass door and light shining through…and THE ROOM beyond it. Don’t make us wait too long! :D
Lynn says
Seems like you are going warp speed, in blog time anyway!!
Stacy says
Oh man, I am about to start this in my house (a kitchen, laundry room and some random patching) and I was so hoping it would go well for you so I could use your tricks! I have that mesh tape and HATE it, so I will definitely be picking up a couple of rolls of the paper tape to try!
angie says
I knew you could do it! Good job. Are you texturing the walls at all in that room?
YoungHouseLove says
All the walls here are smooth (same with our other two houses) but we hear it’s regional!
xo
s
Laurie says
Moving the laundry room like that makes it look like you found a secret room behind it.
Does anyone else have a lot of those dreams like I do? Where you find whole rooms you never knew existed in your house?
Wishful thinking.
YoungHouseLove says
Those dreams are the best!!
xo
s
Milky says
I do! I have those dreams!
But usually the new-found rooms are sagging and moldy and rotten, or they’re basement rooms with long rocky tunnels that are half-filled with water because they eventually lead out to the ocean …
Analyse that! :)
YoungHouseLove says
Yes! Sometimes they’re in an awesome place, but they’re always in that “needs word” condition. Once one of mine had a cat secretly living in there, complete with some replenishing food source. So strange!
xo
s
Michelle says
Wow! Great work!!
Ro says
I have some areas in my home that I’ve put off fixing because I hate to mud and the mess from sanding it is so awful. I’m so excited to try out this wet sanding.
Cathy Ropiski says
This is fantastic! You all do such awesome work–cannot wait to see the end results. It will be the nicest laundry room ever. Thanks for sharing!
Momlady says
Yay! And yes, twirling in your finished (new walls, anyway)room is a “thing” :D, as is petting them gently…don’t let anyone tell you otherwise.
I love the idea of having a frosted glass door at the end of the new hallway. Free lighting source=awesome bonus.
You do know that the space beyond that door will now be calling (loudly after a while) to you to start finishing it, right?
YoungHouseLove says
So loudly! Haha!
xo
s
rachael says
Oh man, I’m so glad you did this. We are a few months away from getting to this part of the process…we’ve got a full basement that needs drywall-saving up for it. I want to try and do the mudding and taping ourselves too. So just to clarify, did you sand in between each and every layer? I didn’t see it mentioned that after the first coat, you waited 24 hours (Sherry noticed it was still wet) and then sanded before you put on more. Why only sand between the last two and after the last one?
YoungHouseLove says
Many of the tutorials recommended that so we followed the recommendation and it seemed to work. I think if you sand right after laying the tape in the bedding layer it would just rip up the tape, so waiting for the second pass protects it more.
xo
s
Allison says
I so wish we had seen this before my husband drywalled our basement laundry area a month ago. Mudding was not his friend. Major dust clouds in there!
Sarah says
The laundry room is looking great guys!! Question: do you know if you can install a floor drain if the washer and dryer are tucked in a closet? Does the drain go under the machines? Thanks!
YoungHouseLove says
Yes, we actually discovered our old laundry closet had one at one point during demo! It’s just a small drain pipe that comes up from the floor under the washer that you attach to the drain pan under the washer.
xo
s
Sarah says
Thanks! I love that you answer all the questions from your readers. It makes the blog so personal and the reason why I read it every day!
Jenny says
I was so happy to see that you did this yourselves! Good for you! I spent my summers in college working as a drywaller, and I can’t tell you how many times that skill (which I never thought I’d ever use again) has come in handy. You really did your homework too, because the steps you followed were almost identical to how I was trained. All you need now is to master stilts, and you’ll be unstoppable. Congrats for having the courage to do this on your own.
YoungHouseLove says
Haha! Stilts are a whole new level of difficulty!
xo
s
Marcie says
Fantastic job! I know what a sense of accomplishment it is to finish a project like that! I’ve been putting off doing wall repair in a bedroom because I’ve done dry sanding before and what a mess! I’m definitely inspired to get busy now and will definitely try the wet sanding technique. Can you tell me what grit sanding block you used?
YoungHouseLove says
Thanks Marcie! It was 120 grit.
xo
s
Holly Marie says
This looks GREAT! You all should be so proud! I have a hard time believing you were hesitant to do the mudding/taping part yourselves- you guys are such DIY pros, I guess I just think you all are capable of doing just about anything. And you clearly proved you are more than capable of mudding/taping! Bravo!
Hillary says
Hey John, would you explain your comment: “I used this based on reviews I read that warned against the “lightweight” stuff.
We’re getting ready to do this too. We have to patch a hole on our outdoor porch ceiling. Wish I knew why someone used regular drywall outside…anyway the product you used is called “lightweight all purpose.” Is it more heavy duty than some other lightweight and not the kind the reviews you read warned against? I would love to use this same kind too and I’m hoping it’s heavy duty enough to work outdoors.
YoungHouseLove says
Sorry to be unclear! It was the “Ultra Lightweight” stuff that people said took forever to dry, so it prolonged the process for them and they said regular/standard lightweight was better. I’ll update that sentence to be more clear as soon as we’re back home. As for it working outside, I would make sure it’s meant for exterior use since I didn’t check for that. Good luck!
-John
Anne says
That’s awesome that you all tackled it yourself! Our house has drywall texture called slap coat (it is kinda awful, but a massive undertaking to get rid of it everywhere). The slap coat has been our kryptonite in tackling the mudding, taping, texturing process of drywall. Getting it to feather out and blend with existing walls is an art.
Iryna says
Whoa! Looks amazing!
Crystal says
Wow – great job!! Thanks for the detailed instructions and videos, I love these step by step tutorials. That seems like A LOT of work. We have paneling in much of our house and I’ve always wondered how hard it would be to replace it with drywall.
Sarah @ Sarah's Daybook says
Ah! Is it weird that I want to do that now? Yes? Oy vey.
Sarah
YoungHouseLove says
No way. Go get ’em!
xo
s
John @ Rather Square says
Looks great! There is an art to mudding and it takes practice. Took me a while. Looks like you guys are getting the hang of it.
When I mudded the garage of my old condo, I found this guy’s video series to be very helpful… https://www.youtube.com/user/drywallgall/videos.
Looking forward to seeing your continued progress! :)
YoungHouseLove says
Thanks John!
– Other John
Christine Duffy says
Yay guys! Congratulations! It looks amazing. One of the things I read in my book about dry walling that the expert recommends slightly bending out the spackling knife. I wasn’t sure why that was necessary, but after seeing the trouble John encountered in the corners, I bet that’s why. With a slight curve, I’d imagine you could rock the knife to the side away from the corner to prevent that ridge on the inner corner side. You think that would have helped at all?
YoungHouseLove says
Sounds really smart! I’ll have to try that.
-John
Natalie says
Hey Guys! Nice work in there! Can you tell me what grit your sanding block was?
YoungHouseLove says
Sorry to leave that out. It was 120 grit!
xo
s
Kami says
My goodness, every day you guys just keep on truckin’ where I would have given up. I’m a quitter. You guys? NO WAY. I get you do this for a living and all, but for reals y’all, it’s impressive. Love this and can’t wait to see it completed!
Kelly says
I’m always so excited to see your project updates every day! This is looking really good!!!!
Marlena says
Jaw. Dropped. Wow! I am so impressed! And I say thank you for finally explaining in a way I can understand what mudding and taping means/is. I’ve heard those terms over the years but never understood what it was and how it worked. High fives (or swirls/twirls) all around!
Jess says
Wow, what a difference this has made in your hallway! Let alone the increased functionality/awesomeness that your laundry room is gaining you. Oh, and you should totally have some people over to stare at the walls. Just watching you mud and sand and mud and sand made me exhausted, so you deserve an “admire the walls” party!
Shelly says
That final before/progress shot is AMAZING! It’s come such a long way and looks SO much better. The best part: it’s not even done! I’m glad you did it yourselves so 1. you can show what you’re learning 2. you’ll be more proud of your laundry room! Very excited for the reveal but I bet you two are working like mad between this and the book! Don’t forget to snuggle your kiddos!
Leah: ) says
So. Much. Better!!! It looks so fantastic, guys, and I’m so proud of you for doing your own drywall/taping/mudding – If I lived closer I would come on over and “ooohhh and aahhh” til the cows come home – err, until the laundry gets done??? Anyway, maybe I’ll just do a little twirl for ya. My kids won’t even blink, since I already do ballet leaps down the hallway when I’m a little jazzed.: )
What a great project!!
Leah: )
Andrea says
Hallo,
I enjoy your blog very much and really admire how you drywalled yourselves. I live in Germany, before in the U.S. and did that once in my “old” house there. You need patience which I am not blessed with. Glad we don’t drywall much over here. ;-) Love the way your job turned out! Oh.. also looking forward to your new book!
YoungHouseLove says
Thanks Andrea!
xo
s
Sophie says
The room is really coming together! You guys did an awesome job :) Just a question from someone who knows nothing about drywall – why is tape necessary? Shouldn’t you just be able to mud over the seams?
YoungHouseLove says
Oh yes, tape is an important part of the fusion process. Wish you could just mud, but the tape stabilizes it and keeps it from flexing/cracking/flaking out over time.
xo
s
Cassie D says
I’m glad to see you tackled the mudding youself. I knew you could do it. FYI, we switched to using the 40 minute mudding with powder. It let us finish in a day, instead of over a few weekends.
Also, we have almost the same washing machine/dryer as you. The previous owners smashed up the doorway (it’s a standard size) trying to get the machine in. It just couldn’t have fit otherwise. I vote you get them in after the floor and before the doorframe :)
YoungHouseLove says
Holy cow, that sounds awesome! Will have to try that mud for a future project. And as for the doorway tip, thanks!!
xo
s
Krissy says
Drywall is Nathan’s least-favorite activity when it comes to house updates. He actually told me that in our “real” house, he will make EVERY room entirely knotty-pined to avoid having to ever do drywall again. He uses the same red tray as you and loves it. And we tried the tape with mesh and had lots of issues with mesh showing through. Also, his friend who does construction professionally suggested no sanding until you finish your final coat. It prevents a lot of dust, which you don’t want when applying your next coat.
YoungHouseLove says
Smart!
xo
s
Cortney says
Am I crazy for thinking that looks…fun?!? And does it sound crazy that I kind of want to pet your walls? Lol! I’m in Texas, where our walls are pretty much always textured…I think the reasoning is for sound dampening. All I know is, when we went from carpet to laminate flooring, it was still really loud.
YoungHouseLove says
Not crazy at all! Come pet them with me!
xo
s
Sally G says
“And it looks like a real room, guys!” LOL. That’s pretty much what my exact response would have been. Looking great!
zoe says
well done!
glad you guys did it yourselves. I am surprised you were thinking of getting someone in. My husband and I are not professional renovators at all! But we built out walk in wardrobe from scratch – the wood framing and everything… (all from you tube tutorials!!)
http://mysleepyfamily.wordpress.com/2011/10/07/diy-walk-in-robe/
I think next time you can do it all.
cheers, Zoe
YoungHouseLove says
That’s amazing! Congrats Zoe!
xo
s
Julie says
Wow! You guys should be proud of yourselves. Taping and spackling is so important and a great skill to acquire (or so says my husband, a former painting contractor). Looking great so far! Love the light shining down the hallway!