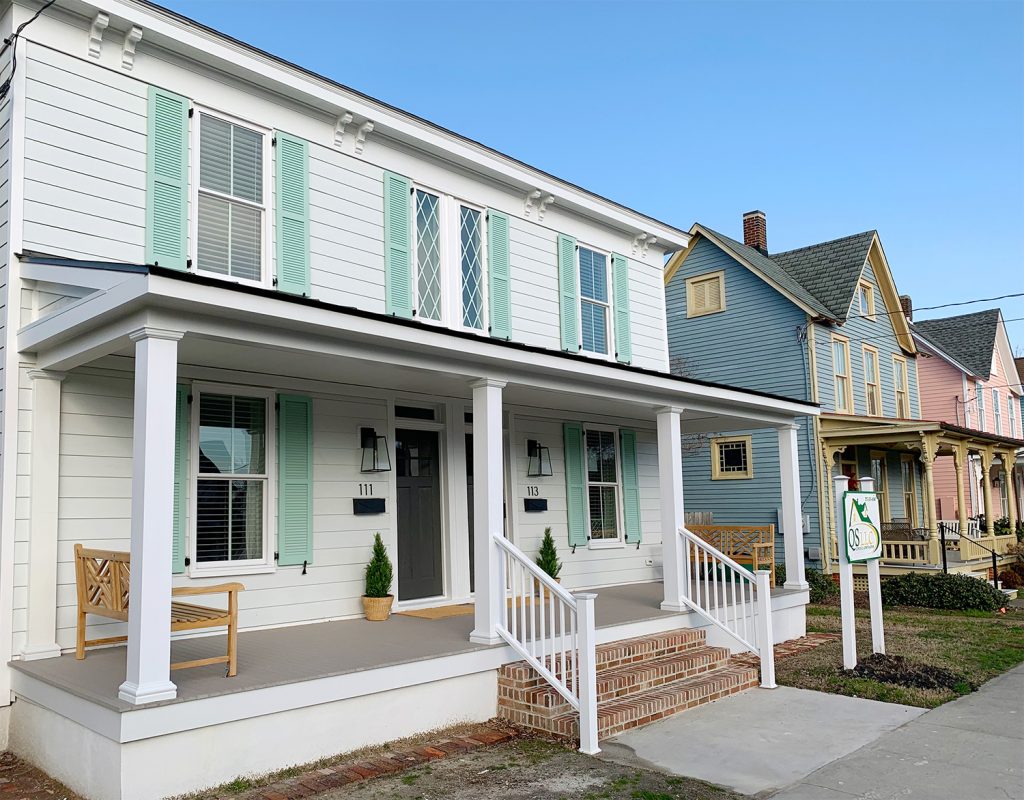
It feels like a while since you’ve seen the front of the duplex (I blame winter) but that’s going to change today. And let me tell you… THINGS HAVE TURNED A CORNER!
There’s no landscaping yet, the grass is patchy, and Sean the Contractor’s gigantic sign is still there…
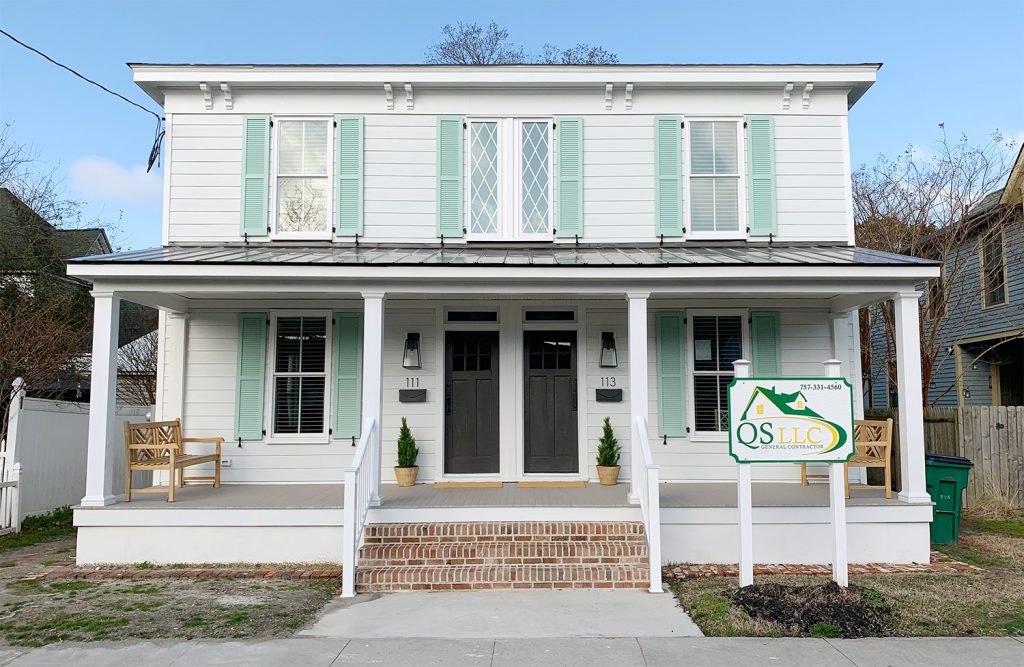
… but boy oh boy is she lookin’ fynnnnnnnneee when we compare her to where we started:
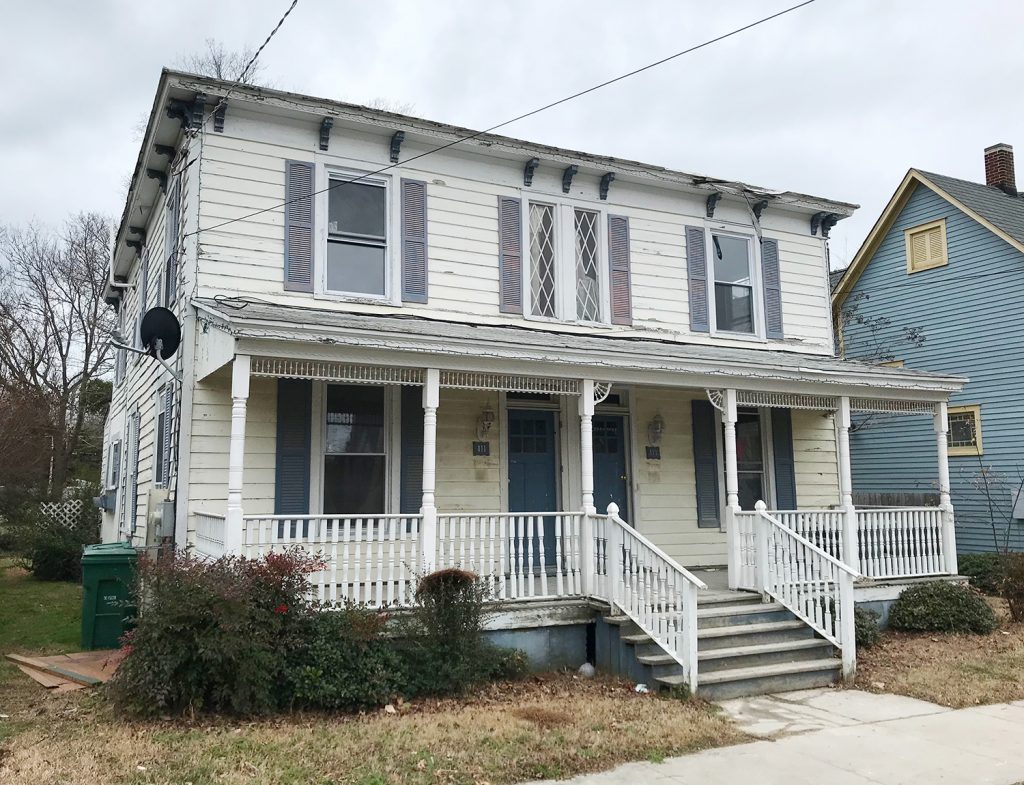
All of the not original details came down – like the weird plastic wagon wheels and strange abacus trim that was added in the 70s, the plastic too-small shutters, the broken vinyl porch railing, all those satellite dishes, and the duct tape along the roofline. And we maintained or added back as much original charm as we could – like the metal porch roof, larger operable shutters, square porch columns, corbels along the roofline, wide brick steps, and those diamond windows that give me cartoon heart eyes.
We’ve already shared a lot of the big exterior decisions that we made as we went, like choosing our siding, roofing, and picking the color for the shutters, so today we’re gonna cover all of our front porch updates.
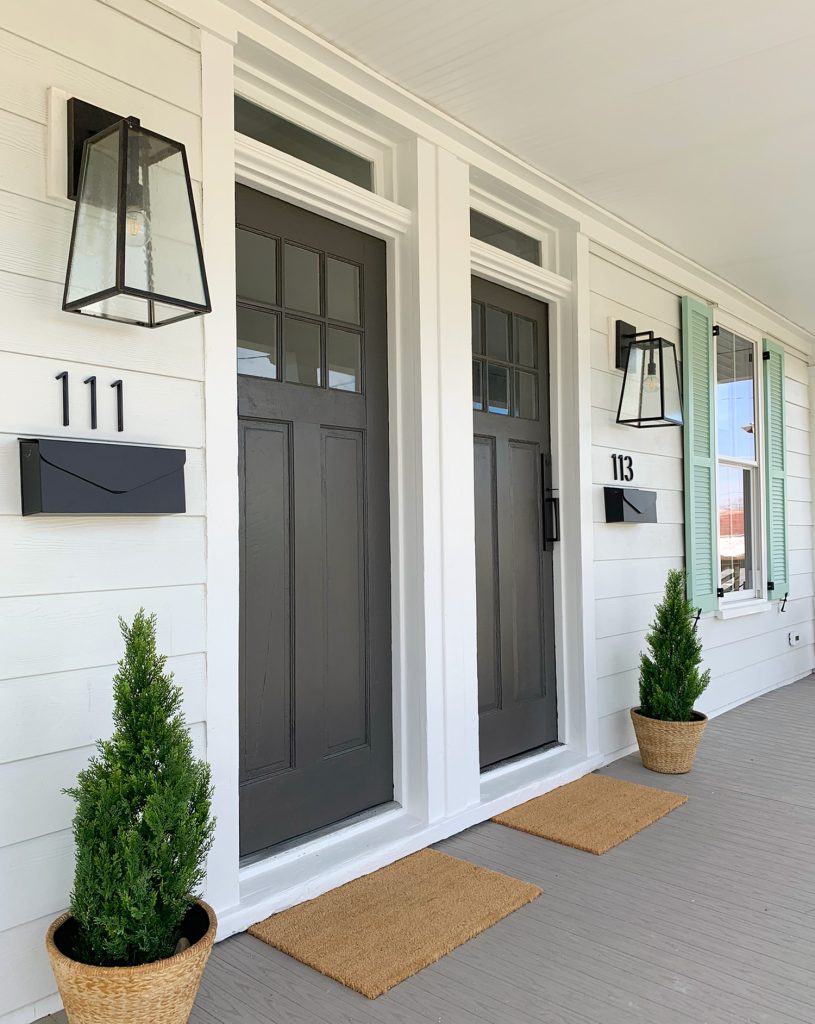
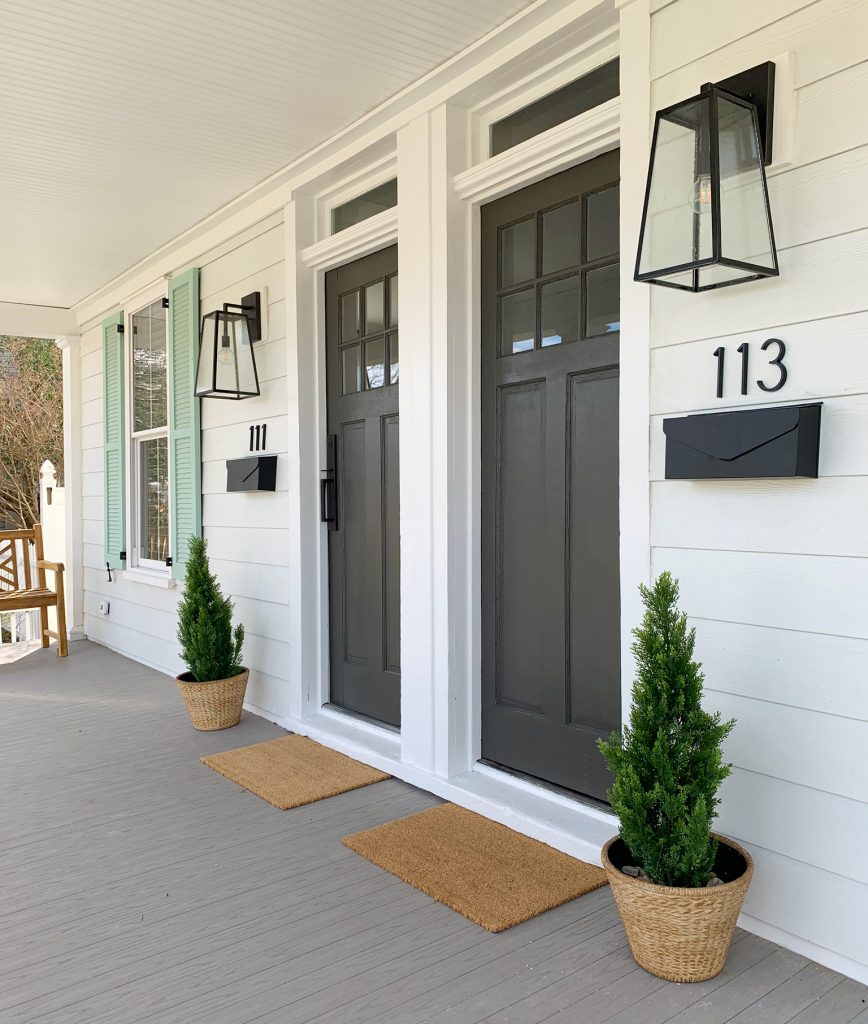
UGH BUT FIRST LET’S ADRESS THE ELEPHANT IN THE ROOM… or should I say the mouse on the porch?! Those tiny postage stamp doormats are so ridiculous I can’t even explain how I thought they were regular sized and then they turned out to be doormats for ants.
So yes, we’re getting bigger ones (they would DEFINITELY make Marlo cringe – Atlanta Housewives… Anyone? Bueller?). So let’s all try to look past those tiny little rectangles and appreciate some of the other stuff that’s giving me life. We have mailboxes! And house numbers! And lanterns to illuminate said house numbers! And composite decking (no rot! YAY!). We even have potted plants and teak benches! SOMEBODY HELP ME CALM DOWN.
We don’t have great before photos of just the front door area itself, but you can sort of see it (including the mismatched storm doors that we got rid of immediately) in the photo below.
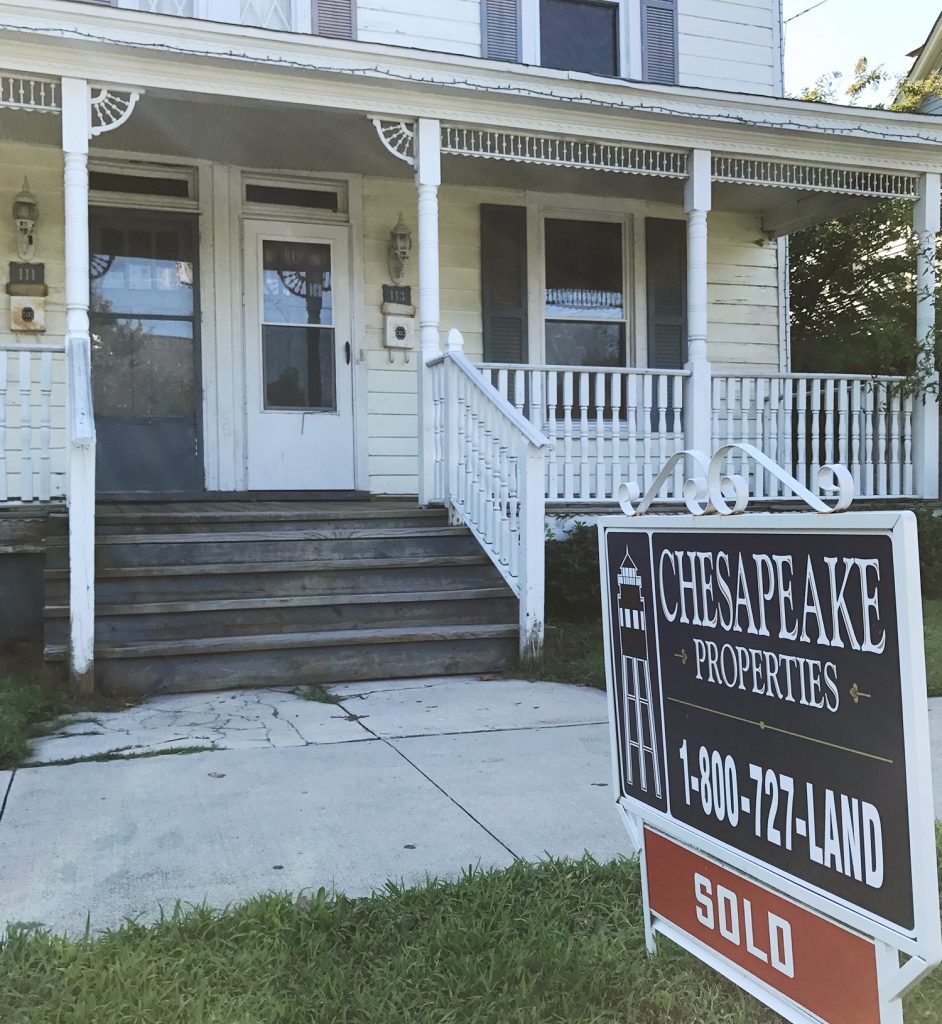
But as artsy as John thought he was being with the “SOLD” sign in the foreground of that picture, it doesn’t really demonstrate how deteriorated the old porch had become.
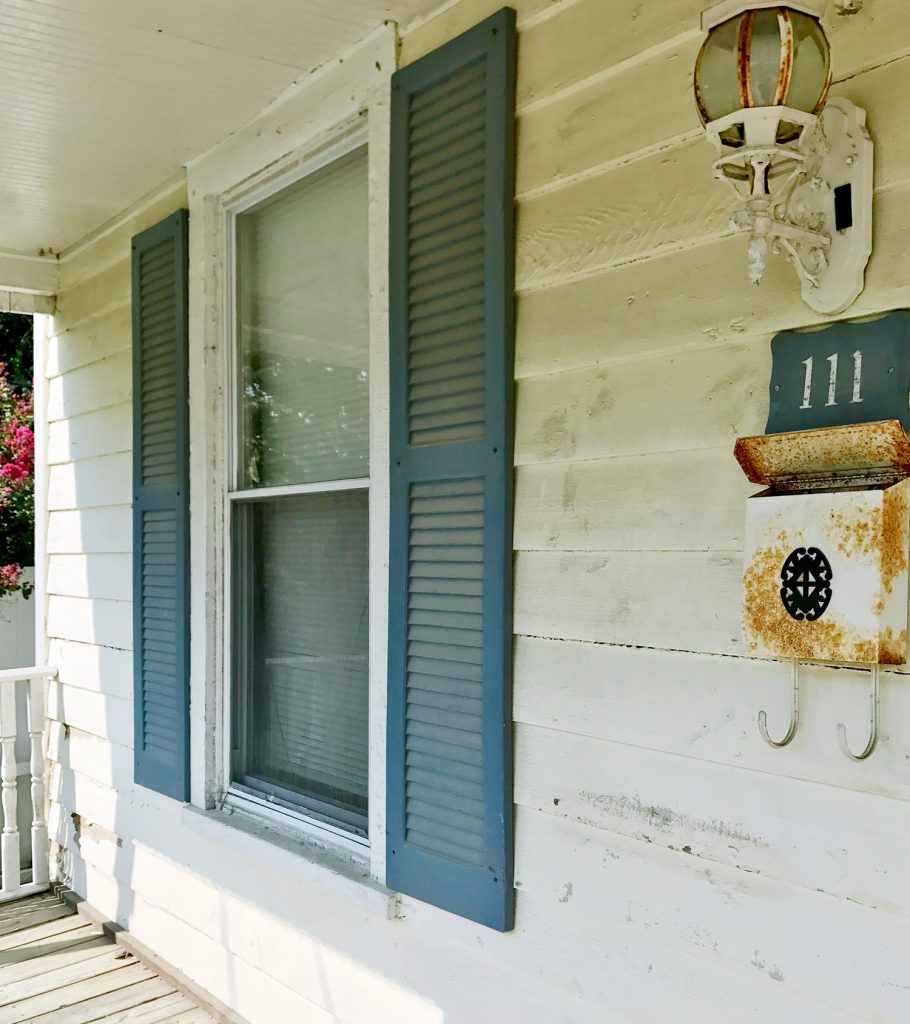
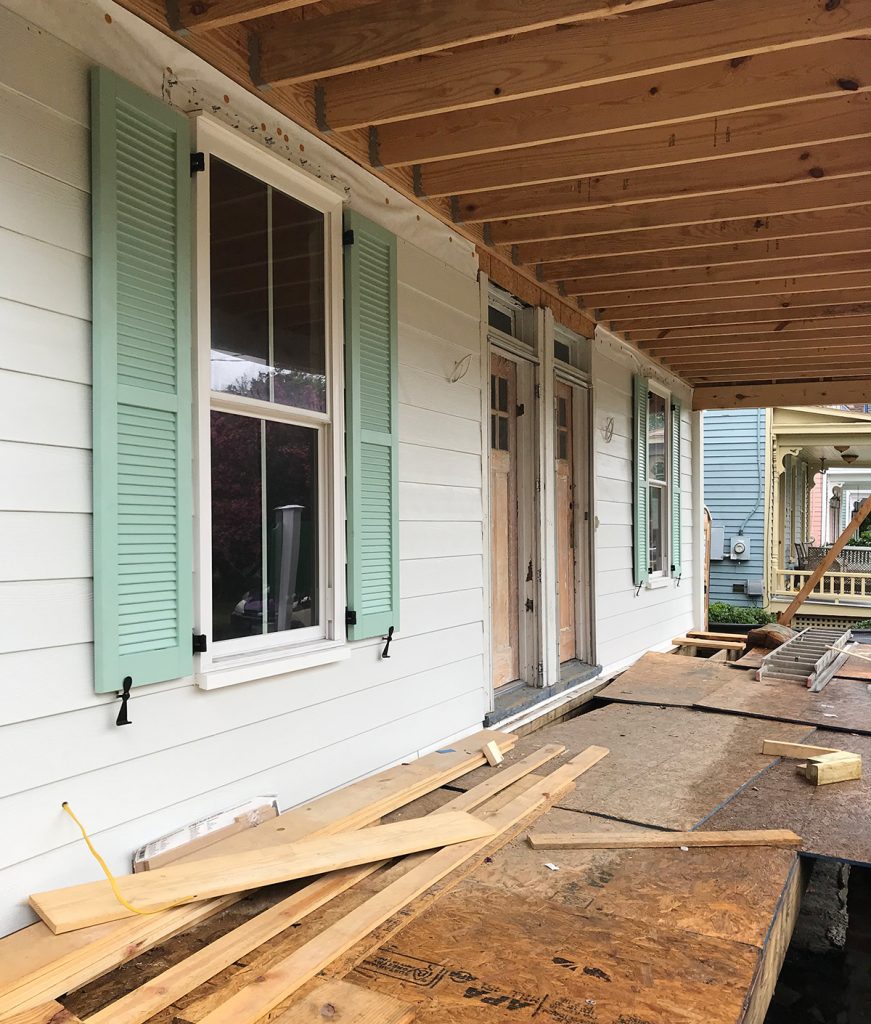
The entire front porch was also so rotten when it came to the actual support beams and structure of it, that we had to tear it off of the house and rebuild it from scratch, being careful to maintain the original transom windows above the door.
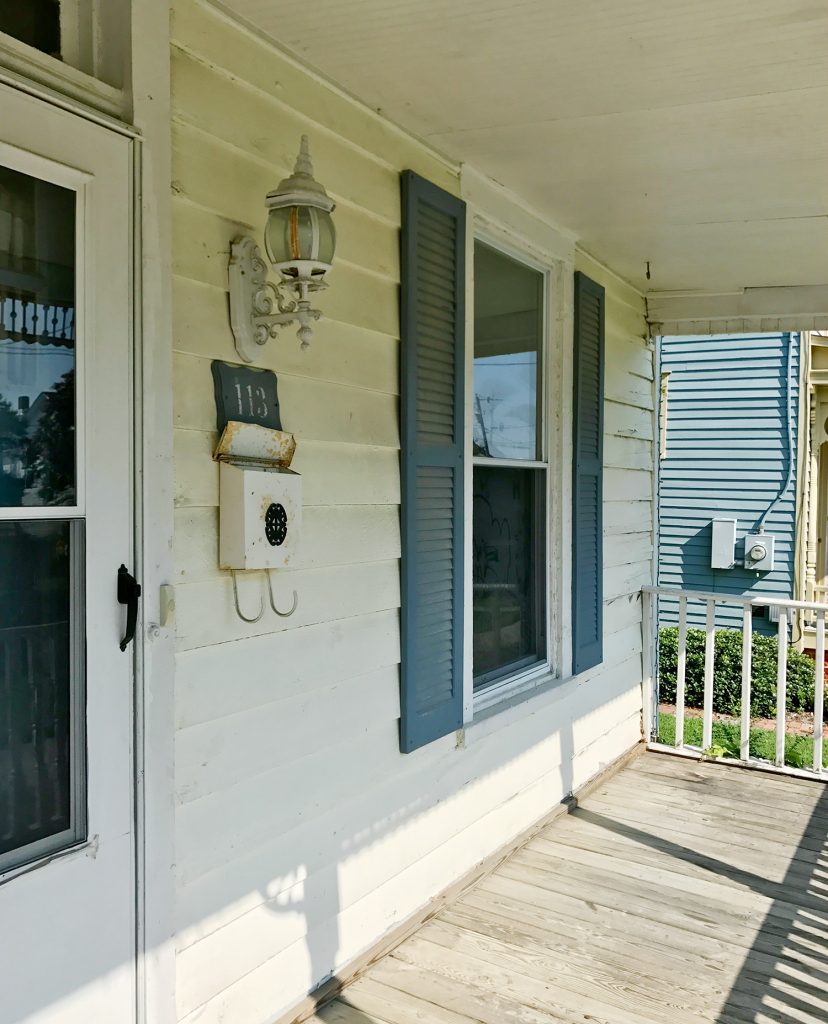
Let’s just say that it feels like we have taken a very significant leap forward in the last year and a half.

After we ditched the mismatched storm doors we decided to embrace the original front doors (figuratively speaking, I didn’t actually hug them, but we LOVE them and wanted to save them). You actually have to get approval from the town’s historic review board to change the style of your doors, so we’re really glad we liked them from the get-go. At one point we considered painting them the same mint color as the
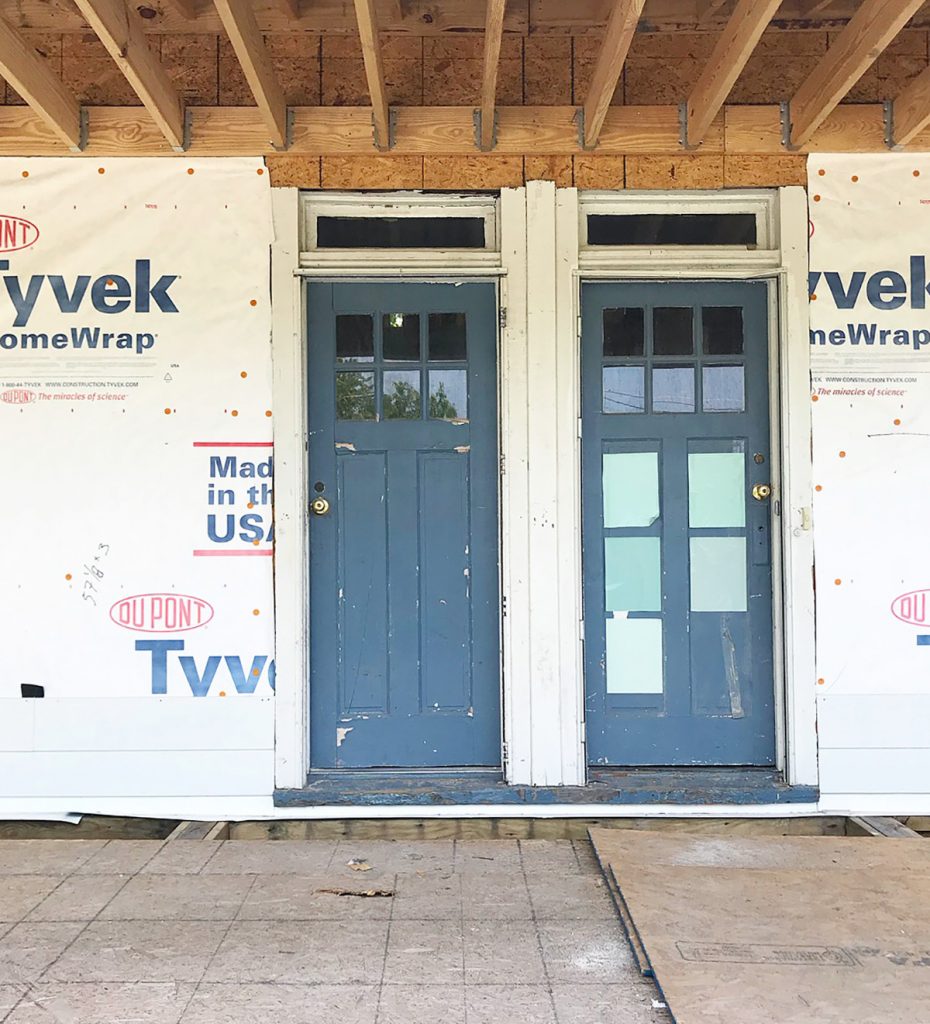
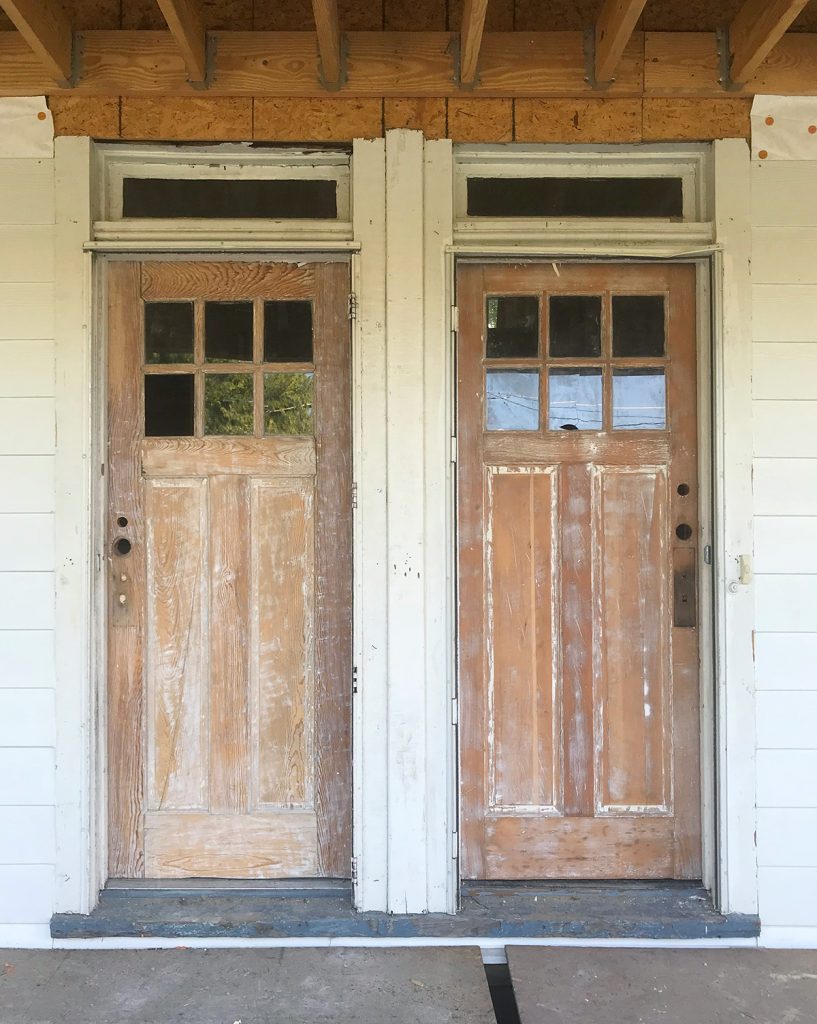
Our next (and longest-standing) idea was to make them some sort of wood tone – just clear sealed or covered with a light stain. You know we LOVE AN ORIGINAL WOOD DOOR (we stripped & waxed all the interior doors at the pink house, and I can’t even tell you how happy we are with them). So we had our contractor strip and sand our duplex front doors to get them as raw looking as possible. Lead paint = we hired them to do it safely in their shop, and they stripped and sanded them as far back as they could without compromising their integrity (they’re thinner than standard doors that are made today, and they had a few cracks and repaired portions they didn’t want to make worse).
But even after we spent $400 to get the doors professionally stripped back as far as they could take them, we just couldn’t get them where they needed to be. From the street (and in the from-a-distance-photos we shared) they looked pretty cool, but up close you could see a lot of stubborn paint in the cracks and recesses that we just couldn’t remove – even after another pass at sanding.
And as you walked closer you could see other general
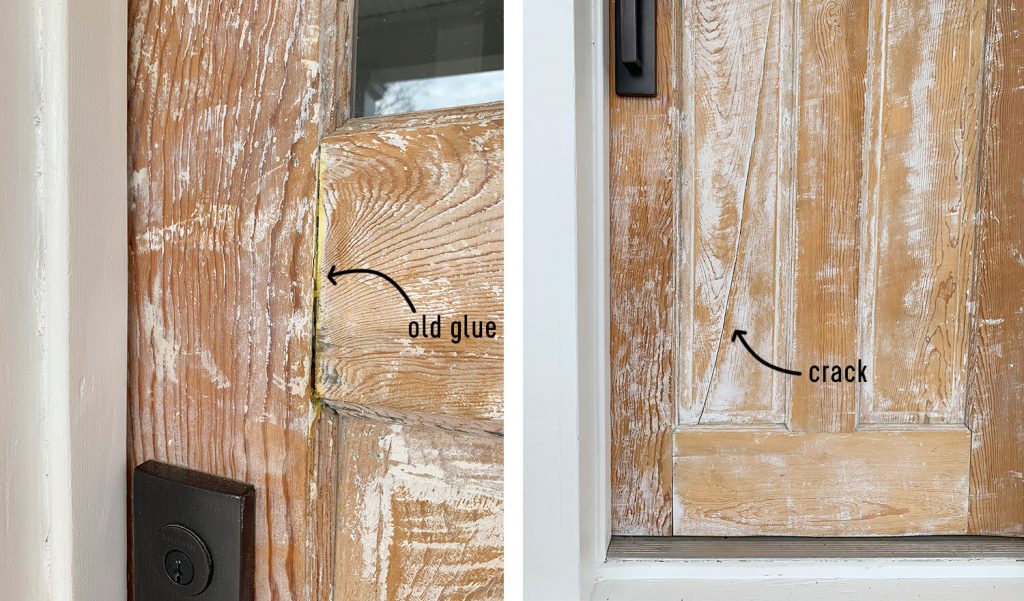
We knew that we could still get a wood look using a dark gel
But once we installed the porch lights, mailboxes, house numbers and door handles, we both kept thinking…. what about a rich
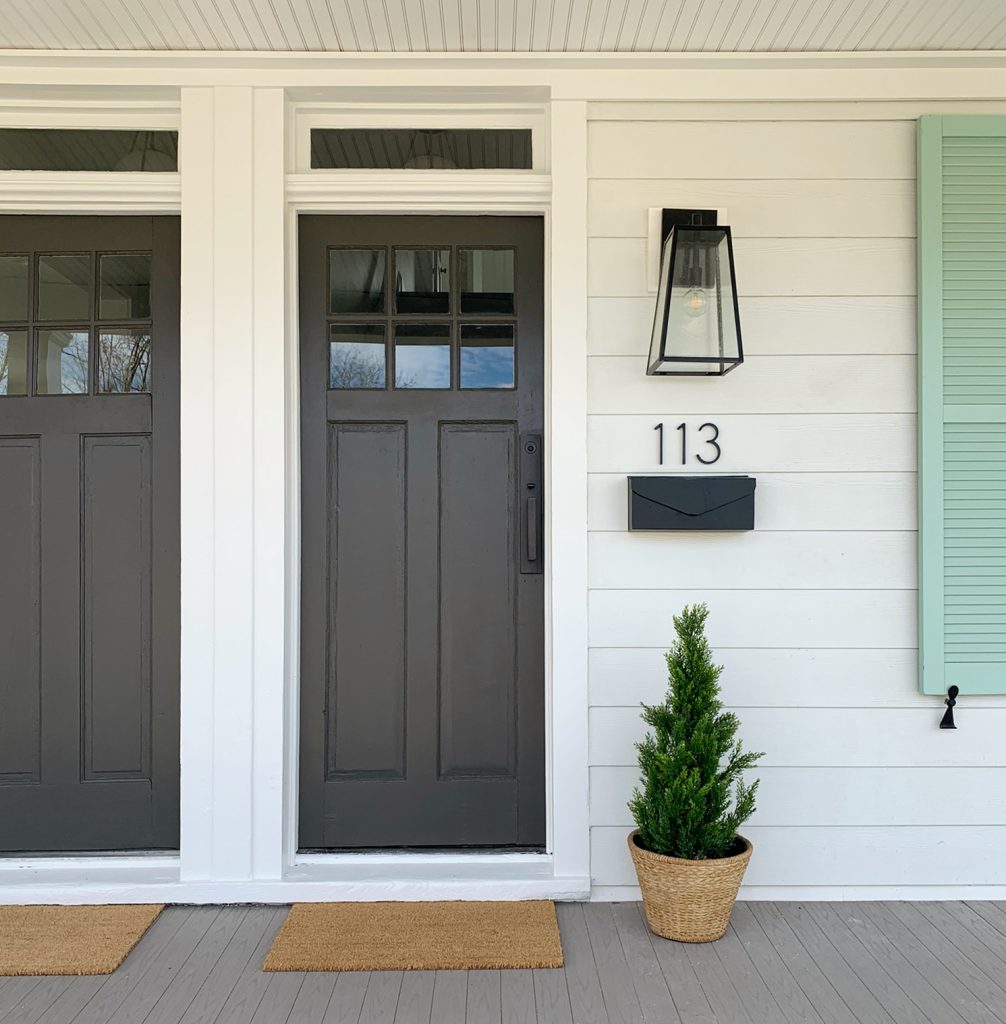
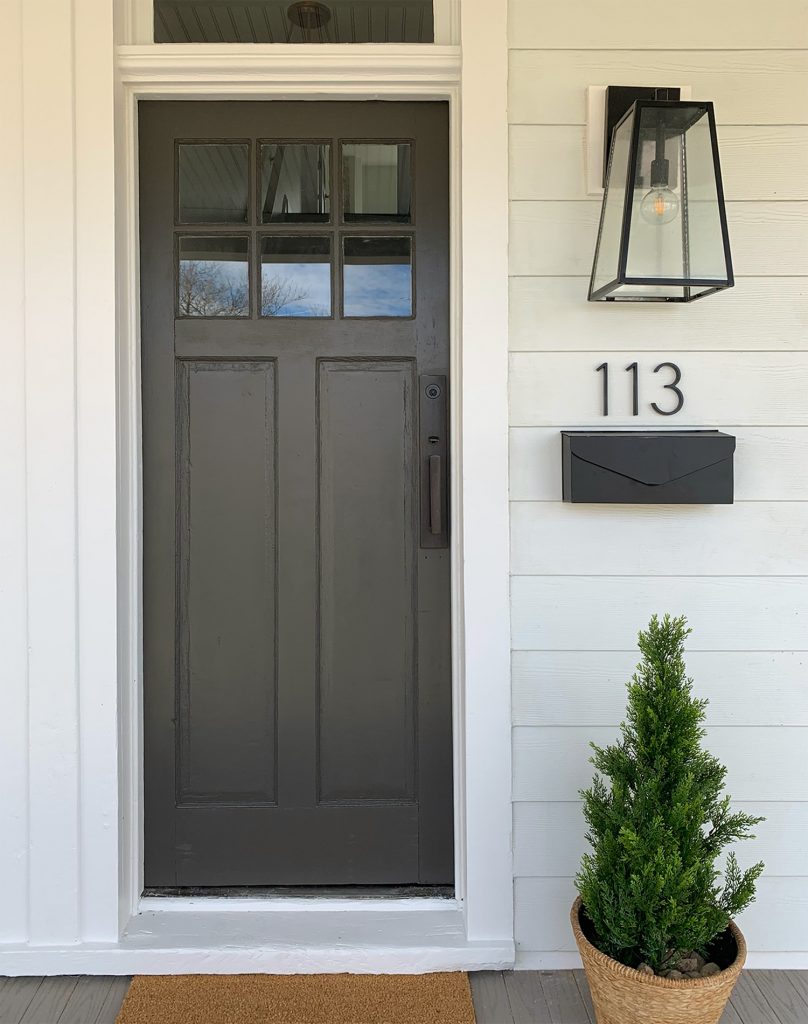
We’ve loved Sherwin-Williams Urbane Bronze ever since we used it our garage doors at home. It’s a really rich and layered color and we’ve always loved how it walks the line between a true black and a warm dark

Long story long, even though it was our lifelong (ok, yearlong) dream to leave these doors a light wood tone, we’ve mourned the loss of that idea and are IN LOVE with the final result. We both stepped back and thought: THE PAINT DID THESE DOORS A TON OF FAVORS!

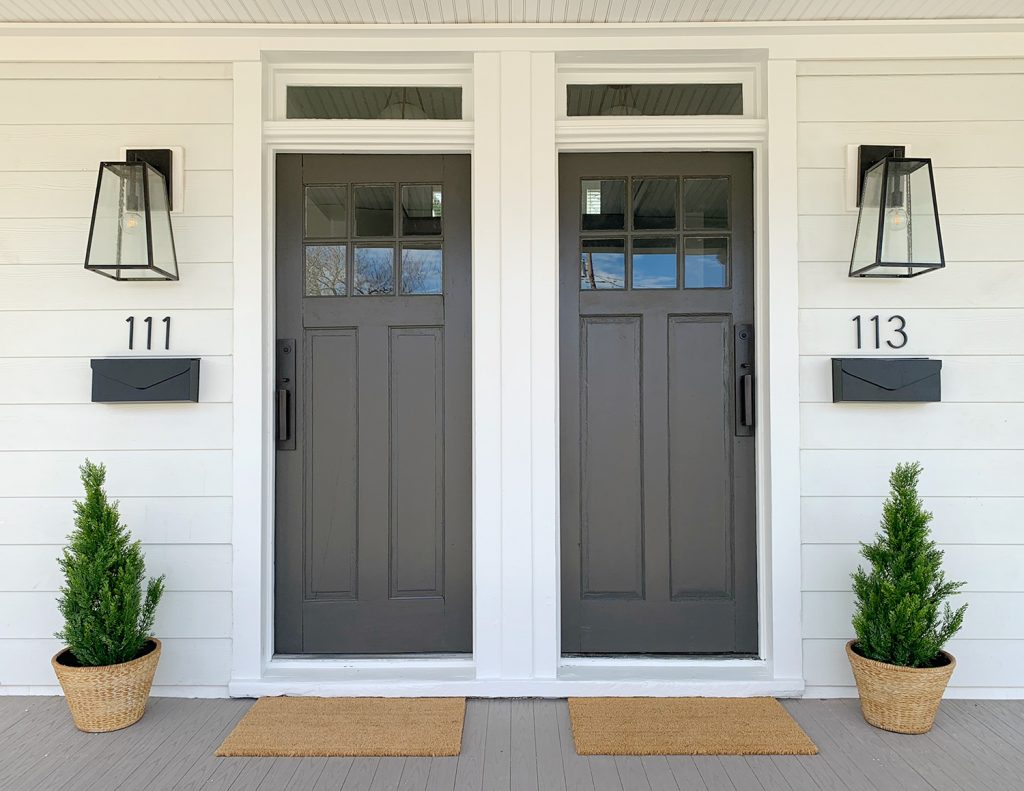
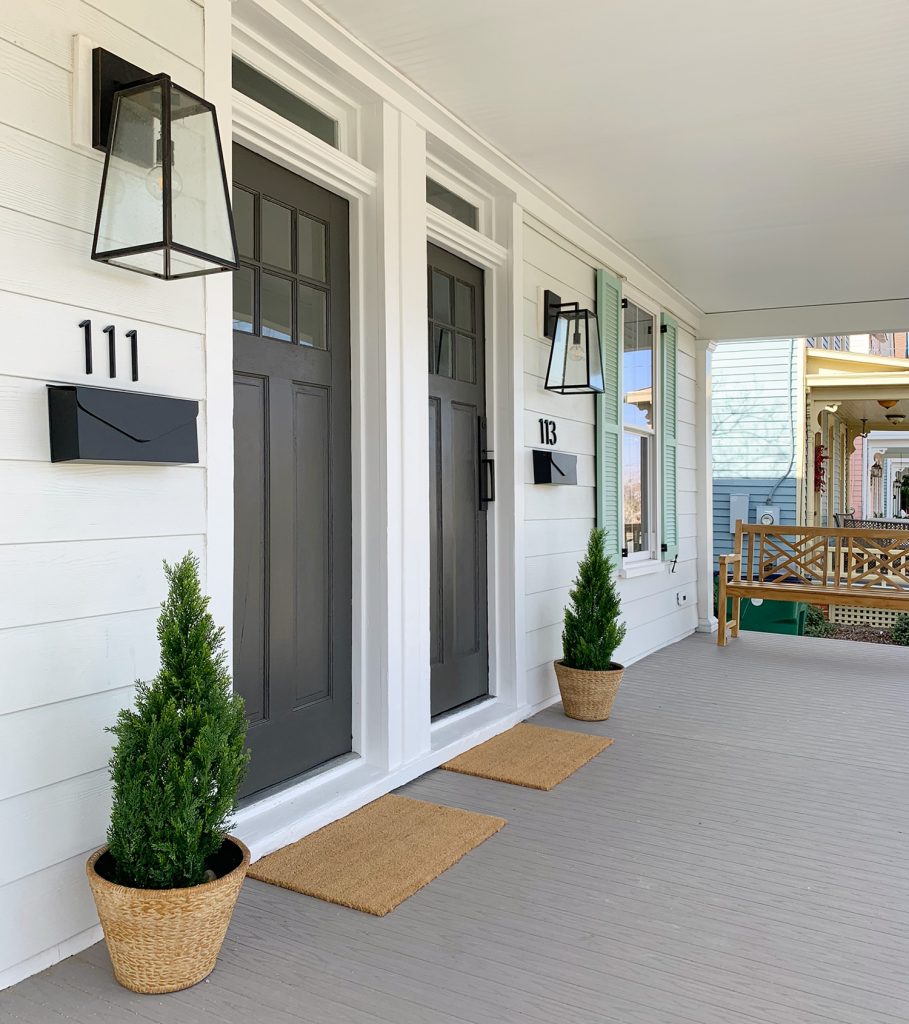
Not only does it hide the cracks and glue bubbles along with all of those tricky paint remnants, it also looks great with the dark porch accents we added, like the operable shutters, the oversized porch lights, our wall mounted mailboxes, and our new house numbers. And the nice thing is that we were able to bring that wood tone in with other things, but more on that in a second.
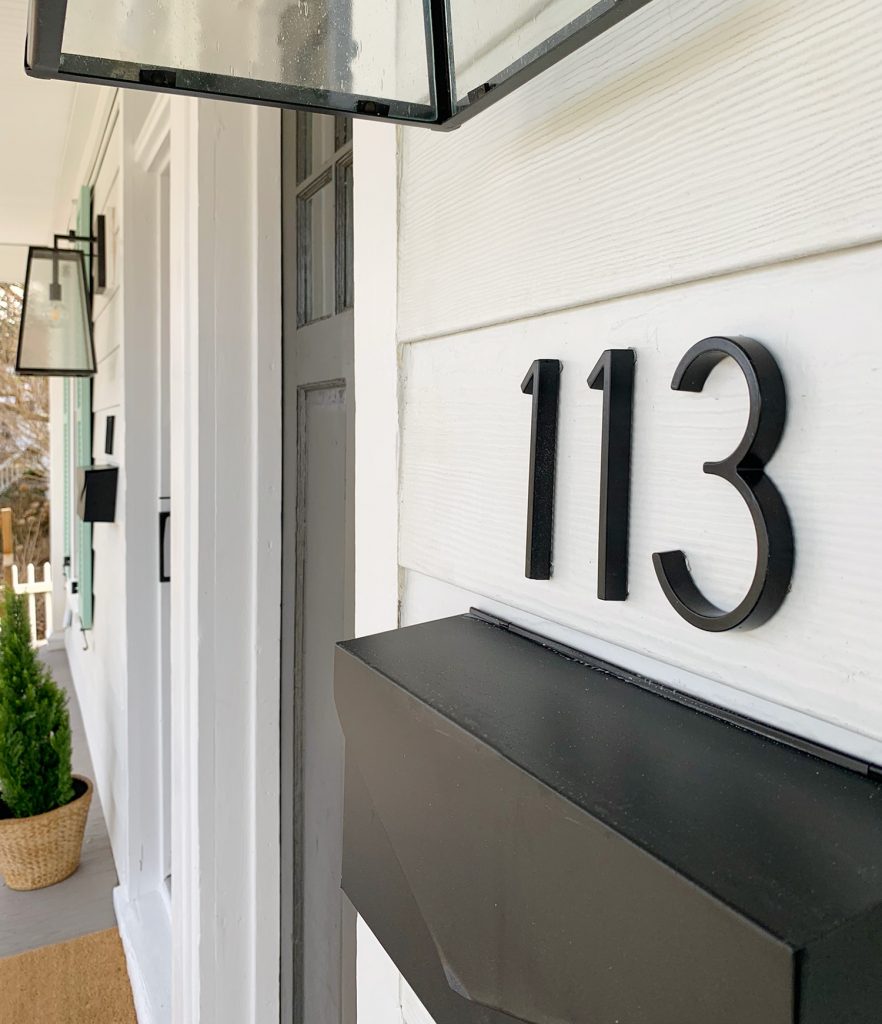
As for installing the address numbers, t
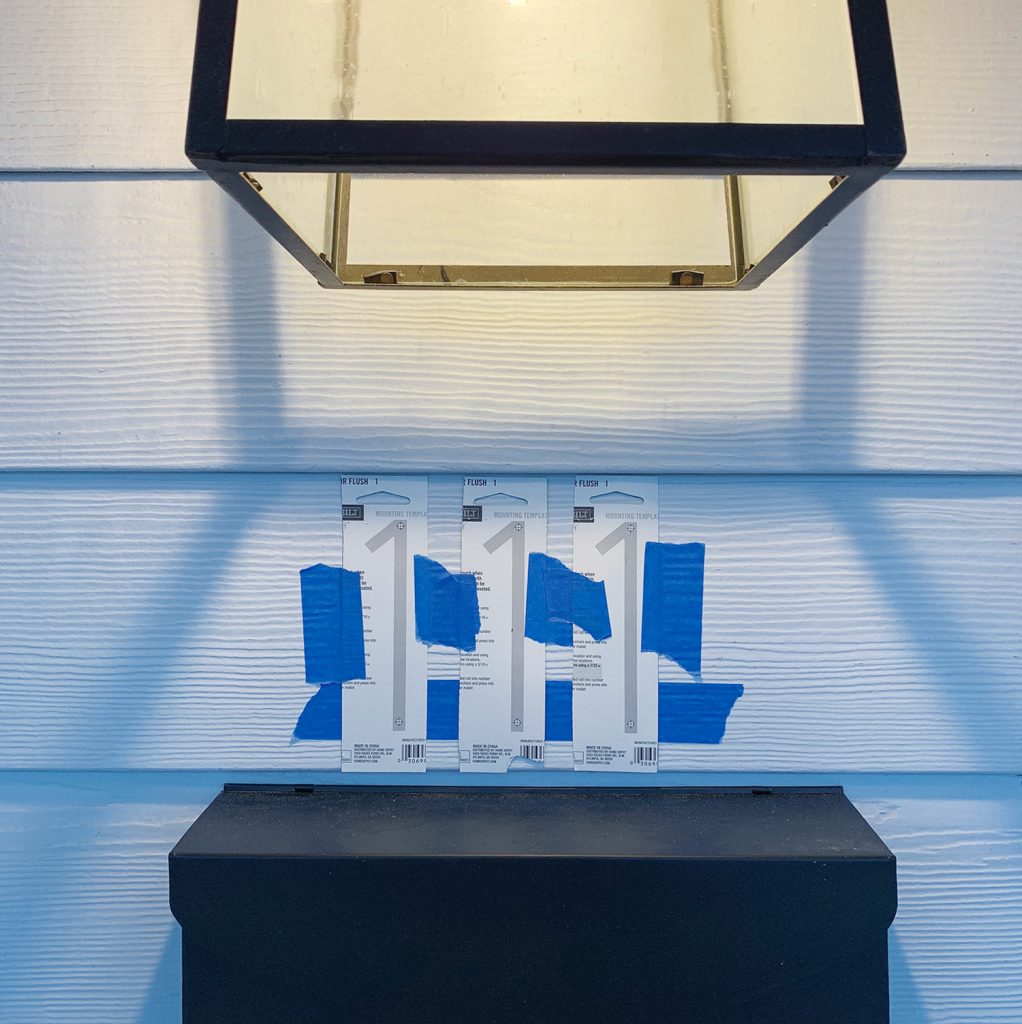
At one point we had planned to just get some subtle number decals to stick on the mailbox, but then we learned it was actually code that they were at least 4″ tall and “visible from the street” for emergency personnel. And by “learned,” I mean that we almost failed our final inspection because we hadn’t installed any yet, so we rushed to get them up and passed by the skin of our teeth (I would like to have a word with the inventor of that gross expression, btw).
Since we lost some of the warm wood tones in the doors, I brought them in with a few other things, like the basket-looking planters (they’re really a ceramic-like material), and the big teak benches on the far ends of the porch. And once we get bigger doormats (maybe a single long one that runs under both doors and up to each planter would be cool?) that’ll add more of that warmer tone to the mix.
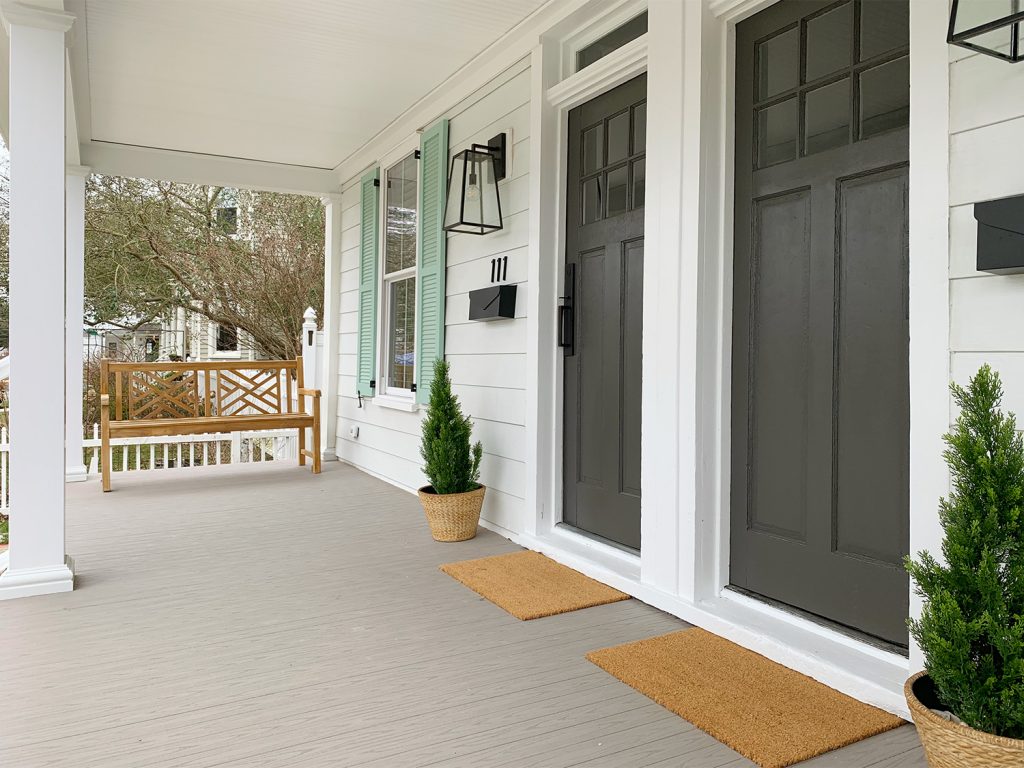
Of course I have to shout out our go-to faux outdoor trees. They inject some much needed zero-maintenance greenery to the front porch. We’ve got the same type on the beach house front porch and the taller versions at home in Richmond. They’re awesome, so yes, we are now the proud owners of six of these babies. Please note that I didn’t floof these before the photos (yes, that’s a technical term), so their shape in the picture below bugs me to no end. They’ll be looking 100 when I get my new mats, landscape the front, and share the updated pics though – mark my words.
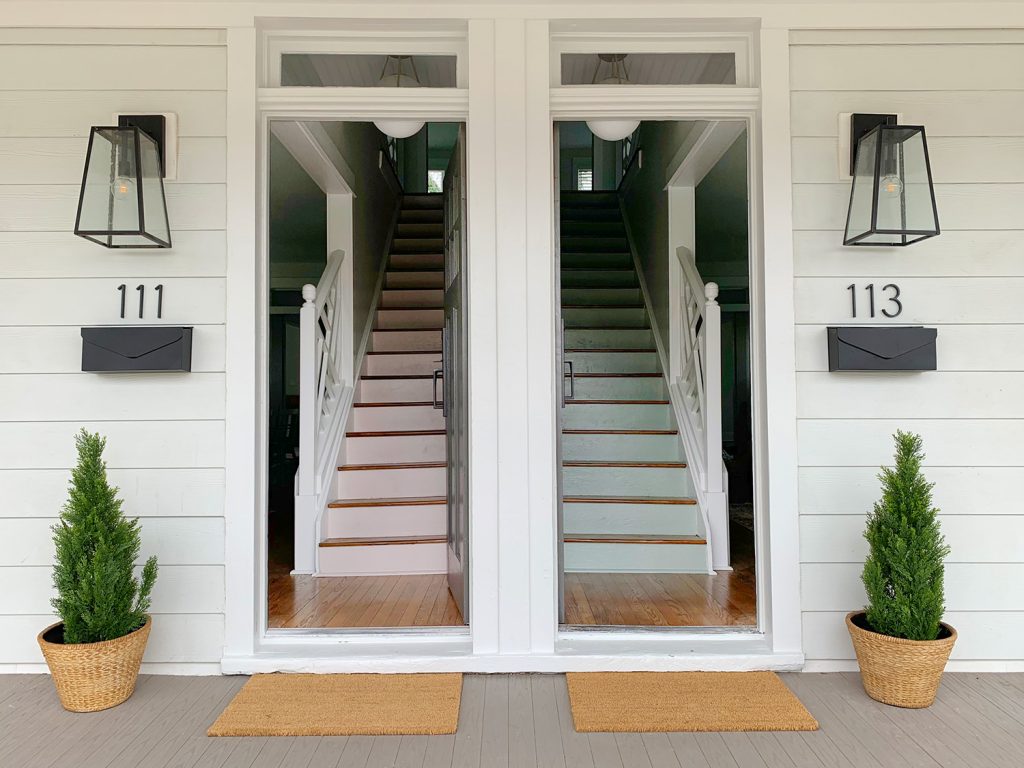
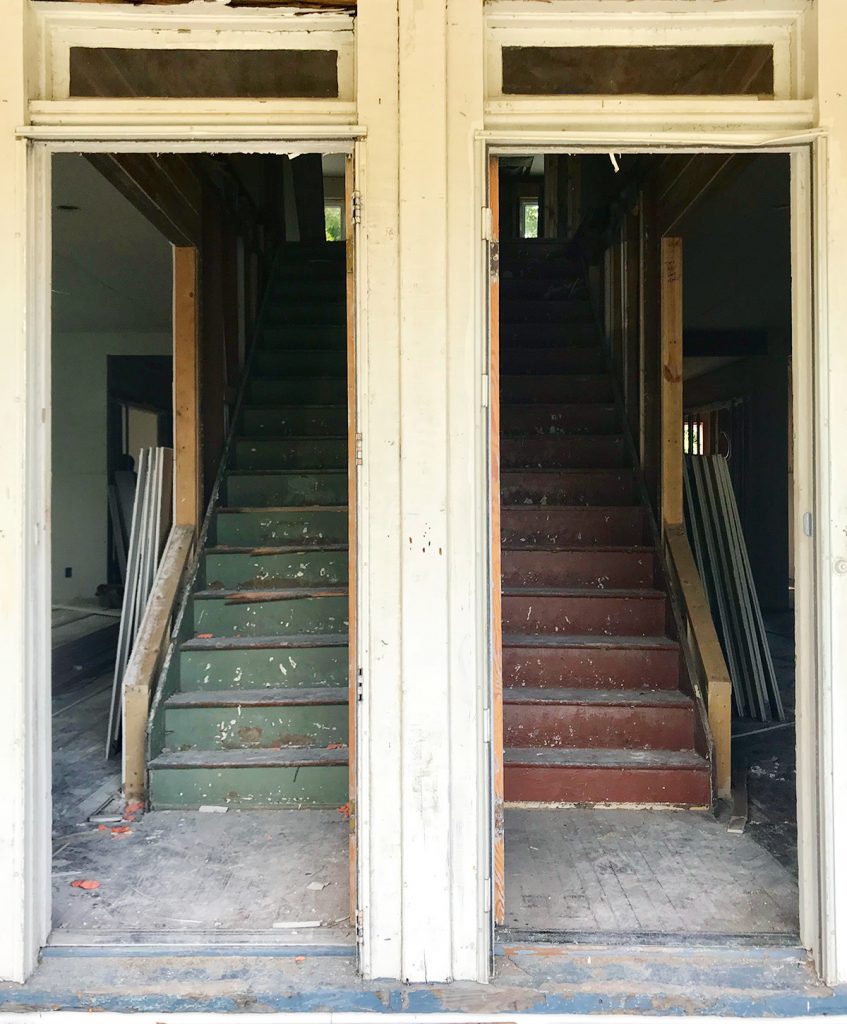
If you’re subscribed to our newsletter, you got a peek inside with the doors open last week. We painted the stair risers on each side the same color as the interior doors on that side (Sherwin Williams White Truffle on the left, and Sherwin Williams Oyster Bay on the right). I also really love that we didn’t do mint on the front doors because it’s a fun reveal to swing open the dark bronze doors and be greeted with a different happy & beachy color inside each one.
This is the before photo, which I now realize is funny because it’s almost like we switched sides – the greenish risers are now on the right, and the red/pink ones are on the left (we chose the colors for each side based on lighting and where they read the best – the pink tone read a little more gray and less pink on the right, so that’s how it ended up on the left).
So that wraps up the whole duplex porch update… but if you could kindly cross every last appendage that the groundhog was right in his call for an early spring, we’d really appreciate it. Because you know I can’t wait to get the front of the duplex landscaped and mulched and add a path to the back and plant grass and ALL THE THINGS! WITH ALL THE EXCLAMATION POINTS!!
We need to get this thing whipped into shape so we can get it all photographed and listed for rent thing spring (rentals will start this summer and it should hit Airbnb this April or so! AHHHHHH!). Oh yeah and we have to finish the inside. And the backyard. Details, details.
P.S. To see how we have fixed up this house over the past 1.5 years, there’s a whole category dedicated to duplex progress.
*This post contains affiliate links*
