Q: Do you guys have any tips for photographing your rooms? I’m actually listing my house for sale and thinking of snapping some photos (for memories and also to help with the flier) but I want them to look great. Any and all tricks, tips and suggestions are appreciated! – Leslie
A: We totally feel your pain. When we started our blog and were suddenly tasked with sharing photos we had no idea how to make rooms look their best (hence all the fugly pictures way back in our archives). But we did learn our fair share of simple tricks (mostly through trial and error) along the way- and we’re happy to share the goods. First of all, we’re definitely not professional photographers and we don’t have a fancy expensive camera. We snap every picture that you see on our blog (including all the “after” pictures on our House Tour page) with a Canon PowerShot SD1100-IS Digital Elph. It’s a small 8 megapixel camera that has great little features like a macro setting, an image stabilizer, and a manual setting (which we use 100% of the time so we can turn the flash off- pictures look so much better without it!).
So that’s tip #1: turn on all the lights and take your photos during the day without the flash. Opening up the blinds to let in the light stream in and turning on all the lamps during the day will create a soft glowing ambiance instead of blowing things out in the foreground while leaving everything dark in the background (which often happens when you use the flash). Sunny days are great for room photos so aim for those but try not to take pictures when the sun is shining directly into the room onto the rug or the furniture and casting harsh shadows (you might want to wait a few hours for it to shift slightly).
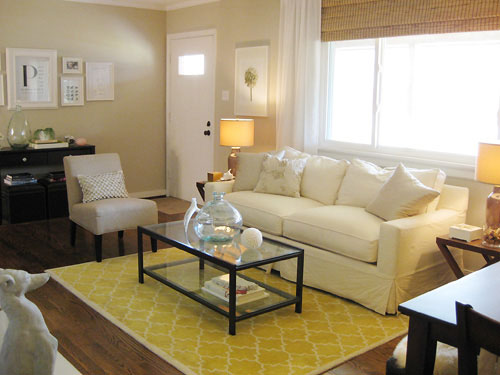
Now for tip #2: tweak the room first. Really look around the space and see what you can do to enhance the look of the room before picking up the camera and snapping away. Some seemingly obvious (but often forgotten) ideas would be lighting any and all candles, fluffing pillows, picking up dog or kid toys on the floor, and even making a fire in the fireplace (or lighting some large pillar candles in lieu of logs). Little flickering touches of light around the room are like jewelry- they’ll add a nice warm sparkle and a certain je ne sais quois that the same space wouldn’t have when they’re not lit. At the same token, small toys on the floor and flat mashed couch pillows take a little bit away from the polished image that you might be trying to capture. And it definitely saves you time to make these small changes before you take all of your photos and upload them only to notice a bunch of little things that you wish you had changed.
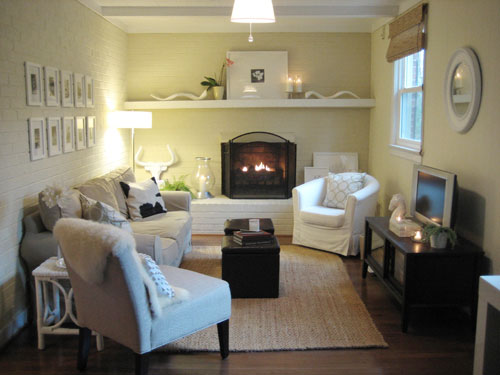
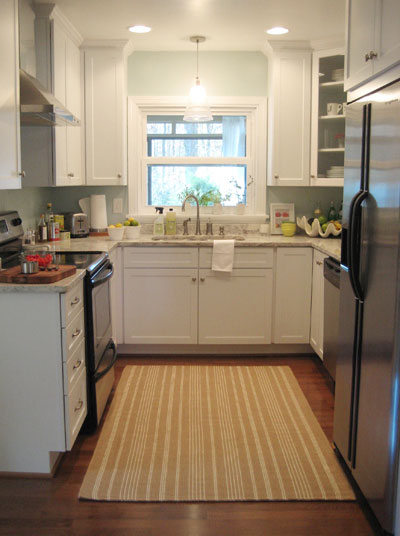
And now for tip #3: take a test shot. It just takes one picture to really “see” a room in a way that you can’t see it in person. By grabbing one shot in the beginning and looking at it critically, you might notice other details in a room that you’d like to change (instead of spotting them after snapping away for an hour). We’ve identified everything from wonky curtains (which were easily shifted on the rod to look more balanced) to the fact that we needed a shot of color in a bland corner (easily accomplished by switching out a throw pillow). This little test shot is a great “last look” before you really give your fingers a workout and snap your final room photos (and it really can make all the difference in your after pics). For example, after shooting a test shot of the kitchen below, we added the dishcloth draped over the sink and the cutting board with tomatoes on it for more interest (and to balance out the splash of red in the art to the right of the sink). Oh and on a side note, bowls of fresh fruit- we love real lemons and limes- make great (and cheap!) centerpieces in a dining room, eat-in kitchen, and even on a living room coffee table. Especially if you’re staging your house to sell.
This brings us to tip #4: work those angles. We take a lot of pictures just to get one that we love. And when I say a lot, I mean anywhere from 25-75 or more (especially when it comes to capturing “after” photos for a big reveal). Try standing on a chair to get an alternate angle or squatting down a bit to make the ceilings feel higher. Shooting from each corner of the room and the center of each wall will also help you evaluate which points of view look best. You can even put the camera on a tripod if your hands aren’t very steady (especially when you have the flash off, you’ll need to keep the camera still to get crisp delicious photos).
And now for tip #5: don’t forget to go tall instead of long. You’ll find a fair amount of vertical after photos on our House Tour page, which might seems strange since you can get a wider shot with more furniture by turning the camera and grabbing a horizontal pic. The key here is again to take a plethora of pictures, both horizontal and vertical. Sometimes the furniture layout just looks better (and the ceilings look higher) in the vertical photos. And sometimes the wide shots will win out for their overarching views. We’re consistently surprised how often we’re drawn to certain vertical shots though, so they’re definitely worth taking (they might just be your favs in the end).
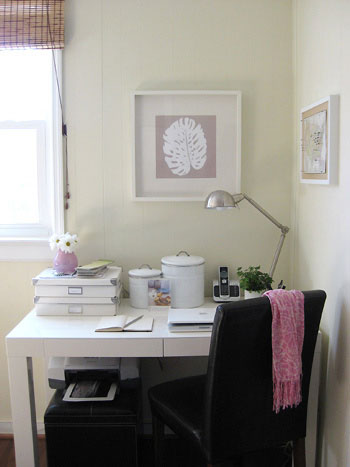
Then there’s tip #6: think about zones and function. Sometimes your instinct will be to cram as much of the room into the shot as possible, but if you’re shooting a small office area that’s within a larger den, you might not want to capture half of the TV and the seating area when the focus should be on the desk. Try taking a few steps forward to spotlight that specific zone instead of capturing half of another area that could look disjointed and busy if it’s wedged into frame.
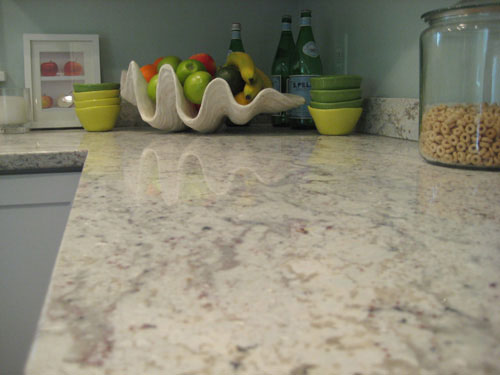
Oh and we can’t forget tip #7: it’s all in the details. We love using the “macro” setting on our camera if we’re doing a close up detail shot (like trying to capture the weave in our jute rug or the soft veining in our granite counters). This built-in camera setting makes things look extremely clear and crisp when they’re up close without any photographic skill required on your part (except for keeping the camera nice and still of course). While this might not be as applicable for snapping wide room pictures for listing your house, it’ll definitely come in handy if you’re taking any shots for memories (and have a particular detail or arrangement that you want to remember long after you move).
And now for tip #8: practice makes perfect. We’re still learning different angles and approaches to picture taking as we go. Don’t wait until you’re under pressure to snap a gorgeous picture (to sell your house or document your baby’s first birthday). Just pick up the camera and start clicking away so by the time something imperative pops up you’ll have more experience and more confidence with your cam. If you go back into our archives it’s obvious that we were terrrrrrrrible photographers when we started blogging back in 2007. But thankfully over the course of a few months we definitely started to hit our stride (heck, we’re still hoping to get better after more than two years of regularly clicking away).
So that’s our non-professional-learn-on-the-job approach to photography. Now we wanna hear what you guys do to get the shot. Any additional pointers for Leslie (and us). Do tell.
Psst- The link to our camera included above is an Amazon Affiliate link.

Catherine @ waking up with you says
Thanks for the great tips guys! I always admire how fresh and bright your house looks but can never seem to achieve that in photos of my own house. Partly to blame is the fact that I only seem to have time to photograph things after work, ie. at night time, so that doesn’t help!
Meredith says
Great post! I struggle with taking acceptable photos for my blog, but it’s nice to know you guys didn’t start out taking pics like you do now. I appreciate that you don’t use a fancy camera, either (in fact, we use the same one). All that potential is there in mine, just waiting to be achieved! I just did a master bedroom reveal on my blog, and I’m getting ready to go back and light candles, take pictures during the day, and try different angles to see if there’s room for improvement! Thanks YHL =)
Master bedroom reveal: http://welcometoheardmont.com/2010/02/master-bedroom-redo-the-big-reveal/
Cynthia says
Great tips and wonderful examples! One of the many things I love about your blog is the quality of the photos. For digital camera reviews and news, you can’t beat dpreview.com. I buy only cameras their reviewers rate as “highly recommended” and love the side-by-side comparison you can do of several cameras. I now have a Panasonic Lumix G1 and LOVE it. My other recommendation is Shutterfly.com — I upload my photos and make prints, personalized cards, photo books of vacations and special events, magnets, calendars, and more. Plus once the Beanette is born, you can upload your photos into virtual “albums” there and send them to family and friends — all free.
Melissa says
It can be so difficult to find the right angle to capture a room sometimes; thanks for the tips!
Renee Smith says
Awesome tips; thanks for the no flash idea… I never would have guessed!
I have to admit that I cannot stop looking at your desk picture! We have a ranch, kind of like yours, but only have one living space (no den, no sun porch); the living room also functions as entryway, mail clutter collection area, mudroom, and we’re hoping to add office functionality (to replace the mail clutter function). We even have a goofy room divider like the one you took out next to your front door and a mail slot that spills our mail all over the entry space.
I would love to know what makes your desk tick… is that ottoman the sole “file cabinet” for your house, or do you spread them across all the storage ottomans (most of my box-style storage functions as stash-the-mess-before-guests-arrive storage, hence the need for functional storage solutions)? Where does all of your mail go? What is inside of all your nifty desktop containers? Do you feel like you need more drawers on your desk? Wastebasket or recycle container? I’m ready to buy a desk solution yesterday, and just cannot figure out what will work the best, and it seems like you have an uber functional uber tidy desk (perhaps we’re just missing out on the “messy desk” pictures?… I have to say, I am one of those readers that enjoys seeing your “messy house” every now and then during your big transformations!) Maybe you’ve already posted about this and could link me back to it? I dig your blog!
YoungHouseLove says
Yup here’s a link with all that info for ya:
https://www.younghouselove.com/2009/04/how-ya-bin/
Hope it helps!
xo,
s
Barbara says
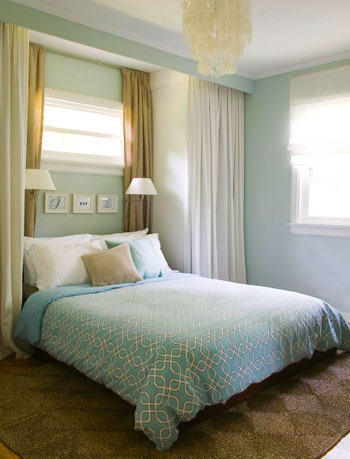
Love your site and need your wisdom. I loooove chandeliers! Unfortunately, I live in a home with 9 ft ceilings and a tall husband. Do you have any advice to get some bling in my ceiling without decapitating my husband? (Particularly my entryway and living room…)
YoungHouseLove says
Just flush mount something (hang it higher to the ceiling instead if dangling it) like we did with our capiz chandelier in our master bedroom (check out our house tour tab under the header for a visual). We only have 8 foot ceilings and John is over 6′ but it works! You can also place them where no one will walk below them, like above a dining table or a coffee table in the middle of the living room. Hope it helps!
xo,
s
Melissa says
I think when selling your house and taking pictures you won’t to remember to purge all your personal items and clutter items. No one wants to see pictures of your kids or dogs all over your house. It makes people uncomfortable when house hunting. They feel like they are invading someones space instead of looking at the house on a buying perspective. Also, when I was house hunting I hated looking at pictures of cluttered counters and messy rooms. It is best to declutter and organize, even if you have to store a bunch of stuff during the process.
Catherine A. says
Try to keep the walls and floors level. Keeping the vertical lines vertical gives a better impression of a room or space than one that is “off kilter.”
Laura says
Absolutely love your house and your blog. Where did you get your armless chairs? the one in the living room and one in the den? I am looking for a pair. You always have great posts–very inspiring! thanks!
YoungHouseLove says
They’re actually from Target and they’re called “Dolce Lounge Chairs” – they come in a tan and a sage tone (we have the creamy-tan ones). Hope it helps!
xo,
s
Lauren says
Thanks!!
Becky says
I love these tips! Thank you! I have a hard time shooting in manual and getting it just right but I will try try again.
I am in love with the yellow rug under your coffee table. Where did you get that? and do they have other colors?
Thank you for all your inspiration!
YoungHouseLove says
Hey Becky,
It’s from Pottery Barn (called the Moorish Tile rug) but they don’t sell it anymore so maybe you can try ebay? They came in brown and orange too so you have a few options. Happy hunting!
xo,
s
Becky says
Thank you so much! I will be on the hunt!!
Bromeliad says
Great tips.
I recently read a recommendation to use a tripod and low shutter speed and no overhead lights. It seems to work.
Jen says
Great tips! and I have had the best luck with Target’s instant photo printing.!
I have an off topic question for you. What wall paint color is that in the room with the yellow rug?? I’m starting to look for paint colors for . well basically my entire living area, since my apartment is all open floor plan (except for bedrooms!) and I want something that will make all my color pop but not be boring (i’m an anti white wall kind of gal)
Thanks!
Dan Tolman says
Great Post!
A couple of things that have made a huge difference in our listing photos. Biggie – have a wide angle lens especially for those tight spots; i.e. bathrooms and hallways that lead to another room. Take landscape photos late afternoon to avoid either direct sunlight. A good (free) photo editor is Google’s Picasa.
Cheryl says
Hello! Love your website– I was wondering if there is a reccommended pixel size when taking pics for the web– sometimes when I email or upload pics they take forever!
Thanks!
YoungHouseLove says
Hey Cheryl,
The rule for online images is that they only need to be 72 DPI, so there’s no need to upload anything higher-res than that. We usually make our landscape photos around 500 pixels wide and our vertical photos around 350-400 pixels wide. Hope it helps!
xo,
s
MJ says
Hey guys,
Thanks for the great post. We’re working on making over some rooms and I’ve used your tips to get great shots with a point and shot camera. I’m wondering if you have any hints for getting a perfect shot in a room without windows and therefore without natural sunlight. With the lights in the room on and the flash off, the room looks dark and shadowy in photos.
Thank you, MJ.
YoungHouseLove says
I think then the only answer would be to bring in more lights (perhaps one you can aim up like a spotlight at your subject) or using the flash. Hope it helps!
xo,
s
Kelly says
I know you guys have since upgraded to the DSLR so I would LOVE your opinion – I have a point n shoot but I am very unhappy with how my indoor (i.e. low light) pics of my son turn out. Trying to decide between investing in a DSLR or Photoshop (to learn to just fix them on the back end) – any thoughts?
which camera do you guys use for impromtu indoor pics of clara?
thanks so much!!!!!
YoungHouseLove says
I’d recommend a DSLR over Photoshop at this point, since the camera will do lots of stuff that Photoshop can’t fix. Plus there’s lots of free (or cheaper) alternatives to sprucing up your photos a bit (like Picasa or iPhoto). We use our DSLR for all of our pictures these days, except for things on the go which often get snapped with our iPhone cameras.
-John
Melissa @ Bless This Mess says
Hey guys! I’m a huge fan and feel like I live in a similar DYI/remodeling boat to you (just on a much smaller scale). I just got my first DSLR which I’m so excited about. I popped on to find out what lenses you all use to get the great indoor/roomy pictures and I’m having trouble pinning down the info. SO, what lenses do you recommend for house pictures and what lense for general life? I’d love for you to point me in the Amazon Affiliate direction because I’m going to buy them, so you might as well get a little percent :) I have a HUGE after that I am prepping to email you, but the pictures are worth a thousands words. I have to get those looking hot before I bug you about a feature :). Thanks Melissa
YoungHouseLove says
Sure thing Melissa! We just use the stock lens on our D3000 (which is here) for most house pics (since many specialty lenses are either too fish-eyed or too much of a zoom lens to take good normal-looking whole room shots) and then sometimes for soft details with more depth of field (and also for nearly all of our Clara-pics, since it’s great for movement or low-light) we use a 55 mm lens that’s specifically made for our Nikon (so if you have a different camera it might not work). It’s here if that helps. Good luck with everything!
xo,
s
Charlotte says
yay! I did a search for photographing your house and found this old article. Do you have any updated advice since you’ve been doing it awhile longer now? I’ve been trying to photograph our recently finished nursery and they always turn out rather drab.
YoungHouseLove says
Other than trying to shoot in tons of natural light and using a tripod we have learned that a lot of it is your camera. Once we updated to a nicer DSLR our photos definitely improved! I think you can do as much as you can with your existing equipment, but if it’s an old-ish point and shoot you might see a huge jump in the quality if you upgrade to something new, just because they have better low-light features and more mega-pixels these days.
xo
s