It’s Tuesday the 30th… so it’s time to share this season’s (completely unofficial) Pinterest Challenge project (not sponsored by Pinterest or anyone else, just dreamed up by Katie to make us stop pinning and start doing). Huzzah!

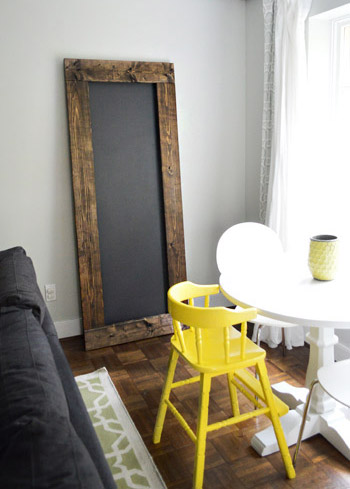
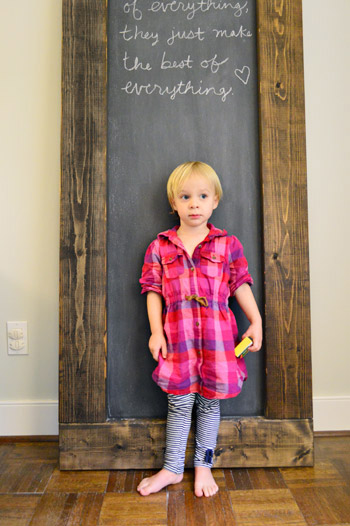
This time John and I tried our hand at making a large chunky-framed leaning mirror – except instead of it actually being a mirror we made it into a giant chalkboard (since chalkboard paint is probably the most Pinterest-tastic material out there, haha).
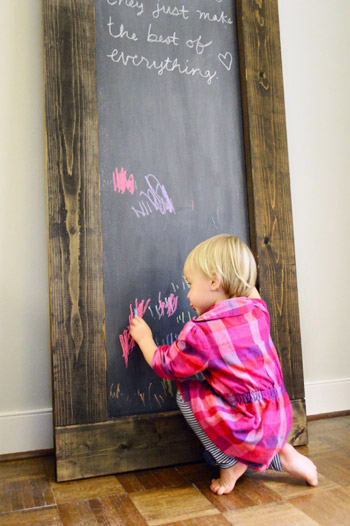
By designing it like a large leaning mirror, it can move from room to room, and it can be a place where we write sweet notes, make lists, and enjoy Clara-scribble (we secured it to the wall with leaning mirror hardware so it’s kid-safe – more on that method here).
As per the challenge rules, I took inspiration (or Pintspiration, har-har) from the projects that I linked up to in last Tuesday’s post and did my own spin. Here’s a recap of them for ya:
- Top left: this big arse chalkboard from here
- Top right: this leaning easel board found here from this awesome blog
- Bottom right: this door-chalkboard from here
And here’s how we tackled our own version. The cool thing is that we were able to use a big board of plywood that we already had leftover from building in the fridge back in November of last year (yes, it was just chilling in our basement since then). But before we got to the chalkboard paint application, we rolled on some magnetic paint (since we already had a quart of that from this project in our first house). Sorry this isn’t a full shot of the plywood board, but it’s 68″ tall and 21″ wide if that helps.
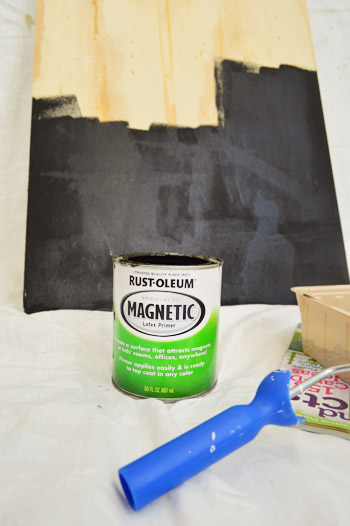
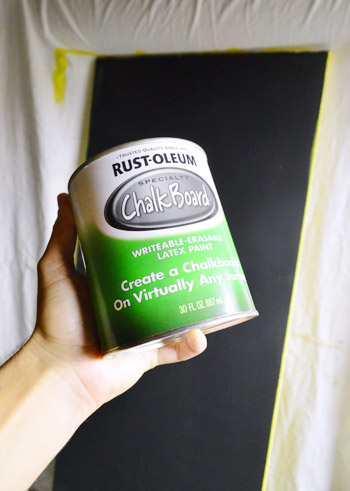
After a four coats of magnetic paint (we wanted it to be pretty strong) it was time to add the chalkboard paint. So we grabbed this can from Home Depot for ten bucks and we rolled on two coats of it. We only applied it to the front side of the board, but you can see from this pic that we actually had some fun with the back side too, but we’ll get to that in a second.
As for building this whole shebang, we set out to make it without the need of any fancy saws or tools. And because Home Depot is happy to cut plywood to size for you to make the board, and you can also get them to cut a few 1″ x 6″ boards to create the frame… this project calls for no cuts at home at all. Woot!
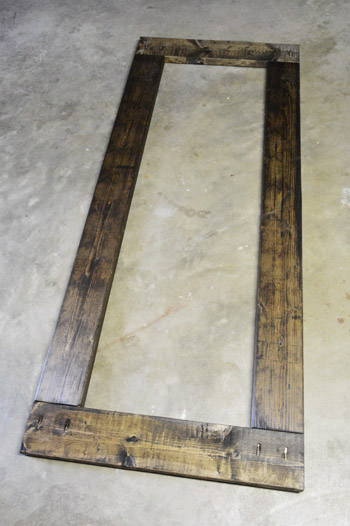
For our 68″ x 21″ piece of plywood we got two 29.5″ 1 x 6″ boards for the top and bottom of the frame, and two 63″ pieces for the sides. This allows for a little bit of overlap when the frame is assembled so the board looks as if it sits inside the frame (but really rests behind it). The total height and width of the entire finished project is 29.5″ wide by 74″ tall.
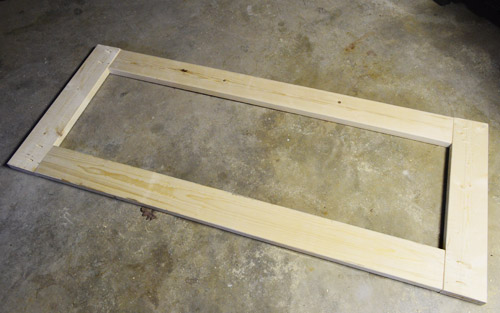
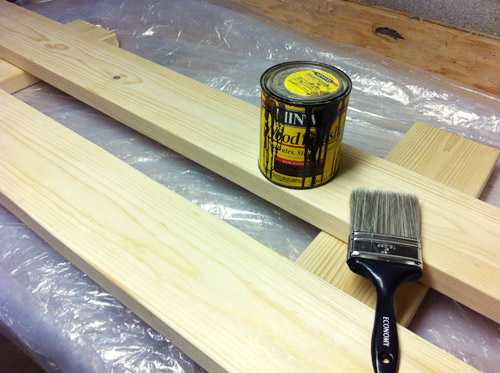
As for the stain, we went with our old favorite (leftover from a bunch of other projects) which is Minwax in Dark Walnut. We stained the wood before we assembled the frame because it seemed easier not to have to worry about getting stain on the chalkboard part of the board.
After the frame was all stained and dried, we just used our Kreg Jig to attach them (but if you don’t have one you could easily use metal brackets to hold them together from behind or just try to screw them together from behind without a jig).
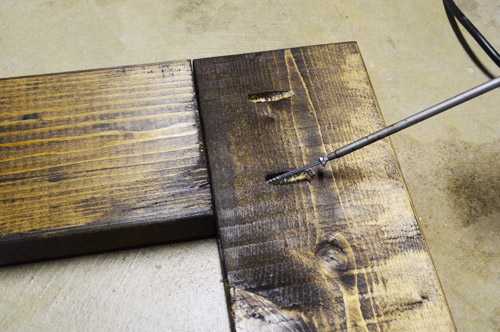
Bam. A dark walnut frame. Without a miter saw, angle calculations, or anything else that could get complicated.
Then we attached the chalkboard part to the frame from behind. And… surprise! John got a wild hair and painted the back in Citron (a leftover pot of BM paint that we had), just because he said the bare beat-up back was bugging him. Sure, we’ll probably only see it once every few years when we carry it around the house (you know we like to move things around) but I love that man for adding that secret plane of color just because he knows it’s there. Haha.
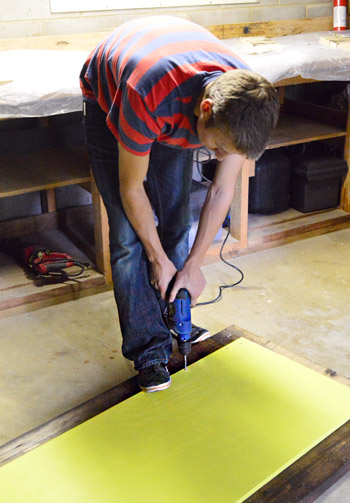
Oh and to be clear about how you attach the chalkboard part to the frame, you just screw around the edge of the chalkboard from behind because it overlaps the frame slightly, so as long as your screws are long enough to go through the plywood and into the stained frame (without poking all the way through the front) you’re golden. I think the length we used for those screws was an inch and a quarter.
Then we just let it air out/cure for a while (chalkboard paint + stain are both stiiinky until they fully cure) and it was finally time to bring it up into the living room along the wall where we wanted to lean it. Then we just secured it to keep it from tipping over (using the same dealio that we used here). Don’t want it bonking the bean!
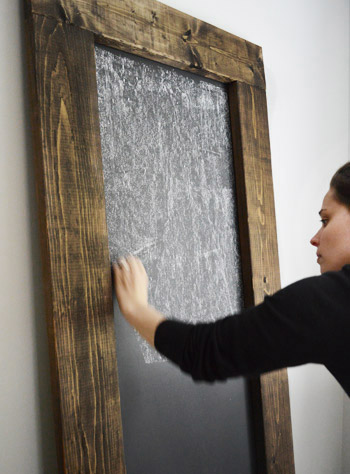
Next it was time to “condition” it by rubbing the side of a piece of chalk all over it and then wiping it all off. Boom. Conditioned.
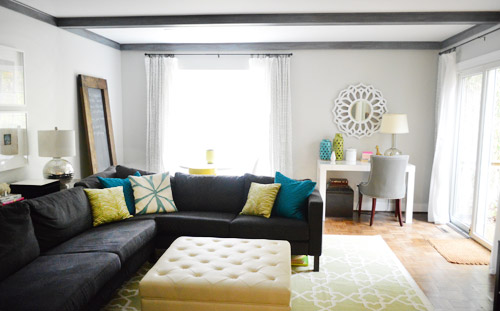
Ta-daaaaa! I know in the pics it seems to be one of the only wood tones in the room, but the console behind the sofa is the same finish and we’d love to build/repurpose a cabinet for the TV in the same rustic finish, so we think it’ll be more balanced and make more sense as the rest of the room comes together. One nice thing we didn’t even think about is that the color of the chalkboard paint ties into the sofa and the beams, so it sort of “marries” the wood console and the gray items in the room. Gotta love a “bridge piece.”
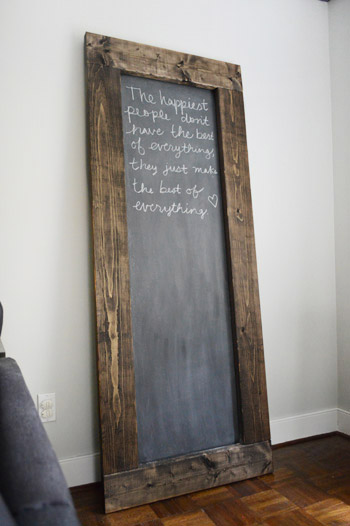
I’m sure the scribbles will constantly be changing (we have a fun Thanksgiving idea to implement when November rolls around) but for now I just wrote a quote that I love up on the top. It says “the happiest people don’t have the best of everything, they just make the best of everything.”
Then Clara woke up from her nap to see it hanging out in the living room and cautiously approached it. For a second she didn’t know what to think, but when we told her she got to draw on it and handed her a box of chalk…
… let’s just say she got pretty darn excited. Haha.

Here’s a video of her in action for ya:
It must be a mom thing, but I totally think my kid’s scribbles are THE BEST. I mean, have you ever seen anything so beautiful?

So that’s how it all went down. As for the money stuff, here’s a little budget breakdown:
- $0 – leftover plywood board, leftover stain, leftover magnetic paint (a guess for buying all of these might be $45?)
- $10 – chalkboard paint from Home Depot
- $16 – four 1 x 6″ boards to make the frame
- Total: $26 (this project could potentially cost around 70 bucks if you don’t have leftover materials)
Don’t forget to check in on Katie, Carmel, and Sarah to see what awesomesauce projects they’ve whipped up (they’ll all be sharing theirs sometime today as well)!

And now here’s the part where we tip our homemade hats to you guys and invite you to share all of the fun Pinterest Challenge projects that you’ve tackled in the last week (right along with us, well at least virtually with us). If you’ve already blogged about it, just:
- click on the blue “Add Your Link” button with the odd cartoon head at the bottom of this post (you might have to do some scrolling, depending how many projects are added)
- add a link to your specific blog post about your project in the url field (not your home page)
- where it says “name” write a descriptive name for your project (ex: “Homemade Leaf Wreath”) as opposed to your actual name
- we’d also love if you could quickly link back over to our project posts within your own (here’s Katie’s, Carmel’s and Sarah’s) – it’s also nice to link to your inspiration project on Pinterest as well as to directly link to the original project/site, just so they get some love too.
And if you’d rather just link over to your project in the comment section, feel free to do that – or even add a link to a free photo sharing site like Flickr with your pics if you don’t have a blog (remember to set the gallery to public so we can all see it). We’re crazypants excited to see what you guys have been up to!

Amy @ Woodlawn Lane says
LOVE Clara’s outfit! She is always so stlyin’ :-)
This is such a good idea…I’ve used chalkboard stick on labels before, but have yet to jump on the chalkboard paint wagon…maybe soon!
Michelle DuPuis says
You mentioned that you used magnetic primer. Have you tried to use magnets on it yet? We have a magnetic wall in our house (http://rustsunshine.blogspot.com/2011/07/magnetic-wall.html), but I only used 2 coats of primer and needed three coats to cover it with a lighter color, so although it works well with strong magnets, it’s never been able to hold up those plastic magnetic letters for kids. I’d totally do it again if I knew it would work!
YoungHouseLove says
So far we’ve only tried it with strong magnets and it works great. When we used it in our last house to hold Clara’s magnetic letters I believe we did 5 coats, so it definitely took more than 2 for us.
-John
Michelle DuPuis says
Cool. I’ll have to give it a try!
Ally says
Gee, it’s almost 4:00 PM PST, and I’m just now making it to YHL…curses to working for a living! :)
What a wonderful project, Youngsters! Clara clearly *loves* her new chalkboard…she’s adorable balancing there on her little tippy-toes to write 1 1 1 1 1 1 1 1 1 1 1 :)
Congrats to all 4 ladies (and other posters :) on another outstanding Pinterest Challenge! For the non-handy like myself, I live vicariously through all of you :)
xox
Paulina J! says
Love it! I was wondering if you just used the magnetic paint because you had it on hand or can you actually put magnets on it? (Sorry if you adressed this already)
Paulina J! says
Never mind. Just saw a comment on it :)
YoungHouseLove says
No worries!
xo
s
Jenny from Made2Love says
LOVE this!!!…I pinned it! Hee Hee
Patty C. says
Love the board and love the ones! So, is Clara a lefty or still deciding? (We had a back & forth girl – it’s cute watching the left/right switcheroo.) She looked so serious when you said Clara starts with C – like what’s your point Dad? :)
YoungHouseLove says
She’s totally a leftie. She even switches hands if you give her something in her right hand!
xo
s
Kate says
Clara is looking so big! She is more of a kid than a toddler now :)
YoungHouseLove says
Sniff, sniff. I know. They grow up so fast!
xo
s
kelly says
Just wondering how the magnetic paint is working? I bought the spray version and sprayed a large wooden “M” for my daughter with plans to put it in her room so she could hang things from it.(pics, notes etc). I was going to cover it with wallpaper or paint stencil. 8 coats later and magnets don’t stick. You can kind of feel the pull, but they won’t stay up. Thank goodness our hardware store refunded us our money, but before I bought the paint version, I was just wondering if it really works.
YoungHouseLove says
Oh no! I think the best option is the can of Rustoleum stuff that we used since we’ve done two projects with it and it seems to work well. One thing that’s important is to shake it well (so the metal particles don’t all sink to the bottom) and to do a few thin and even coats. Then we use those super strong magnets (the ones that look like Altoids) since they stick like glue! Hope it helps.
xo
s
Amy says
I love this giant chalkboard, most of the time all the tutorials are for small chalkboards.
I definitely look forward to making this project.
Thanks for sharing.
YoungHouseLove says
You’re welcome Amy! Good luck!
xo
s
alg says
LOL — I whipped out the ol’ chalkboard paint too!
I made what I’m calling a denim desk caddy… unless you can think of an even sexier name for it. Please? ;-)
Anyhoo, I kind of combined the Pinterest Challenge with a Dude, Get on That Already project I’ve been marinating on.
Basically, I cut up a favorite old pair of blue jeans & glued sections of them onto mat board, then mounted it in a spare picture frame I had laying around. (After giving her the chalkboard treatment, of course.)
It was so simple & works like a dream for keeping little loose stuff in one place. I have it hanging above the family computer desk, but I think the same type thing would work as a bulletin board in a kid/teen’s room. You can make it as big as you’d like… I just made mine to fit the frame I already had on hand.
I don’t have a blog, so I just uploaded it to my “Stuff I Made” Pinterest board.
Here’s a link (hope it works):
http://pinterest.com/pin/79305643409579372/
Oh, and sorry about the lousy picture quality. Best I could do with my current camera. Womp, womp!
Carly says
I love the chunky frame! Super duper cute!
Pamela says
John!! Don’t you realize that 1 & 1 & 1 = 3? 3rd letter of the alphabet is “C.” ‘Nuff said. :) Clara’s such a cutie.
Heather says
This is exactly what I needed! I have this funky little wall between our dining room (a.k.a. kids’ playroom) and kitchen. First thought… chunky leaning mirror. But wanted something more fun for the kids. Next thought… paint entire wall in chalkboard paint. But we have textured walls and I’ve already tried it once…major chalk dust from writing over bumps! But a chalkboard leaner… perfect solution!!!
By the way, what size shoes does Clara wear? My daughter Lilah is a week older than Clara and is tall for her age (hubs is 6’4″), but Clara’s feet look so long! Lilah’s wearing size 8.
YoungHouseLove says
Oh yeah, she’s an 8 too. She gets her long-ness from her daddy. Haha.
xo
s
Natalie says
You totally blew her mind when you said “I thought Clara started with a C” That gave me a little chuckle….
Lisa says
What a cute project! It looks great!
Eliza says
Very cool chalkboard. I love how it’s tall enough to have a high section for you and a low section for Clara. Best part of this post, though? The video. She is talking so well, and ya gotta love the expressions! Takes me back to when my guys were 2 :-) Oh, and I definitely picked up a NY/Jersey thing going on in her voice!
cori roberts says
Too bad Will has already claimed Clara.. because I have a cute little 3 year old boy.. ;)
She is just too cute! I love how she talks! It reminds me of my Abe!
Christina @ Floridays Mom says
I love the way your braced it to the wall like that. I have a 2.5 year old and have been considering getting a leaning wall mirror in our bedroom, but was terrified having something so heavy in his reach like that for him to tip over…LOVE THIS!
Vega says
In the last videos I find Clara like a big girl. She speak perfectly and I see her really tall. She is so sweet and friendly.
Rebecca says
i WILL have a blog by next Pinterest challenge so I can joint he linky party. I need some motivation to get started and this is it.
I did patches on the elbows of a cardigan. One of my favorite dressy ones got a hole in the elbow so I figured instead of pitching it I could dress it up even more with lace patches.
YoungHouseLove says
So sweet!
xo
s
Leah says
Hey Guys! I’m in NYC area and was planning on coming to your book signing tomorrow at Flor. Has it been postponed due to Sandy? Couldn’t find info on your site or theirs.
Thanks!
YoungHouseLove says
Yes, there’s an update on our tour page as well as on the top of this post. Hope it helps!
xo
s
Beth says
My 21 month old and I are home sick today. It brightened his day to see Clara on film. He started it over and over and over again. Thanks!
YoungHouseLove says
Aw, hope you guys feel better soon!
xo
s
Sarah says
This is freaking amazing! I want one in my house immediately. I’m jealous that you guys managed to tackle such a great project during the storm prep. This was our first storm as we only recently moved to Va, so we spent the weekend prepping for the storm (mostly getting the needed supplies, but also going on a cleaning spree because I knew if we lost power I’d go crazy from not being able to clean). But back to your project, the frame is gorgeous and I love the placement and of course Clara’s face when she realizes she can draw on the board! Too precious.
Angel says
This is really cool and I love it, but I was kind of expecting you were doing something like this for that empty side area of your pantry. Do you know what you are doing there yet?
YoungHouseLove says
We’re not sure yet. We thought a big dark chalkboard might be heavy looking there, and even if we used a lighter chalkboard color on it, we walk through that area (it’s a doorway) so we didn’t want to brush up against chalk all the time, ya know? Not sure what we’ll end up doing with it, but we’ll keep you posted!
xo
s
Randa says
Your child is so precious. I love how she says, “no, I can’t try it right now.” Such diplomatic tactics. :) She’s just so fun to watch!
Katy says
This is a beautiful chalkboard!
And Clara is looking so dang tall…and grown up!
julia says
i love that stain! ok.. that sounds weird … but it really gives a rustic look to your home depot boards!
xo julesinflats.com
Emily says
I recently did a chalk board wall in our playroom. I’ve had a hard time erasing the chalk even using a special cloth. I didn’t know about conditioning it. Should I do that to the wall? Also, do you just use a damp cloth to erase (no chalk eraser)? Thank you!
YoungHouseLove says
The conditioning should help. We erased ours with a dry paper towel followed by a damp one and it seemed to work great, although I’ll admit what we had written hadn’t been on there more than an hour or two.
-John
Amy @ Elephant Eats says
I’ve been WAITING for this pinterest challenge!!! I’ve been stockpiling so many projects from my wedding…yay :) Love your chalkboard. Such a great idea for organization, decorating or just plain fun.
Jen says
This is my first Pinterest Challenge, thanks for hosting! The chalkboard looks adorable and is one of the things on my Pinterest to-do list!
Renate says
What a brilliant idea!!what magnetic paint did you use?it would be such a smart idea if you move it to the kitchen a bit later and stick shopping lists et. to it!
YoungHouseLove says
We used Rustoelum Magnetic (you can see the can in the pic). Hope it helps!
xo
s
jja says
Amazing video! And Claras face when John stated her name starts with C :-)))))
Manasi says
Just linked my entry. Thank you for hosting! I am having fun looking thru all entries!
Manasi says
I have linked my post, however, there is a small red X before the number (518) and I was wondering if I have missed a step in uploading or messed up somewhere.
Would you please verify?
YoungHouseLove says
Hmm, I’m not sure why! Anyone know? Is the uploading deadline over?
xo
s
Lauren says
I absolutely love this project and the video of Clara! She is adorable! I am hoping to make something like this for my kitchen. Did you use a sealant of any sort when you stained the frame or did you just use the Miniwax stain?
YoungHouseLove says
Just the Minwax for a rustic non-glossy finish.
xo,
s
Newton says
HI! I was wondering how the magnetic paint seems to be working? I have heard it can be weak. Did the multiple coats make it strong?
Thanks!
YoungHouseLove says
It holds up these magnets so we have no complaints!
xo,
s
Jesette says
Hey guys!! I absolutely LOVEEE this project!! I love chalkboards! I was wondering how many coats of stain did you apply to the frame? Did you rub it down afterwards with a towel? Thanks! (:
YoungHouseLove says
We applied two coats of stain following the directions (wiping it down after about five minutes of sitting each time). Hope it helps!
xo
s
Jes-ka says
I didn’t add mine back when this went on because mine was to be a secret anniversary present! I gave it to my boo this past weekend, and it’s mentioned at the end of my blog post about our anniversary.
http://www.jes-ka.com/happy-hottay-holidays/
Yay for completing stuff! <3
YoungHouseLove says
SO sweet!!
xo
s
Denise Willer says
Sherry,
I am doing the type of thing with 1×6’s to frame out a mirror. Just wondering if you chose to seal it after you stained it. I bought some, but am hesitant because am I am going for a rustic look. The mirror will be going over a fireplace.
Thank you.
Denise Willer says
Pardon the grammatical errors due to lack of sleep with a sick 18 month old!
YoungHouseLove says
Haha, no worries!
xo
s
YoungHouseLove says
We actually didn’t seal ours since we like the rough matte finish, but a matte sealer might help keep it protected if you worry soot from the fireplace might hurt it or something.
xo
s
Virginie says
Hi Petersik family !
I am in love with your chalkboard but unfortunately I won’t be able to make one for the little one I want to treat (I will be flying to the DC area from Montreal right for the holidays).
I wanted to know if you had sources (online or available in the MD/VA/DC area) for magnetic chalkboards (I can’t afford to break the bank but still am looking for something sturdy enough to last her a few years). Be it a big box store or something more local, I do not know where to look being far away…
I know my request my sound like a bit too much, but I hope you can help me !
Thank you so much in advance !!!
YoungHouseLove says
Does anyone have any sources? Maybe try looking on etsy and ebay? Good luck!
xo
s
Katie says
I’m putting together and staining a frame right now and wondering if you guys used a sealer on the wood after staining it? Is it necessary? Thanks!
YoungHouseLove says
We did use a thing coat of an eco polyurethane sealer (called Safecoat Acrylaq). You could probably survive without one, but we wanted it to help seal in the stain odor and also to make it easier to wipe off any chalk dust that gets on the wood.
-John
Heather says
Can you explain how you determined the measurements for the frame? I have a cheaply framed mirror that’s been hanging on the back of our bedroom door that I’d like to frame with something like this. I’m thinking I can keep it in the cheap frame, and screw through that wood to attach it to the chunky frame that I make. Including the thin existing frame, mine measures 15.5 x 55.75 and I’m having trouble translating. Thanks!
YoungHouseLove says
I did all of my cuts based on the lengths of the inside side of the frame. So, for instance, if I knew the chalkboard was 24-inches wide I subtracted 2-inches (because I wanted it to overlap on 1-inch on both sides) and marked a board to cut at 22-inches. Then I used my miter saw to make 45-dgree cuts that angled out on both ends (making the opposite / outside edge longer). I didn’t bother measuring or calculating the length of the outer edge – I just let my miter cuts determine where it fell.
So if you want your new frame to overlap the existing frame, I would measure the inside length of the existing frame and use that as the inside length of the new pieces you’re cutting.
Hope that helps!
-John
Heather says
Yes, it does! Thank you so much. You guys totally win the Patiently Answer Newbie Questions Even 3 Months After the Original Post award!
Berdine says
Say I wanted to recreate this with a mirror instead of the chalkboard plywood – how could I attach it to the frame? I see you overlapped a bit and screwed through the plywood, could I just overlap and use some sort of glue?? How much overlap is needed??
YoungHouseLove says
So sorry, we haven’t tackled that so we can’t be sure about what would work. Maybe ask at the hardware store what they would recommend?
xo,
s
ashlea says
How magnetic did it turn out? I read somewhere the magnetic paint did n’t work that well. Can you let me know before I try it?
YoungHouseLove says
It works with all the magnets we’ve tried, as long as they’re not super heavy (a chunky wood one with a small magnet on the back probably wouldn’t hold, but the magnets we have from target (plastic dots and arrows) work well!
xo
s
Vanessa says
So I found magnetic primer on clearance for $5 and I was thinking of doing a stripe in my sons’ room. Primer first (a couple coats) then paint over it. I’ve heard mixed reviews on it’s magnetic-ness (I realize that’s not a word) and how much you paint over it affects it too? How is it working on Clara’s chalkboard and fridge? Do you think it would work with melissa and doug wooden alphabet letters? Or do you use special magnets?
Thanks!
YoungHouseLove says
Most heavy and thick plastic magnets might slide down and off, but thinner/smaller ones (like the ones we pictured) or super strong altoid ones would probably stick really well. Hope it helps!
xo
s
Danielle says
Hello!
I am hoping to make this same chalkboard because I have an extra piece of plywood from another project. I’m wondering if there might be different quality grades of plywood because mine has a bunch of wavy lines in it, like it’s not a completely smooth surface. Does your have those as well? If so, does that make it more difficult to write on?
YoungHouseLove says
There are definitely different types of plywood and I think I know the kind you’re talking about. Ours was a fairly even surface (wasn’t 100% smooth, but a little light sanding made it smooth enough) so I don’t think it’s the same as yours. But you can always try a bit of sanding first on yours too to see if help diminish the waviness.
-John
Isabella says
I think she’s spelling her name in binary. She’s secretly a mini genius.
(That geeky joke effort was for John, even though I know he doesn’t read comments)
YoungHouseLove says
Haha, I read it out loud to him and he laughed.
xo
s
patty says
Does the ‘alphabet’ set of magnetic letters (the soft fabric ones from etsy) hold up well with this? I am thinking about doing a wall in our playroom that is magnetic and chalkboard! I am guessing I will need LOTS of magnetic paint. Just wanted to see what your experience was. Thanks!!
YoungHouseLove says
Yes, they stuck, although one or two of them slid down it a bit. Hope it helps!
xo
s