With our fireplace refacing plan all worked out, and our supplies waiting at the ready, it was time to dive into step 1: TILE! So we’re here with every last detail, from prepping and tiling to grouting.
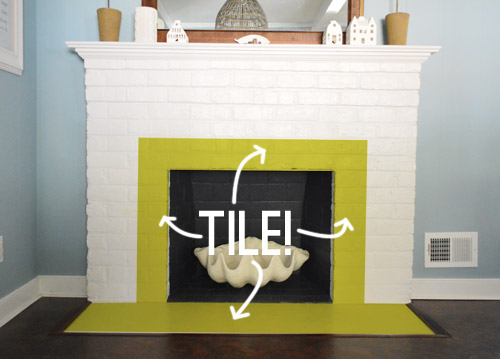
In case my sketch below is still indecipherable to everyone but me, I highlighted the areas of the photo below that are going to get the tile treatment. The tile border is only about 7 inches wide because the rest of the brick is going to get framed out with wood and MDF (which will layer on top of the tile, hence doing tile first).
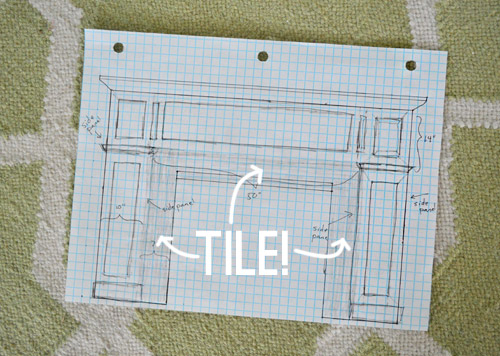
Oh but it’s smart to check the code in your area to make sure your wood surround isn’t too close to your firebox (ours calls for at least 6″ of tile and then the wood surround can start). And no, the tile is not going to be grellow. Ha!
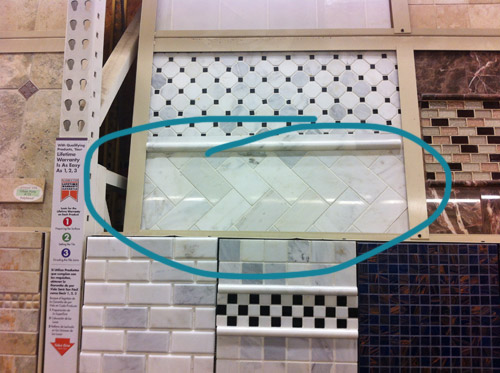
If you recall, the tile we picked out was this marble subway found at Home Depot for a little over $5 per square foot.
But before we could start slapping tile everywhere (that’s a technical description, btw) we had to create a smooth surface on which to attach them. So we bought some 1/4″ cement board and we used the old bend score and snap method to cut it into strips. Then, thanks to some heavy duty masonry screws and a cheap masonry bit for our drill, we attached them to the fireplace. It was quite a dusty process, and it helped to have four hands around for it (Sherry would hold while I drilled and vice versa).
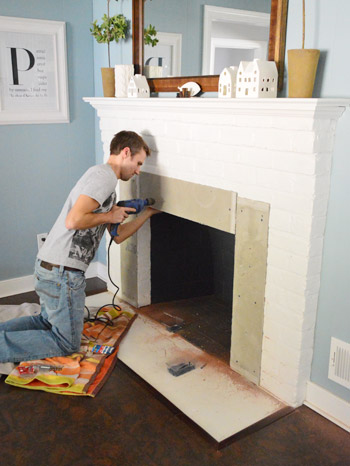
Oh yeah, and it was around this point that we realized we probably should clear off everything sitting on the fireplace mantel so that all of our drilling didn’t send anything down on our heads. Plus I’m not going to lie, if I directly (or even indirectly) sent one of those ceramic houses on the mantel crashing to the floor, the lady wife would not be pleased (I have sort of a bad track record when it comes to things like that).
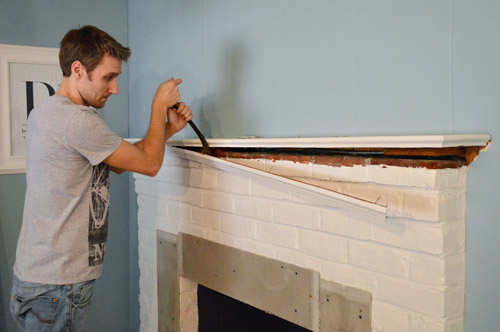
So after we cleared things off the mantel and ripped off the old wood top while we were at it (demo-ing things fully before tiling is always smart) it was back to tile prep. For the bottom hearth portion, I actually just squeezed out a whole bunch of heavy duty construction adhesive, laid down my pieces of cement board and then stacked some heavy storage ottomans (of which we have plenty around here) to hold them securely in place overnight (I later added a few screws at the corners just to reinforce them).
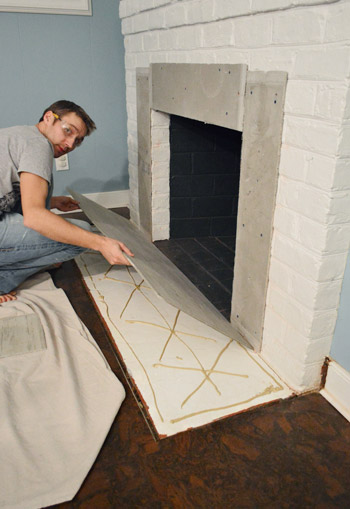
The nice thing about adhering the cement board right over the old hearth instead of demoing it out first was that because we added the cork floor right over our previous linoleum one (due to not wanting to disturb an asbestos liner underneath) we still had room to add cement board and tile without it bumping up and being oddly raised (in fact it brought it back to being aligned).
So here’s the fireplace all set and ready for actual tile.
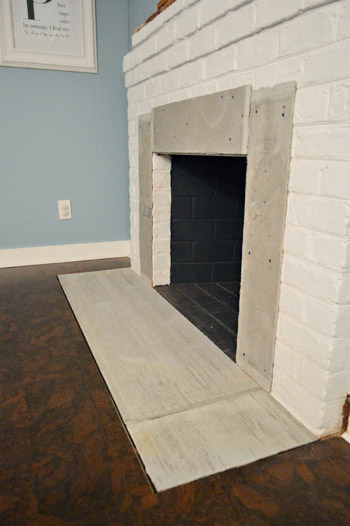
Well, not totally all set and ready. We wanted to protect our cork floors before getting into the thinset-and-grout-y mess of a tiling project, so we quickly taped down some protective rosin paper leftover from our last kitchen tile project.
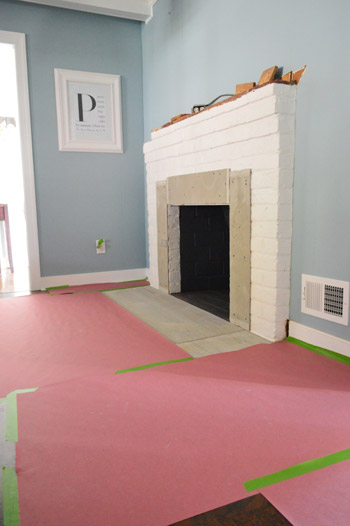
We also took the time to lay out our tile beforehand. At Bryn’s suggestion, we bought a few extra boxes than we needed, just to account for overage and so we could pick out any weirdly chipped or discolored ones. Thankfully there weren’t many broken or otherwise wonky tiles, so I’d say that we used 90% of the tile we bought, and only returned 10% as overage tile (which is a pretty normal percentage – and Home Depot is happy to take it back).
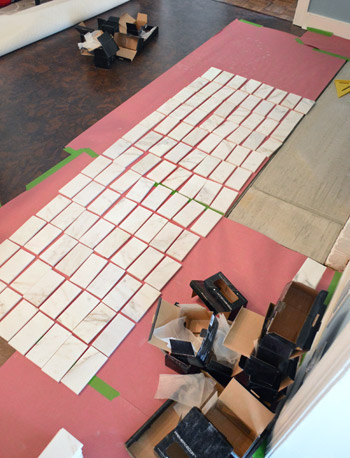
It was a smidge tedious to lay it all out, but it was great because we could begin to see how they’d come together and even do things like space out the veining (so there was a nice mix of both instead of all of the dark veining ending up on one side of the hearth and all the lighter tiles on the other side). And in the interest of using as many tiles as we could without being super picky, we also made a pile of “why-is-this-one-weird-or-chipped-on-one-side?” tiles to use for the smaller cut pieces that we’d need (we could slice off the weird/bad parts for many of the edge tiles anyway).
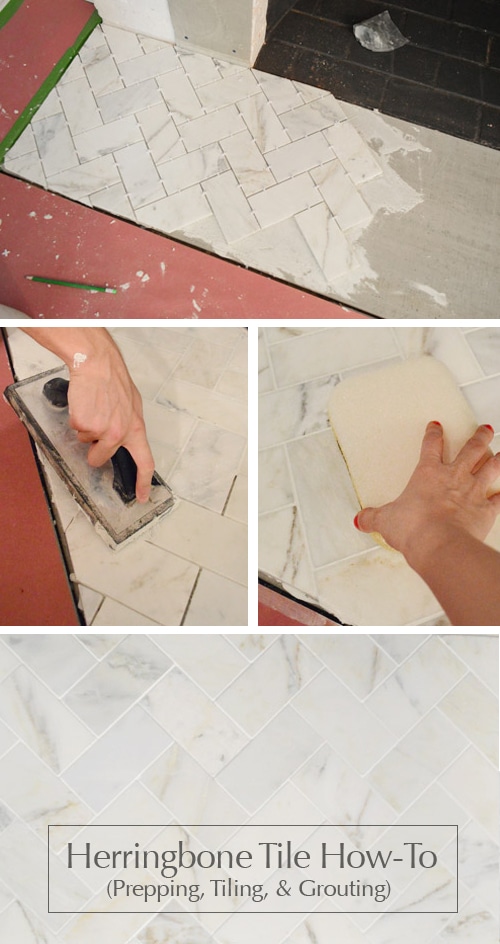
And as you can see from the angled cut that I’m marking below – we decided to go for a herringbone pattern on the hearth mixed with a traditional brick-layers pattern on the fireplace surround (we held them up a few ways and liked that configuration best). Update: we’re getting requests for more info on why we chose that combo, so here ya go… with so little surface area (just 7″ showing around the firebox) it wouldn’t really establish the pattern enough (we thought it would look like random and busy half-zigs and half-zags without enough of the tile showing to look like chevron). So we held it up both ways and liked the simpler pattern for the smaller area, just because we didn’t think it would look as chaotic.
And thank goodness we own this triangle square…
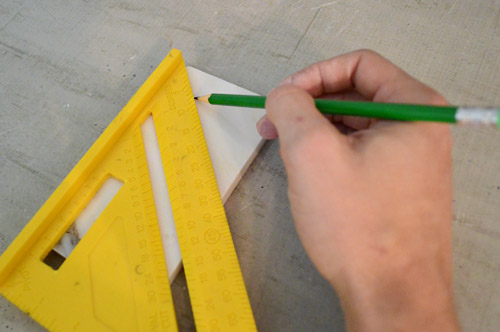
It was a lifesaver since basically every single cut for the hearth was on a 45-degree angle. And after cutting tons of crown molding on all sorts of angles, I gotta say that this was much simpler. Anyone can do this. Yes, even you scared-of-tiling folks out there. It’s really not that bad. I promise.
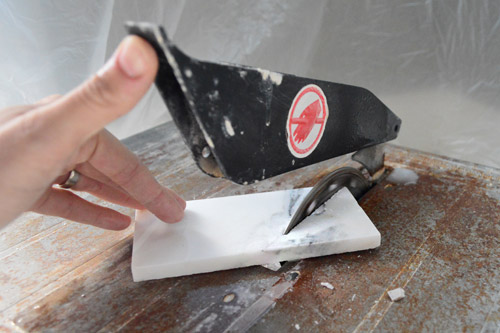
We made all of our cuts with our wet saw (one of my favorite tools) and it was fairly easy. The only challenge was that the marble was a bit brittle so sometimes the corners broke off as I got to the end of a cut. But I didn’t lose too many tiles in the process, so it was actually a lot easier to work with than penny tile (we had a much higher learning curve when it came to cutting that).
Once we had a few of our initial pieces cut, we mixed up some thinset (still leftover from penny tiling – woot!) and started slapping down some tile. Again, that’s a technical term.
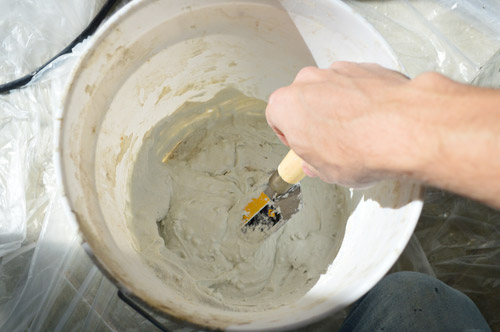
I realize I’m glossing over some of the details of the actual tiling process. But we’ve covered it so extensively in the posts below (including video) that I thought sharing those links made the most sense. So for this project just trust us that it went along pretty much the same way unless otherwise noted in this post.
- Here’s how to hang cement board
- Here’s how to install penny tile (including video)
- Here’s how to grout penny tile (including video)
- Here’s how to de-haze & sealing tile
- Here’s how to install a subway tile shower & marble floor (including an extremely detailed supply list)
Once we had the pattern started it was a pretty mindless process, it just took a long time because there were so many cuts involved in such a small space. But it was pretty straightforward (it was one of those just-keep-going tasks that didn’t involve much problem solving once we got the hang of it). I’d guess that it took us a good four hours to get the bottom portion done (although it was broken up by lunch plans with an old coworker, so it still ate up a good portion of day 1).
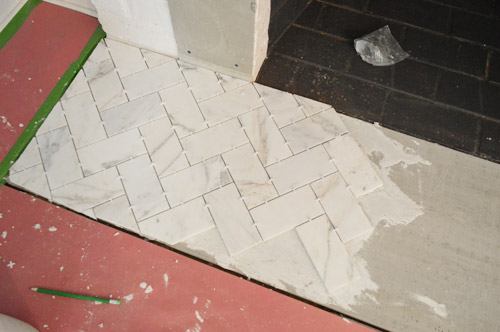
The next day during Clara’s nap we attacked the top portion, which went significantly faster because the straight cuts were easier to do.
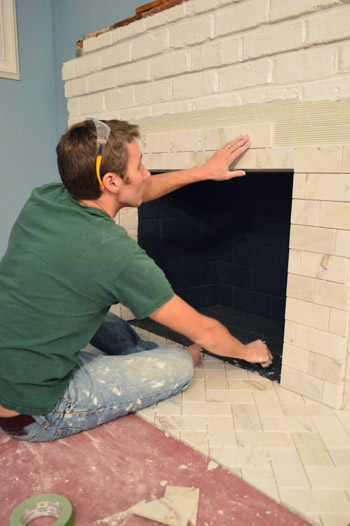
And since the outer edge was going to get covered by the MDF frame of our wood surround eventually, we didn’t have to be sticklers for a clean edge. In fact, Sherry and I figured out a way to stagger the tiles so that we were able to reuse both sides of a cut, which made life much easier. See how the bottom row has a cut tile on the left? The other half of that tile is in the row above it (on the right). So they sort of staggered themselves up the wall, and we weren’t creating tons of tile fragments that we couldn’t use.
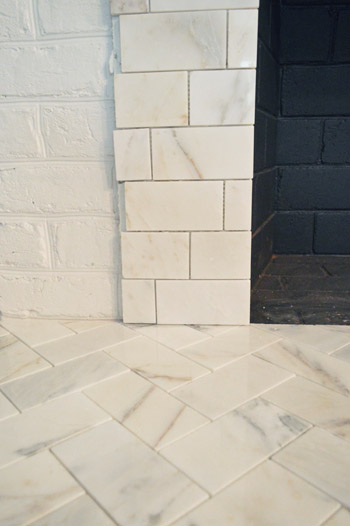
So by the end of day 2, we had all of our tile done. Yeehaw. (Oh, and that white strip of brick inside the fireplace is eventually going to get painted the same dark charcoal color as the rest of the firebox, so just ignore it for now – and of course we have trim pieces for the floor around the hearth so it’ll be seamless and smooth in the end).
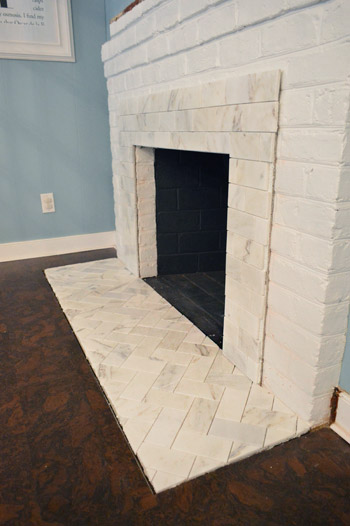
The next evening we got our grout on using some non-sanded grout from Home Depot in their Snow White color (it’s not super white, sort of a very soft gray).
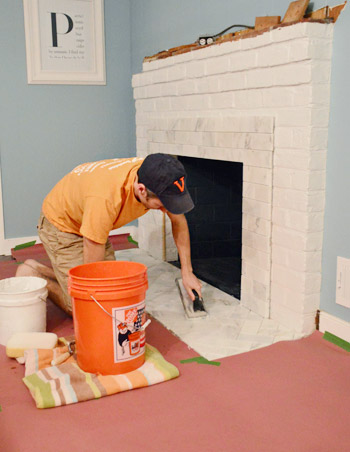
I don’t know about you guys, but for some reason the transformation from un-grouted tile to grouted tile is super satisfying to me. Seriously. I could grout all day… well, if I had a bionic wrist.
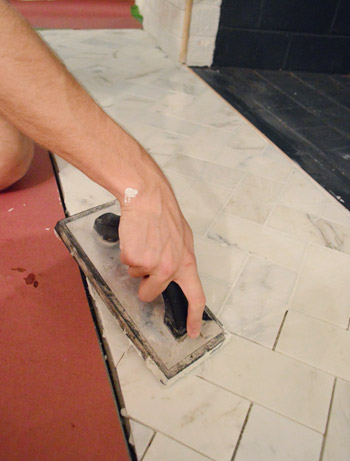
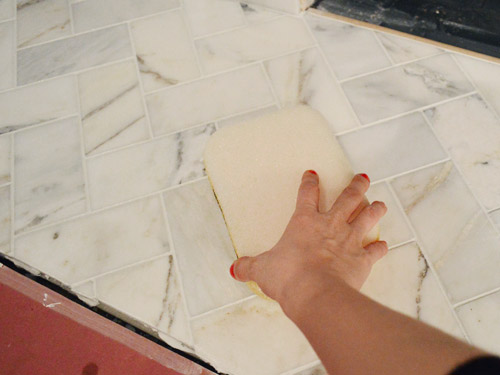
As I shoved grout into joints, Sherry stepped in periodically with a slightly damp sponge to smooth everything and wipe off the excess. I’m still jealous of how clean she stayed.
Grouting took all of 45 minutes, maybe. And it left us with this beaut. Admittedly it still looks crazy without a built out mantel around it, but that’s next on the agenda.
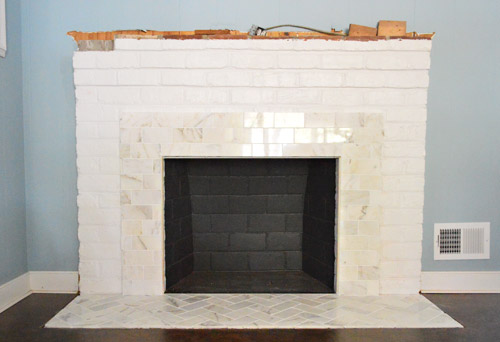
So we’re excited to start building the surround, reconstructing the mantle, adding trim and molding, priming and painting, and eating a celebratory cookie (or twenty) when we’re finally done.

Oh and we sealed all of the tile/grout after the grout-drying waiting period on the bottle (we had some leftover from the backsplash). Took ten minutes tops. Ending up with a completely re-tiled hearth and fireplace surround (in white marble, no less) feels like such an upgrade for only around seven hours of work (total), and the budget wasn’t nearly as scary as “marble tile” sounds. Ha!
- Cement board (2 sheets): $16
- Masonry screws: already owned
- Liquid Nails Heavy Duty: $2
- Subway tile: $5.50/sq ft, totaling $70
- Thinset: Already owned
- Tiling tools (saw, trowel, float, etc): already owned
- Grout: $11
- Tile sealer: already owned
- TOTAL: $99 (*thanks to some holiday gift cards from the family, we actually only spent $49 – but without gift cards or already owned supplies this might be an $150 upgrade)
I think we’re riding a herringbone high right now. Seriously. I’m so glad we decided to do that pattern. For some reason it makes me feel super fancy. Maybe we need to rename our house Downton Ranchy.
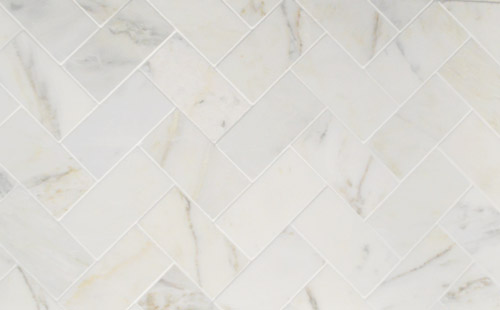
And maybe we should record a sequel to this SNL skit called “Marble Subway Tile.”
Does anyone else have some good experiences with subway tile, a herringbone pattern, or tiling a fireplace in general to share? Have you purchased a marble column recently? Are you like “What is this, The White House??”
*This post contains affiliate links

Brenda says
When I first started reading your post, I thought, “why are they even bothering? The fireplace looks nice.” By the end of the post, my jaw had dropped to the floor. The tile looks beautiful!
YoungHouseLove says
Haha, thanks Brenda! John and I definitely knew that this would be one of those “it looks fine just leave it” things in the beginning but we hoped that as we went (and especially when we share the big before and after) it’ll be a huge transformation. We’re so excited about it!
xo
s
Sara says
This looks so chic – and it’s amazing that you guys can make me feel like I could do this! :)
Lynn @ Our Useful Hands says
That is lookin’ mighty fancy! I can’t wait to see it all come together. On this one, my “eye” is broken and I can’t seem to visualize the end product, so it’s weird but kinda cool that the reveal will be so fresh and new to me. Carry on…
My best, Lynn
YoungHouseLove says
Ha, thanks Lynn! We’re so excited to start building the mantel (we started it while Clara napped today). Woot woot!
xo
s
Cara says
Oh, it’s lovely! Building out a better mantle and replacing the horrible tile hearth for our fireplace has been on my wish list. I think you just bumped it up that list quite a bit.
Allison R says
I work for PBS headquarters, and “Downton Ranchy” has such a nice ring to it. Thanks for making my day!
YoungHouseLove says
Just let us know if you need any help casting that spin off. :) And thanks for keeping up the good work at PBS!
-John
Kathryn says
Hear, hear! Mad love for PBS.
Shauna says
Oh wow, that is STUNNING! Seriously, so beautiful! I cannot wait to see how it looks with all the trim work & mantle. Amazing job!
Ann says
Looks great! Just wondering–can use this method to tile over a tile floor (rather than taking out the original tile)? That would seem so much easier… Thanks!
YoungHouseLove says
I would go (or call) a place called The Tile Shop since they’re crazy pros and they might have the right board to use over tile for a walkable floor area. I’m sure it depends on a bunch of factors but can be done in some areas :)
xo
s
Hilary says
I love it! I so wish I had a fireplace. But my currently being installed wood floors are in a herringbone pattern and I freaking love them! And that marble tile is the tile we just bought for the floor of our bathroom. Seeing it around your fireplace makes me even more excited to put them in! Maybe in herringbone pattern? haha
Jessica H says
Just a tip that while the cement board may help with laying tile over brick, my husband and I tiled over our brick fireplace front without it and haven’t had any issues.
YoungHouseLove says
So interesting!
xo
s
Jenn says
to quote my fave macklemore song… “this is *$%&-ing awesome!!!”
looks AMAZING guys! :D
YoungHouseLove says
Thanks Jenn!
xo
s
Jeanine says
I love it!
I just watched an episode of Renovation Realities on the DIY Netowrk & they did the same Herribone pattern with the same marble and I was really loving it. Nice job!
If you’re curious, it was called the Schiding Job, Episode DRVD-1004PH
YoungHouseLove says
Thanks Jeanine! I’ll have to try to catch it!
xo
s
Nelle says
WOW! Love it!!! Can’t wait to see the final finished fireplace, you guys have the greatest ideas!
Amanda says
Ah! I’m in LOVE. This looks so amazing, and I can’t wait to see the finished product. It’s going to be fabulous!
YoungHouseLove says
Thanks Amanda!
xo
s
Courtney C says
So…in reference to the cookie eating…good thing it’s Girlscout Cookie season! ;)
But love love loooove the blue and the tile!
p.s. dying laughing at the “U smell like a fart” disclaimer below. AWESOME.
YoungHouseLove says
Haha! Gotta draw the line somewhere :)
xo
s
stefanie says
this is gorgeous! i totally see the vision, and can’t wait for the finished product! quick, and probably stupid, question: is cement board necessary for any tile project? my partner and i are planning to tile (with marble like this, actually!) our kitchen backsplash, and i’m wondering if we can apply directly to our walls. we are brand new homeowners and just figuring this all out! thanks!
YoungHouseLove says
It depends how heavy the tile is and how far you’re going up (whole wall, etc) but sometimes you can get away without it. I would call or visit a place like The Tile Shop since they seem to know everything, haha! They can walk you through everything you need and help you skip buying anything unnecessary.
xo
s
angie says
love that tile!
Alisa says
I’m now referring to your house as the glitter palace. I LOVE that you guys incorporate so many polished tiles into your decor and it looks so timeless and chic. It makes me really mad that the only part of our house I agreed to not mess with is the fireplace…
YoungHouseLove says
Aw thanks Alisa! You can drop by our glitter palace whenever you’d like to pet the various tile surfaces :)
xo
s
Sherri says
The herringbone pattern looks fabulous. You two have been knocking it out of the park since you have been back from the book tour. All of the projects have turned out so well! And I am in love with the new kitchen color. I want to use it somewhere in my home. Such a tranquil effect. Hope you had a great birthday.
YoungHouseLove says
Aw thanks Sherri! All that travel had us itching to unleash the DIY beast at home! Haha!
xo
s
Mary says
I wish I had known to lay out the tile in advance. My bathroom floor is marble herringbone tile and someone else clearly followed that advice–several boxes of my tile had a very distinct blue hue…too bad my contractor installed it anyhow. Now there are blue spots all over my floor. It would have been a pain, but I really wish I had laid them all out and been super picky.
YoungHouseLove says
Oh man, so sorry Mary! Hopefully when you decorate and hang art and a pretty shower curtain it won’t even be noticeable :)
xo
s
Audrey says
Sherry & John,
If you were stranded on a DIY island and can only bring one saw with you, which one of the following would you pick?
I’ve been thinking about this and can’t make up my mind. You can just give a one word answer (an explanation if time permits but not necessary).
Miter Saw
Table Saw
Reciprocating Saw
YoungHouseLove says
Miter saw definitely! We use it by far the most.
xo,
s
Evin says
The marble is such an elegant and cooling neutral to accompany your cork floors. Love love love the herringbone design and so impressed with the staggering in the vertical section around the hearth. My parents have been talking about tiling over their brick fireplace for years but fear held them back. Perhaps now!
I will be playing with subway tile in the next week or two as it is going to be the backsplash for my son’s play kitchen. Can’t wait!
YoungHouseLove says
Aw thanks Evin!
xo,
s
Yvonne King says
Love it! Redoing the fireplace is high on my list of to-dos. Thanks for the nudge to get it done!
Stacey says
The marble tiles really are beautiful. Can’t wait to see the finished product.
Cleo says
Gah looks so good! You guys are pretty much tiling experts now, right? :)
I love how you work it into your daughters napping schedule so sly!
YoungHouseLove says
Haha, gotta make hay while the kid snoozes!
xo
s
Mikael says
I am in the middle of the planning stage of re-doing our circa 1963 brick fireplace so this post is so timely! I have almost the exact surround sketched out so I can’t wait to see yours! And I am having trouble selecting tile…I stopped by Home Depot today and got some great ideas. Love how yours turned out. Thanks for your terrific blog!
YoungHouseLove says
Thanks Mikael! Good luck with everything!
xo
s
Cara D says
That tile looks gorgeous! I’m tempted to use it in our bathroom remodel,especially at that price.
I have never tiled but I would like to do our kitchen backsplash. Have you ever tiled with glass tile? We are using brown striated glass subway tiles. My cousin has a wet saw I can use but I have been scared to get started.
YoungHouseLove says
We did a border tile in our master bathroom with glass. It wasn’t too bad to cut them with the wet saw. Hope it helps!
xo
s
Stephanie @ Simply Swider says
I am so lusting after that herringbone pattern. It looks amazing! Oh and I agree, grouting is the best part!
Holly says
Do you plan to do anything to inside of the fireplace opening to disguise the transition between tile, cement board, and brick? This is going to be hard to describe, but the part you would be able to see if you stand to the side of the fireplace, look around the opening and see a cross-section of brick, cement board, and tile?
This is the sticking point I’ve been worrying about in tiling my fireplace! We currently have a brass fireplace door covering up the opening, and I want to be rid of it entirely if I tile … but I’m worried about seeing the cement board or a gap between the tile and brick. Enlighten me, oh brave ones!
YoungHouseLove says
Oh yes, we’ll share a detail shot of how we’re using small pieces to create “end caps” for the tile as we go :)
xo
s
Felicity @ Our Little Beehive says
This is too funny – we saw the same sample at HD a few months ago and are doing the chevron in our master bath!
Jason says
I like how you are weaing safety glasses when sicking the cement board to the floor (likely the least dangerous part of the entire project) but not when you are viciously prying at the wood on the mantle or drilling into the cement board!
Tarnya Cook says
Looks great but am I missing something,did you demo the tiles off the floor first and then lay the cement sheet or did it just go over the top?
Anyway love the tiles, they look superb. xx
YoungHouseLove says
There wasn’t any tile there before, it was just a slab of cement with a pattern that we painted white. And since it was sunken below the cork floor we just built right on top of it, no demo needed!
-John
Allison B says
I LOVE this – we have an ugly black granite surround on our fireplace/hearth. Do you think we could do the same process over our granite? We have a wood mantle that is okay, but I’d like to eventually replace it, too.
YoungHouseLove says
I think as long as the granite is solid and level you might be able to tile right over it (I’d ask a tiling pro, like someone at The Tile Shop, and bring pics) or you might have to add cement board to level it out and make for a better foundation, but one of those methods should work! Hope it helps :)
xo
s
Katie says
We have a brick fireplace in our living room and I painted the brick white a while back as a temporary solution to its ugliness. I have wanted to tile it but we use our fireplace ALOT in the winter months. Do you know how this tile holds up to heat? The brick on ours kind of wraps around the right and left sides in front so that its actually inside the firebox if that makes sense? Can’t tell if yours does and if you just left it alone or tiled that as well.
Katie says
Ok I took a closer look (probably should’ve done that before I commented) and yours is just like ours. Will you leave the white brick on the inside edge or paint it black to match the inside of the firebox?
YoungHouseLove says
We’ll just paint that black so it blends in with the rest of the firebox.
xo
s
YoungHouseLove says
Oh yes, I believe marble fireplace surrounds and even marble fireboxes themselveshave been around for years (even in much older homes that use the woodburning fireplaces for heat full time). I think all natural stone is great with heat, assuming it’s installed correctly and to code for your area. Definitely look into that since you’ll be doing the firebox too :)
xo
s
k says
We want to tile our working brick fireplace with marble as well, but don’t really know if there are any fire code issues we should know about. It will definitely be more than 6″ of tile around, but is the cementboard a fire issue? Also, what do you do about the small sliver of cementboard you see on the inside edge of the fireplace opening?
Anyway, it looks great so far!
YoungHouseLove says
Oh yes, code depends on the area, but in our area cement board + tile = the proper way to redo a fireplace surround/hearth. As for that small side sliver, we’ll cover that in a future post (with detail shots) so stay tuned!
xo
s
Gracie says
The tile looks so good!! I’m filing this one away for my next house with a fireplace.
Lee says
It looks fantastic! And I’m so glad you guys gave the messy-ness of tiling a couple of shout outs. I tiled my kitchen backsplash a few months back (after getting inspiration and courage from you two) and I got SO messy. The whole time I was thinking….how do those Petersiks do it?? They always look so clean!
YoungHouseLove says
Haha, oh yeah we get messy!
xo
s
Katie R says
do you think it would work in an entry? You said it’s intended as backsplash and you used us where there will be minimal traffic. :)
YoungHouseLove says
Hmm I don’t think it would work on the floor, just on walls. Hope it helps!
xo,
s
Tara says
Love this! what size spacing did you do between the tile?
YoungHouseLove says
I think they were 1/8th spacers.
-John
holly says
I love this! We recently purchased a house with a stone fireplace, tore down the stone to find the original brick behind. I’ve never laid tile and we’re a little nervous but this is exactly what we want to do and your details are very helpful! Can’t wait to get started on this :)