When we last talked floors in the kitchen, they looked pretty much done.
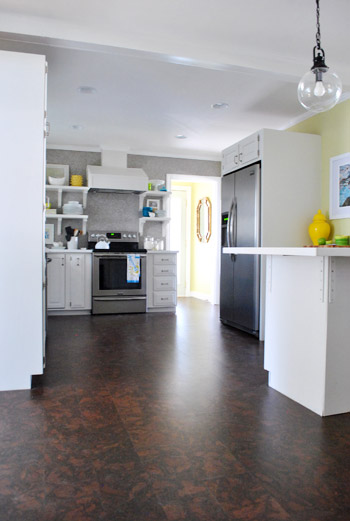
But if you looked closely, they weren’t. They still needed some finishing touches – namely shoe molding to cover the gaps around the edges (which are intentional to allow for temperature expansion and contraction) and some coats of sealant (to keep moisture out of the seams and provide some added durability).
The short version of the “adding shoe molding” step goes something like this: Now you see a gap…
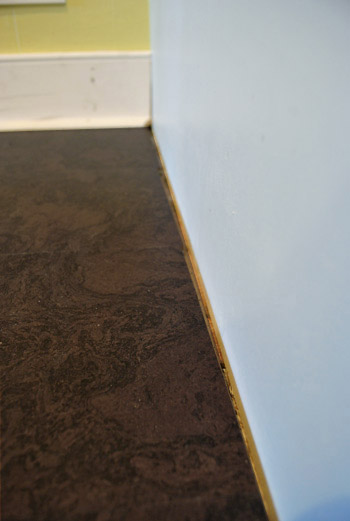
And now you don’t…
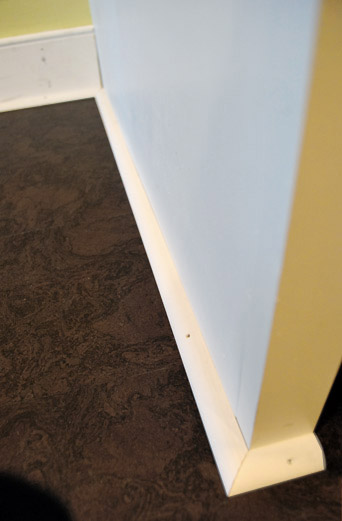
Of course then there’s caulk and paint involved (to cover the nail holes and any seams like where corners meet).
But let’s go with the longer version of the story – which has a few more twists and turns – for folks who like details. The first twist was that we actually ended up ditching our plans to reuse our old shoe molding, despite having saved (and meticulously labeled) all of the old pieces when we removed them a few weeks ago:
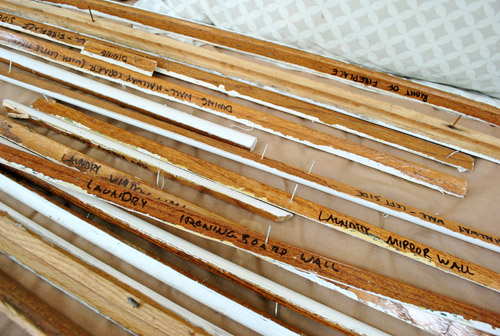
We initially thought that reusing it (after all that meticulous labeling) would make our lives easier. You know, not having to re-cut shoe molding for each span of wall. But when we tried to put some of the old painted pieces in place, they didn’t look so hot. The paint job was a little scrappy looking, and even with touch ups we worried the less than crisp edges wouldn’t look as finished as they could (especially since there’s such a high contrast between the white trim and the dark floor).
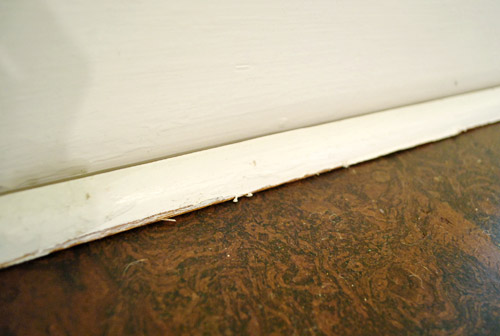
So we opted to install all new shoe molding. We had to buy some new stuff for around the cabinets anyway (like the peninsula, which didn’t have old shoe molding for us to reuse since it was newly added), so it wasn’t a bit deal to pick up a few more pieces of it. We figured it wasn’t worth “finishing” our pretty new floor job with rough looking trim. So in total, it was about $35 worth of shoe molding for a nice clean “like new” (because it is new) look.
Since we don’t own a pneumatic nail gun, we installed it old skool style (although we’ve talked about getting one – maybe for Christmas this year?). After cutting each piece, we’d pre-hammer our nails against a piece of scrap wood to get them in a ways, which minimized how much hammering we’d have to do against the floors.
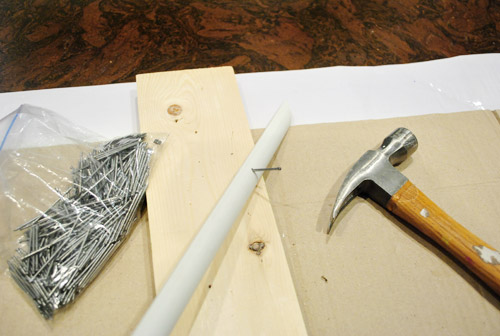
Even when it was ready to nail into place, we still put a piece of cardboard under the work area to keep from banging up the floor too much. Oh, and forgive that piece of baseboard for looking a bit beat up. It was new too (the previous piece was too short since we switched the fridge and pantry location) so we hadn’t painted it yet. It came pre-primed but a bit scraped up.
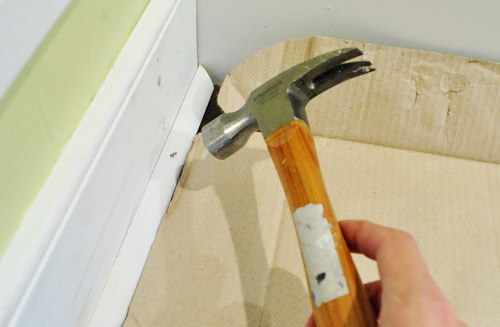
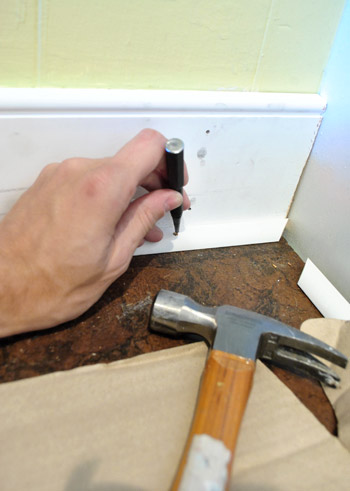
Once the nail was in as far as I could get it with my hammer, I used a manual nail punch to get it in even farther, just beneath the surface. Love that thing. It’s basically just a metal peg with a tiny head that you place right on the nail and bang the end of it to sink the nail in (without leaving big dings in the wood like hammering the nail directly could cause).
I wouldn’t say there were any “big” transformations as part of this step, but if I had to name one – it would be the area around the peninsula, which was lacking both shoe and baseboard:
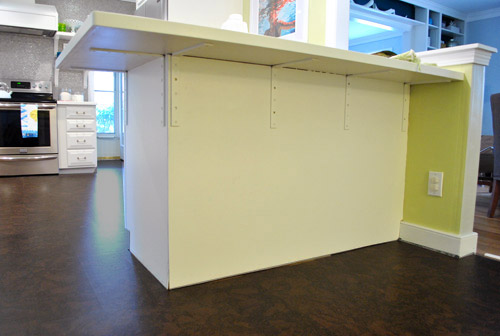
Here it is with baseboard, finally. I’d been dying to add it, but we always figured it didn’t make sense to add until the new floor was in.
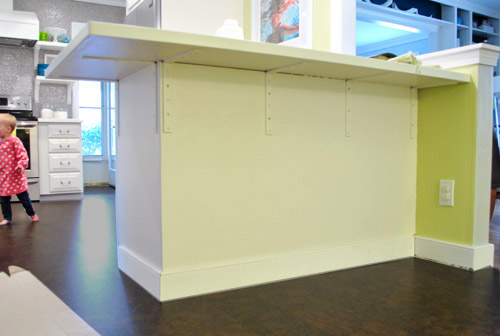
And here’s what it looked like once we had cut the shoe:
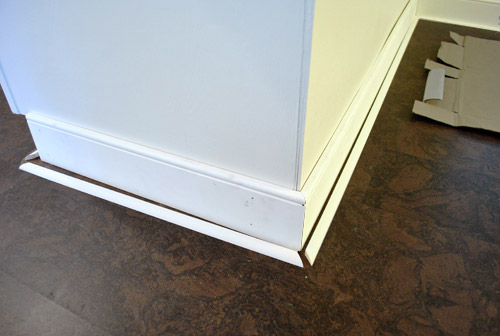
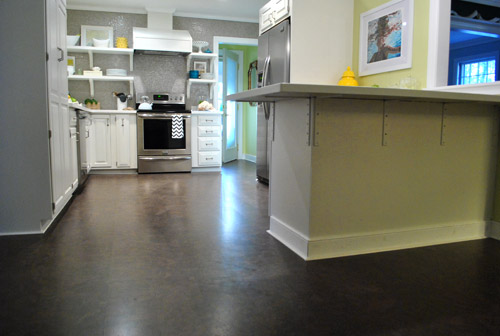
…and now here it is with the shoe all hammered in. It still needs some work (we’d love to add wood molding to hide the metal brackets and add interest to the back of the peninsula someday), but at least it’s looking a bit more finished. When the stools are in there (and you’re looking at it from a normal height instead of squatting in front of it) you actually don’t notice the brackets too much.
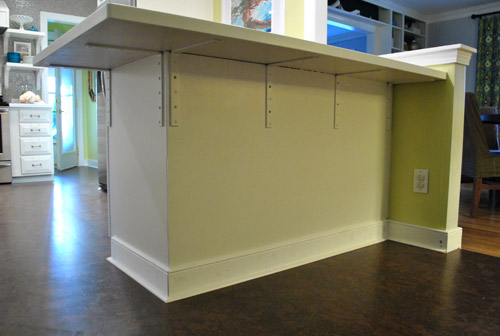
Oh and that picture above is after another important step of the shoe-ing process: Caulk! We always go over all of our seams (including the corners) with a bead of caulk to make everything look more polished. So here’s us gunning a line of it on:
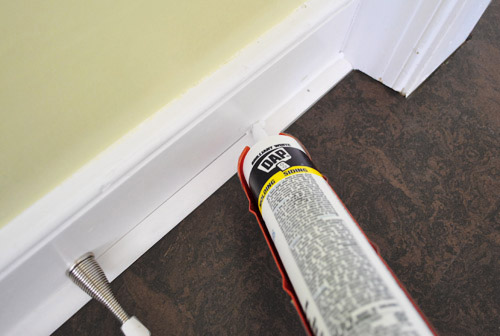
And here I am using my finger to smooth it out. We like to dip our pointer fingers in a cup of warm water to help keep it smooth as we go (and to help keep the caulk from sticking to our hands).
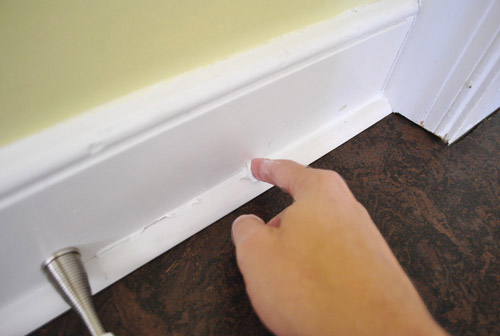
The step after this… well, after the caulk dries… is to paint. We still have to do some of this in a couple of spots, but overall it’s looking much better. But before any “after” pictures, let’s talk about sealing the cork. Even though our cork planks already came pre-sealed, experts recommend sealing them with three additional coats of water based poly after they’re installed to add protection and effectively seal the cracks between the boards (which aren’t sealed even if the tops of each plank come pre-sealed). This also should keep dust and crud from settling into any seams so it’ll hopefully look nice and smooth for the long haul.
We had trouble finding much good info about how this step should go, so we called Lumber Liquidators (where we got our cork) and got to speak with one of their installers. He actually installs and seals the Lisbon Cork that we purchased, so he was able to give us some very clear instructions:
- Hand sand with 100 – 150 grit sandpaper to remove some of the existing finish (“anything higher and you’re just polishing them”).
- Apply a layer of the poly with a 3/8th nap roller
- After that has dried (about four hours according to our poly manufacturer’s label), repeat steps 1 & 2 again… and then a third time.
So yeah, those were his explicit instructions… and we veered off course pretty quickly. But we’re so happy we decided to test things first, because even when experts recommend something, after you painstakingly install something, you want it to look awesome. Not scratched or purple. Yikes.
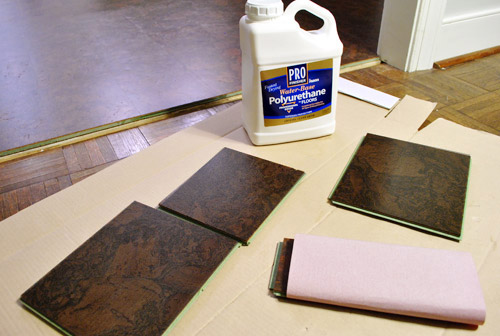
When it comes to what we used, we got some PRO Water-Based Polyurethane from Home Depot since it came highly recommended. We were so glad we didn’t have to use oil-based stuff since when we refinished our first house’s floors it stunk for months- especially on a hot day. Thankfully this stuff has no odor after the four hour drying period. So hooray for water-based stuff.
But our deviations off course began after we picked up the recommended poly. It all started at the sanding step. The sound of that very step made us nervous. Sand our pretty new floors?!? So we did some tests on scrap pieces first. On the first piece we sanded just as instructed with the exact grit he recommended. We even watched the guy demonstrate his hand-sanding technique and replicated it exactly, but it left some very obvious (and ugly) swirly scratches on it. And even after applying a layer of poly it didn’t disguise them. Bummers.
So we thought that maybe sanding in a straight motion might be less terrible looking. Nope… just a different brand of scraped-up-yuck (in person it’s really clear that the surface is scratched, although in this pic it looks sort of like wood grain). Not good.
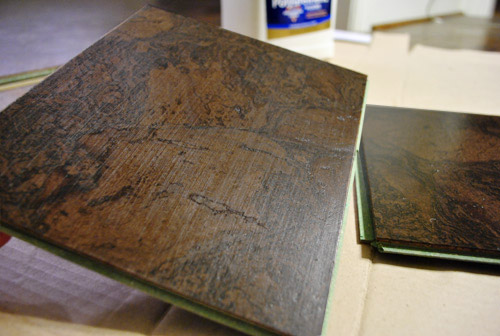
Since sanding seemed to only make things worse, we gave it a go without any initial sanding. We feared it might bead up or slide right off or something without roughing up the surface first. But nope, it worked just fine – and even made the color of the cork really pop. And that, my friends, is how we decided to skip the sanding step. Thank goodness for testing (if we had sanded a corner of the room instead of a test plank, we’d probably be pretty ticked off).
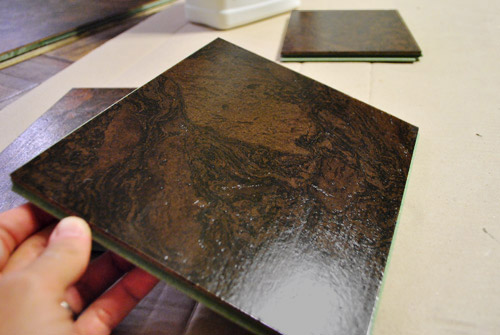
Having opted out of sanding, we went straight to applying it with a 3/8th nap roller, as per the second instruction. Enter “Yikes” moment number 2. This purple party certainly didn’t look right:
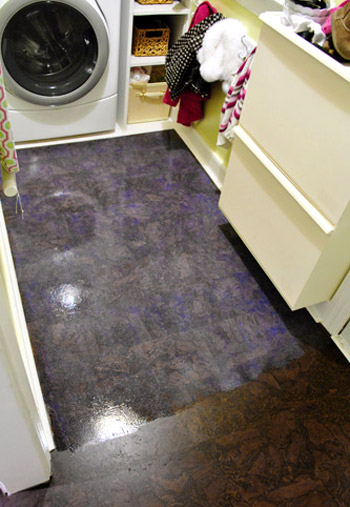
So in a total and complete panic (yes, there might have been some cursing) we quickly wiped up the thick-ish layer of poly that the 3/8th nap roller left with paper towels. It just didn’t feel right. The part of us that lives by the “thin and even coats” mantra (which is how we always apply water-based poly to seal things like wood furniture) decided that we needed to revise this instruction, pronto. So we broke out the least nappy rollers that we had: ultra smooth small foam rollers (the same thing that we use to poly furniture when we stain or paint it).
Worked like a charm. No more glowing purpley-blue haze, just nice thin and even coats to protect things and seal our floors for the long haul. Because just like when you seal furniture, the rule is that thin and even coats adhere better and last longer (anything too thick can crack or peel right off). So it actually makes sense that this works on floors too – all without the purple haze. Whew.
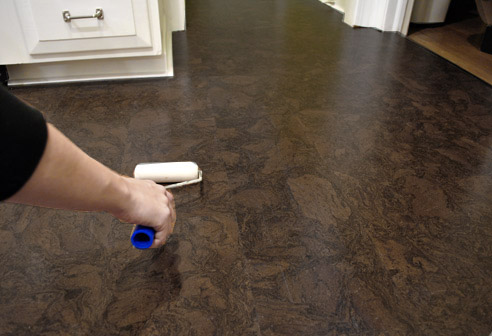
Our revised technique seems to have worked just fine. We can’t even begin to guess why the installer’s detailed tips didn’t work on our sample planks (perhaps he installs lighter cork more often since it’s more common, so maybe the scratches or purple haze aren’t as apparent on that color?).
Thankfully, after three coats (one applied on Friday night right before we went to bed – so we wouldn’t have to avoid the kitchen all day – followed by one on Saturday night and one on Sunday night) it didn’t discolor and it seems to be sealed. Not that we tested it out by dumping water on it or anything. But we have had some small spills that were really easy to wipe up (one even involved boiling water that a friend was using to sanitize her bottles). And it seems to standing up to Clara just fine so far, dump trucks and all:
So now here are some “after”-ish pictures of the floors all trimmed out and sealed, with Clara doing some quality control exercises.
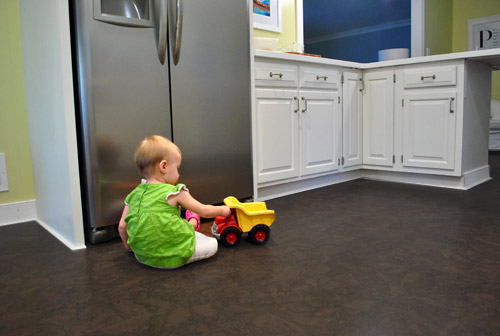
We even dropped a plate (which miraculously didn’t break thanks to the soft cork that cushioned the blow) and there was nary a ding or a dent. And Burger’s nails don’t make any marks either (we heard from someone on this post who has cork floors and a 70lb dog and still doesn’t have any nail scratches, which is pretty cool since we weren’t sure how a larger dog would work with cork).
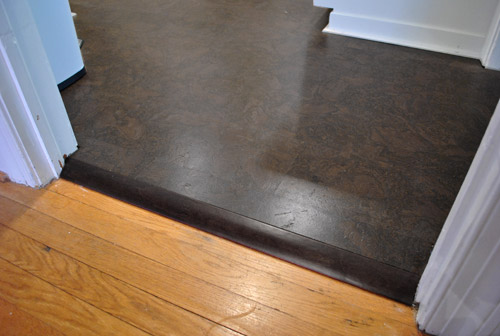
Oh and there was one other thing that are required to “finish” the floors: transitions. We have four doorways in this room, and each needed its own “reducer” – which is a piece designed to join two rooms where one floor is slightly higher than the other. Ours is only about a half-inch higher in the kitchen (due to the asbestos liner under our original vinyl tile, which meant that we couldn’t tear it up and would have to float the cork over it). The guy at Lumber Liquidators suggested getting oak transitions since cork, being a slightly softer wood, could get more beat up on an edge like this where things can catch. LL sold transitions for about $45 a pop, but I found similar options at Home Depot for $29. So after measuring, cutting, and nailing them in – our floors were officially transitioned. Okay, well, I’m actually waiting for two longer length reducers to come in on special order at Home Depot (they only carry 47″ lengths for $17 in the store), so our floors are officially mostly transitioned, to the tune of $140 total (including the special order pieces).
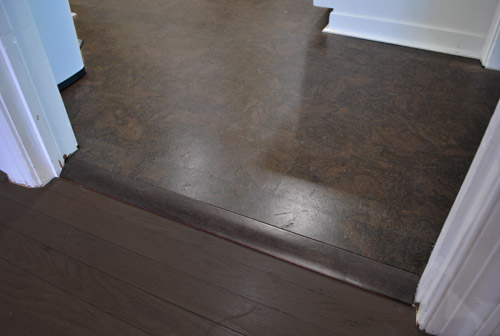
And once we get around to having our other floors stained darker, we might have something that looks more like this (the cork and hardwoods will never look identical, but the same rich mocha tone will unify and help with flow, so our rooms don’t feel as chopped up and disjointed). Ahh, if only getting floors refinished were as easy as Photoshop…
So we’ll call that a wrap on the kitchen floor. And since it was the last big project in the kitchen, we’re thinking we owe you guys some real after pictures and a full-on budget and time breakdown for the entire project. How does that sound? We have some photos to take and some receipts to tally up, so let’s say Wednesday. Same time, same place. In the meantime, what did you guys do this weekend? Any shoe molding installation or sealing going on?

Lindsey @ arkadian belle woods says
Looks amazing! I love the look of the cork flooring!
Vidya @ Whats Ur Home Story says
Wow, The purplish glaze pic scared the hell out of me. Great that your thin coating technique worked. The floors look awesome. I had my own fair share of missteps with my Pottery Barn inspired throw pillow that I made from dish towels project this weekend. All that was worth it in the end.
http://whatsurhomestory.com/dish-towel-throw-pillows/
YoungHouseLove says
They look awesome!
xo,
s
Vidya @ Whats Ur Home Story says
Thank You!
Vidya
Casey says
I’m excited to see what you do with the stools and back of the penninsula!
Kristen @ Popcorn on the Stove says
Ooo that shoe molding looks fancy! Definitely helps bring the kitchen together. It really does look great and you two did a fantastic job!
I’m so glad you were able to seal the floors in one night. Nothing worse than not being able to use a central room for an extended period of time.
Erika @ thelindenlife says
The whole kitchen looks amazing! The baseboards add so much to finishing the floors. Glad the it passes the Clara play test!
Claudia says
Dudes, it looks AWESOME!!! I am bookmarking this for when – not if – we re-do our kitchen/dining room floors!
YoungHouseLove says
Aw thanks Claudia!
xo,
s
annabelvita says
Floor is looking great and HIGH FIVE you guys for finishing your kitchen pretty much all by yourselves at the same time as writing and shooting a book, and looking after a baby, a dog and a blog!
This weekend I half finished a filing cabinet makeover! I love it so far http://annabelvita.com/ta-da-filing-cabinet-make-over
YoungHouseLove says
Aw thanks Annabelvita! High five back atcha! And congrats on the filing cabinet makeover – looks awesome!
xo,
s
Sara says
typo: the first time you said you “deviated [off] course” (just tryin to be helpful!!)
Looks great, guys!!!
YoungHouseLove says
Thanks Sara!
xo,
s
Ainhoa@ALittleBite says
I love the first shot and the last one! The new floors look great.
Melanie @ Mailbox Journey says
I had a crazy, busy, but awesome weekend. I re-caped it here: http://mailboxjourney.com/2012/03/19/weekend-wrap-up-2/
Can’t wait to see the full budget breakdown! & what it looks like with those stools!
YoungHouseLove says
Wow – what a whirlwind!
xo,
s
Crystal says
The new floors look amazingly rich and add such a nice contrast to the light and bright kitchen. Great job!
Liz says
Everything looks so great, especially the molding around the peninsula! I’m so jealous of your kitchen! Why did you choose to use cork instead of hardwood flooring? I think it looks great but don’t remember the reasoning for that.
YoungHouseLove says
We had hardwoods in our first kitchen and loved them, but we were so intrigued by cork and found it for a great price! It’s softer underfoot (not as cold, less breakage when things are dropped, and eco friendly) so we went for it!
xo,
s
Rebecca @This Nest is Best says
We’re getting a quote on floor refinishing tomorrow (this is a DIY we are NOT equipped to handle! lol) and seeing your dark mocha floors makes me so excited to go for it! So rich looking :)
Kate says
I just “Ooooo” and “ahhh-ed” at the last photo – the matching dark wood floors are dreamy!
YoungHouseLove says
Aw thanks Kate!
xo,
s
Jing says
woo, looks really nice, maybe will do our kitchen floor like yours.
Barb says
Oh, my!!
Mission accomplished!
Job well done!!
Finished at last!
Stunning beyond words!
I want a kitchen like this!!!
Time to sit back and enjoy!
Do you feel like the rest of the house will be a ” piece of cake”? What is next on the schedule.
Happy Birthday, Sherry!!!! 30 is a big milestone. Enjoy it to the fullest!
B
YoungHouseLove says
Aw thanks Barb! John actually decorated the kitchen with all this ribbon for me, so I woke up and walked in and it was like he gift wrapped it for me. Haha. Next on the agenda is probably a bunch of things (some outside upgrades, some cheap and easy bathroom stuff like painting and redoing some mirrors and adding art, etc). Then this spring we want to build a huge walk-out deck, so that’s probably the next big thing!
xo,
s
Pamela @ Pink Hammers & Sippy Cups says
Ooooh these floors are just so pretty! I’m seriously considering cork for our attic we’re renovating! And thank god you guys tested this first! What was he thinking?? Yikes!
Monika says
Wow guys! It looks so polished and, well, finished! Whoopee! I love the foreshadowing of the newly refinished floors some time in the future. That will look spectacular!!!
Abigail says
Wow, this kitchen is really looking good! It’s amazing what a little moulding can do to upgrade the look of a room. It’s fun watching it evolve.
em says
I don’t know if you fixed the problem you were having get an accurate picture of the floor cover or if sealing made a difference, but the floors look much browner and less orange to me now. Looks great!
YoungHouseLove says
Yes, it was just photography issues. We’re definitely still learning how to shoot things so they look real and don’t have crazy color undertones that aren’t there in real life!
xo,
s
Krystle @ ColorTansformedFamily says
I didn’t realize you were planning on staining your existing wood floors. It will look awesome! I have some serious cork floor envy going in right now. I don’t think it would work in our house though. But it’s beautiful.
MegRSB says
We were thinking about using the cork shoe molding but after seeing your pictures I am loving the regular white. Thanks for the tips on sanding/poly. That/s the part of the process that makes me the most nervous. Can’t wait to attack our kitchen floors this weekend and no longer mind the delayed installation because we can reference your tips! Many thanks!
YoungHouseLove says
You’re welcome Meg! Good luck!
xo,
s
Ariane says
I just finish the bathroom upstairs, which we started … almost 2 years ago ! well, it needs some art (and new towels, I know …) but it’s getting there.
I really like the dark color of your cork flooring … imagine if it were chocolate …
YoungHouseLove says
That would be dangerous. Haha. I think Burger would just lick the floor night and day.
xo,
s
SingleMama says
I was a little unsure when you were posting the first pics, but I love the final result! Looks amazing!
YoungHouseLove says
Thanks SingleMama!
xo,
s
Julia @ Chris loves Julia says
Gorg! You guys must be feeling so happy with your new kitchen. SUCH a transformation! We did baseboards this weekend, too! …and I am kinda in awe that you did it without a nailgun. It took us a good 3.5 hours WITH a nailgun.
YoungHouseLove says
Oh man, so jealous of the nailgun! That popping sound is music to our ears after all that banging. Haha. Thank goodness Clara sleeps through it!
xo,
s
Karen F says
Looks great! Thanks for sharing the good, the bad and the ugly. I audibly gasped when I saw the pic with the purple floors – so glad you were able to get the poly off!! Yikes!
As for me, this weekend we FINALLY started putting frames up on our gallery wall (that I’ve been talking about for 3 months, and we may or may not have had newspaper templates up for the past month or so…)
YoungHouseLove says
Haha, congrats on getting started!
xo,
s
Karen F says
thank you, and happy birthday Sherry!!
YoungHouseLove says
Aw thanks!
xo,
s
Jess @ Life happily ever after says
I LOVE the look of the new cork floors. Good call testing it first. I think the dark hard woods will look great with the cork. :)
abby says
Your cork looks AMAZING! We’re working on our adorable midcentury ranch, so we also did kitchen flooring this weekend. We spent hours ripping out cork (a terrible color, unfortunately) and carpet (yes, carpet in the kitchen!), scraping up linoleum and doing the tile thing. It’s been lots of work, but I am SO HAPPY WITH EVERYTHING. We are on a tight budget (I’m starting a business and my husband is a grad student), so we’re DIYing it all and I’m so excited with how it looks!!
And I totally have the remodeling bug – my arm is still sore from grouting, we have 2 months worth of projects left on the kitchen and I am obsessed with bathroom ideas for the fall… and I have a folder of next-house ideas, too.
abby says
PS! pictures of our weekend progress posted here: http://acheerfulheart.wordpress.com/2012/03/18/painting-staining-and-tiling-kitchen-pt-8
YoungHouseLove says
Wow- congrats on all that progress!
xo,
s
YoungHouseLove says
Haha, I love it! A girl after my own heart. Sounds really exciting! Good luck with everything.
xo,
s
Vanessa says
I’m exhausted from reading about all this work that I did NOT do. Looks great and I seriously need a nap.
Thought, and I don’t have these often to feel free to cherish this moment…
Have you thought about doing under the penninsula in a little chalkboard paint for Miss C? A little hiding area that only she can get to and doodle away. Could be cute for her and any future mini Perstericks. Since you can get chalkboard paint in almost anycolor you could do it in the grellow or even a brown to bring the floor coloring up.
Ok – now my head hurts for sure.
Keep up the great work.
YoungHouseLove says
We did think about that but worried she’d smack her head on the peninsula since she’s almost as tall as the counter. We do think about adding something to the side of the pantry someday- so perhaps that’s the spot for it!
xo,
s
Deanna @ TheChangingHouse says
Oh my gosh! They’re great! The trim gives it a really clean, finished look. Amazing!
My hardwood is espresso stained, and I am constantly cleaning my floors (dust always makes an appearance — even RIGHT AFTER I SWIFFER! Grrr…) Let me know how you find your new dark floors….
YoungHouseLove says
Will do! We had mocha floors about this tone in our first house (every room) although they might have been a smidge lighter and we didn’t have that many dust issues. I mean, if we didn’t dust and dust bunnies popped up they seemed to be well deserved (gotta clean the house, haha) but if we did they looked good for a while. One secret was that I use a hand-vac to touch up the areas like corners and moldings between vaccuumings (usually when someone is on their way over and I’m panicking). Haha.
xo,
s
Beth says
Was just reading through the comments, and had to post a helpful tip…use a bounce sheet on your swiffer and lightly go over the floors. It will help to repel the dust.
YoungHouseLove says
Ooh sounds like magic!
xo,
s
katie says
Order these and you will never go back. Reusable swiffer pads. They work better, they come in cute colors, and they are machine washable!! No it’s not my store I just absolutely love them!!
http://www.etsy.com/listing/61437354/3-swiffer-sweeper-pads-double-sided-pick
YoungHouseLove says
Ooh fun!
xo,
s
John@Our Home From Scratch says
Good try on saving the shoe molding! Thinking about staining your other floors? Wow, that’ll be epic.
YoungHouseLove says
Oh yes, we’d love to tackle that sometime, although we’d really have to think about how to get all the furniture cleared out (maybe by doing them some parts at a time?).
xo,
s
Lenore says
Looks awesome!!! I’ve been curious since you first posted your new floor, what does the transition look like around your hearth? Did you get same same transitions as the doorways?
YoungHouseLove says
We special ordered something long enough but we have yet to pick it up and install it. Will keep you posted with updated photos when we do!
xo,
s
Lynn van Slyke says
The floors are beautiful. Wonderful job as always! Now my husband and I need to get on the ball and finish our cabinets so we can install those floors in our kitchen =D
Shelby says
We just had to install a bunch of window trim, door trim, baseboards and even did a scrap wood wall in our new family room with this nailer/compressor we got at Sears. It isn’t heavy duty or anything but we have found it works great for little projects around the house (like installing moulding). We don’t have a compressor so it would have been major bucks to pick up a compressor and nailer so we went with this instead and couldn’t be happier. I don’t know what you already have but I saw your comment about getting a nailer and just thought I would mention it. And I have to say your floors, and kitchen, look fantastic! We redid our kitchen ourselves 5 years ago before our kids were born and I can’t imagine doing it all with a toddler running around. I am so impressed!
YoungHouseLove says
Thanks so much for the tip! It looks awesome!
xo,
s
Benji says
Would love to see a pic of the corner where the peninsula meets the half wall. I was wondering how you would handle the area where you had jig sawed the cabinet backing around the baseboard.
YoungHouseLove says
We just caulked it and it looks great! Especially once the stools are there. You can see it in this pic: http://images.younghouselove.com.s3.amazonaws.com/2012/03/seal-under-peninsula.jpg
xo,
s
Pamela says
I just experienced your sanding/poly woes trying to finish my ikea butcher block countertops that I stained ebony. I learned first that sand lightly meant use a finer sandpaper than they said and a really, really light touch. And yes, you could see it a bit, but it dissappeard after the next coat of poly was on. And the purple haze isn’t a problem, it actually helped me see where I had already applied the poly. It dries totally clear. The super thin coats weren’t working for me (turned out streaky because I wasn’t getting even coverage).
YoungHouseLove says
Thanks for the tips! We tested the purple haze issue on a cork plank and it didn’t dry clear! It had a blue/purple undertone for the long haul! Eeks. Maybe it depends what surface you’re doing it on, or if a thicker nap roller really does deposit too much sometimes (a regular roller might leave less on so it dries clear)?
xo,
s
heather says
Yay! They look so nice you guys. I’m so happy for you, that’s huge! Andy told me this weekend that we’re likely going to re-do the deck on the side of our house before our addition (the other side of the house) so we can have a reliable and safe way to get in the house. I’m rather excited about it.
Also exciting? I finally started assembling the darn rug I’ve been doing for the Pinterest challenge for months. I don’t get to work on it too often, which is the time issue – but it’s finally coming together. Even if it’s still super small.
http://www.likeacupoftea.com/pinterest-challenge-winter-2012/
YoungHouseLove says
Haha, the rug looks great! And the deck news is so exciting! Keep me posted!
xo,
s
Lori says
Looks gorgeous! That must have been pretty scary seeing that purple haze in the laundry room. I would have freaked out!! Great tip for trying things out on scrap wood before going to the real thing.
Do you still have plans to add moulding to the peninsula or do anything to the bar stools?
This weekend I organized the pantry and now we can all find what we need – major improvement that was way overdue :-)
YoungHouseLove says
Yes, we’d love to add molding to the peninsula but aren’t sure about the bar stools. Now that the floor is so dark the silver color ties into the stainless appliances and looks nice and balanced. Might live with them a while before we defile them with spray paint! Haha.
xo,
s
Sheela says
You were so smart to test things out first! Everything looks great! And happy birthday Sherry! My little guy just turned six last week. Not so little anymore!
YoungHouseLove says
Aw thanks Sheela!
xo,
s
Crystal @ 29 Rue House says
You have to get a nail gun! :) You will not even know how you lived without once you have it (sort of like Clara but not as much ;) . We’ve got a 2 yr old and a 6 mth old and the amount of noise that our ears are saved because of considerally less banging (it’s just one quick pop of air and the nail is in + no extra banging using the nail punch since it goes in plenty far the first time) is definitely worth the cost. Plus there is the huge time savings.
Nice job on the floors! They look so nice and soft on the feet!
YoungHouseLove says
Sounds amazing!
xo,
s
Constance says
That looks great! Don’t remember if you already addressed this, but are there any special considerations with someone sitting on a bar stool on cork floors? Guessing if high heels aren’t an issue than that isn’t either, but wondered if it was informing your counter stool choice.
YoungHouseLove says
We have heard that padded feet help so we put them on our stools, which actually help them slide in and out, which is nice functionally as well. Other than that, so far so good!
xo,
s
A.J. says
actually, yes we did install some quarter-round this weekend! We moved into our house in July and went through the same painstaking process of labeling all the baseboards for reuse…only to decide that they looked really old and crappy. So we got some nice thick baseboards at Menards and have been installing them on free weekends ever since. This weekend it was our office’s turn…it’s black and the white moulding really pops. Will have to share a pic later!
YoungHouseLove says
Amazing! Would love to see a pic!
xo,
s
Kim says
Could I get the details on the caulk you used to fill the gaps please?! We just installed new floors in our kitchen refresh (we painted our cabinets too!), and I was wondering what to do with those cracks and nail holes! Thanks!
YoungHouseLove says
We like Dap window and door caulk that’s white and paintable. Very important attributes to us (not paintable is a nightmare since paint won’t stick to it).
xo,
s
Erin @ One Project at a Time says
Looks great you guys! Don’t you love how the small, detail pieces make such a difference and add polish at the end?
Unfortunately, we’re at the beginning- having started our third and final bathroom remodel this weekend. If all goes well, it will be completed by our 1 year anniversary in our new house, making three bathrooms and a slew of other projects all completed in year one. Cross your fingers for us! http://oneprojectatatime.blogspot.com/2012/03/oops-we-did-it-again.html
YoungHouseLove says
Fingers are officially crossed!
xo,
s
Carley says
it’s amazing how the shoe molding really just gives it that finishing touch that makes the kitchen look even more amazing! Looks awesome! You guys rock!
Sarah C says
I’m intrigued by the fabric in the old shoe molding photo. I’m assuming that it may be from a secret book project since I don’t think we’ve seen it around before. Any hints on what it could possibly be?
YoungHouseLove says
Wow- good eye! Those are actually giant pillows that are on the daybed in the sunroom. We had them on the daybed in the sunroom of our first house too, so you can see them on the House Tour page!
xo,
s
Sarah C. says
I’m trying so hard to spy secret book projects that may be lying around :) I took a look at the daybed photos and I can see why I was confused because the pillow’s pattern is much more subtle from a distance. But I still have hope that I may catch something that my eyes aren’t supposed to see before the book comes out!
YoungHouseLove says
Haha, I love it! I’m sure you will!
xo,
s
Anna says
I just love, love, love that floor. Itis really stunning.
YoungHouseLove says
Aw thanks Anna!
xo,
s
Bethany says
So so glad you did not sand the cork! We installed the exact same brand/style of cork flooring years ago and learned very quickly that only the top layer of the cork is that beautiful rich color. So I panicked for a moment when I thought you were going to sand them. Phew!
YoungHouseLove says
We’re so glad too! Thank goodness for testing!
xo,
s
Loren says
Oh my goodness the floors look great!
I was going to comment that those brackets on your peninsula are really well camouflaged because I’ve never noticed them before. Lovely job.
YoungHouseLove says
Thanks Loren!
xo,
s
Jamie says
Wow, your hard work payed off! Looks fantastic! Such a bummer, all that work on saving the old molding, but in DIY even the best laid plans go awry! The new molding looks so pretty and shiny!