Our Florida house reno is moving right along. Wanna see it?! We do too! That sounds like a joke, but I’m serious. We haven’t seen any of these changes in person yet, so all of the pictures in this post are from our contractor who has been working on our house over the last two months. So please forgive us if some are a little blurry (like the one below) or not exactly the same angle as our before photos. We’re happy to have any pictures we can get! And when we finally LIVE THERE (there’s still not an exact moving date pinned down – but fingers crossed for sometime next week) we’ll share approximately 4378 photos and videos. And that is a promise.
Today we’re going to share some major progress that has been made in FIVE different spaces that you saw in the “before” tour (and yes, we saved our favorite for last!). So if you haven’t seen the “before” photos or video tour yet, please check that out first. It will help this post make a LOT more sense.
This house is in no way going to be finished when we move in. Most of the renovations so far have been focused on getting it to “livable” (you know, a functioning HVAC system, plumbing repairs so the toilet can actually flush, no more holes in the floor, etc). We also found out along the way that we had to replace all of the drywall downstairs (due to some old water damage). So we took it as an opportunity to do some “makes-sense-while-the-house-is-torn-apart” updates too – like adding a bunch of extra recessed lights to our kitchen and vaulting the two kids’ bedroom ceilings while things were all opened up.
The Kitchen
A lot has happened to this space since we took the before photos in early February. We always like a phase 1 kitchen remodel, so we decided to work with the existing layout, appliances, and lower cabinets. That way we can live with the house for a while before deciding what a more extensive (and more expensive) renovation should look like.
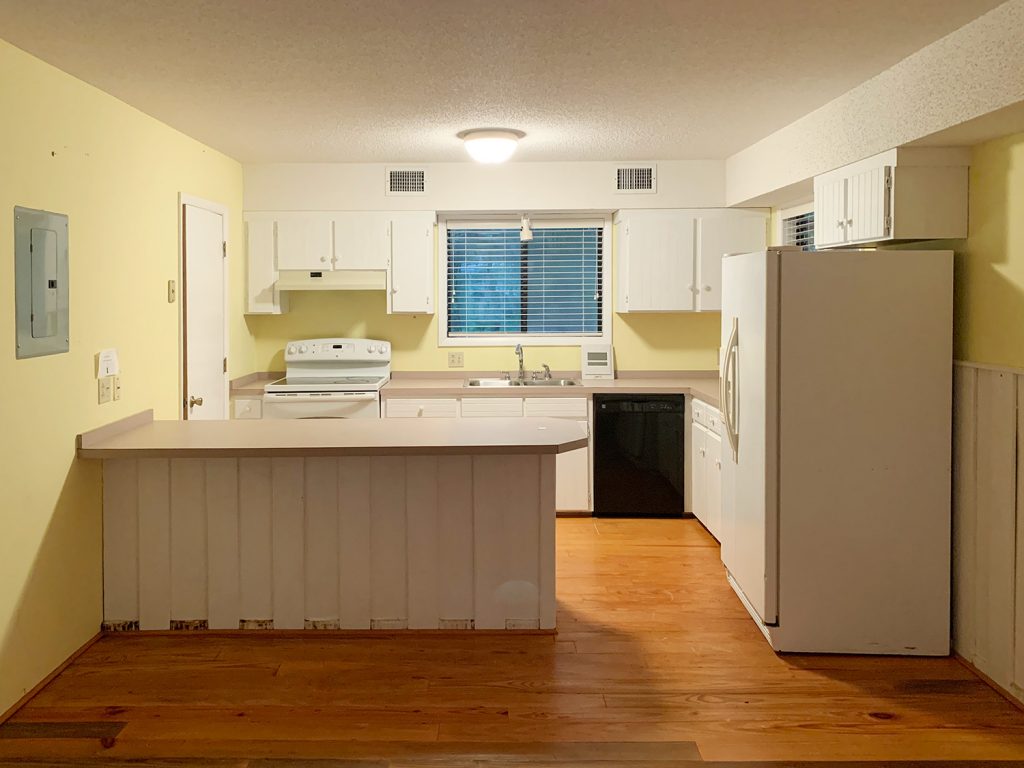
But for this phase we were excited to nix the soffit, the upper cabinets, and the peninsula, all of which made sense to do since we were reconfiguring the HVAC to make it functional, replacing all the drywall, and repairing the floor. And it’s a good thing we didn’t keep that peninsula and assume the flooring ran under it – because IT DID NOT!
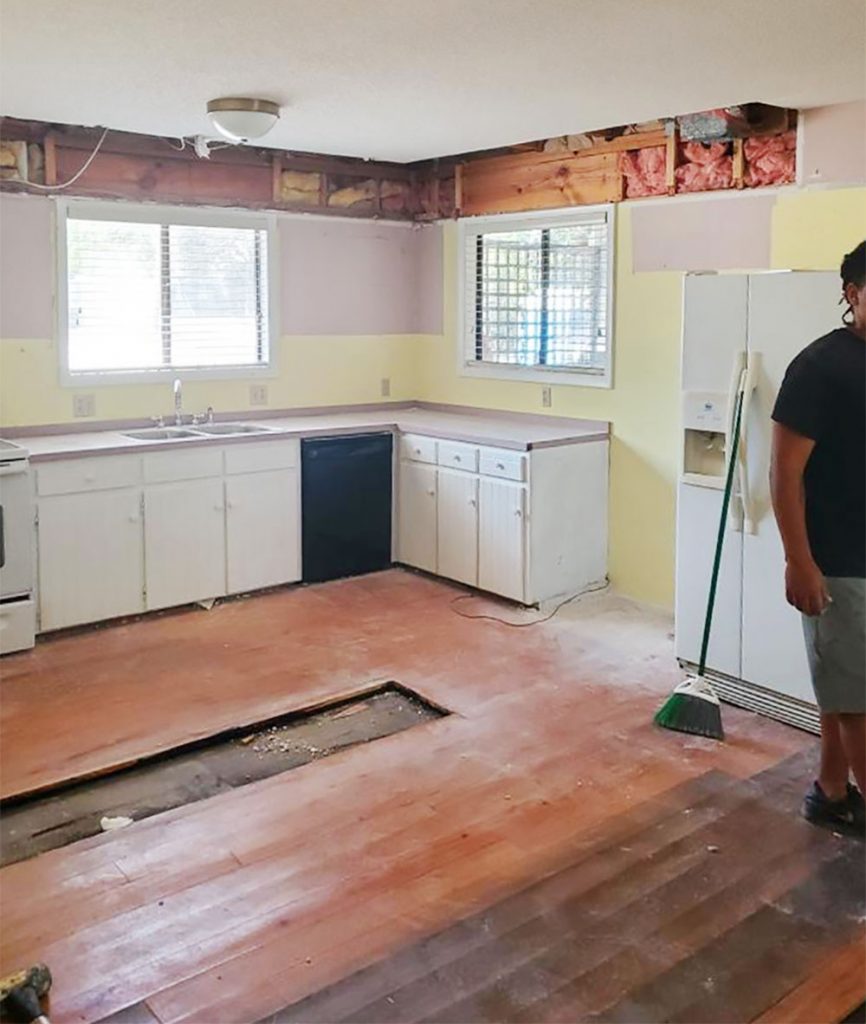
Here’s how we solved some of the biggest issues we had with the room:
- Removing the soffit. We rerouted the HVAC ducting that ran through that heavy bulkhead into the walls instead (when you’re redoing the HVAC system and all of the drywall this is a lot easier to do).
- Brighten things up: We added 6 new recessed can lights to make the room much brighter, and also cleared some overgrown brush outside that had blocked sunlight from streaming into that part of the house.
- Wave buh-bye to the popcorn ceilings: one silver lining to learning that all of the downstairs drywall had to be redone was that we could have smooth ceilings instead of textured ones
Also, I love how removing the cabinets revealed some sort of lavender, mauve-ish paint underneath… which just happens to be the exact same color as the laminate countertops. Can you picture this kitchen being ALL THAT COLOR back in the day? Made us laugh so hard.
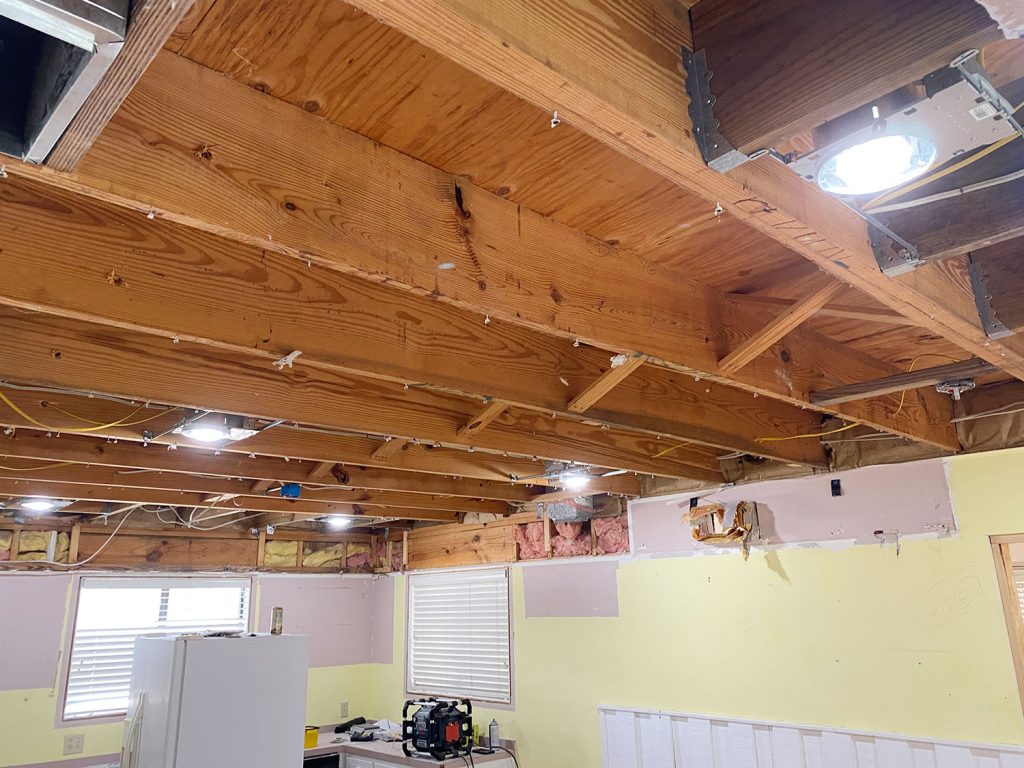
After those six new recessed lights went in, along with fresh drywall, this is where we were (this is mid-floor-patching, as you can see). It’s hard to tell from photos, but when our contractor FaceTimes us it’s crazy how much brighter it is!
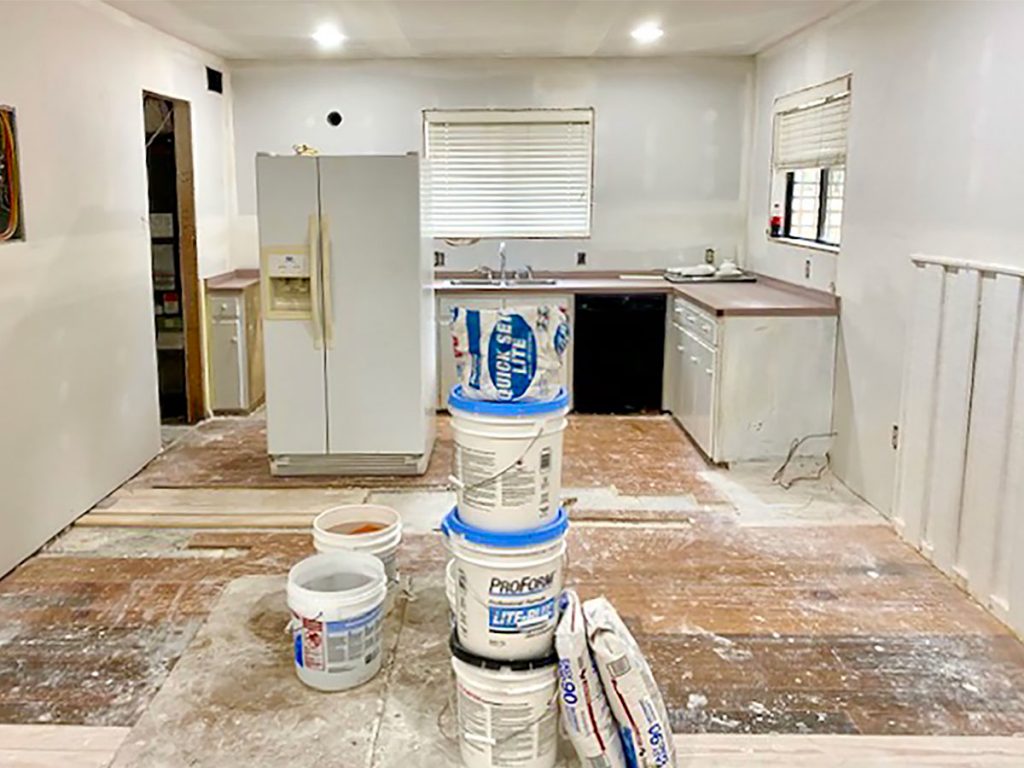
Here’s the before shot again for reference. Obviously this was taken on the darkest rainiest day (as is our tradition – more on that weird house-buying phenomenon of ours here). And we know once there’s some light paint on the walls and the floors are all redone it’s going to look even more light and airy in here.

We’ll complete the “phase 1” portion of this kitchen ourselves by painting the cabinets, installing some shelving, and trying something to improve the countertop situation. But let’s take things into the bedroom, shall we?
Our Bedroom
You may remember that we’re also closing off part of the wall between the kitchen and the old formal living room so that it can become our bedroom. It’s the perfect spot for our bedroom because there’s a natural place to add an ensuite bathroom and we can still sleep on the same floor as our kids. Plus, we can’t wait to wake up and look out that wall of french doors.
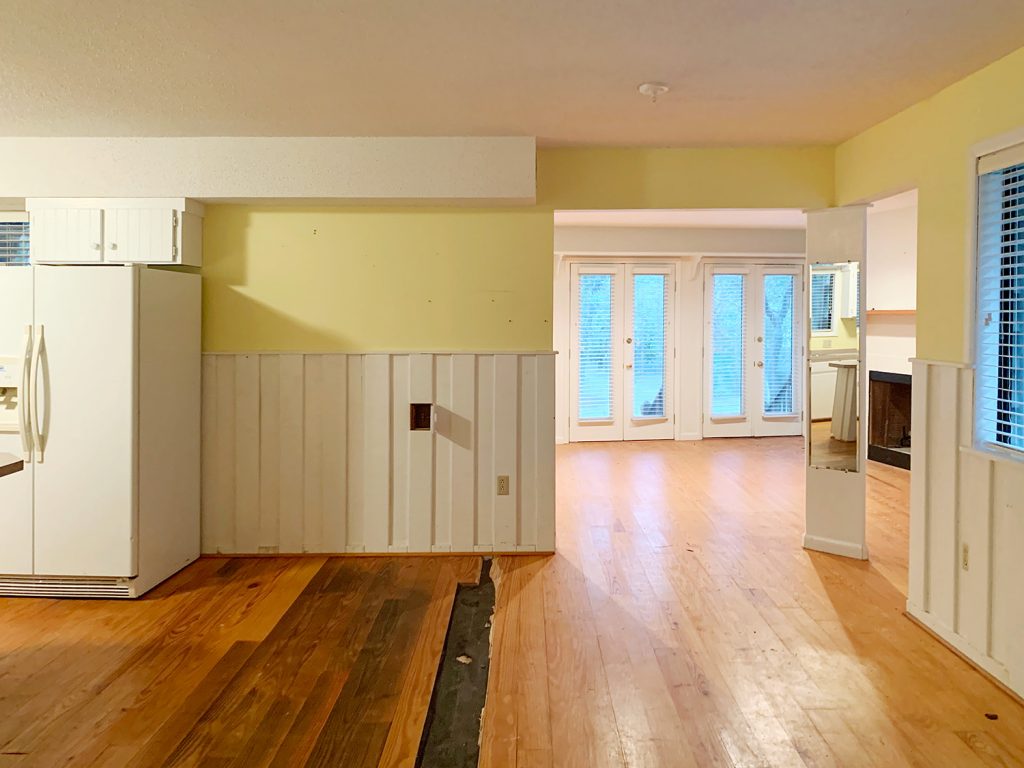
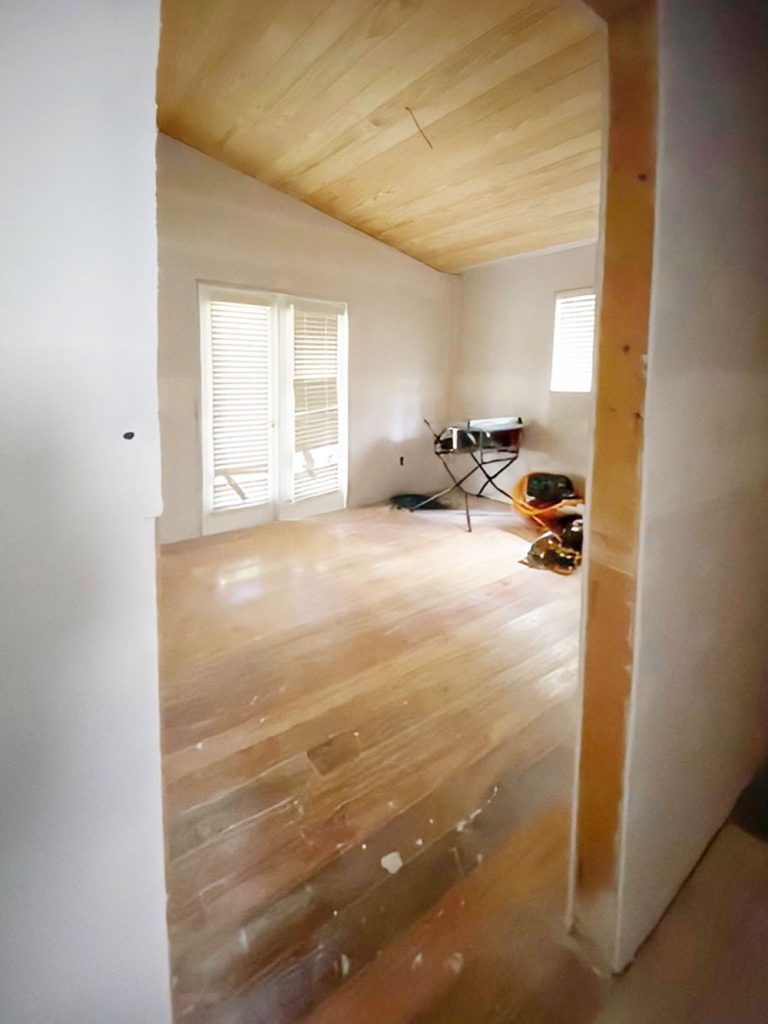
But in order to make that happen, we needed to close off that 5′ opening between the rooms (which also gives us a wall in the bedroom that fits our bed and two nightstands). So here’s what the view is looking like more recently.
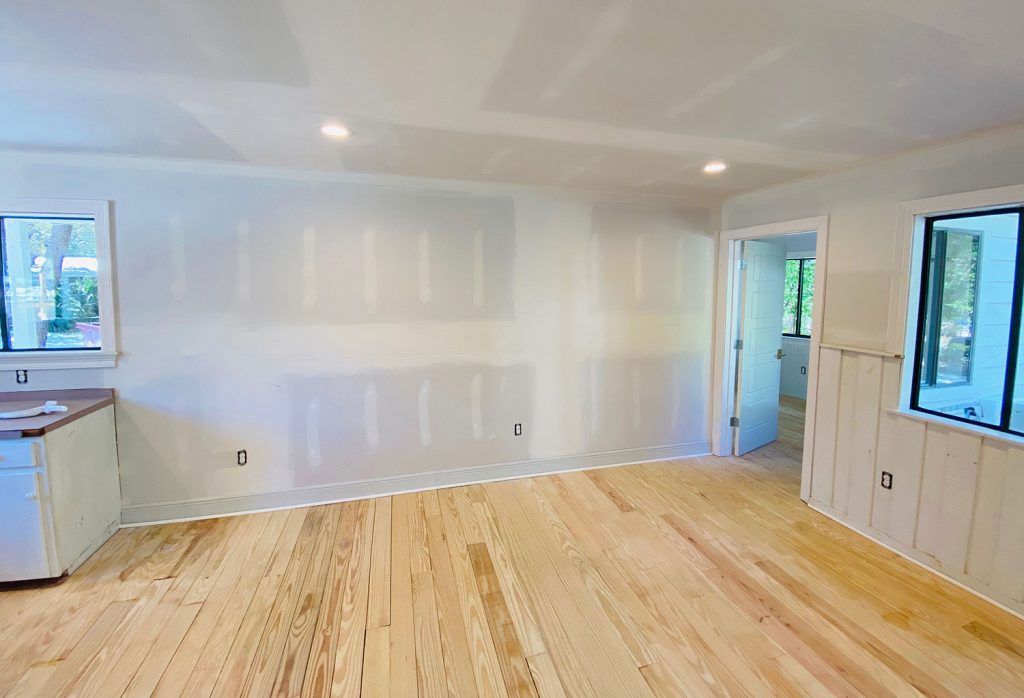
The photo above also helps you see how we have room to add a little living/seating area in front of the kitchen zone. It’s hard to get the scale from furniture-less photos but Sherry did some helpful demos in our current house to show the size of some of this house’s rooms by comparison – and even showed what we’re thinking for the living zone downstairs (just click the circle that says “FL house” on our IG profile page) but there’s plenty of space for more than just a kitchen here.
Here’s what that former opening looked like from within the bedroom. Again, those double doors on the right of the photo below will eventually be where we access our ensuite bathroom.
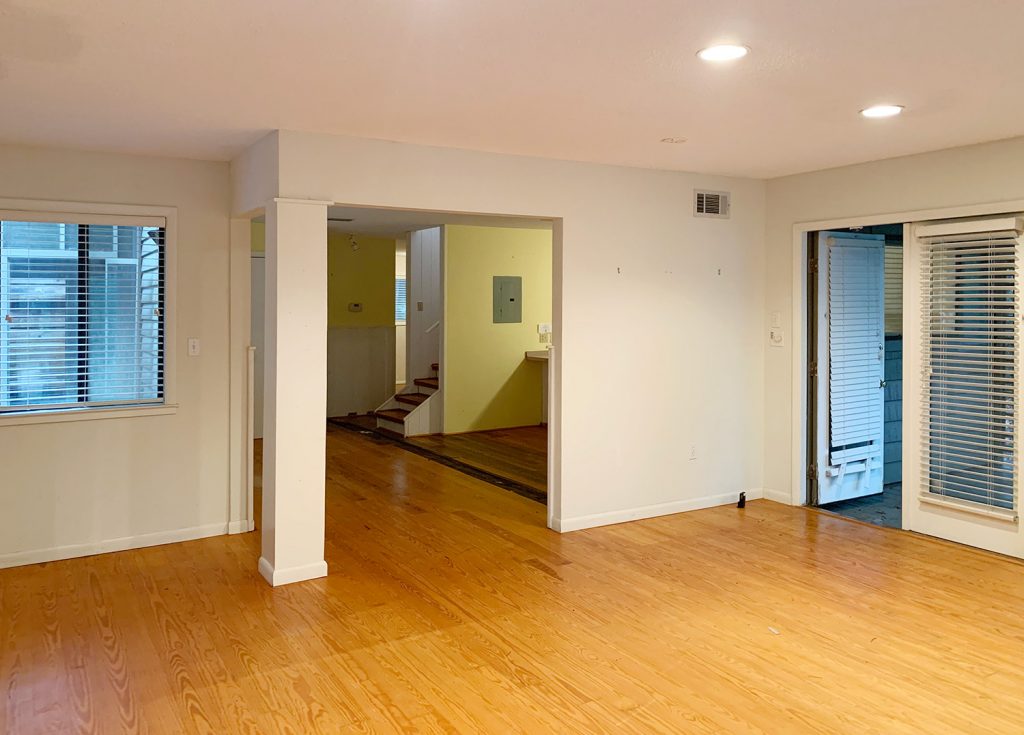
I don’t have a comparable angle of it done, but here’s a progress shot of closing off that wall. It’s hard to see, but it creates a standard doorway on the other side that will be the main entrance to the room. And best of all… there’s no more weird triangle post with a mirror on it.
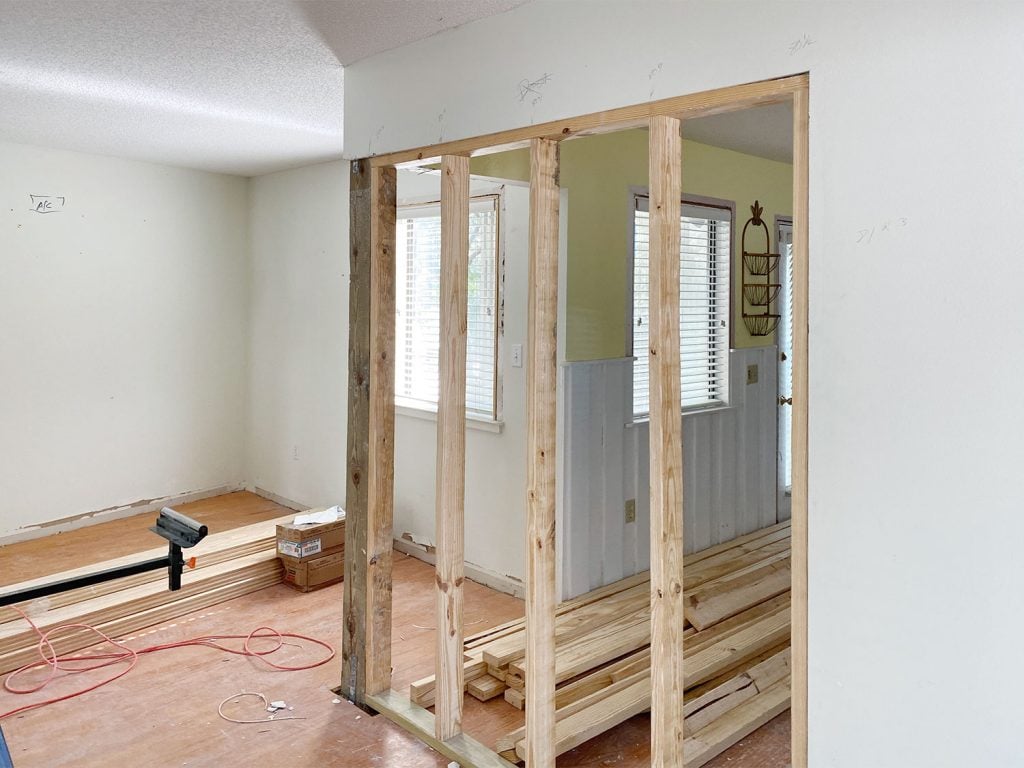
RIP little angled reflective spot for outfit checks.
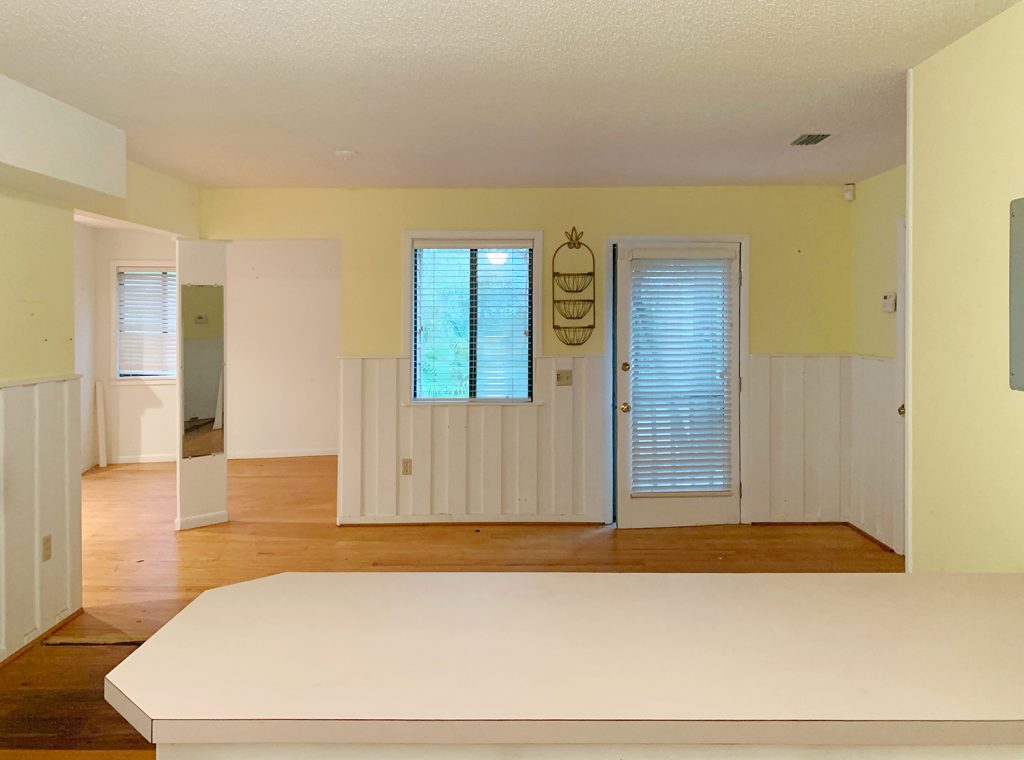
And here’s that shot from the side of the room with the wall closed off again, just for comparison’s sake. The freshly sanded floors are half done, but already looking good!

Now on to the area that we got the most questions about after our post full of before shots…
The Laundry Area
We knew we’d have to relocate the laundry zone since the original hook-ups were in what is becoming our son’s bedroom. We both prefer side-by-side appliances (vs. stackables) with space on top for folding and sorting, so pretty early on we keyed in on this oddly deep closet at the bottom of the stairs. Which yes, had a very strange pass-through to our daughter’s bedroom (imagine someone opening what they thought was a coat closet or powder room door and busting in on your bedroom from a second entry point!).
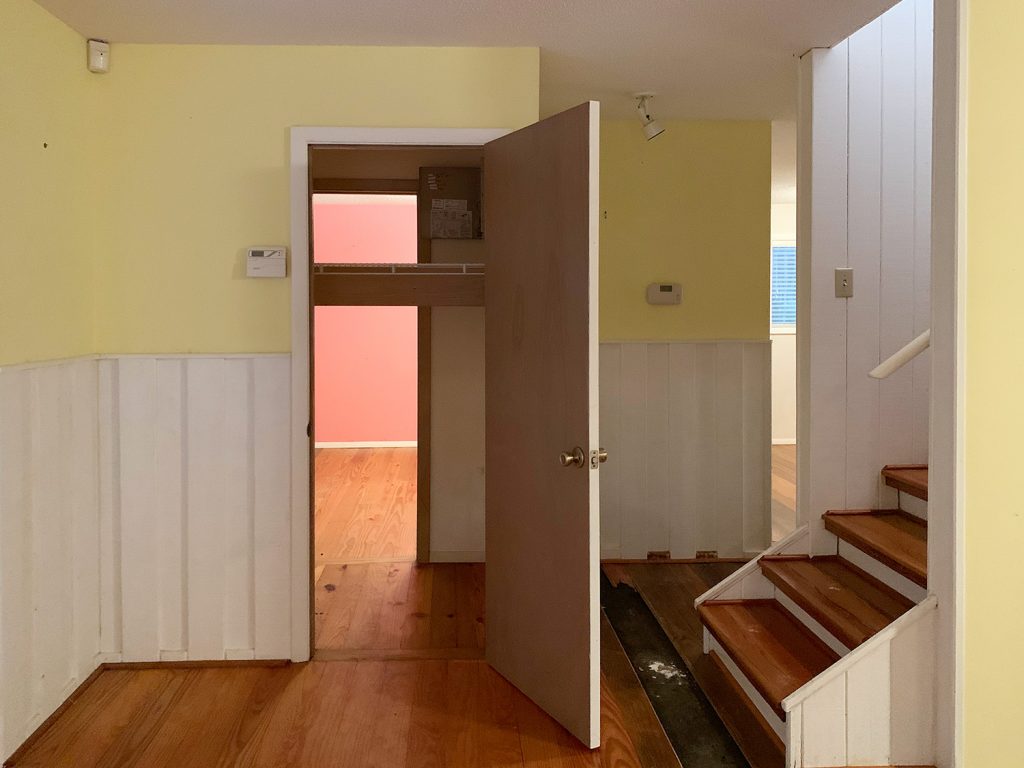
Again, scale is hard to judge in a photo without furniture, but we measured and realized we’d have plenty of room for side-by-sides (with space to spare!) so putting the laundry here became a no-brainer.
In this demo photo you can see how the doorway was widened and the hookups were added. You can also see the framing we added along the back that blocks access to this closet from our daughter’s room (she’s going to have a different closet solution instead of this weird shared one).
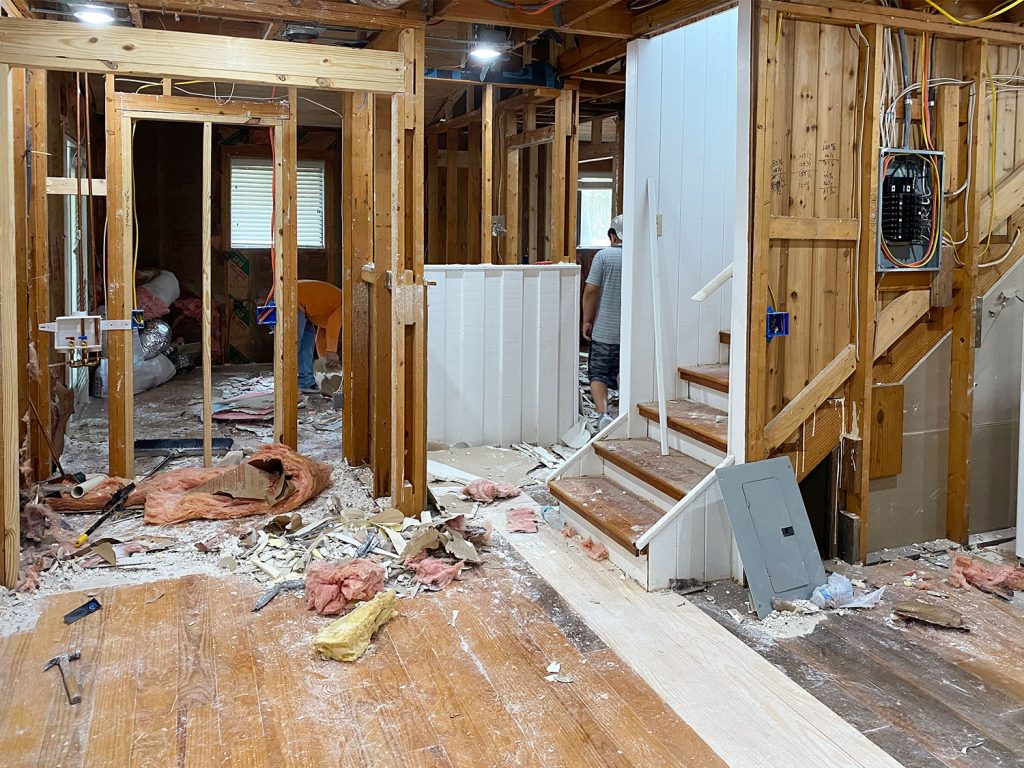
And here it is half drywalled:
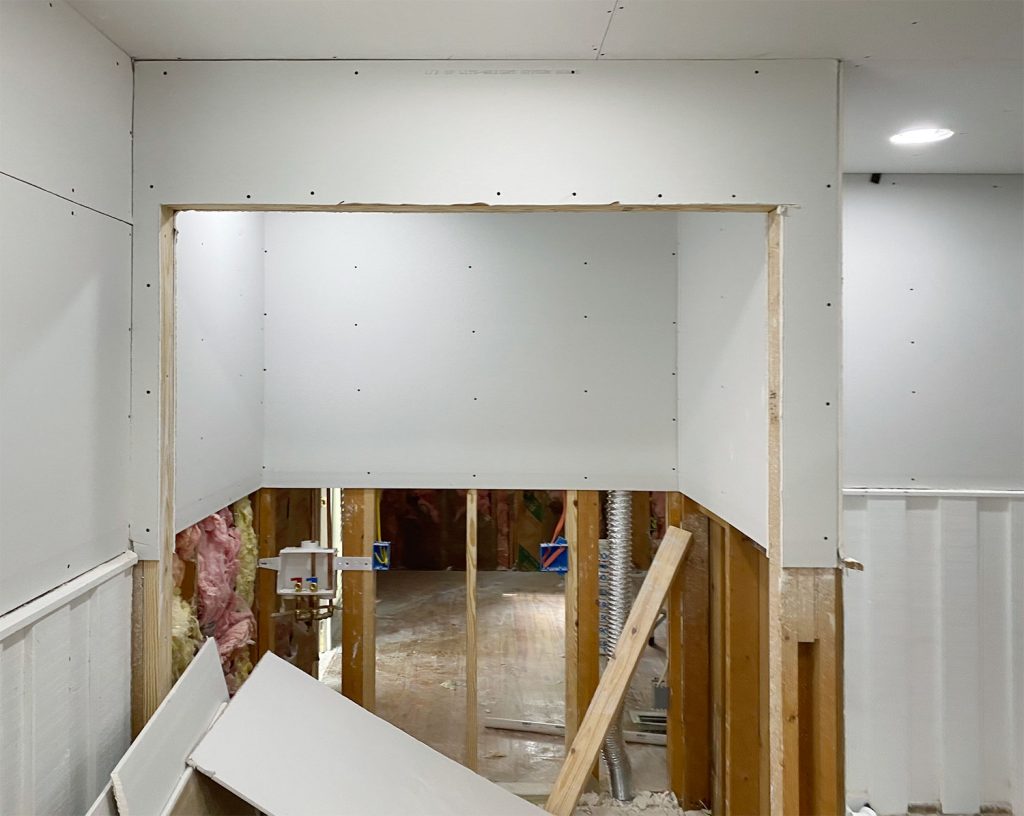
And finally, this is it right as the new doors were added about a week ago. Doesn’t it look great?! Or are we the only ones nerding out about a laundry nook?
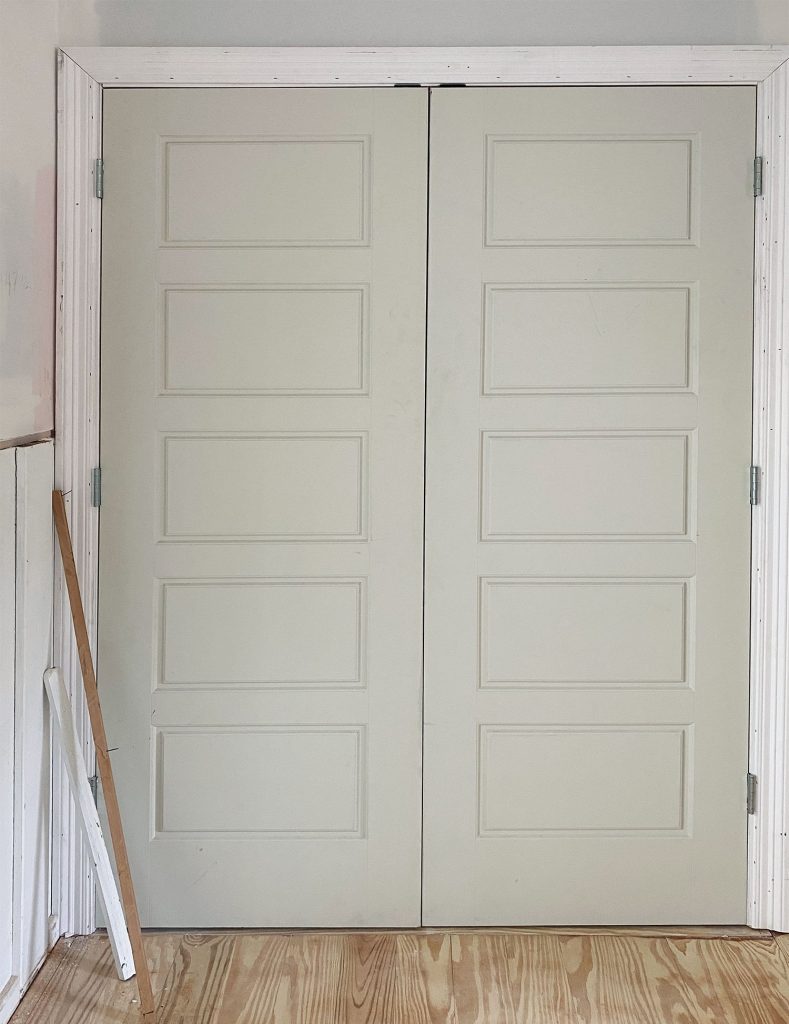
In a lot of ways, it will be similar to our first house’s laundry area, which was also a little nook like this with a big counter for folding and storage up top. This time things will be nicely hidden behind actual doors, which feels like an added perk. We expect to store a bunch of stuff in upper cabinets or shelves behind this door – sort of like we did here.
We also added extra insulation to the back wall to help dull any laundry noise for our daughter’s room. It’s probably not a foolproof solution, so we may also have to avoid late-night laundry sessions… but that might be a lifestyle goal we should be aiming for regardless. Ha!
We know a laundry closet may be considered to be a “downgrade” from our current laundry room, but it’s a concession that we’re happy to accept as part of this whole downsizing thing. There are going to be a lot of perks to this new home and this new location that we didn’t have before, so this is definitely a trade-off that feels just fine for us.
The Bathroom
You may recall that there’s currently only one bathroom in the house and it was completely non-functional when we bought it. As in, no water could flow into or out of the house due to many active plumbing leaks and a fully failed septic tank (which is why the toilet was taped off below). In the last two months since closing on this house we successfully got it connected to sewer (hooray for no more septic! More on that here) and we knew we had no choice but to redo some parts of this bathroom to solve some of the other leaking issues. And of course… this room threw us a few more curveballs, just to keep things interesting.
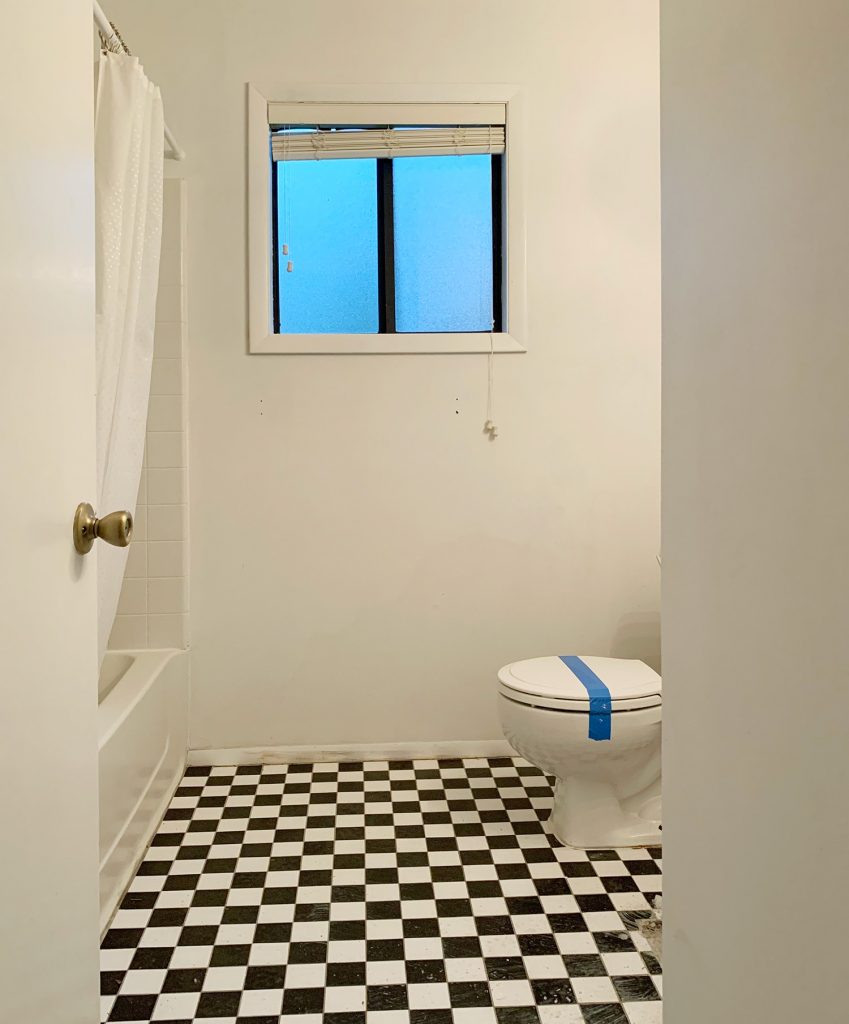
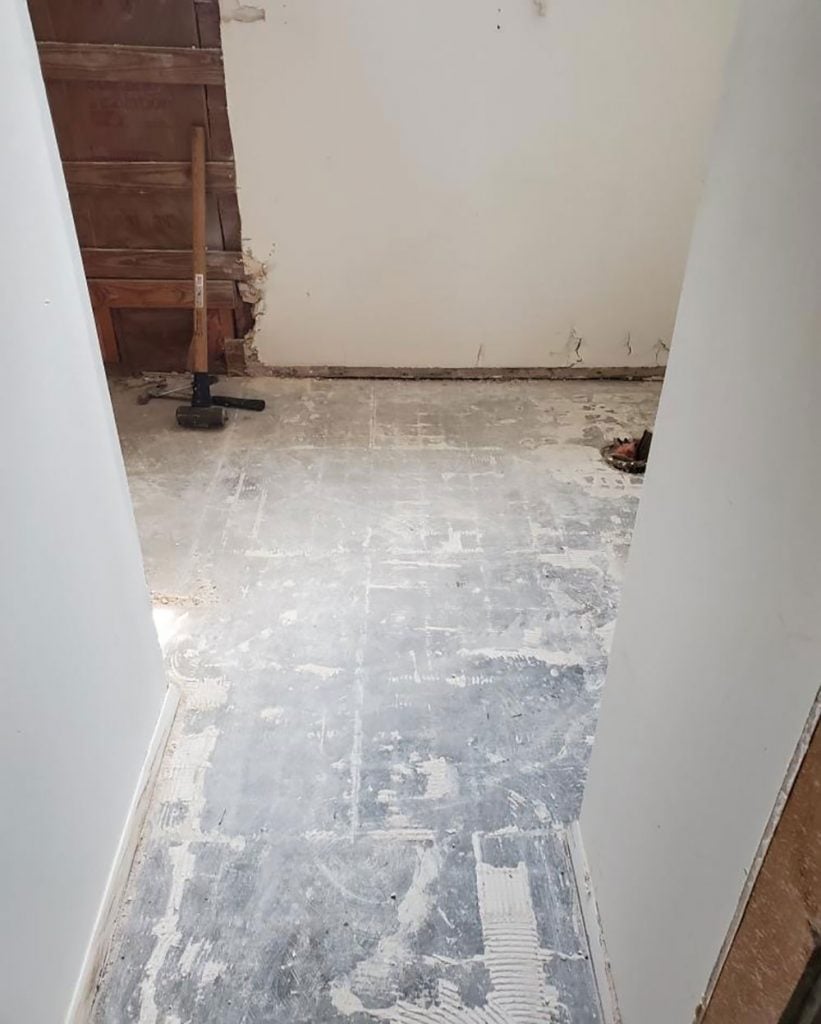
Originally we thought it might be as simple as replacing the vanity. The old one had rotted through due to former water damage, so it had been torn out. But things quickly escalated from there…
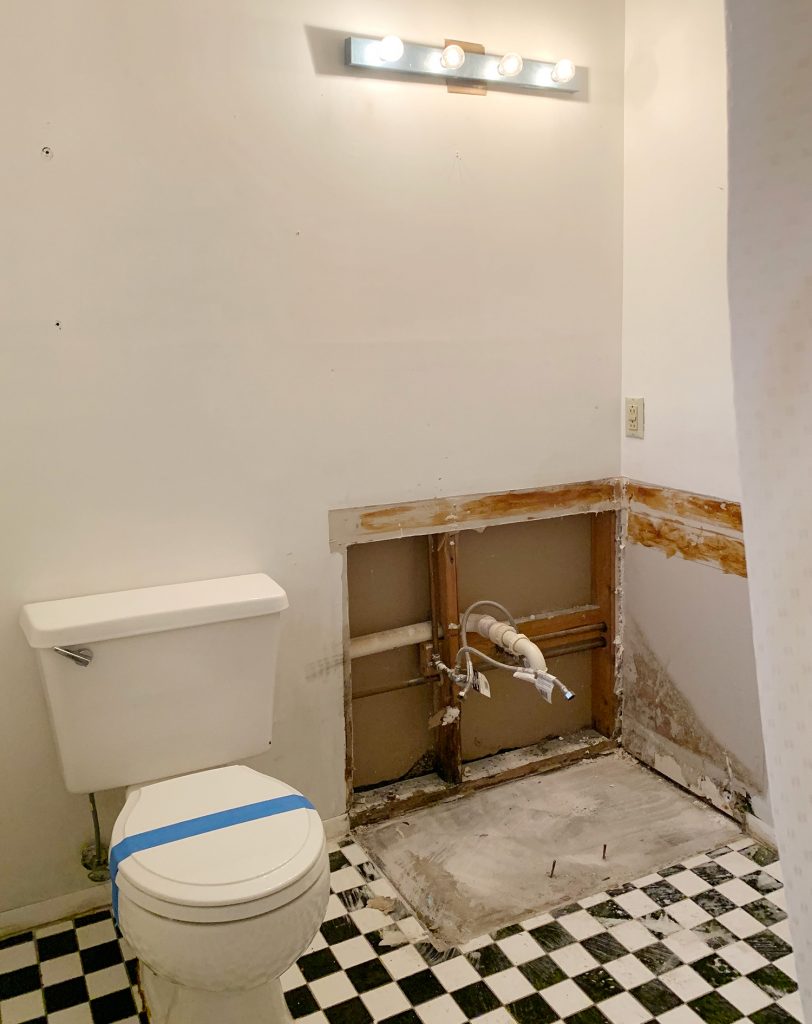
Since the flooring didn’t extend under the vanity, we decided that retiling would be a pretty easy weekend project for us (we had planned to do that ourselves over spring break). But then there was a global pandemic and our spring break vaporized. So we passed the project to our contractor so we aren’t trying to redo the floor in our house’s only bathroom AS SOON AS WE MOVE IN.
Thennnnnnn we learned of another water leak (in addition to the one that had ruined the vanity) that required us to rip out the existing tub and shower surround. And this was all BEFORE we learned that all of the drywall downstairs had to be replaced. We even got a call from our contractor saying that when they installed the new toilet the old toilet valve had failed and soaked the entire room. Sprayed like a geyser. So that had to be replaced too.
Yeah, so that escalated quickly.
But here’s a peek at the progress. We learned from doing the duplex bathrooms that we love a colorful/playful tile floor (especially in what will be the kids’ primary bathroom once we add our bathroom to the other side of the house). So we ordered these porcelain tiles and had them sent to Florida to be installed. Same with this 31″ vanity that will be the anchor to several warm wood accents throughout the house. It’s looking VERY green in here, but the walls won’t be green (that’s just water-resistant greenboard, which is bathroom friendly drywall). The walls will be white, and we’ll add a white waffle shower curtain so nothing competes with the floor.
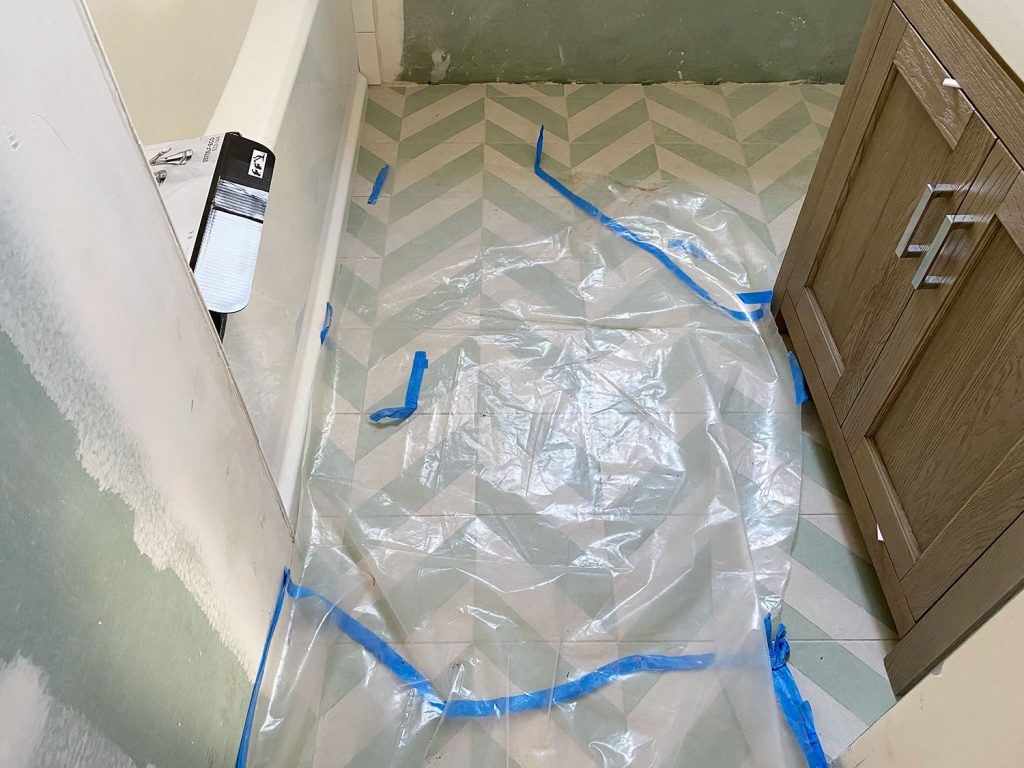
That drop-in tub is also new (it’s the same one we used at the duplex) and we chose classic white subway tile around the shower in there since the floor is so colorful/patterned.
So apart from hanging art, a mirror over the sink, a few towel hooks, and maybe adding a wall or ceiling treatment, this is pretty much the one room that will be fully redone by the time we arrive. Crazy!
The Kids Bedrooms
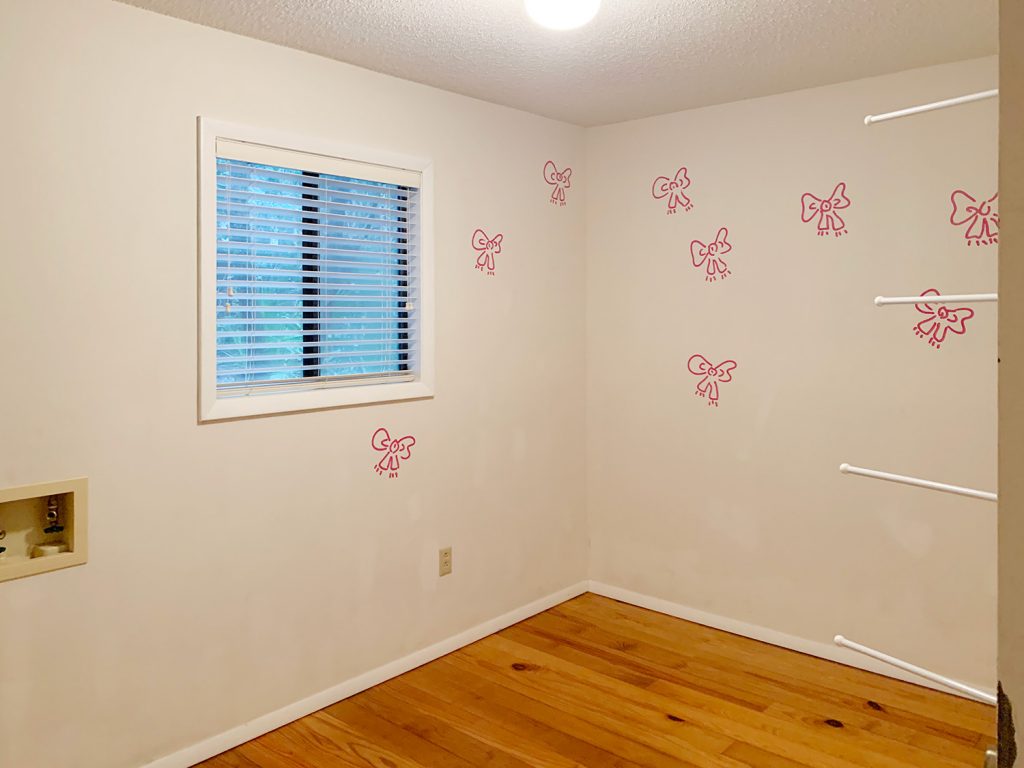
Okay, I said I saved my favorite changes for the end of this post, so here we go! Back when we spent hours planning this reno in person in February, it struck us that we might be able to vault the ceilings in each of the kids’ bedrooms (our son’s room is shown below). There’s no second floor above them and we could clearly see from the exterior of the house that the roof sloped pretty high across each room. The rooms aren’t large, so we knew that some vertical height would make them feel larger… but even we had no idea how much of a difference it would make. Wait for it.
The first step was a little “exploration hole” that our contractor made in the ceiling. He literally just cut a head-sized hole in the ceiling of our daughter’s bedroom and our son’s room. This is one of the photos he texted us. I know it looks a little crazy up there, but he was able to determine that there was nothing that couldn’t be moved. It was essentially all just empty attic space with a non-structural, drywall drop ceiling.
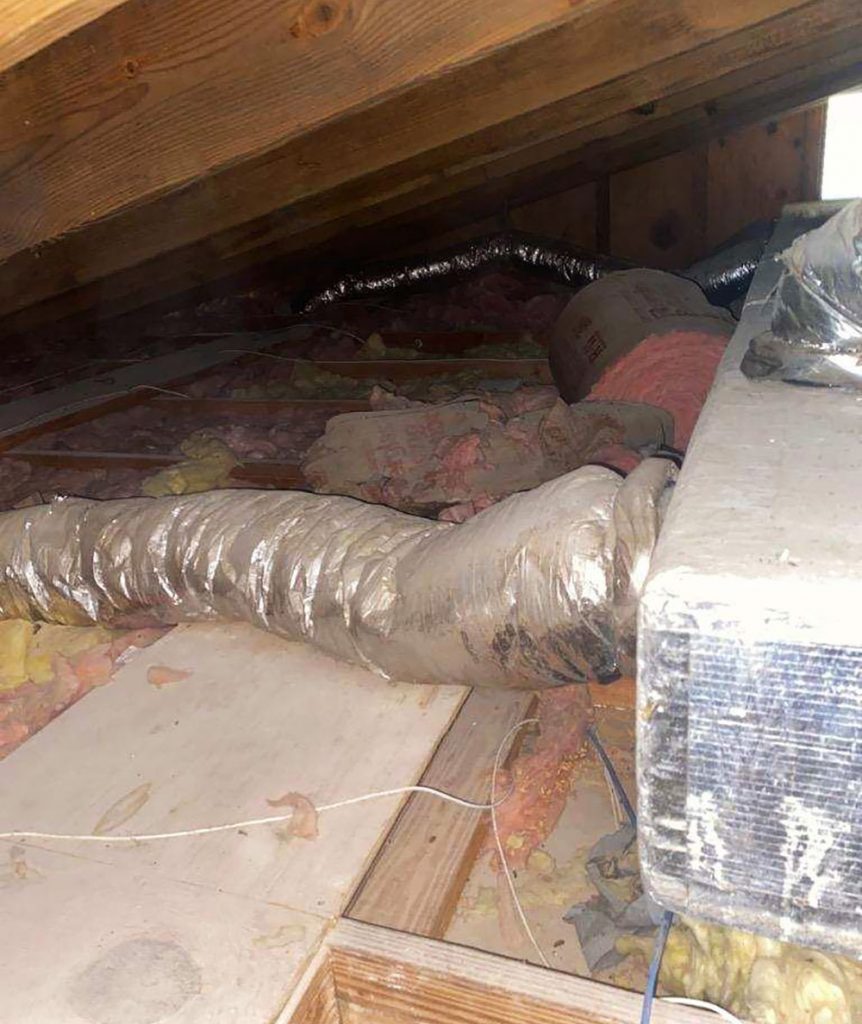
There were some HVAC ducts running through the attic space, but since we were already redoing the entire non-functional HVAC system, they just moved the ducts into the wall. And beyond that it was just some very light electrical work and fresh insulation that was added to the ceiling joists.
After the new insulation went in along the underside of the roof, rather than just drywalling the freshly sloped ceiling, we opted for wood planking up there to add some texture and VOILA. It’s a TOTALLY DIFFERENT FEELING SPACE. Times two since we got to do it in both of the kids rooms!

Let’s look at the before shot of this same exact space one more time, just to absorb how much this changed the game (yes, the room pictured above is our daughter’s room, which is the same room pictured below in this before shot):
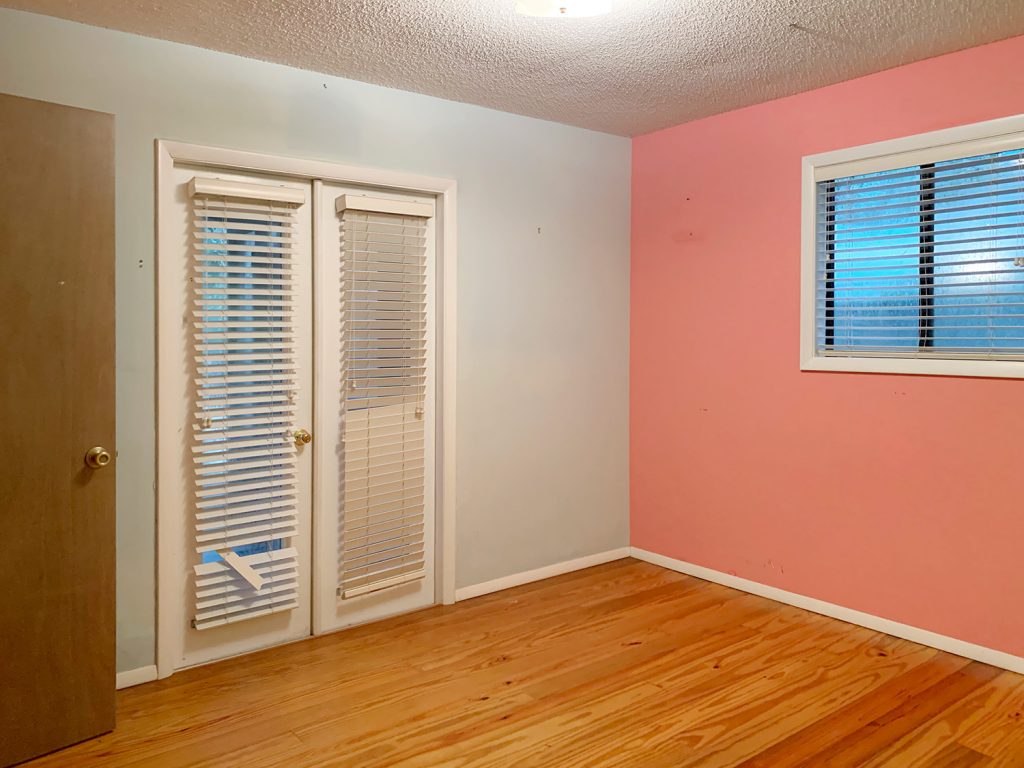
We’re going to be painting our vaulted ceilings white (along with some beams that we’re also adding). I know contrast wood ceilings and wood beams are all the rage, but the third photo in the slideshow on this page has always been our inspiration and these aren’t big rooms, so we didn’t want anything to feel heavy or close things in. The floors are going to be natural pine, and I’m sure we’ll work in some more wood tones in furniture and accessories and stuff, but the goal is bright and airy up top. We can’t wait to see how it turns out.
I can’t begin to tell you how cool it was to see this harebrained idea that we had a few months ago come true. We’re so excited for the kids to see their rooms. And to see them ourselves in person!
BONUS: The Upper Deck
Okay, we can’t help ourselves. We’re trying to hold off on sharing the full exterior progress until we can take some pictures ourselves in person (soon!?), but this sneak peek is just TOO EXCITING to hold back on. Remember this shot of the big deck that’s off of the upstairs family room that we all can’t wait to hang out on?
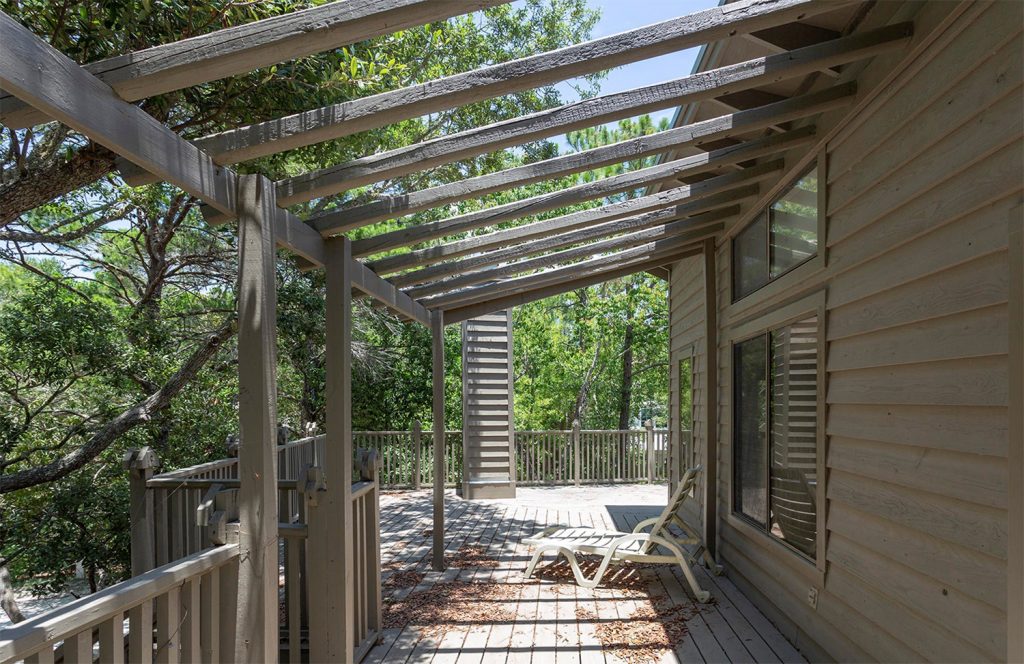
Guys… this is what that view looks like now:
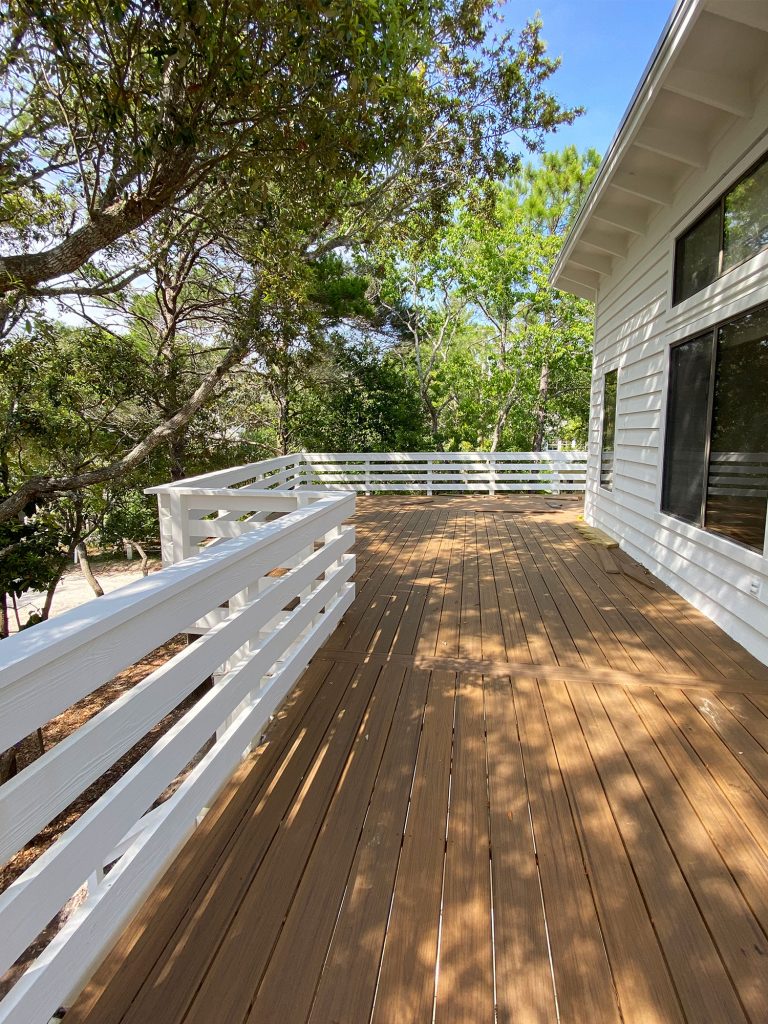
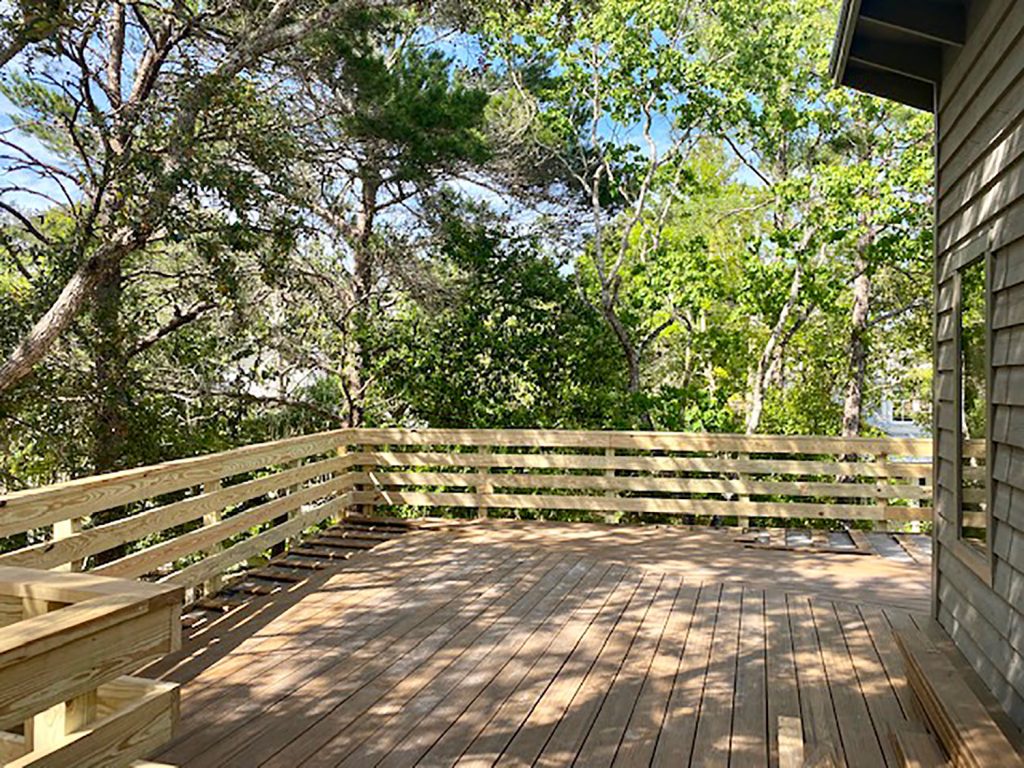
We had originally planned to save all of the exterior reno work until the interior stuff was done, but since we tabled a few big interior projects until we move in (like adding the second bathroom, since we really want to work on that in person versus remotely), there was time to squeeze in some outside stuff. We knew that the rotting railing around the upper deck had to be replaced sooner than later for safety reasons, but it was a total surprise that we had time to move beyond that and get a bunch of other outside boxes checked off while we were at it.
We replaced the railing entirely and changed it to a horizontal style that felt a lot more congruent with the house’s modern lines and the beachy look we were going for. We also replaced the wood decking with Trex (we used no-rot decking at the duplex and loved it). This time we went for a warmer color called Havanna Gold. The rickety wood pergola had to be removed for safety as well as to be able to replace the decking, but we’re considering adding something back eventually – just to gain some shade and maybe even a spot for some hanging chairs. We also took out the chimney because it was the source of (yet another) leak downstairs in our bedroom. Our plan is to convert our bedroom fireplace to gas at some point anyway, so the chimney doesn’t have to stay for that.
Oh and since they were doing a lot of rot repair on the siding that came up in our inspection, we went ahead and had the whole house painted white. If you give a mouse a cookie style…

We both knew from the second we saw this house that it would look really good if it was white (all the greenery around it + the metal roofing = so good with a clean white exterior). In fact in our initial meeting with the contractor in early February Sherry told him “I already know the exact white color I want!” (Spoiler: it’s the same SW Moderne White that we used here in Richmond). I guess you can take the girl out of her painted white house, but you can’t take the painted white house out of the girl.
More on the exterior soon, though. We’re hoping to move in the next week or so, and then we can snap a bunch of updated pictures ourselves! It truly is a remarkable update – and not to beat a dead horse, but WE CAN’T WAIT TO SEE IT IN PERSON!
