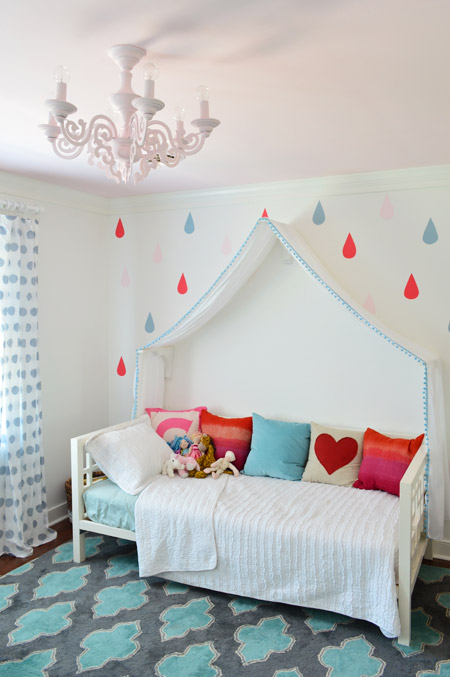
Continuing the recent trend in our house – Clara is the latest family member to get a ceiling fixture in her room. And methinks Sia might break out in song about it (“from the chan-de-li-eeeer!”).
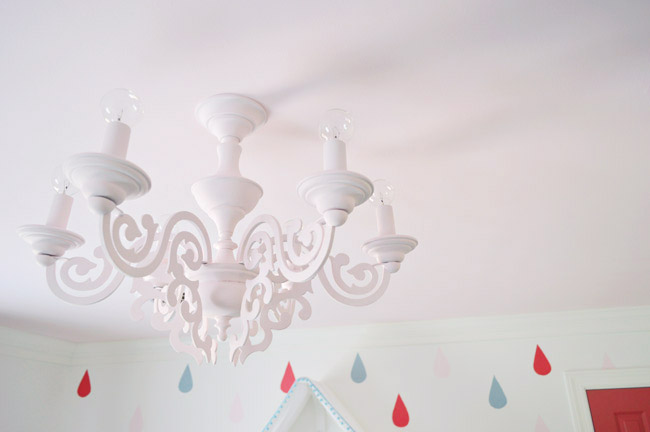
If it looks familiar, it’s because you’ve seen it before in our dining room. Well, a previous incarnation of it at least. We’ve always been intrigued by this chandelier, which was here when we moved in. The finish wasn’t totally our style, but the swirls and flat arms (it almost looks like an intricate paper chandelier) always made us think it could be a good candidate for Clara’s room.
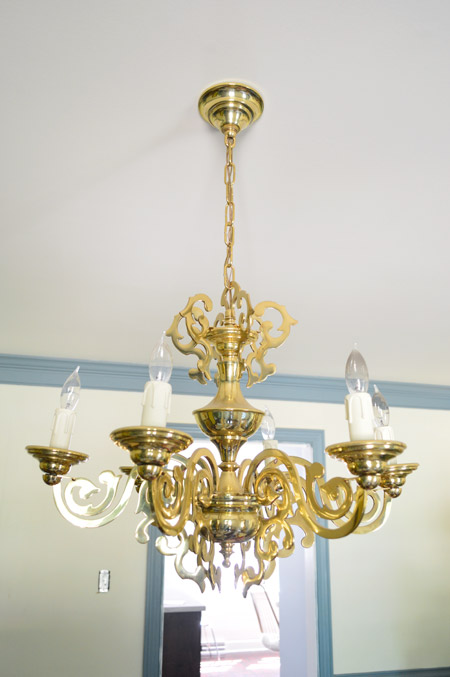
The main problem was that it was too big. Even without any chain, it would’ve hung about 26″ down from her eight foot ceiling, putting it perilously close to her six foot father’s eyeballs. But since Home Depot has yet to carry shrink rays, I decided to take it down and see if I could shorten it myself.
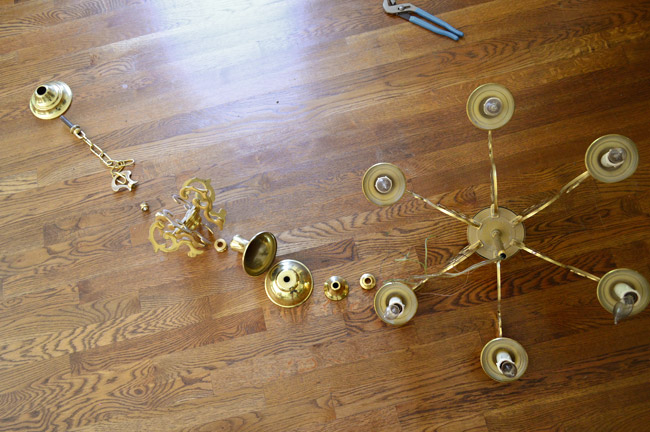
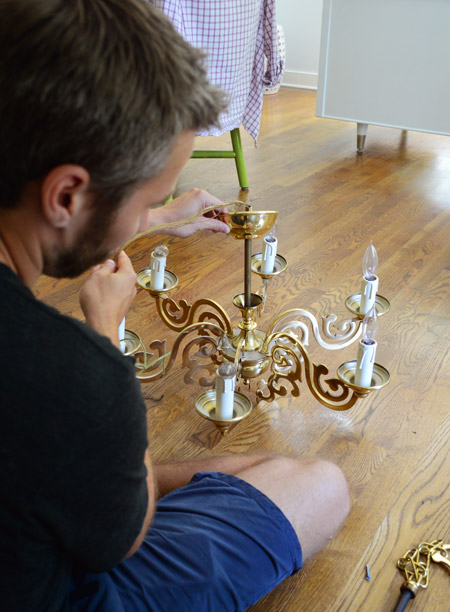
Just by loosening one screw at the top I was able to disassemble all of the nesting parts that create the ornate shape of the chandelier (I laid them out in the line above so I could remember their order). What it left was this long center post so I could begin spooling things back onto it.
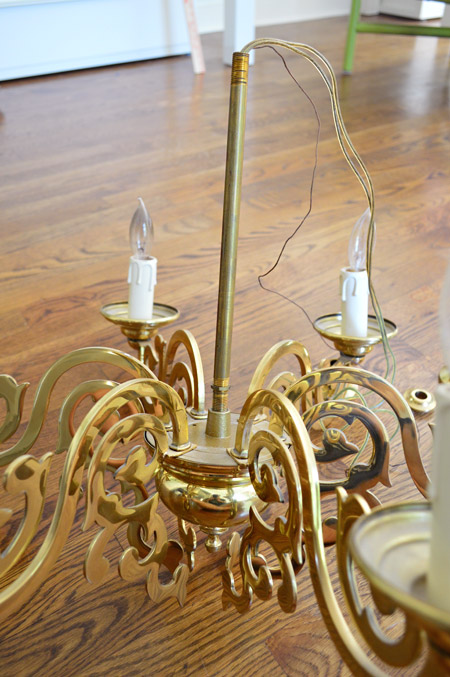
My goal was to reassemble most, but not all, of the pieces into something that still looked like a chandelier, but was several inches shorter than the original shape. That center post, however, was problematic since without buying a shorter one, I wasn’t going to be able shave much of the height off. I contemplated hacksawing it shorter, but then I realized I needed the threaded area right at the top of the rod to screw it back together in the end (hack-sawing it shorter would have removed that threaded area).
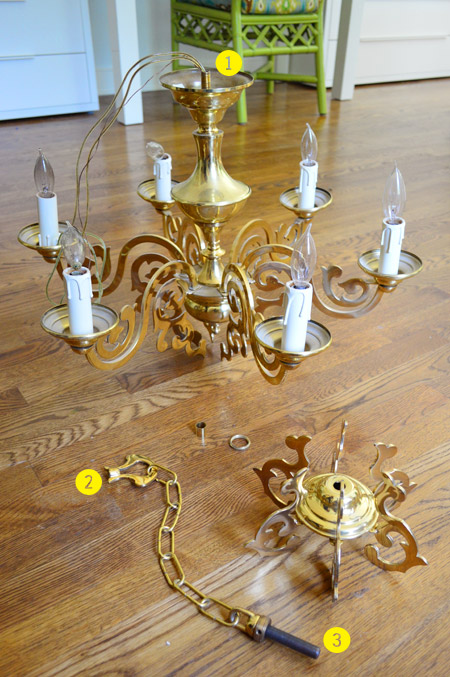
That’s when it struck me. Rather than use that threading (#1 in the pic below) to reattach it to the loop on top (#2) so that it could attach to the canopy piece that screwed into the crossbar (#3) to that loop, I could just screw that threading (again #1) directly into the crossbar itself (thereby shaving off the height of the large loop). That saved me quite a few inches because I could cut out most of the original hanging mechanism, but I knew that it would still be nice and secure. You never want to hang something this heavy by the wires, so threading the metal bar into the crossbar in the ceiling would safely and securely bear the weight.
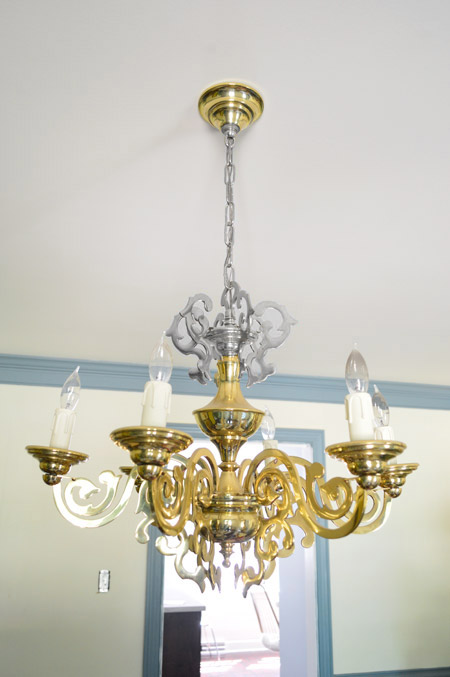
You can see which pieces I left out in the picture above, but for easier reference, here’s the original photo of it in the dining room below with the removed pieces grayed out:
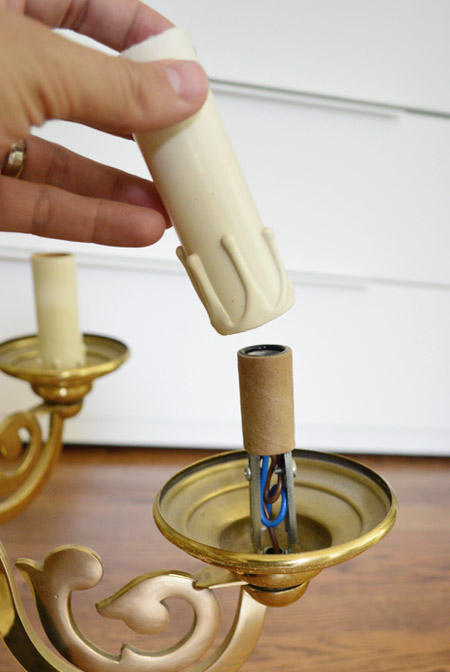
Oh, and we were going to buy new candle sleeves (the faux dripping wax wasn’t really doing it for us) but Sherry realized we could just flip them over and the drips wouldn’t be visible from below anymore (see the one in the background that has already been flipped).
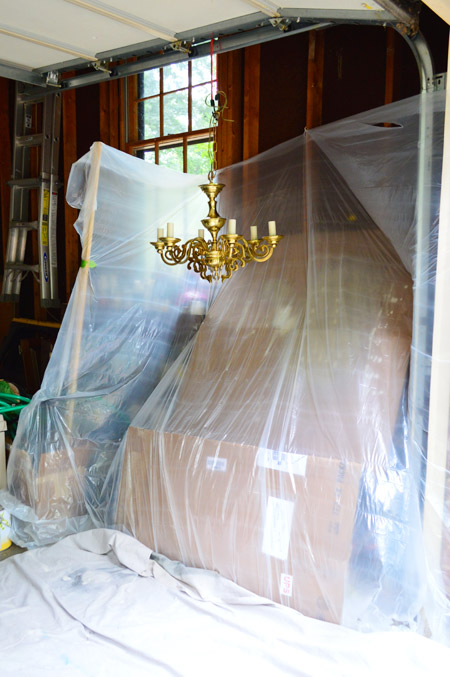
Next up came painting. I set up this little station in our garage using a plastic dropcloth, plus a bungee cord (and the original chain) for it to hang by.
First Sherry taped off the top of each bulb connected in each candle sleeve (don’t want to gum those up with paint) and then she applied a coat of Clean Metal Primer, which is our usual go-to base coat when painting metal.
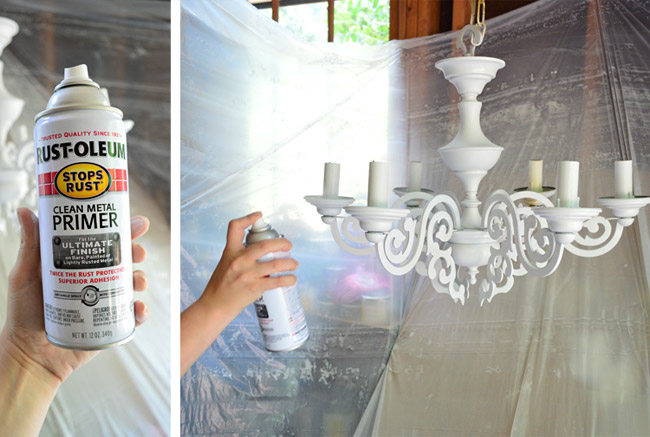
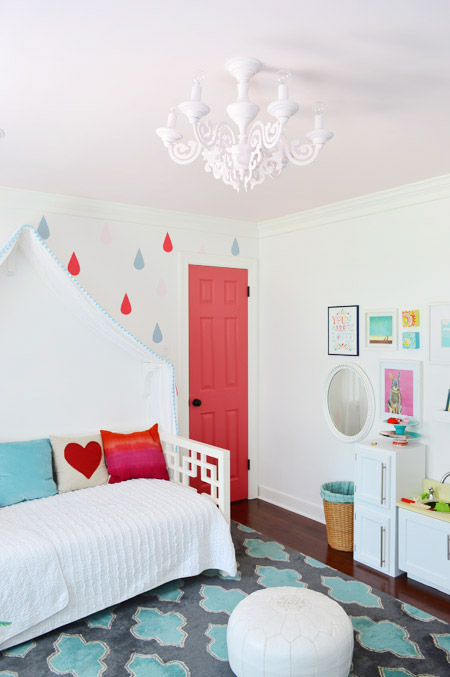
Although we both thought it looked pretty great in white after that round of primer, we were most into the idea of making it the exact same light pink color that’s on the ceiling (Pink Cadillac). Something about a pink ceiling that sort of melts into a chandelier in the same color felt very Alice-In-Wonderland to us, and of course when we asked Clara what color she wanted her light to be, she screamed “PINK!” without hesitation.
But to get it exactly the same color, we couldn’t buy spray paint off the shelf – and we knew our paint sprayer would leave something this intricate pretty drippy and gummed up (we’ve had luck using it on flat things like trim and doors, but even the curves in molding and the recessed areas in doors aren’t always covered that well) so we decided to give something we had seen at Home Depot a try. It’s a “Preval Sprayer” that we bought for less than $5, which promised to turn any paint (plus water to thin it) into spray paint.
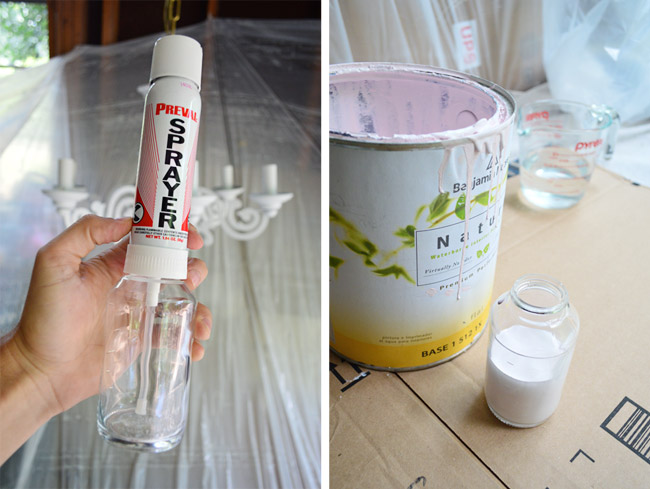
Well, we had a difficult time with it. There isn’t much direction given about how thin the paint needs to be. It took LOTS of trial and error (and mess) to get it thin enough to finally spray at all and once it did, well, it was super runny and we ended up needing to add more paint to thicken it back up again. I wish I could tell you the final formula that worked, but we lost track along the way. I think it was somewhere in the neighborhood of 1 part water to 2 parts paint.

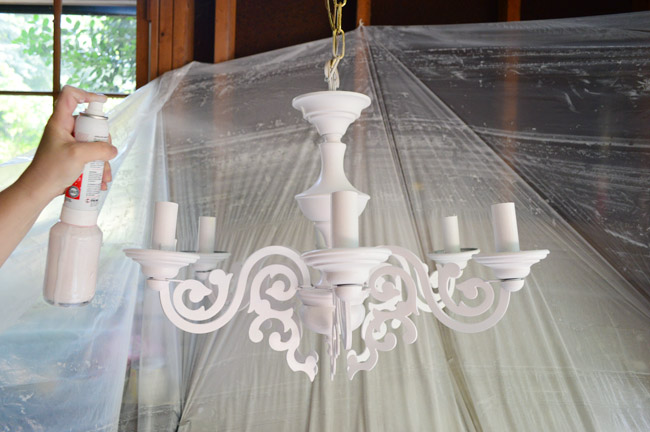
Spraying was still spotty and it would cut out or spurt sometimes, which required unclogging it somewhat frequently (putting your finger over the hole and pressing the spray button). So I’m pretty sure we never landed on the perfect paint consistency, but eventually Sherry got the job done. Once we got it spraying it was a lot lighter and more mist-like (like true spray paint) than our large Graco paint sprayer that we use for cabinets and doors, which seems to apply a lot more paint than a spray can, so it can get really drippy if you go over the same area twice or from a different angle.
The next morning we hung it up, but I didn’t get any photos of that process because it took both of us to get it in place (Sherry supported it while I did the wiring) and it wasn’t until we were both on the ladder that I realized the battery in my camera remote was dead.
But the gist is that I attached the crossbar to the ceiling fixture (which had a center hole with threading in it, like this one) and we were able to spin the whole fixture so that the long center post (#1 from that picture way above, if you recall) screwed directly into it. We had intentionally left just about a half-inch of it sticking out above the canopy so that it could catch that ceiling crossbar, screw until it was nice and secure, and hold the canopy snug to the ceiling.
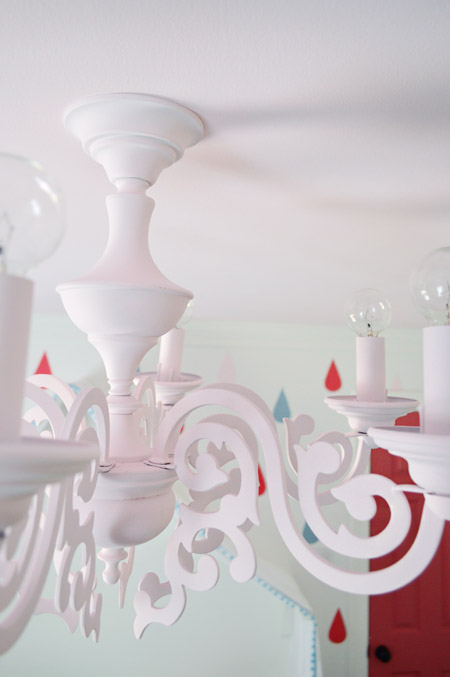
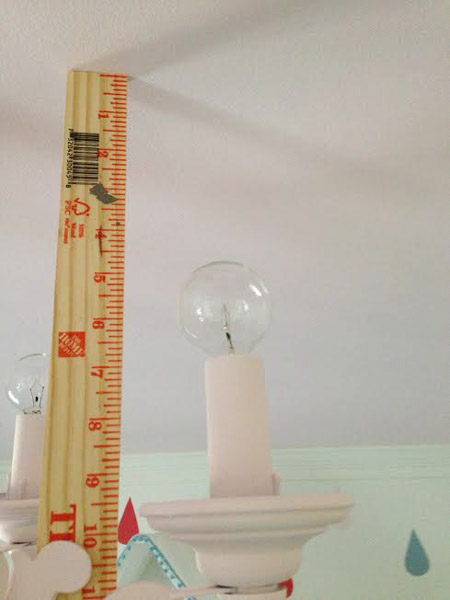
It’s hard to tell how much drop we have from the ceiling, but those bulbs are a good five inches from it, so they’re not right on it. It’s important to give bulbs breathing room on all sides (these have more than most chandeliers with shades on them).
We worried that the watered down paint would look lighter than the ceiling color, but if it is we haven’t noticed. In fact, it came out so nicely that we’re almost ready to forget the struggles we had with the sprayer which (beside the new round 25 watt light bulbs) was our only cost for the project (we spent $5 for the original sprayer and $4 for one extra air can).

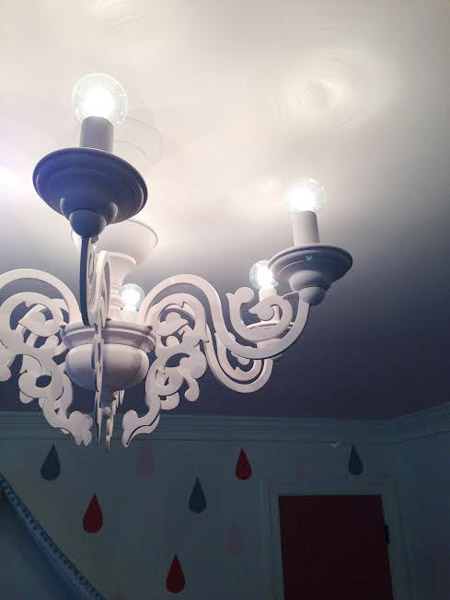
It’s nice to have a nice bright light to illuminate her room with the flip of a switch. And of course it’s always fun to take an old light that didn’t work for us in the dining room and reimagine it for Clara’s space. Here are those six 25 watt bulbs in action along with her fairy lights.
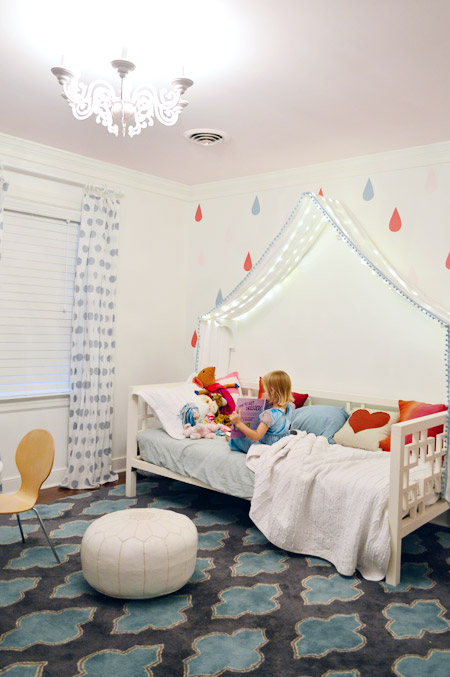
And a more ambient night shot thanks to the ol’ iPhone:
Since Teddy is too small to comment on his new light, it’s nice to know that Clara loves hers. Our favorite quote so far has been: “It’s all swirly like it’s from Belle’s castle!”
Of course this does leave us light-less in the dining room at the moment, but that’s kind of the least of our concerns in that room (I’m talking to you, blue trim). If anything we’re probably most focused on finding a light for the guest room, which is the only one upstairs that’s still ceiling fixture-less. And we’re expecting a guest next week…
Psst- Wanna know where we got something in our house? Just click on this button:


Lisa M says
I would echo the comments on the dimmer switches – they are such a good idea in bedrooms. Great for when your little one is sick and you want to briefly check on them without blinding them awake – even good in grown-up bedrooms so you don’t blind your spouse when you are coming home later or leaving earlier than the still sleeping spouse. Now that we have them, I couldn’t imagine living without them.
Melissa says
love the chandelier! it does look like it’s super close to the ceiling, maybe take it down a notch or two so it doesn’t heat up the ceiling and cause a fire?
Jean says
Love the ‘new’ chandelier.
My 14 yr old daughter saw me reading your blog and was so interested in it I ended up showing her your house yours. I think you have a new teenage fan :)
Jean says
*tours
YoungHouseLove says
Aw thanks Jean!
xo
s
katalina says
I love it –love how it is the same color as the ceiling. it does look like those very expensive paper cut out $200 -$300 lights for kid rooms!
so whimsical. I would love that room and I am alot older than clara!
could the candles be replaced with a round globe like lights–than that would be whimsical squared and look like cupcakes?
I am still hoping you design a line of lights where you can screw in bulb from underneath without those 3 pins that you unscrew trying to get the shade down.
YoungHouseLove says
So much fun! We did replace the flame bulbs with the fun round ones but will keep an eye out for other shapes :)
xo
s
My Crappy House says
Candelabra sockets come in different heights. It would have been super easy to use the shorter kind, buying yourself some additional room between the bulbs and the ceiling. Just sayin.
YoungHouseLove says
Great tip!
xo
s
Kelsea Echo says
Wow! This is freaking awesome! I’m obsessed with chandeliers, but traditional ones never seem to quite do it for me. I love how you’ve transformed this one!
Tracey says
I love this post! I would never have thought to remove parts of a hanging fixture to turn it into a semi-flush mount. And the finish is killer. So many ideas brewing now. I’m going to look at old light fixtures with new eyes!
Mandy says
If you haven’t, look into a cricket sprayer. It is great little gadget for smaller jobs like this, works with any paint and mason jars. It’s super easy to clean and I would recommend it even for something as big as a door (I used it that way). Latex doesn’t take that much thinning (especially with floetrol) and is easy to use once you get the technique down. Great for trim, very little overspray and it’s less than $50! After reading all the trouble people have with the Graco/Wagner sprayers, I decided to skip the headache and get a smaller option that won’t work on walls but is less of a cleanup nightmare.
YoungHouseLove says
Thanks so much for the tip! I hear great things about that Cricket!
xo
s
Christy says
Who’s the guest!! Oprah???? :)
YoungHouseLove says
Haha! Close… it’s Nonna! (that’s my mom)
xo
s
Kate says
It’s 11:50 pm and I’m trying to get to bed…when all of a sudden I realized what was missing from my day: reading YOUNGHOUSELOVE! I had to get on the computer and see what the Petersiks have been working on. The fixture had an almost shocking metamorphosis, and even though I’m too tired to really follow how the heck John figured it out, I’m really glad he did because it looks like something from a really expensive lighting store! NOW I can go to sleep!
xo K
Kate says
And I really like the word really in that comment…I really need to get to sleep! Ha!
zzzzz K
YoungHouseLove says
Ha! I do that too!
xo
s
Rebecca says
Love it! Everything you guys do is amazing. I love her room, I pinned it;)
Just a idea- if you still have the top part of the chandelier that you removed, you could use a one bulb lighting kit to make a cute little matching chandelier or lamp to hang above her bed or art table??? Anyway you guys are awesome!
YoungHouseLove says
That’s a fun idea!
xo
s
Jen says
For what it’s worth, I think the more flush mount of the light makes it look unique in a good way.
Robin Stephens says
I so enjoy your posts. They’re always so lighthearted and so easy to read…not to mention informative. You pull us inside and make us feel a part. How inspiring you two are to so many. I think Clara-the-Lucky is a dumplin’… I was a SAH mom….and now our oldest’s wife reads this blog. Thanks for being such a fine example of life-after-college to so many. Keep it up!
YoungHouseLove says
Thanks so much Robin!
xo
s
Sarah says
LOVE how the chandelier turned out. I agree with the others that it is hung WAY too high!
We put in a chandelier in my daughter’s room, and my 6’3″ husband has to duck, but it’s really rare that he’s right *under* the chandelier, so we hung it a normal height.
I’d love to see some bling on the chandelier to liven it up and make it fun for a little girl – some crystal beads, glitter, etc – would Clara be into that?
YoungHouseLove says
She definitely could love that too!
xo
s
Ydubby says
How creative! I wonder how many of those brass fixture are in the dump when they could have been repurposed.
Joseph@littlehouseblue says
So happy to hear a Beauty and the Beast reference in a sea of Frozen.
Mrs. Frugalwoods says
Gorgeous! Spray paint is amazing. We spray-painted our gold mirrored closet doors white and they’re like entirely new doors for just $4!!!
Nicole @ Liberty Belles says
I give you guys major credit for dealing with that sprayer. I would’ve given up after a few false starts for sure!
Lindsay says
Love the chandelier! I never would have thought to make it pink, but it’s perfect!
I think it’s the first time I’ve noticed Clara’s hamper. I love it! How big is it? Do you feel like Teddy’s is big enough?
Also, I got the Triscuit one question survey pop-up today. I’ve never seen it before, but I’m using firefox, if that helps!
YoungHouseLove says
It’s about the size of two gallon milk jigs on top of each other. Random measurement, I know! Haha! It works for a week’s worth of clothes and then we wash them. Teddy’s has worked so far too. I think when he’s bigger we’ll need to upsize it though ;)
xo
s
Sharee A says
Talk about a re-do. Looks fantastic! Is the Prevail Sprayer a pump-type contraption? I think I may just stop over at the local Home Depot or Lowes and pick one up. Got some projects on the table where I could definitely use it, rather than spending tons on not-quite-right spray can paint colors.
YoungHouseLove says
It’s just like an aerated spray paint can! No pumping, which is nice!
xo
s
Jennifer says
I love that you gave the ol’ chandelier a new life! It’s so charming.
randa says
Her room is so interesting and different. I love everything about it! Good job guys!!! That “chan-de-il-eeeer” (said in my best Scarlett Johanson voice :) is just perfect. Love seeing you guys re-purpose something.
Lea says
I LOVE the Prevail system. My mom and I have used it for years to get custom spray paint – did you find the instructions on the inside of the box? You have to open it up and I know a lot of people who missed that.
We always buy those outlet covers from home depot that cover everything but the plug slots and then use prevail to paint them with leftover paint from the walls and they disappear.
http://www.homedepot.com/p/Hubbell-TayMac-1-Gang-Decorator-Wall-Plate-White-2500W-20/100156927?N=5yc1vZc6r0
YoungHouseLove says
Smart! The issue with the directions were that they said to follow the thinning instructions on the paint and there weren’t any on there to follow. Maybe it was just a bad first impression or Natura paint isn’t a good match?
xo
s
bfish says
Oh man, I am really of two minds about this project! Pro: I love the way it came out; it looks great and is functional. Nothing could be better! And good recycling/reuse of something that isn’t your style and didn’t do much for your dining room. Con: From the pictures, it looks like it was a very nice solid brass fixture. I have loved brass (in moderation) through its “in” and “out” phases, and I wish there could have been a way to modernize it (probably not for Clara’s room) without painting over the finish. So, while I love what you did there’s a little devil on my shoulder whispering “painting it was a crime”. (FTR I have spray painted Williamsburg-style brass DR chandeliers and loved the results, but the pieces weren’t nearly as nice as yours.)
Angie says
A lovely transformation… That chandy must be massive! Any idea of the overall dimension?
YoungHouseLove says
It’s around 17″ tall and about 23″ wide (hard to measure with all those arm, haha!).
xo
s
Cindy says
Oddly enough, this is definitely one of my favorite things I’ve ever seen you guys do. It’s weird how very much I love it. Great job. xo
Kara says
Adorable!
Gretchen says
Sherry,
I just read my Real Simple for Aug and you were featured!!! It was like oh I know that person. So cool to see you in one of my favorite magazines. I have been a huge fan of your blog and I love seeing all your hard work pay off for you and your family. Thanks for keepin’ it real.
Love, Gretchen
YoungHouseLove says
Thanks so much Gretchen, you’re so sweet! It was such an honor to be featured!
xo
s
Bailey says
It really looks perfect! It’s a great light fixture, and it definitely does look straight outta Belle’s castle (great reference Clara) ;)
Victoria says
Thanks for posting this! The chandelier looks great and I’ve had my eye on that Preval Sprayer for a while now but have been too chicken to buy it…however, I splurged on an HVLP sprayer to try, so go figure. Here’s hoping it was worth it!
Emily @ Life on Food says
Great reuse. Our current dinning room chandelier has fish heads on it (no joke) and is brass. I wish a little paint would allow us to redo it. The swirls are so pretty with Clara’s room. I am totally jealous of her space. Pretty darn cool!
Jennifer says
I love a painted chandelier and Clara’s room. You guys have awesome style: cute, practical, comfy, and quirky :)
Sassafras says
That swirly piece that got left off…wouldn’t it be neat ORBed or something like the antiqued mercury mirror paint that’s out and then placed under a beautiful planter? …or a nice fat white ceramic animule????
Love the chandy. Thanks for explaining about the height of the bulbs in relation to the ceiling…those first shots had me worried.
Super job!! Do Clara and Teddy have the book “Harold’s Purple Crayon”?????
YoungHouseLove says
That would be awesome! Love that idea. And Clara loves Harold! I don’t think we’ve read it to Teddy yet, but soon!
xo
s
Sassafras says
Ooops – it’s “Harold and the Purple Crayon” book by Crockett Johnson. Perfect for the creative Miss Clara-The-Lucky and Mr. Ready Teddy – the littles cut from the amazing Petersik family cloth!!!
Sarah says
Oh my goodness, that is totally from Belle’s castle. He’s like Lumiere’s big brother! What a good idea to paint it the same soft color as the ceiling. I’d definitely steal that if I ever get around to painting a ceiling a soft color…
Jamie G says
You just gave me a brilliant idea for repurposing a brass chandy we’re about to remove from our dining room… I wonder if I have another closet somewhere that could use one! (Since my walk-in already has one!)
xo
Jamie
http://snapginger.com
Karen from Cord Controller says
Wow! This absolutely adorable, truly love it!
http://cordcontroller.com/
Bethany says
Where did you get the children’s bentwood chair?! I’ve been searching all over for some!
YoungHouseLove says
Those were from a thrift store!
xo
s