It has been about five months since we first introduced you to the outside of our house. That was our very first week of living here, and our outdoor spaces have been getting a lot of use ever since. You’ve already seen how our second-story deck has come together, so today we wanted to update you on our front porch as well as the covered area that we call the side porch and some new landscaping that we’ve added too.
We’ve made some functional and organizational improvements, some strictly aesthetic enhancements, and have some other upgrades that are still in the works. So won’t you join us on the front porch? Here’s how it’s looking these days:
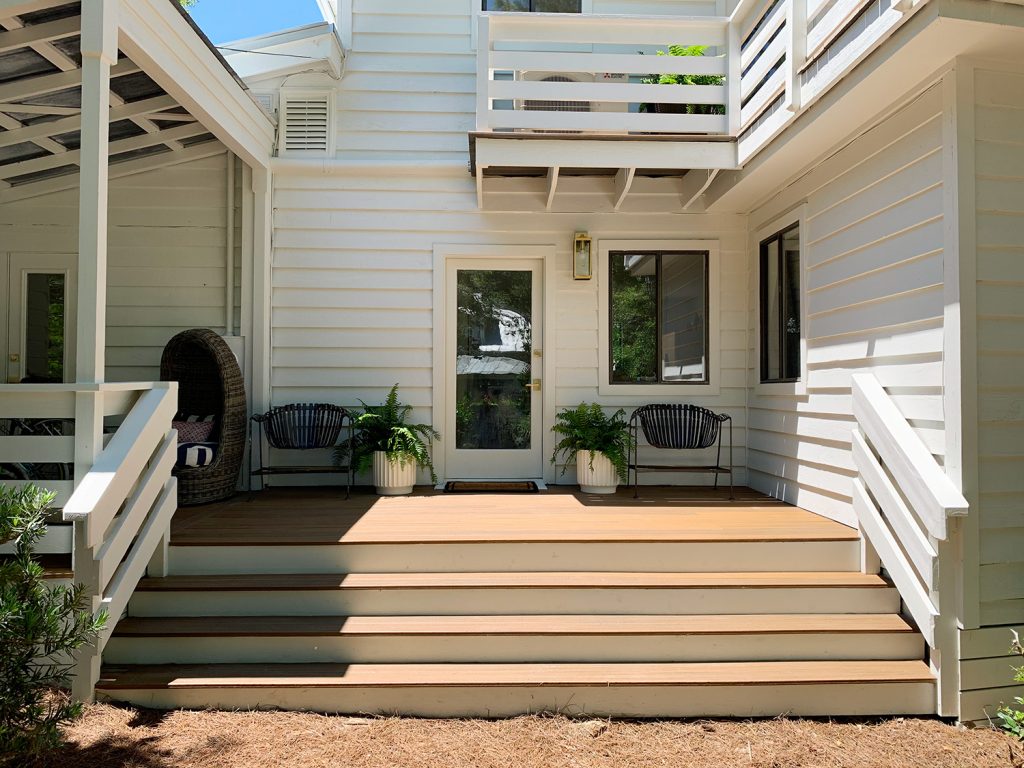
This next picture was a photo from back in May, when it was basically just our existing furniture and a couple of plants plopped down to make the space feel occupied. Things just sort of came out of the pod and landed like this (except for the ferns, which came from the grocery store):
And here we are now. I did say something about “big plants” in the title of the post, right?
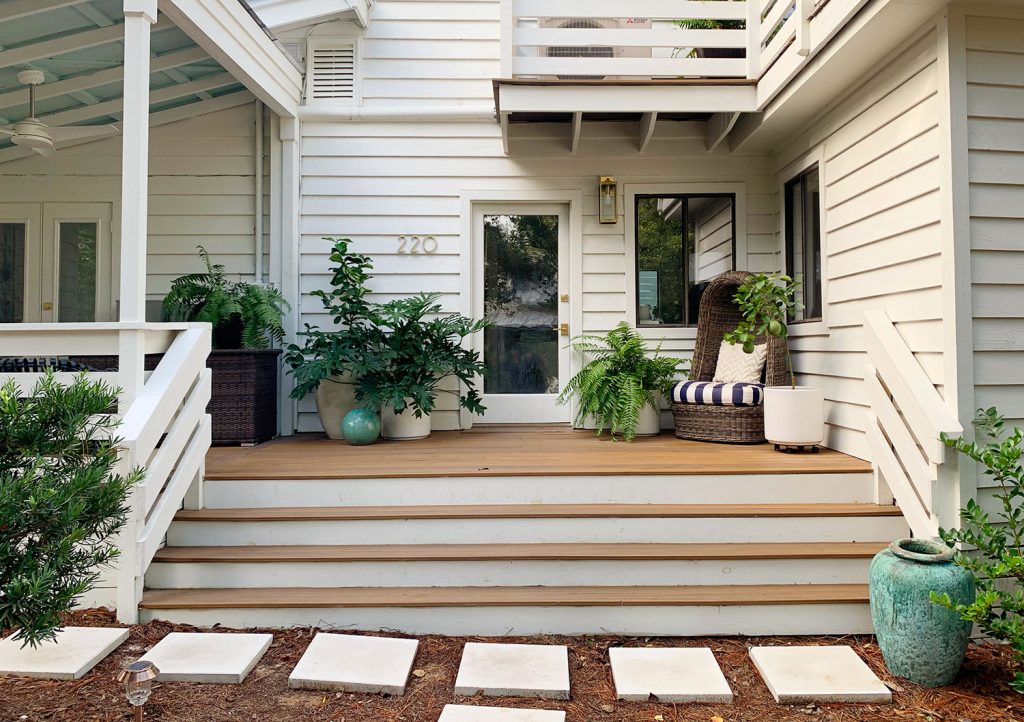
You might summarize our space planning strategy here as “MORE COWBELL PLANTS!!!” – which could seem odd since our outdoor space already has so much natural greenery surrounding it, but it really makes the deck feel connected to the outdoor areas that surround it, which is such a nice welcoming feeling.
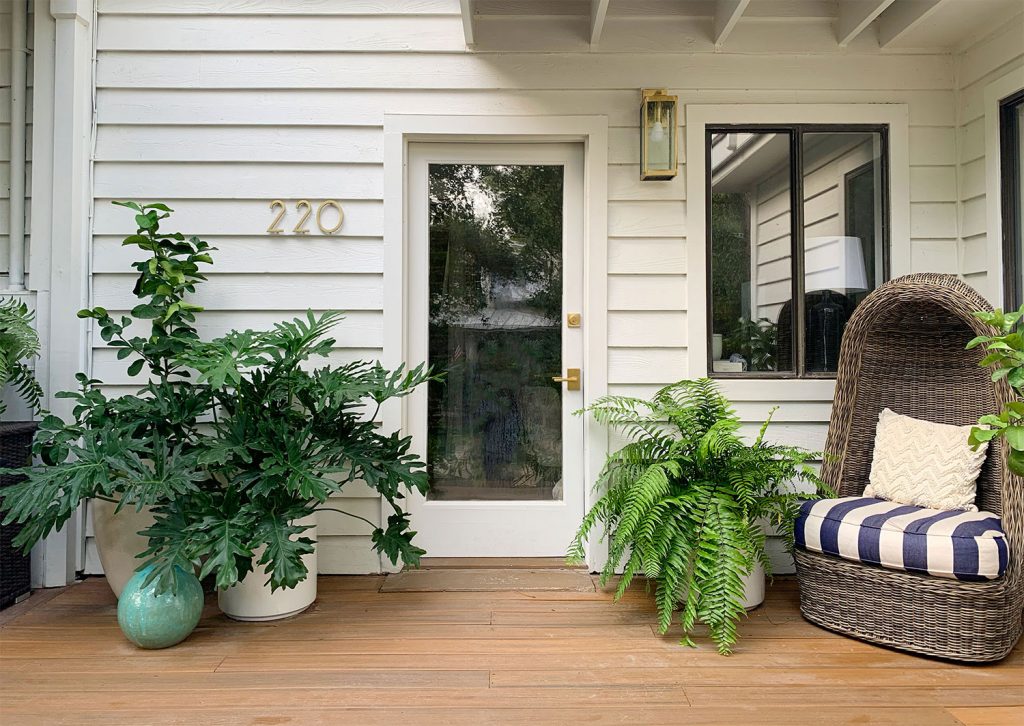
Between this porch, the “side porch” that I’ll talk more about in a second, and our upstairs deck, we feel SO FORTUNATE to have so many great “outdoor rooms” to hang out in. And as I mentioned in the deck post, we’re trying to be thoughtful about creating spaces that we’ll get to use as effortlessly and often as possible (without a lot of maintenance & upkeep). Our large second story deck felt like a more natural spot for the large dining table and conversational seating area (we found ourselves drawn out there for meals & game nights even before we had a table or a chair up there – we ate and played games on towels on the floor in the beginning!).
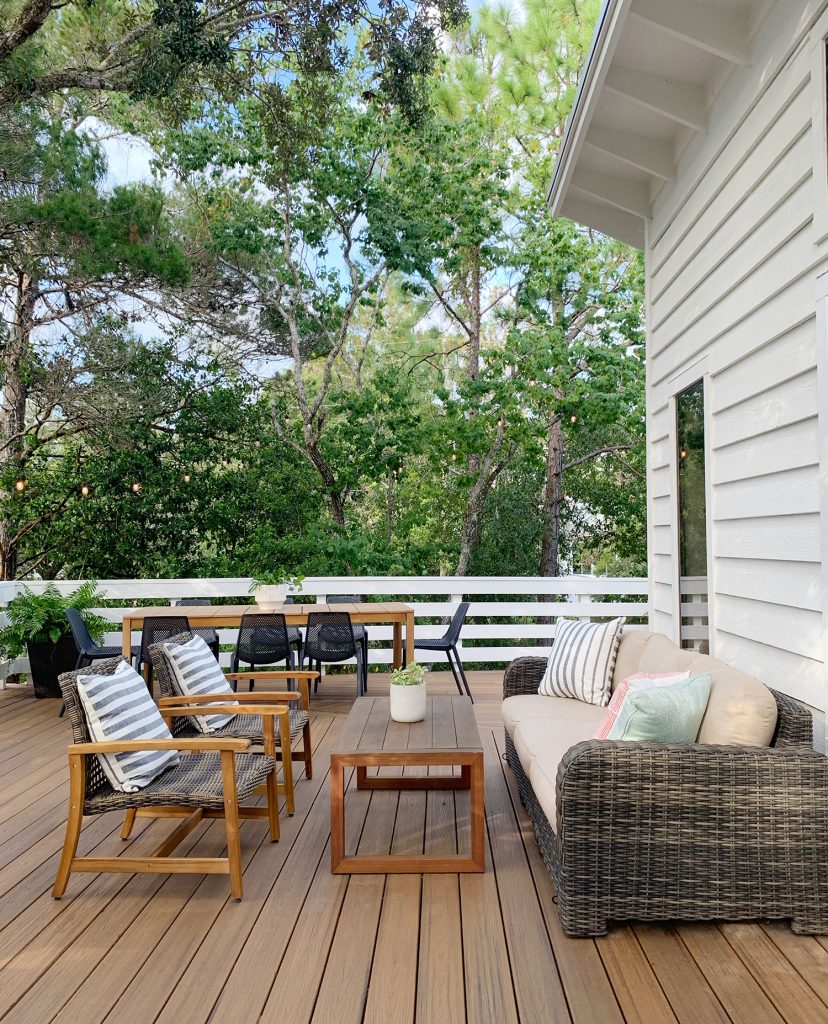
It’s also a great spot for hanging out with larger groups of friends & family when we go back to hosting gatherings (for example, our outdoor dining table that seats eight wouldn’t fit on the front porch or side porch down here).
The front porch, by contrast, has shaped up to be a spot where just one or two of us sit in the early morning listening to a podcast, drinking some tea, or watching the dog as he takes care of business (it’s a glamorous job, but somebody has to do it). So rather than overload the porch with tons of seating or a second smaller outdoor dining spot that might not get much use, we added enough seating to be functional but stopped there – and then Sherry embraced her plant-mom tendencies. There are actually three chairs out here (I’ll show you the other two in a second) but we both love sitting in this one the most (as does Burger, who perches up there nearly every morning).
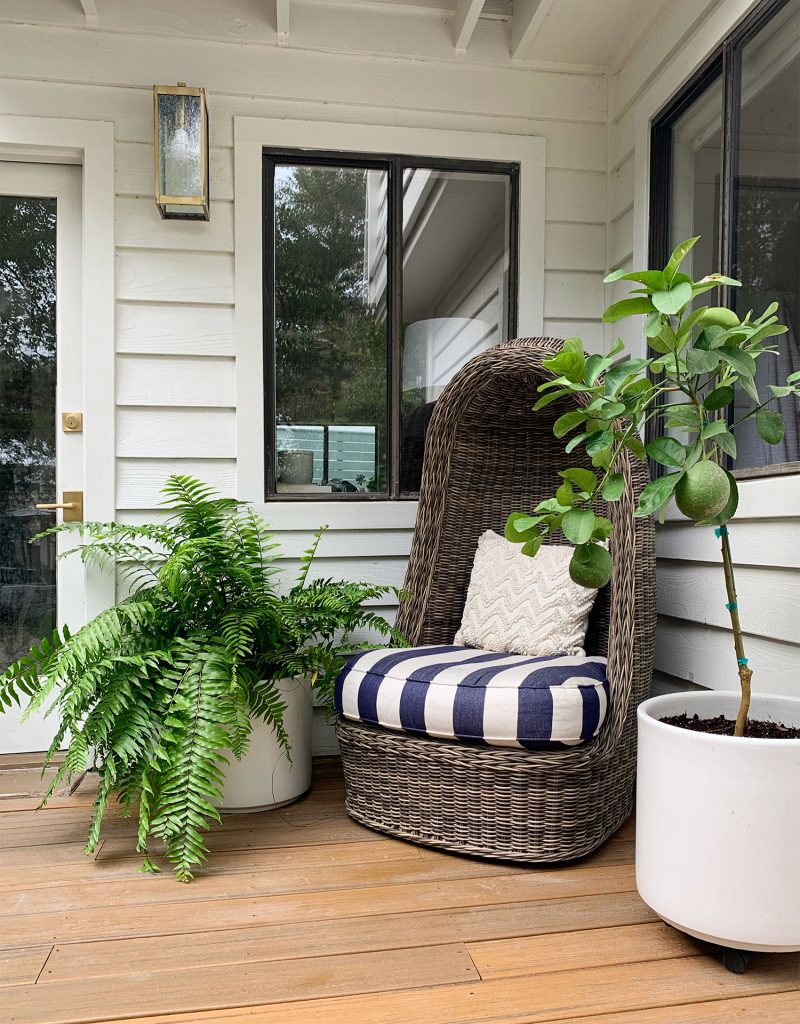
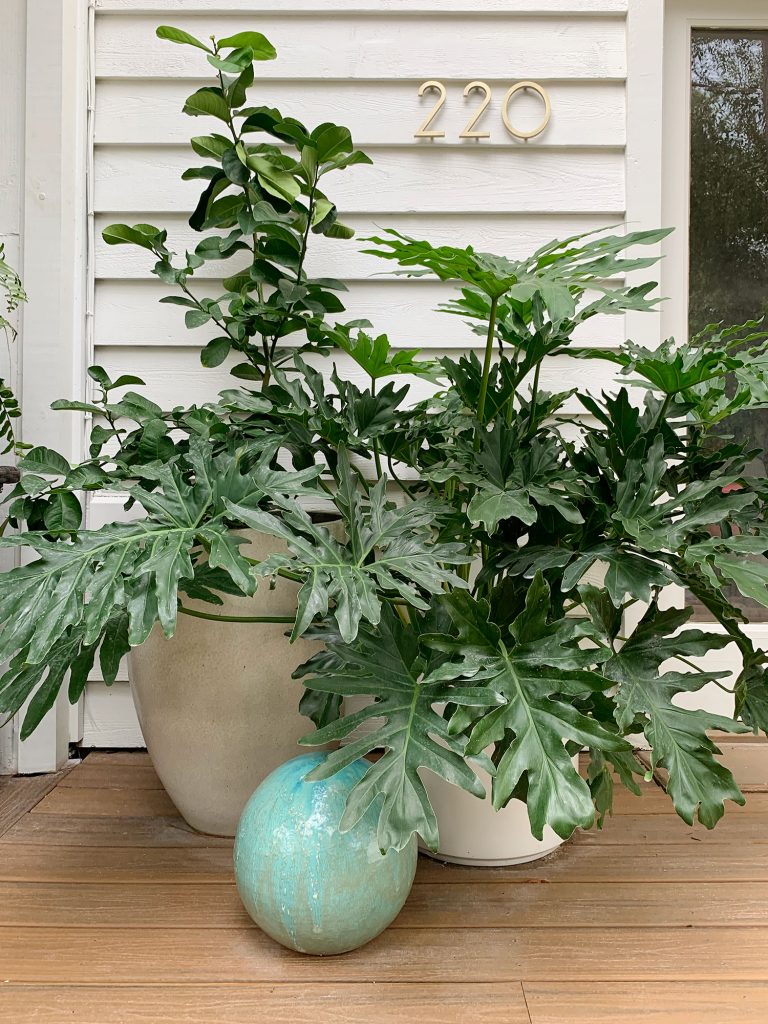
Some of the plants are actually lemon trees that are getting closer to yielding fruit (we have three huge “Ponderosa lemons” that should be ripe next month, according to some green-thumbed neighbors). Yes, the excitement is palpable.
Over the summer Sherry gradually grew our collection of plants and planters, most purchased at various home improvement stores and some larger ones snagged at our local nursery. I wish I could find photos of when we first planted these puppies because they’ve already grown SO MUCH the last couple of months. Especially that big split leaf philodendron on the right!
NOTE: Don’t worry, we digitally altered our house number for all of these photos.
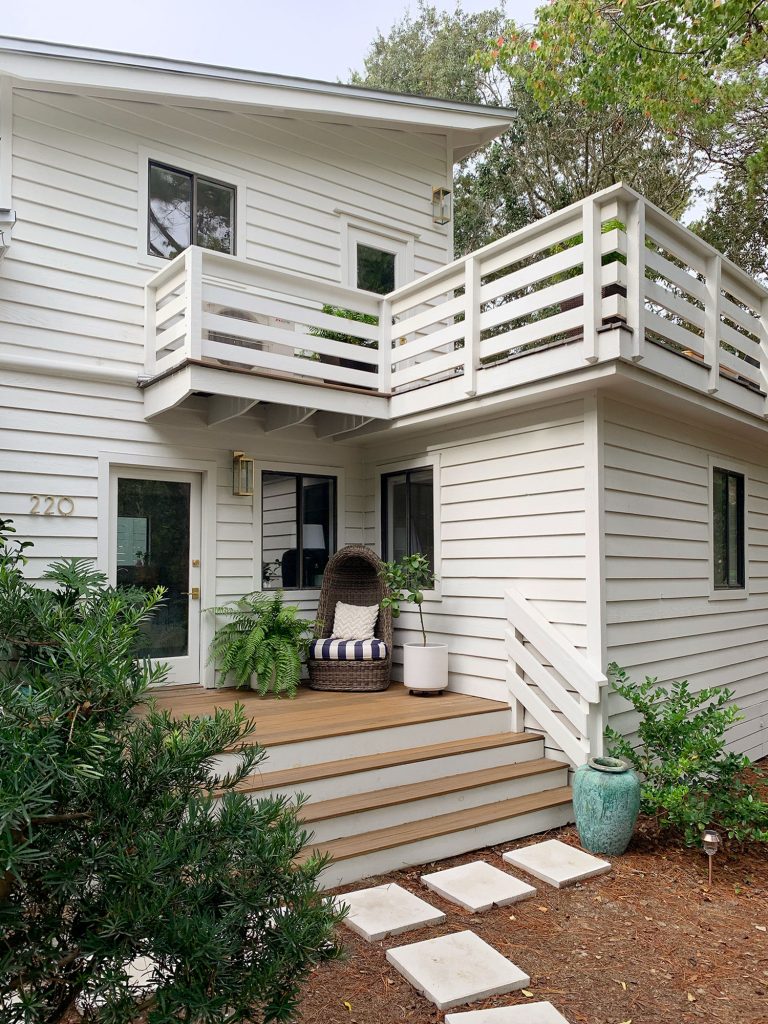
And the potted porch plants aren’t alone because we also peppered privacy plantings around the perimeter of our property as well (how’s that for a tongue twister?). Here’s a shot from further back:
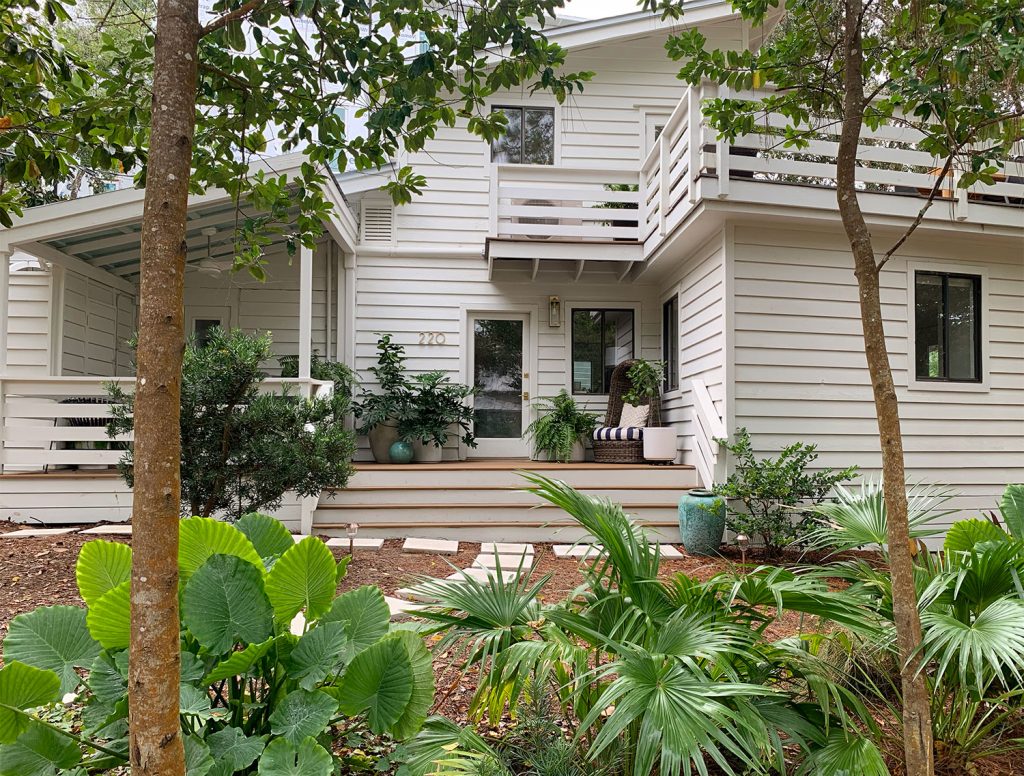
This was the view from our front door back in May. Our front “yard” is pretty shallow (our side yards are where we have the most space) so there wasn’t a whole lot that separated us from the road. This actually similar to the view you’d get from the Ring video doorbell we installed more recently. Ha!
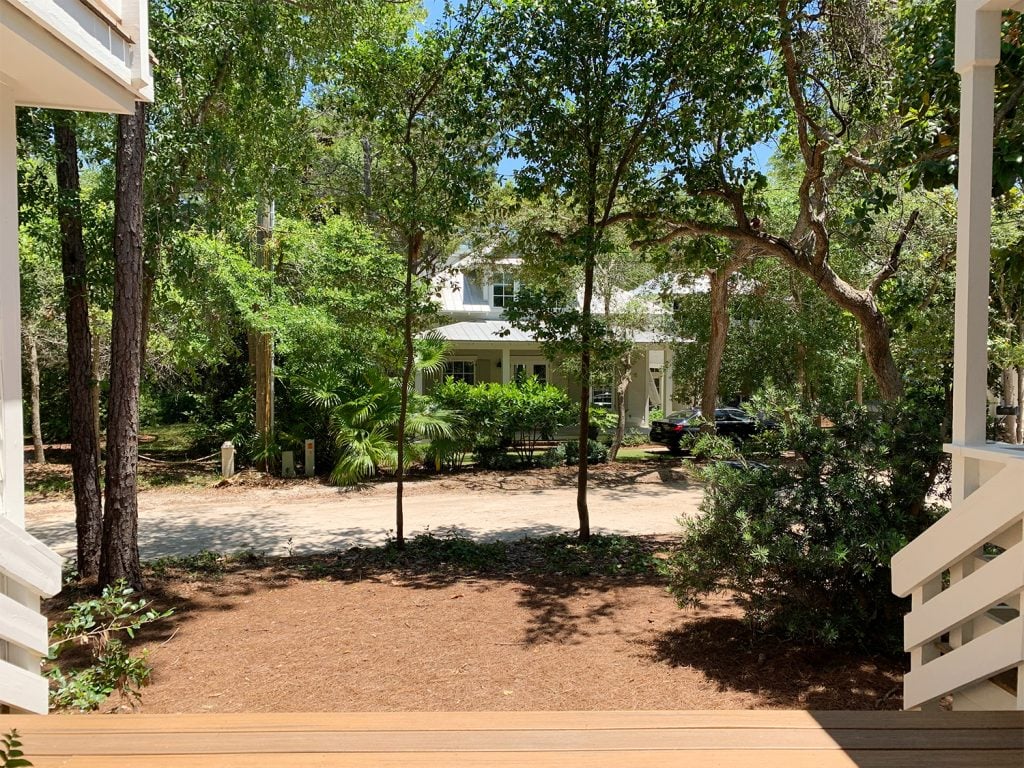
Fast forward five months, and here we are today:
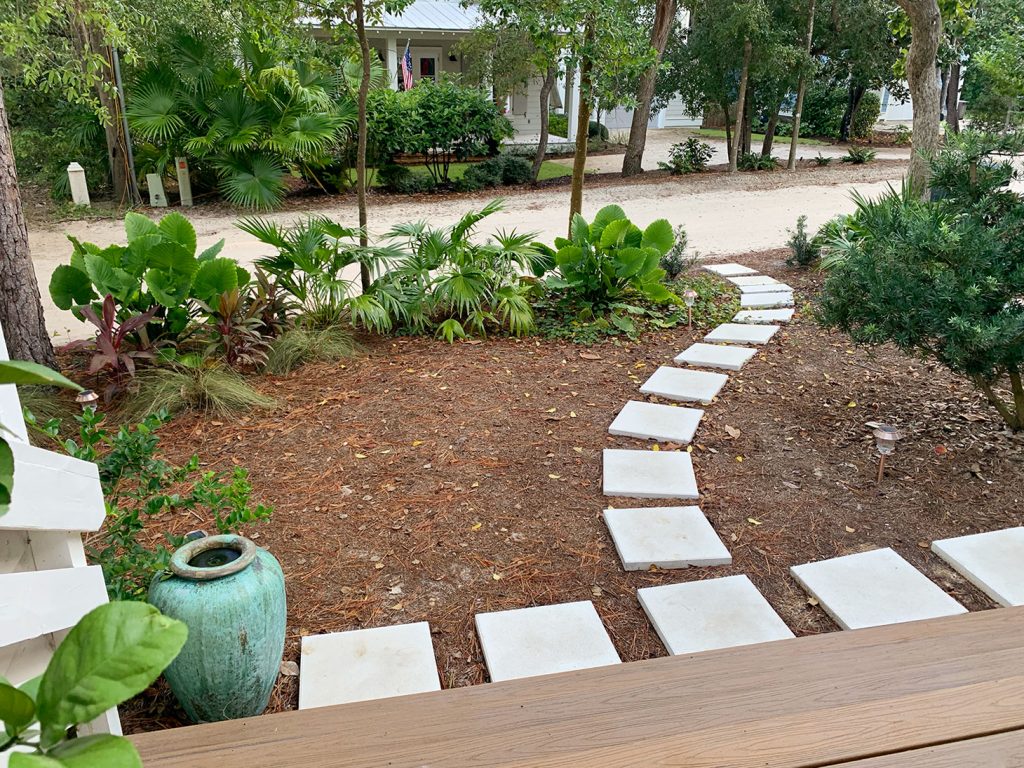
We’ve focused our initial landscaping efforts on delineating our yard from the street, creating sort of a “fence” of greenery that should grow to give us more privacy. The large palm-like bush across the street at our neighbor’s house (near the left side of the picture above) is the same variety we planted if you want a sense of how big they can get – so we’re looking forward to a more enveloped feeling when they grow to be as large as the ones across the street).
You probably also noticed that we added a simple paver pathway using some 20 x 20″ white pavers (they’re $5.88 a pop from Lowe’s – still have to dig them in though). Eventually, we’ll do some more permanent hardscaping (the pavers won’t just be dropped down on the ground – we’ll make them flush), but this turned out to be an easy solution for keeping our feet less pine-needly while also creating a nice curve to break up all the straight lines of our exterior. They’re big and heavy enough to stay put pretty well on their own, so we’re glad to save all that digging for another day.
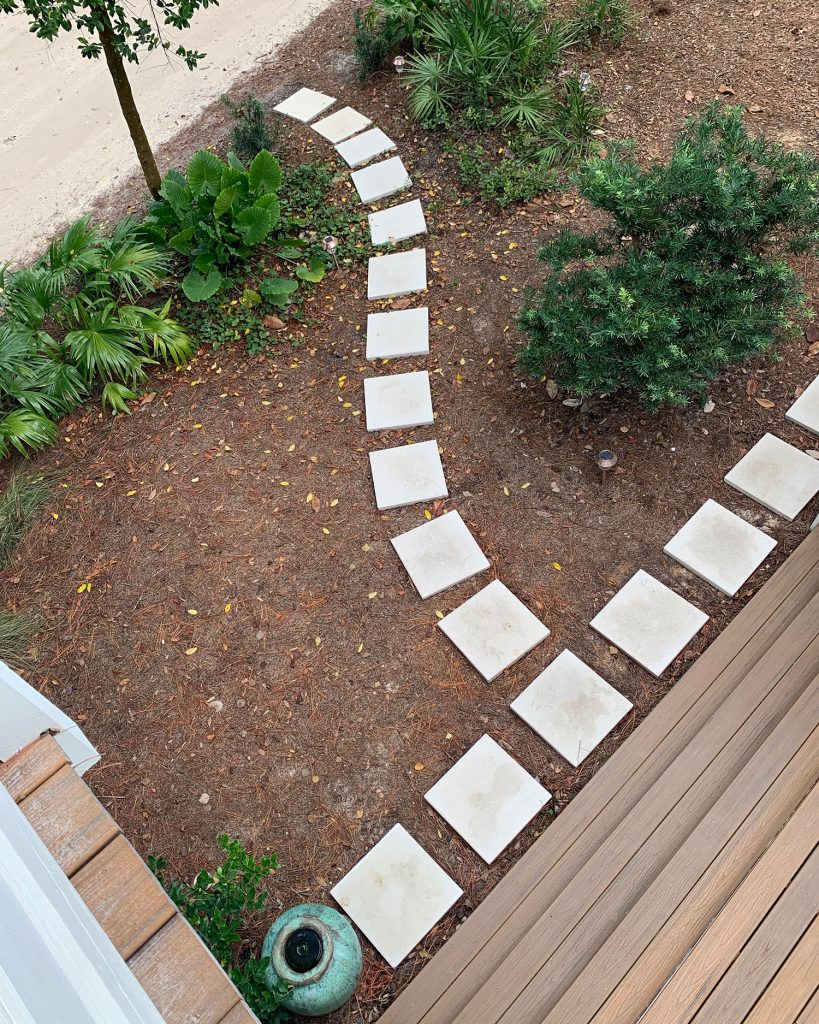
We also extended a secondary path towards our side yard, which is where we have a tree swing that the kids love (this is the swing, and this is the hanging system we used – just one of these makes it spin freely and it’s super secure). I can’t really stress how much use the tree swing gets – it’s where the kids love to lay and read comics, have an afternoon popsicle, spin each other until they can’t walk straight, etc.
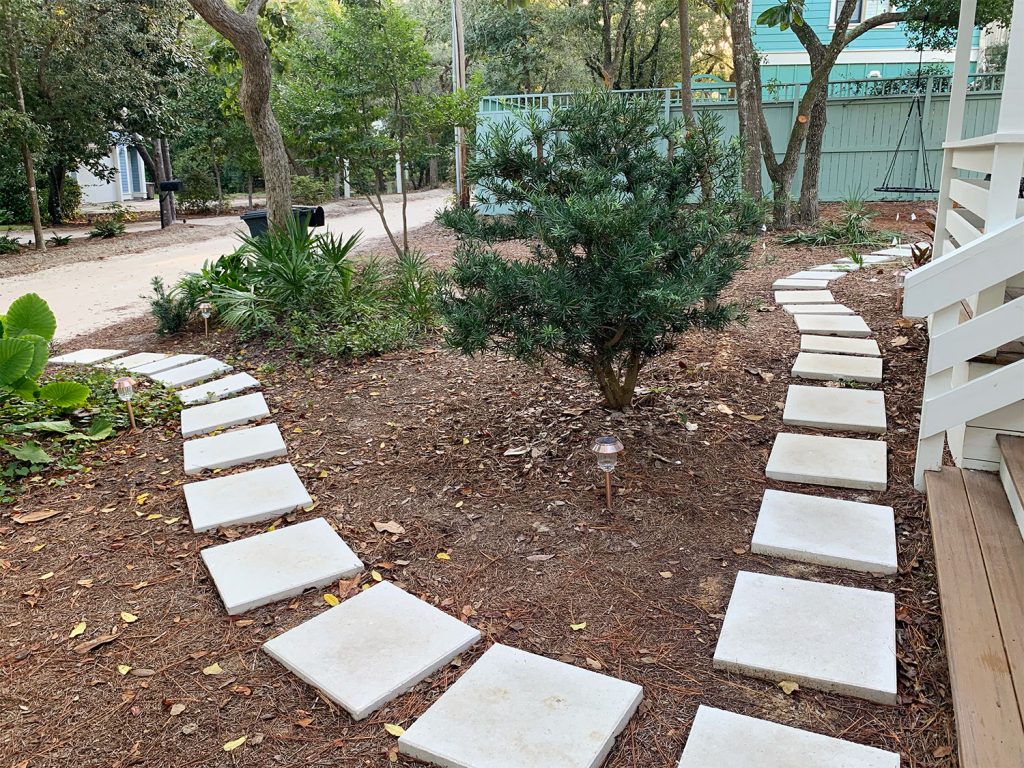
Generally we’ve been enjoying having a fairly “naturalized” yard – especially the no mowing part! We’ve had to replenish the pine needles in a few spots (regional thing we realized: they call it “pine straw” down here), but it’s much easier than the traditional mulch we’re accustomed to.
Our neighborhood generally has an “Old Florida” kind of vibe (hence the unpaved road) and nearly all of our neighbors have pine straw instead of grass (another nearby community actually has a no grass rule and is all pine needles and native plantings). Speaking of native plants, nearly everyone uses at least 90% native plantings in the ground (typically they’ll pot a few non-native things on the porch, but in their actual landscaping it’s not uncommon for the entire yard to be mostly native plants).
So if we see something that seems to be doing well in a neighbor’s yard and can grab it at the local nursery, it’s nice to know that it likely won’t need any special effort to keep it alive (we don’t have irrigation here at all, and love that everything is self-sustaining).
When it comes to rainwater, we’ve really enjoyed having a rain chain, which is essentially just a variation of a normal downspout that would be attached to your gutter (the rain filters down the chain and into the pot – just like any enclosed metal downspout). The pot has a drainage hole, so there aren’t any worries about standing water (which breeds mosquitoes), and we like the idea of possibly adding a drip hose to the drainage hole eventually, which we could use to water a nearby garden (once we plant one).
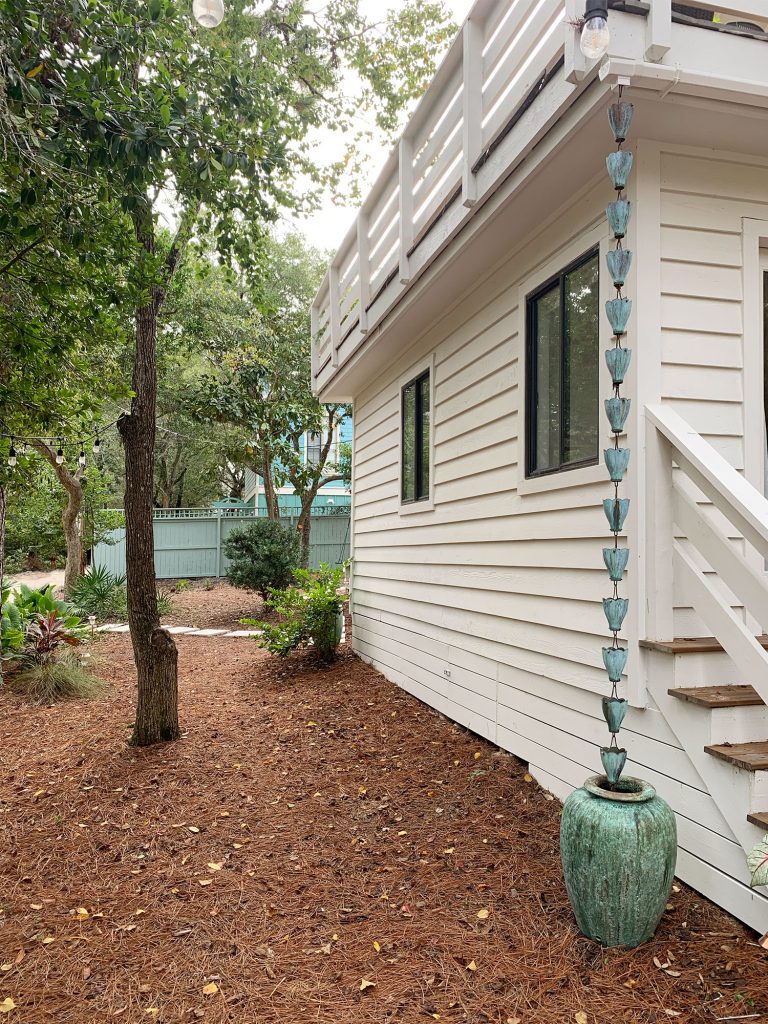
Now let’s get into this covered area on the left side of the front porch, which we call… the side porch. I know, very creative.
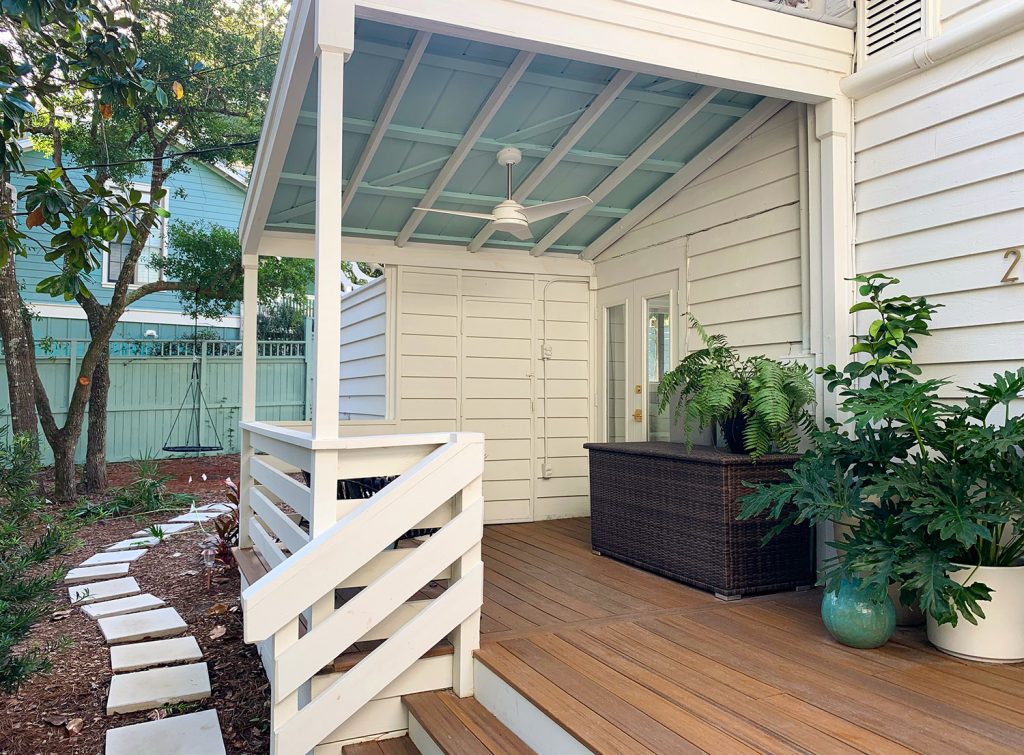
The first thing on our list was adding a nice functional fan. Mosquitoes hate moving air – so it’s a great tip for a space that isn’t screened if you have bugs that are bugging you (second tip: they don’t seem to like to fly up high enough to bother us up on the second floor deck, so I highly recommend that as a place to hang out, eat, etc – even at dusk when mosquitoes can otherwise be annoying).
Our second focus was making the ceiling less of an eyesore. It had been just the raw unpainted metal (plus some paint overspray), so it looked pretty unfinished:
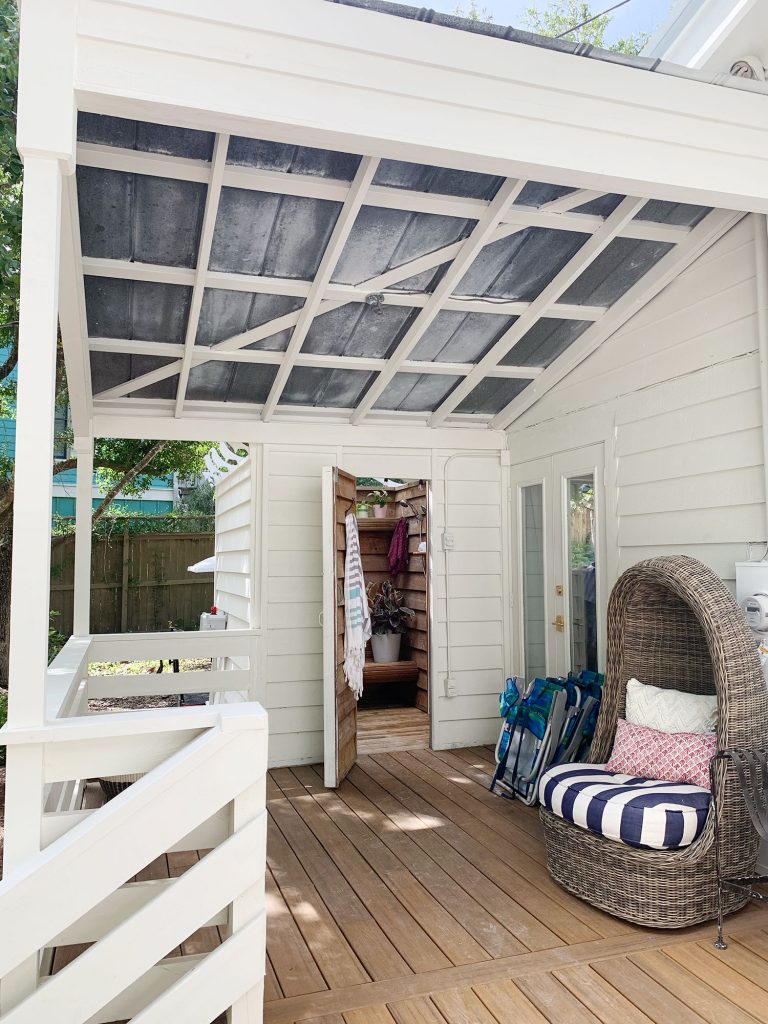
We used a metal primer first (which involved a lot of tedious cutting in)…
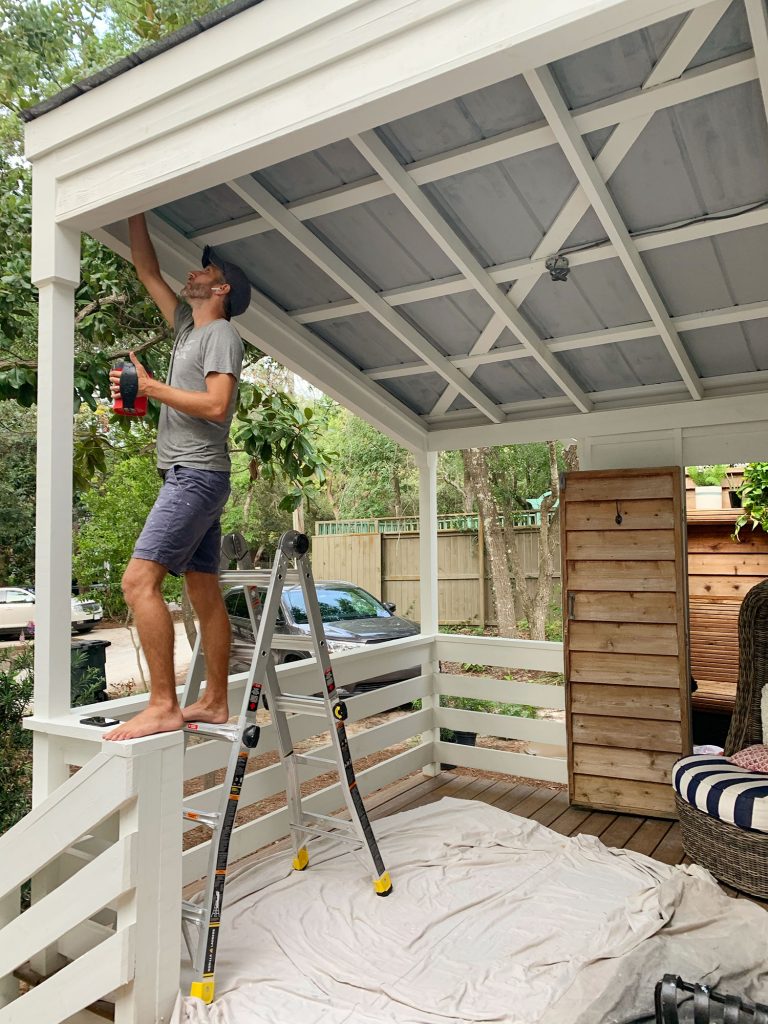
… and then we painted the rest with exterior paint (Waterscape by Sherwin Williams). We’ve always loved a blue ceiling, especially on a porch. It’s actually a bit of a Southern tradition, which you can read more about in our roundup of the best haint blue paint colors.
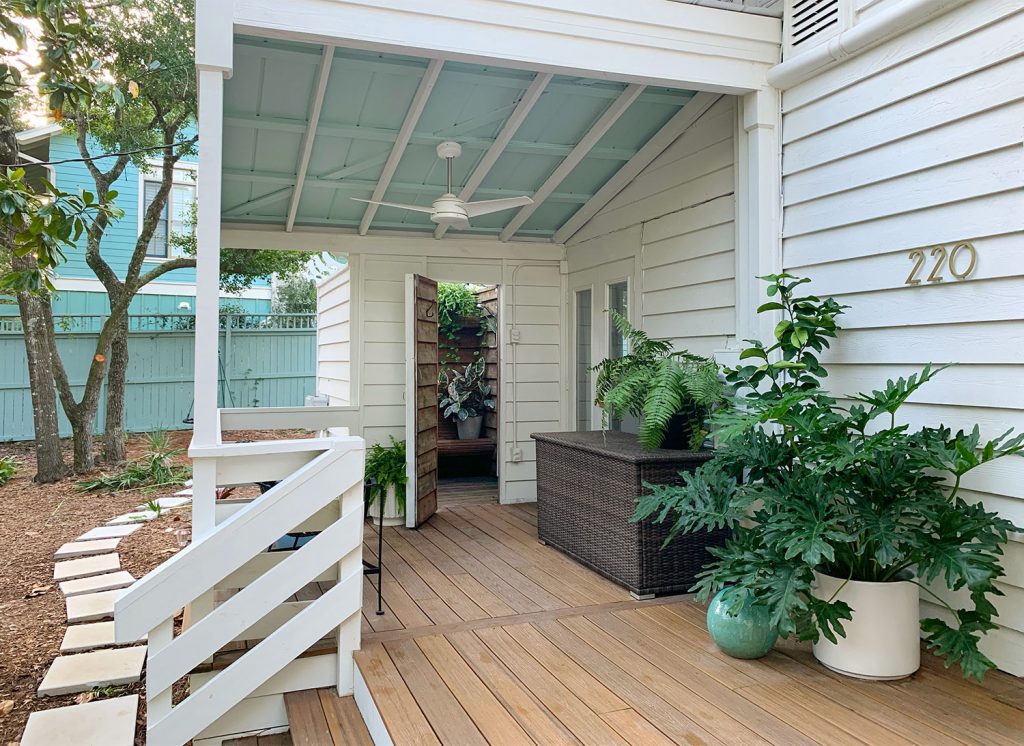
It’s definitely an improvement and it feels less busy, but sometimes it still looks like the raw underside of a metal roof that was just painted blue (which makes sense because that’s what it is). So eventually we’ll probably cover it with some beadboard or some wood planks or something to make it look more finished, while embracing (and maybe enlarging) the exposed beam vibe that’s already happening.
The other thing we’ve got in the works is a DIY hanging daybed situation for where you see the two metal chairs in the photo below (they’ll just move upstairs to the deck or over by the pool once we have that).
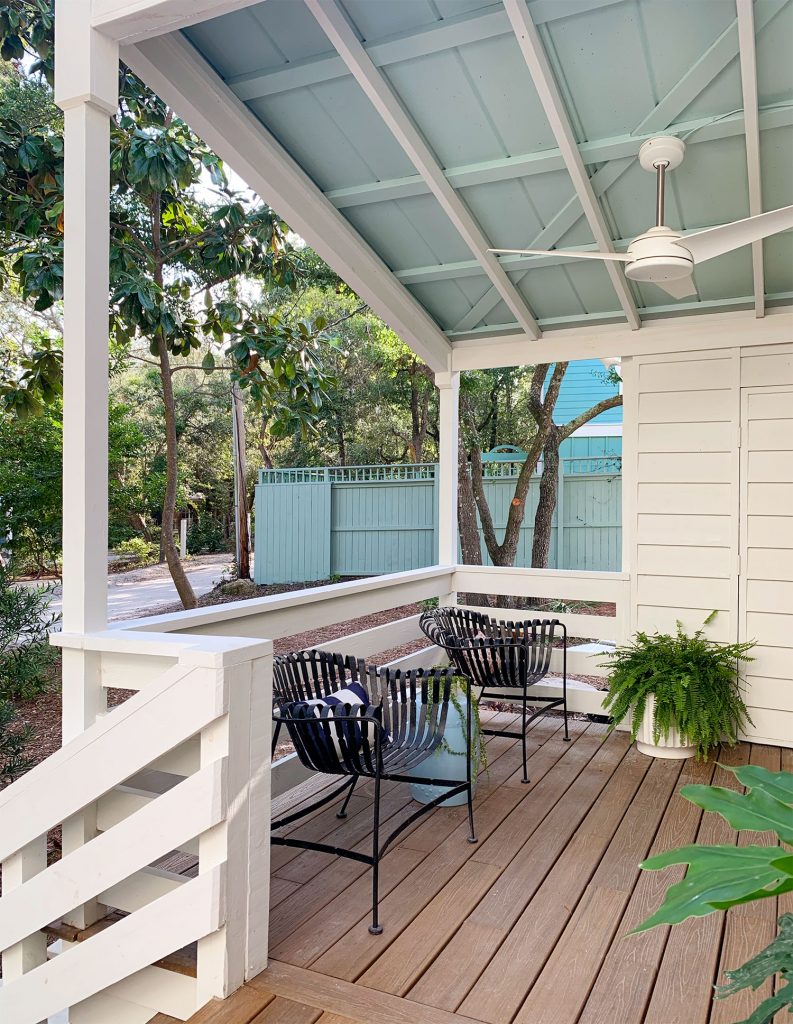
We’ve all been craving a loungier spot where we can recline and rock gently, and this is our favorite location to scratch that itch because:
- 1) it has a strong overhead beam we could attach it to
- 2) there’s a nice strong fan overhead for a gentle breeze even on hot days
- 3) it’ll be covered even in a rainstorm (imagine a nap under there while that happens)
- 4) it’ll feel somewhat private because there’s some larger landscaping that obscures it from most angles
The materials we ordered to make it happen have been on backorder for months, but hopefully we can get started in November.
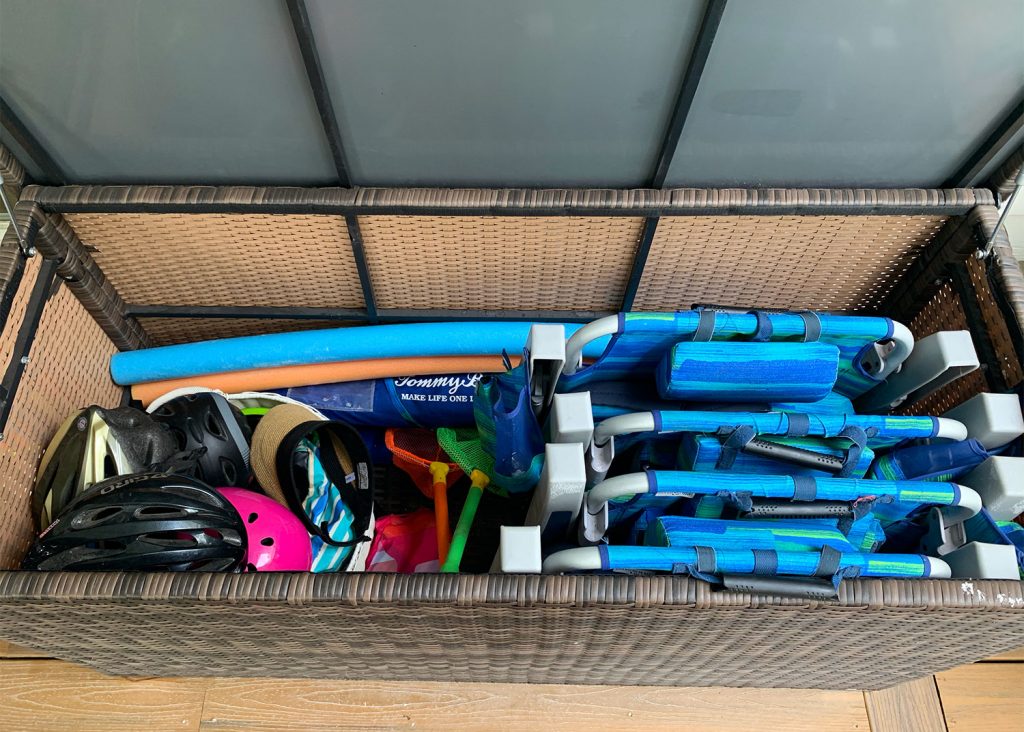
Across from those chairs we’ve added this oversized woven storage box. It may not feel like the most glamorous use of this space, but it’s extremely functional for two reasons. The obvious one being, well, storage!
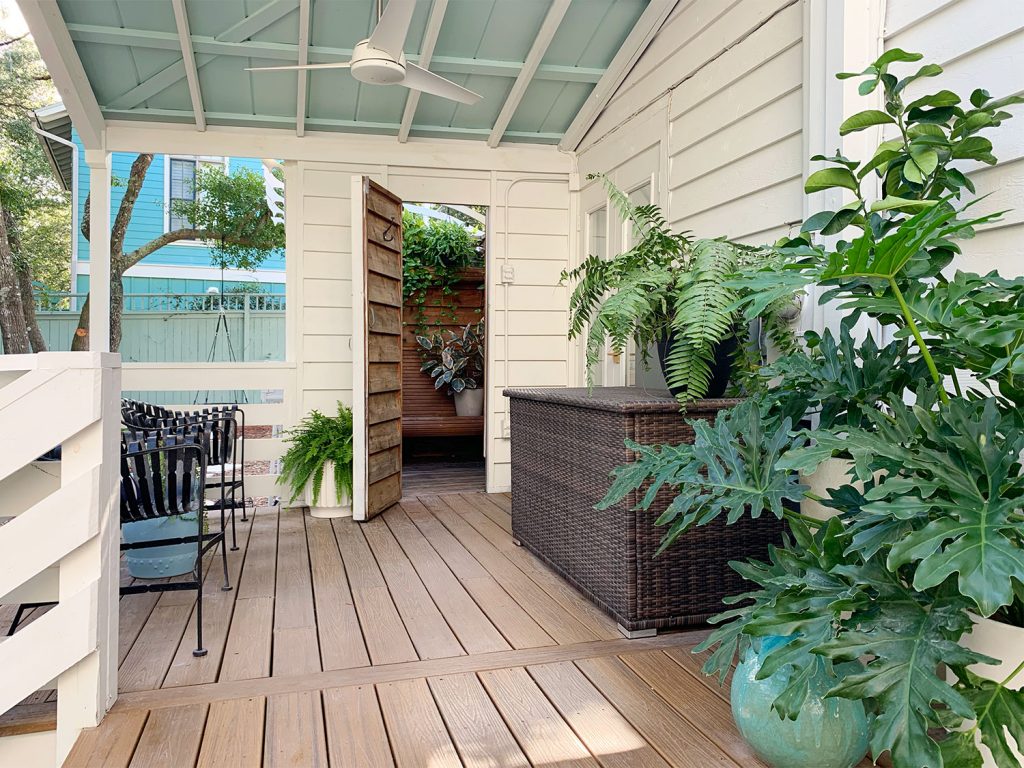
Apart from a small tool shed on the back of the house (which you can see here), we don’t have a garage or any other natural place to stash our beach stuff & outdoor gear. So rather than just leaving our beach chairs and bike helmets in a pile (which is what we did for the first couple of months here) we found this outdoor storage box that not only matched some of our existing outdoor furniture, but also fits all of our beach stuff perfectly! We’re talking about four beach chairs, two umbrellas, all of our bike helmets, some noodles, beach toys, etc.
Beyond the storage function, it also helps us partially solve one of those unfortunate outdoor eyesore issues. Whoever built this house put all of the electrical panel boxes SMACK DAB ON THE FRONT OF THE HOUSE. Yes, not the side or back, these are just a few feet from our front door. We’ve looked into having them relocated but it’s cost-prohibitive at this point (due to various quirky things about our house’s foundation), so for the foreseeable future… this is where they are.
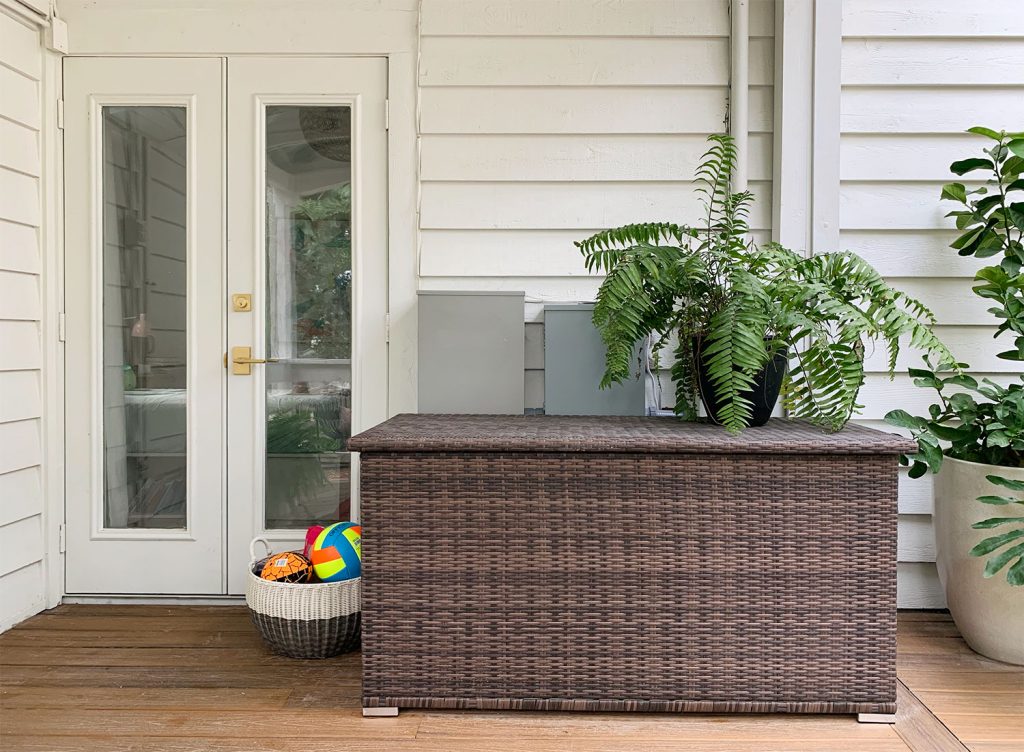
The storage box + lightweight fern does a pretty good job of hiding the meter and all the various tubes and connectors that come up from the deck on that right corner of the covered porch (and the person who reads the meter doesn’t mind the fern since it’s easy to move). But when we had a whole house generator added a few weeks ago, it meant adding two more panels boxes to the mix (you’re killing me, Smalls!). But fret not, we have a plan. So we’ll show you how we’re solving this wall-wart situation soon.
Let’s wrap this post up with one last area that has seen a lot of progress since we last shared it here. Back in June we showed how we whipped our aging outdoor shower back into shape, and it looked like this when the pressure-washing haze lifted:
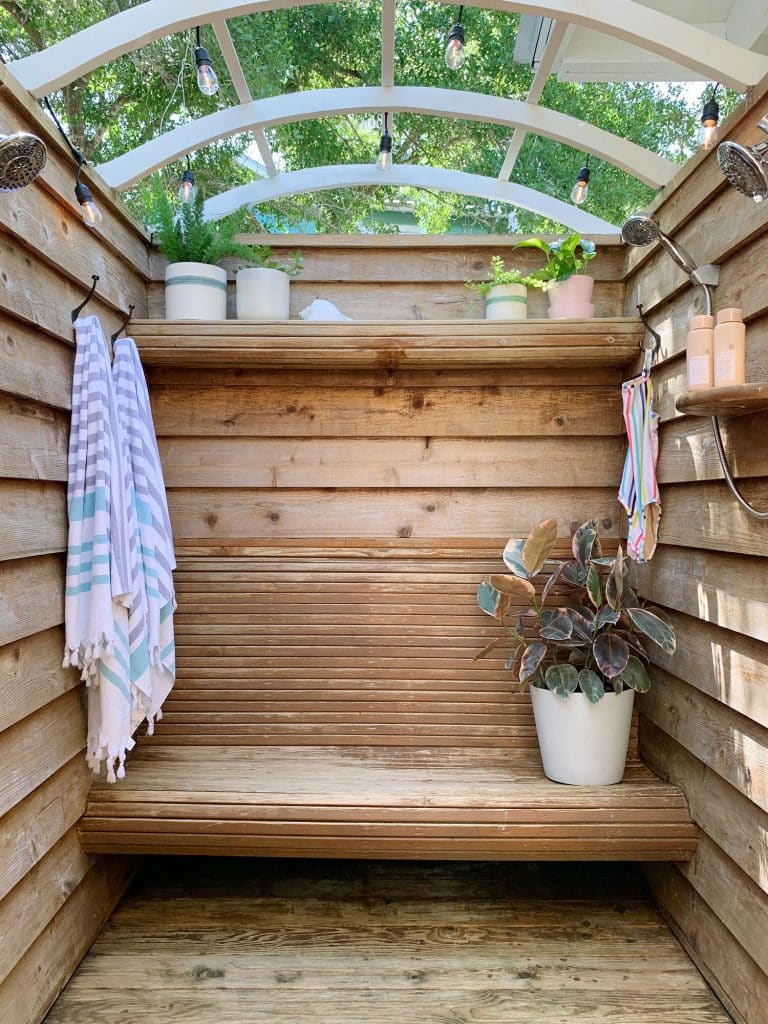
Well, fast forward four months and now it looks like this. Shortly after that original shower post we added some hanging planters along the ceiling of the outdoor shower and to say that they’ve flourished in this environment is an understatement. It’s actually every human in this household’s favorite place to shower (the reason I said human is because Burger hates to bathe pretty much everywhere).
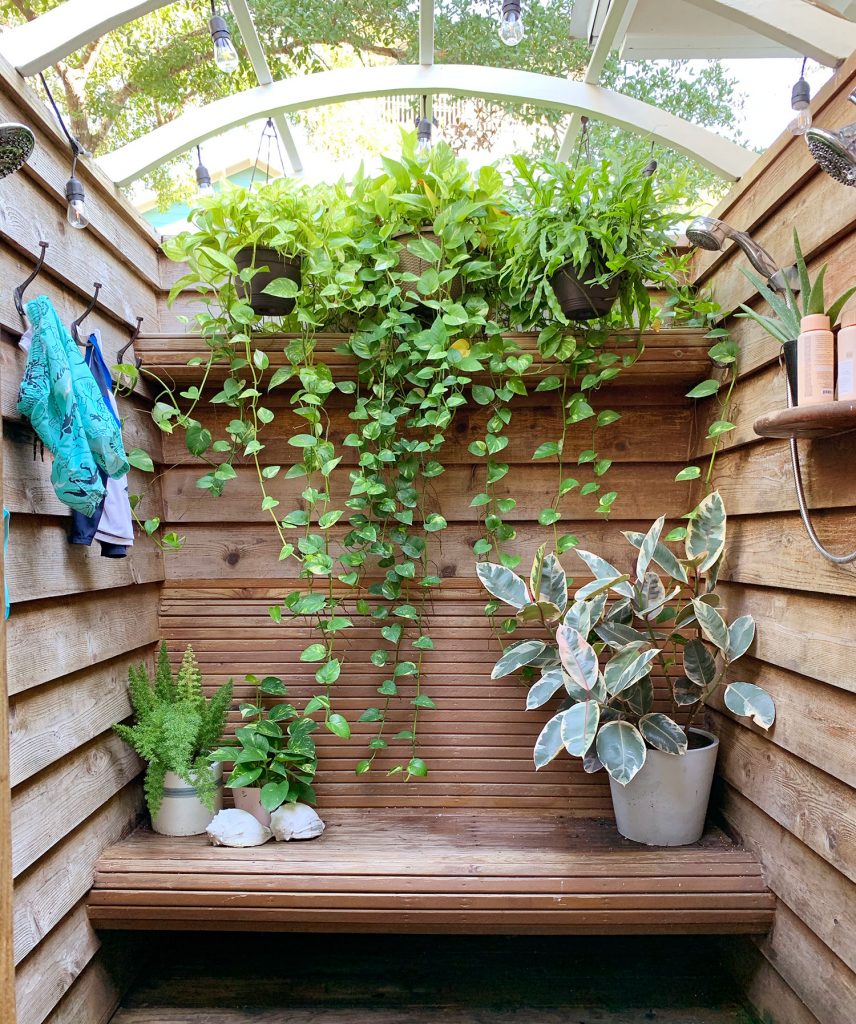
And with yet another big plant reference, I think this post has come full circle. Hope you guys enjoyed seeing a few updates and new angles of these outdoor spaces of ours, and you can always see the entire progress of this house’s makeover right here on this page. We’ve come a long way in 5 months, and by we, I also mean our plants.
More Plant Guides
If you’re looking for more information on some of our favorite plants (real and faux!) check out some of these posts below:
- Fiddle Leaf Fig Care Guide
- Tree Philodendron Care Guide
- How to Build An Easy Plant Shelf
- Protecting Outdoor Plants In A Deep Freeze
- Getting Started With Houseplants, An Expert Interview
- My Favorite Faux Plants
- Easy Houseplants To Keep Alive
- 10 Houseplants For Better Indoor Air Quality
*This post contains affiliate links, so we may earn a small commission when you make a purchase through links on our site at no additional cost to you.
