- The 12 Best White Paint Colors
- Benjamin Moore Edgecomb Gray
- Benjamin Moore Simply White
- Sherwin-Williams Pure White
- Sherwin-Williams Extra White
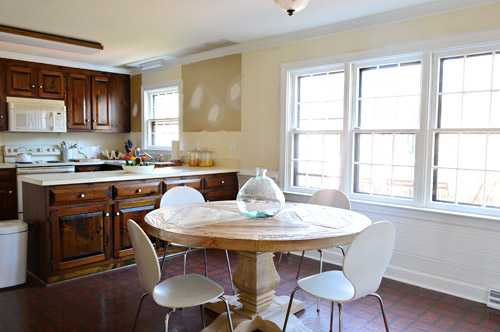
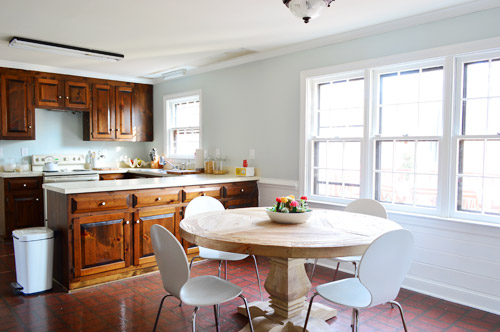
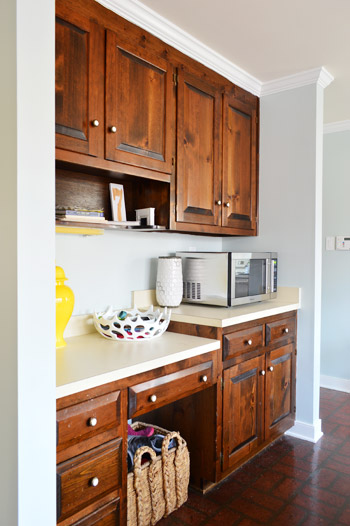
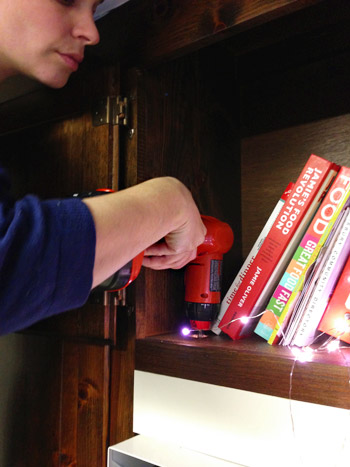
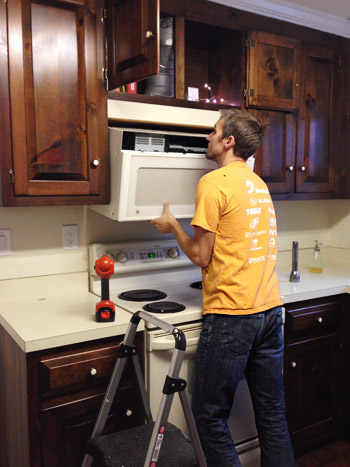
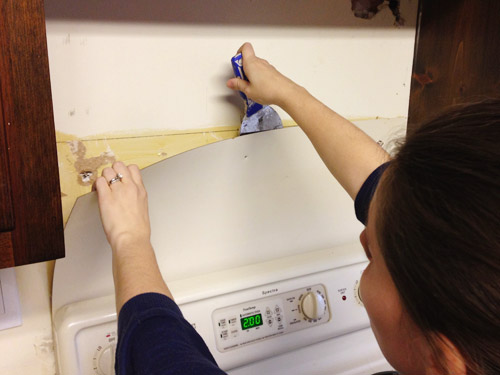
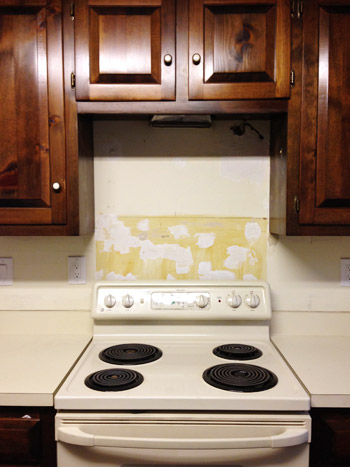
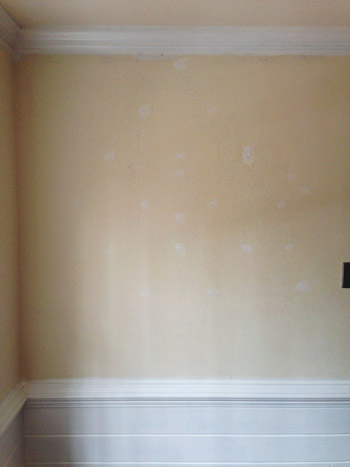
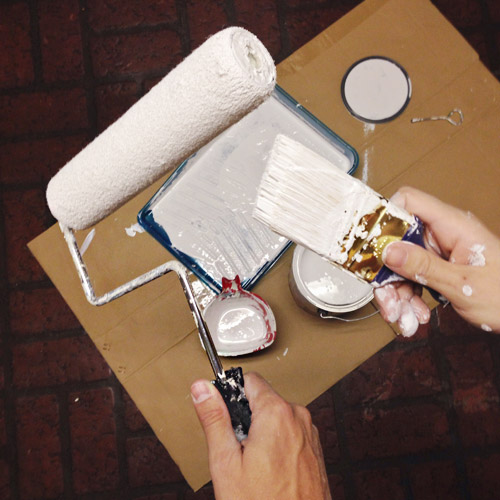
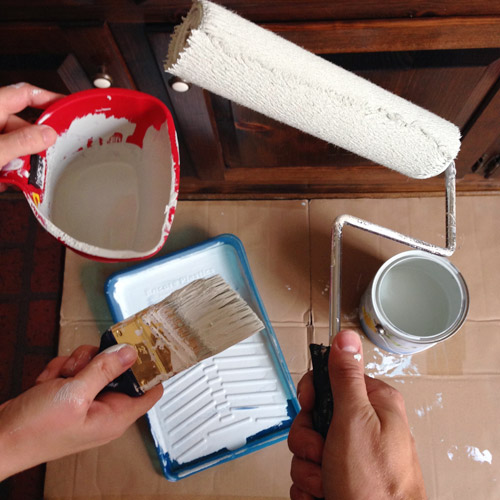
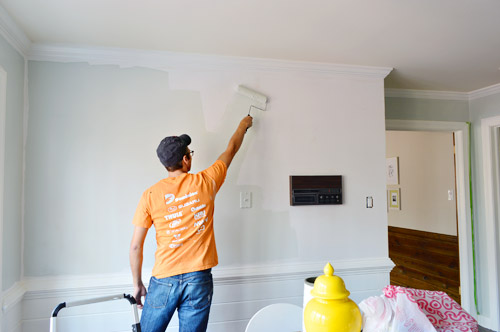
- The areas behind the cabinets that we took down had never been primed or painted, and it’s always good to prime drywall before painting it.
- Walls that haven’t been painted for several years may soak up more paint (as we experienced when painting Clara’s room) and we’d rather it soak up extra primer instead, since it’s cheaper than paint (one coat of primer + two coats of paint is almost always cheaper than three coats of paint because you usually need to buy more than one gallon of paint for more than two coats).
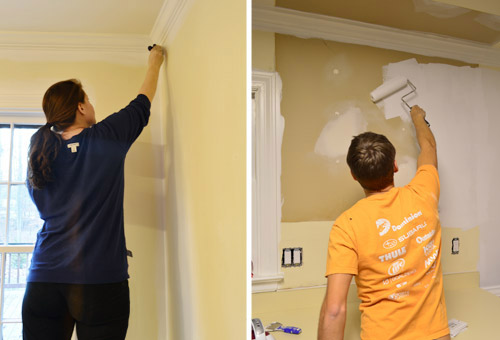
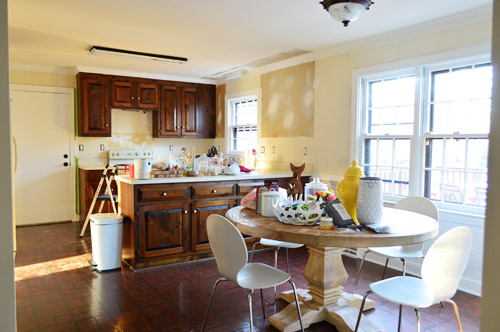
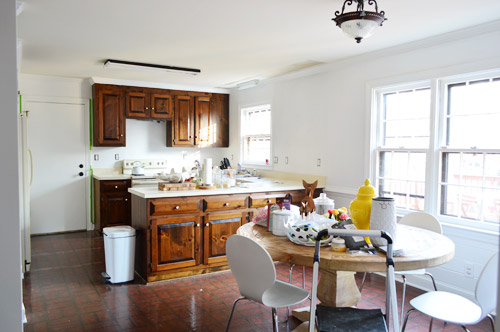
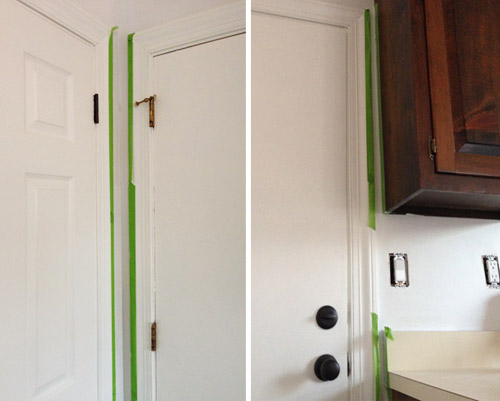

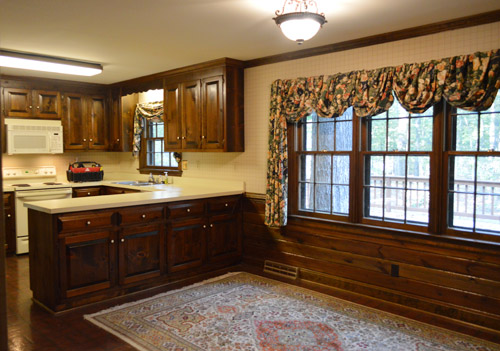
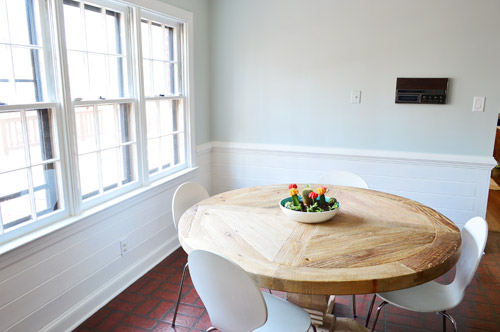
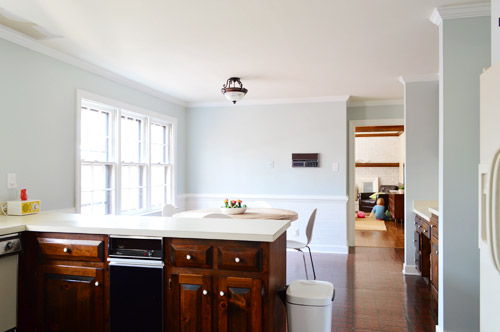
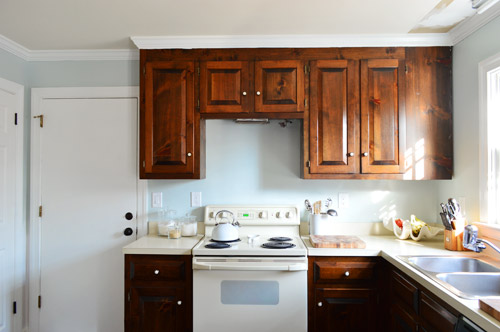
Remove wallpaperMove fridge cabinet forwardRemove upper cabinets on window wall to prep for open shelvesReinstall crown molding(you can read about how we did those first four things here)Prime & paint the pantry and the door to the garagePrime & paint the trim, crown molding, & baseboardsPrime & paint the paneling(you can read about how we did those last three things here)Prime and paint the wallsRemove the existing microwave (craigslist it?) and get a countertop one we can eventually install in the pantry- Install a cheap range hood (we’ve seen some like this for $20 on craigslist) to lighten up that wall
- Patch and paint the ceiling
- Replace the florescent light in the cooking area and the pendant over the sink
- Replace and center the light over the dining table
- Hang floating shelves on the window wall
- Paint the cabinets (you can see the colors we’re leaning towards here)
- Update the old cabinet hinges and knobs
- Get a rug for eat-in area? Possibly install peel and stick tiles everywhere?
- Curtains for windows?

Micha says
Hurray! I’m not the only one who shamelessly paints over yellowed doorbell boxes! I feel redeemed *L* Looks great :)
YoungHouseLove says
We need to start a club! Haha!
xo
s
Heidi says
Just the coat of paint is transformative! The floor, cabinets and counters look so neutralized by the paint. I love it!
Alison says
I just LOVE this color! It looks beautiful. We are using very similar colors to what you guys have chosen so far in our own house, and the next phase for painting will be our conjoined kitchen and family room – and you just put Nelson Blue in the running for color choice!
YoungHouseLove says
It was a really close race between Nelson Blue and Palladian Blue and in the end we just loved that swatch more in here! Good luck with yours Alison!
xo
s
Kate says
Love the color! In some pictures it looks almost like a blueish gray and in other pictures it looks light greenish blue. Is it one of those colors that changes at the different times of day/different lighting?
YoungHouseLove says
Yes! It’s definitely such a mutating color, although I’d describe it less as blue-gray and more as a watery blue-green I think. Very light light aloe.
xo
s
Leigh Anne says
Although you have yet to lay the new tile floors in the kitchen, what are your thoughts on hardwood vs. cork vs. tile? We’re closing on a new house in two weeks and are thinking about doing hardwood in the kitchen. Did you like this in your first house, or have you found that you prefer other flooring in the kitchen?
YoungHouseLove says
We LOVED the hardwood in our first kitchen, but worry we won’t be able to get a good match with the existing hardwoods in the living room and dining room which all run into the kitchen at different doorways. We also really liked cork, but it was a smidge more high maintenance (high heels could put little dings in it – ours never did that, but it’s what we heard) so I think heated tile is this new idea we have since it seems cozy but really good for wear and tear (dog + kid = a love of durable and wipe-able). But hardwood had that going for it as well, we just worry about an unmatched seam looking weird on two sides of the kitchen.
xo
s
Michele says
A.) I L.O.V.E. the new wall color! Refreshing and uplifting! Crazy – the power of paint! I am tucking this color away in my archives of paint chips!
B.) I am TOTALLY looking forward to the painted cabinets and the rest of this room.
Keep up the good work momma – and dad too :)
Donna LeBrun says
Love it! We went from a terrible salmon color (thanks to previous owners) to Nelson blue a few months ago in our dining room. It’s nice and subtle and looks great with our dark wood furniture and pottery collection. The kitchen update is looking good!
YoungHouseLove says
Paint twins! Love it.
xo
s
Stacey H says
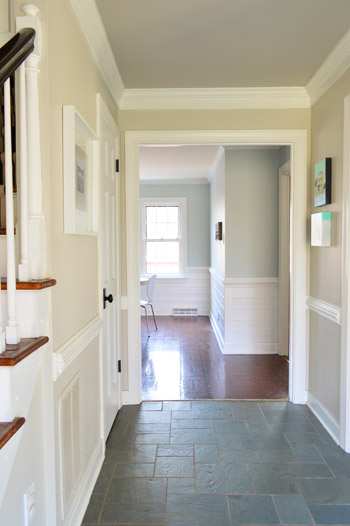
We have a very similar home and also moved in around the same time as you. We are slowly crossing off projects on our to-do list too. We have the same slate floors in our foyer and the same intercom system! Our home was built in 1968….what about you guys? We recently painted our kitchen cabinets Simply White by BM and used Pale Avocado on the walls. I am trying to overlook the awful brown intercom box on the wall and honestly struggle doing so everyday, but my husband thinks that it is the coolest thing ever! ;). He has looked into a new replacement model and promised me that he will update it before we hit the one year mark (May 30th!…I’m not counting down or anything!). It is pretty cool that we will be able to play music through the entire house and even the back patio when it’s done. I guess it will be worth the wait. Good luck with everything! Love your blog!!
YoungHouseLove says
Our first house was built in the 50s and had the faux brick floor and this one is late seventies/early 80s and still has that faux brick flooring! Seems like it was popular for a while! So funny that the slate floor and intercom are identical in your earlier house too – maybe this house is a throwback? I love that you’re replacing your intercom. I’d love more info! What are you going with? We haven’t done any research but hear they can be kinda pricey.
xo
s
cc says
What year was this house built? I am guessing around the time my parents built the house I grew up in (intercom!), and my grandparents built theirs (same brick flooring, but as a backsplash behind the laundry room sink (?!?))
YoungHouseLove says
This one was a late seventies/early 80s house, but our first ranch (from the 50s) had the same faux-brick floor, so it seems to be a trend that inexplicably spanned a few decades!
xo
s
Mary says
So our dear friends have the same cabinets and flooring as your kitchen and are looking to redo it. Two other lovely features are a pale yellow tile backsplash and bright red countertops. :) It’s got a very Southwest feel to it, which is not their thing at all. Changing out the countertops is not an option for them at the moment and they’re struggling with how to make a change on the cheap that will work with the red counters. Any ideas?
YoungHouseLove says
They sell kits for refinishing laminate counters in any color you’d like for $50, so that could be a great way for them to get a new look and not have to work with the red! Otherwise just bringing in swatches of paint to see what goes with the red could help (maybe white cabinets and sand colored walls?).
xo
s
Katie says
A question about the vinyl backsplash: We’re about to remove ours so we can add a tile backsplash, but I can’t see how to remove it at the top. Instead of a microwave, we have an old hood up there. Do I need to remove the hood? If so, has anyone done this before, and are there any electrical concerns?
YoungHouseLove says
What if you pull out the stove and remove it from the bottom? It should have a seam there too and hopefully you won’t have to take the hood out for that!
xo
s
Robin says
What an improvement! I could live in that kitchen for a couple years for sure!
Necole@seriouslysassymama says
What a pretty shade of blue.
Marilyn says
Looking good! Had to laugh at the hands; mine is always covered in paint and even up the arm while my husband doesn’t get a speck on his.
YoungHouseLove says
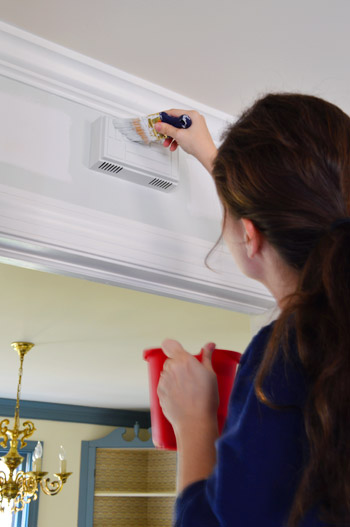
Oh man, mine got so dirty priming this time. It’s always that “transferring it from the can to the little red bucket” phase – and primer’s so much thicker and oozier than paint, so it gives me a harder time. Need to get one of those snap on spouts for the can to keep it clean.
xo
s
Melissa @ Loving Here says
This is so inspiring. We tackled a lot on our list this weekend (using our paint sprayer for the first time was on the list!) but nothing is really done… (still need the clear coat on some furniture we painted, still need to stain the table top to attach it to the now-painted apron for our table project. I have to admit to feeling a little down in the dumps when you all speed through your progress but I imagine you also sometimes feel like things take forever, right?
Anyway, looks great. Good work!
http://www.lovinghere.com
YoungHouseLove says
Oh yes, sometimes it feels like everything that can go wrong, goes wrong (rain for weeks when we just want to grout the sunroom, for example – or thinking a simple light fixture switch will take ten minutes and realized there’s no electric box and having to completely redo things to add one, which takes days). Don’t be sad though, it’s always so worth it in the end. And looking back it never feels like it took that long (only when you’re right in the middle does that happen, haha!). So in hindsight it’s all good ;)
xo
s
Chelsea says
The kitchen looks great! THANK YOU so much for telling us about the signed copies of your book at Chop Suey! Your book was on my Christmas list & I’m beyond excited to get a signed copy! I have one on hold for boyfriend to pick up ASAP! :)
YoungHouseLove says
Aw thanks Chelsea!
xo
s
ETB says
Do you have an idea of what kind of floor you want ultimately in the kitchen? That faux brick is really throwing me off! I love the colors thus far.
YoungHouseLove says
I think we picture large dark tiles (heated) that run into the foyer and half bathroom as well. Maybe in some sort of herringbone, or just laid in a running bond pattern?
xo
s
Marta says
That looks amazing. That’s it I am not waiting another minute. I am getting started on the kitchen. I don’t even care if I can’t do it all at one time. Anything would be a vast improvement. Thanks for the inspiration.
Marta
YoungHouseLove says
Go Marta, go!
xo
s
Jackie says
I think I just found the perfect color for our new baby boy’s new nursery – Nelson blue! Love that it’s not a baby blue and can work once the nursery gets changed back to an office!
YoungHouseLove says
That sounds perfect! It’s one of those colors that changes a lot with the light, so it’s really charming I think!
xo
s
Lynda says
Looks amazing! I’ve loved watching your Phase 1 transformations with the new house because we bought a house in June that has about 10 different types of wallpaper too! I have a question about sanding. We’ve taken down some wallpaper in the kitchen/eat-in area and spackled holes, but we generate a lot of dust when we smooth those parts. We have a newborn and a 4 yr. old so i’d like to minimize dust as much as possible. Do you have any tips for sanding that won’t make a huge mess?
YoungHouseLove says
When spackle is wet (after just being applied), try gently smoothing it with a damp sponge. That tends to even it out it a lot more than just slapping it on there, and you’ll need to sand far less (making less dust) if it’s not as built up and clumpy. Hope it helps!
xo
s
Julie says
First, let me say, this is my first comment on one of your posts! Woohoo! I love YHL and all that goes with that. I read each and every update, and received your book as a gift for my birthday. (yay for me!)
Anywho, I was reading through your “to-do” list for the kitchen, and I see you’re considering possibly installing some peel and stick tiles. If you are truly interested in vinyl, peel and stick or not, please contact me. I work for a luxury vinyl flooring manufacturer that makes peel and stick, along with floating and glue down product that, if I do say so myself, looks pretty dang good. Would love for you to look at some of our product to see if it might work for you.
Thanks for all you do in inspiring all us DIY-ers!
YoungHouseLove says
Aw thanks Julie! You’re so sweet!
xo
s
Koliti says
I really like that you removed those wall cabinets – just because there’s a wall doesn’t mean someone has to put a cabinet on it. Love the nice fresh airy blue and crisp white trim. And fairy lights to the rescue :) ((And…I am very thankful for you and your blog. I was also VERY pleased to see you took last Friday off!))
YoungHouseLove says
Aw thanks Koliti!
xo
s
Sammy says
I really love blue paint colours. Even though I prefer them in other rooms of the house to the kitchen, here it looks great!
Kim says
Looks great guys! It is so fun checking in on your progress. I keep wondering what kind of light fixture you will put in the main part of the kitchen. I have one in my kitchen that is almost exactly like yours. I can’t wait to get some inspiration from what you decide on. Thanks for the great blog!
YoungHouseLove says
We’ve been doing a lot of light fixture debating lately! Can’t wait to share our finds!
xo
s
winterscrow says
Loving the look you guys are leaning toward for the kitchen and i’m also learning from this too.. I have a dream of re doing my kitchen i just have to get the husband on board to let me do it :)
Diana Villabon-Perez says
I love your website!
Debra Shatto says
I have an intercom just like that! Cool eh? I made a chalkboard from spare wood from the pile, I think it was old paneling.I turned it over and painted it with chalk paint and put a simple frame around it that fits tightly enough to stay on the intercom. On another one in a different room I just glued fabric that I liked over the fugly orange original speaker fabric and put framed artwork around it. Best of luck!
YoungHouseLove says
I love that!
xo
s
Kelly says
It looks beautiful! I can’t wait to see how you’re going to replace the fluorescent light! I have FOUR of them in my kitchen AND they’re recessed!
YoungHouseLove says
Oh man! I can’t get to those lights soon enough!
xo
s
adolfo says
so cute
Brandyn says
Love the progress! Can’t wait to see the finished product.
Allison says
“What a difference a day maaaaaaakes! 24 little hourrrrrrrssss!”
Looks great guys!!
Laurie says
It looks great! I love the color! Nicely done you guys. I’m impressed you got stuff done this weekend.
I’ll be really interested in your decision making/research/thought process with the intercom because, in general, I think old electronics like that are kind of intimidating. I have a BUNCH of old doorbells in my hallway. Someone clearly didn’t want to deal with removing them but they kept adding them.
Ultimately, I’d like to get rid of them all and find an updated, sleek, modern solution but when I looked into it, I wasn’t finding a lot of options that were all that different than what I had. I can’t believe that’s the case.
I relate this to your thermostat project. Little updates like that, give an impression of the whole house being updated and I think could make a difference in selling your house down the line. It doesn’t need to be super fancy, just updated.
So whatever you are finding as you figure out the intercome question, do share! It’s very interesting.
YoungHouseLove says
Thanks Laurie! Will do! John loves that kind of stuff, so I’m sure he’ll have a field day researching things and options and can’t wait to share what he finds.
xo
s
Cathy says
Room looks beautiful! Which of the Ben Moore paints did you use?
I wanted to use that color awhile back and was told at the BM paint
store they could only mix it in their most expensive paint line, Aura
I think. I live in Richmond. Thanks!
YoungHouseLove says
That’s so interesting! Were you getting things from Virginia Paint? That’s where we go, and they were able to mix it in the Natura base for us. We did the satin finish if that helps.
xo
s
Larissa says
Looks so much better! You guys need one of these: http://www.homedepot.com/p/Defiant-3-Pack-5-LED-Headlight-809-2613-D/203138523
My husband got one and uses it all. the. time. Like, even when it really isn’t necessary.
YoungHouseLove says
Hilarious! I love that. I will now wear it around the house 24/7.
xo
s
Lindsey Waugh says
Love it so far! With the other changes the cabinets actually don’t look bad at all in the wood color. We retrofitted a new intercom system to replace one very similar to yours and have been happy with it. It’s not something that we wanted, but we wanted to avoid a LOT of drywall work to get rid of it, and there are times that we have really enjoyed being able to play music through the house. It wasn’t inexpensive, but it was fairly simple!
YoungHouseLove says
Would love to know the make/model of your system! We’re looking for something inexpensive and simple, so it sounds perfect!
xo
s
Lindsey Waugh says
Ours actually WAS expensive (wasn’t inexpensive – sorry for the double negative!) but we were happy with it. This is the one that we used. http://www.home-technology-store.com/intercom/MU-DMC34-CD-KT2.aspx
We ordered online from The Home Technology Store, but talked to a representative that was very helpful. I asked a million questions before I purchased it since we were planning to install it ourselves and have never done anything like that. We also had one room where the wiring was bad, so we just covered that one up rather than redo wiring. All-in-all we were glad we did it!
YoungHouseLove says
So awesome! Thanks for the info!
xo
s
Mia says
Are the lower cabinet doors that face out (towards the round table) false fronts? If so, have you considered wrapping the horizontal planking around to that part? It looks to be at the same height as the peninsula.
YoungHouseLove says
Yes, I’d love that (they’re actually real fronts but we never access things from that side) but John thinks it’s too involved just for Phase 1 (since we’re eventually moving these cabinets to the garage for a workroom for John and getting new cabinets, which will be configured differently. If we were keeping the cabinets we’d do that for sure though!
xo
s
Katie says
I love how the kitchen is turning out! Question for you: why do you always paint a coat of primer instead of using paint that includes the primer? Does it produce better results? Painting can be so time consuming, and I’ve always figured I’d want to cut out an extra coat (or two) if I can. Thanks!
YoungHouseLove says
We usually have primer on hand so it’s cheaper to just use what we have and buy paint than spring for the primer + paint stuff (it’s usually more and also isn’t usually VOC-free, which is something we get by doing them separately with a VOC-free primer + a VOC paint like the Natura that we used here). It’s definitely a great way to save a step if you don’t have primer on hand or worry about going no-VOC (I believe it’s still low-VOC so that’s nice).
xo
s
Lindsey says
Can you please remind me where the white chairs came from? I’ve been looking for something similar and I think those would be perfect. Also, are the chairs comfortable to sit in??
Thanks!
YoungHouseLove says
They’re very comfy! They were actually an ebay purchase from my NYC days 7 years ago. They were really cheap and I just primed and painted them white (they were orange). Still alive and kicking years later!
xo
s
Mairi says
Hi guys! I’m loving your paint choices in the new house. Are you planning to do an updated floor plan that includes your paint choices by room ???
I might want to use some of the same in my house!
Thanks!
YoungHouseLove says
Yes, we should do that! Maybe when we get a few more rooms going (I think we’ve painted five so far, so maybe once we hit seven?).
xo
s
Andrea says
WOW!!!! Such a huge improvement – it looks so much brighter and bigger. Love the crisp colour too.
Leah says
Very pretty! LOVE that blue!!!
Sarah says
Was the microwave vented to the outside or was it just recirculating? If it was just recirculating, do you have concerns about steam build up at all? Your kitchen layout is very similar to mine, and I’ve actually been debating putting a OTR microwave in because our counter top space is limited (we don’t have a pantry area).
YoungHouseLove says
It was venting to the outside, so we’re going to replace it with a $25 one on craigslist that we found that also vents outside (we’ll use it for Phase 1 and then hope to craigslist it for $25 again in a year or two when we splurge for a nice range hood during Phase 2).
xo
s
mary says
Don’t take this wrong, but don’t the sleek, contemporary chairs with the (gorgeous) rustic/traditional table bother you? Is it on your list to replace them?
I love the Wooster Shortcut brush (thanks for the rec) and usually only wash them once or twice before I buy a new one because of dried paint high on the bristes. So I splurged on the Chinex version (on Amazon, for like $19), which is easier to get the dried paint up on the bristles. So far I’ve only used/cleaned it twice but it looks brand new, unlike the $6 version. If you burn through the little Shortcut ones, you might like the Chinex for a ‘keeper’.
YoungHouseLove says
Oh yes, those chairs are just placeholders. I don’t mind modern + rustic in general, but they seem a little small for our big table (they used to be around the smaller pedestal table in our last living room). I’ve had then for 7 years (since my NYC days) so they work for now, but once we find something we love more, we’re sure they’ll end up in the office or Clara’s room when she outgrows her little chairs, etc. As for the paint brush recommendation, thanks for the tip! Will have to check them out!
xo
s
Hope says
Looks great. Btw, is that a magic chef microwave oven from Home Depot? I am looking to buy one too.
YoungHouseLove says
Yes! So far it has been great, but we don’t use microwaves often, so we’ll have to do an update on it a few months in or something.
xo
s
burgessjackie says
The kitchen is looking great! Have you two considered removing the faux brick flooring in there to reveal the plywood subfloor (similar to the master bathroom?). Might make it easier to live with the kitchen until you’re ready for phase 2? :)
YoungHouseLove says
Haven’t even thought about that, but you’re right – depending on what shape it’s in we could do that! We want to check the floor for asbestos before we rip it up(should be safe since this house was built after the cutoff, but we hear some builders used old materials so they still test positive). Thanks for the idea!
xo
s
Jessica says
What line of BM paint do you use? I just learned that they have a specific Kitchen & Bath paint, but I haven’t tried it yet. Have you?
YoungHouseLove says
We use Natura just because it’s VOC-free, but I hear good things about the kitchen/bath stuff!
xo
s
Diana Buchanan says
Wow, it looks GREAT! I really love how the table works with the light blue. So pretty. :)
Seems like we had similar weekend activities! We are in the midst of redoing our kitchen (as in – I currently have grout-less tile on my wall and paper all over the counters) and I’m memorizing your post on grouting your penny tile. I’ll be back with updates! :)
http://www.fromragstonorthrich.blogspot.com
YoungHouseLove says
Good luck Diana!
xo
s
Kathy says
Very soft and pretty! I tend towards Almond Latte, Pavillion Beige, or Graham Cracker, so seeing the blue is always a surprise – a good one – to me.
Do you need to keep any of the uppers? I’ve seen several kitchens with no cabinets at all just some open shelving, and love that look. As long as there’s enough storage elsewhere. (I think I first saw it in the movie Hitch with Will Smith, but that kitchen also had a ton of windows, but it’s still one of my favorite movie kitchens).
YoungHouseLove says
I love that look too Kathy! Unfortunately we do use them, since half of the peninsula is taken up by a non-working garbage disposal. But I think when we redo the kitchen for Phase 2 we might be able to reconfigure things to make uppers in some of those places less necessary!
xo
s
holly andler says
if you are coming to the charlotte area any time soon you can pick up our nice stainless, kenmore hood that we just took down to replace with a microwave. our tiny kitchen couldn’t afford to lose counter space or pantry space for a microwave.
holly andler says
also, we just painted our living spaces revere pewter and it made the house look brand new!
YoungHouseLove says
Oh man, that sounds awesome!
xo
s
Tess says
This is probably super silly, but my house never looks as clean as yours, even when I’m not in the middle of a project. Do you have some kind of chore system to keep it sparkling all the time? Especially with a little one running around! I’m in awe.
YoungHouseLove says
Our house is a MESS! It’s just a strategic mess. Meaning the dining room is full of stuff (hospital projects, stuff offset from the kitchen, Clara’s random toys that she left in there) but the kitchen’s clean at this moment. Maybe next week the mess will be in the kitchen and we’ll clean and paint the dining room. It just seems to get displaced from room to room, but rest assured, it’s there! Haha!
xo
s