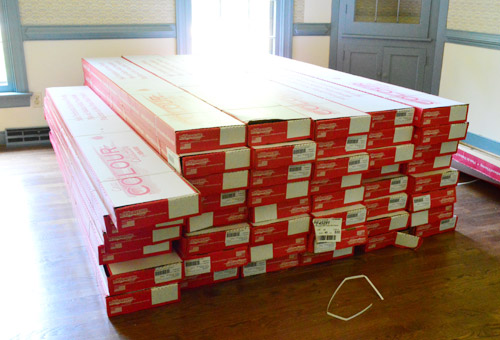
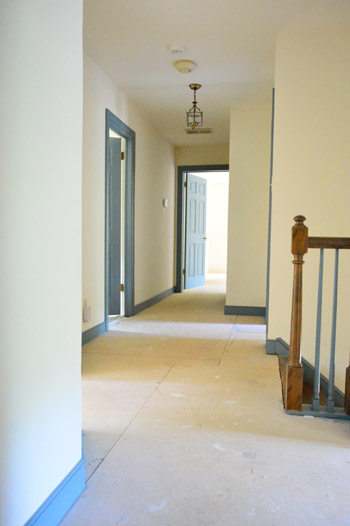
Particle board subfloors aren’t always great under hardwoods – especially when you buy nail-in flooring like we did. Some folks install right over it without any issues while other folks have big problems down the line. Because it’s so unpredictable, hardwood manufacturers void the warranty if you install them that way – which was definitely not a risk we were willing to take. According to our initial research, we were left with three not-so-hot options.
- Return the meant-to-be-nailed flooring and buy a meant-to-be-floated floor instead. But after falling hard for the one we picked and our adventure getting it home, we weren’t eager to take it back. Especially since none of the floating options were as close of a match to our existing wood stairs and hardwoods downstairs.
- Remove the particle board subfloor to (hopefully) reveal plywood underneath. This would’ve been time-intensive (the particle board was laid under all of the door jambs and everything) and it would’ve lowered the level of the floor (making door heights and transitions into the bathrooms weird). It would also cause us to lose the sound deadening effect that this particle board was installed to create in the first place. And we definitely didn’t want a loud and echo-ey floor upstairs.
- Install plywood right over the particle board. This was most the promising option, except that it too would’ve been time intensive, would’ve raised the floors (requiring us to cut down all of the doors and live with a noticeably high top step of the stairs). It would also carry an extra material cost.
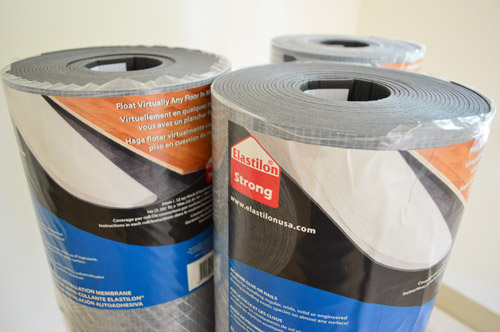
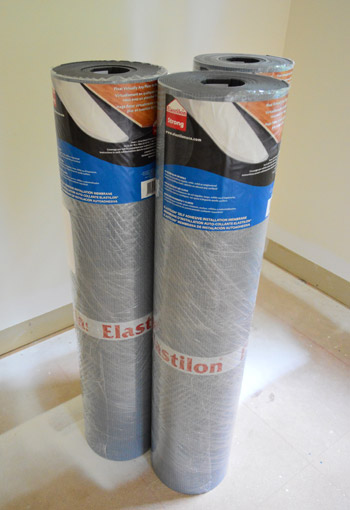
- It has a lifetime warranty, and is guaranteed to last as long as the hardwoods
- It’s elastic, so it stretches along with your boards during seasonal changes in temperature (this helps to prevent cracking, gapping, or warping)
- We only needed an exacto knife to install it, which saved us the expense of buying or repeatedly renting a nailer (although we were a little sad not to get to try one)
- It’s non-toxic, has no-VOCs, and no odor – which is great considering it’s an adhesive product
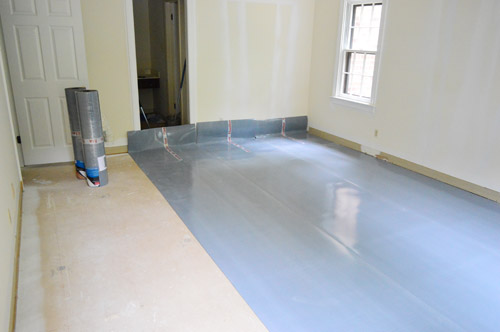
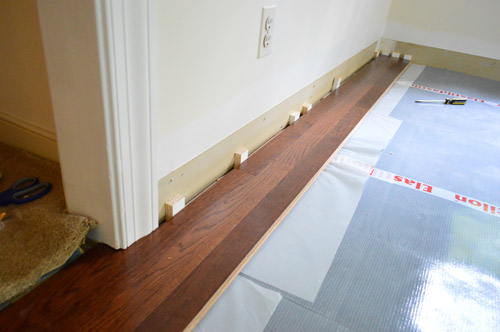
Laying the first row is a tricky step, since it sets the tone for how straight your entire floor will be. And you can’t always trust your drywall to be straight. So we started building our floor using some of the longest, straightest boards we could find to help overcome any curves in the wall. Oh, and those are scrap wood spacers against the wall that help leave an expansion gap around the edge (for when changes in temperature may make the floor expand).
Another thing that helped us feel more confident about our first row being straight was laying it across as long of a wall as possible. For us, this meant taking our first row all the way out into the hallway. Which also meant rough-setting a lot of boards before anything was actually ever stuck down – just to make sure they didn’t look wonky.
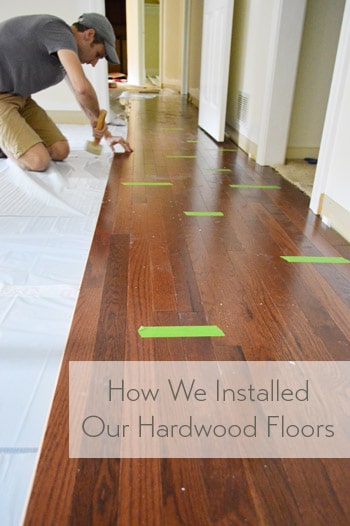
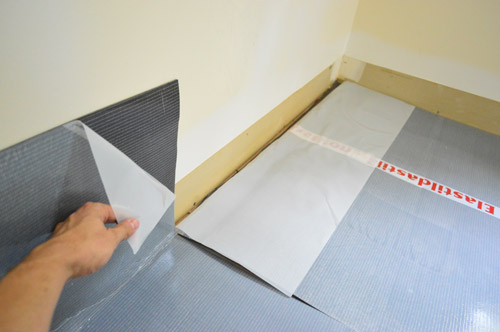
Once we felt good about our first few rows being straight, it was time to permanently secure them in place. Here’s where that extra flap of plastic comes in handy. You pull on it slowly so that it exposes the sticky Elastilon beneath the floor boards, so the bottom of the boards can be joined to the underlayment, permanently holding them in place.
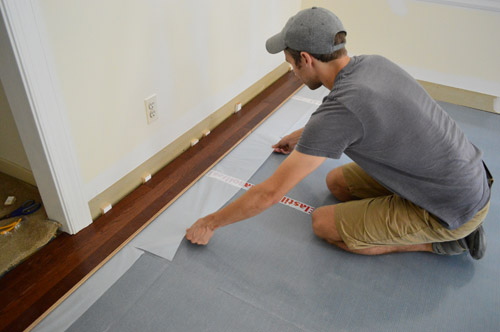
Once those boards touch the Elastilon, boy are they stuck. It takes a good yank (and sometimes even a pry) to get them loose. So that makes us feel good about the long term hold of this stuff!
From there, it was pretty much the same process – lay a couple rows, bang them in tightly, peel back the plastic so they’re secured, and move on. Laying the boards was just like any floor – the boards have a tongue and groove that slide together, and we used a rubber mallet to tap them snugly into place.
We also used a bit of wood glue on the groove at the end of each plank as suggested, just to further secure everything.
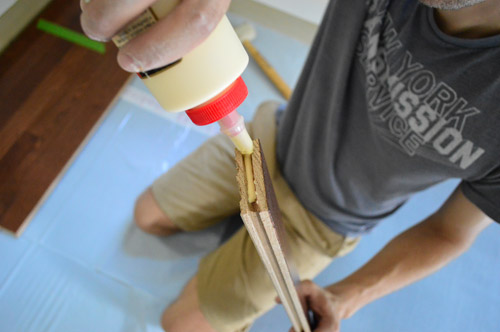
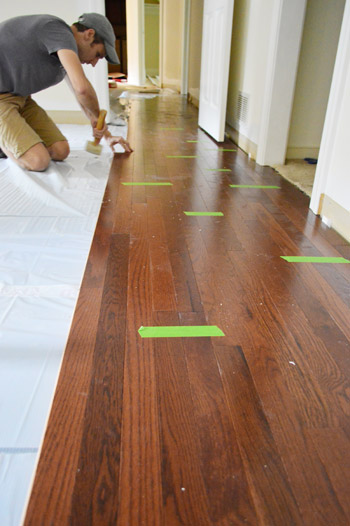
Oh and we periodically taped the boards together, which was also recommended – just to discourage slipping or shifting during the install. If there are two of you working on this project, one person might grab boards, run a bead of glue along the end grove (seen above), and hand them to the other person who’s clicking them in and hammering them into place. The person on glue duty can also pull the Elastilon every few rows and toss down some tape as you go. That’s the grove that Sherry and I got into (and every few hours we switched jobs to keep from getting too sore/tired).
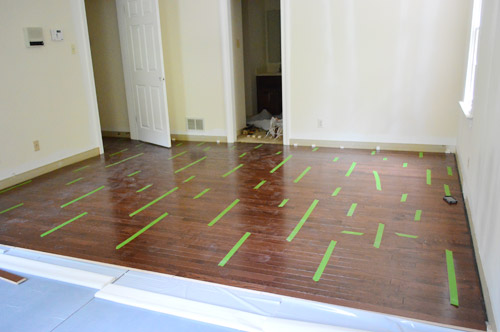
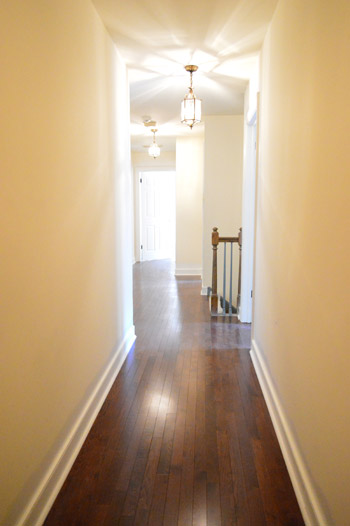
The result? A super tight gap-less floor that will still flex with fluctuations in temperature without cracking or warping – and it should outlast us. Huzzah!
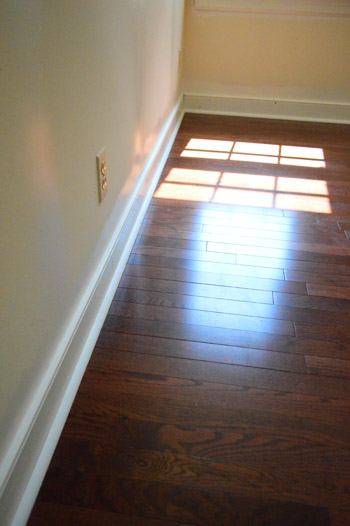
Except… as simple as the process was, it still was not a quick process. I think our bedroom took us 10 hours to tackle together (across two days) while my parents watched Clara. Granted it was the largest room and it was our first one, but boy did it not inspire much confidence in how quickly this could get done.
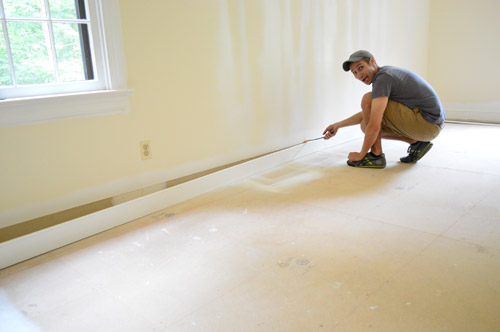
As is the DIY way, there are always little curve balls. For example, we originally had hoped to not have to remove our baseboards. But when we looked at things more closely, losing 3/4″ of the baseboard behind the floor made them look dorky-short. And we learned that neither quarter round alone (nor baseboards alone) would cover the expansion gap that our hardwoods required in order to keep the warranty in tact. So we pried all of our baseboards up and resigned ourselves to later having to reinstall them with quarter round. Le sigh. At least they’re already painted so we’ll just have a few small touch ups to take care of.
The good news is that we made lots of progress over the long weekend and yesterday evening we finally finished. We even got around to adding the baseboards back and placing the quarter round in most of the rooms already. The floors are looking awesome and feeling super solid.
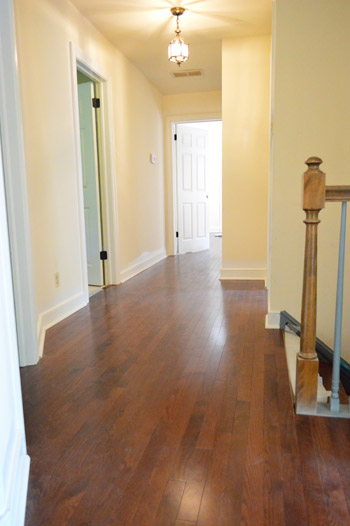
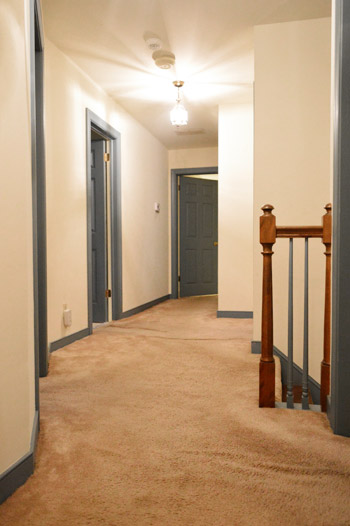
So much better than the carpet.
More Flooring Projects
If you would like to read about other flooring projects we’ve done, please check out the posts below: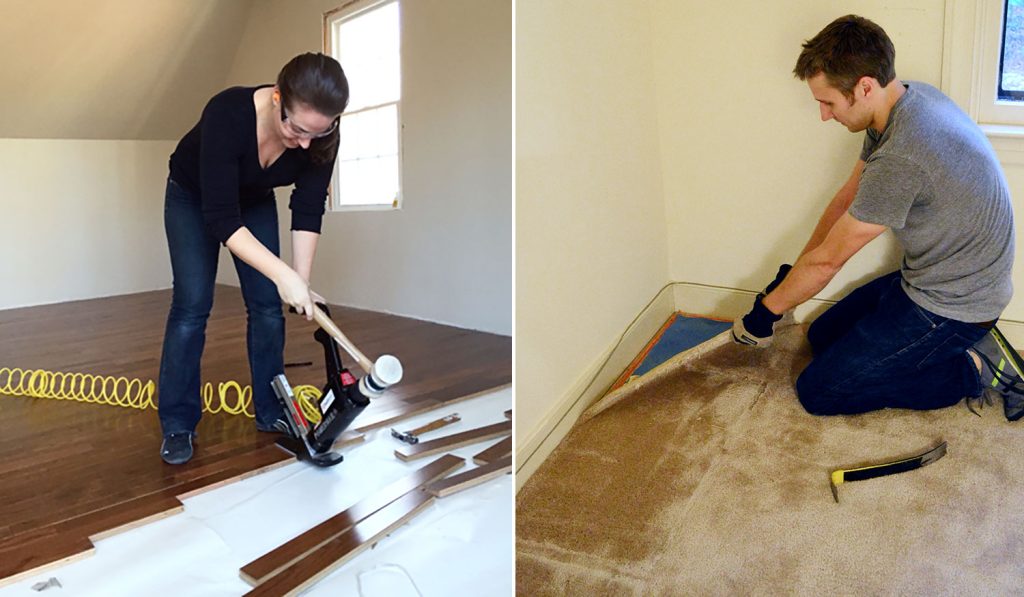

Alicia says
My husband and I are closing on our first home tomorrow morning, and we’ll be moving this weekend as well. I’ll be thinking of you guys and knowing we’re not alone with the move. I am 8 months pregnant though, so I’m pretty much useless at this point, I just point and say that box over there, lol. Good luck with your move!
YoungHouseLove says
Oh man, good luck Alicia!
xo
s
Carla says
Holy moo cow, I’m aching all over just reading about that. You really did a wonderful job, though, and came up with a great solution for the subfloor problem. I’m still not sure what a quarter round is and keep thinking you’re getting ready for a barbecue. Anyway, the flooring is so incredibly beautiful. This new house of yours is dreamy!
YoungHouseLove says
Ha! Quarter round is another word for shoe molding (that small curved piece of trim that you see following the baseboard along the floor). I wish it had something to do with a BBQ though. Hilarious.
xo
s
Rachel says
So… When the first “after” picture showed up, I thought to myself “oh! What a nice inspiration photo from Pinterest!”
Once I realized that was your old dingy hallway… Jaw literally dropped.
You two are clearly magicians.
YoungHouseLove says
Haha, thanks Rachel! I’m beaming over here. I get that same feeling when I read someone else’s blog and see a pretty picture and then realize it’s actually their house! So crazy that our new floors did that.
xo
s
Ronda says
Just wanted to say that it looks beautiful! Seriously, the after picture is amazing. I’m so excited to see you both transform this new house :) Also, I totally get the whole working best under pressure thing. My husband and I are the exact same way.
Natalie says
Looks amazing guys!! Well done!
aliceeyyy says
That’s nice. I am inspired by your idea of hardwood flooring. This could be an better option.
Kathy says
Absolutely stunning!! Love it! When we got our new wood floors installed a fews years ago, we would just sit on the floor and stare at it for hours–we were so in love with it. :)
alisha says
WOW!!! That first picture of the hall with the new floor….SUCH A DIFFERENCE! My eyes about fell out of my head I was soooo impressed! Those fresh, new hardwood floors next to that crisp white trim and doors???? GAME CHANGER. Totally inspirational.
Now slow down so you don’t have to move again anytime soon (well, other than this weekend, of course) because, seriously guys, that upstairs looks 100% happier :)
YoungHouseLove says
Haha, thanks Alisha!
xo
s
Lara says
Amazing job! I spent the long weekend installing hardwood too! I can’t even imagine how exhausted you guys are, I know I was. I always find the worst part when installing flooring is making the floor flat. Did you guys have any issues with that???
YoungHouseLove says
Thankfully our subfloor was already extremely level (we checked it a bunch of places with a nice long level to make sure there weren’t gaps or areas where it was uneven). Totally luck of the draw though!
xo
s
Kristin says
You two are amazing. AMAZING. Makes me feel like I should get MUCH more done in my free time! Good luck on the move!! Hope you can take some time off soon!!
Kelly says
Do I spy some oil rubbed bronzing of some door hinges? I finally jumped on that bandwagon today painting the 90s gold towel bars in my parents’ bathroom.
YoungHouseLove says
Good eye! We actually grabbed new hinges for the doors at Home Depot (they even had a bulk “contractor pack” to save us money) – we just worried that spraying them would mean over time they’d rub together and flake off (you know how hinges sort of grind against each other at the seams?) so we thought it was better to rehang them with fresh hinges. Now we just need to deal with the knobs!
xo
s
Autumn Beach says
Even the baseboards are back in place and the quarter round installed! AMAZING!! You guys are MACHINES! And these floors look gorgeous. The whole upstairs has just done a 180. SO fun to witness this fabulous transformation…and you guys haven’t even moved in yet! Way. To. GO. Hang in there. Seriously…after this project, moving/unpacking will be a piece of cake!
YoungHouseLove says
Aw thanks Autumn!
xo
s
Meg Sluyter says
I’m so glad you guys shared this! I have MDF sub floors which are being replaced soon and thought my only option was going to be floating floors. That’s awesome that you can just glue them down. My options have just opened up!
Lee says
Great Job guys! They are beautiful! AND you just increased the value of your home.
Lisa Boccetti says
So beautiful and inspirational! Did you have any problems working with the door trim? Were you able to just slide the floor boards in underneath it once the shoe molding (quarter round) was off?
YoungHouseLove says
We actually had to cut them a bit (we’ll cover those details in a follow up post since so many folks would like more info/pics).
xo
s
KiKi B says
Its my absolute dream to have hardwood floors in my house one day and I’m completely in love with yours! I can see why you didn’t want to give them up for another option, they’re such a beautiful colour and they do look soo much better than the carpet!
Good luck with the move, I can’t wait to see what you guys will do with the house :)
KiKi
lesli devito says
just stopping by to say…wow….wow…and one more time….WOW!!! Wonderful job and how are those knees doing???
looks beautiful…lots of sock sliding just around the corner!!!
xo
YoungHouseLove says
Aw thanks Lesli! We both feel ok in the knees but have sore backs and oddly enough our feet hurt! Haha! No pain, no gain!
xo
s
Gordana says
Great job John.
Colette says
Once again, you guys are an inspiration! When it comes time for us to do our floors, we know just what to do! I was wondering, how did you tackle the closets? Did you put hardwoods in them too?
YoungHouseLove says
Yup, we extended the hardwood in there and then just added the baseboards and quarter round in when we were done so it’s all seamless :)
xo
s
Kim says
Well they are absolutely GORGEOUS! Great job guys.
Jackie says
I echo everyone else’s comment and want to say how beautiful your upstairs looks! Inspiring! Question: love the shadows from the lights are you planning to keep them ( and spray them) or replace them? Good luck with your move!
YoungHouseLove says
I think I’m falling for them and can picture them in a dark finish (ORB) with dark doorknobs and an ebony stair railing (with white ballisters). Can’t wait to see where we end up!
xo
s
Jennie says
The floors look beautiful! I like the idea of the sticky underlayment – we installed hardwoods with a floor stapler in our kitchen, and my back was on FIRE by the time we finished…standing up and bending over to nail all those floors in was brutal. Hope y’all arent too sore!
Tami says
Way beyond impressed. The floors look gorgeous and changes the look and feel of the 2nd floor. Great job you two!!
Sassafras says
A.maz.ING!!!!! Wow, and superwowser! The floors look terrific.
KE says
Holy cow! That hallway before and after shot is incredible. By my standards you’ve done a lifetime worth of work (haha), but by your standards you’ve just barely started and it has already made a HUGE difference!
How do you properly clean real oak floors? Is it true that real oak cannot get wet?
YoungHouseLove says
It shouldn’t be soaked/sopping wet, so we like to swiffer them or wipe them down with an oMop with a really mild soap (Mrs Meyers) that has been watered down and then wrung out so it’s just damp (not super wet).
xo
s
Eri says
Can you list the tools you actually used for this project? Wanna compare yours with those lists at DIY info websites (like this at Home Depot http://tinyurl.com/cprnjkp). Thanks!
YoungHouseLove says
We just used Elastilon, hardwood flooring, a rubber mallet, and a box cutter! Oh and a miter saw, dremel, and a table saw for cutting the ends of the wood (we’ll cover more on that in a follow up post since there have been a bunch of more detail-oriented questions).
xo
s
Eric says
Installing floors has been our favorite project so far – granted I found out putting my thumb between the mallet and tapping block does not prove to be a good idea… We went with a solid strand bamboo in our master/bath and used a pneumatic nailer. Why did you guys decide on a floating floor with that much square footage?
YoungHouseLove says
If you check out this post we actually talk all about choosing that (subfloor made it necessary) – hope it helps!
xo
s
Sarah says
Looks awesome. We had the exact same situation in our 1981 built house, and we bit the bullet and ripped up the particle board and laid a new layer of plywood. It was a nightmare, but gave us a great subfloor for our oak hardwoods.
YoungHouseLove says
That’s awesome Sarah! Congrats on all that work!
xo
s
Rachel says
With a post title get on the floor, I expected an everybody walk the dinosaur reference. I was slightly diappointed. :)
YoungHouseLove says
There are LOTS of those in the comments. Haha!
xo
s
Steph says
Wow, what a difference already! It looks so much brighter and fresher with just the flooring and trim done! I’m beyond excited to see everything that you guys are going to do with this house :)
Tiffany says
Great job you guys! It looks AMAZING!!!! It makes such a big difference.
Mary says
Looks GREAT!!! What a difference it’s made already just in painting the trim and putting wood floor in! LOVE it!!
Mia B says
I’d pecked out a lengthy comment on my phone last night and Feedly ate it! So here goes again…
Wowsa! Beautiful. I’ve been waiting on tenterhooks since the words “special underlayment” were dropped a week or two ago, and told my husband: “If YHL uses Elastilon, that’s it. Decision made!” And there you are! We’d found that product online several months ago and even ordered a sample from the mfr. and went to LL to stand on it, feel it, etc., but haven’t been confident enough in it to pull the trigger. You know how it is with a semi-unknown product that is SO IMPORTANT TO THE ENTIRE FLOOR IN YOUR HOUSE. Now, I think we know what we’ll be working on next! I’ve read all eight pages of comments, so will wait with bated breath to hear the time breakdown in your follow-up post – that’s the other “hook” with Elastilon on installation time being so short. Wanna see what the real world has to say about that! We’re working with almost 1500 sf upstairs with a concrete subfloor (I think it’s for sound deadening, but has made choosing a “classic” floor a major PITA) plus the stairs. We can nail into the stairs, though, they are plywood.
Anyway, best of luck with the move, and if you get a chance to squeeze in that details post soon or, ya know, just, whenever, we’d all be appreciative. :)
YoungHouseLove says
Aw thanks Mia! It definitely took a while but from what we hear, glue down or nail down options can take even longer and leave you even more sore, so we’re happy we didn’t need any tools other than an exacto for most of it!
xo
s
Susan Hines says
Just saw that you attended FIT. I work at Cotton Incorporated in Cary, NC and they sometimes bring the FIT “kids” in to tour our building and the “cotton” fields! Did you ever come this way many moons ago??
YoungHouseLove says
So cool! I never did (I wasn’t a fashion major, I was in advertising design) but that’s awesome!
xo
s
Sarah says
The floors look beautiful! And thank you so, so much for explaining the process. I have old carpet in my condo and want to replace it, but have been told by several different professionals that hardwood isn’t even an option because I have “weird” subflooring they’ve never seen before… which looks exactly like particleboard. It’s so great to know there might be an option to make that a possibility – and that installing it on your own might not be totally impossible either. Thanks you guys!
YoungHouseLove says
Good luck Sarah! Hope it works like a charm!
xo
s
Megan Poletti says
You guys are troopers and totally inspiring! Out of curiosity, are you the first “generation” of DIYers in your family, or did you learn from your parents?
YoungHouseLove says
We both came from frugal DIY parents. John’s dad built a deck when he was a toddler and my mom renovated two houses completely (she always had contractors, but she was so creative- I remember over a decade ago she found an old dresser and had a sink added to make it a bathroom vanity – just about blew my mind at the time). Both of our parents have different styles than we do, but they definitely instilled the pride and excitement of really making something ours – and not spending a fortune to create a home ya love :)
xo
s
Megan Poletti says
Awesome! My parents are nervous nellies when it comes to DIYing, so it’s fun to show them how it’s done. My mom reads my blog and is always giving me ideas for new projects now. She just gave me a stack of old Better Homes & Gardens magazines to leaf through for inspiration :)
YoungHouseLove says
That’s so sweet!
xo
s
Jaye @ Just Tryin' to Make Cents of it All says
Trust me – nailers are HIGHLY over rated!! I did one room and then said “no way, Jose!” and switched everything over to planked laminate.
The floors look amazing – yours do, I mean. Mine look pretty darn good also. I personally can’t believe you got rid of that blue trim. It was gorgeous!
Not!
Not My Mother says
The floors look AWESOME! We want to replace some of the carpet in our home (with a toddler, a parrot and me who can’t carry a cup of coffee straight, they look AWFUL) with wood floors and I wanted to tackle installing them ourselves, but this would be our first major DIY project and you’ve scared me a little with talk of how long it will take :-)
So can I ask, how did the installation compare with your cork flooring, both difficulty and timewise, and do you think the process would have been easier with floating floors? Basically, can you hold my hand and tell me it will be okay?
Good luck with the move! Can’t wait for the new home!
YoungHouseLove says
Cork was way easier! It was lighter, took less time, and clicked together to be laid. Hardwoods are heavier, have to be hammered together for a tight fit, and are thinner than cork planks, so we could probably lay a 1′ x 10′ area of hardwood in the same time we could lay a 5′ x 10′ area of cork. BUT, once you got the hang of it there was just time (it wasn’t hard brain work, just took a while) and it’s SO WORTH IT when you’re done. We’re in love. Hope it helps.
xo
s
gail says
Beautiful job!
deb says
I have followed you from your very first house remodel,I love your budget ,goals ,and how well you do your homework before diving in ,thank you ,you save me so much time ,lol,but this new flooring discovery about installing hardwood has to come at the most perfect time as I was just about ready to start my venture since my subfloors are not solid plywood either and I wanted my subfloor to have some kind of water proofing as the time of grandchildren is coming along with the accidental spillage . My dad also taught me another handy little trick and that is to caulk / silicone on both sides of your bathroom walls bottom plates ,behind your moulding so water seepage will be contained and not run under the wall to the other side ,I did it all around in our bathroom and ajoining bedroom bottom plates and trust me ,it has saved us in two different homes ,hope this makes sense .Congrats on the sale of your home and I look so forward to all your new wonderful ideas for your new home ,by looking at your first before and after pics you are off to a wonderful start !!!
YoungHouseLove says
Love that tip Deb! Thanks for sharing!
xo
s
Sarah Stäbler says
I imagine laying floors like this for hours upon end is a similar feeling to being at the beach swimming in the ocean all day. When you go to bed at night, your body still feels like it’s floating and rocking in the waves. I sure do believe it entered your dreams that night!
The flooring looks great – love that dark color! – and oh my goodness about a MILLION times better than that ugly old (stinky) carpet! You go, guys!
I’m so excited for you and your new house adventure.
Wanda says
It looks beautiful. What a transformation! Do you have any tricks for making the cuts around the door moldings? We have had issues with that area in the past. We found it difficult to get a snug fit. Can’t wait to see what you do at the new place.
YoungHouseLove says
We’re going to share a more detailed post about the floor since we have so many questions about it – hopefully within a week! We have all the pics, but just have to get all settled in the new house :)
xo
s
Jess says
It looks amazing!!! A total transformation already… You guys are awesome!
Jenny Roes says
Hi John,
My husband and I decided we wanted to try to tackle laying hardwood on the first floor of our house – roughly 1100 square feet of it. Could you describe how you transitioned from room to room (or room to hallway) seamlessly. We have an older home like your new one 1970s so we have the formal dining, formal living, office, kitchen, family room and hallway. I’m not sure how we go from one room to the next without a threshold. It appears that installing the hardwood in an adjoining room would require laying the flooring wood in more than one linear direction. Thanks!
YoungHouseLove says
I’m working on a follow-up post that shows this detail, but basically you have to cut out the bottom inch-ish of your door jambs and door moldings so that your floor boards can slide under the door from one room to another. Then you can just continue building your floor out the door and get the seamless look.
-John
Shawni says
We used Elastilon under our new wood floor because we were laying it over a concrete sub floor. I think the hardest part was the prep, not the actual installation (ripping out tile, and then making sure the sub floor was completely level) but the installation did take a lot of time also.
Did you have any trouble with boards that weren’t completely straight? That is my *only* worry with our floor now. In a few places there are tiny gaps between boards because they weren’t totally straight. And we even spent extra time tapping in rows to make sure they fit well before we glued them and pulled the Elastilon. I worry about spills getting down into the cracks and causing problems later.
YoungHouseLove says
We had some non-straight boards but we put them into a discard pile if we couldn’t get them to lock in tightly (I think there are just some wonky boards in those boxes sometimes, so skipping those and using the straight ones seemed to be the easiest thing). From what we hear about Elastilon, since it flexes with the wood I think you’d be less apt to have issues with anything warping or bowing (and I believe it’s waterproof from the top, so you only have to worry about a leak occurring from below). Hope it helps!
xo
s
Shawni says
Oh, and just an fyi for anyone else considering this method, we avoided needing quarter round by undercutting our drywall before installation. That way our expansion gap didn’t need to extend into the room as much.
YoungHouseLove says
So smart!
xo
s
Adriane says
Hello guys,
The floors look great!!
I’m curious about the baseboards and how you installed them. I imagine that you nailed them to the wall, right? If so, how do you cover the nail heads, caulking or just paint?
Thanks a lot!
xo
Adriane
YoungHouseLove says
We used our nail gun and then just caulked the small dot where the tiny nail gets shot in.
xo
s
Celise Munoz says
OMG, Sherry and John, this is looking awesome! BIG difference from the carpet. I am super duper excited for you all and the new adventures this house will have. Yayyy (clapping sound)!!!
Our laminate floor warped a tiny bit and so in our guest room of all places we have a loose piece. :-/
But it looks like y’all’s (that’s right, I’m from Texas) is perfect!
-celise
Kim says
Nice job Sherry and John,
I’m so looking forward to watching your progress with your lovely new home. I must tell you, it’s like the first show of the new season of the Bachelorette! Woo Hoo! Can’t wait!
Looks great so far,
Kim
YoungHouseLove says
Haha!
xo
s
Bailey says
What a project!! I love the way the floors flow into each room with no seams. It’s unbelievable how much better the place looks with you as the owners! I wonder if they old homeowners are reading your blog and super pissed that you made it look so much better, hehe.
xox
Bailey
http://akabailey.blogspot.com