So, remember that microwave that we got a great deal on a couple of months ago? Yeah. Well. We returned it.
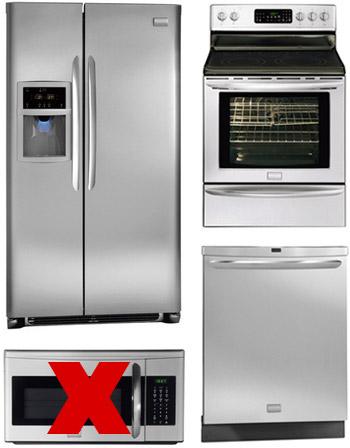
A few of you questioned why we needed “such a big microwave” when we originally posted about it, which did get us thinking that we don’t do all that much microwaving. A bowl of soup here. A bit of reheating/defrosting there. And when we took down the kitchen’s original black over-the-range microwave (which was just as wide as our oven – 30 whole inches)…
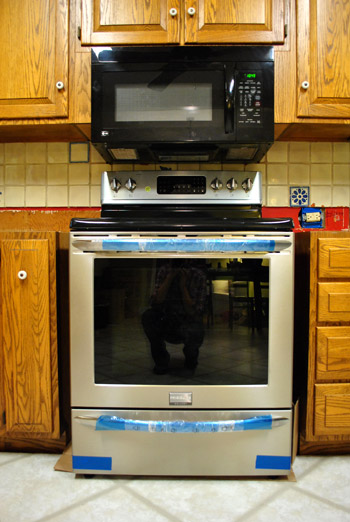
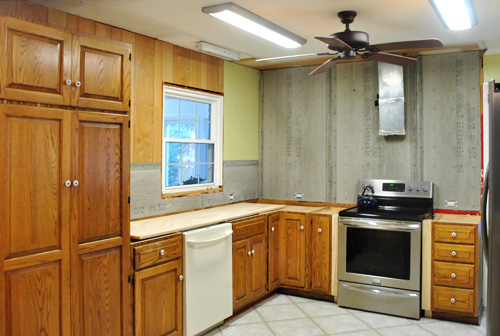
… we realized just how hulking the new 30″ one would look in its new home next to our pantry. See, we had originally planned to build it in there like the one in our first kitchen, but that meant that it would butt up right against the side of the window:
So two weeks ago (after seeing how nice and open the kitchen felt without a lot of those heavy, overbearing upper cabinets)…
… we returned it and bought this much smaller countertop one instead for $84 (it’s 18″ wide). He’s nice and “modestly sized” as Sherry likes to say. I even tossed a tea mug in there for scale:
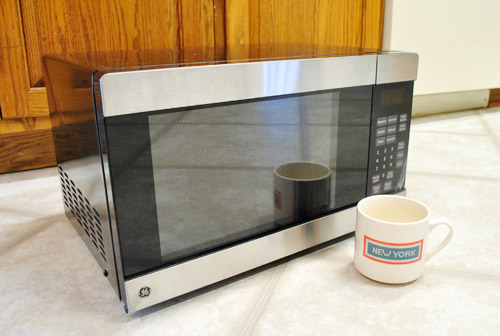
But much like the big original microwave that we got, we never planned for it to live on the countertop. Oh no, we got planz yo. This guy is getting built in…
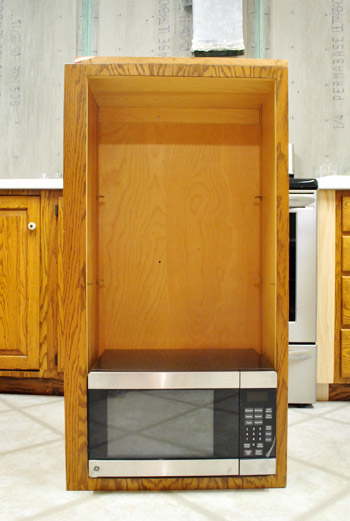
This is one of our old upper cabinets (it hung to the left of our old microwave when it lived above the cooktop) and it just happens to fit the microwave almost perfectly. It’s actually a bit snug around the frame, but the frame is built in around the front edge of the cabinet if that makes sense. So on the inside of the cabinet there’s about two inches of extra space on either side.
The only problem was that:
- the cabinet itself was too tall for its new home next to our pantry (it would hang oddly low as-is)
- it wasn’t deep enough for the microwave to sink back into it and look flush (with extra ventilation room for safety reasons)
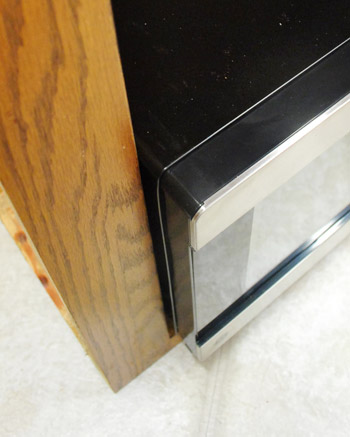
So we had some work to do. We had to adjust the height and depth of the cabinet, then hang it next to the pantry with a new door. That way the infrequently used microwave can be hidden away most of the time and when it’s needed we can open the door and zap our food while allowing the appliance to vent (more on that in a moment). Oh and we already had an electrician add an outlet where the cabinet will hang, so the microwave will have power.
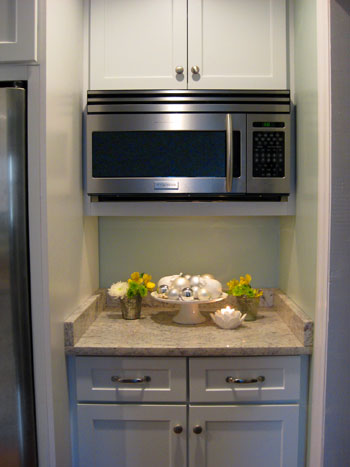
Many custom kitchens actually have built-in microwaves, like this one from here, and this one, from here. So we knew it could look great and actually be really functional (warning: read the paperwork on your microwave to see what type of ventilation it needs – some don’t need any except for the ready-made space under the little legs while some have a vent on the side or back that needs room for aeration, which is something we took into consideration as we went)
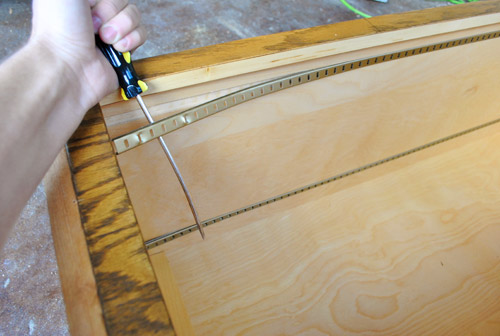
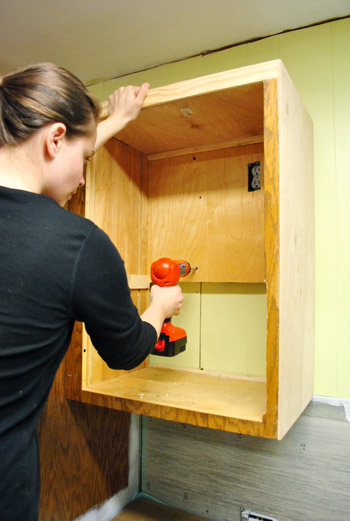
But back to the whole cabinet being too tall issue. First up was chopping that baby down to size. I started by prying out the metal shelf rails. Luckily they came out with almost no effort.
Then I measured, marked, measured again, leveled, measured again, double-checked my marks and leveled one last time…
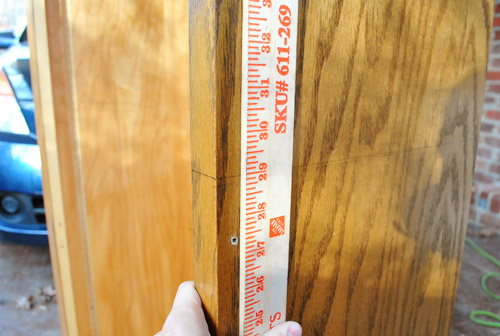
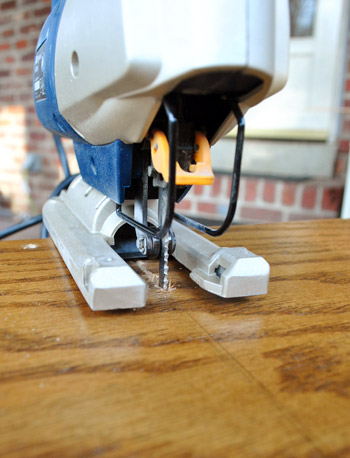
…before taking my jigsaw carefully along the lines I had drawn on each of the three sides.
What I was left with looked like a bad magic act. All that was missing was a lovely assistant chopped into two lovely pieces.
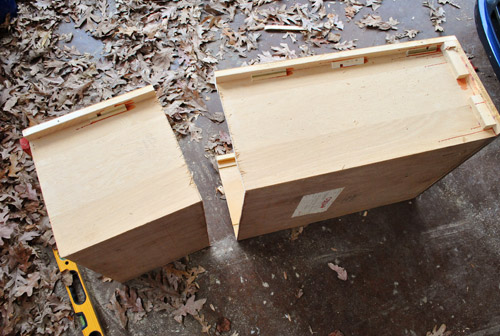
Are you nervous yet? I was. Although I felt a bit better because this was my second time doing this (I tested this method on another spare cabinet that we weren’t reusing first).
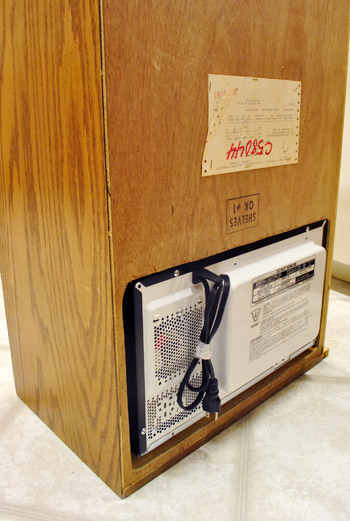
So that big cut started getting me to a better height, but I also had to cut a hole in the back to help with the depth/ventilation plan. Oh, and I had to put a slight notch in the bottom right side of the frame so that the microwave door could swing open more easily (this way we can shimmy the microwave over to the right in the cabinet, which gives the hinges on the left more room to swing so the door can open freely). Not to worry – it will later be concealed by a door.
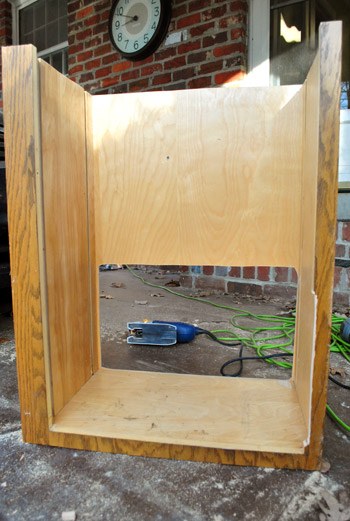
Here’s a shot to show how the microwave stick outs the back – which also helps it vent since there will be a column of “free space” behind the cabinet for aeration all the way up and out the top of the cabinet (more on that a bit later).
Enough looking at its backside. Let’s look at the front. Is this starting to make more sense? Remember once we add a door that small notched out area for the microwave will be concealed.
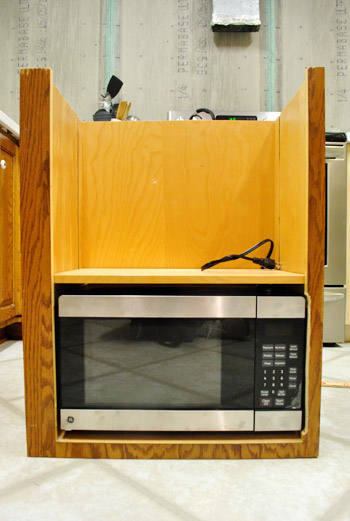
Oh, and I added that shelf above the microwave by nailing in some fixed ledges for the shelf (which we already had) to sit on.
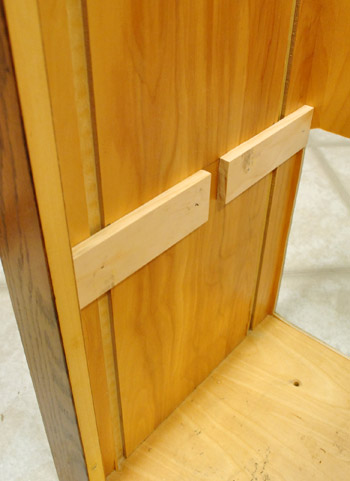
Obviously the cabinet was far from being ready to hang. It needed a top, for one. And it needed some extra support on the back if it was gonna sit away from the wall enough to let the microwave vent out the back.

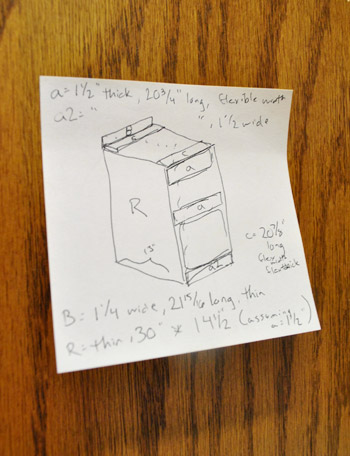
So we devised a plan, I made a sketch (which I don’t expect anyone other than me to understand) and hit up the hardware store to grab some wood.
The new top was basically three pieces. A thin piece of plywood as a new top, a thin piece of pine on the front and a scrap piece of 2×4 to hold it all in place. It’s looking a bit rough at the moment, but bear with me…
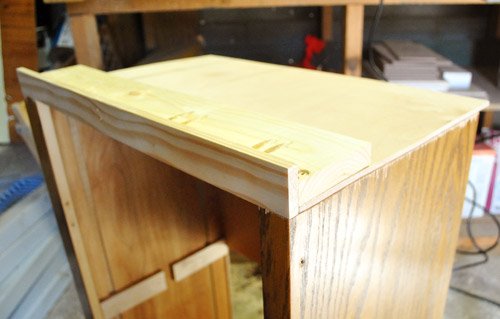
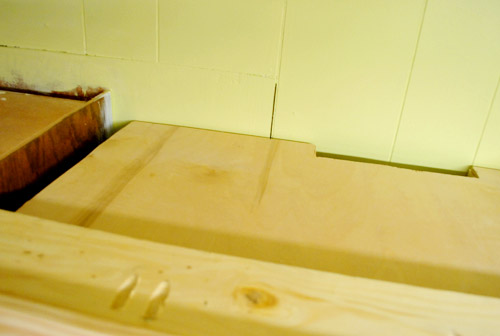
Along the back I screwed in a few blocks of 1 x 4″s doubled-up. This way the cabinet will sit away from the wall a couple of inches and I still have solid wood to screw into when we go to hang the cabinet. Oh, and we cut a wide channel in a couple of the blocks to (broken record alert) help the microwave vent up the back.
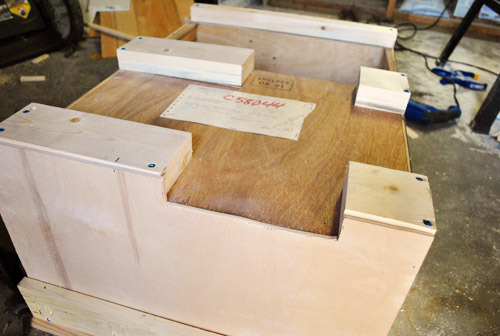
Last but not least was the side. For this I used another thin piece of plywood that I clamped on tight, cut to size, and then nailed in place.
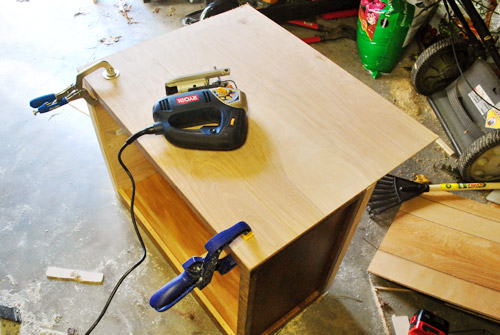
After all that “fun” stuff, it was looking more like this:
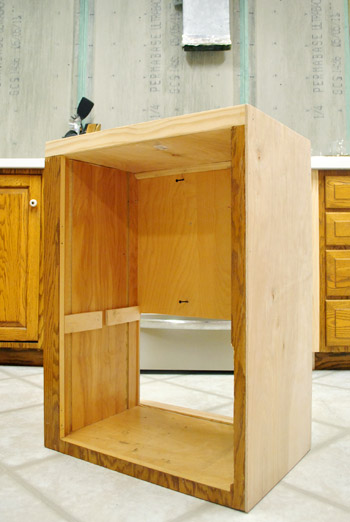
Significantly more cabinet-like if I do say so myself. Especially once it all gets painted the same color with a door in the front and some shiny new hardware.
Then with the help of my lovely assistant (nope, not the one I pretended to cut in half earlier in this post) we hung this Frankstein’d cabinet in place.
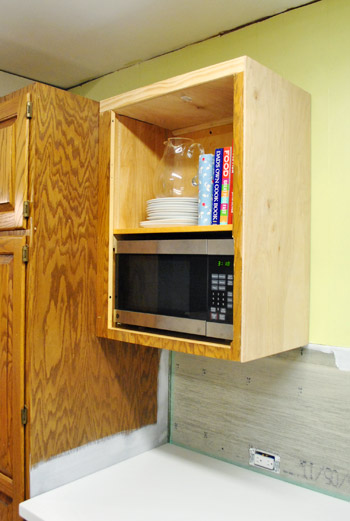
Here’s a view of the top so you get a sense of the venting on both the back and side. I drilled some holes in the left side of the cabinet to take advantage of the gap between it and the pantry (the gap exists because the cabinet frame was wider on that side).
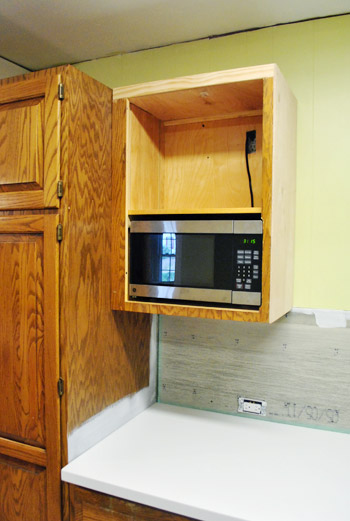
So with cabinet hung, we put the microwave in place and plugged it into the outlet that our electrician put in when he was here about a month ago (more on that here).
Of course it’ll look better once it has a door on it (and when it’s all painted) but even with the addition of some cookbooks and plates it’s starting to look more presentable. Even if just a little bit.
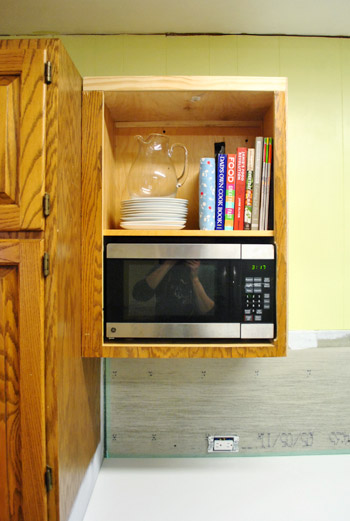
Update: as for that little routed out area that will only be visible with the door open, many of our cabinets are less than gorgeous when they’re open (picture them stacked high with cookware, blenders, tupperware, and all sorts of other stuff!) so we’re of the “what happens in the cabinets, stays in the cabinets” mindset. If the doors are closed and the kitchen looks good, we’re happy!
This makes us all the more excited to take care of the door situation – which we’ll hopefully be posting about later this week. Until then, allow this terrible photoshopped rendering to demonstrate how the added door will hide the little routed our area for the microwave when it’s closed (it’ll be open whenever the microwave is in use, of course).
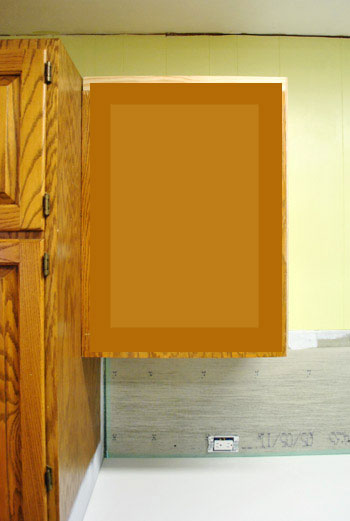
Oh and with this cabinet now hung next to the pantry it leaves us 14″ to the right of it (between the side of the cabinet and the window over the sink). And once the new 12″ deep floating shelves get hung on the oven wall of the kitchen there will also be exactly 14″ between the front of those floating shelves and the right of that window over the sink). So it won’t look crowded, and will actually be nice and balanced. Whew.
Getting the whole cut-down microwave cabinet thing done also makes us excited about our shrinking budget. Not only did we get $255 back for returning the jumbo microwave, we also sold our old over-the-range one on craigslist for $90 (which adds up to $345 back in the ol’ kitchen piggy bank). Plus, we craigslisted our old kitchen table & chairs for $120 and actually sold our old granite counters for $350! If my math is right, that’s $815 back in our pockets… well, it’s actually $731 after we take out $84 for the cost of the new microwave. Still, over seven hundred beans is definitely a welcome “kitchen refund” as we get to that hard “middle part” of the makeover that has us eager to reach some of the bigger changes that we’re slowly but surely inching towards.
No one wants those cabinets painted and the new backsplash hung more than we do, but we’re trying to be realistic about the timeline in here (we originally estimated that we’d be done sometime in January, which we still hope to accomplish). We don’t know how much we’ll have done for the holidays, but at the very least we’ll have our microwave concealed by the time company arrives (oh man, I first typed that as “by the time cabinets arrive” – clearly I’ve been spending too much time in the kitchen). And just to lay it out for anyone wondering what our next steps are, they’re a little unglamorous for a bit longer – and then they should get a lot more exciting:
- cut down all the doors for the cabinets that we added
- add window trim and build a window sill (we had to strip the window over the sink down here)
- add toe kick around all the cabinet bases to make things like the peninsula unified with the rest of the kitchen (we’ll hold off on adding shoe molding until after we do the cork floors later)
- remove all the cabinet doors (after making sure they hang straight and are fitted correctly) and wood putty and sand any gaps/cracks/old hardware holes, etc
- prime everything
- and then we get to paint – yeee haw! (we’re still torn between white and a soft tone like gray-beige, but we’ll share as soon as we’re sure!)
Continuing the list after that step gets us all clammy and overwhelmed, but a new lighting plan, cork floors, and backsplash tile with floating shelves and a built-in range hood are all on the agenda. One cabinet day at a time. What have you guys been doing in the kitchen? Demo? Holiday cooking? Painting? Microwaving?

Alison says
I had a question about the range hood you’ll be adding. Since the old microwave was also the hood, and not vented to the outside (I’m assuming), will the new hood also recirculate the air, or are you adding a vent to the outside? I have the same microwave/hood combo and I want to get rid of it! Also, I think the kitchen is going to look amazing! I love the peninsula :D
YoungHouseLove says
Ours actually does vent to the outside (you can see the big ugly vent pipe hanging where the microwave used to be in some of our recent kitchen pictures), so we’ll be getting a hood that connects to that vent. Sorry that doesn’t necessarily help with your situation!
-John
Alison says
Thanks…I guess I wasn’t observant enough!
YoungHouseLove says
No worries at all!
xo,
s
Gabbi says
we made a little room for our microwave today too! and you guys got a little shout out in my post! ;)
http://retroranchrenovation.blogspot.com/2011/12/new-developments.html?spref=fb
YoungHouseLove says
I love it! Those painted cabinet insides are amazing too!
xo,
s
Josephine says
Wow. I tell you what, if I was ever stranded on a desert island, I’d want you two there with me! You guys are supremely resourceful! It’s all looking very promising… can’t wait to see the end result!
YoungHouseLove says
Aw thanks! We’d make a cabinet out of coconuts for ya. Haha.
xo,
s
molly says
your progress is amazing! i think i am most looking forward to light change in your kitchen. your pictures are amazing with fluorescent lighting, but they will even be that much better with improved lighting.
my bathroom has really bad fluorescent lighting so i will be living through your upgrade.
bryn alexandra interiors says
We have our microwave in a cabinet and we LOVE it!! We tucked ours into our pantry. Here is the post in case you are curious:
http://brynalexandra.blogspot.com/2010/06/my-dad-hero.html
YoungHouseLove says
Love that! It looks so handy!
xo,
s
Kim says
ack! such geniuses!!! i really can’t wait to see how your kitchen turns out!
and here we are debating what colour to paint our kitchen walls – a decision that’s been on our minds for 15ish years.
Trisha says
Fantastic. I’m a minimal microwaver as well. Right now it looks a little gangster, but it seems like it’s going to be much better then the previous plan.
Asami says
Today’s article reminded me of a microwave cabinet we built five years ago! We built the body out of wood but recycled the doors that came with the original cabinet by shrinking the size. You can see during and after pictures here:
http://asamishouse.blog57.fc2.com/blog-entry-138.html
We were very proud of the result and loved that we got to use our then 14-year-old microwave! (Believe or not, that microwave is now almost 20 years old and is still going strong…)
I can’t wait to see the progress of your kitchen and all other projects! We bought our 1930s Spanish fixer 3 years ago and have been renovating ever since (all the projects are on my blog). After 3 years, I think we’re finally at the point where we can start ‘thinking’ about decorating, so I’m a little jealous that you guys are already where you are after only a year! Your blog has been such an inspiration for me, so please keep up the great work!
YoungHouseLove says
That’s amazing! What’s even cooler is I totally understood every step just from the pics. Love it so much! You have a perfectly seamless result with those cut down doors!
xo,
s
Morgan says
Looks great!! Love the built-in and I knew you guys could come up with a great microwave solution! You’re inspiring me to finally order a cabinet door that we can use to cover up our microwave cubby that we built in to the new kitchen… but that now houses our blender and mixer.
Kim says
I painted the kitchen cabinets white at the last house we lived in back in the U.S., and I LOVED the look. I’d wash them down periodically and ended up touching up the doors twice over 11 years. I’m looking forward to another white kitchen when we build our house next year.
My husband’s family owns a house out in the country, in a little town called Santa Rosa de Calamuchita. Based on our good experience with white cabinets, I decided to paint the cabinets there white as well. It’s our get-away place (2 hours from where we live) but we also allow a LOT of other people to use or rent it… and I’ve discovered that makes for an impossible situation. With so many in and out all the time, those lovely white cabinets are looking decidedly grimy. We were gone for 7 months (in the U.S. to visit family) and when we got back I wanted to cry at the state of the cabinets. I tackled them with some heavy duty cleaning but I’m seriously regretting my decision to paint them white. We have too many other things on our plate to repaint them now (lots to other things to do at that house, as well as the one we’re getting ready to build in the town where we live) BUT in a few years I plan a re-do and I’ll go with a color that should hide the dirt. Live and learn. White cabinets are great when you’re there all the time to maintain them, but are NOT a good idea in your second home!
Lisa says
Seeing your moving van in the ditch reminds me of what happened in our sold home during the week we were closing…My husband was running the vacuum and snagged our berber carpet. If you know anything about berber, it runs like pantyhose and with a vacuum beater spinning it’s downright scary how fast that can travel. Thankfully, he stopped it asap and we were able to superglue the string of carpet perfectly into place and continued to vacuum it after to make sure it was going to stay.
Brittany Long says
So are you guys going to put one of those beautiful range hoods over the stove now? That would look so awesome with your penny tile!! (Sorry if you mentioned this somewhere in the post already–I am an admitted skimmer!!).
YoungHouseLove says
Oh yes, that’s the plan!
xo,
s
Nicole says
I am really excited for your kitchen and yes, can’t wait for it to be painted and shiny. Love the microwave cabinet idea! In thinking about the possible distant future and any kitchen reno that I may do, I have a question:
why did you wait until after the counters were on before painting the cabinets? I’m sure it was a conscious decision, as yours typically are, but I was thinking it would be easier to do without the counters on.
YoungHouseLove says
Typically when counters go in it’s a very heavy/tight fit. Cabinets can get scraped and dented, so if they’re painted it can mar that finish (it happened in our first house and we were so sad that our white cabinets got all scraped up). So this time we decided to wait and we’ll just dropcloth the counters to cover them while we paint!
xo,
s
Nicole says
You always have such a good reason. Thanks for such a quick reply!
YoungHouseLove says
Glad to help!
xo,
s
Jenna at Homeslice says
When you first said you bought a counter microwave, my first thought was “No!! Sherry and John, don’t do it!” Silly me, I should’ve known better! It looks AWESOME. I’m itching to see everything painted!
Firesparx says
Looking great! If you take a peek inside my mom’s lovely kitchen the insides of her cabinets are all different colours, but it looks fantastic on the outside. My mom designed her kitchen with Home Depot cabinets but didn’t buy them there. Instead, she snagged them all from the Habitat for Humanity ReStore that she volunteers at. It took her some time, but eventually all the parts and pieces came in and she was ready to go.
Question: does your local code allow for appliances behind doors? Up here in Ontario that wouldn’t be allowed (I think they are afraid that you’ll shut the cabinet on your microwave while it’s running and won’t notice that your microwave popcorn is on fire.)
YoungHouseLove says
That’s amazing! Your mom sounds like my kind of gal! Here in Richmond built-in microwave cabinets are allowed as long as it’s a dedicated outlet (aka: not an extension cord that snakes through the back of other cabinets to reach an outlet half of the room away). I guess they just want a certified outlet for that appliance and of course expect that the door will remain open while it’s in use.
xo,
s
JaneS says
Looks great. Jut a thought – why not cut a thin piece of plywood to make a false back in the top part of the cabinet to hide the cord and routed out section? You could easily make it removable for access to the power. Keep up the good work!
YoungHouseLove says
Oh yes – that’s definitely a possibility if it bothers us! Now that we have a door on there we don’t mind it (our last kitchen had a cord and a plug above the microwave too)!
xo,
s
Mary says
I have the Frigidaire microwave you returned and I hate it. It’s hard to keep looking clean thanks to the shiny black areas and even worse… it beeps incessantly when food is done. So if you’re in another part of the kitchen you HAVE TO stop what you’re doing and go hit END or open the door. Annoying as heck, especially when there’s an island between you and it most of the time.
Jan Meyers says
Love the concealed microwave look. Recently remodeled kitchen and contractor also put micro in pantry cabinet. We were wondering if you have any heat issues with the above pantry space. After heating a frozen dinner the other night (4 mins. on high) we noticed above cabinet was pretty warm and the contents (jar of granola) actually began to sweat. Do you have any remedies for the heating in above cabinet? We were thinking of having a side air vent installed to alleviate heat inside above cabinet. Will detract from esthetic, but may be needed to avoid too much heat.
YoungHouseLove says
Thankfully we haven’t had any issues, but we have it vented up the back a lot and out the sides around it and the front since the door stays open when it’s in use. Nothing gets too hot that way. Hope it helps!
xo
s