Let’s talk about grout, because with our penny rounds finally all installed, grout was next on the agenda. It has a way of taking things from in-progress to looks-completely-finished-oh-thank-goodness. Observe:
So here’s how we got there. First I have a little “materials shot” for ya:
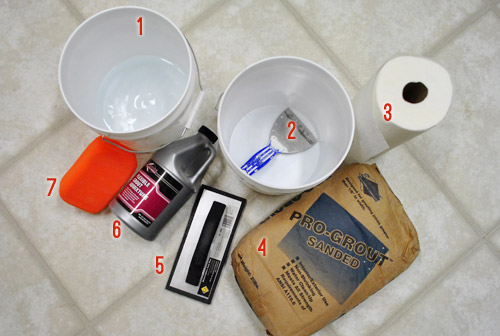
- Bucket of clean water
- Putty knife & another bucket to mix grout in
- Paper towels because, well, grout is messy
- Sanded grout (from The Tile Shop, $19 with discount) – ours is the Mobe Pearl color
- Rubber float (from Home Depot, $2)
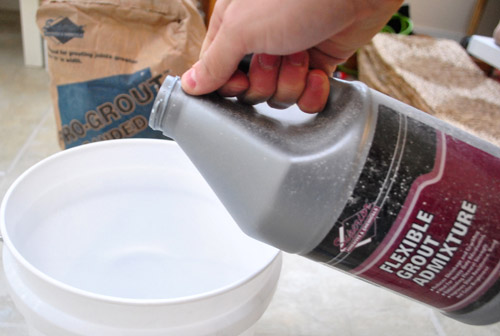
- Flexible Grout Admixture (from The Tile Shop, $17 with discount) – this reduces grout shrinking and cracking
- Sponge. Woot!
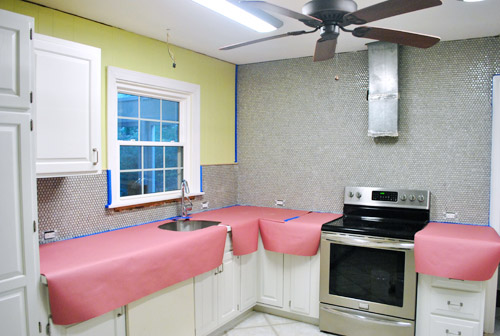
Oh and we used leftover rosin paper from Home Depot to prep the room, since it was again helpful in keeping the mess off of our counters.
Grout, like thinset, is another mixture that you only want to make in small batches – since it’ll dry out after about 20-30 minutes. So according to the instructions, I started by pouring a bit of admixture into my bucket and then adding the grout powder second.
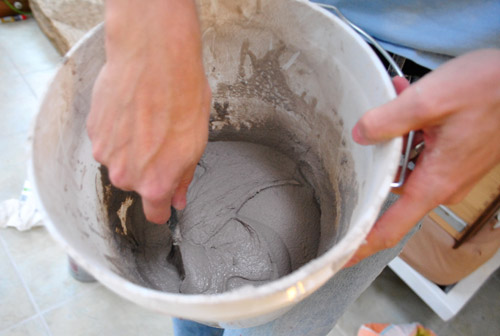
Just like with my thinset, I used my putty knife to mix everything together until I got a that toothpaste-y consistency that I found easiest to work with.
I had forgotten how much I enjoy grouting. That may be an overstatement, but after the focus it took to actually install the tile it was fun to do something that took very little thinking. It was basically just using the float to smoosh the grout onto the tile and, more importantly, into the cracks. Sherry helped too. She was less into it than I was. Ha.
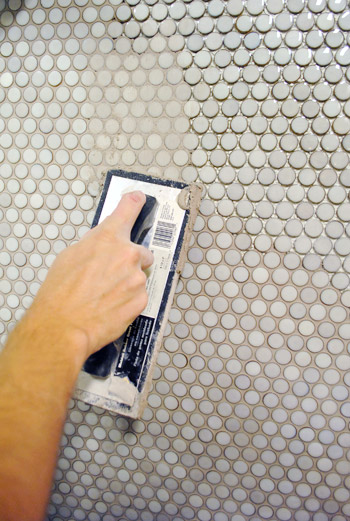
Once we made sure we didn’t miss any spaces, we held the float at an angle and scraped off some of the excess from the front of the tiles. Then it was time for some sponge-and-water action. This not only cleans grout off the front of the tiles, but also kinda smooths the grout between the tiles. It’s kinda weirdly amazing to me how simple but helpful this step is.
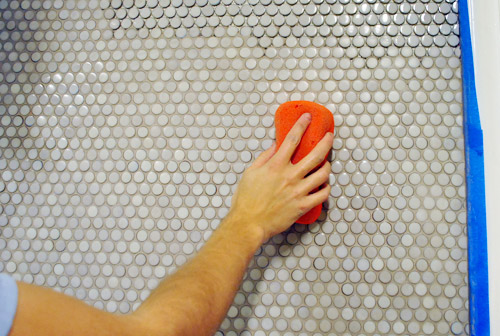
If you want to see these steps in action, we managed to film this little one-take video of it. Clara’s need for a cream-cheese refill cut it a smidge short, but you get the point:
Admittedly the task is a bit tedious – and more than bit taxing on your wrist – but we managed to get it all done in one afternoon.
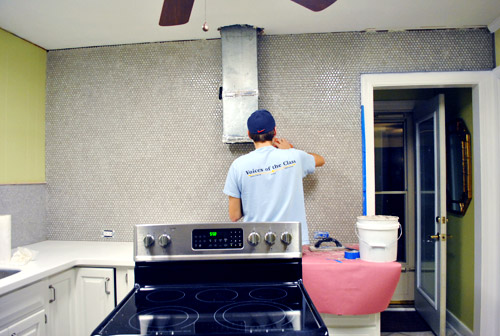
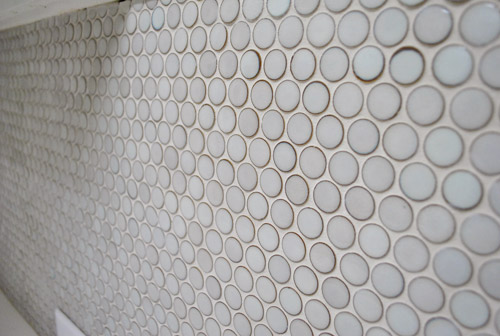
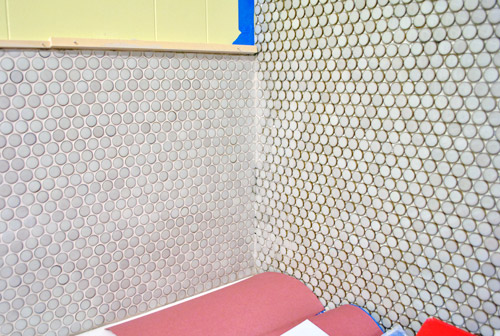
The difference between an ungrouted and grouted tile job still amazes us. Just when we thought we couldn’t love our penny rounds more. You can see the difference below – the left side has dried grout in it, the right side is ungrouted. You can also see how much lighter the grout gets once it dries. Of course there’s still a haze on the grouted tiles on the left, so they don’t look as gleamy as they do once you buff that off with a cloth after it has fully dried.
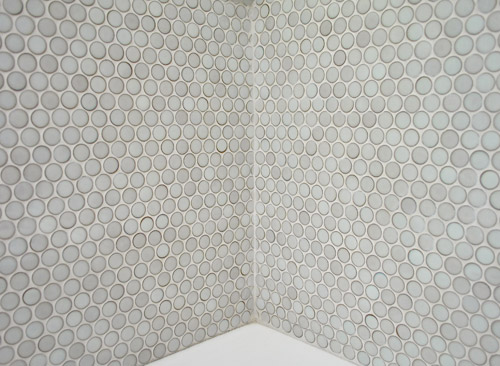
Oh, and since people had asked before – here’s a picture of the corner seam after it was filled with caulk that matches our grout. We also caulked the seam where the tile meets the counter (that’s still drying in this pic, so it looks darker along that bottom edge). This was taken before we buffed the tile with a cloth though, so it’s kinda chalky. But you get the idea.
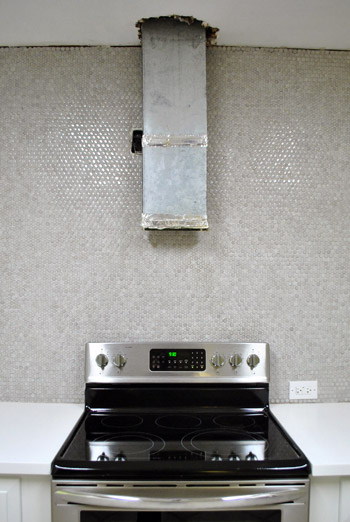
Here’s the whole room completely done, though it’s kinda hard to make sense of it at this picture size – since it sort of just looks like a gray wall. Haha. But in person it’s approximately 50 times bigger than this photo on your monitor. And those gleaming penny rounds look pretty darn lip-smacking. Yes, I just used that adjective. The penny tile does that to me.
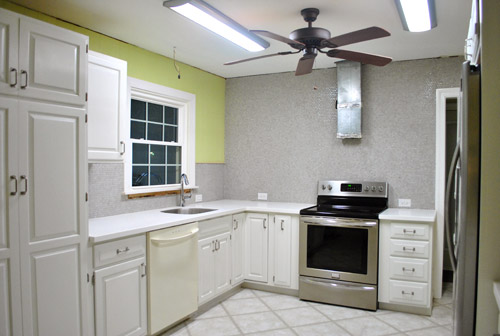
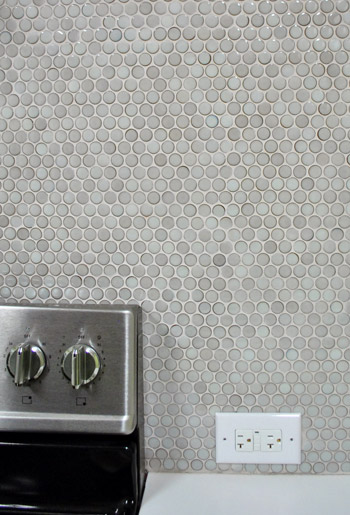
So here are some close ups so you can get a better idea of what it looks like in real life. Thankfully even when you enter the room from the frame hallway on the far side of the kitchen you can easily make out each individual penny tile. Which is nice because it would have been a colossal bummer to spend 14 hours tiling the room only to have it look like gray paint from afar. Even from the front door it clearly looks like little round penny tile on the part under the microwave that you can see from there. Whew.
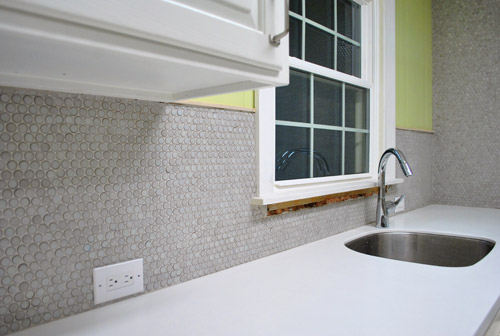
This shot is probably best at depicting all the varying tones in the tile. It’s awesomely random. Some tiles are a bit darker and some have a dark ring (or semi-ring) around them – we think it looks really charming and adds to the dimension. And you can see the polished shine on the top right corner of this shot (they look hazy in this pic for some reason, but up at the corner you can see that they gleam in real life). It’s actually a really “marble-ish” look without having to dish out the money for marble.

Here’s another close up to show how some tiles have darker rings and varied coloring. And you can really see how the grout cleans things up and adds some nice tone-on-tone action where dark holes and mesh once were:

We were a little nervous about the grouting step because we had heard that it can accentuate any seams or inconsistencies in the way that you laid the sheets. But our experience was the opposite: it actually seemed to disguise those little mistakes. It’s probably because our tile / grout color combo is low contrast, but if it was dark it could highlight those flaws instead of bridging the gap and making things look more finished and even. So this isn’t to say that grout solves a bad tile job when it’s low contrast (unfortunately nothing solves a bad tile job) but if there are tiny inconsistencies, similarly toned grout might be your best friend. And thanks to using a good sealer, it shouldn’t be a bear to keep clean (we used something awesome on our first house’s tiled shower and didn’t have to scrub it ever again – even while hosting Open Houses a year later it looked as good as it did the day we grouted).
Here’s a better shot that shows the shine- although it’s only on that portion of tile on either side of the range hood. I blame our terrible kitchen lighting, but it’s next on our to-do list! Yes, we have an appointment with our electrician and everything.

Speaking of other still-to-be-completed projects, we also still have to add a range hood and some open shelves. We think our tile will be a pretty darn sexy backdrop for our dishware and such (knowing Sherry, there will be a whole lot of “and such” up there with our dishes – the girl has plans).
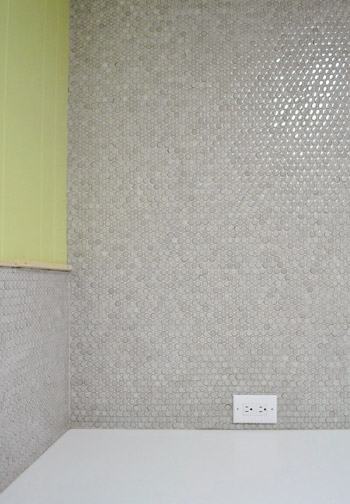
Even though grout is done, our job with the tile isn’t 100% complete. We still have to seal it. And before that we have to do a bit more clean up (aka: more buffing to remove small traces of haze in some areas). It’s pretty common for grout jobs and The Tile Shop actually sells haze remover, but we’ve found that just good ol’ fashioned elbow grease (and a dry dishtowel) can also do the trick. Buff, buff, buff. So we may try that first. That is, once our wrists recover.
You know we’ll be back to share all the goods as we go (applying our sealer, planning/replacing the lighting, range hood happenings, open shelves, new cork floors, etc). In the meantime, have you guys ever grouted? Did you kind of like it (me) or kind of hate it (Sherry). The good news is that we both admitted that it was totally worth the hassle when we were done, so that’s unanimous. Glad to have it checked off.
Psst- Take a wild guess who is the most excited indoor train rider in our family. Might not be who you think. More on that here.

gayla says
GASP—- LOVE IT! I LOOOOVE FINISHED PRODUCT :)
Sandra T says
Yay! A Tear’s for Fears reference!
Sandra T says
And the tile is looking lovely, too!
Heather says
oh that looks so much better than i even could imagine! i love it…makes the kitchen so much brighter too doesn’t it? great job!
Whitney Dupuis says
Looking great! You guys amaze me at your vision for a space. Please help with my house!!! Hahaha
Stephanie says
How long would a tile job like this generally take you from start to finish? My husband and I are using your wonderful tips to plan a tiling job for our small bathroom and possibly our kitchen. We are trying to figure out how many days, weekends etc. to set aside….
YoungHouseLove says
We mentioned how long our tile installation took here (we did a full back wall of tile mind you, so if you’re just doing a regular backsplash it might be less). And the grouting was probably done in about 4-5 hours one evening. Hope it helps!
xo,
s
Kim says
It looks fabulous! And I love the song reference! Great job!
Jennifer says
Love the title! It took me wayyyy back! :)
Lauren says
Wow! I cannot believe the difference the grout has made. I loved the penny tile when you picked it. And I loved how evenly you guys layed it. But I was concerned that it was getting a little lost on that big wall. Then today’s post made me love the penny tile again. Somehow the grout really helps it pop and the very subtle variation in the colors of the tiles stand out much more adding interest that was absent before it was grouted. Awesome job!
Amanda @ Our Humble A{Bowe}d says
Oh grout, you make everything look finished and pretty. Loving it, guys! Great choices. :)
Oddly enough, we have a post about grouting our marble back splash over the weekend: http://ourhumbleabowed.wordpress.com/2012/01/18/oscar-the-grout/
YoungHouseLove says
So pretty! That big window above your sink is heavenly.
xo,
s
Lindsey says
Im super curious as to the floating shelves you’ll be using. Im going to be putting some in my kitchen soon, but everyone has me overly paranoid about the weight they can hold. Have you guys decided if you’ll be DIYing them or Purchasing them? If you’re purchasing them, do you know where from yet?
YoungHouseLove says
I think we might have to build them since we want them to be 12″ deep to hold our big plates and most of the ready made ones are 8″. We’ll keep you posted for sure!
xo,
s
Kate says
We built 12″ deep shelves in our kitchen using the tutorial Ana White wrote on your blog a while ago. I don’t have a post on it (was done pre-blogging), but you can see a picture of it in this post: http://house185.wordpress.com/2012/01/14/2011-house-accomplishments/
Lindsey – The shelves we built were screwed into studs. The corbels were also drilled into the studs and added more support than I expected them to. I’ve never been concerned about the weight they can hold. They are very solid.
YoungHouseLove says
Thanks so much Kate!
xo,
s
Christie DeSilva says
We just added open shelves. After looking at all of the (expensive options) we picked the best construction grade 2″x12″s out of the pile from Home Depot. $16 for two. :) We had to pick through the pile carefully, but we have two stain-ready shelves! They may still end up being white, but I think we want to add some age and vintage’ish’nses, so stain for starters, and if we don’t like it, paint. :)
YoungHouseLove says
We’re definitely leaning towards that option too Christie! Love it!
xo,
s
Katy says
Ohhhhh, it looks great! I have grouted before just on decoupage type things, like a pretty pot, this looks a bit more intense. A lot more space to have to do it! To me, its like faux painting, the first 5 minutes are great. The next two hours suck but finally at the end, it looks pretty freaking good! Can’t wait to see the rest!
~Katy
YoungHouseLove says
Haha – that’s the perfect description!
xo,
s
Elisa @ The Self Life says
Wow, that looks amazing! The grouting difference = seriously unbelievable. We’re still frozen with fear when it comes to choosing a backsplash (http://theselflife.com/2012/01/o-kitchen-my-kitchen/) but you’re starting to make the decision much easier!
DJSherry says
:) simply gorgeous
Amber says
BEAUTY!!!
Mitzi says
LOVE the Tears for Fears reference–you guys are funny–look forward to your play on words. FAB job on penny tile too!
Danielle says
I absolutely love it! Sooo pretty! You guys are seriously so inspiring, especially as I sit here, looking at houses for sale online. I really hope we find one with an old kitchen, vs an updated one. We did a bit of remodeling on our old kitchen and you guys are challenging me to attempt even more in our next one!
emily @ go haus go says
Absolutely gorgeous! I love seeing the glimmer across the tiles in the different photos. Definitely NOT just a gray wall!
Lori B. says
This looks incredible! It really does look marble-esque.
Daniela Erbstoesser says
White vinegar works great for that haze removal!
Your kitchen looks awesome!
Sarah says
You guys are so close to the finish line!! Most major projects are checked off, could you imagine if you went with the banquette idea?? Kind of glad you didn’t, but I’m sure it would be just as fun with you two writing about it.
YoungHouseLove says
We laugh about the ol’ half-baked banquette idea all the time! It’s so funny to see where you end up and how you get there!
xo,
s
Marianne says
Awww. Pretty. The third photo really shows how glamorous the tile is. John, hope you feel comfy in a glamorous kitchen!
Tiffany says
Oh wow, it looks awesome! Y’all might be developing a penny tile lust in me.
Johanna says
Loving this! What do you think about continuing the penny tile theme under the peninsula?
YoungHouseLove says
That would be fun if we had the budget! We’re going to do something fun down there for sure though…
xo,
s
Audrey says
love, love, LOVE your kitchen. what a huge improvement! this gives me hope as we are looking at older homes as well and that you can transform bad ’70’s to modern. also, love the placement of your outlets in the back splash.
tara says
It is amazing how much more “finished” grout makes the tile look. It’s beautiful!! I love the penny rounds!!
My first job out of college was at the Tile Shop and I had never tiled in my life, but there I was teaching classes on tiling materials, mixing thin set, and showing people how to do it. I’m sure I was a stuttering fool when my “students” asked me questions! Now I’ve tiled a few kitchens myself:)
Kate says
It really does have the effect of marble. Just lovely. I bet it’s overwhelming (in a very good way) in person.
Brandi @ His Shabby Her Chic says
It looks great!
Can’t wait to see those shelves up!
Krystle @ Color Transformed Family says
I really live the way it turned out. I have to admit I was a little skeptical but the grout really completes it. I am looking forward to the lighting changes now.
maryanne says
Wow! It looks great! Your arms must be looking pretty buff :)
YoungHouseLove says
Haha, picture a bulging right arm and a skinny twerpy left arm. Haha.
xo,
s
Elizabeth says
It looks amazing! I’ve been on the edge of my seat waiting to see how it turned out and y’all did not let me down! I’m so impressed with the changes you have made, the original owners wouldn’t recognize that kitchen!
Courtney says
I love that picture of the oven straight-on! It’s definitely shiiiiiiiiiny, and the picture helped me understand the shininess allure of your penny tile. Very exciting!
Elisabeth says
You’d think I’d get tired of saying it, or you’d get tired of hear it but…. Your kitchen is turning out wonderfully. I can’t wait to see the finished product. If we ever get the time and money to redo the house we rent out in SC I’ll definitely share pictures. Be warned that renovating won’t be happening for a while since the military owns us for the next few years. Oh the joys. THE JOYS!
abode love says
Good gosh- it’s AMAZING what grout can do! I love how soft and subtle this look has become… I’m truly on the edge of my seat awaiting the next big kitchen change! Great job!
abodelove.com
Devon @ Green House, Good Life says
Am I the only one who keeps thinking about Cougar Town’s Penny Tile? And have you calculated just how many penny tiles there are in your kitchen (and then, just to keep it extra-nerdy, the total cost per installed penny tile)? And on a more serious note, have you considered painting those little wood caps at the top of the tile in the wall color so they’re less conspicuous? They might detract from the tile less than if they’re white.
YoungHouseLove says
Haha- I totally think Penny Can! every time I type penny tile. Oh yes, and those wood caps will get painted- just haven’t done that yet. As for the cost per tile, there are 270 penny tiles per sheet (holy cow, that sounds like a ton- they’re laid out in 15 x 18 rows). And they were $5.03 per tile, so that adds up to almost 2 cents per tile. Haha. That was fun.
xo,
s
Devon @ Green House, Good Life says
D’oh! I did it in reverse there — “Penny Tile” when I meant “Penny Can”! See? They’re pretty much interchangeable.
YoungHouseLove says
Haha- same thing.
xo,
s
Nicole says
We would like to redo our kitchen but we know that we will move in the next year or two so we are not going to put our money into it, but I dream about kitchens constantly…so it is AWESOME that I get to live vicariously through your redo!!!! I feel like I get all the kitchen redo excitement with none of the work or cost! It is really fun for me to watch your room progress and I think you have made wonderful/chic/smart choices for everything. It is all falling into place nicely! Thanks for living out my kitchen dreams!!
heather says
I immediately laughed out loud when I read the title. I absolutely loved the Tears for Fears reference. I was secretly hoping you would do something like that, only I kept singing, “Grout it out, Grout it in, Let me Begin”. Love it. On a side note, I didn’t even try to get clever with my blog post title last night and my husband proclaimed that I had finally run out of absolutely horrible puns. False! I will always have hip-hop puns!
On a relevant note – I really like how the penny tile looks all grouted. The last photo looks like a macro shot of a mermaid tail. I can assert this as fact since mermaids are clearly real. On a completely irrelevant note – I would definitely be walking around singing snippets of Little Mermaid songs whenever I walked in the kitchen.
Heather for the win as loser of the day. Baha.
YoungHouseLove says
Haha, I love Grout It Up, Grout It In, Let Me Begin. Holla.
xo,
s
Jennifer says
Oh man….you two are so inspiring. It looks great and SO worth all of that hard work. Can’t wait to see what you do with the lighting situation!
SherriEakin says
Bahaha! Oh yes, Tears for Fears will be stuck in my head all day now. ;)
It looks so great! Awesome job!
Monika says
It looks fantastic you guys! We are getting ready for our own kitchen updates and you’ve been soooo helpful and have given me so much courage. Yey! Btw, I knew that yesterday’s post would gather lots of comments. $herry, you are too cute! :)
Kristen @ Popcorn on the Stove says
So fancy looking. I have a new appreciation for circle tiles!
Laura says
I’d like to know what type of sealer you used on your old house bathroom reno that prevented you from ever scrubbing the grout again. I live in a 50’s rancher and let’s just say the previous owners weren’t the cleanest people. Would love the name of the sealer you used…STAT. :)
YoungHouseLove says
Haha- here’s that post (the sealer info is way on the bottom). Sealers depend on what type of tile you have though, so make sure they’re compatible. Pretty much any sealer these days is “state of the art” and can really cut down on scrubbing. Of course the most important thing is to have your grout super clean when you seal it, otherwise you’re sealing in the grime!
xo,
s
Adrienne says
So pretty! I’m worried about 14 hours of tiling work for my own house but if you can do it so can I right?!
YoungHouseLove says
Haha- you totally can!
xo,
s
meryl rose says
OMG the penny rounds look totally awesome!!! And oh man, I praise your enjoyment of grouting because I’m totally on team Sherry: I. HATE. GROUTING.
http://picardyproject.blogspot.com/2010/12/grouting-sucks-big-one.html
YoungHouseLove says
Haha. I’m right there with ya.
xo,
s
Kim says
Yep! We just retiled our backsplash last week and are now in the midst of a cabinet painting marathon! Kind of wish we would have tiled after painting like you did, but you live, you learn!
Elizabeth says
That looks so cool
Sarah T says
As a preschool teacher, I am reminded of the book “Rainbow Fish”. Can I have one of your beautiful glittering scales? I really love how your kitchen is coming together!
YoungHouseLove says
Ooh I love that book. Memories.
xo,
s
Jeanne says
I was wondering how far you went down with the tile behind the stove! Not too far I see. How did you decide how far down to go? Very nice job, btw!
YoungHouseLove says
We used the old trick where you nail in a wood board at the height of the counter after pulling the stove out and just tile up to that. So the tile follows the same line along the bottom of the counter – nice and clean.
xo,
s
Amy says
I’m impressed. Oh, by the tile too. I meant I was impressed by the Tears for Fears reference because you guys are too young to be making it. :)
Katie says
Just beautiful!
Kaytie @ GardenKitchenHome says
Crikey! It looks amazing! I had no idea the grout would make things look so… finished! I know you’ve got a lot more on your plate, but that one (big) step made the world of difference.
I’ve always wondered how to hang shelves over tile. Is it just a matter of a fancy drill bit? I’m excited to see how you guys do it.
YoungHouseLove says
Hah, funny you should mention that. We’re not sure. We know it takes a special bit to go through them cleanly so we’ll definitely have to do some research before that step. You know we like to learn as we go! Hah.
xo,
s
Rachel says
I hung baskets in my shower and I just drilled into the grout (MUCH easier than drilling through tile)! I had to be super careful not to crack the tile because I could see right through the baskets, but it still made the job a lot easier… and I just used a regular drill bit too.
Good luck! This looks amazing!!
YoungHouseLove says
Smart!
xo,
s