Betcha thought our grouting post was the last time we’d talk about installing our tile, eh? We’ll you’d be incorrect, sir – er, madam? We had a few other less-fun and less-interesting steps once the grout party had wrapped. And since a bunch of folks have asked us to detail the de-hazing and sealing steps… here they are! So stay tuned while I try to make them as interesting as I can. Maybe I should get my laser pointer.
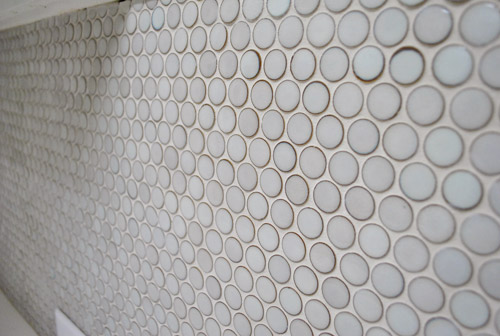
Anyone who has tiled knows that grout often leaves a bit of a hazy film on your tile. We saw it on both the subway tile and the marble floor tile in our old bathroom and this penny tile was no exception. I actually referenced my own post from 2 years ago to see how I had dealt with it then because although we document everything that we do in posts, we usually forget the details – so it’s nice to have them in writing to look back on. In case you don’t feel like reading it again yourself, basically I just used some elbow grease to essentially buff the tiles clean in our bathroom. So once again I broke out a clean rag and rubbed the surface of my tile with a little bit of pressure. You can see it working in this angled shot below. See how the left half of the tile is hazy and the right half of the tile is smooth and shiny? That’s the part I had buffed. We hear cheesecloth is especially amazing, but we had pretty good luck with just a plain white rag.
So yeah, that was a fun task. But it was nice to see the tiles start to get some of their sparkle back. And Sherry followed right behind me and scratched any grout that was around the perimeter of the tile off with her thumb to clean up the circles so they looked like full round tiles instead of hazy half-moons. It actually filed down her nail all the way to the nub (ouch) so her recommendation would be “don’t use your nail, because it hurts – but I don’t know what else to suggest- anyone have ideas?”
Only it didn’t really solve everything. See this close-up below (can you tell this was all going on while we charged ahead on other projects, like hanging the hood?):
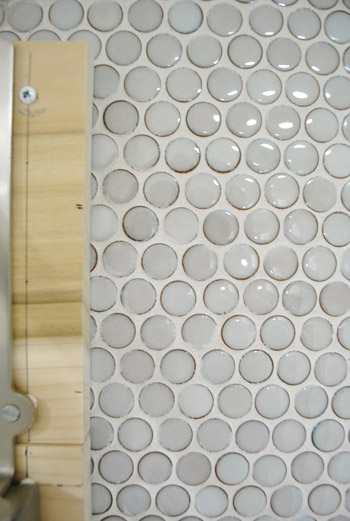
Maybe we had gotten a bit lazier with grout sponging towards the end of the task, but we noticed in a bunch of spots that the tiles were looking especially clouded around the dark outer ring. It wasn’t visible when wet, but it dried like the pic above. See how all the dark rings around the circle are irregular instead of all being exposed and looking clean and round? And although Sherry could scrape it off with a fingernail, since we didn’t have 10 billion spare hours to do that to each individual tile (and Sherry had ground both of her thumb nails down) I called The Tile Shop to ask their opinion. They confirmed my guess that I should let Haze Remover do the work. No more buffing and scraping every last tile.
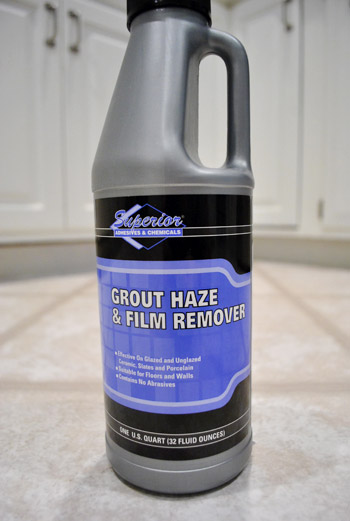
I had been hesitant to use this product previously because (1) why break out another chemical if you don’t need to and (2) it can damage certain types of tiles. But The Tile Shop guys assured me it’d be just fine on our penny tile, so I picked up this bottle for $8 and gave it a shot. Here’s my result:
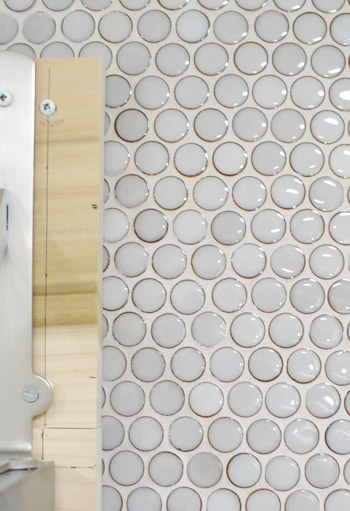
Is that amazing or what? To save you from scrolling back up I’ll put the before right here for ya again:

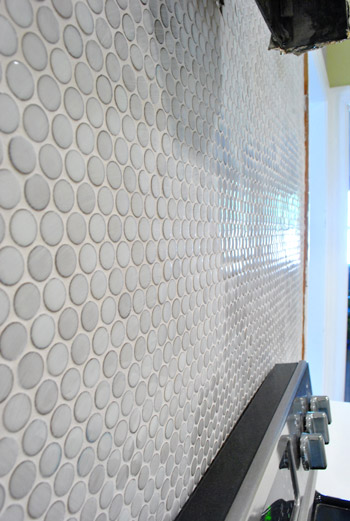
There’s still a smidge of that hazy ring in some very very subtle places, but it’s a HUGE improvement. I was also pleasantly surprised by how it brought out more of the tile’s shine. If you look below, you can see my progress line right under the left edge of the hood. See how much shinier it is on the right side of the wall up to that line and how dusty it looks to the left of it?
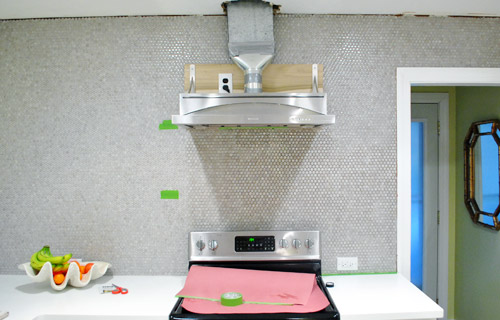
So yeah, we’re really glad we decided to do the haze remover. Although it was a bit tedious to apply over the whole wall (you basically apply it with a sponge, let it sit for a few minutes, then rinse and dry it off). But it was actually good practice for the next step: sealing.
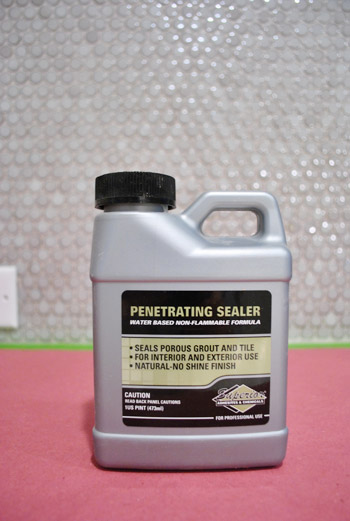
The process for applying the sealer is essentially the same (minus the few minutes of wait-time in the middle). The purpose of this step is to seal the grout to protect it from staining (since this isn’t porous tile in our case, so the penny tile can’t be stained), which is definitely an especially important step for a kitchen backsplash that’s sure to see a lot of action over the years. There’s no visible change to the tile/grout after it has been sealed, so sadly I don’t have any before and afters to show you. It all looks exactly the same, but now it’s protected so rogue spaghetti sauce won’t make us shake in our boots. We like that the sealed grout still looks matte, because we like the play of the shiny tile and the matte grout to balance things out. The lack of visible shine on the grout phenomenon also occurred when we sealed our first houses’ bathroom tile and then never had to scrub it once in over a year of use – even before hosting an open house and selling the place! So it’s safe to say they we’re huge believers in sealing tile. Oh but our tip would be to seal it when it’s clean (if you’re sealing an existing kitchen or bathroom) since sealing it when it’s grimy just seals in the grime. Haha.
We also had to caulk all of the edges of the tile. Basically anywhere that the tile met another surface at an angle, we applied some caulk to help keep that seam from cracking. This meant where the tile met the counter, where it met the wall in the corner, where it met the cabinet under the microwave, where it met the door frame and… well, you get the idea. We bought caulk that’s colored to exactly match our grout from The Tile Shop (where we purchased our tile and grout). It’s so nice that they make matching caulk so it all looks seamless.
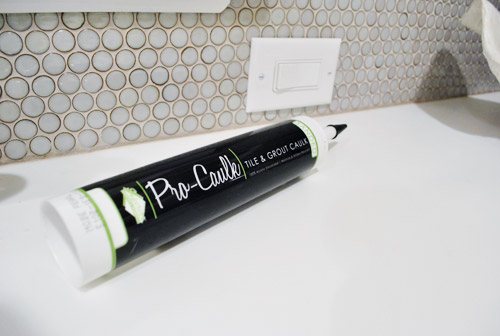
I probably could’ve snapped more pics of this process, but it was one of those “quick, Clara’s about to wake up and our hands are covered in sticky stuff” tasks. Sherry and I each started on different sides of the counter and worked towards the middle (we met behind the sink) and then Sherry stood on the counter to get the crack up to the ceiling (since she can stand on the counter without crouching like I have to). Meanwhile I worked on the doorway and the side of the pantry. So we don’t have application pics, but at least I remembered to artfully pose the tube next to the finish product when we were done.
So I think we’re now officially done talking about how we installed our tile. Hope this post cleared things up for everyone out there wondering why we didn’t detail the buffing/de-hazing/sealing/caulking steps. We now return to our regularly scheduled, non-tile-related programming.

Robin @ Our Semi Organic Life says
We just moved into a rental who’s kitchen was recently redone. I must say that after 6 months here I’ve realized they didn’t caulk properly at all! We get dustings and even small fallen pieces of grout(?) here and there along the backsplash which is such a pain. This is all good learning for one day when we get our own house!
Andrea @ the yellow cottage says
I think a run-of-the-mill plastic spoon would be a better alternative to fingernails. Though the professional haze remover is probably the best.
Sprite's Keeper says
How funny! I just “de-hazed” my backsplash last night! I tiled with glass mosaics on Saturday, grouted on Sunday, and last night, tried buffing with a clean lint free cloth. That got me nowhere. Elbow grease didn’t seam to work either and I did notice, like Sherry, that I could use my fingernail to quickly take off the film, so I got an unused kitchen sponge, you know, the ones with a sponge side and a pot scrubber green side, and CAREFULLY, because every tiling manual tells you not to use anything abrasive, ran it along all my glass tiles with some slight pressure and the film disappeared immediately. I am very happy with the results, especially since this was the first time I ever tiled anything! (So, yes, I’ve been following your tiling posts extra closely. :-)
Kathy says
I have used a similar thing – one ok for teflon, they’re called Dobie. Not much pressure, but just the slight abrasive seems to work with little effort. Very similar to a fingernail, I’d say!
Adrienne says
One of those plastic dish scrapers might work better (and less painfully) than a thumb nail.
Lizzy says
That looks like a LOT of hard work but I’m sure you’re glad to have your shiny tile back!
We just laid (or is it layed?) our tile floors last week and the tile shop recommended using a product called “Grout Once”. It’s a liquid that you mix with the powdered grout instead of water and it acts as a sealer. We’ve only had the tile down for about a week but have already noticed that it is super easy to clean. (Especially after our 16-month old got crayon marks on the grout – I probably couldn’t have done that if I tried!) (We plan to give our floor a good cleaning once our reno is complete and get rid of the dreaded haze but you can see pics here: anexcellentadventure.blogspot.com)
I know you’re already done with your tiling but perhaps others should check it out – and save them that extra step of sealing!
YoungHouseLove says
Thanks for the tip!
-John
Rebecca says
Hmm, we sealed our grout already and still have some of the grout on the tiles. Wonder if that will come off using the grout haze and film remover. It was one of those jump the gun and get this thing done (we don’t have patience like you guys).
LauraC says
Yeah, I got quite the arm workout when I buffed our newly-installed subway tile around our tub last summer! But it sure does look good, totally worth the effort.
Knitandmake says
Looking great I ve never seen the bottle of remover before.
Hannah says
Hmm, grout de-hazer looks interesting and a huge time saver rather going penny by penny.
It would be great if you can do a post on grout, do you use a special tool that you recommend, your finger, how thick do you grout, how do you get a straight line, do you tape, how do you remove unwanted caulk? Or maybe you already did this and I missed it (which would be shocking because I stalk your site 2x day).
YoungHouseLove says
Not sure we’ve done a post on caulking specifically, but we do prefer the finger-dipped-in-warm-water technique for smoothing it out. We try not to put too much on, unless there’s a bit gap. And if extra goes where it’s not supposed to go we wipe off with a paper towel. I think the only time we’ve used tape to get a clean line was in our old bathroom and that’s just because we were using white caulk again the tub right next to dark marble tiles.
-John
Keisha says
I had to re-caulk all of our windows in our previous house and this tool was a life saver. I will never use my finger again, this was so much easier and cleaner.
http://www.lowes.com/pd_173745-1168-34070_?PL=1&productId=3017708
Victoria says
I second that caulk tool that Keisha recommended! It’s amazing. The rubber-y-ness of it not only smooths the caulk but removes unwanted caulk from almost anywhere! Whenever the rubber-y part starts to get “dried out” from use (or because I’m not cleaning it well?) :) I get a new one because they’re only a few dollars and it’s so amazingly worth it! I feel like I always have 2 in my toolbox. :)
Meg@ Green Motherhood says
Hope y’all are feeling better! Stomach bugs are the worst!
I certainly don’t know what I am talking about when it comes to grout and tile, but would the Magic Eraser work? I know it can clean up tons of stuff around the house. This might sound crazy though!
YoungHouseLove says
Oh yeah, I wonder if it could. Might take a long time to scrub all that grout by hand though!
xo,
s
my honest answer says
I didn’t know you could get caulk to match different grouts – I thought it only came in white! That’s why I read, now I know :)
magda says
Can you go into more detail about how you caulked?
YoungHouseLove says
We squeezed the caulk from the tube in a little bead along the area we needed to caulk (between the counter and the tile) and then ran our finger over it to smear it and work it in so it wasn’t a huge glob. Sometimes you want to run your finger over a few times, and sometimes getting your finger wet helps it glide. That’s it!
xo,
s
Vidya @ Whats Ur Home Story says
Totally bookmarking this page for our future kitchen back splash redo.
jess says
Love it! Great step by step instructions, as always!
YoungHouseLove says
Glad to help!
-John
The Mrs @ Success Along the Weigh says
Ooh, that made my thumbnail hurt! I’m so glad you guys got that stuff so you could give yourself a bit of a break on the elbow grease! (Even if it’s a whole other kind of process)
Lynn says
I know that tennis elbow is a real thing having been a victim to it numerous times through the course of my life, but how about tile elbow? Seeing how much elbow grease was needed for that haze to start to fade looks like it was an insane amount of pressure needed and really repetitive. I hear ya about the chemicals though, amen to that, but the tile looks so pretty…so when it comes time for us to be doing the same project, I will be saying “More chemicals please!” as I tear up and gag.
My best, Lynn
emily @ the happy home says
for all of my odd scratching/smoothing needs, i tend to use those reward cards that grocery stores pawn off on you. i used a rite aid card to smooth all the wall decals in my living room! maybe that would work instead of a thumbnail?
Jenny says
As a substitute for the fingernail, I’d recommend this type of “bowl scraper”: http://www.amazon.com/Ateco-1303-Bowl-Scraper/dp/B000KEUKO2/ref=sr_1_4?ie=UTF8&qid=1329248005&sr=8-4. It’s a plastic (nylon, probably) scraper that’s useful for things like scraping gunk of non-stick dishware, getting sticky goo off things…basically things where you might use your fingernails.
Alternately, my mom always recommends using junk credit cards that come in the mail as scrapers. But we don’t get those — maybe it’s just her?
YoungHouseLove says
Interesting – never seen one of those!
-John
Rachel H says
I recently redid my tiny bathroom, and the entire thing is tiled (floor to ceiling)! I didn’t notice that the grouting job was awful until the workers left.. I guess I was too excited that it was finished! I have been using a paint scraper to get the haze (and bits of grout) off the tile. It’s the generic white subway tile, so I’m not sure if it would work for all types of tile, but it has been great to fix my problem. It’s way better than the sulfuric acid remover Home Depot had recommended.
I love your penny tile, btw! I helped my friend backsplash her kitchen, and we used your instructions. It looks amazeballs! Thanks for your tutorials!
Shannon says
Not that it will help now… :) But, the last time we tiled, someone told us to put vinegar in the rinse water. We did that and it immediately cleared up the haze. (this was during the grout process, rather than after it dried). We only had to wipe it with a sponge with a few passes and no elbow grease!
YoungHouseLove says
Oooh, good tip!
-John
Joy says
Just don’t use vinegar with marble tile as anything acidic (like vinegar) will damage it.
YoungHouseLove says
Good point! Make sure whatever product you’re using won’t damage your tile – marble and other porous natural stones are especially vulnerable.
-John
Diana @ Boy + Girl says
Wow! What a difference that haze remover made. I can just imagine how sore Sherry’s thumbs must have been! All in the name of DIY!
-Diana
Lindsey @ arkadian belle woods says
AHH….that tile is so delicious! I am in love with it all over and it’s so crazy that even though it was still gorgeous what a big difference that made to the look!
Nicole says
It looks amazing! I also use my nails as a “tool” all the time. Which is why I will never be a hand model!
Andrea says
The flooring guy at our Home Depot suggested using a paint stir stick (or wooden shim) or something plastic to scrap up errant grout/thin set. We made the mistake of using metal and have a few scratches on our lovely marble floor.
When doing our kitchen I used a shim and damped down the grout first. It worked fairly well, but as they were 12×24 tiles, there were significantly less grout lines than with your penny tile!
snosie says
I have got my excess grout off with a metal ruler (what I had at the time), it was multi purpose, also slathered on the grout too!
Heidi P. says
Wow, that pic w/ the one part hazy and the other shiny – wow. So I assume you stopped using the towel/elbow grease method after you bought the dehazer. Or did you finish buffing everything and then go over it w/ dehazer?
I totally feel Sherry’s nub-pain. Yesterday my thumb nail ripped off below where it’s supposed to. Oh man my thumb nail hurts! Sorry, that’s kinda gross to talk about…
YoungHouseLove says
We actually did finish all of the buffing before going to the store and getting the haze remover, so sadly we didn’t save ourselves any trouble there. Oh well!
-John
Amanda says
Ah ha ha! I scrolled up to look at the before picture before I realized you posted it right underneath. I couldn’t help it, I was so anxious to see the difference. LOL! Looks sooooo shiny.
YoungHouseLove says
Hahaha, too funny!
xo,
s
sarah says
I havent read through the comments so this might be a repetitive but I had the same problem with my subway tile and used a large sponge and warm water mixed with vinegar and it worked like a charm! I could even see the vinegar/water mixture changing to a hazey white when the haze started to come off the tile. I really liked that I had the supplies on hand and that I also didnt have to use chemicals!
Sarah @Savvy Young Something says
When I first saw the tiled wall, my roommate and I both sort of said, “Huh, it doesn’t look like much texture in these photos. It must be easier to see in person.” Then, the other day when we saw the shelves I thought, “wow, I am really liking the texture from the penny tiles.” It’s amazing what a difference a little shine makes in those pictures!
Evin says
Instead of your thumbnail, a synthetic “bone folder” may work. Art supply stores carry them for bookbinding. But looks like The Tile Shop didn’t steer you wrong.
Melissa Evans says
Amazing transformation! Looks great!
Alissa says
One thing I’ve definitely learned from reading you guys is that it’s the details that makes or finishes a project. Little things like adding caulk in gaps (tile, hood covers, etc) result in a much cleaner, more professional, and long-lasting product.
So I guess I’m saying thanks for teaching me that it’s these [sometimes boring and tedious] steps that help reach a better end goal. I’ll try to remember to not to do half-a$$ jobs on projects because I’m tired and want to move on to something else. :)
Leanne says
Our builders did a junky job on our fancy glass tile bathroom. We have mildew settling into the cracks between tiles, in the joint btw the wall and the marble floor tiles. Nothing gets rid of the orangey and green stains (and we’re not supposed to use most household cleaners near the marble). Any tips for 1)getting the tile squeaky clean and 2) caulking/sealing tile that’s already been crummily installed and grouted? Thanks!
YoungHouseLove says
Hmm, I don’t know what cleansers will work with your marble (maybe try googling or call someone like The Tile Shop for advice) but it sounds like once you get it as clean as possible, it would be nice to seal and possibly even regrout/recaulk just to get it to a place that’s more maintainable!
xo,
s
Marianne says
LOVE the penny tile- hazed or dehazed I can’t get over how great it looks! May have to incorporate some into the bathroom we are doing soon…
Paige says
This is unrelated to de-hazing, but it’s at least a question about the same room.
That hole in the ceiling that was above the hood vent–how did you patch it? We have something similar going on in our bathroom because we got a new fan. Have you already written a post about patching ceiling holes somewhere?
YoungHouseLove says
We used the same method used for patching the holes from our old lights. You can read about it in this post: https://www.younghouselove.com/holey-mole/
-John
Bri says
We tiled our bathroom a couple months back with white hex tiles and dark gray grout. I never thought that maybe that wasn’t such a good idea and we ended up with horrendous dark haze over our lovely tiles. After hours of scrubbing and using haze remover (and a little, maybe a lot of crying on my part) I busted out good ol white vinegar as a last ditch effort. Worked like a charm where the haze remover did nothing. Vinegar is magic I tell ya!
Mandie says
Would you recommend using this on a floor that was tiled a year ago? Could it still brighten it up?
Kitchen looks AMAAAAZZZING!!
YoungHouseLove says
Perhaps. I think they also sell “refresher” products for tile as well that help clean and reseal the grout. I’d recommend talking to the folks at your local tile place (or you can always give The Tile Shop a call. They’ve always been very helpful to us).
-John
Annie says
I save those little plastic “square” clips that come on loaves of bread. They’re great for all kinds of scraping (I use them all the time on frying pans and stuff.) You can also use them to label cords and cables …
Rebekah back in VA says
So, looking at all the pictures of the penny tile made me realize that it is pretty similar to the pattern on the side of the site. so, that’s pretty cool….
Feel better :)
Mariu says
Congratulations for your nice work!! It’s so admirable.
John@ Our Home From Scratch says
This post title makes me think of the Bengals song… Hazy shade of winter… in a salvation army band. That is all. :)
Carley says
Looks amazing! The picture showing the completed tile vs. the hazy looking at the oven really shows how shiny and fab the penny tile really is! I think it especially looks great against the stainless appliances!
Alison Shuman says
Oh, thank you. I put in the same tile, and have some of the same haziness and half-mooniness. I take a swipe every so often, but now you’ve inspired me to get the haze remover and just get it done!!! Love how you share such detailed photos – it’s what sets your blog head and shuolders above the rest. That and your funny-as-heck writing!
Heather says
We just finished a tile backsplash too! Seems like it should be a small project but it’s neverending! We went with white too, but marble, and love it! It’s the second post down on our blog:)
Ali says
Looks amazing!! However, you have officially confirmed that I will never do a tiling project on my own. I’m way too lazy for all these steps. Haha. :)
Natalia says
You guys probably already have seen this, but check out #4! John is a internet meme reference!
YoungHouseLove says
Oh man, should their be a link? We’re so curious now!
-John
Natalia says
http://twistedsifter.com/2012/02/top-10-what-my-friends-think-i-do-vs-what-i-actually-do-posters/
I double added the link of the meme, because I’m that excited for you guys to see it. Enjoy!
YoungHouseLove says
Too funny! Um, where do I collect my royalties? :)
-John
L says
One thing y’all did not mention (that I saw) was how you adjusted your switches and outlets to accommodate the thicker, i.e. tiled, wall. I tiled my kitchen backsplash and realized afterward that the boxes should have been moved forward BEFORE I applied the tile. It is now a year of wobbly switchplates that don’t quite fit because I didn’t do it right the first time, and I wonder how the P’s coped with theirs.
GORGEOUS makeover, BTW!
YoungHouseLove says
Oh yeah – we actually installed “old work” boxes that get tightened to the wall (rather than screwed to a stud) which made it easy to readjust once the wall got thicker. It was a trick we picked up watching our electrician!
-John
Krystle @ ColorTransformedFamily says
The haze remover made a huge difference in the look of the tiles. I’m feeling a little sad for Sherry’s fingers though. Thank you for sharing about everything. We hope to do some DIY tile projects soon. All of this information definitely boost my confidence!
Amy Knisely says
We just did our kitchen counter top in black granite tile and we used one of those large shop sponges (one side has a sponge side and the other a slightly abrasive side, like what you would use on non-stick pans) and then followed up with a microfiber cloth before sealing and that worked pretty well.
We also used as smaller kitchen sponge to get some of the excess silicon off of the counter top (from installing the sink) and that worked nicely.
Amanda says
What about these wooden sticks instead of fingernails?
http://www.dickblick.com/products/scratch-art-sticks/
YoungHouseLove says
Oh yes, those could work!
xo,
s