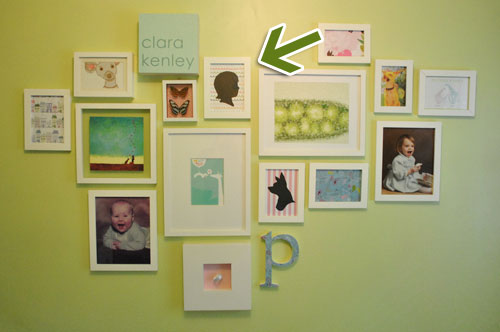
There’s been an impostor in our house. This placeholder silhouette of a little girl has been staring back us from Clara’s frame wall since even before she was born. And it’s finally time for this fake head to go so Clara’s real head can take its rightful place. Well, not her real head. A rendering of her real head. You know what I mean.
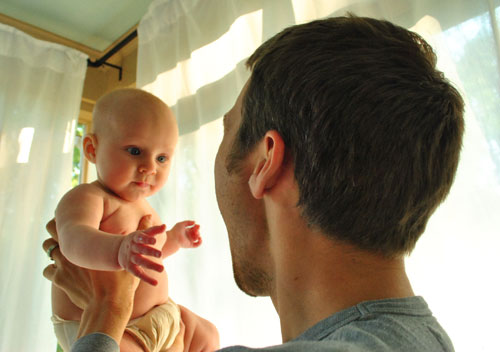
After snapping Clara’s weekly photo on Friday (see how we do that here), we decided to grab a shot of her in profile while we were at it. We’d be adjusting it later in Photoshop so all that was important was getting a clean shot (which meant taking off her onesie since it was bunching up around her neck and shoulders). Photographing her against the curtain in the sunroom helped get the silhouette effect started and making funny faces at her got her looking in the right direction (most of the time) so Sherry could snap away from the side.
After about 15 shots we ended up with this one that seemed perfect for silhouette-ification (weird back of the neck lump and all):
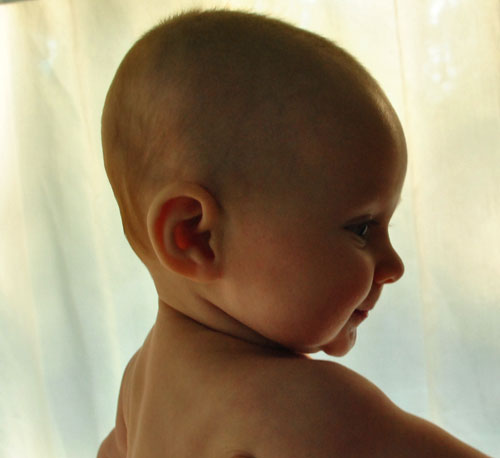
Now we considered this low-tech approach (which anyone who doesn’t have Photoshop can do in about ten minutes):
- Print your profile photo out to the size that you want your silhouette to be (even if it gets blurry from enlargement it doesn’t matter)
- Cut out the baby head so you’re left with just a profile and no background (yes, it will feel weird to cut off your baby’s head)
- Trace your head cut-out onto black construction paper with a pencil and then cut the shape out one last time.
Instead I took the Photoshop approach (partially because we didn’t have any black construction paper around and I’m lazy). I just cropped the pic, desaturated it to black & white, and then played with the “Brightness & Contrast” (under “Image”, “Adjustments”) to get a mostly silhouetted look:
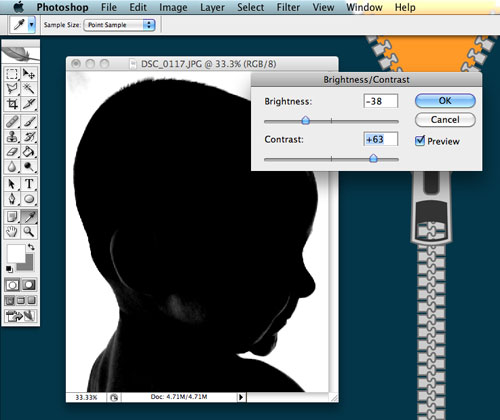
Then I used the paintbrush tool to fill in those lighter areas with black, which left me with a crisp black silhouette on a white background. Oh and I added some eyelashes and wisps of hair like we’ve seen in professional silhouette cut-outs. And I extended the shoulders a bit so we had a little more to work with. We didn’t worry about 100% clean lines on the added shoulder part since we knew the scissor cuts would straighten things out.
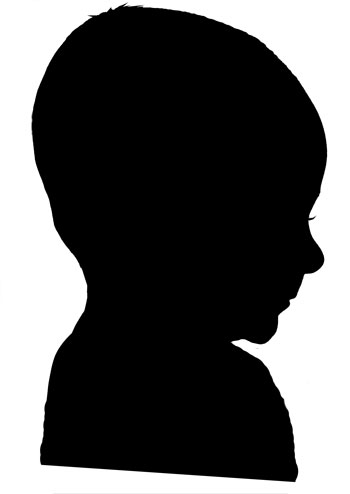
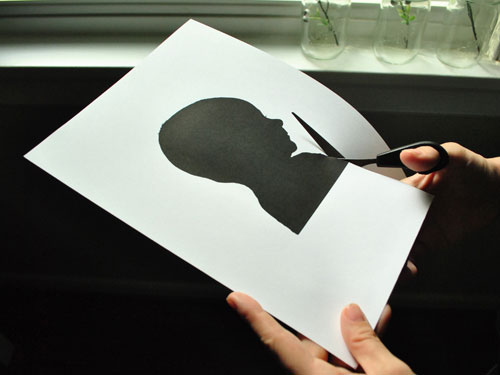
Once we had it done and printed to the size that we wanted (around 3.5″ x 5″ for our 5 x 7″ frame) Sherry “Steady Hands” Petersik took to cutting it out with small hair-cutting scissors. Yes, the same pair that she got at CVS and uses to give me a trim every few months.
Then came the official head swap in the frame (where we had previously used a colorful piece of craft paper from Michael’s for 60 cents as the background). Looking at our placeholder silhouette really shows how off-base our expectations were in the hair department. Oh well. She’s got time.
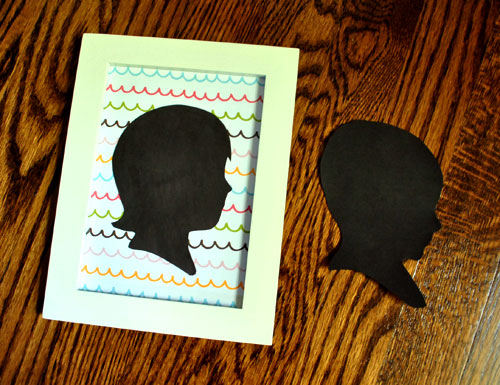
Oh but notice how we cut the bottom of the shoulders for a more “traditional silhouette” look (I added more than enough black on the bottom in that area before we printed for Sherry to create that little freehand shape as she was cutting).
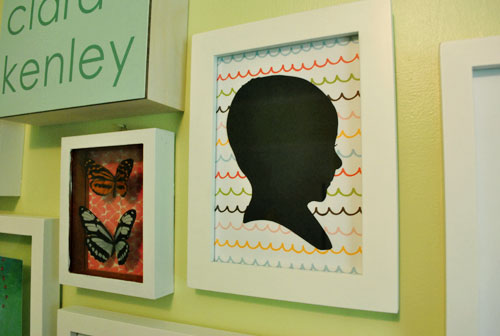
And with that, Clara’s round little head is officially represented on her frame wall. Of course I’d be lying if I said we weren’t looking forward to updating her silhouette periodically as she grows… especially when that hair finally does decide to come in. Have you guys done any silhouette DIY projects? Or cut out photos of someone’s head for any other reason? It feels weird, right?
Psst- Wanna know where we got something in our house or what paint color we used? Just click on this button:


Haley says
I love those baby bellies! She’s so cute!
Haley says
Oh and besides the belly…the cheeks are too adorable. I bet you can see those cheeks when looking at the back of her head. Ok, thanks for the dose of precious baby. I am off to deal with not so precious homework frustrations!
Jenn A. says
Dear John and Sherry,
I have nothing specific to the post to say, but I was just thinking that I love visiting your blog! It is so fun to read and I love your economical approach to decorating. I am also truly enjoying your more relaxed approach (ie, keeping it real) as of late.
You have inspired me recently to think about what I already own and how I might be able to freshen it up a bit with just a few dollars (or just a bit of time and tlc). In this tricky economic time, that approach is helping me to still have fun while staying in the budget.
I appreciate what you do! Thanks, Jenn
YoungHouseLove says
Thanks so much Jenn! It really means a lot. We’re definitely having a blast being more spontaneous, imperfect, and real – so we’re glad our back-to-basics approach is doing it for you too.
xo,
s
Lonely Wife Project says
She’s such a doll!
aly says
I remember my mom making silhouettes of my sisters and me using polaroid pictures (she used the black layer).
Flynn says
A friend had been lamenting that he’d missed a lot of life events taking place in his hometown, where we live, so I added him and his girlfriend in pictures with us at said weddings, birthdays, etc. It was fun to do and they thought the results were hilarious, but cutting out pictures of people and putting them into pictures of me made me feel like a TOTAL creepshow!
Btw – that side pic of your baby is a beautiful photo of her regardless; nice job :)
Ange says
Thanks for another timely post! I have been saving some examples of silhouettes in my DIY craft file to one day do a wall art of these of our 3 kids. This helps alot! Also thanks for all the helpful commenters too. I want to have mine printed as canvases & hung Andy Warhol style, with the 4th in the grid being myself & hubby on 1 together. Each child will have a different background colour, their ‘baby colour’.
Alaina @ LiveCreatingYourself says
Love this – like everything you do! Your baby girl is beautiful and so is her silhouette! : )
Heidi H. says
Ohhh pretty. I like it! Silhouettes are one of my all-time favorite decor pieces. I have one hanging in my living room. Very special! xo
Christeen says
Hi from Down Under(Brisbane)
What a great simple idea! I immediately thought that you could do it on the same day every year and see the progression of growth. Even if it is just for her photo album. We take our daughter’s picture every birthday wearing the same white t-shirt. It’s funny to see her swamped by it on her first and now at 8 it’s starting to look normal.
Christeen
kelly says
love the 3D name hanging, where did that come from? it’s all so very cute!
YoungHouseLove says
That was a gift from http://www.numsi.com. We loved it so much we had to get a You Are My Sunshine canvas for John’s mom from there too!
xo,
s
Anna says
Here’s my twist on a classic silhouette and some simple directions for Picnik editing. :)
Lawrence Girls
Skooks says
I’ve done this with everyone in the family . . . however we’ve added a kid since then and I haven’t made one for him yet. And we moved recently and I have no idea where those frames are . . . should dig them up and make up a new one for baby boy!
Katie says
Hi There! I have been following your blog for quite some time! I check it every morning :) I did my Scrapbook Silouette a few weeks ago and absolutely love it! Yours looks great! My is a little different but the shape of Clara’s face is perfect.
http://katieedean.blogspot.com/2010/10/scrapbook-silhouette.html
Claire K Creations says
That looks great. I have to say I do know the feeling. We have had a big canvas printed photo of us just sitting in the corner for ages so today I decided to make it into something useful. I brought out the old blackboard paint and converted it but I felt awful erasing friends and myself!
Helen | numsi says
Adorable silhouette! And hair on babies is completely overrated! So nice to see the wall art hanging there, it looks great with your lovely collection. Clara is a lucky wee girl!
Alycia says
Very cute and I wish I had done this when my daughter was a baby. Oh and I hope you guys keep all the silhouettes as your baby grows up and you update those. They will be a nice keepsake to look back on when she becomes a teenager and you start remembering the good ol’ days! lol
Allison says
I have been going silhouette crazy ever since I saw this! I first did one of my Boston Terrier, then one of each of my roommates and me. I made smaller ones and put them on the fridge as magnets. I work as a nanny and did one for each of kids I watch for the mom’s birthday, which is on Monday. I hope she likes them!
Thanks for the great idea!
Didi says
Thanks! I think thats nice too! Keep going with this great blog/house/way of living!
xo!
Kerry says
You know, we did a silhouette project in kindergarten, long before photoshop had been invented… (ahh, the apple ii e was a beautiful, if not monochromatic, thing).
For the SUPER low tech approach… and you save a bit of paper and some ink…
We would have kid 1 (posing for the portrait) sit parallel to the wall with a piece of black paper taped up. Then the overhead projector (any really focused light source would work) was aimed at kid 1’s head. Kid 2 (the artist) would reposition the paper until happy with the location of the shadow. Then, Kid 1 would sit still (a mighty task for a 5-year-old) while kid 2 traced the shadow. The lights come back on and the kids cut out the black paper.
Tada – but this doesn’t really work with an infant.
Handy Man, Crafty Woman says
How cute!! We had a silhouette done of our son’s head when he was about 3. We went to an art store that had someone come in to do it. It’s one of my favorite pieces of art in our house!
Monica says
This is too precious and a great idea.
It turned out so well! I’ve got to try this!
Jennae @ Green Your Decor says
I actually used my daughter’s silhouette to create a t-shirt design: http://www.guillotineco.com/products/just-act-natural/
I added hair to it for a bigger afro effect, but it feels so much more special because I know it’s her silhouette rather than some random face I drew.
Lucy says
Woow! That just great! I have a friend who can do this without a computer). Looks at your head profile and quickly cuts from paper)
Jan's camera says
Thanks for the wonderful tutorial. YIt’s a great idea. Your little Clara is just beautiul.
susan says
Clara is beyond adorable! I love her little profile!
kristin says
finally did mine! yay!
MelissaG says
I have my three boys in silhouettes! Mine was “low-tech” I guess?? I took the pictures. Adjusted them to the size I needed in my card making program and ordered them through the big chain drug store. Then I cut them out (using my EXPENSIVE hair cutting shears for some of the detail work…now they need sharpening but it was worth it!) Then I spray painted them with black spray paint. I LOVE THEM. They are one of my favorite things in the house right now.
YoungHouseLove says
Love it! What a cool way to do it.
xo,
s
Wendy says
Where did you purchase your frames? I have been looking for white frames just like that!
YoungHouseLove says
All of them came from Ikea and Target. Hope it helps!
xo,
s
Haley says
Love this! How did you add the eyelashes and hair in Photoshop? Was it a brush? Happen to remember which one? Can’t seem to get it just right! Thanks!
YoungHouseLove says
I think we used the “polygonal lasso” to cut out those shapes (while very zoomed in) and then just filled them with the same black color to add them to the shape. Hope it helps!
xo,
s
Marissa says
I thought of you when I found this Etsy seller who makes custom profile pendants:
http://www.etsy.com/shop/luckymebeads?ref=seller_info
YoungHouseLove says
Pretty!
xo,
s
Jennifer says
Hi guys!
I love your blog so much, I am always on it looking for inspiration and trying to learn new things. I was wondering what photoshop you use for your pictures, I am looking into getting it and there are so many options!
Thanks!
YoungHouseLove says
We have the kind of expensive one (Adobe Creative Suite) because we used to use it for advertising stuff too, but just the basic Adobe Photoshop version would most likely be all you need!
xo,
s
Laura @ The Soulful House says
I love your silhouette with the colored background! Here’s my easy twist on the traditional with white instead of black.
http://thesoulfulhouse.com/2011/12/how-to-make-silhouettes/
Alicia Skkag says
Amazing, wow I never thought that creativity could be so easy and fun
savas says
Hi from Istanbul-Turkey,
I just discovered your blog and couldn’t take off my eyes from
your entries and videos you posted.. just love it..and appreciate that you are so nice people that you share all the steps and tutorials of liked works and it is so obvious that you love to do it.. I just became a fan of you.
Love from Istanbul.
sava?.
YoungHouseLove says
Aw thanks so much! You’re so sweet Savas. So glad you’re enjoying our blog.
xo
s
Rachel says
So, I know this post is ancient at this point. And, you might not ever even see this comment. But, on the off chance that you do, I just wanted to say I’m so glad you just embraced your baby girl’s profile – no hair, “weird back of the neck lump” and everything. I knew a girl who did a project like this too and she totally edited her baby’s profile to make it look better! I was shocked.
Anyway, precious project, and I love that you get to remember your darling girl exactly how she is – just perfect!
YoungHouseLove says
Aw thanks Rachel!
xo
s
maria says
Love it
maria says
love this .