Holey moley. Our ceiling was having a little hole problem after some electrical wizork last week (warning: $herdog is in full effect in this post)…
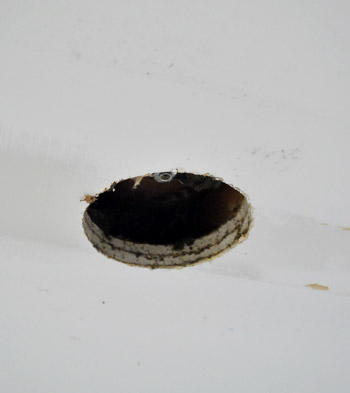
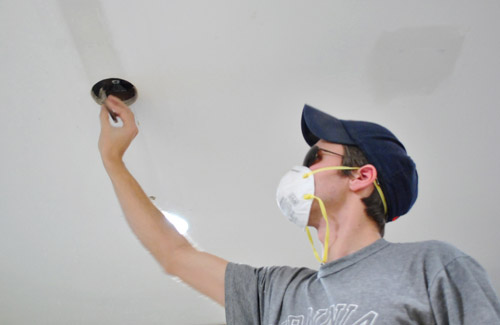
So we did the normal thing and donned sunglasses and hats along with breathing masks. Why? Because we can’t find our safety glasses (book shoots = can’t really find anything). And ceiling dust is gross when it’s up your nizzle.

Then we got our patch on. I’m the designated Spackle Wench in our family, but John has longer arms, so he helped me by doing step one: lightly sanding the outside of the holes we were patching.
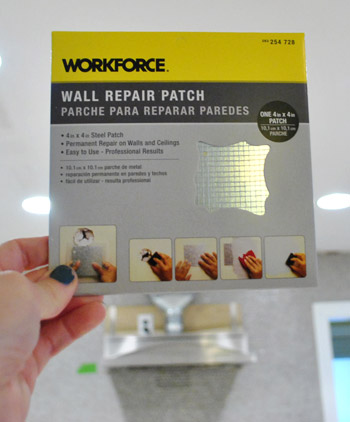
Then it was time for these guys from Home Depot. They’re basically a wire mesh patch that’s stuck to sticky paper. You stick it on the hole firmly, spackle over it, sand things down, and paint. Das it. They really make things pretty easy – even on a ceiling (the most notoriously annoying plane to work on in any room). Hardest part: gravity. More on that later (there’s video evidence of my struggle).
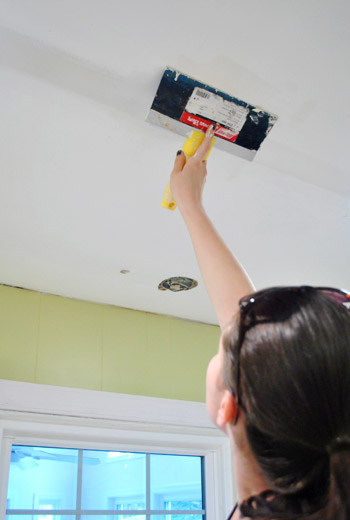
After the mesh patch is stuck up on the wall (darn, no pics of that, but that’s all in the video), just get some spackle on the biggest putty knife you have and squish it all over the mesh pad. Smooth it as much as you can with the spackle knife, but know that sanding everything down afterwards is when you’ll get the finished look you’re going for (so it’s always better to build things up slightly more than you need since you can always sand it down).
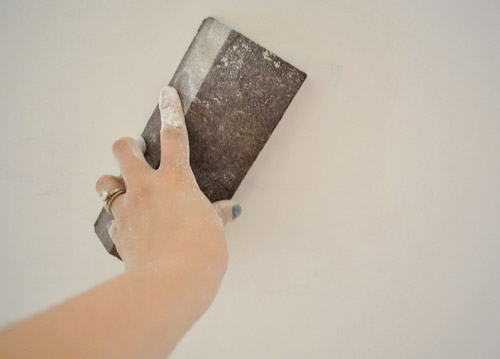
Then just wait the recommended drying time and get to sanding. I like to use a sanding block when it comes to sanding large planes like walls and ceilings, just because it keeps things straight (sandpaper is so floppy that it’s hard to keep things as rigid in this case, but it’s great for sanding furniture since it flexes to follow the lines of those items, like the legs of a chair).
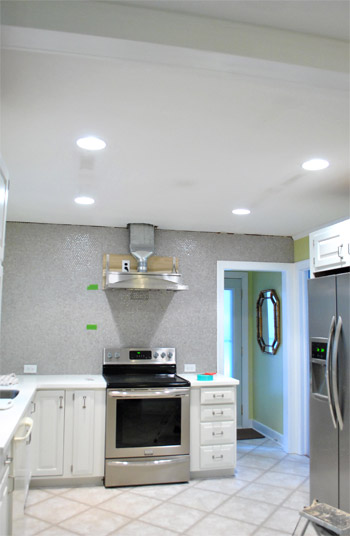
After sanding everything (and sweeping/vacuuming/showering to get the white powder off of everythingintheentirekitchen-urgh!) it hopefully looks like this. See the three dark-ish areas where those holes used to be? They just need some paint (along with other dirty areas of the ceiling that got grunged up under the old fluorescent lights).
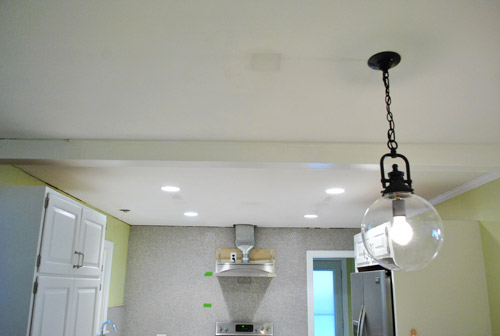
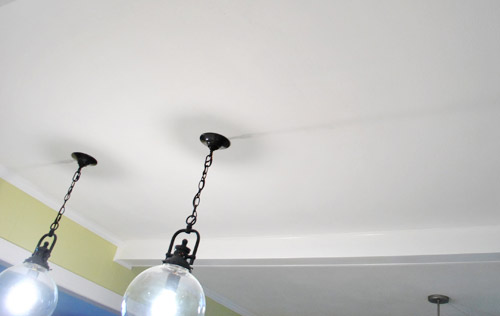
Here’s the hole next to the new pendant lights that we patched too. Oh and see the one over the sink- that’s still waiting for a fixture, so it stays. We’re on the hunt so we’ll keep you posted when we plug that guy up with something light and pretty.
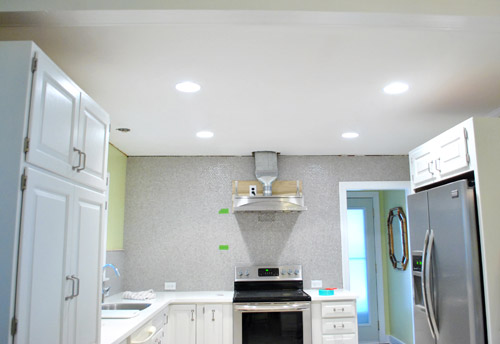
Two coats of ceiling paint later (bless the previous owners for leaving that behind for us), any evidence of those old holes were history:
Here’s the other former-hole next to the pendants after paint. See it? Me either. Huzzah!
And here’s a video. Admittedly, things got a little wonky (falling spackle, shrieking Sherry, an offhanded mention of a slug, etc). Yes, there are outtakes right in the middle of the thing. But it kind of perfectly captures the whole process. You’re gonna get messy, and it might take a few tries to get things to stick. But in the end, you can totally get ‘er done. As in, this is about a 2 on the difficulty scale. So put on your Brave Girl Underoos and get ‘er done! Or your Brave Boy Underoos if you’ve got those.
Hope that comes in handy for ya. Next up in the kitch: shelf planning and hood painting. Hootie hoo. Then floors. Momma’s excited. Bring on the colorful plates and bowls! Ah accessorizing, the best phase of every project. And the cork – that’ll be a room-changer for sure. What are you guys up to this week? Any hole patching? Shelf building? Painting? Secret project-ing? Spackle-dodging? Tell $herdog all about it.

Melanie @ Mailbox Journey says
I haven’t been doing anything as challenging or exciting as you guys :p but I did manage to get 1/2 of my frame wall up this week: http://mailboxjourney.com/2012/02/01/family-gallery-wall/
YoungHouseLove says
Wahoo! Congrats!
xo,
s
Melanie @ Mailbox Journey says
Oh & I just wanted to thank you guys so much for inspiring me to create my own blog, I just hit my 100th blog post today. :)
http://mailboxjourney.com/2012/02/02/100th-because-of-you/
YoungHouseLove says
Wahoo! Congrats Melanie. That’s amazing! Happy blogging…
xo,
s
Debbie says
Hootie Hoo! Looks great.
Amanda @ Our Humble A{Bowe}d says
My hubby still has to finish filling/sanding our kitchen ceiling. I want to start painting (and finish the kitchen!) But he did do something wonderful for us. He built and installed our cabinet doors: http://ourhumbleabowed.wordpress.com/2012/02/02/cabinet-doors-done/ I think am just as excited for the cabinet doors as you are for your shelves. :)
YoungHouseLove says
So exciting!
xo,
s
Kelly says
DANG that looks nice. You can’t even see the holes! Do you know if that mesh stuff works on plaster walls or just drywall? We got a grizzly crack on our (popcorn plaster…yikes!) ceiling that needs a fixing. We’ve just been staring at it. Maybe this will give me the motivation to fix that this weekend!
YoungHouseLove says
It works on both! We’ve used it on plaster too!
xo,
s
Diana says
I just did it to patch up my plaster walls after a pipe leaked.
Kristen @ Popcorn on the Stove says
For the light over the sink, do you think you’ll try to find something orbish to stick with the round/circle theme you’ve got going on or do you think you’re going to look for something that’ll break it up? Maybe some color?
I am always nervous about spackling holes. Not entirely sure why (although spackling mini holes are okay in my book)… it’s just one of those weird phobias.
YoungHouseLove says
Some color would be fun! Or something super glassy or cage-y. Something to sort of complement the orbs over the counter. Or we could always get another orb like the peninsula ones if we think it’s getting too busy with something else…
xo,
s
Jenn @My Southwestern Life says
The people who owned our house before us left all kinds of bad patch jobs on the walls. :( Our walls have texture, so I imagine that they’re not very easy to repair. The patches are all raised from the wall, and the texture doesn’t match the rest of the wall. Maybe someday I will have the courage to redo them!
heather s. says
Ugh…you just described half of the walls in my house. The living room makes me cringe every night when I’m in there but I just don’t want to fix it since I know it will be a TON of work.
Amy @ this DIY life says
Isn’t spackling fun? Gotta say the first thing I noticed “Oh my word $herdog has on nail polish…or is it paint? Hmmm
YoungHouseLove says
It’s a necessity these days since they’re shooting our hands in the book and they always look soooo grungy with junk in them from projects! So dark nail polish hides that! Haha.
xo,
s
Ainhoa@ALittleBite says
We’ve been living with a pretty big hole in our bathroom ceiling for a couple of months now (http://www.alittlebiteofeverything.com/2011/11/theres-a-hole-in-our-bathroom-ceiling/). It’s awful… thanks for explaining how you patched your up cause it seems like the neighbor’s insurance people are never going to fix it, so we might have to do it ourselves!
Katy says
Oh, you guys always make me want to go fix up tons of things in my apartment. But I am only here for three more months, so I can’t bring myself to, yay graduation! I am currently finding all my leftover valentines from last year’s crafternoon. No tools required just tons of looking through boxes. I love reminiscing about good times. http://thefirstapartment.blogspot.com/2012/02/weekly-wonderings-february-1st-2012.html
~Katy
YoungHouseLove says
Love it!
xo,
s
Ainhoa@ALittleBite says
*yours, sorry
Amy says
I had Wonder Woman Underoos.
That is all.
I lied. In second grade, I was Batgirl for Halloween … with my Wonder Woman Underoos on underneath. :)
YoungHouseLove says
Haha- nice.
xo,
s
Criss says
Me too! In second grade I had WW Underoos. In third grade I was WW for Halloween – complete with my mom’s big brown wig.
Lisa says
Yep….spackled some holes in the wall in my daughter’s room last week so that I could paint. It looks so different in there! I plan to submit pictures when I am all done for your redesign or maybe just to Facebook. Where can I find your email address when I am ready to send those? I can’t seem to find it on here anywhere…am I just lost? :)
YoungHouseLove says
See the button on the sidebar with our smiling faces? There’s a contact us link there for ya!
xo,
s
emily @ go haus go says
Wait! What about the floors? And again, thanks for letting us know how truly easy home improvement can be. I would have tried to cut out little drywall circles, glued them up there (seriously), spackled around it. But no, all I need is sticky mesh. You guys rock.
YoungHouseLove says
Oh yes, those go in after shelves and painting the hood (don’t want to ruin them with paint or wood while shelf-building and hood-painting). Haha.
xo,
s
Suzy Smith @ Suzy Home Made says
I need you guys to come repair some holes in my ceiling from electrical wizzork as well…We replaced our florescent lights with track lighting (which needed some patching up) and once my husband installed the light and patched the extra space, he realized the electrical work was wrong and needed to take undo everything he just did…and that was 2 months ago!
Diane says
Your ceiling looks great! I’ve been working on a project to remove popcorn from the ceiling in our front room. It was hugely messy and lots of work but after lots of sanding and a coat of primer and ceiling paint, it looks great. If anyone has tips to make that job easier – i.e., less messy – I would love to hear them as there are many more rooms to do!
YoungHouseLove says
Ugh- sounds so messy. Anyone have tips for Diane?
xo,
s
Amanda @ Our Humble A{Bowe}d says
My husband removed popcorn ceilings from the apartment buildings. He lightly sprays the ceiling with water (from a weed sprayer) and the scrapes. It seems like it’s just a little at a time, but it’s still messy. Tarp the floors and it might make it quicker to clean up…
Melissa Breau says
I’m not sure if it’s applicable to your popcorn, but the popcorn on my grandmother’s ceilings (which she hates) is supposed to be water soluble…. as in if you get it wet enough it comes right off. At least that’s what she was told by the home improvement guy that came out to look at her place.
Maybe worth a try?
Ashleigh says
I have removed popcorn ceiling in every room of my house…the only room left is a tiny bathroom which I am planning to do before June. We have carpet, so I lay down a huge sheet of plastic, use a pesticide sprayer that is filled with water (never used for pesticide) spray the ceiling, let it sit for 2-3 minutes and then start scraping….going slowly though to minimize the scrapes to the sheetrock. I also try to get as much off in that phase as possible because again it reduces the sanding. It usually takes me two hours to do a whole room, but then I scoop up the whole thing of plastic and throw it out. Depending on how great I am feeling about prep, I might lay down plastic again for the sanding stage, but usually it’s easy to vacuum one room. I also do what John and Sherry did when they were working in the kitchen (i.e. plastic the doorways), because that dust somehow finds its way into every room of the house if you don’t. I also hang up crown molding after every job, because it’s way easier to do that than to try to get your ceiling and walls perfectly painted. Yes, I’m lazy. :-)The results though are AWESOME. I will likely never buy a house again with popcorn ceiling. Good luck! It is so worth it in the end….
Meaghan says
We’re doing the same at our house (scraping, plastering, sanding, painting). Some people have suggested either tearing down the ceiling and replacing the drywall or just drywalling over the existing popcorn ceileing. We didn’t go for the first cause we’ve never drywalled and our ceilings are too low to do the second, but one of those might work for you?
Melanie says
Everyone please be careful if you decide to work on your popcorn ceilings and look into some testing. It’s not uncommon for popcorn ceilings (particular in homes built pre-1980) to contain asbestos. Just do a little research and some testing before you start scraping. Don’t want anyone breathing in that stuff! :)
YoungHouseLove says
Oh yes! Great tip Melanie! Safety first!
xo,
s
Christa says
My parents were doing this to the popcorn ceiling in their house a few years ago. It was awful, so I feel your pain! Their much improved way of doing it was hiring a contractor with a power sander. And changing the A/C filters pretty much everyday to avoid breathing it all in!
Probably not the most helpful suggestion, but I know my parents were happy to spend the money after watching that guy on a ladder with holding a sander above his head for a week straight!
YoungHouseLove says
Oh yes, so smart!
xo,
s
Kathy says
Only thing that helped us – we made a fairly large cardboard “funnel” and taped in onto the vac hose and after wetting one portion with sprayer, one scraped while the other held the vac, and we switched back and forth.
YoungHouseLove says
Smart!
xo,
s
heather says
Hahaha it’s just a messy process, though I love the idea of slightly misting it first. We have them in our house. Thankfully we’re just ripping the entire ceiling down! No scraping necessary.
Karen F says
Are Brave Girl Underoos similar to Care Bear underwear?
Those mesh thingies are a lifesaver – this is one of the few projects of yours that I’ve actually done before! For some reason, I don’t mind spackling. I find it kind of medatitive or something. I hate the sanding part, though! I can never get it completely smooth. I’ll have to try a sanding block next time (thanks for the tip!)
I am so excited for you guys that you are getting near the end of the kitchen projects! Those floors and shelves/accessories are going to have a huge impact and I can’t wait to see them! Also, we renovated our kitchen 2 years ago (we contracted it out) and I now hate my backsplash (which took me forever to choose). I want penny tile! I chose a glass/stainless combo and every time I look at it I just think it’s too busy. Maybe someday…
Dana says
Looks good! Sherry – I don’t know how you keep your rings on during projects! I always have to take them off. I’m afraid they’ll crumble, haha.
YoungHouseLove says
It’s so weird but I never take them off. We sleep in them!
xo,
s
Angela says
Ha Dana! I totally zoomed in on that too!
I was wondering how often you have to get your ring cleaned? Hehe, once a week?
And I have to say that my fav thing about your blog is the way you two write! I would love to see an unedited-by-Sherry John post just so I can laugh my head off. I try so hard to proof read my work but I just suck at it!
YoungHouseLove says
Hahah, nearly never! I’m so overdue! But I have noticed that doing yard work with gloves on shines it up! Maybe it’s the moist gloves making it steamy in there? So there’s a DIY ring cleaning tip: do yardword with cloth gloves on. Haha.
xo,
s
Lauren Nicole says
Is there anyone who doesn’t sleep in their wedding ring? Because that would be weird.
YoungHouseLove says
A lot of our friends take them off at night.
xo,
s
Randa says
I take off my engagement ring at night, and don’t wear it working or swimming, etc.
My Dad is a jeweler, though, so he definitely gave me all the warnings. That’s probably why I do it… hear his voice in my head. :)
YoungHouseLove says
Haha, that’s like how I hear my eye doctor yelling at me when I forget to take out my contacts!
xo,
s
heather says
Pull those gloves off slow! My husband lost his solid gold wedding band three, count it – three, weeks after our wedding. We finally bought him a titanium replacement off of Etsy for about $40 (and he loves it). We’re pretty sure it’s tilled into our orchard somewhere. He was working out there hauling logs, brush, working on the tractor, tilling etc. and had gloves on. The only thing we can come up with is when he pulled his gloves off (sweaty) that the ring flew off too and he didn’t notice.
Haha. I like to say that it’s buried in our orchard to help it grow with love. Corny.
YoungHouseLove says
Oh man, that sinks! My ring is suuuuper tight so even in the shower when my hands are all soapy it doesn’t budge. Because I’m a paranoid girl, so I wanted it basically welded onto my hand. Haha.
xo,
s
Melanie @ Mailbox Journey says
Heather –
Maybe this will happen: http://abcnews.go.com/blogs/headlines/2012/01/swedish-woman-finds-lost-wedding-ring-on-a-carrot/
haha :p
YoungHouseLove says
Haha- hilarious!
xo,
s
heather says
Note to self: must tell husband to rip up the orchard – we’re planting carrots! Bahahaha. My ring fits good too but I have knuckles like king kong. My husband has super straight fingers and sure enough it flew off. He’s careful now but there’s a reason we bought a $40 ring off of Etsy haha (and it’s super good quality too, he’s had it for months and no issues it’s solid metal).
Kate says
I recently patched two holes in my parents house that were left when a contractor installed a chandelier in their library. I got a little over zealous with sanding after we had speckled one of the holes and had to go out to get another patch to start again. We decided that from now on I am not allowed to sand any more patch jobs, which works for me!
Ana says
Looks beautiful, guys! Are you planning on patching the hole above the new hood cover in the same way?
YoungHouseLove says
Yup, we’ll tackle that the very same way!
xo,
s
Allyn says
I’m not a wench, I’m your wife (name that movie)!
The $herdog was totally what I needed this morning, so distract me from singing lovingly to my coffee mug.
Yeah, that happened.
I seriously love those lights!
YoungHouseLove says
Oh man I don’t know that movie. Anyone gonna snag the win?
xo,
s
Bethany says
The Princess Bride :)
Such a classic!
Mary Jane says
Princess Bride!!
Kim says
The Princess Bride!!
Mel says
Princess Bride, of course!
Allyn says
The middle school girl in me knows it’s Princess Bride.
Melanie says
The Princess Bride!
Elise says
Princess Bride! Which if you Petersiks haven’t seen, you need to. Best movie EVER!
Brenna says
Princess Bride FTW! “But after what you just said, I’m not even sure I want to be that anymore!”
Although, I think he says “witch.” Wench would’ve been better.
Melissa says
The Princess Bride! Love it, watch it every year!
Carly says
The Princess Bride! Now I need to go watch that movie again, but it might not be able to beat the “slug” spackle attack today…
Rachel Gross says
Princess Bride!!!! Great applicaton, nicely done :-)
YoungHouseLove says
Aw man, I’m ashamed I didn’t get that. I love that movie.
xo,
s
Alissa says
Princess Bride! But I always thought it was “witch”? I suppose either could work in the context.
And the falling spackle had me laughing quite a bit. I kept expecting John to zoom out and we’d see a spackle slug on your face.
Michelle Crenshaw says
The Princess Bride!
Deb D. says
Good laughs this morning!! I’ve never seen those metal “band-aids” before. I always thought you had to cut a small piece of drywall and nail it to the inside. Your way is much easier!!! Looks fab.
Captain Micah says
Gravity…it’s not just a good idea. It’s the LAW!
YoungHouseLove says
Bwahahahah.
xo,
s
Julia @ Chris loves Julia says
This looks so seamless! We had a hard time trying to patch our ceilings when we switched out the fixtures. The ceiling is textured and trying to mimic it was…rough. I was talking to those holes in the ceiling for 45 minutes while patching trying to convince them to just heal themselves. Hahaha. If only.
This week I am really trying to find some fabulous fabric for curtains for our bedroom. Looking for a large print. Stenciling fabric? Ready-made curtains? The perfect fabric? Who knows!
Katie says
Hi Julia – how did you recreate the texture? I am facing the same issue and wondering how to texturize the spackled area prior to painting over it?
Deb D. says
PS: Happy groundhog day! No mentions in the post… :-)
Keisha says
You guys crack me up, thanks for the entertaining video to start my day off well. :)
Cathy says
Agree! Love the video. :)
Catherine says
This is coming along beautifully! Very inspiring. My kitchen needs a revamp too. I think I’ll wait until yours is finished and then go for it!
Emily says
Nothing to do with spackling…my husband suddenly piped up and wondered about your last name…is it Czech?
Kitchen looks great, bt dubs.
YoungHouseLove says
Yup! John’s grandparents were Czech!
xo,
s
Niki says
I’m Czech too. My grandpa lived there as a baby! When Czechoslovakia “broke apart” my dad liked to say he was a “cancelled Czech.”
YoungHouseLove says
Haha- totally something John’s pun-tastic dad would say!
xo,
s
Melissa Stottmann says
YAHOOOOO for a nice even ceiling <3
molly says
I was cry-laughing! That was the best video ever!
Randa says
Me too – so glad you left the out-takes IN! :)
Claire says
Oh my gosh, your video made me laugh out loud. You guys are a hoot.
Maureen @ This (Kinda) Old House says
I HATE SANDING SPACKLE AND CLEANING IT UP.
Yes, that sentence needed to be in all caps. I love doing the actual spackling, but the sanding and cleaning up is the pits. Blech.
Here is what we have been up to this week:
http://thiskindaoldhouse.com/2012/02/boarded-up/
I can’t wait for this bathroom to be done. It’s taking forever!
YoungHouseLove says
Wahoo! You’ve been busy!
xo,
s
Bethany says
Big girl underoos! LOVE!
Robin @ Our Semi Organic Life says
I was dying laughing in that video. Ever had Spackle ever fallen in your mouth? It totally looks like it could – and probably would if that were me. Also question: what type of Spackle is that? Any kind will do?
YoungHouseLove says
Ugh, never in the mouth but on it plenty of times. Blech! Oh as for what type, I like Dap Crackshot (I think that’s what it’s called).
xo,
s
Andrea says
Didn’t you get a pretty fixture awhile back from PB outlet for the kitchen? I know it’s crazy that I remember that, but I liked it.
YoungHouseLove says
Yes, we love that but it’s mercury glass and silver so we don’t know if it works with the ORB lights- might end up in a bathroom someday!
xo,
s
Stefani says
That video was funny! Thanks for giving me a good laugh this morning :) who knew spackling was so humorous? Haha :)
Nikki says
Talk about keeping it real! Too freakin’ hilarious $herdog!
Rebecca says
Still unpacking after our big move but I’m having an internal argument that I thought I’d share. I love your pendant lights so much that now I’m wanting to replace ours with some beautiful blue beauts that I saw in a catalog. The problem is that we bought a brand new house (spec home though) and it has new pendants that match the other lights in the house and the SO thinks I’m being totally ridiculous wanting to swap them out. I think we need some personality even if the wallet takes a hit. Who is right here?
YoungHouseLove says
Oh yes, I think people should always go with lighting you love (even if you’re replacing something new- just craigslist it to get money towards stuff you prefer!).
xo,
s
Rebecca says
Thanks! I’m going to tell the SO that YHL says that we should go for it.
YoungHouseLove says
Haha- good luck!
xo,
s
Suni says
Looks awesome!! You guys are such inspirations to get my motivation going, and work on cross things off my to do list! This weekend, is frame the 3 prints I have had for 4 months that have been waiting patiently. Also, paint in the basement, buy and install 3 doors, and put the trim and baseboard in! Can’t wait to cross it all off my list!
Kelli says
Loved the video, Sherry you are too funny! Loved John as a sander incognito!
Emily Rae says
I am reaaranging our kitchen cupboards to make things more amenable to 5’4″ me. The previous placement of everything was great for my husband, who is 14 inches taller than me, but guess who’s in the kitchen now!?
Sarah says
OMG…Spackle Wench?! I just laughed coffee out my nose!!
On an even less dignified note…when I was moving out of a beat up city rental a few years back, I patched up a hole in the wall with one of those patches. Thing is…I didn’t get a patch big enough and didn’t have a second one to spare, nor did I have the time to run out and get another one. So I used the cardboard paper that it comes with to patch up the rest. Classiest DIY moment of my life.
YoungHouseLove says
Haha- I used wet newspaper once. I basically paper mache’d the hole.
xo,
s
Maureen @ This (Kinda) Old House says
Hysterical!
Erin says
Looks great! Quick question – did you just touch up the ceiling, or did you have to paint the whole thing? We have a couple of spots on our ceiling due to water damage, and I’m not sure the best way to approach it.
Thanks!
YoungHouseLove says
Just touched up those spots thanks to having access to the matching paint!
xo,
s
Sara says
Erin – with water damage you want to use a stain blocking primer first. then touch it up. Paint pros often say you can only touch up flat paint but ceiling paint usually is flat.
Lauren says
So no home-related projects in the works (We’re moving this summer so it seems kind of pointless I guess) but I did just hire a web designer for a humongous blog redesign, which I am totally geeking out about.
YoungHouseLove says
Ooh that’s exciting!
xo,
s
Andrea in KS says
John cracks me up. I’ve noticed from many of your pictures and videos that he seldoms wears shoes when doing projects. He’s barefoot!
YoungHouseLove says
It’s true! In real demo we don shoes, but for sanding and puttying, it’s less to get all dusty and messy (we ruined many a pair of shoes before learning that)!
xo,
s
mike @ the lil house says
Does the metal meshy thing stick out from the wall surface? Does it sit entirely flush? Every time I used one of these things, it was always raised slightly off from the wall just a tad.
YoungHouseLove says
Yes, it sits oddly flush. You would think it would be a square bump once it’s spackled, but when the spackle dries it pulls in slightly I think, so once you go over it with the sanding block it’s all good!
xo,
s
mike @ the lil house says
Ha! Ok, makes sense! I always thought I might have to peel the cardboard/thick-coating paper from the drywall AND THEN apply this metal mesh — for it to sit flush.
Thanks!
Lara says
I have never been able to get them to sit flush either. I did it EXACTLY like the video with a crap ton of sanding and spackleing but it never sat flat. I spackled and sanded and even once I got down to the mesh, even, it had a slight bump. I re-spackeld and re-sanded and never got it to sit flush. :(
YoungHouseLove says
I wonder if it has to do with the brand (maybe some are thicker than others or some stick better so they don’t bow or bend?). It also might help to only apply a thin amount of spackle to begin with (heavy applications might puff it out so that when everything dries it bumps out more?). Hope it helps!
xo,
s
Darcy says
Hello! Happy Thursday! $herdog — you really crack me up! That video was way too funny — the slug comment really had me LOLing! Oh and your “oh, BRB”..goes to get large putty knife!!
You gotta pace yourselves — this is only week 1 of the 3 week craziness, and your already getting silly — I’m skeerd!! But please keep the video’s coming! :-)
But back to the post — nice work – I had no idea they had those handy little wire meshy cover things — I kept asking myself -how in the world do you cover those holes!! So cool they have that! And I’m super impressed that you painted right away (or at least it seems it was done in all one night!) Good job as always!!
YoungHouseLove says
I know, right? We’re in that giddy overtired phase where everything is funny. Haha. But we’re making progress so we’re psyched!
xo,
s
Darcy says
You really are making incredible progress — I would be pysched if I could get 1/8 of the amount of stuff done as you!!
Your like TOTALLY AWESOME! (Sorry — the underoos talk has transported me back to the 80’s with my Wonder Woman ROOS!!)
YoungHouseLove says
Aw thanks Darcy! You’re sweet!
xo,
s
Monika says
Just recently patched the ceiling in the exact same way after we got our pendants installed! I used a pink spackle, that turns white when dry and ready for sanding. The color is so helpful for impatient people like me, who would sand wet spackle :\ Looking good, great funny video :)
Zoe says
Ha…love the video … and the fact you didn’t swear when the spackle rained down on you. It would have been $****K round here!
Lindsay says
Hahaha…you said ‘nizzle’ lol
Melissa says
I’m so impressed…you made patching holes in the ceiling look like fun! Love the humor you bring to your projects!!