Holey moley. Our ceiling was having a little hole problem after some electrical wizork last week (warning: $herdog is in full effect in this post)…
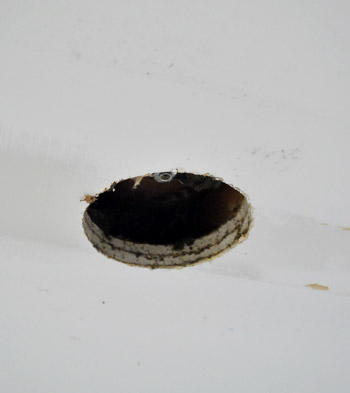
So we did the normal thing and donned sunglasses and hats along with breathing masks. Why? Because we can’t find our safety glasses (book shoots = can’t really find anything). And ceiling dust is gross when it’s up your nizzle.

Then we got our patch on. I’m the designated Spackle Wench in our family, but John has longer arms, so he helped me by doing step one: lightly sanding the outside of the holes we were patching.

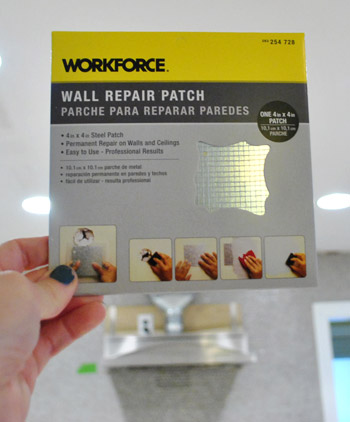
Then it was time for these guys from Home Depot. They’re basically a wire mesh patch that’s stuck to sticky paper. You stick it on the hole firmly, spackle over it, sand things down, and paint. Das it. They really make things pretty easy – even on a ceiling (the most notoriously annoying plane to work on in any room). Hardest part: gravity. More on that later (there’s video evidence of my struggle).
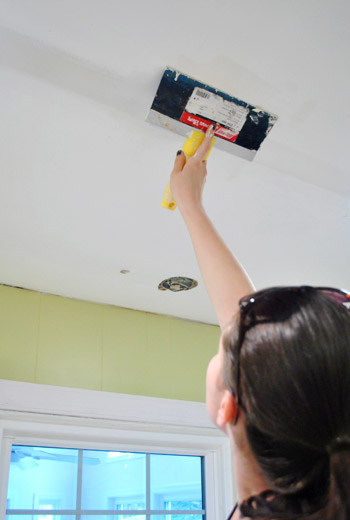
After the mesh patch is stuck up on the wall (darn, no pics of that, but that’s all in the video), just get some spackle on the biggest putty knife you have and squish it all over the mesh pad. Smooth it as much as you can with the spackle knife, but know that sanding everything down afterwards is when you’ll get the finished look you’re going for (so it’s always better to build things up slightly more than you need since you can always sand it down).
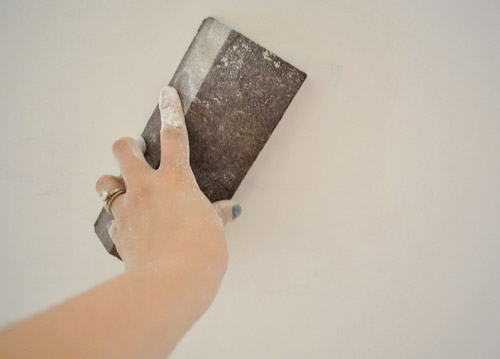
Then just wait the recommended drying time and get to sanding. I like to use a sanding block when it comes to sanding large planes like walls and ceilings, just because it keeps things straight (sandpaper is so floppy that it’s hard to keep things as rigid in this case, but it’s great for sanding furniture since it flexes to follow the lines of those items, like the legs of a chair).
After sanding everything (and sweeping/vacuuming/showering to get the white powder off of everythingintheentirekitchen-urgh!) it hopefully looks like this. See the three dark-ish areas where those holes used to be? They just need some paint (along with other dirty areas of the ceiling that got grunged up under the old fluorescent lights).
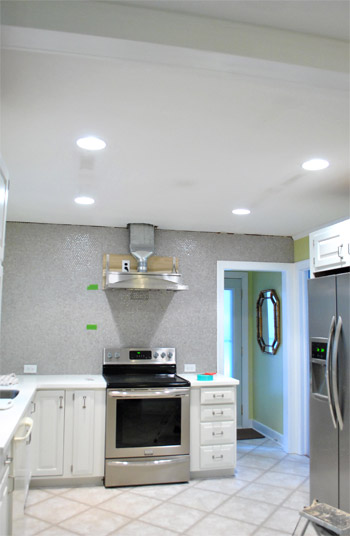
Here’s the hole next to the new pendant lights that we patched too. Oh and see the one over the sink- that’s still waiting for a fixture, so it stays. We’re on the hunt so we’ll keep you posted when we plug that guy up with something light and pretty.
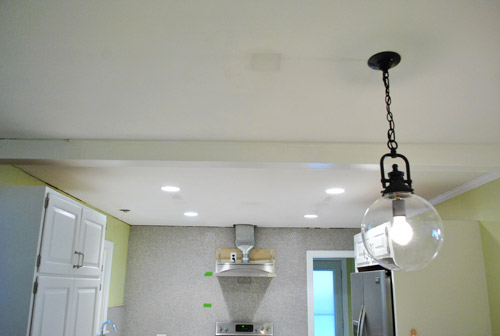
Two coats of ceiling paint later (bless the previous owners for leaving that behind for us), any evidence of those old holes were history:
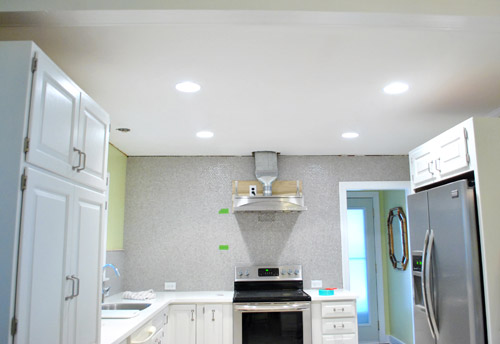
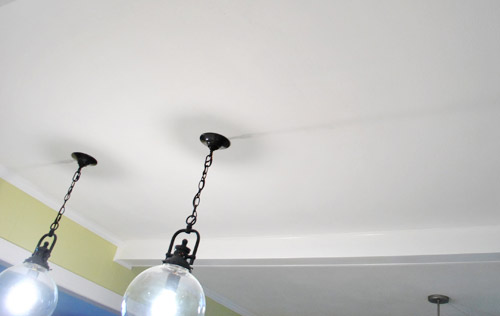
Here’s the other former-hole next to the pendants after paint. See it? Me either. Huzzah!
And here’s a video. Admittedly, things got a little wonky (falling spackle, shrieking Sherry, an offhanded mention of a slug, etc). Yes, there are outtakes right in the middle of the thing. But it kind of perfectly captures the whole process. You’re gonna get messy, and it might take a few tries to get things to stick. But in the end, you can totally get ‘er done. As in, this is about a 2 on the difficulty scale. So put on your Brave Girl Underoos and get ‘er done! Or your Brave Boy Underoos if you’ve got those.
Hope that comes in handy for ya. Next up in the kitch: shelf planning and hood painting. Hootie hoo. Then floors. Momma’s excited. Bring on the colorful plates and bowls! Ah accessorizing, the best phase of every project. And the cork – that’ll be a room-changer for sure. What are you guys up to this week? Any hole patching? Shelf building? Painting? Secret project-ing? Spackle-dodging? Tell $herdog all about it.

shelby says
Our home is about 60 years old and all of the walls and ceilings seems to have just a slight texture to them. I’m not sure if it’s from many layers of different colored paint or how the house started. It seems that freshly patched holes are so much smoother than our regular walls and ceiling. Any advice? I’ve wondered about just sanding all of the walls, but boy that seems overkill and messy!
YoungHouseLove says
Hmm, maybe try using some texturing spray and then sanding it to smooth it a little. Or skim coating it with spackle instead of sanding it perfectly?
xo,
s
Robin says
Ok this is not impressive (but it’s very terrifying for me) This week I took the ugly knobs of my dresser as well as some ugly detail that I thought was wood. Now I have nails I am having difficulty removing. Hammer didn’t work so I have to go buy pliers… yes buy pliers. This single momma owns a hammer, flathead, measuring tape and screwdriver. That’s about it. I’m determined to sand, paint and rennovate my dresser this month. First DIY furniture project ever. Inspired by your niece, Olivia’s dresser. My next project will be a dresser for my daughter, Destiny’s 11th birthday. Thanks for being my DIY inspiration. :)
YoungHouseLove says
Wahooo! You go, girl! You can do it.
xo,
s
Robin says
*inspired by Olivias desk.
YoungHouseLove says
Oh yes, I knew what you meant! Good luck with everything!
xo,
s
Julie says
Once again I’m jealous of your flat walls/ceilings! Patching holes is not fun with texture!!! We have popcorn to remove from a few of our ceilings still too.
Dave says
Couldn’t find safety glasses….right you just wanted to look more gangsta with the shades. Gangsta type #21 when sanding use a bandana instead of the face mask….show you colors $herdog and represent….lol
YoungHouseLove says
Bwahahahaha. I can just picture a bandana. And it’s hotness. Next time.
xo,
s
sarah says
we just got cork floors laid in the bathroom–we weren’t brave enough to do it ourselves, but we love, love the finished project. ours are lighter than yours are going to be.
http://carrotcakeandcreamcheeseicing.blogspot.com/2012/01/floor-is-in.html
YoungHouseLove says
Gorgeous!!!
xo,
s
Karen Zimbelman says
Thanks for keeping it real… great way to start my morning! You guys are awesome! Love the blog!
cleo says
wahoooo the end is nigh!
i am ridiculously excited about the cork floors and shelving phase….not long to go now, and it’s looking spectacular.
I have been secretly addicted to this blog for 6months now, it’s my daily pick me up, thank you for these daily nuggets of enjoyment!
Renata says
I was just wondering, is it really necessary to have that light over the sink. I know that you can never have enough light over a working space but it seems to me that the 4 recessed lights plus the window should be enough.
YoungHouseLove says
Definitely not necessary but we have the fixture box there anyway (it would cost money to get it killed and removed) and it’s so nice to have a light hanging in front of a kitchen window over the sink!
xo,
s
Rachel says
Well, if you count patching a whole kitchen cieling where we are removing the dropped cieling, I guess you could say we are “patching” holes :-) Not nearly as easy as those cute little patches, so we’re hiring that one out, especially as it has to tie in seamlessley into existing cieling/walls with texturing. Anyway… I’m planning out the lighting and open shelves at the moment for our kitchen reno… so excited to see what you guys do!
YoungHouseLove says
Wow- so much work!
xo,
s
Callie says
Haha love your writing style in this post! You had me laughing :D I think you are enjoying working on what is becoming a gor-ge-ous kitchen!! Yums. :)
Lori says
Looking good! Amazing how a small touch up makes such a big difference.
Brynn says
Just gotta say how impressed I am with you guys for powering through (pretty big!) projects that aren’t book-related when obviously your life (and house) is not really your own for these few weeks. I think you know that we would be more than understanding if your posting schedule were to chill out a bit while you work on the 1,786,221 other enormous things going on right now. So, thanks for being so ridiculously awesome. May I please borrow some of your energy?
YoungHouseLove says
Haha- you’re sweet Brynn! Thanks!
xo,
s
John says
Sherry, still waiting to see you wrap your head in painter’s tape with the sticky side out to collect the dust.
YoungHouseLove says
Bwahahahaha. Great tip. I will have to make a video.
xo,
s
Rachel says
Oh and by the way… I live in Seattle, and am definitely considering coming down to Portland to see you guys. February isn’t the best time for a visit up here, but hope you guys feel at home in the PacNW!
YoungHouseLove says
Yay! So excited!
xo,
s
Elizabeth @ The Little Black Door says
I’ve got the same project planned for this weekend (we moved our chandelier in the dining room) so this comes at a perfect time. I hope this works as well with plaster walls. Fingers crossed! Thanks $herdog.
elaine says
Awesome! So, I learned three things:
1) that there is such thing as sanding block (just sanded big holes with sand paper. Sanding block would have been So much better – now I know.
2) there is such thing as a wire mesh patch. Super neat
3) cold wet spackle feels like a slug when it goes down the back of your shirt.
I’m feel so informed :)
Hilarious video and great info in this post. You guys always make me smile. Love your blog!
YoungHouseLove says
Haha- I’d say that’s enough DIY knowledge for at least a week. The slug lesson was invaluable for me. Haha.
xo,
s
Ashley@AttemptsAtDomestication says
Looks awesome! I really can’t wait for those shelves! I’m beyond excited! And I totally agree that accessories are the funnest part. They are super easy to arrange, and rearrange, and they add SO much life to a room.
Knitandmake says
Cool never seen those patches before not sure if you get them in the uk or not.
Gina (Lady Goats) says
I KNOW you guys have probably already seen this, but I totally have to bring it up (really, I mean gab-for-no-other-reason-than-to-hear-myself-talk-about-something-i’m-geeking-out-about)… Have you thought about this pendant from IKEA?!?!?! http://www.ikea.com/us/en/catalog/products/70148531/ I don’t know if you’re going for an ORB pendant, there, but I’m pretty sure this wouldn’t clash with your bulbies (pronounced like “babies”, because they’re just that cool). The picture OBVIOUSLY doesn’t do it justice. That thing makes me smile just thinking about it. It would go great with the stools you have in there, and… I’m rambling. Check it out!
YoungHouseLove says
Oh yes I’ve seen it in person and love it! Always a possibility!
xo,
s
Karen @ bellacarina.com says
Several years ago, when I redid my bathroom, we somehow created a ginormous hole in the wall (I think it was when we removed the handicap rail next to the toilet…yes, an older lady lived there before we did) we didn’t have those handy dandy sticker mesh things so we just went with regular mesh, but that sucker was a pain! We probably should have actually used a piece of drywall somehow, but after several days of drying, sanding, reapplying it actually blended in! I’ll have to remember that sticker mesh for next time!
Valerie says
I did this whole process not long ago when we had pot lights installed in our kitchen. We have textured drywall (which was tricky enough) so I’m super impressed you got your flat ceiling to look that uniform! Skillz. When the electricians cut the holes I saved the circles of drywall that were cut out. Then took those to the paint store (I knew what brand and finish) to have them match the ceiling paint exactly. Our house is 10 yrs old so the paint had darkened ever so slightly with age. It worked really well.
YoungHouseLove says
Sooooo smart! Great tip!
xo,
s
Vanessa says
Are they looking for people to do color commentary for the Olympics? If so you have to apply – that was beyond entertaining.
YoungHouseLove says
Haha, now that would be funny. I would just babble incoherently and laugh nervously.
xo,
s
Wrenaria says
Your video made me LOL so hard. Good way to start a Thursday. Beaucoup thanks.
Also, your ceiling looks great. Good job.
Katie @ explanationrequired says
You guys are busy bees! We don’t have nearly as much going on around our place – just making purchases so we can finally get our daughter’s room decorated (we moved into our new place around the same time you did). Our most recent find was vintage sheets that I’ll be making into curtains.
http://explanationrequired.blogspot.com/2012/02/new-sheets-curtains.html
YoungHouseLove says
So pretty! Good luck!
xo,
s
Jennifer B. says
I’ve been taking your “dude get on that already” challenge with our disastrous spare room. I haven’t blogged any of the results yet, but the first week I made an erasable menu board out of a picture frame, scrapbook paper, fabric scraps (turned into roses), and scrabble pieces. This week, I cleaned, stripped, sanded, primed, and painted an antique media cabinet for extra storage in the hallway!
YoungHouseLove says
Woah- you’re a busy lady!
xo,
s
Jillian@TheHumbleGourmet says
On the photo of those gorgeous pendant lights over the peninsula, I saw the lines on the ceiling next to them and said (out loud, mind you), “oh, no! What happened? The ceiling is all smudgy!”
I then realized that they were just the shadows of the chains on the pendent lights.
It’s still early here. I’m usually much smarter than that :-)
YoungHouseLove says
Haha, glad you worked it out in the end! I do that all the time on photos – John will be editing them and over his shoulder I’ll say “ahhh! What’s that smudge!??” and he’ll say “um, it’s a shadow.”
xo,
s
Sara says
Looking so good!!! Love that you guys are having fun in the daily grind. To me the video says Life’s a Journey, Not a Destination simply because you’re laughing…AND you’re covering up ugly HOLES!!! To some, the prospect of being left behind with holes can be THE deterrent to ever moving light fixtures to the proper places. Same reason some people don’t ever rearrange artwork on their walls. Beautiful work. So inspiring!!!
Erica says
The kitchen ceiling looks amazing!! Our home was flooded last summer, so I’ve been painting for the last few weeks. In fact, I just finished painting our living room wall, that I am going to “try” to stencil.
I also wanted to thank you for having such an inspitational blog. I look forward to reading your posts every morning! Your blog has helped keep my spirits up these past 6 difficult months.
YoungHouseLove says
Aw thanks Erica! So sorry to hear about your home flooding! Happy decorating/stenciling/home-making!
xo,
s
Ryan says
That video is hilarious! I laughed so hard I snorted!
I’m loving the funnier YHL of late. :)
Sarah @Savvy Young Something says
You’re kitchen is look amazing! I am so excited to see the floors — I know they’re going to add so much richness and depth to the room.
I have been a furniture refinishing/painting maniac over the last moth. I just turned a dresser into a TV console with a hidden shelf, and now I’m attempting to refinish what was a painted chair. By taking it apart. What have I gotten myself into? Project pics are on my blog: savvyyoungsomething.blogspot.com
YoungHouseLove says
Wahoo! You can do it Sarah! Love the dresser turned console and good luck on the chair!
xo,
s
Kasey M. says
I’m not tackling anything as intense and drippy spackle, but I am hopefully getting a new shipment of yarn so I can start working on new products for my Etsy shop. It just opened this week and I’m super excited!
http://etsy.com/shop/buttonwoodcottage Feel free to stop by and let me know what you think :)
YoungHouseLove says
So exciting! Happy Etsy shop creating!
xo,
s
CJ @ STC.com says
You make patching look so easy! We’ll need to do this when we take out a partial wall (a beam that supports the wall goes into the ceiling which we will be taking out). I’ll be on the look-out for the patch kit at Home Depot!
robyns says
I thought you already bought the pendant for over the sink when you were at the pottery barn outlet with the bowers.
YoungHouseLove says
Yes that’s silver and mercury glass so we don’t know how it meshes with the ORB pendants so it might end up in a bathroom. We’ll see!
xo,
s
robyns says
I just wanted to make sure it wasn’t lost in the Room of chaos and forgotten! It was so pretty. And shiny. Me likee shiny…
YoungHouseLove says
Haha, me too!
xo,
s
chatelaine says
we’re trying to pick paint colors. pick 4 colors from the swatches but on the wall they’re so different. i can’t decide. we’re going to get one more color just to see. *sigh*
Anika says
Well done! I hadn’t realized these patches existed and I now know exactly how I’m going to fix a hole I’ve been hiding behind a picture – thank you!
Also, Sherry you’re hilarious! You and John make a great team and it’s fun to see you both in action. I love unedited videos like this one – keep them coming!
LauraC says
I was going to email you, I still will when they’re really finished, but my husband built the first shelf Monday. It turned out pretty good! It’s not done, still needs sanding, wood filler, primer and paint, but it’s up. Hopefully he’ll finish the second one today. Once it’s sanded and even, I think the rest should go pretty quickly! Are you thinking floating shelves, or ones with brackets for the kitchen?
YoungHouseLove says
I think we might use brackets to add some interest and make them super strong! So excited about our shelves!
xo,
s
Aurora says
OMG I love it when $herdog is in full effect.
Also, sticky mesh rules, gravity drools.
jess says
We’re expecting delivery of a new counter-height dining table and stools this week and next. Lots of assembly, but everything’s all glass/chrome/white, which makes me super happy :-)
Alex says
I am SO EXCITED to see those floooooooooors in! They will defs be a room-changer and give some nice contrast :)
Monica says
Have you guys thought about putting edison bulbs in your hanging lights above the bar?
YoungHouseLove says
We tried but they were too yellow (our counters looked dirty) and then we tried clear glass ones and they left really harsh spider-like shadows on the ceiling. Still working on it- will share whatever we find soon!
xo,
s
Jenny says
Looks awesome! Great job!
Jennifer says
Thanks for the reminder that I need to patch a hole in one of our walls. I went out shopping by myself one day. When I got home my husband was being weird in a ‘I did a bad thing’ sort of way. While I was gone he some how managed to drop our vacuum down a flight of stairs and the handle punched a hole in a wall close to the baseboard.
*Sigh* Surprisingly the vacuum still works but the handle is barely holding on. You know its not enough that we have more than enough projects to do as it is – without him putting more holes in walls. Hah.
heather says
This is one of the funniest posts to date. I can’t explain why but it is. I would send you a virtual high-five but I was laughing too hard and would likely virtually miss and virtually hit you in the forehead instead.
Between the “I’m the designated Spackle Wench in our family” to the mid-video outburst of laughing and turning bright red…oh my sweet baby Jesus.
I vote you make a new author identity that says “$herdog”. I love the way you guys write, but this – this $herdog, made my face hurt from laughing.
YoungHouseLove says
Hahaha, I love it! $herdog has to be my pen name. Haha.
xo,
s
KristenK says
but where is ceiling cat?????? lol
YoungHouseLove says
Hahaha.
xo,
s
Linda says
I read through the comments that have been published so far and didn’t see anything about the hole around the range hood vent ceiling hole. In the pictures it doesn’t look like it’s been patched yet. It seems like this could be tricky to do. Will you have to use a different method or are you going to use the same patch method there?
YoungHouseLove says
Oh we’ll use the same method, we just didn’t get to tackle it that day with so much book craziness going on! Soon!
xo,
s
Amiz says
First time commenting because I had to comment on that video. Hilarious!! I love that you guys are so real! And I think I would have reacted the same way haha. My favorite part was $herdog’s “oh brb!” Haha
emily @ the happy home says
i read your blog every morning when i get in to work and without fail, it’s the highlight of the work day. hootie hoo!
YoungHouseLove says
Aw thanks Emily!
xo,
s
Jessica says
this is unrelated to ceiling hole patching, but last weekend in Starbucks I noticed your nerdy chic bar stools. They looked great paired with the mocha floors and white + green Starbucks theme going on. I’m so excited to see your cork floors going down! woo to the hoo
xx
YoungHouseLove says
Wahooo! I can’t wait to see them with the floors!
xo,
s
Sarah says
Nice ceiling! I used those patchy things to cover up old piping holes before tiling my back splash. Easy squeazy.
I am going to be quilting this weekend! Oh yeah, I’m 27 years old, not 87. I bought this amazing $10/yard designer fabric a while back but have been paralyzed with the fear of messing it up. My mom is coming to visit and help me get started!
YoungHouseLove says
Sounds gorgeous! Good luck! Gotta love mom help!
xo,
s
Patricia says
Random question. For some reason I’ve been trying to remember how and when exactly I started reading your blog and I feel like you posted an entry on LiveJournal somewhere and that that was how I came across it. Am I imagining things? I feel like it was your master bedroom that was posted! If you can shed any light onto this random weird question, that’d be awesome. I’ve been trying to blog more and get off Facebook so I’ve been thinking more LJ thoughts lately. lol. Thanks!
YoungHouseLove says
Hmm, we don’t use LiveJournal I don’t think. Could someone else have posted it there? Our master bedroom has been a sort of intermittent process…
xo,
s
Patricia says
Oh and I forgot to mention it was the master bedroom from your old house. haha… and I know I started reading before you were pregnant. so it’s been a while. I guess it’s possible someone had posted it for inspiration or whatnot…. however it was they posted it, it did lead me here and I’ve been a daily follower for probably 2 plus years now.