Holey moley. Our ceiling was having a little hole problem after some electrical wizork last week (warning: $herdog is in full effect in this post)…
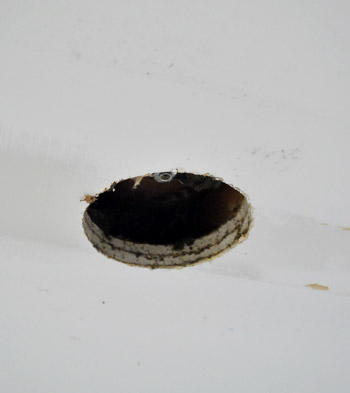
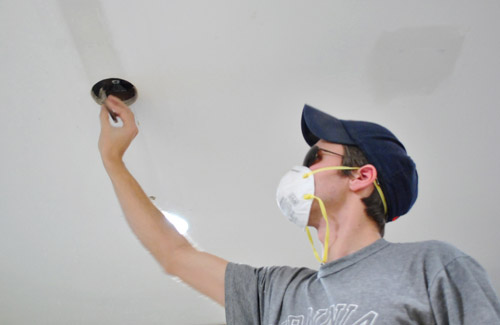
So we did the normal thing and donned sunglasses and hats along with breathing masks. Why? Because we can’t find our safety glasses (book shoots = can’t really find anything). And ceiling dust is gross when it’s up your nizzle.

Then we got our patch on. I’m the designated Spackle Wench in our family, but John has longer arms, so he helped me by doing step one: lightly sanding the outside of the holes we were patching.
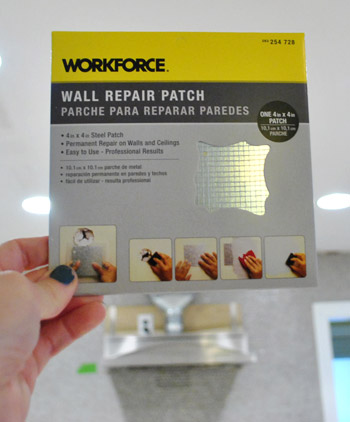
Then it was time for these guys from Home Depot. They’re basically a wire mesh patch that’s stuck to sticky paper. You stick it on the hole firmly, spackle over it, sand things down, and paint. Das it. They really make things pretty easy – even on a ceiling (the most notoriously annoying plane to work on in any room). Hardest part: gravity. More on that later (there’s video evidence of my struggle).
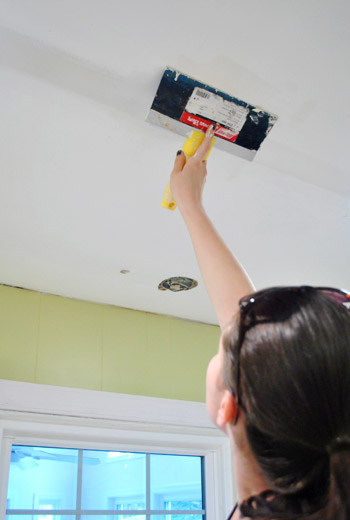
After the mesh patch is stuck up on the wall (darn, no pics of that, but that’s all in the video), just get some spackle on the biggest putty knife you have and squish it all over the mesh pad. Smooth it as much as you can with the spackle knife, but know that sanding everything down afterwards is when you’ll get the finished look you’re going for (so it’s always better to build things up slightly more than you need since you can always sand it down).
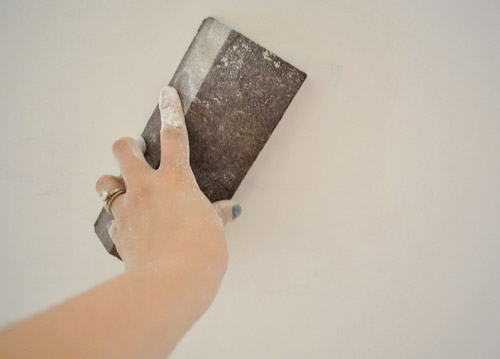
Then just wait the recommended drying time and get to sanding. I like to use a sanding block when it comes to sanding large planes like walls and ceilings, just because it keeps things straight (sandpaper is so floppy that it’s hard to keep things as rigid in this case, but it’s great for sanding furniture since it flexes to follow the lines of those items, like the legs of a chair).
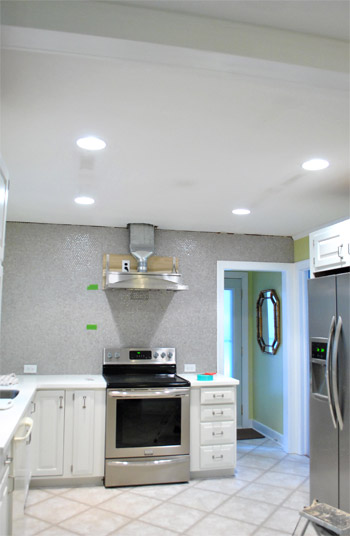
After sanding everything (and sweeping/vacuuming/showering to get the white powder off of everythingintheentirekitchen-urgh!) it hopefully looks like this. See the three dark-ish areas where those holes used to be? They just need some paint (along with other dirty areas of the ceiling that got grunged up under the old fluorescent lights).
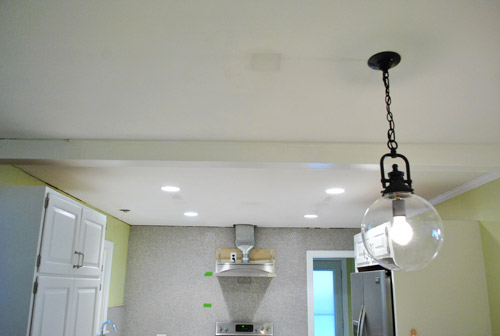
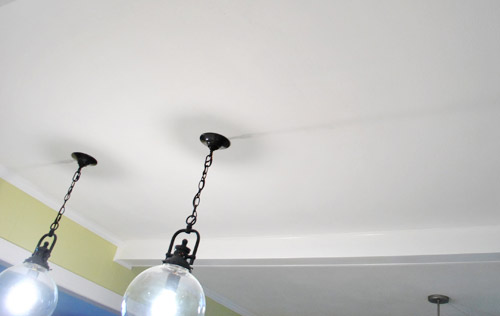
Here’s the hole next to the new pendant lights that we patched too. Oh and see the one over the sink- that’s still waiting for a fixture, so it stays. We’re on the hunt so we’ll keep you posted when we plug that guy up with something light and pretty.
Two coats of ceiling paint later (bless the previous owners for leaving that behind for us), any evidence of those old holes were history:
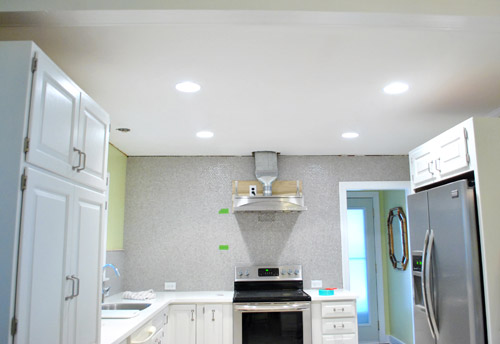
Here’s the other former-hole next to the pendants after paint. See it? Me either. Huzzah!
And here’s a video. Admittedly, things got a little wonky (falling spackle, shrieking Sherry, an offhanded mention of a slug, etc). Yes, there are outtakes right in the middle of the thing. But it kind of perfectly captures the whole process. You’re gonna get messy, and it might take a few tries to get things to stick. But in the end, you can totally get ‘er done. As in, this is about a 2 on the difficulty scale. So put on your Brave Girl Underoos and get ‘er done! Or your Brave Boy Underoos if you’ve got those.
Hope that comes in handy for ya. Next up in the kitch: shelf planning and hood painting. Hootie hoo. Then floors. Momma’s excited. Bring on the colorful plates and bowls! Ah accessorizing, the best phase of every project. And the cork – that’ll be a room-changer for sure. What are you guys up to this week? Any hole patching? Shelf building? Painting? Secret project-ing? Spackle-dodging? Tell $herdog all about it.

Nicole says
Looking good guys! You are giving me the much needed kick in the pants I need to finish up our bathroom walls after applying layers of skim coat. Now is the time to sand it all smooth and make a huge mess! Been dreading it. So ready for paint!
Holly says
Thank you for this!! A while back my great dane came down the stairs a bit too enthusiastically and put a hole in the wall with his hip. I have all the stuff but was a little nervous to do it. Weekend project, here I come!
Meg says
Bummer! Looks like you’re in good hands though…..
Emily R. says
I feel like I get nothing done compared to you two. He is a post about skim coating that I did (and hired out a portion)in December. http://a-can-do-attitude.blogspot.com/2011/12/living-room-wall-update.html I have 6 more walls to go. Thanks for all the inspiration.
YoungHouseLove says
Aw, you’ll get there! Congrats on the progress!
xo,
s
Bree says
“We’re on the hunt so we’ll keep you posted when we plug that guy up with something light and pretty.”
Hahahaha…. ‘light’ and pretty. I see what you did there.
amelia says
Hi Sherry! I have been waiting for this post, since I have a hole to patch on my bathroom wall before hanging a new sconce. Question about the junction boxes – your previous post said the electricians terminated the boxes. I’m not quite sure what that entails – am I ok just capping the wires with wire nuts and installing a cover plate before spackling?
Thanks!
YoungHouseLove says
They actually have to move wires and stuff in the ceiling since just covering the live wires with a wire cap isn’t to code (someone might drill into the ceiling later and not know there’s a wire there and hurt themselves). So killing the power source completely via a licensed electrician is recommended!
xo,
s
Jill Palmer says
Good post $herdog! I think you should adopt “the $herdog” the addition of the article really adds a certain something special to this moniker.
Word,
J-money
YoungHouseLove says
Haha, oh yes. Adding The always adds authority.
xo,
s
Ali says
I’m impressed! I’ve tried to use those wall repair kits before and it did not look too good. How do you get the mesh not to stick out above the plane of the wall/ceiling?
YoungHouseLove says
The key is really sanding so it sticks nice and flat! Maybe try our brand if you used something else (the ones we used were nice and sticky and they stayed firm and flat).
xo,
s
laura says
I just wanted to leave a message about your “hootie hoo!” cheer.
Did you know Feb. 20 is national hootie hoo day?
I just learned this yesterday. You’re supposed to go outside at noon and shout hootie hoo! to welcome spring.
Sort of off topic. But I’ve been sanding and puuttying walls lately too. It’s amazing how quick and coordinated you guys are.
YoungHouseLove says
Oh my gosh, I did not know that. Will have to break it out even more that day. Think I can work it into a post ten times…? I can at least shot it outside at noon. I love it.
xo,
s
Lisa Bump-Riley says
Ok, deep breath lisa…I think I just might tackle my many small spackling jobs this weekend. I think I’m just scared it will look wonky but after seeing your video and reading this post…I realize I’m just “a-fraidy-cat” but for no good reason! thanks for sharing and kicking my butt into gear! :)
laura says
I’m almost done with our cork floors in our basement…it looks awesome! I’ll send you a pic when it’s done done.
Laura
LARY says
The kitchen is looking better and better everyday :) I’m so excited for you guys!
Jenelle says
Off-topic question… I was looking at Clara’s weekly/monthly photos, and I noticed she’s not wearing her cloth diapers in most of them… did you guys stop using them or… well, or what? :) This is not a judgey question. Just curiosity.
YoungHouseLove says
Since Clara didn’t grow into her cloth diapers for a few weeks, the first few were taken in disposables so from there we just decided to keep it consistent each week by changing her into a disposable. They’re also less bulky so they were less distracting in the pics. But nope, she’s still wearing the BumGenius on a daily basis!
-John
Natasha says
Bahaha, I loved the video!!! Watching it also brought back a great memory of my grandma who used to “spackle” a little hole in her wall (the size of a dime/nickel made by the lock on a door knob) with…toothpaste! Hahaha.
Note: This does NOT work, the toothpaste never hardened and she’d just keep adding more, I really can’t tell you why one of the adults didn’t do something about this, but this was the same lady who wore two pairs of eyeglasses (one on top of the other) while she was doing the daily crossword puzzle so…
YoungHouseLove says
Ha! That’s how we covered holes in our dorm room wall before it was inspected by the housing folks to make sure we could get our deposit back. It worked for that just fine!
-John
Jess M. says
I love that you are known as Spackle Wench in your family! When I was spackling a boat load of flats for a tv show a few years back the guys in the shop called me ‘Spackle Bunny’ :P I think everyone needs a Spackle Queen in their household!
Nice work on the kitch BTW! I am soo impressed with all the things you two get done especially while working on a book and taking care of baby girl. You guys rock my socks off!
Lindsy says
So, $herdog… I have a bone to pick with you. A few days (week?) ago you referenced the song “Ho’s in different area codes” and I CANNOT get it out of my head. My hubby is like “who are you?”.
Gotta say, I love all the references from my childhood. Makes me a happy camper. Keep it up!
YoungHouseLove says
LOL. I’ll be sure to give Sherry the memo that she’s in the doghouse with your husband.
-John
Colleen S. says
This is awesome! I’m hoping to take down the awful fluorescent lights in our own kitchen, and seeing how easy this is to fix back up makes me happy. :)
I do have a question though. We’re renovating the nursery and taking down the textured ceiling (SUCH a PITA – we’re going the sanding route, or DH is cuz I’m not inhaling the dust while pregnant), but that means we’ll need to paint it. What type of paint do you recommend for ceilings? We’re putting up nice white crown moulding and I’m not sure if we should use the same trim paint, or something else? Thanks!
YoungHouseLove says
Some places sell specific ceiling paint, if you want to go that route. But if not we just usually use a white or subtle color in flat finish. You probably want to avoid using the same paint for your trim (I assume semi-gloss or satin) because using a sheen on the ceiling will show more imperfections. Good luck and congrats on your bun!
-John
Colleen S. says
Thanks John! I was thinking a flat finish was best but I wanted to double check. :)
Sharon @ mamadoitall.blogspot.com says
The work you’ve done on this room is awe-inspiring. Amidst all your work, I didn’t want to you to miss a deal (I swear, I don’t work for them, I just saw this deal as a loyal reader and thought of you and your rug) – $10 for $20 on overstock! https://www.livingsocial.com/deals/251922?ref=conf-jp&rpi=46150072
YoungHouseLove says
Wahoo! Thanks for the tip!
xo,
s
seansmom says
Great job on the ceiling! I always end up with as much spackle on the floor as the ceiling when I’ve done that.
As for what I’m doing this week… putting up anaglypta panels in my hallway and painting/glazing them. Got the panels up and the base coat on, now comes the glazing “fun”.
Amanda Nowak says
Bahaha! Your video was great. The End. :)
Sara says
The hole in the ceiling looks remarkably like the one existing in our master bedroom right now! We are in search of a light fixture, probably a small chandelier, to add some sparkle. Your kitchen, and indeed your whole house, looks amazing….I really, really enjoy your blog. I’m looking forward to the release of your book!
heyruthie says
thank you for sharing this post/video! it was really helpful. i’d never seen that metal/mesh panel before.
i have a hole that is BIGGER than the one you patched (maybe 8×12 inches?) do those matal/mesh patches come in a larger size? or do i have to go a different route since the hole is so large?
YoungHouseLove says
I’ve only seen a 6×6 as a larger size, but maybe another store has something larger. Much larger and it might start sagging, so you may have to patch with a piece of drywall. Good luck!
-John
James Olsen says
Nicely done, I am about to start the process to fix a smaller water damaged hole here later this week, question, are your celings flat in there, and if they are textured do you have a surefire way of making the patch look ok?
Great as always guys!
YoungHouseLove says
Luckily they’re flat. I did see some textured ceiling patch stuff in the same aisle as these metal hole patches, so maybe that’d do the trick?
-John
James Olsen says
Thanks for the tip John I will look into that! Keep up the great work guys, not matter what others say other places, you guys are an amazing inspiration, need to send you guys pics of the master bedroom makeover you inspired for me and the Wife!
Katie says
I have a random question, how do you cover glass when spray painting a mirror? I tried (unsuccessfully) to cover it with newspaper and tape but the big reveal turned into a big whomp whomp! Paint was all around the edges of the mirror. I recently bought another mirror and am hoping to get some tips from you this go around! Any suggestions?!
YoungHouseLove says
We do something similar, though usually use a brown paper bag instead of newspaper. We still sometimes have paint seep around the edges onto the mirror, but it’s usually easy to clean it up by scraping a straight edge razor along the surface. Hopefully that will solve your issue!
-John
karyn says
You may have already answered this in the comments (sorry, I don’t have time to read through all of them), but did you paint only the patched holes? Or the whole ceiling? I would think that a kitchen ceiling may become quickly discolored (steam, food vapors, grease, age, etc).
I recently painted my dining room ceiling after having electrical for a ceiling light fixture installed and it was one of the worst experiences ever! I was literally crying. The first 2 coats of paint came out SO SO SO blotchy (we used the tinted kind from Lowe’s and it looked terrible). Then, on recommendation from a pro, we used Sherwin Williams brand and it was much better, but still blotchy in spots (most likely operator error!). Luckily we have a very cool light fixture with strings of crystals in a type of ORB cage, so it casts pretty design on the ceiling, effectively hiding the flaws.
Apparently, there is a system to painting a ceiling (the Sherwin Williams guy tried to explain it to me…I had to ask him to draw it…haha). I would love to see what the YHL method is via post with video… if you ever come across that task. Thank you!
And thanks for a great blog. I can only imagine that it must be a great feeling to be such an inspiration to so many.
YoungHouseLove says
We got lucky on this ceiling and were able to just paint the patches areas – though we’re always sure to paint beyond the patched area and try to feather the edges to help it blend. The previous owners had a fairly fresh looking can of ceiling paint that they left for us, so I wonder if they had painted shortly before we moved in. But I with on how bad painting ceilings can be. It’s exhausting!
-John
Laura V. says
Hot diggity dog… The mention of the floors made my heart flutter. I have been not so patiently waiting to see that beautiful cork put down! :) The day that post comes up, I may do a happy dance. Right here at work.
As for sanding on the ceiling, blugh. That’s my only word… Our always-in-progress-because-it-was-a-foreclosure home has required painting in every. single. room., including all ceilings (yeah, even the 20ft. ceiling in our great room). I have sanded far more spackled nail pops and taped seams than one human ever should…
Sarah B says
It’s my birthday today! Woohoo!
Katie says
Just a thought, but next time you could ask your electricians to leave you the drywall circles that came out. Most holes that are drilled that large end up with a circle piece the same size as the hole minus the drill blade thickness.
When we had the same condition while renovating our house, my husband just nailed the “cookie” back in place and then plaster patched over it. Therefore there’s no need for the mesh reinforcing. As long as the piece is put back flush and the patch is done well, it’s just as unnoticeable.
Otherwise – great job!
p.s. since my husband and I are both architects (and he actually has a construction background) I am always amazed at how much you guys accomplish and “figure out” without having any training – so inspiring!
YoungHouseLove says
That’s a great tip! We’ll think of that next time.
-John
Marina says
Crocheting a t-shirt rag rug for the living room and it’s not going well so far. It has been some time since I’ve picked up a hook and I can only remember the simplest of patterns but none I’ve tried so far are looking that good, but I’m going to keep at it until I find one I like. I’ve tried looking on-line for some help but a lot of the patterns are written in a ‘crochet-code’ I no longer understand. The good news is the project seems to go pretty quickly since you are using t-shirts strips as yarn, so once I do get a pattern I like I’ll be able to finish the project fairly quickly.
ScullyPA says
Yeah for mesh patches, I think they are neat!
For all the commentators talking about cutting dry wall to repair the holes, I just patched big holes in my bathroom wall, and read afterwards that for bigger holes, you should be cutting dry wall to support the patch, and using a patch that is about twice the size of the hole. (Absolutely not necessary for your ceiling holes, but I think that if holes that size were located on your walls, a professional might recommend the dry wall AND the mesh patch, so that you don’t accidentally lean on the patch and cause another hole after repairing it. I read that AFTER starting my job, so here is hoping that the mesh alone holds,’cos I am not redoing it….)
What kind of spackle do you use? I could not get mine to go nice and smooth, so switched to joint compound, which I am finding easier to sand to a nice non-noticeable texture, and thought maybe you had a better spackle…
Elle B says
Can you do this for holes that are larger than 4×4? We are switching out a fan/light in our bathroom, but it would leave a 8×3 hole…right up against where we are hanging the rest of the hardware and stuff. My DH is convinced that that area will need to be re-dry-walled…if I understand him, anyway!
YoungHouseLove says
They also sold 6×6 patches, so for an 8×3 you might be better off patching with a new piece of drywall unfortunately. But it shouldn’t be that bad!
-John
Rosalie says
im in the accessorize phase of our living room project. Today I bought some lamps at habitat for humanity restore. Next up is the pictures on the half-wall.
Oh, and I HATE spackling…and terrible at it.
Shannon Hoving says
Have you seen those mesh sanding screens that attach to your shop vac? They suck up all of the dust as you’re sanding so there’s less mess. They work really well on ceilings. (And we would know, as we’ve had to replace every single ceiling in this whole darn house!)
YoungHouseLove says
Oh man, that sounds awesome.
-John
beth says
hahahaha BEST. VIDEO. EVER.
it’s been a long work day so i was turning to my favorite blogs for a pick-me-up and that sucker totally delivered. “Ew! Why are you still filming?” hahaha, hilarious. And, bravo! Looks great
kim says
Looking really good so far, so exciting.
Also I know how much you like jewellery and I had to share my friends site with you
http://www.etsy.com/shop/CassandraWells
She just moved from Florida to Texas and started her only business, enjoy
YoungHouseLove says
Thanks! So pretty!
xo,
s
Erin @ One Project at a Time says
Nice work! I actually just posted about ceiling patches today too, but mine was in the form of removing a popcorn ceiling first. It was easy, but crazy messy, with even a few embarrassing photos of myself to show for it. http://oneprojectatatime.blogspot.com/2012/02/removing-popcorn-ceiling.html
YoungHouseLove says
Haha- nice work!
xo,
s
Sarah says
I’ve never commented before but read your blog all the time. Great job with the kitchen! Just wanted to tell you that you’ll love the cork floors! My husband and I installed them (ourselves) in our basement and they look awesome. It’s been 2 years and they look like new. Everyone comments on how cool they look. Install is pretty easy. We have all hardwood floors in our home, but my husband loves the cork so much he would redo the whole house if I would let him (I won’t).
Alice says
We’re finally finishing up a little bathroom project: taking out the old broken space heater that was original to our 1940 home (and set in bead board, not a normal wall) and building an inset magazine rack with trim. Today it’s getting the final coat of paint. The old thing was such an eyesore, I’m thrilled to not have to see it ever again.
Annie says
Oh man. Tears are coming out of my eyes from laughing at the video. Darn that gravity!
Gillian Kerr says
For the first time i actually watched one of your videos (i normally read on my lunch hour and can’t view them due to struct government policies on what staff can look up online grrr!). So funny to hear your voices in a ‘wow they are actually real’ way ha.
Great job on the holes tho, inspired to get onto fixing the crack in my bathroom ceiling now… But ive bed building to do this wkd, so the ceiling may have to go on the very VERY long list!!
BeccaK says
I am totally ready to fix my husband’s previous “fix” of our bathroom wall. He used an electric sander and basically sanded all of the spackle right off that he’d put over the mesh tape stuff, leaving us back at square one. I take it the sanding block and the paper is a better way to go? And I apologize if someone has already asked you this, but what grit sand paper do you find works best to give it a nice finish? Thank you!
YoungHouseLove says
We go with a high grit (like 150=200) to keep it smooth. Hope it helps.
xo,
s
Melanie says
I can’t believe how much you guys get done! You’re amazing! You mentioned you’re on the hunt for a light above the sink. What about the sweet mercury/honey comby one you got from Pottery Barn a long while back?
YoungHouseLove says
We love that one but it has a lot of silver/pewter coloring so we’re not sure if it clashes with the ORB guys. Might get to hang it in a bathroom or something!
xo,
s
Jo says
You guys are the only people who could possibly make me think patching ceiling holes is interesting. But I’m so fascinated with your kitchen remodel, and I love your blog so much, you could write about anything, and I would think it’s the bees knees. I seriously love this blog, ceiling holes and all.
erica says
LOVE that you’re rocking a manicure while spackling! Way to go, girl!
Carrie says
I have one of those secret weapon big spackle knives too and I love it! I haven’t patched a ceiling before but I will watch out for slugs when I do ;)
Becky says
John & Sherry,
You make me want to dance!! Alright, maybe spackle, but you give me the courage to put on Big Girl Undies and tackle a few projects. I have learned to caulk and paint around light fixtures. Thank You.
fd says
thanks for the video! this was much more like how DIY goes down in my house. Except I don’t laugh about the spackle in my face as much – I probably should!
Alicia says
So, I’m sitting in my office at work all alone, with the rest of my coworkers in the other room, and I totally started to laugh LOUDLY when the spackle fell off the knife! EXACTLY what I needed at 7:15 in the morning! Y’all are so fun to read and watch. My husband and I will be buying out first house this summer and we’ll DEFINITELY be using your tips, and remembering that we don’t have to be perfect…this is supposed to be fun! Thanks, y’all!!
Bethany says
Totally unrelated comment… Sherry, has anyone ever told you that you look/sound just like Natalie Portman?! I was watching an old rerun of Project Runway last night and she was a guest judge. The whole time I kept thinking “She reminds me of someone, who is it?” Then I realized it was you! That’s probably a little creepy of me, haha.
YoungHouseLove says
Haha, yes! It’s so odd, but whenever I post a video I get comments that I sound like her. I hear it sometimes (when I whisper in a video it’s more obvious to me- isn’t that weird?).
xo,
s
Jenna says
Those mesh sticker things are so cool! I haven’t ever seen those. Love the video – $herdog, you’re too cute!
This week we’ve been updating our 1/2 bath. I say “we,” but really my dad {who is a general contractor} has been over mudding and sanding the walls, since the removal of the grody wallpaper destroyed the walls. Ugh. Today I picked up a piece of furniture to convert into a sink vanity! So excited!
YoungHouseLove says
Wahoo! Good luck with everything Jenna! Sounds like lots of progress is going on!
xo,
s