Yup, we’ve been digging. And my arms are sore. But they don’t look like Madonnas yet so it couldn’t have been that bad. We still have a ton of things to do outside, so this is one of those it’ll-take-years-things, and not a ta-da-here’s-the-after-by-the-end-of-the-post things, but it’s nice to focus on one small area at a time to keep from getting overwhelmed (last year we limbed up the magnolia, transplanted/removed a lot of the bushes, and painted the front door). And for this installment of Petersiks Vs. Wild, we tackled the sad little garden bed to the right of the front porch:
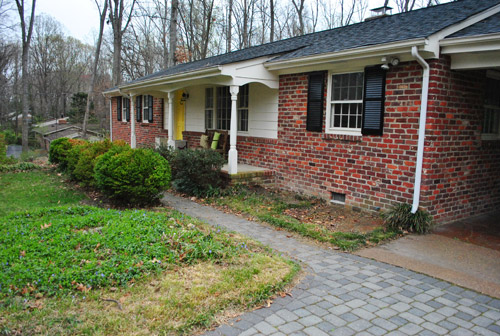
If you look closely, you’ll see what looks like a rectangular brick patio on the right half of the garden bed, which prevents us from planting anything there. But for reasons of balance, function, and curb appeal it had to go.
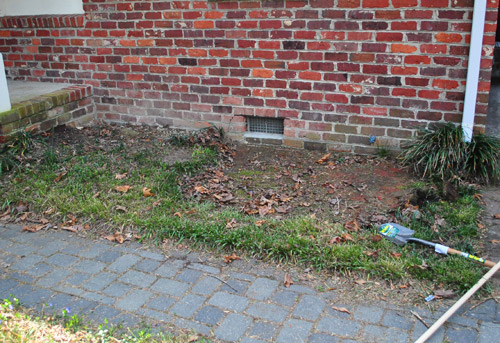
So $herdog got her shovel on:
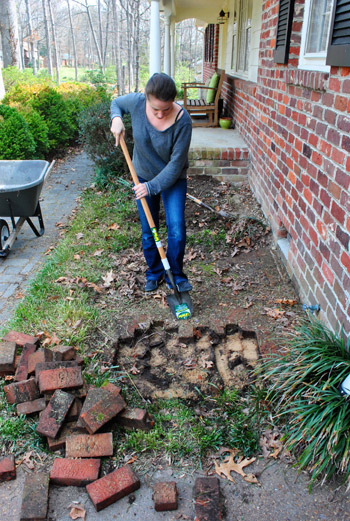
The brick wasn’t mortared together or anything, so it was easy enough to dig one out and free up the next brick, one by one. It wasn’t exactly quick work or light work (I must have carried 100 bricks to make a neat pile next to the carport) but it was nice to start clearing things out. As for what we’ll do with those bricks, we’ll either use them somewhere else down the line or craigslist them. We’ll keep you posted.
Meanwhile John started digging up the liriope on the side of the garden bed right next to the porch as Clara played with all of her friends nearby. No she doesn’t have invisible friends, the girl actually loves worms. She loves talking to them, waving at them, and crouching down to watch them wiggle. It’s weird yet hilarious and adorable. Whenever John or I found them while digging we’d just gently put them in front of Clara so she could watch them inch by (at this point we were both wearing gloves mind you, $herdog doesn’t palm worms).
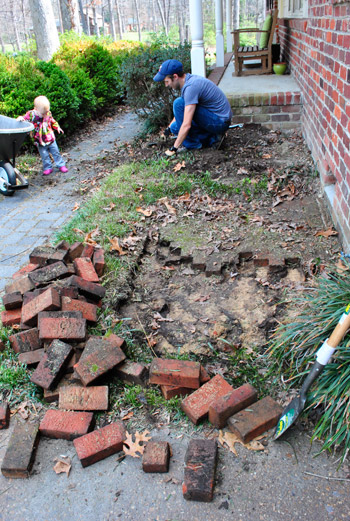
The liriope was a beast. Check out this sod-like run of tangled roots he dug up in a strip:
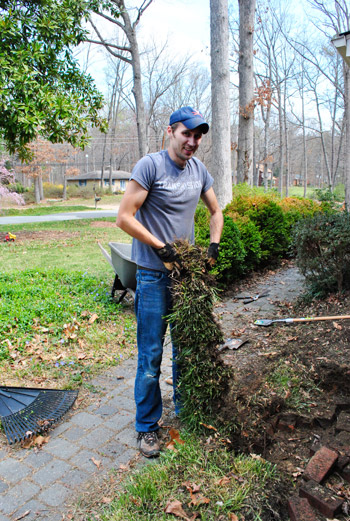
Then we found what we thought was the mother of all worms but actually was a tiny garden snake. So snake alert- don’t scroll down and look at John’s comical expression if you have nightmares about those guys. Although, if you’re gonna see a snake, this one’s pretty small. John was flashing a smile and I said “look scared” so he gave me one of these:

After about four hours we had our little 13 x 7′ zone stripped down and ready for some actual plant-life (it always looks less wide in photos for some reason- probably because I can’t exactly take aerial shots being 5’2″ and all).
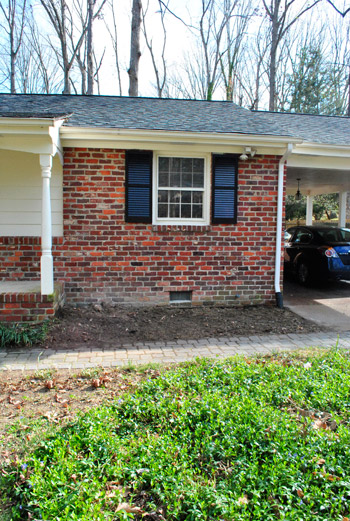
It took us a while of hunting around at a bunch of nurseries and places like Home Depot to find two more things to add to this part-shade garden with the otto luyken laurels we planted here. We usually go for a group of the same thing (or at least try to repeat a few things), but we fell in love with the idea of a feathery little maple and a sweet white-flower-covered shrub (which we also planted around our first house’s perimeter) so we just went for it.
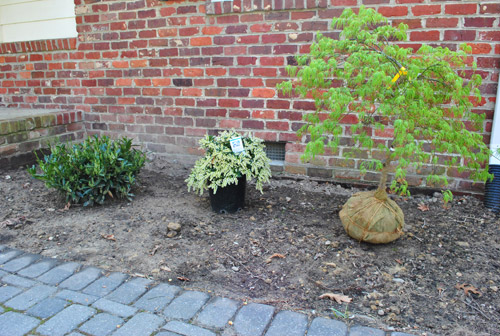
We looked at some red maples but thought they’d blend into the red brick too much (and some would get too big). But this feathery green one (a virdis laceleaf) had us at hello. It’s a small dwarf version that’s great for a 7 foot deep bed in front of a house (it will only get 6′ tall, and is often recommended for a house’s perimeter since it has a small root base and can easily be trimmed if it crowds the house). We planted it almost 4′ from the house, so although it looks more cramped in the pics, there’s lots of room for him to fill in.
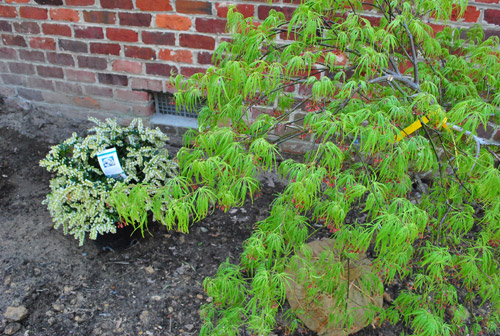
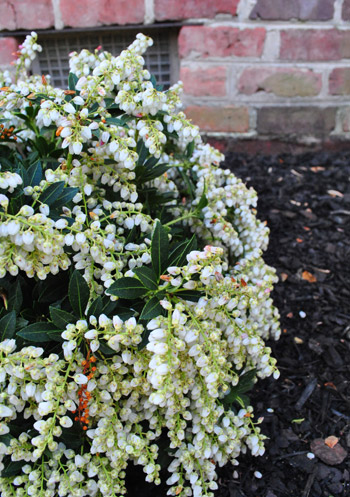
The small flower-covered bush in the middle is a Dwarf Pieris Japonica Variagated, which only gets to be 2 feet tall and 2 feet wide (so it’ll just get around 6″ wider on all sides). It’s covered in white flowers in the spring and is a pretty leafy shrub for the rest of the time. It also works in part shade like the maple so it just felt like they were meant to be. And they both have a one year warranty so we have high hopes for their survival.
So yeah, there are lots of rules of gardening (like “group a bunch of the same type of plants, repeated three or five times since odd numbers are great”) but in the end our two rules were: 1) pick plants you love – no placeholders allowed and 2) make sure they’re right for the spot and that you plant them with the recommended amount of room around them and sun on them – so you don’t end up crying over dead plants or having to dig them up to place them more thoughtfully
We remembered doing some yard work in the back yard at our first house and in the first few years we just bought whatever was cheapest or seemed like a quick fix instead of really thinking things through and holding out for stuff we loved. And it either ended up dying because it was wrong for the place we put it or we ended up wishing we had put the money/time towards something we actually liked a bit more. So we learned our lesson and course corrected just in time to redo the front yard there, which we really loved. But back to our planting project. We dug in our new tree and our bush following the directions on the tag (read them! they help you know how to space them, how big to make the hole, how to break up the roots, what to add to the soil, how often to water, etc).
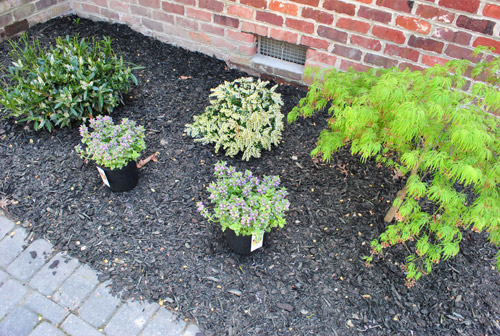
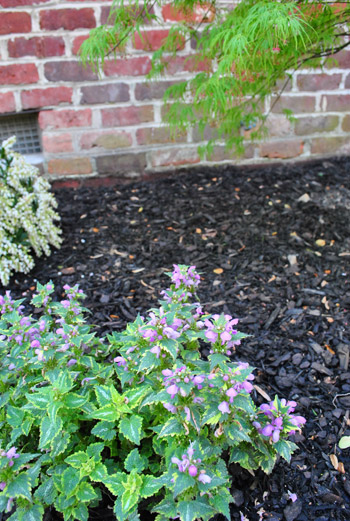
And speaking of spacing, we originally planned to pop two annuals in front while we wait for things to fill in (everything will grow a foot or two over time, but thanks to proper spacing it shouldn’t get crazy/crowded). But while we were at the nursery we saw these inexpensive perennials called Garden Variagated Dead Nettle. They only get 6-8″ wide and tall, so they won’t overwhelm our little garden- and they should be easy to dig up down the line if things fill in and we’d rather move them somewhere else. The great thing about these little purple flowering guys is that they bloom in the spring and summer year after year (instead of just for one year and die like annuals). And they work well in part shade. Holla!
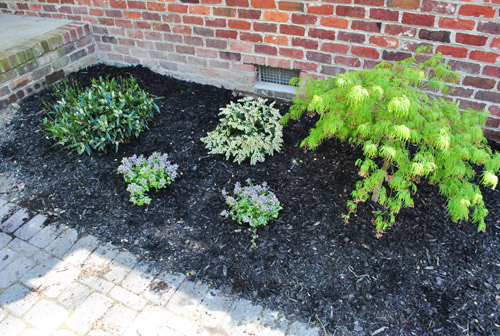
Once they were planted and everything was mulched to keep the weeds away (and keep them nice and moist between waterings), we were really happy with our small side garden.
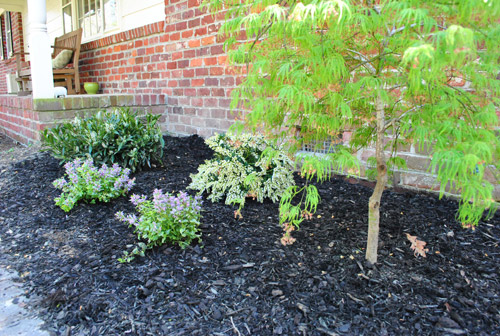
And now for some plant-tastic detail shots. No allergy meds required:
Shucks, they’re sweet. All told, it probably took us about seven total hours of work (done sometimes with Clara and her worm friends nearby and sometimes while she napped) to go from raw and bare…

… to this not-grown-in-yet-but-much-better result. But we hope these guys will fill in a bit more and live here for the next few decades, just doing their thing. So a little work up front will hopefully pay off. We’ll keep ya posted!
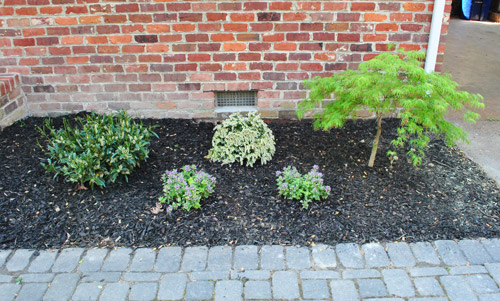
It’s funny how much smaller this planting bed looks in the pics. Doesn’t it look 4 feet deep in these shots or something? Meanwhile, all the plants in the back are almost four feet from the house and the whole bed is 13 feet wide by 7 feet deep. Oh and here’s a tip we learned in our last house from a master gardener: it’s always good to place things a bit further out from the roof overhang so roots don’t mess with your foundation, so runoff doesn’t flood your new plants, and so they get a bit of sun instead of always being in the shade of the awning.
Now the plan is to attack the garden on the other side of the porch while Clara’s out there whispering “wooooorms? where the worms go?” We’re also starting to plan our big deck project (we called in Miss Utility to make sure there’s nothing dangerous in the ground and then need to get a permit). So that’s on the docket along with finishing our bathroom and hopefully tackling more Dude Get On That Already things. Ah, spring. It never fails to get us excited to hop from project to project, Easter-bunny style. Speaking of which, what did you guys do this weekend? We got to see a bunch of our family (including Clara’s youngest cousin Ben who is just six months old) and had a grand old time. Lots to be thankful for. We owe you a Young House Life post about it soon. Hope you guys had the perfect mixture of family, food, and DIY fun.

Janette@The2Seasons says
My daughter/blog partner and you guys seem to be on the same house schedule. Last year when you were building your patio, they were doing the same thing. This month, just like you, they are ripping out and/or transplanting plants to completely redo their yard. They painted their kitchen right after you did yours.
YoungHouseLove says
So funny! I love it!
xo,
s
Elisha says
I’m working on my first home outside and I have no clue how start dealing with my overgrown yard what kind of tools where you all working with?
YoungHouseLove says
We usually just use a shovel to dig things up and plant new things. You might want a hedge trimmer and a tree trimmer to cut back branches that get too overgrown. And a little garden trowel is nice for planting smaller edible things like herbs.
xo,
s
Melody says
My daughter is literally obsessed with worms (and all things creep crawly). She will play outside for hours digging in the dirt looking for them. The scary thing is, we have seen 2 copperhead snakes on or close to our property because of a wooded area behind our house.
YoungHouseLove says
Oh man, so scary! Maybe they’re afraid of your no-fear daughter digging around for them! Here’s hoping they stay away!
xo
s
Jen D. says
Love it, especially the maple. What a great green.
Heather's Garden says
The nettle plant itself won’t get big, but it will self-sow, meaning the flowers will drop seeds and little seedlings will grow all around. It’s really a ground cover and can be invasive in some areas. I have it on a dry root-bound hillside and it’s one of the only things that will grow there. But, it is easy to pull up seedlings if you don’t want it to spread.
YoungHouseLove says
Thanks for the tip Heather!
xo,
s
Staci @ My Friend Staci says
I sewed curtains! Well, let me rephrase that. I sewed two 4-yard long panels in white and gold to decorate the church for Easter! Remind me never to agree to wrangle 4-yard-long pieces of fabric again.
I work at a church, so Holy Week really took it out of me! No home projects; at this point I count tidying up a “win.”
This week should be much slower and I can’t wait to get out to our backyard and dream up a patio project!!! I also have lots of furniture painting to do now that it’s finally warm outside!
YoungHouseLove says
Wow – that sounds like such a big project! I bet it looked beautiful!
xo,
s
erika says
It looks really nice! I spent the some of the weekend digging up neighbors’ hostas (they were donated) and planting them in our (landlord’s) backyard – slowly it will become prettier than mulch and weeds.
YoungHouseLove says
We love hosta! Such a great thing to get them for free!
xo,
s
gina says
WAIT! what did I miss? what happened to Burger???
YoungHouseLove says
We mentioned it at the beginning of Thursday’s Reader Redesign: https://www.younghouselove.com/2012/04/reader-redesign-ka-powder-room/ – hope it helps! So glad the little guy’s doing better!
xo,
s
Lizzy says
Have you guys heard that the dark mulch has added coloring (ie- chemicals)? We’ve been warned not to use it because it adds yuckies into the soil that make it bad for plants. We were told to use only natural hardwood mulch.
YoungHouseLove says
We never heard that! We’ll have to check out the bag next time we go for mulch. We used it in our last house as well and it never seemed to hurt the plants, but we definitely don’t want extra chemicals. We just thought it was natural dye like soy dye or something so it wouldn’t hurt plants. Will have to check!
Update: Just looked it up online and it said: “Mulches are not treated with any chemicals. Dyed mulches contain wood and are colored with a non toxic dye similar to high intensity food coloring. When you get your mulch home, spread it out as soon as possible and let it sit in the sun for a couple days to even out and set in the color” – hope it helps!
xo,
s
Sam says
Looks great guys! This almost gives me the needed boost to get my landscaping done… almost. I need a really big boost:)
YoungHouseLove says
Haha, we’ll we’re just getting started. Perhaps the boost will come later this week or next week. Assuming our achy arms return to normal. Haha.
xo,
s
Jen @ The Decor Scene says
Love everything that you guys picked out for your new garden. I just love the way new gardens look. We actually did some gardening this weekend ourselves on Saturday. We had to move our Globe Blue Spruce to the backyard. We didn’t plant well in the front yard when we bought our house almost 5 years ago and things have grown in too much. We also didn’t prune like we should have each year to keep things smaller. But you live and learn. So we gave some of the other evergreens a good trim and now it looks neat again. Reading about and asking about plants is the best thing you can do before you buy and plant them. Great advise for sure. We still have more evergreens to move to a new garden bed, but that will be over the next couple of weeks I think. ;) It’s fun to do sections of a garden at a time. Thanks for sharing. :)
Joan says
I need some bricks if you freecycle them. I’m in the Richmond area!
YoungHouseLove says
Sounds good! We’ll definitely make an announcement on the blog if we do!
xo,
s
Kitty says
We started to buy plants for our garden too! We got some really great deals on some roses, heathers and some hanging plants that were on clearance to make way for fresher ones.
Unfortunately, doing so has heralded a week of April showers, so they are sitting in our garage until the weather perks up a a bit.
We’re having to repair some of the grass, which is something we’ve not done before so lots of researching going on for that.
YoungHouseLove says
Good luck with everything Kitty! Hope it stops raining real soon!
xo,
s
shannon says
I have to thank you guys!! I stumbled across your website a couple of weeks ago. I had been feeling overwhelmed with the amount of work both inside and out at our newly purchased home. You have taught me to plan out each project and to take pictures to help me see how much I am actually accomplishing. This weekend, we focused on our front yard by grinding down 25 large tree stumps (previous, we had the trees removed by professionals) and removing all the saw dust (still in progress). Next step is planting grass and painting the outside of the house. Thanks again. I look forward to watching your progress with future projects. Absolutely love what you have done so far.
YoungHouseLove says
That’s an amazing amount of work! Congrats and good luck Shannon!
xo,
s
Kristen says
Not sure if someone else already asked about this, but do you know if the brick was there for drainage purposes? We recently dug out some cement under our hose and then I noticed it dripping… so now I’m concerned about too much moisture right there near the house. Oops!
YoungHouseLove says
If you check out our drainpipe, it actually goes into the ground and is routed far away from the house’s foundation, so that drain really keeps the foundation dry. The previous owners just put it in for a place to leave a coiled garden hose since the spigot is there – but we like to store our hose out of sight and just use the watering can with our rain barrel water (or turn on the sprinklers if it gets really dry).
xo,
s
Jenna at Homeslice says
Looks great! I love that you guys try to share the amount of time it took you to do something (i.e. seven hours while Clara was there and while she napped) because it’s so easy to see before and afters and FEEL like it was easy peasy and took no time at all- obviously not the case! Also- I love the airiness of the tree you planted, it’s going to be gorgeous when it grows up :)
YoungHouseLove says
Aw thanks Jenna!
xo,
s
Laura says
I am not scared of snakes, but I probably would have screamed if I found one in my yard! I think growing up on Long Island jaded me. You would have thought spending a few years in Ohio for grad school would have changed that. Nope, I prefer no snakes, haha.
kristin@justwannaparty says
Thanks so much for this post and your wonderful ideas! I have something like this in my front yard and have been so clueless with what to do to it, but now you’ve given me great ideas and motivation! Thanks!
Meghan says
So my first memory is of my brother eating a worm… hopefully Clara doesn’t head that way, but it makes me laugh every time I think about it.
YoungHouseLove says
Haha – I’m hoping she doesn’t head that way either!
xo,
s
Kelly says
Your garden makeover looks awesome! It’s inspired me to re-read through the association book for my new neighborhood to see what I can do in my borders. Not that I plan to do anything till fall, but ….
I’m prepping to actually move into my new house. Painting is generally taking up most of my spare time these days. I figure if I paint before I move in, I’m more likely to actually do it. That said, I won’t be painting the whole thing to start, just a few rooms.
However, my painting plans took a turn when I discovered more silverfish than I’m comfortable with. I figure the house has been empty for so long, they’re happy with any food they can find, even if it’s a hair or two. I bought some diatomaceous earth to spread around to help kill them … trying not to get impatient and turn to chemicals….
YoungHouseLove says
Hope it works Kelly! Good luck with your new home- so exciting!
xo,
s
Taylor @ thehouseonpennylane says
Looks fabulous! We must’ve been on the same wavelength because I just wrapped up a front bed “makeover” too! Mine is even a scaled down version of yours at 5 feet by 9 feet. You can check it out here:
http://thehouseonpennylane.wordpress.com/2012/04/07/mulch-mulch-and-more-mulch/
YoungHouseLove says
That looks so sweet! Your house is adorable!
xo,
s
Leslie says
It looks great. Small things like that go such a long way! At least that’s what I have to tell myself since all we have done lately is a series of small projects no one notices. But we are building good bones, right? …Right. :) You guys are such an inspiration! Even for an architect. Always looking forward to your posts!
Audrey says
Looks great! I wish I could grow plants in and outside of my home but I have a terrible black thumb. A good friend has given me four different plants, all of which I’ve managed to kill. :( She’s threatened to just give me a catcus because I won’t be able to kill that (hopefully!) Can’t wait to see the pictures when all the plants and flowers start to bloom!
Jackie Toye says
Love the tree. I’m looking for a Non-Shedding Shade Tree myself. I’ll have to check around for one of those.
KarenH. says
Very nice! Clearly I was channeling you guys,since I spent all weekend working in my yard. Got a ton of little jobs completed and one large job started. And many hours with a wood chipper to finish it all off.
And I’ve counted both days of yard work towards my weekly workout goals, because ….. Ow. :)
Anne At Large says
I hope you like your Dead Nettles, the “only 6-8″” may have been a bit misleading on the nursery tags. They are in the mint family, which means they spread and reseed like maniacs… in some places they are considered invasive or undesirable weeds. So I hope you are a fan – I have unknowingly planted other Dead Nettle relatives and gotten stuck picking seedlings out of a several foot radius around them. But they are sure cute!
YoungHouseLove says
Aw thanks Anne! Ours are the mounding kind, not the spreading kind (apparently there are different varieties?) so we hope ours don’t take over like mint would! Will keep you posted!
xo,
s
Rebecca Coles says
oh man i did find the mother of all worms once in my garden when i was planting a tree, so it was a deep hole. that thing crawled right up on my foot and i felt it before i saw it. he was so huge and wet and gross and it still gives me the willies. ugh
Susie says
Great job!!! This is my first time here and I love your blog. Isn’t is amazing how such a small space can make a huge impact on your home. A little elbow grease and a vision can bring something beautiful in our lives. It looks beautiful! If you ever want to swap articles and links I would be honored. God Bless!
Katie G says
Looks great guys!
We ended up digging up our chinese maple last weekend, it didn’t survive the winter :( but we DID replace it with a bush that was already happy in the backyard, but in the wrong spot out there.
This weekend we tore down the ceiling of our porch and found some surprises (yay old houses!) and then put up new beadboard and plan to finish up next weekend.
I’m so jealous of your weather in Richmond! It’s still pretty cold up in Windsor, Ontario at night, so no new plants just yet.
Tracey says
Things are lookin’ good over there! I had to laugh out loud at the comment…$herdog doesn’t palm worms. Hilarious!
erin says
Where do you buy your mulch in RVA? Any experience with or contacts for free mulch?
I worry about the dump mulch because I hear there are bugs.
YoungHouseLove says
We hear certain dumps or recycle centers have free mulch but it’s not very nice stuff so we usually establish new gardens with mulch from Home Depot that looks nice and that we don’t have to worry about being contaminated with anything odd since it’s free- ya know? Maybe someone else has had a good experience with the free stuff? We just hear “warning: it’s not very nice, but it’s free” most of the time!
xo,
s
Wildlife Removal says
Love the garden snake!
Teesha says
Love the plants – looks great! Which nursery did you shop to find the dwarf japanese maple? I live in Richmond and have been looking around for a full maple.
YoungHouseLove says
That was from Great Big Greenhouse. They’re one of our favorites here in Richmond.
xo,
s
Nicole @ Frameless Shower Doors says
You got these all done by yourselves? You are amazing! My dream house is to have a garden around full of wonderful plants and flowers. Yours are really lovely. Unfortunately, we don’t grow those plants here in our country and I am having a hard time looking for plants and flowers that will make the yard attractive but not too much. Can you suggest for a particular type/color of plants great around the house?
YoungHouseLove says
I would just look around in your area for other yards that you admire and try to take notes on what you like. Maybe it’s a certain color scheme or type of plant or height/layout/shape, etc. Good luck!
xo,
s
Tammi says
April Superlative: Best quote to take out of context, to randomly fill space in the family yearbook 2012, or otherwise just blurt out for no reason: “$herdog doesn’t palm worms”
YoungHouseLove says
Haha, it’s like Take That Baby To The Market!
xo,
s
Leslie says
I love weeping laceleaf maples! It looks fantastic against the black mulch and red brick.
Powerpuff says
We just redid a side garden as well and planted a japanese maple. Before we planted it, I read a bunch of websites to figure out how to plant it, how to amend the soil, etc., and the different sites say to keep the mulch 3-6″ away from the trunk base. That way the roots can still breathe and the mulch helps retain moisture.