How much wood could a woodchuck chuck if a woodchuck could chuck wood? What do I look like, a woodchuck expert? I have no idea. But I do know the answer to a related yet far lesser known riddle: how many pallet planks could a Petersik pry free if a Petersik could pry free pallet planks? You practice saying that five times fast while I walk you through the answer.
You know by now that the plan for our mondo 12′ long DIY console table (last shared here and here) was to build a rustic weathered-looking top out of some old pallets left in our yard by the previous owners (spotted in the background of this post).
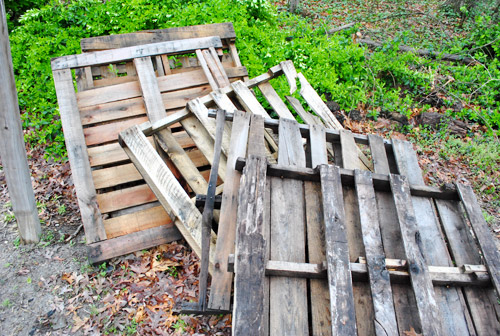
So last week I lugged them into my basement lair workshop so they’d dry off (“lugged” is the operative word because after a few days of rain, the heavy soaked wood made it quite a back-breaker). But since rain this time of year is frequent and sometimes unpredictable, I wanted to get them inside so I didn’t have to worry about a sudden spring shower thwarting my plans and soaking them all over again.
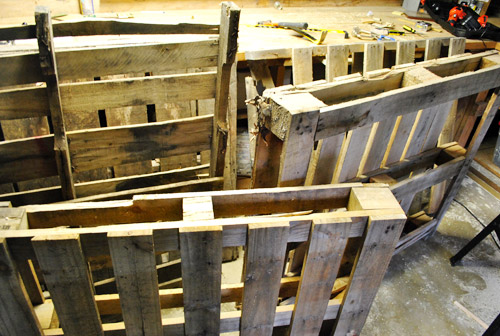
There were five pallets in total. Considering how much wood is on each one, I quickly thought to myself “self, this is way more material than I need.” Somewhere in the distance the universe began laughing at me behind my back. Hold on, we’ll get to that.
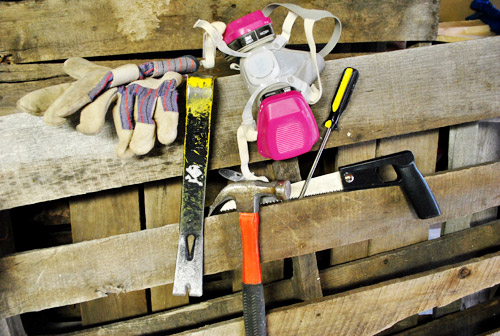
After a few days of drying out, Clara went down for a nap and I took my cue to start breaking down the pallets so I could start building our giant 140″ long console table top. My tools included work gloves, a crowbar, a hammer, a hand saw, a flat head screw driver, and a mask (since pallet sawdust isn’t thought to be part of a healthy diet and my wife is a worry wart like that).
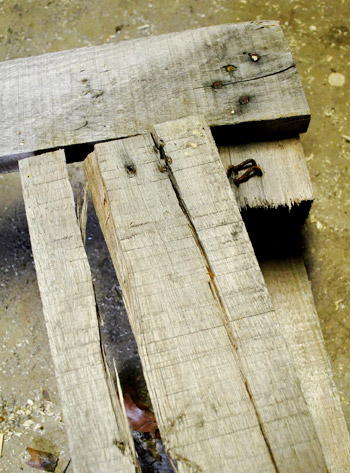
It didn’t take long to figure out this would be harder than I thought. Mostly because each plank was nailed (or stapled) in three spots, and each spot apparently required 3 – 5 nails or staples to keep it in place. I first attempted to cut boards off with a hand saw, but since they were stapled on each end and in the middle, it left me with dinky little unusable pieces, so prying was a better bet. But it took a lot of effort to pry off a piece – and the process frequently resulted in cracking the wood (which pretty quickly rendered the entire piece useless since we wanted long-ish boards to work with and not small slivers).
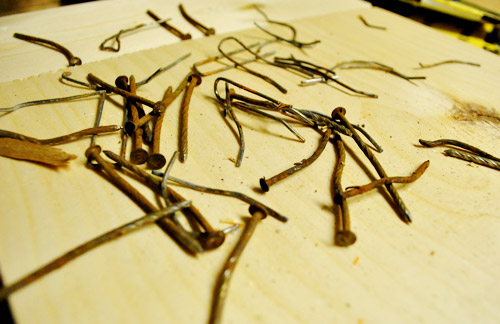
I’m no stranger to elbow grease so I stuck with it for the length of Clara’s nap (about 90 minutes). In that time, my nail and staple pile grew to look a little something like this:
And my pile of usable pieces of wood looked like this:
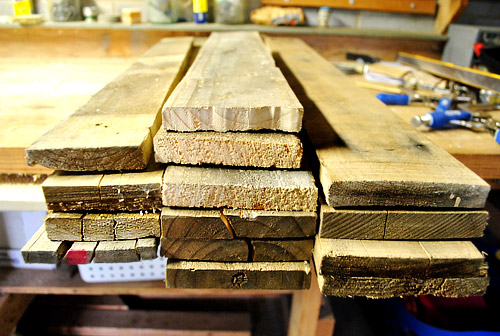
Fourteen usable pieces in 90 minutes wasn’t that discouraging at first… but then I looked closer at my definition of “usable.”
Notice how each piece of wood is a slightly different width? Since my tabletop would be comprised of 4 or 5 planks laid side-by-side, I realized that inconsistency would make achieving a consistent width across all 140 inches of tabletop very difficult – especially when I was looking for a very specific width (and don’t own a tablesaw to help me achieve that width artificially by cutting the boards lengthwise).
But I gave it a try and was able to find 5 pieces that gave me exactly what I was looking for (16 and 7/8″ of consistent width if you’re wondering):
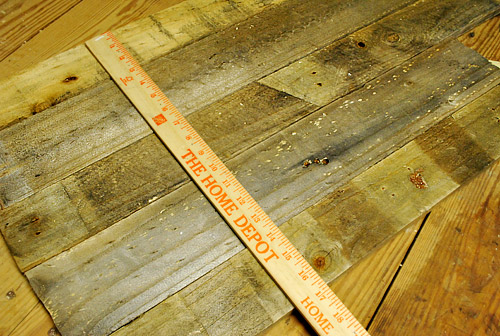
But only 5 pieces of the 14 that I fought tooth and nail (literally) to free would work to create that width. Meaning that in one and a half hours I had only wrestled enough wood to make about two feet of tabletop. Wop wop. By my math, that means it’d take me about 9 hours to get all 12 feet of tabletop free. And that’s only if my 5 pallets actually contained enough “perfect” pieces to provide all of the wood I needed to get the exact same width all the way down the 140″ countertop (an unlikely scenario considering I had already stripped one palette entirely to get these 14 5 usable pieces).
So as much as I loved the whole “reclaimed pallet wood” idea, all signs were pointing to “give up on it already.” And when I told Sherry about my doubts – how much time it would require, how much wood was cracking and breaking, how difficult it was to achieve the right width (only around a 33% success rate), and how I was running out of material – she basically said the same thing: “oh well, you tried – give up on it already so we can figure out a plan B.” Plus she added that it might have been a sign from the universe since there are more and more health concerns over the sometimes-toxic chemicals found in pallet wood (some contain formaldehyde, which is a known carcinogen) so although we planned to seal the wood with an eco-safe poly (by Safecoat) to keep things baby-and-rest-of-the-family friendly, the whole leave-the-pallets-alone-and-move-on-to-Plan-B thing was probably for the best.
And happyily, Plan B is already underway. We’re hitting up a few local places in search of reclaimed wood and might even use store-bought white wood like we did for the entire console base if our search for something “recycled” backfires (hooray for consistent sizes and no prying necessary!). Heck, if we went with the same wood that we already used for the console base, we could even beat the heck out of it distress it ourselves (I’m not gonna lie, the idea of “testing” a number of techniques involving hammers, screws, and crowbars appeals to me). It’s not quite as cool – or as free – as the original plan, but at least we gave the pallets the ol’ college try. And who knows, I might end up using them for something else or giving them a second life thanks to freecycle or craigslist.
Update: We’ve made great distressed wood progress in lieu of pallets for the console top. Here’s a quick sneak peek. We’ll share waaaay more info/details/videos about that process when we put everything together and reveal the finished console. Hopefully before Christmas. Just kidding, hopefully by early next week (is it just me or is this project taaaaking forevvvvvver?).
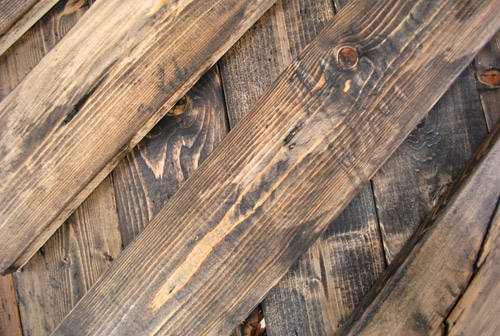
In other news – we (and by we I mean Sherry) finished staining the exposed sides of each console. You know the ones that have little shelves for easy-access storage that were last seen here.
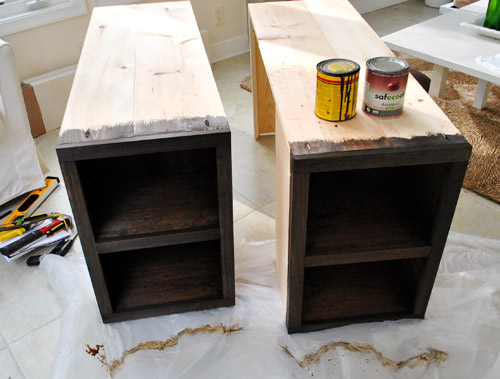
That picture above is a little dark just thanks to the angle. Here’s a more true to life shot. Yummy and warm, right? Wait, are grown men allowed to say type yummy?
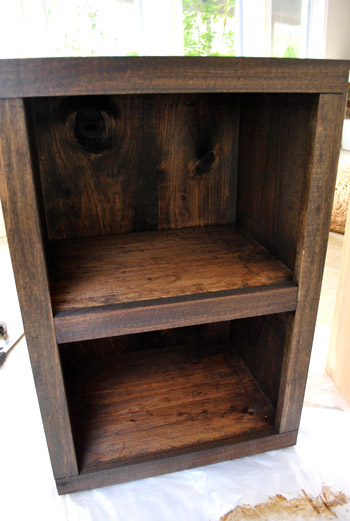
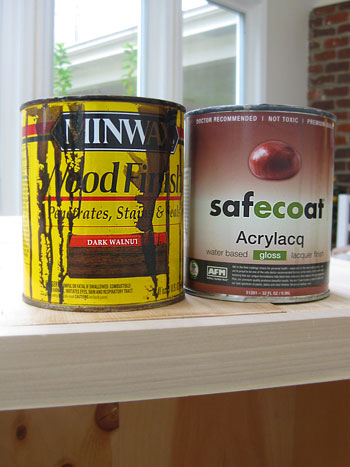
The staining part of the project was 100% free since Sherry was able to use leftover materials that we already had on hand: Minwax stain in “Dark Walnut” and Safecoat Acrlacq (which is basically the water-based eco version of polyurethane).
Since most of the console will be hidden behind Karl or under the eventually-completed tabletop, the only thing that needed to be stained was the shelves on the two exposed ends (once it all gets put together all the other exposed parts will be stained as well). So Sherry parked herself in the sunroom – which is sealed off from the rest of the house so she doesn’t have to worry about Clara inhaling anything – and did two coats of stain (which she applied with a foam brush and wiped off five minutes later with an old rag). Find more how-to-stain details here.
Then the next day she added two “thin and even” (her favorite words to describe anything involving paint or stain – she stressed them like you wouldn’t believe because they can make or break things) coats of the Safecoat Acrlacq with a brush. This seals in all the gross stain fumes and creates a water-based low-VOC and non-toxic “shell” that protects the wood and blocks off-gassing (as opposed to high-VOC oil-based poly) so it’s nice and kid friendly. You might remember that we (Sherry) also used it to refinish Clara’s dresser here.
We’re glad that the wood grain shows through for a varied and rustic look. Since the living room is a bit more modern than we’d like, adding hefty pieces with “authenticity” like this will help balance things out.

So we’ll hopefully be back with a big the-console-is-fiiiiiiinally-finished post as soon as we make some headway on the top. In the meantime I can be found murmuring sweet nothings at those freshly stained shelves. Seriously, can my wife work some serious magic with a rag and some stain or what?
Pssst- Confused by the console? Learn how we built it here and here. And of course we’ll share even more details when we finally piece this thing together and call it done. Soon hopefully, because I am so ready to stick a fork in this baby.

Allison says
Bummer about the pallets, but it will still look great in the end.
Also bummer that I have a big can of poly and I just want that eco-friendly stuff you guys used (it’s the first time I’ve heard about that–awesome!)
But it’s kinda like your view on clothes you don’t like–I already paid for the poly, why pay for it again by breathing in the chemicals, etc!! It’s a sunk cost, to use a term from my business classes.
Stephanie B says
Just in case here’s a link on how to weather new wood with vinegar and steelwool. It’ looks pretty awesome!!
http://showandtell-sausha.blogspot.com/2011/01/how-to-weather-new-wood.html
YoungHouseLove says
Woah. So awesome.
xo,
s
Nat says
My guess is Minwax driftwood with no conditioner (for the top). Am I right? Am I right?
YoungHouseLove says
Nope! Haha. But good guess! More details in a future post soon (we just want to include pics and a breakdown and all that jazz).
xo,
s
Barbara says
I know you’ve moved on to Plan B already, but did you think of just using a circular saw to cut the pallet boards out? Yes, you’d lose an inch or two, but it beats a crowbar.
YoungHouseLove says
I did actually cut out a few of the pieces using a hand saw, Barbara. It was helpful – but since they’re nailed on both ends and in the middle, it still required some prying (if I didn’t want really short pieces). In the end, the varied widths of the boards was really what did it in though.
-John
Ames says
Too bad about the pallets, but it looks like you guys came up with something pretty cool anyway! I can’t wait to see what you end up with!!
Carrie says
You could use the pallets for raised beds for that future garden! Some herbs, mint especially, can take over your entire garden if they aren’t contained. Trust me, it is no fun trying to rip out mint-gone-wild!
Love the stain color btw :-)
Amber Anderson says
Okay, I admit it. I had to laugh when I pulled up your site this morning and saw the picture of the pallets. I just wrote a post yesterday on my blog titled “Palletopia” (http://meadowstreetmemoirs.blogspot.com/2011/04/palletopia.html) because I have been collecting some pallets for some projects I want to do. I feel your pain! I disassembled one pallet two nights ago and man was that a lot of work! I am fortunate to have a table saw though so I was able to rip boards to the size I needed. I’m glad you gave it a try, and there are a TON of ideas online for those pallets. I highlighted some of my favorites in my blog post. Good luck! I can’t wait to see how your sofa table turns out.
vanessa says
I can’t wait to see how the top turns out. We have so many pallets at work I need to be churning out furniture on my lunch break. :)
Kelly Anne says
I came across this right after reading your post: http://www.apartmenttherapy.com/la/diy/diy-small-space-pallet-garden-life-on-the-bacony-143775
Looks like another fun way to recycle your pallets, and requires no prying at all. Hooray!
YoungHouseLove says
Love it so much!
xo,
s
Felicity @ Our Little Beehive says
John asks the question, “are grown men allowed to say ‘yummy’?” but makes zero mention of the hot pink respirator. Now that’s some really funny irony!
YoungHouseLove says
Real men wear pink.
-John
Gaidig says
I appreciate the info from the commenter above about the gassing of pallets in overseas shipping. I believe this is the concern from pallet wood, not formaldehyde. You may not realize that formaldehyde occurs naturally in all wood, but in very low concentrations. It becomes a concern in wood composites like pressboard and plywood because there is formaldehyde added in the glues. The ones that contain urea-formaldehyde resins are the worst because they have the most off-gassing.
Here’s what the EPA has to say about it: http://www.epa.gov/iaq/formalde.html
YoungHouseLove says
Thanks for the info! Off to check it out.
xo,
s
Meagan says
I know you won’t be able to see the sides of the console, but why are you not going to stain them anyway? I just feel like the piece would feel incomplete. I understand not staining the top because its getting a new top, and maybe its the perfectionist in me, but I would just really want the sides stained. I just think it would look so pretty all stained, because the ends look fabulous.
YoungHouseLove says
Once it’s put together all the exposed parts will be stained (when the top goes on you won’t see a lot of the raw wood that would take time and materials to stain), so I guess we just think that’s standard practice (when we built our crib some parts weren’t painted or stained since they were “non see interior pieces”). I guess it’s one of those to each his own things. Of course we can always go back and stain anything if it bothers us!
xo,
s
Michelle says
So glad to see Sherry responded to this! Here I’d been thinking they were leaving anything Karl blocked unstained, and that seemed so odd to me. This explanation makes much more sense! :-)
Kristi @ Addicted 2 Decorating says
Well, darn. Too bad those palette boards didn’t work out. Can’t wait to see what you come up with, though! The stained ends look beautiful. And I do think on rare occasions such as this one, it’s perfectly fine for grown men to use the word “yummy”. Just so long as it’s reserved for truly special things. (I’ve recently noticed on my own blog how much I “LOVE” everything. Ha! I’ve said it so much, I even annoy myself with that word.”)
Rob says
Hey, I’ve been lurking for a little while and love your suggestions (we’re moving into our first house in about a week and are super excited about the project opportunities, although I think my wife is already tired of hearing “well the YHL couple say…” during pretty much every project discussion :). I’d love to be able to offer a suggestion in return:
If you’re still looking for ideas for the pallets, my classmate and good friend Shelton Davis designed an attractive Adirondack Chair fabricated entirely from pallet materials. They’re meant to go outside (although they certainly don’t have to) which could mitigate your chemical concerns. He provides a ridiculously helpful set of instructions at http://www.repurposedgoods.com (the idea started as a search for an affordable way for the community to improve urban bus stops)
YoungHouseLove says
Sounds amazing! Off to check it out.
xo,
s
Avone says
I have to admit, I was thinking “told ya so” before I even finished reading the post. I tried to make a rustic-modern coffee table with pallet pieces and it was a huge FAIL! I had hope that you guys could pull it off ;-) Your DIY ‘reclaimed wood’ is looking great. Can’t wait to see the finished project!
Ashton says
What a cool way to incorporate old wood! I just covered a small wall in my house with old barn wood. Check it out here.. http://www.project737.blogspot.com. Can’t wait to see the finished product!!
YoungHouseLove says
AMAZING!
xo,
s
Dave says
I saw this and thought of you. In case you find of these pallets lying around.
http://www.apartmenttherapy.com/la/diy/diy-small-space-pallet-garden-life-on-the-bacony-143775
YoungHouseLove says
Isn’t that a cool project? Love it!
xo,
s
Rosa @ flutterflutter says
Love the look of that wood!! I was just craving some pallets last night, no seriously! LOL. I want to try and make a coffee table for the family room with huge, chunky rolling wheels on the bottom. Love that there’s a shelf built into pallets already!
Sophie says
My mom had a client a year or two ago who had a son who was brilliant. One day, the son (about 12 years old) came over while they were meeting and he had somehow mathematically figured out how many pounds per hour/day a woodchuck would eat. We have a big inside family joke now about it because at the end he said, “But if it were a BEAVER…” and proceeded to tell her all out his calculations for beavers.
Ok, I’m stopping now. ;-)
YoungHouseLove says
Bwahahahaahaha. Love it so much.
xo,
s
Kacee says
I see that you came up with a new plan but last summer I did my first art festival (for photography) and made my displays out of old barnwood. Well using new wood for the frame it looked awful so I found stain that matched the barn wood wonderfully it’s Cabot (sold in Lowes) color: Tannery. I couldn’t believe how well it matched the barn wood.
YoungHouseLove says
Great tip! We’ll have to check it out.
xo,
s
Dave says
btw if you use the right pry bar or crowbar it would make pulling up the planks of wood up easier. the cane or as my daughter says it candy cane crowbar make it muse easier to pry up the board do to better leverage.
YoungHouseLove says
Thanks Dave! I used a crowbar and a hammer but they were still pretty stubborn! I think I just got “lucky” to end up with super reinforced (read: stapled 100 times) pallets.
-John
Amanda says
Not 100% related, but I just wanted to say “thanks” for all the Safecoat love on your blog. After reading about it on here many times, I tried it and looooved it. I actually think it’s easier to work with than my normal polyurethane *and* less stinky. I could only find it at one store around here (Seattle) and it was pricy, but in the end, worth it.
YoungHouseLove says
So glad! I like it a lot too (the thin water-based formula seems to make it easier to spread).
xo,
s
carolinaheartstrings says
I love your posts. They always make me smile, sometimes laugh and they are just plain entertaining. The stain is perfect . Cannot wait to see the finished item.
Nicole says
I’m working on refinishing my dining table right now and found a tip online to get old, weathered looking wood quickly. I just soaked steel wool in vinegar for a few days and then rubbed the “juice” on. It’s looking great and I love it. I’m excited to hear how you treated your wood!
Jen @ The Decor Scene says
Love it. Can’t wait to see this table done. It’s going to look awesome!!!
Susanna says
A Petersik would try
All the wood he could pry
In the name of DIY
Before he could clearly see
Time for Plan B!
YoungHouseLove says
Hilarious.
xo,
s
Danny Griffith says
I had the same problem as you guys did with the pallets. Cara, my wife, saw me outside and thought I had gone mad. Ha-ha. But I did make a couple of the shelves that are on Ana’s (?) blog. Cara says she loves them but it was way more work than expected.
Terry @ toolsandpartsdirect says
I have just tried to say “how many pallet planks could a Petersik pry free if a Petersik could pry free pallet planks” 5 times in quick succession but failed miserably haa
Love the outcome of this project, just goes to show that these pallets that are just dumped along the roadside could be turned into beautiful cabinets etc….
Looking forward to your next project!
Terry
Rocky B says
I have always shyed away from using the pallet wood because of the work involved. After seeing your picture above I have a renewed interest in trying. The reclaimed planks are beautiful, I am so bummed you can’t get enough material out of them to make an entire top!
Chaucea says
“…how many pallet planks could a Petersik pry free if a Petersik could pry free pallet planks?”
*gigglefits*
HAHAHA, that’s awesome! x-D
r8chel says
Wow – the distressed wood looks better than I expected. Can’t wait to see how it looks when it’s finished!
Krissy says
WOW. That stain looks FANTASTIC. Well done. Bummer to hear the pallet plan didn’t work out, but you guys are crafty, so I’m looking forward to seeing the finished product.
Arlington Mama says
My heart literally skipped a beat when I saw this post! Ha! I’ve been wanting to do a project out of pallets or fence wood for a few weeks now, and you’ve just inspired me! We’re replacing part of our fence in a few weeks, and I’m so making a console table! I’ll let you know how it turns out. THANK YOU!!!!
Corey says
I have to say thank you. I have always wanted to use pallets for a fun project like yours, but after reading about your should I say adventure I don’t really have that drive anymore. The lack of useable wood was enough to turn me off, let alone the dangers of pallets.
On another note, what a great job you have done John. I can’t wait to see the finished copy.
The Nester, Meagan says
Ohhhh using pallets is all the rage! Love all the recycling.. if you are getting a little worried about chemicals, we posted a cool pallet container garden idea here: http://rowhousenest.com/2011/03/29/sharing-an-awesome-post-how-to-turn-a-pallet-into-a-garden/
This one calls for plastic on the inside so it would act as a barrier between the herbs and the chemicals that are potentially in the pallets.
also featured a coffee table made out of old pallets yesterday!
anyways, i adore pallets and have never really thought about the chemicals. I also made an outdoor dog bed for my dog with a pallet last fall – it worked out great and I didn’t mind it being outside in all the elements! Just throw a blanket in it.
Cheers,
Meagan
YoungHouseLove says
So cute!
xo,
s
Bethany says
When Clara gets older she’ll be able to help with wood distressing. :) I’m also building a distressed wood table. I handed my 6-year-old one of those meat tenderizing mallets (with all of the little pointy things on the side) and let her whack away at the table. It was fun for her and it resulted in a great distressed look!
YoungHouseLove says
Haha, love it.
xo,
s
Carla says
Your house probably has lots of formeldhyde, sadly. Anything new generally gives off toxins and that includes Karl and your bedding. That’s one reason I always favor secondhand furnishings, and there are tons of people who purchase secondhand clothing for their children for this very reason and then wash everything with their favorite detergent.
But I love that you’ve introduced your huge readership to Safecoat, and your reclaimed wood project is going to inspire endless DIY projects, which makes my heart jump up and down with appreciation. So what a relief that you haven’t given up and apparently found another source. Craiglist (the free section and garden supplies section) is also a great source, and there’s a popular free-stuff-only nation-wide website that’s divided into communities, but I forgot the URL. Anyone know about this?
Anyway, your finished project is going to be worth the effort. Someday I’d love to do something similar, but instead of staining the end pieces I’d like to paint them a creamy white and then slightly age the surface to look like old milk paint, with a top made out of reclaimed wood. Beautiful!!!
Lindsay says
So you didn’t use wood conditioner before you stained, then? Interesting. I actually kind of like the look of that – the different amounts of grab that the stain has make the wood grain look pretty cool. When I’ve read warnings about using wood conditioner on soft woods, I always pictured the alternative looking splotchy and bad. Good to know it actually looks COOL (just in a different way) when you leave that step out! :) Love it!
YoungHouseLove says
Yup, I skipped it and hoped for the best. Haha. Can’t say I didn’t hold my breath the first ten minutes out of fear though. But it worked out really well!
xo,
s
Tammy says
The console is looking great – can’t wait to see the finished product! I have a question about the type of lumber that you used to build the base of the console – um, what type is it? My husband and I want to build a small desk for our office/guest room, and some picture ledges for our dining room, and I was wondering what type of wood would look and hold up the best. Do you purchase at a Home Depot or Lowe’s type of place, or a lumber yard?
Also, do HD or Lowe’s sell the Safecoat? We have been using regular old polyurethane for our furniture projects, and didn’t even think about a greener/less toxic option – thank you for bringing it to our attention!
And, as always, keep up the great/inspiring work.
YoungHouseLove says
It’s white wood, sort of like pine, from Home Depot. It’s sustainable and very affordable and it works well for projects like this. We were so happy with how it held up to staining! As for SafeCoat, we got that at a local eco building supply place called EcoLogic, but I think they sell it at greendepot.com. Hope it helps!
xo,
s
Amy @ This DIY Life says
I have two questions. 1 – Did you use the Safecoat Acrlacq on the floors in your old house? 2 – Did you just get it from Lowes or HD? We will be refinishing all the floors on our first floor this summer and this sounds like it would be what we would want instead of a typical poly…if it works for floors.
Amy @ This DIY Life says
One more thing: LOVE the reclaimed wood look. My dad has an old fallen barn that I’m itching to get at to make some furniture! Good for you John for sticking with the pallet disassembly for 90 minutes…I quit much sooner ;)
YoungHouseLove says
Nope we used regular poly and it was stinky and nasty. From now on we’d definitely use something water-based and eco-friendly, but I don’t think Safecoat is meant for floors, so maybe google around for something specifically meant for foot traffic? We got our SafeCoat from a local eco building store called EcoLogic (which also had products for floor refinishing). Hope it helps!
xo,
s
susan says
I am tired just reading the post that involved 90 minutes of crowbars and nail removers and possible toxic materials and/or insects from foreign lands…whew. Good call to try something else. susan
Nora says
We used a Sawzall and cut thru the nails and then sanded each piece of wood with a belt sander and then made a nice little crate out of the pieces of wood. Any sharpish pieces of nail got smoothed out when we sanded. I think we only split one piece of wood fro the whole pallet we took apart.
heartartz says
Maybe some one already cited this reference but did you think of having the boards run the other way?
See this fabulous plank desk at funky Junk Interiors
You’d only need 16 7/8 length pieces of plank!
http://funkyjunkinteriors.blogspot.com/2010/08/palette-desk-project-part-6-big-reveal.html
Like other comments I say finish staining the whole piece…you never know!!!
But whatever you choose to do, I am sure your console will be fabulous!
YoungHouseLove says
Ooh that’s really fun too! Thanks for the link!
xo,
s
Bryan says
The best way to take apart skids is to use a zawsall with a metal cutting blade and cut the nails. This is good for several reasons: 1) you can leave the nail-heads in the wood which adds character and patina and 2) this take A LOT less time to tear apart a skid than trying to pry every board off. I make “antique looking” signs out of old skids and this is the system that I found to work best!
YoungHouseLove says
That sounds like a took that John would like way too much. Maybe Santa will get him one…
xo,
s
heather says
So I just took a look at the distressed stuff you guys made. Good job on it! We both work in construction, and even with a discount Mr.A has told me that reclaimed wood is insanely expensive – the wider you go, the more dollar dollar bills ya’ll you’ll be giving up. A great way to distress is to lay the items on the grass, take big old chains and wack the bleepity bleep out of it.
Or just watch this guy, he’s pretty darn good at distressing new wood.
YoungHouseLove says
Love it! Haha, look at him go.
xo,
s
Ted says
Oh yeah…a belated thanks. A couple of weeks ago, we were painting our dining room and I managed to find your video on cutting in without tape. We bought one of the brushes (actually, we bought the long-handled one because the short-handled one was out that day) since our old angled brush was getting well worn and my wife tried out your technique. She said it was a little faster than taping (since she went slowly), but it saved a lot from the bleed that we sometimes got when paint seeped around the tape and all the touching up. All in all, she said it turned out better…so thanks…not only for how to do it, but for taking the time to make a video about it.
YoungHouseLove says
So glad!
xo,
s
jbhat says
Love Plan B. The console looks just right, Sherry.
jbhat
Anna says
I’m sorry it didn’t work out with the pallets, but it’s looking really good so far!
Oh, and ….
A woodchuck would chuck as much wood as a woodchuck could, if a woodchuck could chuck wood!
(I simply couldn’t resist .. it’s my fav tongue twister)
Stephen Johnson says
I have had good sucess using privacy fencing as a rustic table top material. It comes in 6 foot sections for a little over a dollar and can be cut really easily. It stains well or looks great with a coat of clear poly. Cant wait to see the finished product!
Melissa says
My husband lugged home pallets from his workplace with a glimmer in his eye over the excitement of free wood…hours later that glimmer had morphed into a blaze of fury! He did manage to convert the pallets into a large shelving unit for the garage, but I quote, “NEVER.AGAIN.” :)