How much wood could a woodchuck chuck if a woodchuck could chuck wood? What do I look like, a woodchuck expert? I have no idea. But I do know the answer to a related yet far lesser known riddle: how many pallet planks could a Petersik pry free if a Petersik could pry free pallet planks? You practice saying that five times fast while I walk you through the answer.
You know by now that the plan for our mondo 12′ long DIY console table (last shared here and here) was to build a rustic weathered-looking top out of some old pallets left in our yard by the previous owners (spotted in the background of this post).
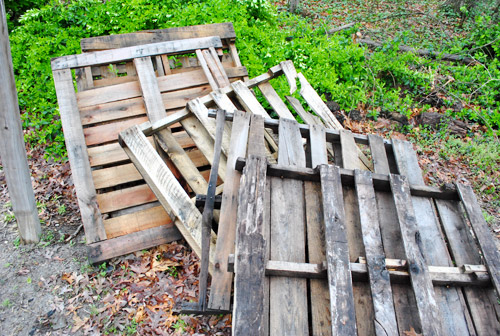
So last week I lugged them into my basement lair workshop so they’d dry off (“lugged” is the operative word because after a few days of rain, the heavy soaked wood made it quite a back-breaker). But since rain this time of year is frequent and sometimes unpredictable, I wanted to get them inside so I didn’t have to worry about a sudden spring shower thwarting my plans and soaking them all over again.
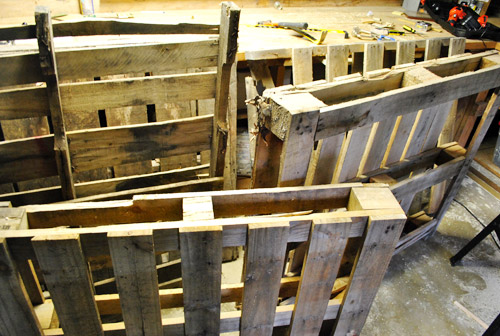
There were five pallets in total. Considering how much wood is on each one, I quickly thought to myself “self, this is way more material than I need.” Somewhere in the distance the universe began laughing at me behind my back. Hold on, we’ll get to that.
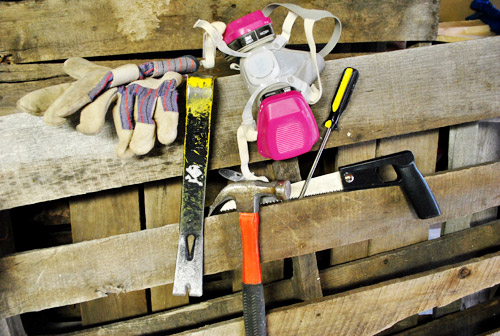
After a few days of drying out, Clara went down for a nap and I took my cue to start breaking down the pallets so I could start building our giant 140″ long console table top. My tools included work gloves, a crowbar, a hammer, a hand saw, a flat head screw driver, and a mask (since pallet sawdust isn’t thought to be part of a healthy diet and my wife is a worry wart like that).
It didn’t take long to figure out this would be harder than I thought. Mostly because each plank was nailed (or stapled) in three spots, and each spot apparently required 3 – 5 nails or staples to keep it in place. I first attempted to cut boards off with a hand saw, but since they were stapled on each end and in the middle, it left me with dinky little unusable pieces, so prying was a better bet. But it took a lot of effort to pry off a piece – and the process frequently resulted in cracking the wood (which pretty quickly rendered the entire piece useless since we wanted long-ish boards to work with and not small slivers).
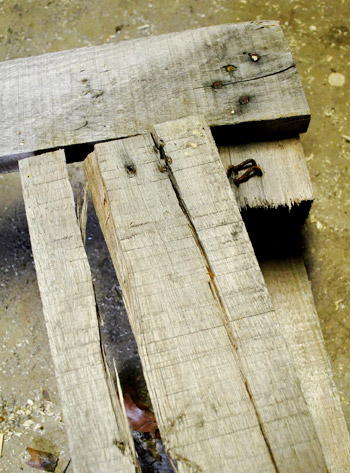
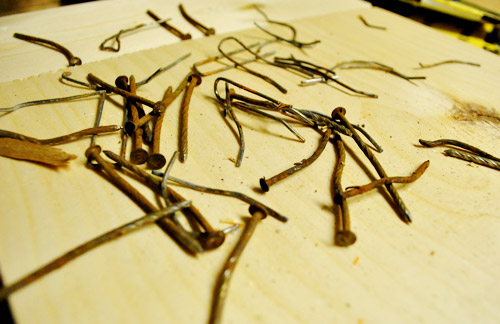
I’m no stranger to elbow grease so I stuck with it for the length of Clara’s nap (about 90 minutes). In that time, my nail and staple pile grew to look a little something like this:
And my pile of usable pieces of wood looked like this:
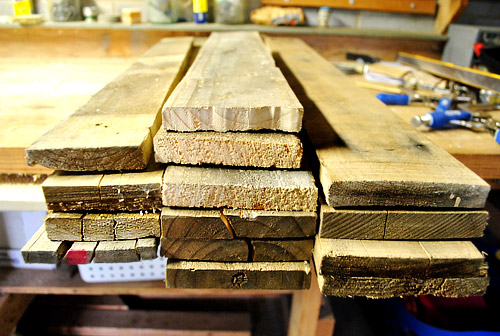
Fourteen usable pieces in 90 minutes wasn’t that discouraging at first… but then I looked closer at my definition of “usable.”
Notice how each piece of wood is a slightly different width? Since my tabletop would be comprised of 4 or 5 planks laid side-by-side, I realized that inconsistency would make achieving a consistent width across all 140 inches of tabletop very difficult – especially when I was looking for a very specific width (and don’t own a tablesaw to help me achieve that width artificially by cutting the boards lengthwise).
But I gave it a try and was able to find 5 pieces that gave me exactly what I was looking for (16 and 7/8″ of consistent width if you’re wondering):
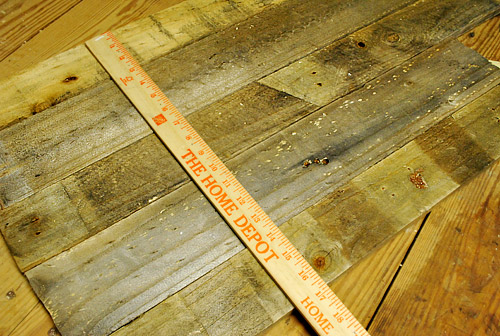
But only 5 pieces of the 14 that I fought tooth and nail (literally) to free would work to create that width. Meaning that in one and a half hours I had only wrestled enough wood to make about two feet of tabletop. Wop wop. By my math, that means it’d take me about 9 hours to get all 12 feet of tabletop free. And that’s only if my 5 pallets actually contained enough “perfect” pieces to provide all of the wood I needed to get the exact same width all the way down the 140″ countertop (an unlikely scenario considering I had already stripped one palette entirely to get these 14 5 usable pieces).
So as much as I loved the whole “reclaimed pallet wood” idea, all signs were pointing to “give up on it already.” And when I told Sherry about my doubts – how much time it would require, how much wood was cracking and breaking, how difficult it was to achieve the right width (only around a 33% success rate), and how I was running out of material – she basically said the same thing: “oh well, you tried – give up on it already so we can figure out a plan B.” Plus she added that it might have been a sign from the universe since there are more and more health concerns over the sometimes-toxic chemicals found in pallet wood (some contain formaldehyde, which is a known carcinogen) so although we planned to seal the wood with an eco-safe poly (by Safecoat) to keep things baby-and-rest-of-the-family friendly, the whole leave-the-pallets-alone-and-move-on-to-Plan-B thing was probably for the best.
And happyily, Plan B is already underway. We’re hitting up a few local places in search of reclaimed wood and might even use store-bought white wood like we did for the entire console base if our search for something “recycled” backfires (hooray for consistent sizes and no prying necessary!). Heck, if we went with the same wood that we already used for the console base, we could even beat the heck out of it distress it ourselves (I’m not gonna lie, the idea of “testing” a number of techniques involving hammers, screws, and crowbars appeals to me). It’s not quite as cool – or as free – as the original plan, but at least we gave the pallets the ol’ college try. And who knows, I might end up using them for something else or giving them a second life thanks to freecycle or craigslist.
Update: We’ve made great distressed wood progress in lieu of pallets for the console top. Here’s a quick sneak peek. We’ll share waaaay more info/details/videos about that process when we put everything together and reveal the finished console. Hopefully before Christmas. Just kidding, hopefully by early next week (is it just me or is this project taaaaking forevvvvvver?).
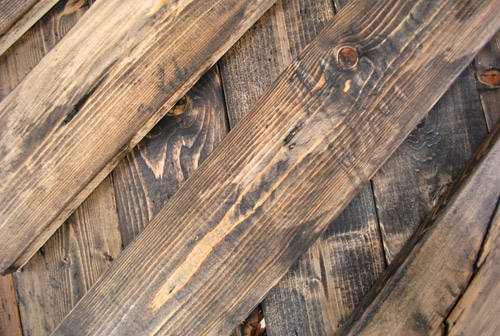
In other news – we (and by we I mean Sherry) finished staining the exposed sides of each console. You know the ones that have little shelves for easy-access storage that were last seen here.
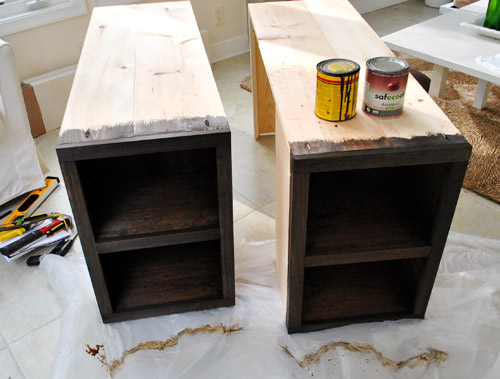
That picture above is a little dark just thanks to the angle. Here’s a more true to life shot. Yummy and warm, right? Wait, are grown men allowed to say type yummy?
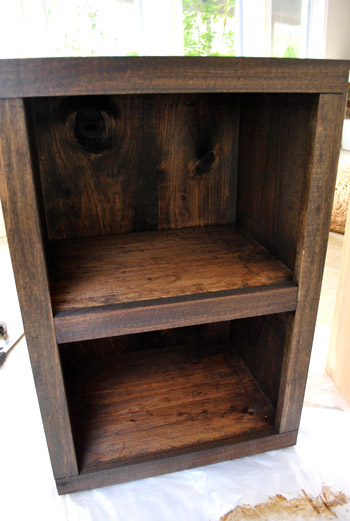
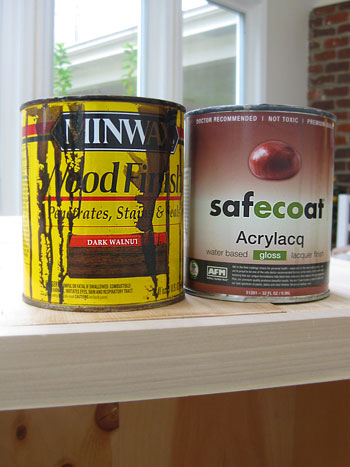
The staining part of the project was 100% free since Sherry was able to use leftover materials that we already had on hand: Minwax stain in “Dark Walnut” and Safecoat Acrlacq (which is basically the water-based eco version of polyurethane).
Since most of the console will be hidden behind Karl or under the eventually-completed tabletop, the only thing that needed to be stained was the shelves on the two exposed ends (once it all gets put together all the other exposed parts will be stained as well). So Sherry parked herself in the sunroom – which is sealed off from the rest of the house so she doesn’t have to worry about Clara inhaling anything – and did two coats of stain (which she applied with a foam brush and wiped off five minutes later with an old rag). Find more how-to-stain details here.
Then the next day she added two “thin and even” (her favorite words to describe anything involving paint or stain – she stressed them like you wouldn’t believe because they can make or break things) coats of the Safecoat Acrlacq with a brush. This seals in all the gross stain fumes and creates a water-based low-VOC and non-toxic “shell” that protects the wood and blocks off-gassing (as opposed to high-VOC oil-based poly) so it’s nice and kid friendly. You might remember that we (Sherry) also used it to refinish Clara’s dresser here.
We’re glad that the wood grain shows through for a varied and rustic look. Since the living room is a bit more modern than we’d like, adding hefty pieces with “authenticity” like this will help balance things out.

So we’ll hopefully be back with a big the-console-is-fiiiiiiinally-finished post as soon as we make some headway on the top. In the meantime I can be found murmuring sweet nothings at those freshly stained shelves. Seriously, can my wife work some serious magic with a rag and some stain or what?
Pssst- Confused by the console? Learn how we built it here and here. And of course we’ll share even more details when we finally piece this thing together and call it done. Soon hopefully, because I am so ready to stick a fork in this baby.

Elaine says
Hi there, I’m a big fan of your blog and have never commented until now :) I work in shipping and the idea of using used pallets just brought about the ick factor! We’ve had plenty of incidents involving aphids in pallets that if we receive pallets that do look suspect, we just fumigate the crap out of them. Just wanted to let you guys know since you have a little one who might potentially come into contact with your console.
YoungHouseLove says
Thanks so much! We mentioned in the post that there were icky chemicals that scared us in pallets (we planned to SafeCoat seal them) but ended up not even being able to use our pallet wood at all. So I guess it’s all good. Haha.
xo,
s
brigwork says
We managed to build a barn door with pieces of wood we ‘reclaimed’ from our back yard. Getting the warped rotted pieces to cooperate was tough, but we loved the end result. See our barn door here: http://settlingwest.com/?p=1049
YoungHouseLove says
Oh man, that does look awesome! You guys made it look so easy!
-John
amymargaretc says
I had never heard about carcinogens in pallets before… we were planning on using pallet wood to make a headboard. Should we just toss that plan?
Great progress on the console!!
YoungHouseLove says
It could work if you seal them with something certified to keep in dangerous stuff (like lead paint). Safecoat is a great company to try first. They make great seals. Good luck!
xo,
s
Karen says
I just read your “goo-related secret” post and, for the same reason that I immediately have to remove the price sticker goo from an object, I would have to stain the entire console. Well, not the top since you’re covering it, but the front and back for sure, along with the sides of course (which you did). We all have our “thang” don’t we?!
Beth says
I love how you shared this with us even though it didn’t work out as planned. About that mask- I didn’t see anyone ask this yet but was hoping you could share the details. I’ve been needing a good mask like that for DIY projects and could use some direction. Thanks for all you do!
Kim @ Life Analytical says
Someone may have suggested this already, but I would totally use one of those pallets to do something like this garden from Life on the Balcony: http://lifeonthebalcony.com/how-to-turn-a-pallet-into-a-garden/
Gavin says
Looks like you’ve got a good thing going with plan B. Just thought I’d let you know for future projects, though, that reclaimed floorboards are really swell. I live in NC and there’s a rockin’ architectural salvage store in Greensboro (a friend in Richmond tells me you have something similar in a bigger/better version) that sells old floorboards and paneling for $2. The pieces are usually really long and workable. I built a table with some! Keep an eye out for future reference. In the meantime, keep up the great work!
whitney says
have you seen this? its a coffee table made out of a pallet. http://pinterest.com/pin/13778684/
YoungHouseLove says
Yes love it!!
xo,
s
Kiran @ KiranTarun.com says
Love the consoles. Looks so easy to built, but you guys are awesome to have 2 of it built on your own :D
Ann says
How about this for a great pallet idea?
http://www.bodieandfou.com/pallet_coffee_table_by_house_doctor?category_id=90
YoungHouseLove says
Love it! Such a great idea.
xo,
s
Jenna says
I am so jealous of your carpentry skills!! Way to go!
Amy T says
Did you guys ever consider pickling your timber? Tiffany Ruda did a great job of making her brand new table top look a hundred years old in an afternoon…
http://www.tiffanyruda.com/how-to-build-a-farmhouse-table/
YoungHouseLove says
Yes- we love how that looks!
xo,
s
Spencer says
I read this post earlier today and came across this just now:
http://www.apartmenttherapy.com/la/diy/diy-small-space-pallet-garden-life-on-the-bacony-143775
However, as the comments say non edible plants would be best unless you know they aren’t treated with chemicals.
YoungHouseLove says
Love that project! So cool.
xo,
s
emily @ thirtyeight20 says
Not to make you even more paranoid about chemicals, but formaldehyde is in SO MANY HOUSEHOLD THINGS. (Fabric dyes, lotions, clothing, detergents, etc.) My sister-in-law recently developed a serious allergy to it and has had to eliminate it from her home as much as possible. Much like you guys, she uses mostly green products around the house–even still, she found that she has had to make some drastic changes. She sews a lot, and now she has to wear gloves to avoid touching fabrics until they’ve been washed numerous times because of the formaldehyde that is used to treat fabrics. I truly don’t understand why formaldehyde is allowed to be so prevalent, but I’m glad you researched!
Carollyn says
I have an Ikea couch VERY similar to your Karl. This console you are planning is so genius! I really think I’m going to steal the idea from you because it would solve my despised coffee table situation so well. Are you going to post an entire write up on how you did it in your projects section by any chance? Pretttyyyyy pleeease!?!?
YoungHouseLove says
We’ve already shared two DIY posts about building it (see the links at the bottom of this post) and we’ll post about the top/completion soon! Then on our projects page we’ll just link to the final post (which will have lots of info and photos along with links to the first two building posts for reference). Hope it helps!
xo,
s
From London says
Maybe Sherry could use the wood in little piece to do some custom art inspired from pinterest!
ellis says
Leaving the unseen parts unstained totally makes sense to me. I’d do it that way too!
Sandy says
Because you mentioned you didn’t have a table saw, I thought that I would let you know about the joy of a track saw if you didn’t already know about them.
I am super scared about the hubby cutting off fingers, etc, so the track saw is a much safer option. We have the Dewalt version, and we really love it! (Much cheaper than a table saw and can work in place a circular saw too.) Although, on DIY I saw a clamp track you can use with a regular circular saw too!
Callie says
This is no coffee table. But it is a pretty fun way to use your pallets… Just thought you guys might be interested.
http://lifeonthebalcony.com/how-to-turn-a-pallet-into-a-garden/
YoungHouseLove says
Love it so much!!
xo,
s
L says
I, too, have succumbed to “free wood fever” and dragged home pallets (from work). Then I tried to take them apart. Never again. Did manage to salvage about 30% of the boards for shelving; the rest make fine shims and temporary hold-’ems (that’s a technical term). Wish I’d seen your anticipatory post sooner, and could have warned you.
But I think John is like me: if I’m gonna try it, I’m gonna try it. And bandage either my fingers or my ego later. Gotta love you guys.
Cait @ Hernando House says
I think Jeremy had the best way to take pallets apart (when making Will’s accent wall): sawzall. He may have used a corded one, but the 18v one we have made things a lot easier when taking pallets apart.
YoungHouseLove says
Yeah he was really lucky they weren’t stapled in the middle (just on the sides I think) so he got longer pieces! Either way I can’t wait to get our mitts on a sawzall someday! Sounds like fun.
xo,
s
Katie says
I don’t know if you’ve seen this idea on Pintrest, but you could do this with the pallets instead: http://pinterest.com/pin/13818041/ OR even any of these ideas: http://tatertotsandjello.blogspot.com/2009/08/project-idea-creating-furniture-using.html
I did the coffee table and love it!! I get compliments on it all the time.
YoungHouseLove says
Love the links- thanks for sharing!
xo,
s
Maggie says
I’ve had much the same experience trying to re-use pallet wood. However, I recently found at Home Depot enough scrap wood (they spray paint green on the ends, and each piece costs 51 cents at my local HD) to make a new top for a cupboard I was repurposing. No nails, and I was able to work around knots and splits to easily get boards of matching dimensions. You do have to look for twisting and cupping, because that’s harder to compensate for than knots. You have also convinced me I need the tools for making pocket screws. Toenailing screws doesn’t work all that well for me. I have enjoyed your postings on your website.
YoungHouseLove says
Great tip about scrap wood Maggie!
xo,
s
Lauren C says
After reading your blog about pinterest, I checked it (pinterest) out. I came upon a pseudo wall frame with shelves made out of what appears to be a pallet…
http://pinterest.com/pin/14295206/
Pretty cool, albeit maybe not the style you’re going for…
YoungHouseLove says
Cute!
xo,
s
Erin says
I can’t wait to see the finale. Repurposing that wood was a fantastic idea. i LOVE repurposed wood. I just saw an add in This old House for using an old rustic door and a pair of saw horses to make a dining room table. It had a lot of charm.
kelly says
check out this idea to make composting from those pallets: http://www.livingoffgrid.org/used-wooden-pallets-or-skids-making-free-easy-compost-bins/
I’m pretty sure if they’re mishapen it won’t matter much!
YoungHouseLove says
Love it so much!!!
xo,
s
Bruce says
Hey Guys… Not sure if you ever got a sure fire way to get usable pallet slats (I didn’t wanna read thru all 198 comments) :). After Going through many of the same struggles you did aka…a lot of time and a lot of unusable pallet slats, I thought about it for a while and figured it out… I won’t be posting a video as I’m not that technologically (ooh…big word) inclined.
If you have a reciprocating saw (sawzall), a short metal cutting blade and about 20 minutes, You can completely dismantle a pallet and have full length usable pieces… just cut the nails between the slats and the spacers. Use a small punch to tap the nail heads back through the top of the slats. It’s really very easy, far less destructive to the slats and less time consuming than trying to pry them off (yes, I tried as well). Hope you are able to understand my long-winded description. If not, feel free to shoot an E-mail back to me.
Love your Page
-Bruce
Heather says
I am new to staining and came across this post. I bought traditional stain and poly, but now I am reconsidering getting some safecoat. Is a traditional poly very dangerous? I live a pretty green lifestyle and I don’t want to compromise my health. I just want to know if it is worth the increased cost in your mind?
YoungHouseLove says
For us there’s no contest- Safecoat is all that we’ll use! It’s definitely one of those personal preference things, but to be able to use a product that’s eco friendly, non-toxic, and low-VOC over something that’s high-VOC and stiiiiinky is always our first choice.
xo,
s
Michelle says
I am a regular reader of your blog, but I just googled “How much wood could a wood chuck chuck?” And your blog popped up as one of the top results. Does your blog get a lot of hits for that search? Hilarious!
YoungHouseLove says
Haha, it’s the first we heard of that – so probably not that many. So funny though!
xo,
s