So yeah… our fridge is white now.
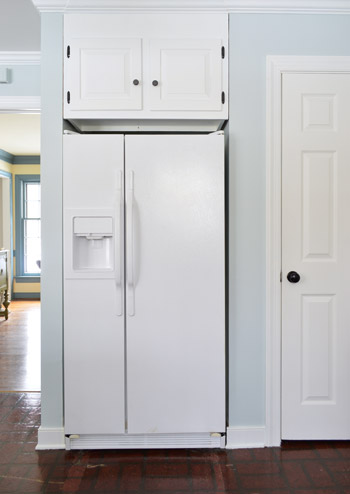
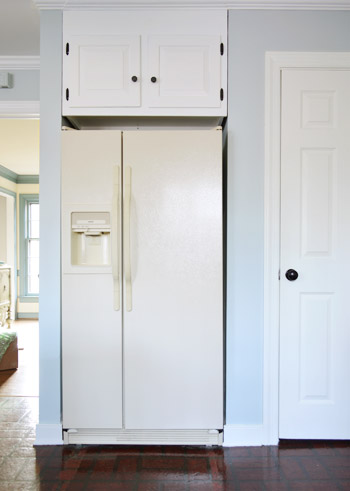
It’s not a new fridge, it’s just our old almond-colored one “freshened up” a bit with some appliance paint so that it would play along more nicely with our white cabinets. After tons of you (literally dozens) mentioned that you had great luck with appliance paint in this post, we were encouraged to give it a try.
I’ll admit that I initially had my doubts, but after hearing such rave reviews from you guys, we figured at its best, this update would help an old fridge blend in more until we save up enough money to replace it during Phase 2 of this kitchen makeover. And if it completely tanked, we could tell you guys the truth, share the awful photos, and just generally save you the trouble of doing whatever it was that we did.
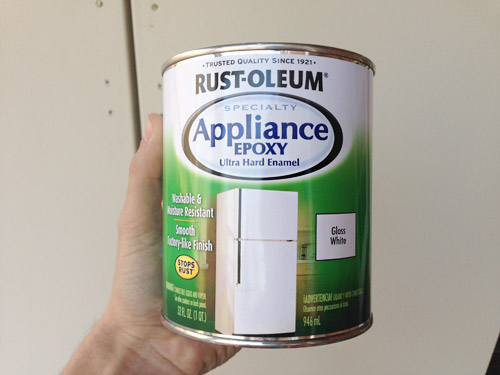
After doing a little bit of what-had-good-long-lasting-reviews research, we settled on this Specialty Appliance Epoxy that was $15 from Home Depot, which was only available in exactly the color we needed: gloss white. I know it’s not as cool or trendy as something like chalkboard paint (which Sherry had mentioned a few times) but I’m weird about chalk and all that dust near my food source gave me the heebies jeebies. Plus I knew if we craigslisted this fridge down the line we could probably ask more for a white one than a chalkboard painted one.
The refrigerator “refinishing” process itself was pretty darn easy. It was the prep that took some muscle – namely moving the fridge outside so that I could paint without stinking up the house (the epoxy smelled like rubber cement, so we definitely wanted to follow their “do this in well ventilated area with a mask on” instructions). After I turned off and disconnected the water line, my dad came over and with a dolly we got it ready to head out to the sunroom… until we realized the handles made it too big to fit out the doorway.
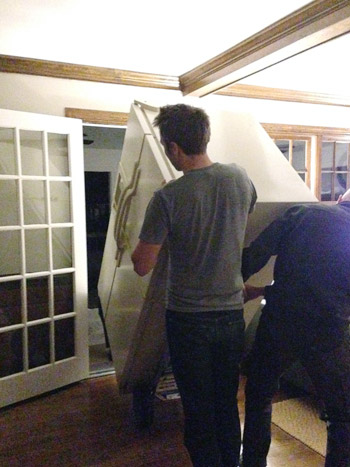
So off came the handles (well, and one of the doors too – it’s a long story) so we could bareeeely squeeze it out the door. We actually left most of the food inside (except for some especially heavy, breakable, and spillable stuff that temporarily came out during transport) to avoid the extra hassle of unloading and reloading everything. Oddly enough, it worked.
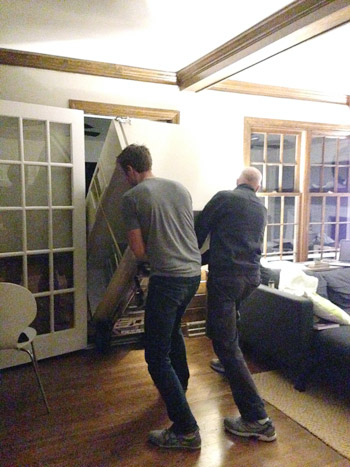
The move took place on Friday night so that we’d be ready to go on Saturday morning, since the weather forecast was nice for the weekend and the epoxy is supposed to be used in 50°+ temperatures. We weren’t the classiest neighbors for a couple of days, but at least it’s better than having it on the front porch. We even plugged it in out here so the food would keep. Nothing like going outside to get milk for your cereal in the morning.
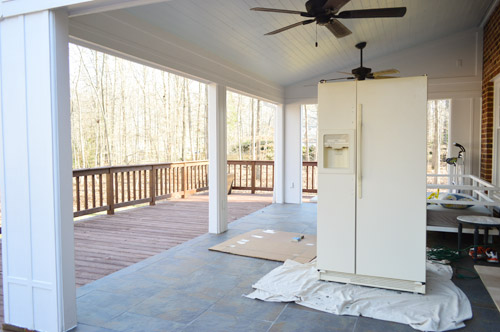
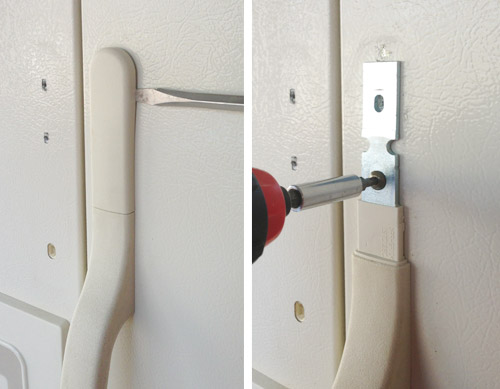
The project didn’t get going until later in the day on Saturday (once temps crept up enough to meet the can’s requirements). Obviously I had reattached the one door that we took off to keep the food cold, but Sherry decided it’d be best to have both handles off when painting for the most seamless and hopefully drip-free result. All it took was popping off a cover on either end and then unscrewing them.
Per the directions on the can, Sherry and I started by lightly sanding the whole fridge – just enough to get the gloss off. A power sander felt like overkill, so we each used sanding blocks of 150 grit.
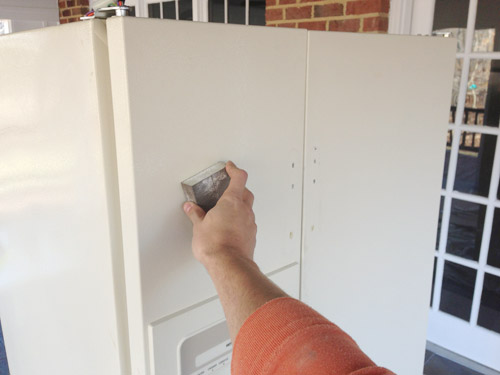
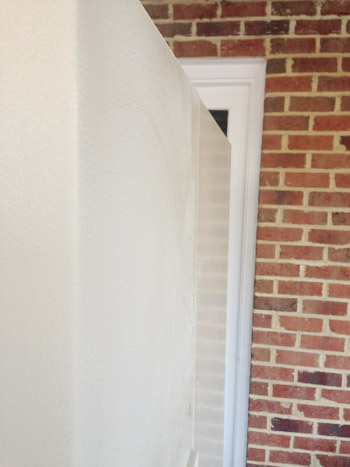
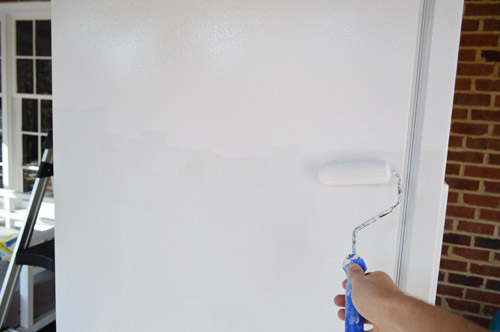
I did the front two doors while Sherry did the sides. You can see the difference between the door I roughed it up and the door I hadn’t done yet in this picture.
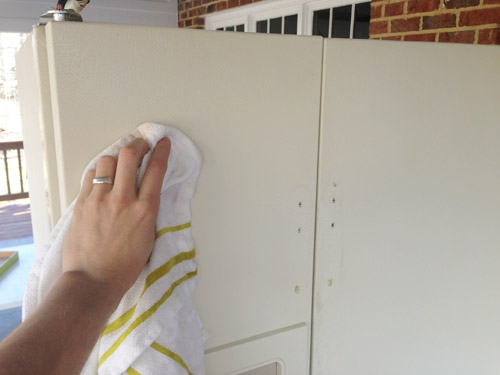
Then we went over it with a damp cloth to get all of the sanding dust off followed by a dry cloth to, um, dry it.
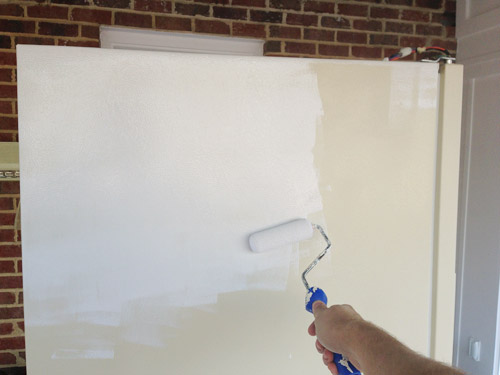
I used a foam roller to apply to epoxy while wearing a mask, just as the instructions suggested (and Sherry, Burger, and Clara went inside and steered clear, so they weren’t exposed to the stink). This stuff basically has the exact consistency of paint so the process wasn’t unfamiliar at all. It goes on a little bubbly but it quickly smooths itself out.
I did break out a brush to help me get into some tight spots, like some of the nooks around the doors and the ice dispenser. We chose to just paint right over that whole area too (covering up the much coveted “Hot Point” brand logo – gasp!). The paint doesn’t actually touch the water/ice dispensing apparatus (that’s tucked up under a cover) so it was nice to know that this definitely-not-food-safe product wouldn’t interfere with anything that goes into people’s mouths – but we could achieve an all-white look from the front instead of having to leave some trim parts cream or something.
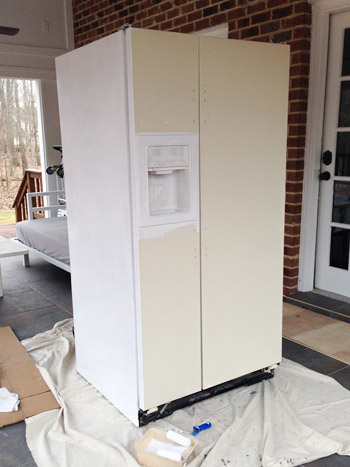
I painted three sides and the top, leaving the backside unpainted. There were enough cords, tubing, and venting back there that it didn’t seem worth the hassle (in what installation scenario is that visible?). I probably didn’t need to do the top either but someone even an inch or two taller than me would get an okay view of it, so I just did it to be thorough.

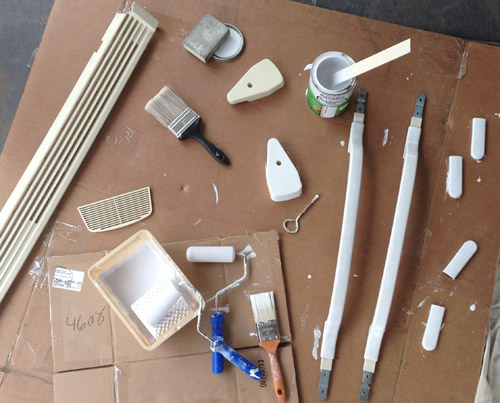
Sherry had spread out all of the little parts – the handles, door hinge covers, bottom grille, etc – on a piece of cardboard so that I could paint them separately. It was easier this way and also minimized the opportunity for drips on the main fridge.
The can said you can recoat in one hour assuming that 70° temperatures were met, so I decided to give it at least overnight before continuing since it was only around 55 degrees on Saturday. But at least the fridge was looking somewhat less offensive out there in white. I’m sure that’s exactly what the neighbors were thinking: “Oh nevermind, honey! It’s white now so no need to call the HOA anymore. I wonder if there’s any beer in that thing…”
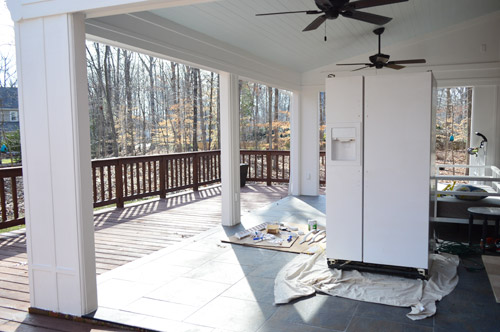
You can’t really tell in pictures, but it did need a second coat. So on Sunday morning I rolled on another one pretty quickly and let it dry in the awesome 70° day that we were suddenly having.
We didn’t get it rolled back inside until it was too dark to take pictures on Sunday night (which is why this post is coming to you today, and not yesterday as we originally planned) but here it is, back at home looking much more blendy with the cabinetry.
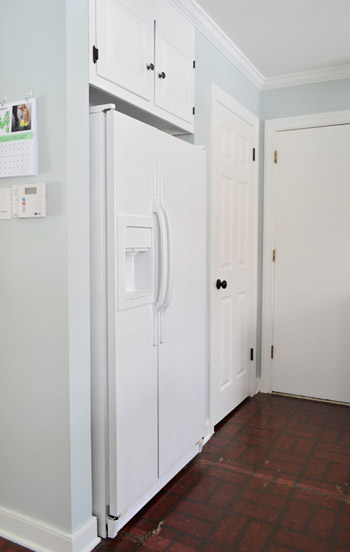
It’s not a perfect color match (the fridge is slightly whiter in color) but it’s only about a shade off instead of being a lot more noticeably clashy like it was when it was cream. Our white range hood is the same slightly whiter tone as the fridge, so we think appliances just tend to be that color when they’re “gloss white.” It’s actually a surprisingly big help in making the room feel a bit more current (I’ll admit that I didn’t think it would make as much of a difference as it does).
And it’s definitely a vast improvement from what this corner looked like back in the day:
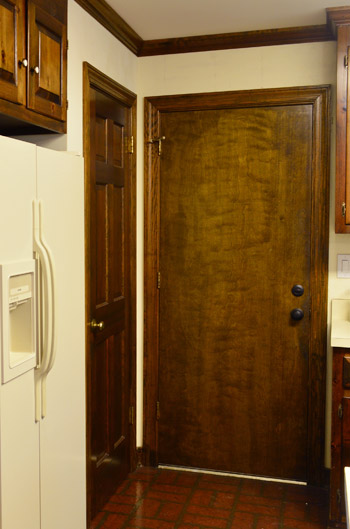
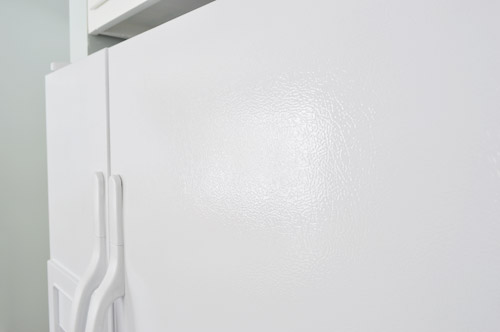
As for how the epoxy feels, it’s very smooth, very hard, and looks/feels pretty much just like the fridge was always this color. If you stare at the glint of light reflecting off the fridge in the picture below you can see how the sort of lightly marbled texture of the fridge was maintained, and it’s glossy and convincing, just like a factory finished white fridge would be. I actually don’t think you could tell that it was painted unless someone told you. And I’m not just saying that. Picture me as the negative naysayer who had to see this to believe it.
We’ll keep you posted on how it holds up over time, but from what we’ve heard from you guys and read in reviews, it seems to be good for 5+ years and we’re hoping to get to Phase 2 a good deal faster than that. So it won’t be a big loss if it nicks or chips as we go, but it’ll still be interesting to see if this stuff is as good of a cheap and easy upgrade ($15!) as it seems so far.

Has anyone else had luck with appliance paint? We hear for a stove you need to use high heat paint, which seems to only come in spray form. Or has anyone done anything different or bold with theirs? We were contemplating painting the handles an accent color (like navy or ORB) but it just didn’t feel right for our goal, which was just to let this guy blend into his surroundings and draw attention to the better stuff like our succulent art, rope chandelier, and the rough wood dining table nearby.

Bonnie @ The Pin Junkie says
I didn’t even know appliance paint existed! Thanks for this great tip!
Stefani says
Looks delicious! So clean. I feel the same way about chalkboard dust. Don’t understand why it’s all the rage now.
Sommer says
The spray version is a nightmare. When I saw the fridge on the porch I thought “oh no, their new tile” because when I used the spray kind on my washer and dryer it got on everything within at least 20 feet and even went under the drop cloth I put down. The results are great but the application is a headache if you’re unprepared.
YoungHouseLove says
Oh man, that sounds like such a headache!
xo
s
Denise Armbruster says
My mom, back in the 70’s, painted her refrigerator and kitchen sink!!!
YoungHouseLove says
No way! How did the sink hold up?
xo
s
Denise Armbruster says
It held up very well. I thought she was bonkers for attempting it but she knew what she was doing.
Linda B says
Looks fantastic! Thanks for all the pointers. If we EVER get warmer weather here, I will do our old freezer in the garage. But, our freezer has rust spots on the front. Anyone know how to treat the rust spots first?
YoungHouseLove says
Rustoleum makes awesome rust blocking products (we used some in John’s Granny’s bathroom a while back). Maybe those and then the appliance paint would work?
xo
s
Sarah Miller says
Wow! Had no idea appliance paint even existed until now. Good to know that option is out there.
But I have to say, the part of this post I can’t get over is that you had two days above 55 degrees! Seems impossible in Chicago.
YoungHouseLove says
Well now there’s snow on the ground and everything is frozen again. It was such a tease!
xo
s
Katie says
So excited to see the eventual floor update! Are you still thinking peel and stick tiles or do you think you will wait for a Phase 2 permanent update?
YoungHouseLove says
We’re still debating. Peel and stick is what we used for Phase 1 in our first kitchen (even before we started blogging!) just to tide us over, so we’re leaning that way but not 100% yet.
xo
s
Amy says
I painted my fridge red with just regular Rustoleum paint last year. It has held up really well no scratches or anything. I did it inside in the spring and just opened all the windows and shipped the dogs to Grandpa’s for 3 days.
YoungHouseLove says
That sounds awesome!
xo
s
Sara says
Wow! It looks fantastic and so real! The white paint in that room has totally transformed it! I sort of love the last picture because you can see the blue trim in the other room. Later looking back you’ll look at that picture and say, that blasted blue trim still wasn’t gone when we did the fridge! haha
Good work! :)
YoungHouseLove says
Oh my gosh it’s never-ending! Haha!
xo
s
Lauren says
I’m so glad you guys did this! I’ve been seriously contemplating doing this to our fridge, dishwasher, and stove. All our appliances are that same almond color, and our cabinets are white (I refinished them using your tutorial…it’s actually how I found your site!). It looks so good, I think you’ve convinced me. Thanks!
YoungHouseLove says
Good luck Lauren!
xo
s
Alicia says
Can you use this on ovens of just fridges? I have a yellowish oven, hood and dishwasher that I would love to paint.
YoungHouseLove says
I believe for ovens you need to get the high heat version, but it should work the same way. I can only find high heat in a spray version though, and we prefer rolling it on, but someone else said they found some you can roll on, so we’re on the hunt and will keep you posted!
xo
s
Julianne says
Looks great! Thanks for sharing about this….had no idea that this stuff existed. Bonus! :O)
sharon says
Friends of mine painted their fridge several years ago and it looked perfect right through the time the appliance itself gave out. Nice upgrade!
YoungHouseLove says
So glad to hear that!
xo
s
Nick B says
I’m a long time reader, and love your blog. I’ve been curious about epoxy appliance paint in general for a while. Now that you’ve used it, do you think there any any other applications or uses? I was thinking to add a hard coat to an old bi-fold closet door or even a bathroom cabinet refresh. Do you think that would work? Does it need to bond to metal/plastic? (or whatever the fridge is made out of)?
YoungHouseLove says
I have never thought about that. I think it’s made for metal or plastic (it’s bu Rustoleum) so some other applications might be the bottom of a claw-foot tub or the metal legs of a coffee table. Not sure it would be great on wood just because cabinet or furniture paint (like Advance, which is made for those surfaces) might have the edge in that area.
xo
s
Mikki says
Just a thought, I know you are planning to eventually get rid of it, but you might want to consider using it in your garage once you do phase 2. I always thought this was a crazy idea until you realize that it’s a great place to store drinks for kids who are outside…no running in and out, it’s a great place for extra freezer items, including frozen Popsicles for summer time. It’s great for the occasional watermelon, party trays, and beer. When it’s not as full, you can store water in gallon jugs inside to make it run more efficiently, and those can just sit outside next to it when you need the space. We store our still in use paint brushes wrapped in Saran Wrap in ours when we are in the middle of a project. I seriously couldn’t live without my extra frig….
YoungHouseLove says
Thanks Mikki! John’s parents always had an extra garage fridge growing up.
xo
s
MikeLove says
So.. what about the words that tell you “water” “Ice” “Crushed”??
YoungHouseLove says
Good question! We only use the fridge for ice, so it’s always on that setting (no need for labels since we never change it). We have a filter on our sink, so we prefer that over the “freezer-burn” taste of the water our fridge dispenses. I think even if someone used all three it would be easy enough to remember that the right setting is ice, the middle is crushed, and the left is water – or they could stencil it on there or use small letter decals or something to relabel them.
xo
s
Hannah Wallace says
I’ve been watching tons of youtube videos on the stainless steel appliance paint. Can’t convince myself to jump for it. Does anyone have any experience with it?
YoungHouseLove says
Anyone have experience with this for Hannah?
xo
s
Dora says
I love it! I have been wanted to try this for a while now! Great way to extend the life of something that works but doesn’t exactly match your aesthetic, and for $15! Cant beat that!
Kim Hall says
I have never heard of appliance paint. It looks great!
Samantha @ Fabulous Fabris says
What is this mythical 50+ weather you speak of? I dream of such things!
Looks fabulous! I’ve never heard of appliance paint. They have paint for everything I guess.
YoungHouseLove says
Haha! This weekend was such a tease. Now there’s snow and ice on the ground and school is canceled for the second day in a row. Boo to always-changing March weather!
xo
s
em says
This looks wonderful, although I think in person it would make me even angrier at your countertops. I can’t wait to see what you do with them!
I’m not sure if that was a rhetorical question in the comments, but, YES!, a bottom freezer is SO much better. We finally got a new fridge this year after years of having the side by side model you have. It’s life-changing. If we only have one slice of pizza left over, sometimes I just put the whole pizza box in the fridge just because I can!
YoungHouseLove says
Haha, oh yes, the counters and the floor are now Public Enemy #1. And thanks for the bottom freezer info. That sounds awesome!
xo
s
Larissa says
I was going to comment about that, too. I’ve had all kinds of fridges and my favorite BY FAR is the bottom freezer with one door on bottom and one door on top. (Not the french doors on top). I am longing for the day we get to replace our current side-by-side.
Tracey says
Sherry, I know John did the painting here but I wanted to ask you what products you use while you’ve been doing all that painting while pregnant. I know you’re probably as paranoid as I am, and I want to get a start on some major painting projects here to be completed BEFORE our little one arrives. Tips & tricks?
Thanks:)
YoungHouseLove says
I prefer to use no-VOC stuff whenever I can (thankfully primer and paint are easy to come by with that formula now) and I also will use low-VOC stuff with a respirator that blocks the fumes (we have one of those big gas-mask ones). Sealers like Safecoat Acrylacq are some of my favorites too (it’s even non-toxic). There’s more info for ya here: https://www.younghouselove.com/2013/10/the-411-on-baby-2/
xo
s
Em says
How did you deal with the rubber seals around the doors? Did you paint the sides of them, or leave them bare?
YoungHouseLove says
Oddly enough the rubber seals were already white, so I didn’t need to paint them.
-John
Daisy says
Growing up (before appliance paint) we moved and our fridge clashed with the new kitchen. My Dad paid an autobody shop to paint it for $75. It was a perfect match after that.
YoungHouseLove says
That’s awesome!
xo
s
Jadie says
I’ve never commented before, but you guys are some of the only bloggers that I follow that actually still respond to comments, & I just think that’s so awesome. Keep up the great work!
YoungHouseLove says
Thanks Jadie!
xo
s
caroline [the diy nurse] says
Looks great! I wouldn’t have thought it would turn out so nice– even the handles! Would love to hear how this holds up when you finally replace it.
Melissa says
We used appliance paint on a wall oven and it came out great! It was also cream while the other appliances were white! The best and cheapest fix. We noticed no chips and we had the stove for 5 years till we upgraded. The fridge looks fab you wont regret it!
YoungHouseLove says
That’s awesome to hear, Melissa!
xo
s
Cassie says
I’m so glad you did this! The fridge in our house is white while the rest of our appliances are black. We’ve been considering painting it but I was nervous about how it would look. And I didn’t even consider keeping the food in it! There were no issues with that I assume? I’m with John, I don’t want weird things around/in my food! I guess I just thought the fumes would sneak in there somehow…? I don’t know. Thanks again for the post!
YoungHouseLove says
Since it was all sealed up inside and we were just painting the outside it seemed to be fine. We were so glad we had a plug out there to keep the food cold during those few days that it dried/got a second coat.
xo
s
Janet says
‘m curious to see the water dispenser up close. Did you have to paint over any words? It looks a bit bit different from before and after…
BTW looks great!
YoungHouseLove says
Good question! We painted over the Hotpoint logo along with the tiny words that say water, crushed, and ice. We only use the fridge for ice, so it’s always on that setting (no need for labels since we never change it). We have a filter on our sink, so we prefer that over the “freezer-burn” taste of the water our fridge dispenses. I think even if someone used all three it would be easy enough to remember that the right setting is ice, the middle is crushed, and the left is water – or they could stencil it on there or use small letter decals or something to relabel them.
xo
s
Janelle @ Two Cups of Happy says
Such a difference! White looks much better.
Does the water dispenser thingy look weird now? Is the inside edge still cream? So many questions, sorry! Haha.
YoungHouseLove says
Thankfully everything that’s in sight on the dispenser is white now. Just the tube that goes up that’s under a cover is unpainted, so all of the trim/edges got a few coats of white for a nice seamless look. If you crouched down and looked up at the tube where the ice/water shoots down, that’s unpainted, but it was never cream – it’s actually black!
xo
s
nancys says
I painted my last fridge with chalkboard paint & just loved it. I knew it was never going to be resold & it came in very handy for grade school notes :)
I’m also a chalkboard paint addict………………
I’m enjoying your kitchen progress too!
Erica says
I love that you used appliance paint to freshen up your fridge! I considered touching up my old fridge with some appliance paint since it had some rust stains (?) on it. But then it died one day and I had to go buy a new stainless one. I was so lucky I got a really good deal on mine. :-)
My mom and dad have a cream colored fridge that my mom can’t stand. I will suggest appliance paint to her, but I have a feeling my dad will grumble so badly about taking the fridge outside to paint it that she’ll eventually get a new one before it gets painted. :-) How lucky you are, Sherry, to have a guy that is willing to move refrigerators for you. :-)
One question for you about the paint- how does that affect the fridge being magnetic? Can you still use magnets on the fridge? I am used to not hanging anything on the front of my fridge, but my mom and dad’s is full of stuff! :-)
Erica
YoungHouseLove says
Such a good question! I just ran and got a magnet to check. Still magnetic!
xo
s
carey says
Hi,
Did you have to paint the seal around the doors or were they close enought to the correct color?
Thanks!
YoungHouseLove says
Oddly enough the seal around the fridge was white to begin with, so I didn’t need to paint that.
-John
Andrea says
Looks great!! Just curious, it looks like you may have had buttons on the ice dispenser, did you paint over those? And if so, are you worried that the epoxy will wear off with time on the buttons? My fridge has the crushed/cubed ice buttons but I don’t think I should paint those. Thanks!!
YoungHouseLove says
Good question! It’s actually a plastic lever that clicks into three spots (not a button system) so we think it should hopefully hold up well – it’s made of the same plastic as the handle. Will keep you posted!
xo
s
Amy says
It looks fantastic! I’ve always wondered about painting appliances and the durability, but I’m super impressed with how original it looks!
Effie says
you guys are too cool, I can’t even take it!
Anu says
Hi,
never thought of using appliance paint but good for the records. btw on a completely diff. note, are you going to do a post on how you consigned the baby clothes. is it really straightforward as choosing the clean clothes & bringing them in or is there some strategy to get the most money for the baby/toddler or older kid clothes?
YoungHouseLove says
Oh yes, it was really straightforward. I washed them all, folded them nicely, and brought them in one of those nice big plastic tubs (as opposed to raggety old bags or boxes). Sometimes presentation like that seems to help, but mostly I think it was volume (I had a ton of stuff, even after donating and giving back hand-me-downs and pulling out gender neutral stuff).
xo
s
Cynthia says
We used appliance paint and painted an almond dryer white. It held up for years until it was time to purchase a new one. We also, at least 15 years ago, removed and used appliance paint to spray paint my MIL’s avacado green vent hood to white. It was oversized and finding a new one was a challenge.
YoungHouseLove says
That’s awesome!
xo
s
Amy says
On the chalk marker discussion, soft scrub is a great solution for removing the shadowing. I update mine for each season so it has a good long time to set in and a good scrub down takes away the remnants.
YoungHouseLove says
Thanks for the tip Amy!
xo
s
Brandyn | Southern Distinctions says
I’ve always wondered if that stuff really worked. It’s been a consideration in the past. I just wasn’t sure if it would be worth the time and effort. Yours looks fantastic. Thanks for sharing~
Holly says
The fridge looks awesome! We’re looking into doing this in our kitchen, so I’m glad that you guys like the results! I was wondering though, do magnets still stick to the fridge?
YoungHouseLove says
Someone else asked that so I ran and checked. Still magnetic!
xo
s
Nicole says
We painted our fridge about a year ago. We used spray paint…we couldn’t find appliance paint. It turned out pretty decent, but I don’t think i’d do it again. Plus we could only find grey primer, so final colour didn’t end up being as bright as we hoped for, but it’ll get us by until we buy a new one.
Check it out here:
http://visualheart.wordpress.com/2012/10/15/spray-painting-our-fridge/
YoungHouseLove says
That looks really charming Nicole!
xo
s
Danielle says
Wow – looks amazing! We’re not planning to paint any appliances anytime soon, but it’s good to know when a product does the job it was designed to do!
Tori H says
Had no idea that could be done..what a neat update!
tara @ tara goes streaking says
holy shiz-button! You just gave me the greatest idea ever… My fridge is already white, but the stupid handles get so GROSS looking when you have 4 kids and a hubs. I just can’t keep up with scrubbing those handles enough. I NEED to paint them dark to hide the dirt!!! thanks for the epiphany!!!
YoungHouseLove says
Wahoo! Good luck Tara!
xo
s
Laurie says
I’m with you on the chalk paint. It’s a cool concept but if I had a bunch of chalk surfaces around my house, I guarantee you, it would be dusty and smeary. Not at all cute like all the pictures online. But even when I was in school I was the one who managed to brush up against the board and sported dust on my arm or back end.
This is a great little update! I love these inexpensive details. I think they go a long way in updating a look and feel of a room and house.
Amanda says
After being snarky, rude even, about how much I hated yesterday’s project – I really like this post. I’m curious to see how this holds up. A lot of your “phase 1 fixes” are what I’ll be doing when we are first time home buyers later this year, and I HATE ugly yellowed appliances, so this is great to show how to work with what you’ve got until ican one day afford a beautiful French door refrigerator!
Sara says
70 degrees!!! We spent our weekend in the -15 range. I think a move is in order. Our ‘winter projects’ have been hiding in the still too cold to do anything garage for 6 weeks.
Sarah @ Sarah's Daybook says
Woah. Time to go paint the fridge.
I had no idea that you could do that! When are you guys going to come out with the secret project?? I am super excited!!
Sarah
http://www.sarahsdaybook.wordpress.com
YoungHouseLove says
Last we heard we can announce in a few weeks, so it looks like the big day is March 17th! Wooooooooot!
xo
s
Sarah @ Sarah's Daybook says
Yay!! If it is something that will be sold, you best believe I will buy it all.
KiWi says
The fridge looks fantastic. We’re planning on giving our old inherited fridge a fresh coat to cover up a scratch and a couple of small rust spots. Your post makes me even more desperate for warm weather. How did you handle the rubber gasket areas on the doors and where the doors meet the fridge? Any pointers there?
YoungHouseLove says
Weirdly enough, our seals were white already, so we didn’t need to paint those.
-John
Alex the airhostess says
When I painted my front door, I used a large putty knife and gently slid it between the door & the rubber gasket to keep the door paint from getting on the gasket. When I do the back door this spring, I’m going to try using a metal yardstick & tape it in place so I don’t have to keep sliding the putty knife down.
It was significantly easier than trying to painters tape a flexible gasket (which drove me insane by flexing).
YoungHouseLove says
Really smart!
xo
s