So yeah… our fridge is white now.
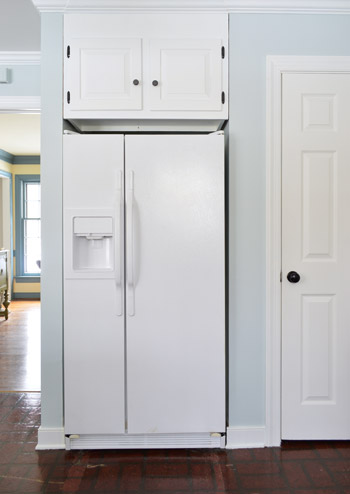
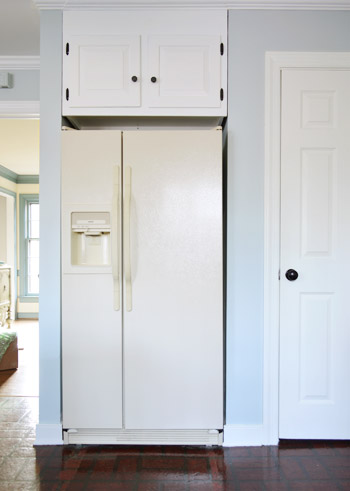
It’s not a new fridge, it’s just our old almond-colored one “freshened up” a bit with some appliance paint so that it would play along more nicely with our white cabinets. After tons of you (literally dozens) mentioned that you had great luck with appliance paint in this post, we were encouraged to give it a try.
I’ll admit that I initially had my doubts, but after hearing such rave reviews from you guys, we figured at its best, this update would help an old fridge blend in more until we save up enough money to replace it during Phase 2 of this kitchen makeover. And if it completely tanked, we could tell you guys the truth, share the awful photos, and just generally save you the trouble of doing whatever it was that we did.
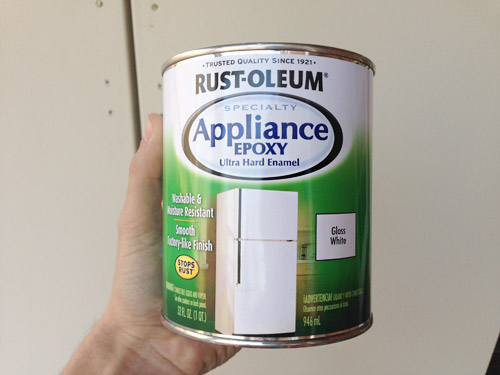
After doing a little bit of what-had-good-long-lasting-reviews research, we settled on this Specialty Appliance Epoxy that was $15 from Home Depot, which was only available in exactly the color we needed: gloss white. I know it’s not as cool or trendy as something like chalkboard paint (which Sherry had mentioned a few times) but I’m weird about chalk and all that dust near my food source gave me the heebies jeebies. Plus I knew if we craigslisted this fridge down the line we could probably ask more for a white one than a chalkboard painted one.
The refrigerator “refinishing” process itself was pretty darn easy. It was the prep that took some muscle – namely moving the fridge outside so that I could paint without stinking up the house (the epoxy smelled like rubber cement, so we definitely wanted to follow their “do this in well ventilated area with a mask on” instructions). After I turned off and disconnected the water line, my dad came over and with a dolly we got it ready to head out to the sunroom… until we realized the handles made it too big to fit out the doorway.
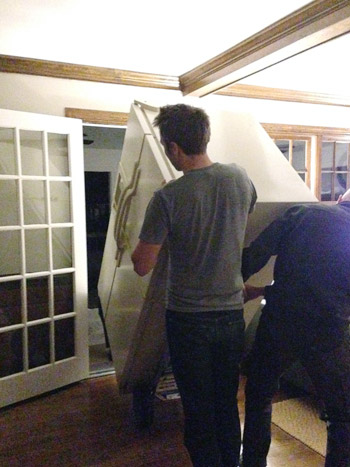
So off came the handles (well, and one of the doors too – it’s a long story) so we could bareeeely squeeze it out the door. We actually left most of the food inside (except for some especially heavy, breakable, and spillable stuff that temporarily came out during transport) to avoid the extra hassle of unloading and reloading everything. Oddly enough, it worked.
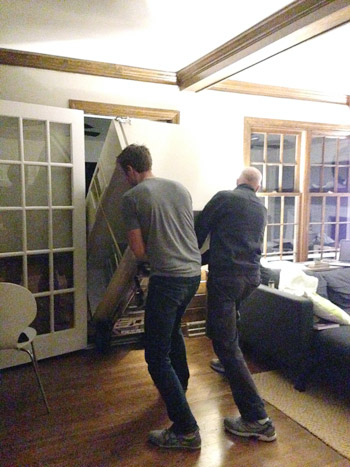
The move took place on Friday night so that we’d be ready to go on Saturday morning, since the weather forecast was nice for the weekend and the epoxy is supposed to be used in 50°+ temperatures. We weren’t the classiest neighbors for a couple of days, but at least it’s better than having it on the front porch. We even plugged it in out here so the food would keep. Nothing like going outside to get milk for your cereal in the morning.
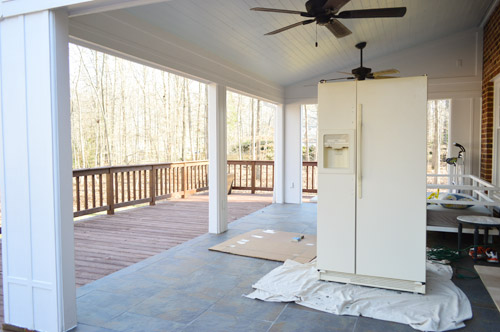
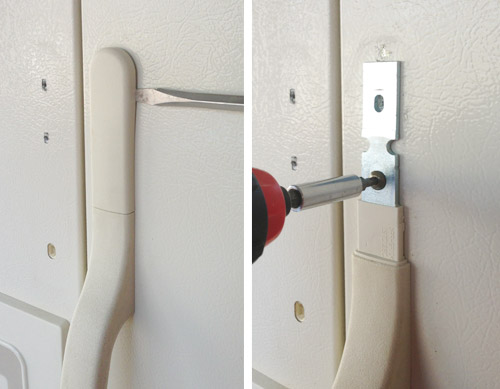
The project didn’t get going until later in the day on Saturday (once temps crept up enough to meet the can’s requirements). Obviously I had reattached the one door that we took off to keep the food cold, but Sherry decided it’d be best to have both handles off when painting for the most seamless and hopefully drip-free result. All it took was popping off a cover on either end and then unscrewing them.
Per the directions on the can, Sherry and I started by lightly sanding the whole fridge – just enough to get the gloss off. A power sander felt like overkill, so we each used sanding blocks of 150 grit.
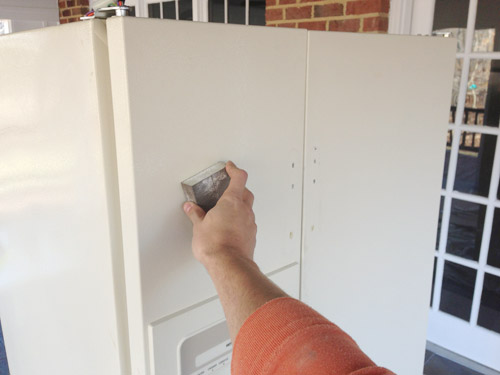
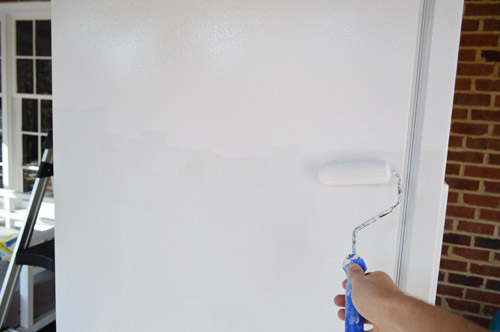
I did the front two doors while Sherry did the sides. You can see the difference between the door I roughed it up and the door I hadn’t done yet in this picture.
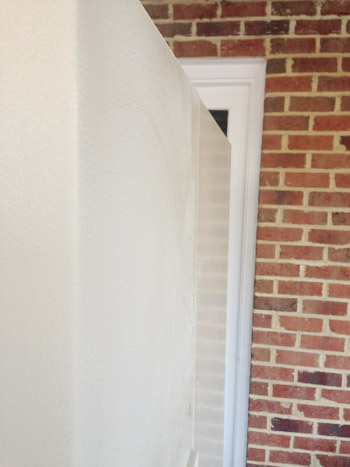
Then we went over it with a damp cloth to get all of the sanding dust off followed by a dry cloth to, um, dry it.
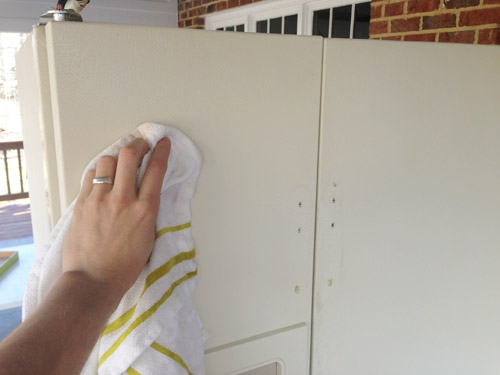
I used a foam roller to apply to epoxy while wearing a mask, just as the instructions suggested (and Sherry, Burger, and Clara went inside and steered clear, so they weren’t exposed to the stink). This stuff basically has the exact consistency of paint so the process wasn’t unfamiliar at all. It goes on a little bubbly but it quickly smooths itself out.
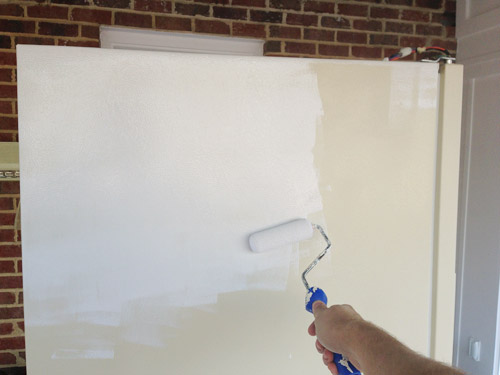
I did break out a brush to help me get into some tight spots, like some of the nooks around the doors and the ice dispenser. We chose to just paint right over that whole area too (covering up the much coveted “Hot Point” brand logo – gasp!). The paint doesn’t actually touch the water/ice dispensing apparatus (that’s tucked up under a cover) so it was nice to know that this definitely-not-food-safe product wouldn’t interfere with anything that goes into people’s mouths – but we could achieve an all-white look from the front instead of having to leave some trim parts cream or something.
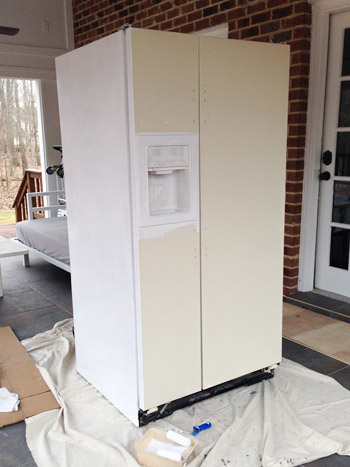
I painted three sides and the top, leaving the backside unpainted. There were enough cords, tubing, and venting back there that it didn’t seem worth the hassle (in what installation scenario is that visible?). I probably didn’t need to do the top either but someone even an inch or two taller than me would get an okay view of it, so I just did it to be thorough.

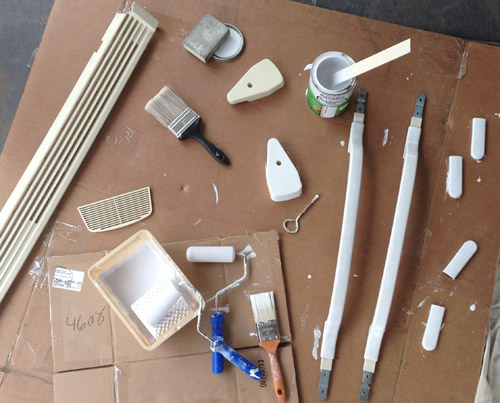
Sherry had spread out all of the little parts – the handles, door hinge covers, bottom grille, etc – on a piece of cardboard so that I could paint them separately. It was easier this way and also minimized the opportunity for drips on the main fridge.
The can said you can recoat in one hour assuming that 70° temperatures were met, so I decided to give it at least overnight before continuing since it was only around 55 degrees on Saturday. But at least the fridge was looking somewhat less offensive out there in white. I’m sure that’s exactly what the neighbors were thinking: “Oh nevermind, honey! It’s white now so no need to call the HOA anymore. I wonder if there’s any beer in that thing…”
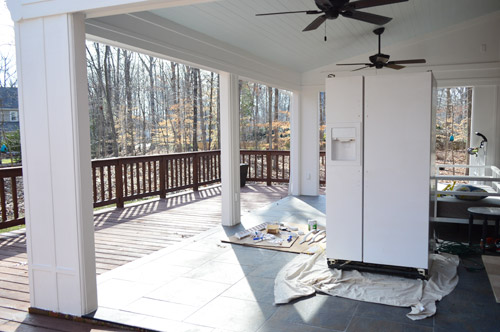
You can’t really tell in pictures, but it did need a second coat. So on Sunday morning I rolled on another one pretty quickly and let it dry in the awesome 70° day that we were suddenly having.
We didn’t get it rolled back inside until it was too dark to take pictures on Sunday night (which is why this post is coming to you today, and not yesterday as we originally planned) but here it is, back at home looking much more blendy with the cabinetry.
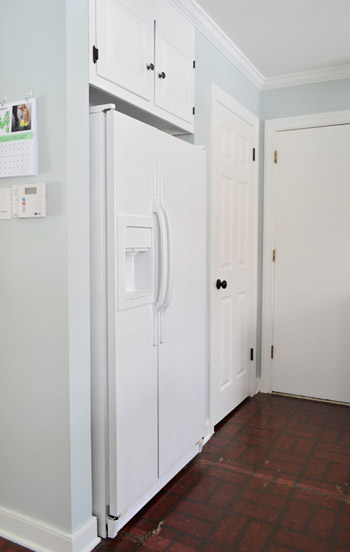
It’s not a perfect color match (the fridge is slightly whiter in color) but it’s only about a shade off instead of being a lot more noticeably clashy like it was when it was cream. Our white range hood is the same slightly whiter tone as the fridge, so we think appliances just tend to be that color when they’re “gloss white.” It’s actually a surprisingly big help in making the room feel a bit more current (I’ll admit that I didn’t think it would make as much of a difference as it does).
And it’s definitely a vast improvement from what this corner looked like back in the day:
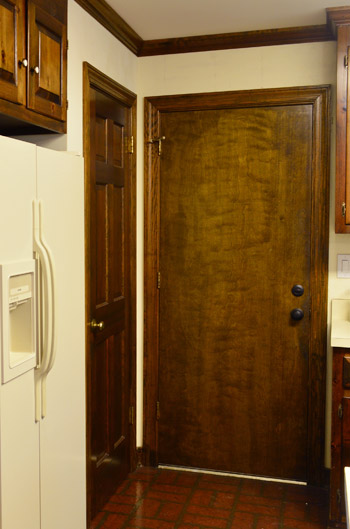
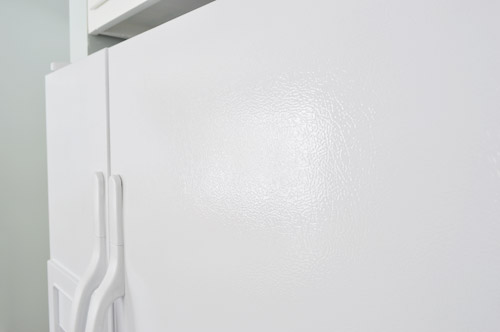
As for how the epoxy feels, it’s very smooth, very hard, and looks/feels pretty much just like the fridge was always this color. If you stare at the glint of light reflecting off the fridge in the picture below you can see how the sort of lightly marbled texture of the fridge was maintained, and it’s glossy and convincing, just like a factory finished white fridge would be. I actually don’t think you could tell that it was painted unless someone told you. And I’m not just saying that. Picture me as the negative naysayer who had to see this to believe it.
We’ll keep you posted on how it holds up over time, but from what we’ve heard from you guys and read in reviews, it seems to be good for 5+ years and we’re hoping to get to Phase 2 a good deal faster than that. So it won’t be a big loss if it nicks or chips as we go, but it’ll still be interesting to see if this stuff is as good of a cheap and easy upgrade ($15!) as it seems so far.

Has anyone else had luck with appliance paint? We hear for a stove you need to use high heat paint, which seems to only come in spray form. Or has anyone done anything different or bold with theirs? We were contemplating painting the handles an accent color (like navy or ORB) but it just didn’t feel right for our goal, which was just to let this guy blend into his surroundings and draw attention to the better stuff like our succulent art, rope chandelier, and the rough wood dining table nearby.

Kelly says
This is a perfectly timed post for me- it looks great! I’ve been trying to convince hubby that our fridge needs to be painted this spring. My only question- is it no longer magnetic? My kiddo would be heart broken if I took away her alphabet letters. Thanks!
YoungHouseLove says
A few others asked that so I ran and checked and it’s still very much magnetic!
xo
s
Briana says
Love this post! It is amazing what a little paint can do. We are currently painting our whole house, prepping it to sell. I’ll have to try this on our yellowed fridge handles.
See Emily Shop says
Looks awesome!
Karen A says
Sorry if this has already been answered (you get SO many posts) — did you paint the inside of the door where the outside sort of wraps to the inside? Not the outside edges of the door, but kind of what is exposed around the gasket on the inside. Does that make sense?
YoungHouseLove says
I did the inside lip of the doors themselves, but didn’t paint anything that’s technically on the inside of the fridge (aka: “the cold storage surface” that food touches). All of that was already white. Isn’t that funny? We already had a white interior and white seals, so it was just the doors and handles and hinges that were cream.
-John
Elizabeth says
Wow! Impressive transformation for just paint! Can’t wait to see how it holds up!
Mary says
Looks so much better!
Does the paint “cure” completely? With hands coming into contact
with the painted handles and then with food, are there any leeching
issues?
YoungHouseLove says
Yes, it seems to harden up and cure really fast. It had a very strong rubbery odor when it was put on outside, but when it dried it was odorless and really hard- just like the original surface of the fridge.
xo
s
Amber says
Looks great guys! Could I use that paint on my old-ish washer and dryer? They have a few rusty looking scratches on the top.
Thanks!
YoungHouseLove says
Yes, I think it would be the perfect candidate for that! I’d use Rustoeum rust-blocking primer first on those scratches and then follow up with this paint.
xo
s
debbie says
Years ago my parents wanted to change out their white refrigerator for something much more “current and contemporary,” so they used an epoxy to paint the fridge avocado green! They even had a second, darker spray for the outer edges that framed the doors with a slightly darker shade of that lovely color. (That was probably about 40 years ago ~ and I still remember that!)
Love your family, your home and your posts!!
YoungHouseLove says
I love that.
xo
s
Patty says
I love Rustoleum appliance paint. I’ve never used the can version, only the spray. And oddly enough, I’ve never used it on appliances! I’ve sprayed cabinet hardware (black) to give it new life, knowing the finish would be ultra hard and durable for regular handling. I also used it to spray a small end table (white) that has a lot of tight spaces (that took me about an hour when I painted the first coat by hand). I decided that was crazy and gave the appliance spray a shot, assuming it would hold up to a lot of wear without wearing out – it totally has, it’s AWESOME! Plus, no poly top coat needed – bonus! Anyway, it’s great stuff. So glad to hear the can stuff works well too (and on actual appliances!). Your fridge looks much better – your whole house is coming together amazingly beautiful. And on a side note, I want to tell you I absolutely LOVE your blog! It’s the only one I follow that I read every new post you put out! Thanks for your well written, detailed approach. :)
YoungHouseLove says
Thanks Patty!
xo
s
Tall Tee says
Ooooh, I never thought of using it on furniture. I have a little table I’d love to paint black and would love to avoid the paint and poly cycle. Thanks for the tip!
Emily M says
Did you guys just paint the water and ice buttons? My husband and I were chatting about doing this last night and could not figure out what to do about the buttons on our dispenser! Thanks so much :)
YoungHouseLove says
Ours didn’t have buttons, it has this lever that’s plastic (made from the same stuff the fridge handles are made from) so we did just paint that. Seemed to work. Not sure how it would go on buttons though. Anyone tried that?
xo
s
Tall Tee says
I am soooo in love with painting appliances instead of swapping them out. I figure if it works well, why pay money for something different?
I’m so in love with painting things that I even painted my countertops, lol. Sounds strange, but I get so many compliments on it and have had several people tell me that they can’t believe they’re painted. When in doubt–whip the paint out :)!
YoungHouseLove says
Haha! That needs to be on a t-shirt or something.
xo
s
K.D. says
We have that exact same fridge in the beige color. The other appliances are all black and then the stove is black/stainless. We were hoping that the next step would be to just replace with a stainless steel fridge to match the others. She’s old but she keeps on running, so I guess we’ll keep her until she konks out. LOL.
Lisa says
It works great. We painted a 20 year old refrigerator which had gotten a few rust spots where the water and ice dispenser is. Actually it was something in the dispenser that dripped a rusty stain on the white refrigerator. It has lasted 4 or 5 years except the color doesn’t stay white. It doesn’t yellow but it isn’t as white as it was. No chips, cleans well. Today I cleaned permanent marker off with bars keeper and it worked. Old refrigerator still hanging in there and this paint made it look much much better. We also used the left over to paint a metal door in the garage and it has lasted. For whatever reason that one stayed whiter maybe because it doesn’t get any sun or it doesn’t cleaned like the refrigerator does with different cleaners. I would use it again.
YoungHouseLove says
Thanks Lisa! It’s awesome to hear an update down the line!
xo
s
Steph says
Hi, I think the fridge looks great in white, but I wanted to put a little public safety announcement in, that you need to be really careful about leaving doors on the fridge when it is outside. In many places, it is actually illegal to leave a refrigerator outside with the doors on since children can go inside and get trapped. At any rate, it’s something to be aware of if you have little ones running around.
YoungHouseLove says
So scary! Never even thought about that. Thanks for sharing the info Steph!
xo
s
Kelly says
OMG I just had a flashback. Who else remembers the episode of Punky Brewster about this in the 80’s? There was an old fridge outside awaiting pickup, and Punky’s friend hid inside while playing hide and seek. They found her unconscious but revived her with CPR that they had conveniently learned at school the previous day. That scared me so much that for years after I saw that, every time I got something out of the fridge, I would check carefully to make sure our cat wasn’t inside before closing the door.
Does that no-fridge-outside rule apply if the fridge is full of food? In that case, there wouldn’t be room for a child to climb inside.
Kelly says
Just did a little research. Fridges from the 1950’s and earlier had a mechanical latch that couldn’t be opened from the inside, so if a child went in and closed the door they would be trapped until someone opened it from the outside. Hundreds of children unfortunately did die this way. Modern fridges are held shut with a magnet and you can push the door open from the inside, so there is no danger of being trapped. However, I suppose if a child went inside and fell asleep or otherwise didn’t try to get out, they could suffocate. I didn’t find any report of a child dying in a modern fridge though.
Cynthia says
As someone who prefers white appliances (stainless reminds me of the toilets at the Port Authority and refrigerators in hospital kitchens), I was pleased to see your repainted fridge. What I’d dearly love is a fridge available in the beautiful silvers or ambiguous pale greens and blues of many cars. Failing that, I’d like a white fridge with elegant stainless handles, but only seem to find that combo in brands like Fisher & Paykel. Households had a host of fridge colors in the 1950s, but now there’s just a handful. I had high hopes for the Whirlpool Ice collection, but there isn’t much selection in terms of size and style (I don’t like ice and water dispensers breaking up the lines of a door — THAT reminds me of garbage cans lined up at the entryways of otherwise beautiful brownstones).
Kerry Velliquette says
Hi guys! It looks a ton better! I had a similar problem but my refrigerator was jet black and my cabinets were recently painted white. So… Guess what I did?! Instead of painting the appliance white I added wood to it to resemble a custom built in refrigerator to match my freshly painted cabinets. I even added matching hardware! It is unbelievable how it turned out!
I would love to send you pictures of it.
YoungHouseLove says
That sounds so cool!
xo
s
Marisa Zimmerman says
Oh my gosh! I had no idea that there was Appliance Epoxy and I can paint my fridge! This is totally going to open up a whole new world when I redo my kitchen in the spring. Im sure my husband is going to think I am crazy.
Gaidig says
We had luck repainting the gross fridge in a house we rented. We used the high heat spray because the fridge was located next to the stove and it held up well during the years we lived there.
Beauty and the Bump says
It looks good to me. We’re about to close on a house. All of the appliances are black. I wonder how the stainless rustoleum appliance epoxy would look.
Emily @ Life on Food says
It looks brand new!! Great update.
Bethany @ Dwellings by DeVore says
Wow, what a difference and you can’t beat the cost! I’ll definitely be filing this away in case I run into this scenario one day!
Janice says
We painted our freezer. We got it with our house and it was rusty on the top but it still worked great so it made no sense to replace it right away. We used the spray paint kind because my husband wanted to see what it was like. After 2 years it still looks great and I’m so glad I didn’t have to shell out all kinds of money to buy a new freezer! However, someday hopefully soon I’d really love an upright freezer!
Elizabeth says
We just painted our fridge this weekend from Almond to Stainless steel. I’m so pleased with how it turned out!
YoungHouseLove says
So glad to hear that! I always wondered how that looked!
xo
s
Holly says
Just wondering if this paint has held up nicely over the past few months?
YoungHouseLove says
So far, so good!
xo
s
Par says
Hi, looks great! If you ever have to do this again, I highly recommend using auto vinyl instead. Fast, no odors, and after wrapping it you use a hair dryer and it shrinks to size and shows the original texture beneath. Seriously looks brand new, from white to black (though every color including stainless is available) hope this helps in the future, it can cover anything- the stuff is amazing! Pat
YoungHouseLove says
Smart!
xo
s