Whether you’re interested in painting a chair, a table, or any other wooden piece of furniture, the steps are pretty much the same.

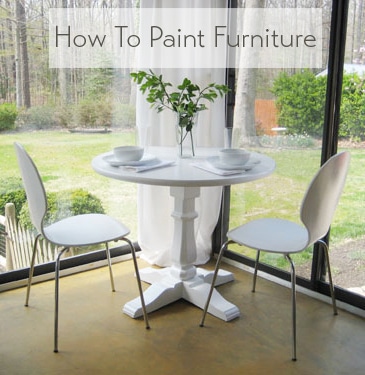
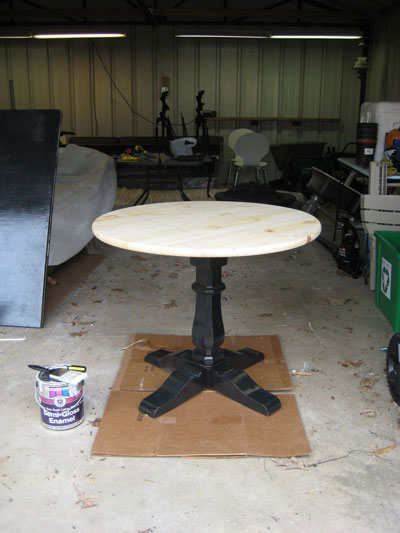
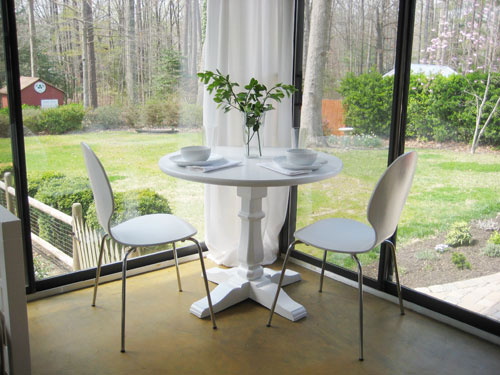
Take this table that we built and subsequently painted along with the accompanying white chairs (which used to be a golden blond wood tone).

Sprucing things up with a fresh coat of white paint took them from thrift store (where we got the table base) to Pottery Barn (which sells a similar version of it for 500 beans) in just a few hours.

But enough jibber-jabber. On with the how-to deets:
Step 1- Evaluate the surface of the piece that you’d like to paint. If it’s a sleek glossy surface (like varnished or sealed wood) you’ll want to gently sand the entire piece with 100 grit sandpaper). If it’s more of a dry chalky texture (like unfinished wood or flat paint) you can forgo the sandpaper and skip right to step two.
Step 2- Break out the oil-based primer to ensure that the paint sticks and no stains come through and ruin your finish (we’ve also used Zinsser Smart Prime with great success, which is a low-VOC stain-blocking primer that’s not oil-based – so it’s less stinky). Give the entire piece a good once over with a small foam roller or a paint brush. This coat of primer doesn’t have to be perfectly even in tone (it’ll probably look thinner in some areas since that’s how primer rolls) but as long as the entire piece is well covered – and it’s not too gloppy and thick – it’s ready for step three once it dries.
Step 3- Use a fresh small foam roller or paint brush to apply two thin and even coats of latex paint (a semi-gloss finish is usually best since it’s nice a wipe-able and durable choice). Many people mistakenly think that latex paint isn’t supposed to be applied over oil-based primer, but the real painting no-no is applying latex paint over oil-based paint, which is a guaranteed bubble-fest and should be avoided at all costs. And a word about small foam rollers vs. brushes: according to experts, all rollers – especially if used too quickly- may rile up the paint and lead to bubbles while paint brushes are the most bubble free application method known to man (although you might have brush stroke issues if the paint isn’t applied thinly enough or given ample drying time between coats).
We painted the table above with a paint brush, not a roller. But we have also used small foam rollers with great success, so those are actually our recommended choice for beginners since they cut down on brush strokes or drippy finishes and seem to be the most error proof. No matter what you use, be sure to wait until the first coat of paint is thoroughly dry before applying a second coat (each coat should be applied super lightly and evenly – aim for the thickness of an eggshell or a piece of paper). This thin application is the key to avoiding brush strokes or roller marks for a smooth, gorgeous finish. Repeat after me: three or even four super thin coats are far better than one or two thick and drippy ones!
Step 4- This step is optional, so think of it as extra credit. Brushing on two thin and even coats of water-based poly for wipe-able protection that really goes the extra mile (and provides a glossy oh-so-luxe sheen) can’t hurt if you pick the right stuff. The only two brands that we’ve ever used with unmatched success are these two, so they’re our strong recommendation (other types can yellow or crack over time):
- Minwax Water-Based Polycrylic Protective Finish in “Clear Gloss” (found at any home improvement center)
- Safecoat Acrylacq (which is a low-VOC, non-toxic alternative sold at eco boutiques or online at places like greendepot.com)
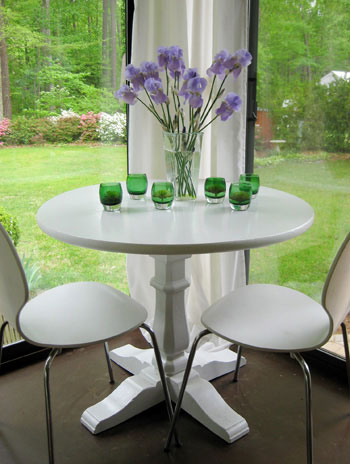
We went the extra mile and applied poly to our white table above for a bit of added protection, and we even thinly polyed the chairs since they need to be just as easy to wipe down due to their proximity to food whenever we dine in the sunroom. Thin is definitely the operative word, and again you’ll want to be sure to let the first coat thoroughly dry before going in for the second. Any time you go over semi-wet paint or poly to smooth things out you’ll get terrible drag marks, so work from one side to the other and never go back over things until they’re completely dry.
Step 5- Wait at least a full 72 hours to place objects on your newly painted piece to avoid dents or divots in your finish. If you really want to be on the safe side, we’d recommend waiting five full days. Sometimes factors like humidity and primer/paint/poly thickness can keep things from fully curing up, and you don’t want to get indents from using your newly painted piece too quickly. Waiting this long might take some willpower because you’re dying to sit on/eat on/enjoy your brand new piece, but it’s worth the wait. Promise.

Easy, right? Ok, those were a lot of words, so it might sound complicated. But just take things one step at a time. And remember to breathe. You can totally do it. There’s really no reason to live with wood furniture that’s not exactly the tone or the shade that you’d like. So from painting an old side table a handsome glossy black to giving a scratched up wooden chair a cheerful red tone, it’s definitely a project that you can confidently tackle in an afternoon. Go forth and paint something!
*Oh and it bears noting that if your furniture item is anything other than solid wood or veneered wood (like laminate, melamine, etc) you should visit your local hardware store and ask the paint pro there what they recommend for that surface. There are some great oil-based primers and enamel paints out there (which are changing all the time) so it might be possible to get a great result. The key is really roughing up the surface so it’s less glossy and then priming and painting with the best stuff they have (usually oil or enamel based).Good luck!
Psst- In the market for a quick cabinet painting tutorial? Look no further.
Psssst- Wondering how to paint a brick fireplace? Wonder no more.
Pssssssst- Itching to paint wood paneling? Try this.

suzyk says
painted my chairs last summer and JUST getting around to putting poly over them. I can’t remember if I used latex paint or enamel… can water based poly be used over enamel??
YoungHouseLove says
We have only used latex so I’m not sure about enamel with water-based. Might not be the best pairing. I’d ask the paint pros at your home improvement shop or google around for someone who hopefully has tried it.
xo
s
Molly Stone says
Oh, it is amazing what did you do with that coffee table. I always admire people who has the look for the beautiful things, which I don’t. If that was mine, it is most possible to put it in the trash and buy a new coffee table like this here http://www.houzz.com/photos/modern/coffee-tables.
Veronica says
Hey y’all! I know this post is from way back, BUT, y’all were the first place I turned when I decided to paint my husband’s grandmother’s chest of drawers as a changing table for our first munchkin who is on the way. And I was happy to see you have a tutorial about this! I noted that you recommended a “small foam roller or paint brush” and then I read in the comments that probably not a small foam roller due to bubblage. So, forgive my grammatical neuroticism, but should I use a small foam paint brush or just a regular ol paintbrush?
Mad cool points for responses to comments on old posts!!
YoungHouseLove says
I would use a small foam roller. Not a regular nappy roller, one of those tiny 4″ ones made of foam from Home Depot. We love those (with a brush just to get into the cracks and crannies). Hope it helps!
xo
s
Malinda says
Hi! I am repainting a dining set that I got. I used a paint stripper and sanded down all surfaces on the chairs and I have put two layers of an indoor latex flat paint on them. So far it peels off very easily when I go back to sand down rough spots. Did I make a mistake by not putting down a primer first, and do I need to remove all the paint and start over? Thank you for the help!
YoungHouseLove says
Yes, I would definitely sand them down and use a good primer. Hope it helps!
xo
s
Tiffany says
Oh, how I love your first house…
Kalina says
I haven’t refinished furniture before and want to refinish a glossy kitchen table and chairs. There is so much talk of chalk paint and it not requiring sanding, etc. What is your take on chalk paint? Ever used it? Is it an option for a kitchen table even where it’s going to get so much traffic and need to be able to be wiped clean? Thank you in advance!
YoungHouseLove says
I have tried it once but it felt like a lot of work with the waxing step at the end (yes you don’t have to sand, but you have to buy expensive wax along with the chalk paint being more money and then you have to wax it well and if you use too much it can stay sticky/tacky) so we prefer this method. Good luck!
xo
s
Anne says
I love how much difference it makes when you add a little paint! I recently spray painted old wooden stairs leading up to a jacuzzi and now it makes the house and jacuzzi look more upscale as well. Love the classic white as well. Nicely done.
Bekah says
Hey, Petersiks! I had a table given to me, much like this one, and happily went to the store with my shopping list of products you recommended. Followed your instructions to a T, and was very pleased with the results…except…we painted our table black, not white, and have been disappointed to see that the Minwax water-based poly that you recommend hasn’t (even after a full week of curing, and then two months of light use) gotten to the point where moisture doesn’t turn it light gray on top of the paint. I wonder if it does the same thing on top of white, but you just can’t see it?
We refinished two tables simultaneously and also used the Minwax polycrylic stuff on top of a moderately dark-stained coffee table. Looks beautiful, but gets cloudy immediately with any moisture. It’s not so bad on the coffee table, where we can use coasters, but for the kitchen table, I’m really regretting using the stuff. =( It’s going to be a while before I’ll feel like taking all the layers off and starting again, but when I do, do you have any suggestions for what will work on dark-painted or stained surfaces?
I love your blog so much and (like most others around here) feel almost as if I know you, and I feel like if one of your tried-and-true methods didn’t work for me, I’ve let you down…hahaha. =)
YoungHouseLove says
Oh no! I’m so sorry Bekah! I have never heard of that happening but we have never sealed black furniture. Maybe try sanding it down and resealing with Safecoat Acrylacq? I love that stuff and we have used it over dark stain without any cloudiness :)
xo
s
Bekah says
Good to hear the Acrylacq works over dark finishes. I feel that if I sand the tabletop down, I may need to repaint it as well as re-seal it? …but since it’s just the top that needs it, maybe it’s worth doing sooner rather than later…hmmm. Thanks for the help!
YoungHouseLove says
Oh man, sorry for the headache Bekah! Good luck!
xo
s
Clare says
Hi there – I have a similar table that I got on Craigslist ($40 yahoo) but is already stained. I plan on painting it white. Do you I need to degloss??
Thanks!!
Clare
YoungHouseLove says
I would just sand if it’s glossy/sealed and then use an oil-based primer and then white paint. Don’t want any stain bleed-through. Good luck!
xo
s
Lindsy says
Just followed your How to paint furniture tutorial step by step. I thought I had purchased the poly you recommended (see link) but after three coats of beautiful yellow latex paint that I let dry completely I’ve now got an orangy tinted yucky color after two super thin coats of poly (applied with a quality paintbrush). I read back through all the blog comments where others had similar problems and saw you’re responses regarding the specific type of poly necessary so now I’m wondering if this is not the right one. Would you mind letting me know? Also, if you’ve any recommendations on what now aside from sanding and starting all over from scratch I’m happy to hear them! Thanks so much!http://www.minwax.com/wood-products/clear-protective-finishes/interior/minwax-water-based-oilmodified-polyurethane
YoungHouseLove says
Oh no! That looks like the wrong stuff. It’s in a blue can and it’s called Polycrylic and not Polyurethane (that stuff can yellow). So sorry for the trouble! I think the only way to remove that and eliminate the yellow/orange cast is to sand it down. You might only need to sand the sealer off and maybe do one coat of paint to clean things up and then wait for that to dry and re-seal. We also LOVE Safecoat Acrylacq which has never yellowed on us! You can order that online :)
xo
s
Anita Morris says
Hi There – I have end tables and a huge coffee table bought in the 80s. They are varnished wood and in some places the varnish has worn down to the bare wood. Practically raised 2 families with this stuff! Anyway, I’d like to paint it all white. Can I just use a white primer and then go over it with white paint. I would like the gloss on it too. Is that possible or do I have to strip all the varnish off and sand it down and go through all that. (I’ve done that process before and didn’t like all that work!) One of our sons said it is possible to skip stripping the varnish, but I’ve never heard of that before. I’m asking the experts. Just found your website cause I just started thinking about this project yesterday. Thank you for your time.
YoungHouseLove says
I would sand the whole thing to rough it up and even out the spots where the varnish is flaking/worn down, otherwise it’ll still likely look uneven after you paint, and the varnish might make the paint peel/scrape off too easily. After sanding use an oil based primer (that’s important over the varnish so the paint sticks) and then follow that with a semi gloss paint. No need for a sealer, and it’ll be nice and glossy. Good luck!
xo
s
Thrifty Legs says
I’ve just discovered your blog and I’m hooked! Wish I’d seen this post before I renovated this table I rescued from the side of the road! Luckily I think it turned out ok though!
http://thriftylegs.wordpress.com/2014/07/11/our-coffee-table-for-under-5/
Look forward to reading lots more of your posts! x
YoungHouseLove says
Looks great!
xo
s
Argus says
I recently found some vintage game boards that you can download and print. You could decoupage them to a tabletop for an interesting effect. http://bartlettandbeebe.com/?p=874
YoungHouseLove says
Fun idea!
xo
s
Seher says
Hello,
Can you please tell me which brand/name of primer you used as well as the brand and color of the paint? Thanks!
YoungHouseLove says
This was years ago, but lately we have been loving Kilz Premium (from Home Depot – it’s no-VOC and still blocks stains).
xo
s