Did you know you can give your whitewash your brick fireplace with paint you already have around the house? We were able to give our fireplace wall a fresh look in under a day and with no money spent!
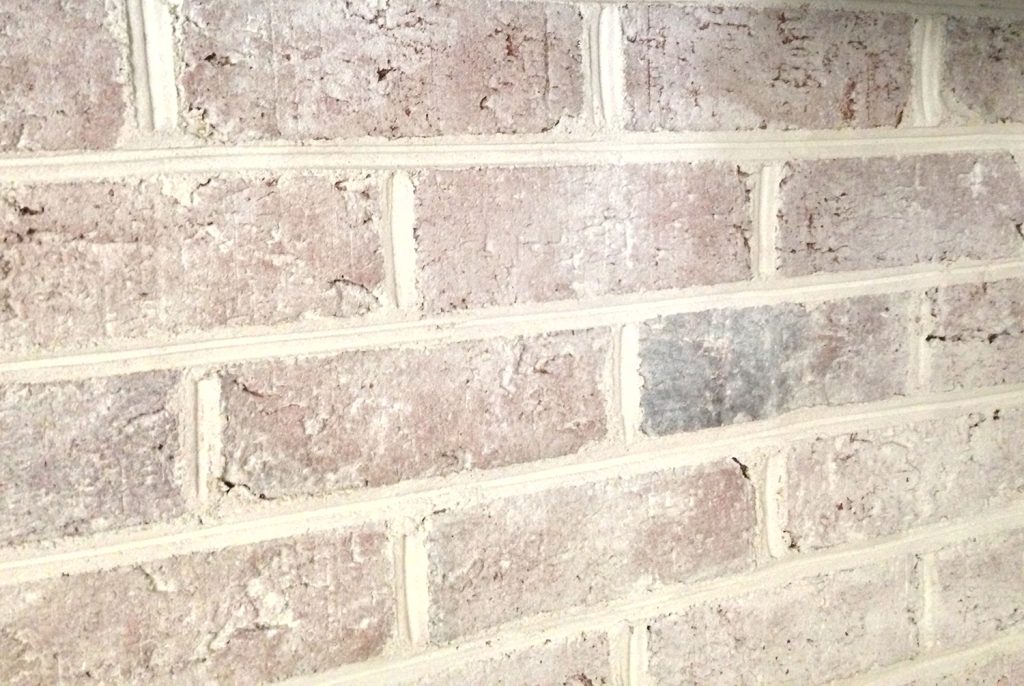
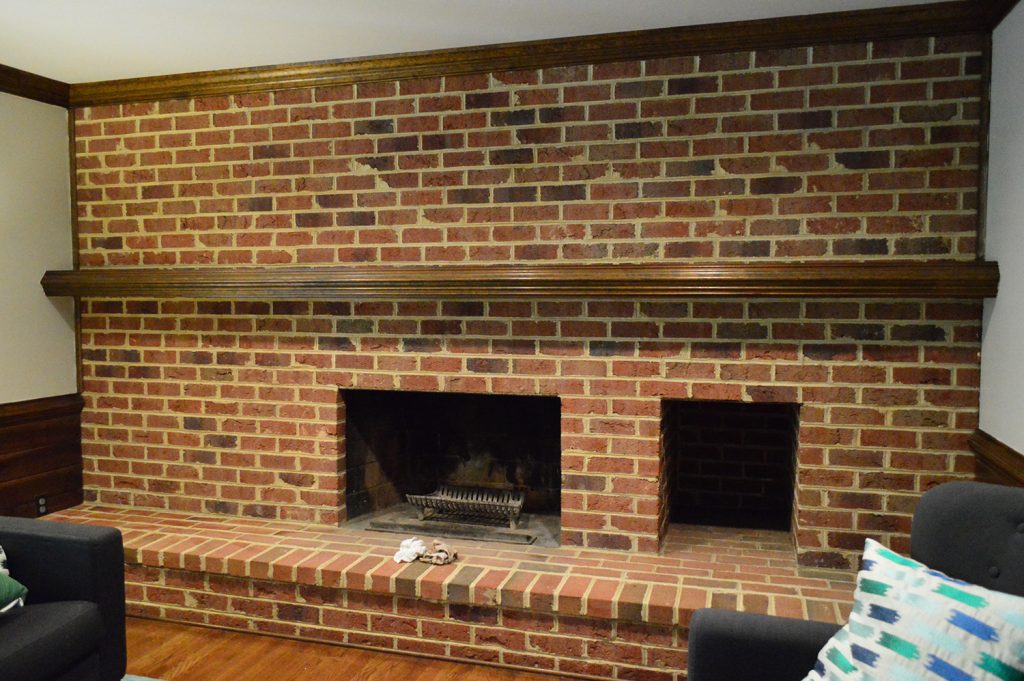
We don’t mind unpainted, exposed brick, but in all of our houses it’s been an unattractive orangey-brown brick – not that pretty rustic red brick you find in New York apartments. So in previous homes we’ve straight-up painted those walls because we LOVE the look and texture of painted brick. But after seeing a few whitewashed brick walls over on Pinterest and reading a few tutorials online, we decided to give whitewashing a spin this time. We figured if we didn’t like it we could always just paint over it!
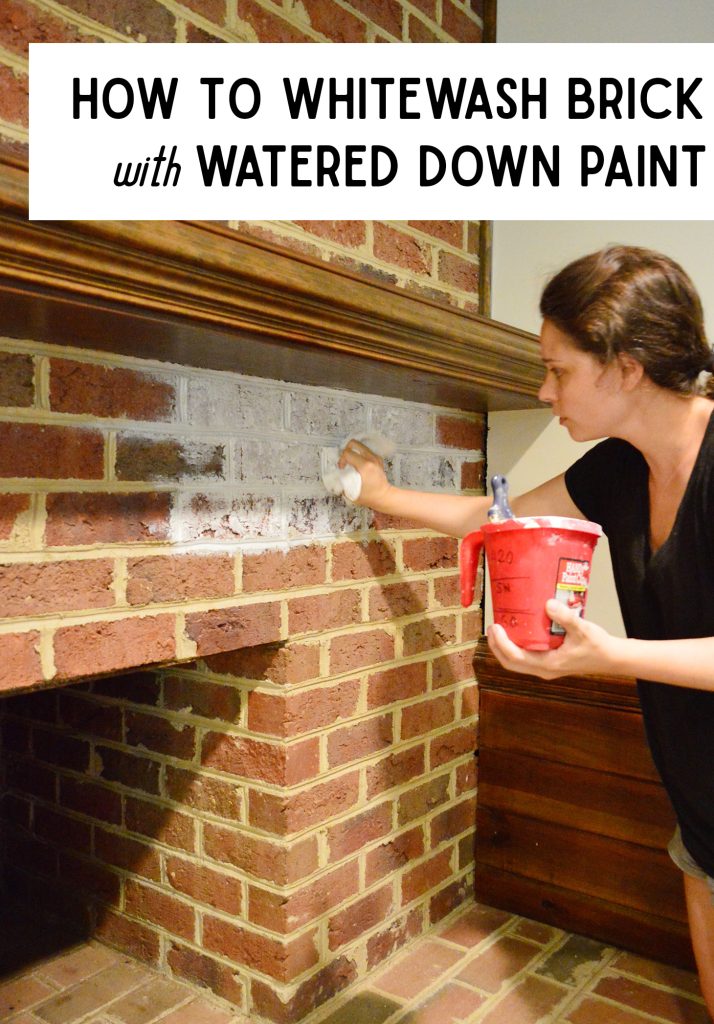
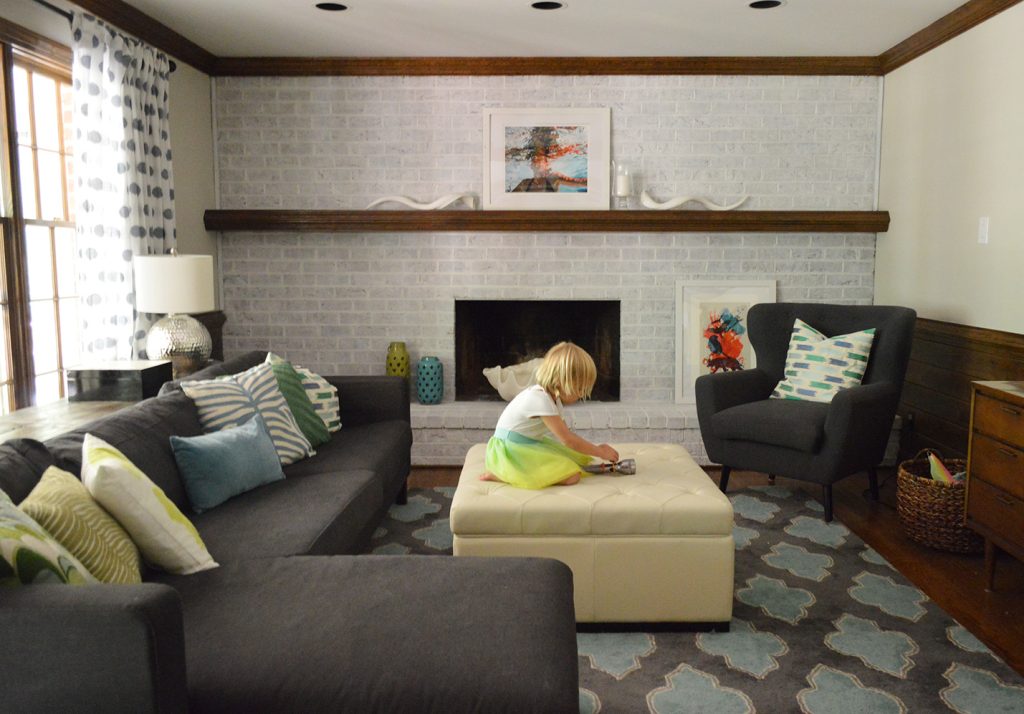
Luckily, we really like it! The room is far from done, and it might not be a forever thing, but for a day of work and a total cost of $0 we’re really pleased with the outcome.
Materials Needed For Whitewashing Your Brick
This supply list is short & sweet and probably includes a lot of things you have leftover from other painting projects:
- Regular white latex paint
- Paint pail or other container for mixing
- Paint stir stick, spoon, or other mixing device
- Paint brush
- Water
- Rags or old t-shirts
- Drop cloth and/or rosin paper
- Scrub brush or wire brush (optional)
They do make special whitewash paints and even more durable limewash applications for exterior use (similar to the paint we used when we painted our home’s brick exterior white), but for a simple interior project like this it’s fine to save your money and use regular paint you’ve used on your walls.
And, like the material list, the steps are pretty easy too. Here’s how I knocked it out in a day.
Step 1: Clean Your Brick
First, I wiped down the brick to make sure there weren’t cobwebs and old soot all over it – just a good once over with an old rag did the trick. However, depending on the condition of your brick, you may want to use a scrub brush or wire brush to remove any loose material or dirt.
Step 2: Create Your Whitewash Mixture
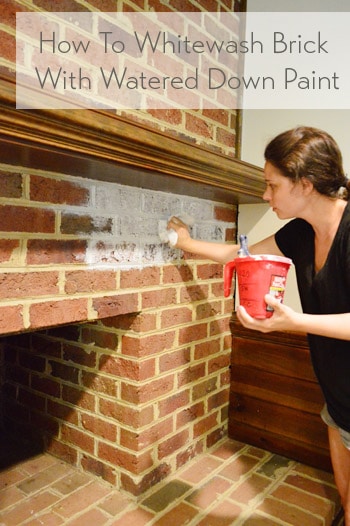
Next I mixed up a mixture of one part water + one part paint in my paint pail. I used Simply White by Benjamin Moore in an eggshell finish since had some leftover from a previous project. But any of these best white paint colors would work. The consistency was pretty drippy and watery. Imagine taking a gallon of paint and pouring out half of it and refilling that half with water.
Step 3: Apply With A Brush & Rag Technique
I used a regular paint brush to “wash” on a thin layer of this watery mixture over the whole surface, brick by brick, including the mortar. I moved quickly and sort of smeared it onto each brick with the brush, and then dabbed over it with a rag – just to remove any excess paint and absorb any drips (since it was so runny those popped up from time to time).
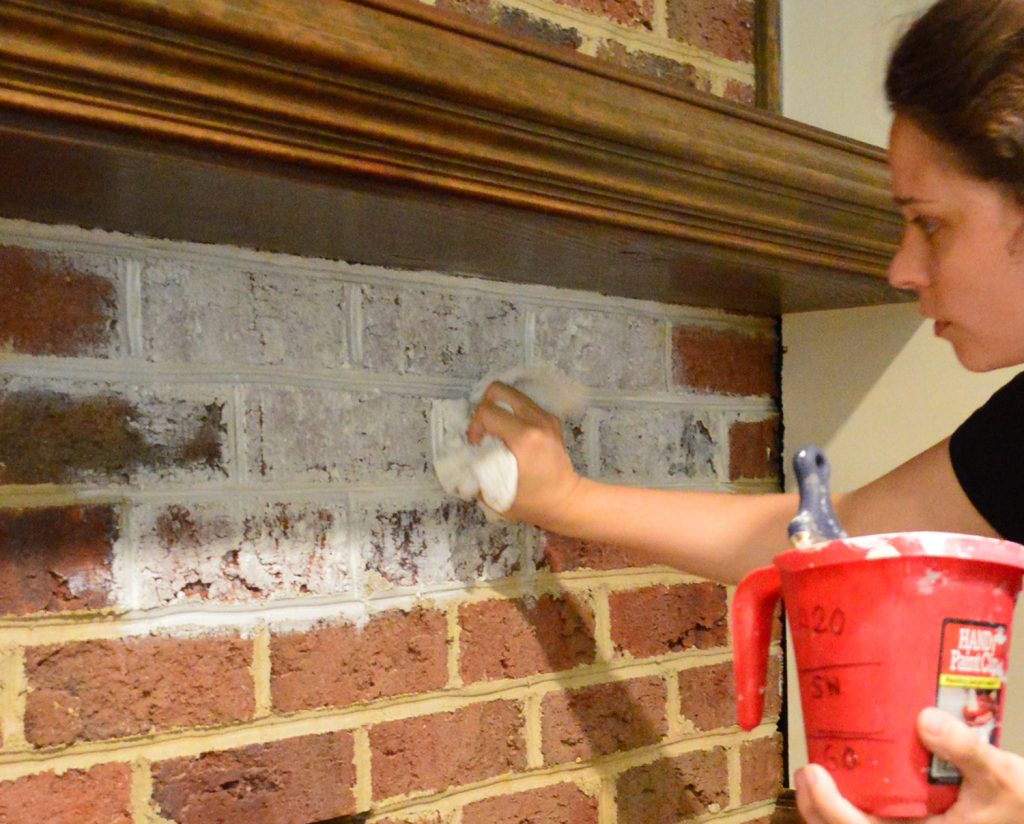
The dabbing took more arm strength than the washing-with-the-brush step, and I tried to work as fast as I could – just because I had heard that it could go pretty quickly and I couldn’t wait to step back and survey a larger area to see how it looked.
Here’s a quick video of the process for ya:
Note: You can also watch this video on YouTube.
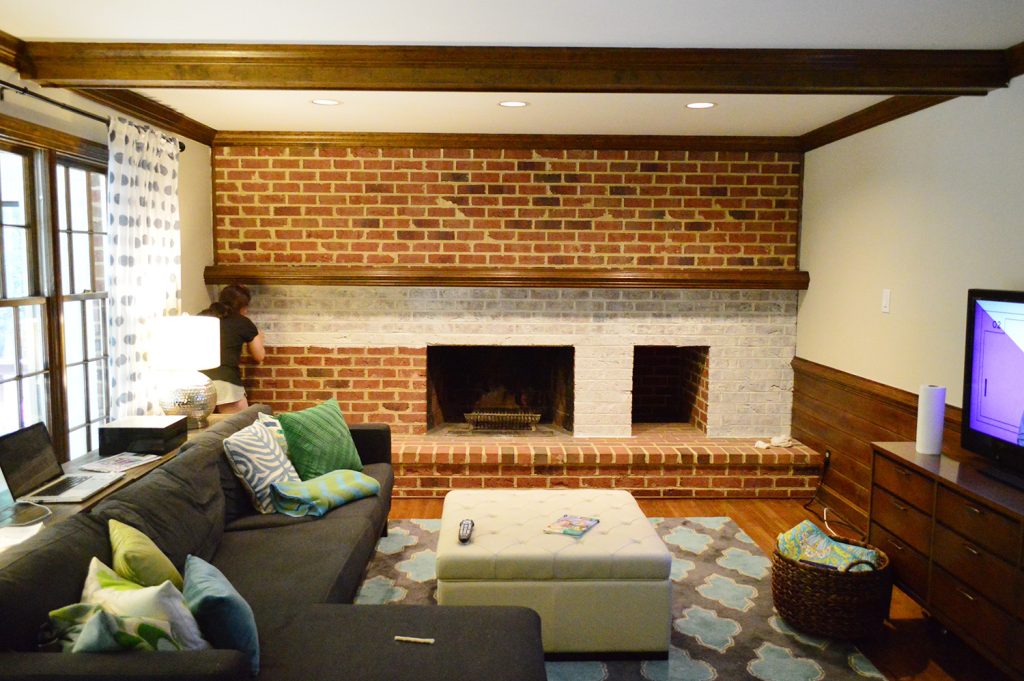
The bricks soak up the wash pretty quickly. When you first run your brush over them it may seem like you’ve straight up painted them white. But after you dab and the paint has a chance to soak in, the brick’s coloring comes oozing through.
After finishing my first coat on the wall, I moved to the hearth and realized I was about to get drippy paint-water all over our wood floors. Oops! So I took a second to tape off the floor with rosin paper. It’s waterproof, which is nice because I didn’t have to worry about any drips soaking through to the floor.
Step 4: Let Dry & Evaluate
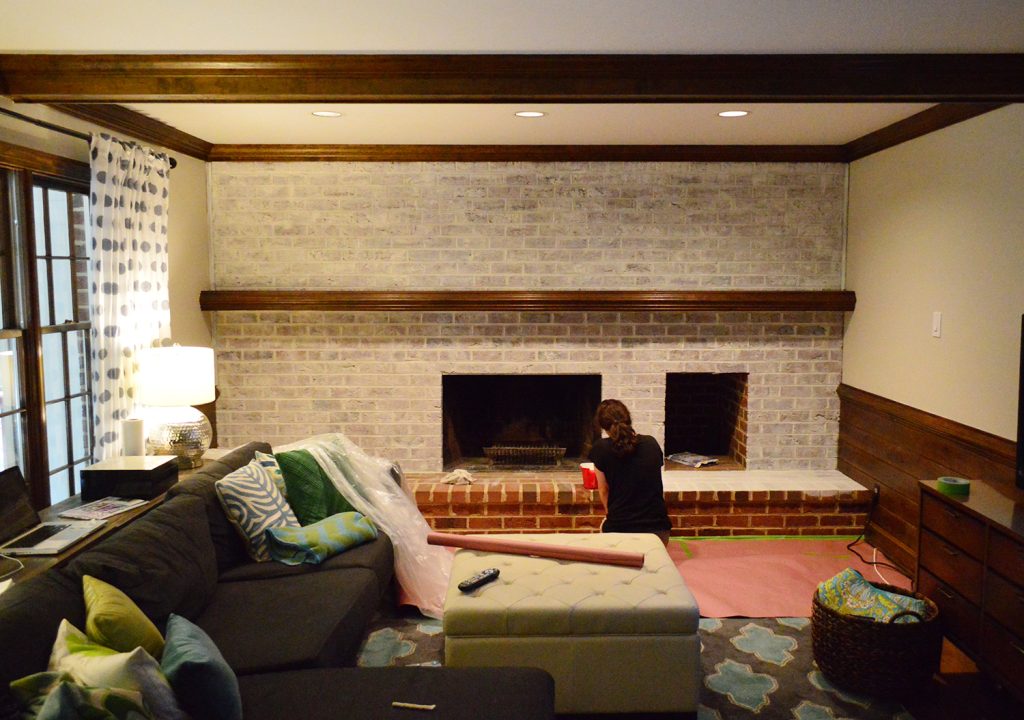
It probably took me about two hours to do the first wash and by then most of it had soaked in and dried. So, I stepped back and was faced with the question: should I leave it or do another pass? That’s the beauty of this technique – you can apply additional coats to make your whitewash more solid / opaque if you don’t like the original results.
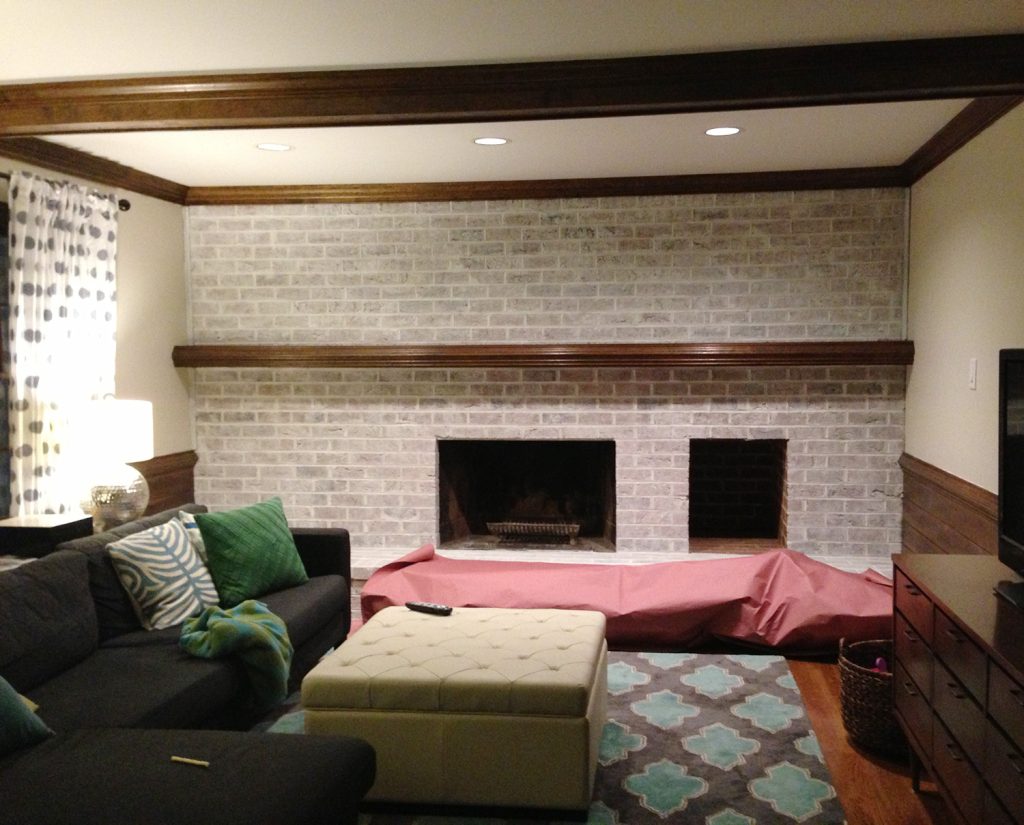
I decided that in person too much dark red and brown was still showing through in a few areas (it’s harder to tell in these photos) so I decided to go for a second coat.
Step 5: Apply Additional Coats As Needed
For my second coat, I mixed up an even waterier second wash and then went over the wall again – just to add a bit more haze. So if my first whitewash mixture was equal parts paint and water, this second mix was more like one-third paint + two-thirds water.
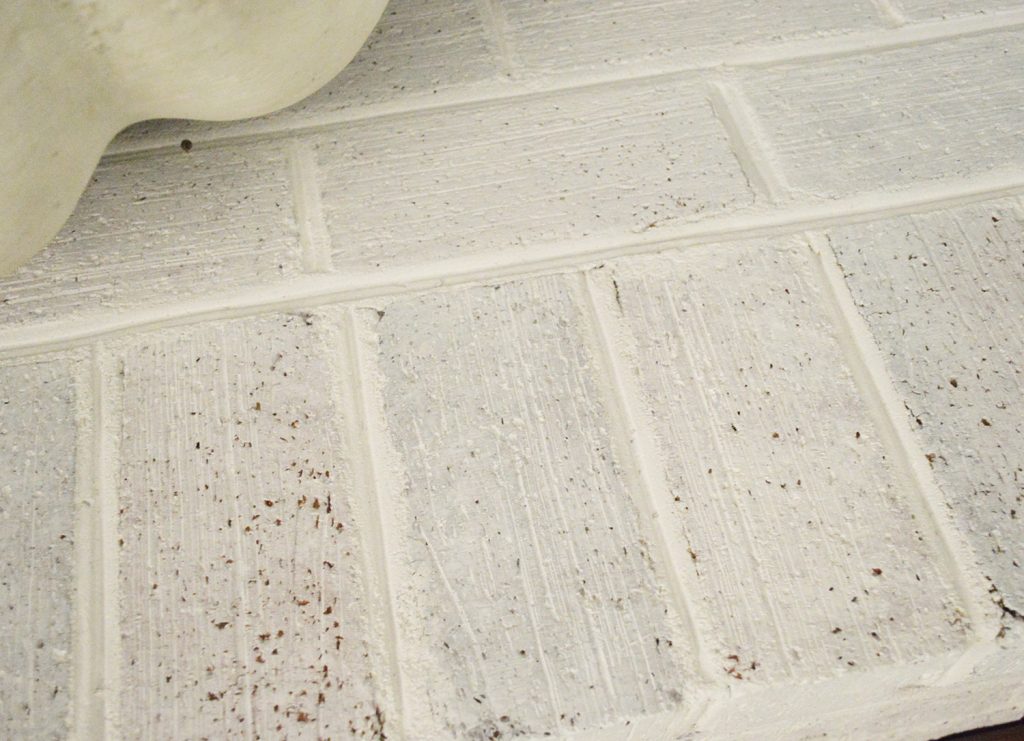
That coat was much faster – maybe an hour, tops. After that second pass, I was really happy with it. The room no longer felt as dark and cavernous, but the brick still had a lot of texture and detail in person (this photo makes it a bit harder to see than in person, unfortunately). I love the weathered effect that it gives without feeling too “faux finished” or “Medieval Times” (not that I didn’t love that place as a kid).
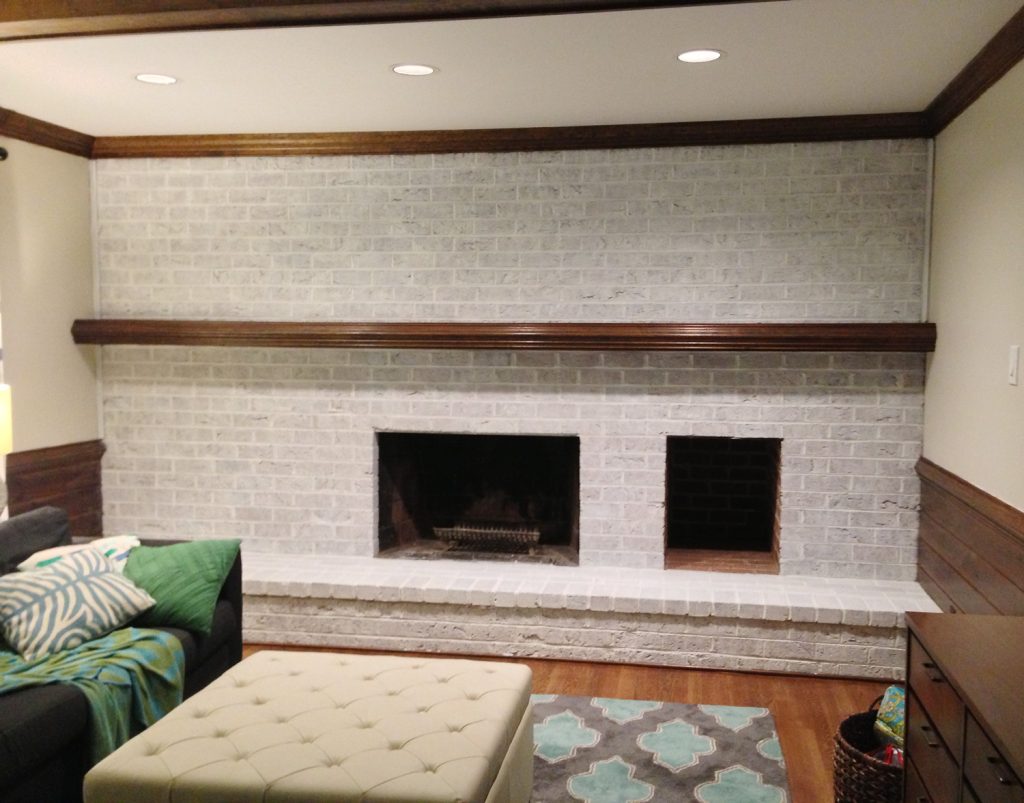
From afar the wall looks sort of chalky and textured and varied – as opposed to the glossy and super white result we would’ve gotten from painting it normally. When you get closer you see more of the pretty details of each brick. Some are a bit lighter. Some are darker. Some are craggier. It’s a nice mix.

We still have a long ways to go in this room, but whitewashing this once dark wall was a HUGE help in making the space feel brighter and less cavernous (which is tough, since it gets the least natural light of any spot in our house).
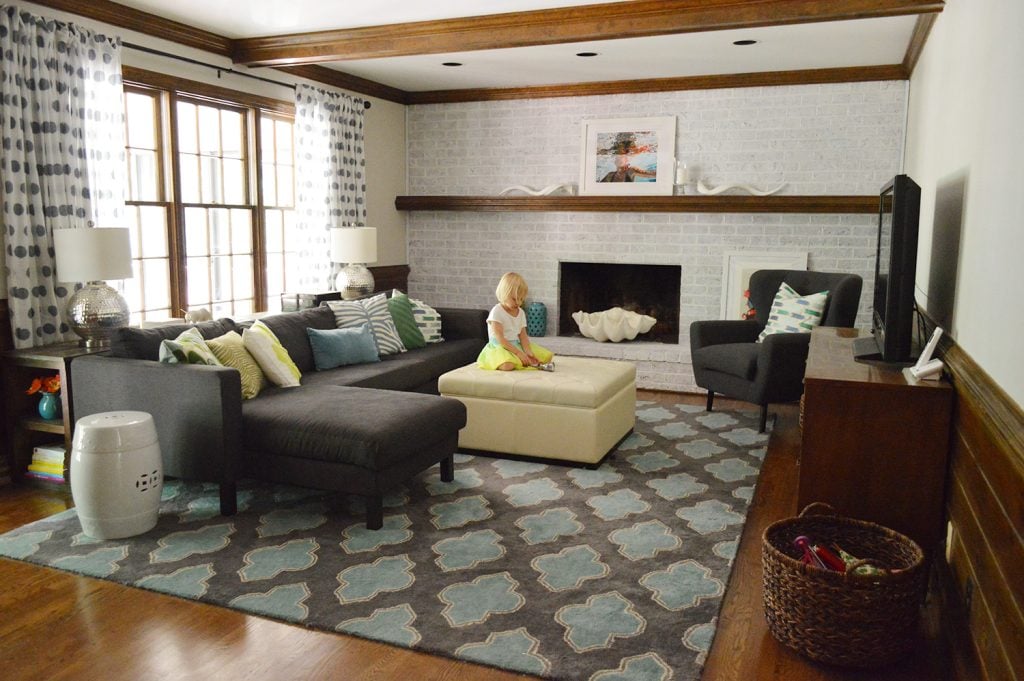
Either way, I’m glad the room is looking decidedly less salmon these days.
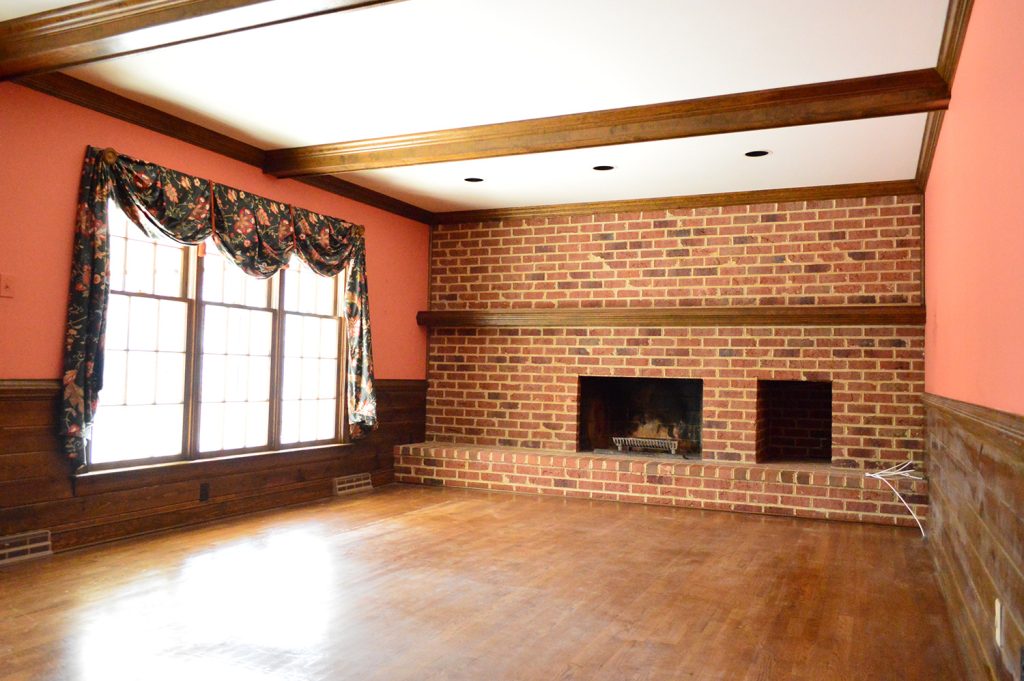
Some folks have asked if we’ve considered painting the wood beams, wainscotting, and mantle. We’re definitely leaning towards it, but we don’t want to rush into anything. I always say never to paint brick or wood unless you are 100% sure you’ll like it since it’s so hard to undo! Basically, wait until you can’t stand waiting another second to paint it and only then should you grab a brush.
Update: We Painted It!
After a few years of living with the whitewashed brick, we decided we needed to significantly lighting up the living room even more. So using a paint sprayer with painted the brick and wood Benjamin Moore Simply White, and it did wonders for the room.
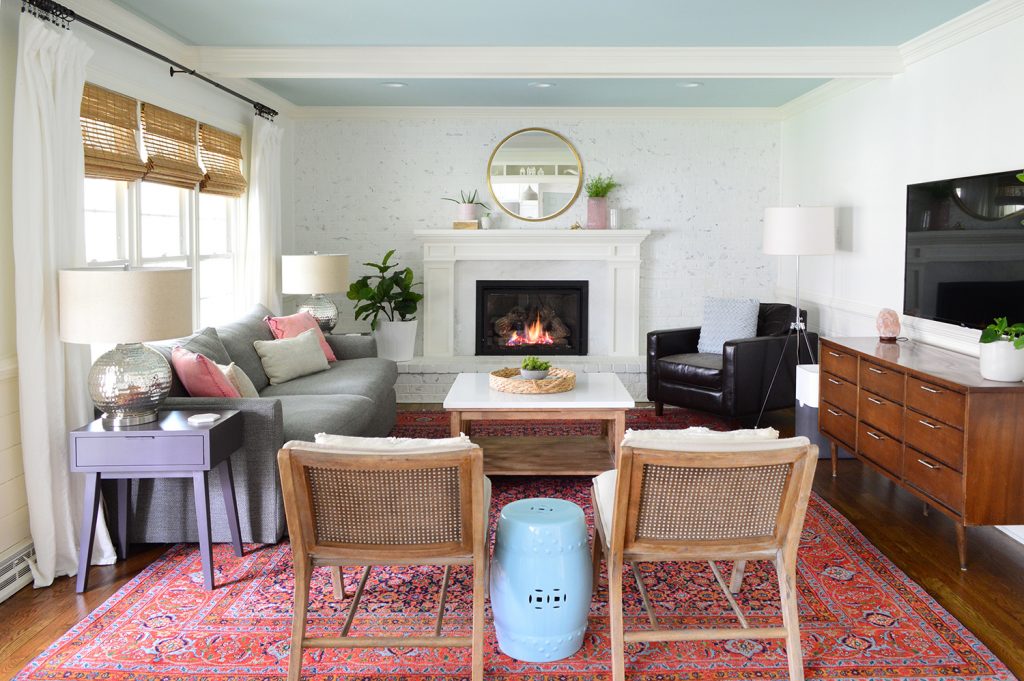
A whole lot else evolved in the room over the 7 years between the original whitewashing and when the above was taken (we constructed a new mantle, changed out some furnishings, etc), but we’re grateful that the whitewashing project gave us the confidence to make major changes to this space.
Update- We finally created this Shop Our House page to help you hunt down any furniture/accessories that you see in our house, along with all of our paint colors.

Kim says
I think that hole where you’re supposed to place wood would be super cute with a wire basket filled with comfy throws and even some yarn. Especially with the new whitewash, I just think it would look so homey. :)
YoungHouseLove says
Cute!
xo
s
Lynn says
It looks awesome! Orange brick is definitely a hard thing to work with – I think you made the right decision.
Eri says
Great job. Now the room looks bigger and opener. And funny what the lighting and the surrounding color can do — now I can tell the new paint is indeed edgecomb (as you mentioned, it wasn’t instantly clear after the painting).
One quick question — what is the sheer of the leftover white paint you used here?
YoungHouseLove says
It was an eggshell finish. Will add that to the post too!
xo
s
Karen L. says
Great job! We bought a home in WV years ago that the previous owners had white-washed the brick fireplace and it was one of the reasons we bought the house. It just made everything else seem more contemporary and fun. I loved that living room with it’s white fireplace, white beams, park bench green walls and bright art touches! Good memories there like you’ll have in this living room in the years ahead, too!
Alexandra Schelling says
LOVE!!!! The changes so far have made such a huge difference, I can’t wait to see the next few steps! Now I wish I had some brick to whitewash in my house haha :)
Kristina says
Did you guys actually paint the room already? > or is that just the primer? I remember a post about priming the room, but can’t recall a painting post, but I may have missed it.
YoungHouseLove says
That’s paint in the same soft tan tone as the foyer. Here’s that post for ya: https://www.younghouselove.com/2013/08/lightening-up-in-the-living-room/
xo
s
Kristen says
I’m a little sad that you guys will be painting the trim (I like the contrast against the white walls), but I know that the room is going to end up looking awesome!
Myra @ MyBlessedLife.net says
This is perfect! I’m getting ready to do the exact same thing! So good to see a video tutorial of how you did it. :)
Candice says
I love it. I’ve been trying to convince my husband (and his mother)that it’s perfectly acceptable to paint brick. His mom is of the, “you just DON’T paint brick or real wood cabinetry, ever” camp, and hubs always said he thought it looked ‘cheap’. Her belief I can understand, his made me laugh. Especially after we just bought something on Craigslist from a person who lived in a historical, well to do area and half the mansions (yes mansions- some of them even have historical titles that include mansion in them) were painted brick. He’s agreed that maybe it’s not that cheap after all.
Anyhow- my question has to do with the inside of the fireplace (and sorry if someone asked faster than I type…). Did you leave it the original brick color? Is it painted black? Is it just brick and soot color? I’m not staring at our fireplace right now and can’t remember but I think ours is one of those fire boxes in black. I know there is such a thing as high heat fireplace paint. But what did you guys do and what was the reasoning for it? Thank you.
YoungHouseLove says
That’s just soot, but we’re planning to add a gas insert since we used the gas fireplace in our first house so much!
xo
s
Meredith says
My question is along the same line as Candice’s question… I went to Sherwin Williams today to buy some white paint for white washing my brick fireplace too. The sales guy said that I need a high heat paint… even for painting the OUTside of the fireplace. He said you risk the paint melting for the foot border around the fireplace opening. As you guys painted your first fireplace (and based on other comments, used it alot too), did you have any of this “melting” problem? I assume not since you didn’t use a high heat paint this time around but I had to ask for my own insurance :) Love your work!!!
YoungHouseLove says
Never heard that about the outside! Thankfully we never had an issue!
xo
s
christina @ homemade ocean says
So funny! I saw your comment on Katie’s photo of Weston’s room (hi my name is Christina and I am a total stalker) and I told Tim, I said, “Tim, mark my words there will be a white washing tutorial on YHL this week”. He is going to be so impressed with my psychic abilities haha. And for that I thank you.
YoungHouseLove says
Haha, you’re a mind-reader!
xo
s
Eri says
Oh, and one more (unsolicited :) comment — now the walls and the brick are painted, I can see the trim/mantel shelf stained like the beams of the living of your second house. Glossy white may not pop enough, it seems… just my impression from the photos.
Olivia says
Looks gorgeous! Have you ever thought about painting, or can you even paint, the inside of a fireplace? Just wondered since you said you’re going to add color on the opposite side of the room.
YoungHouseLove says
If you’re planning to use the fireplace it’s best not to paint the inside, and we’re planning to add a gas insert down the line (we used the one at our first house so much).
xo
s
Heidi says
Do you have any fears that oily/sooty parts may bleed through the whitewash and require additional coats?
YoungHouseLove says
That’s a good question! I thought about that a few times but nothing has come through so far! Will keep you posted though!
xo
s
Nicole says
hmmm did I miss when you got those curtains? are they navy blue? I want to bring navy into my tanish living room. love it.
YoungHouseLove says
Those are the ones from our last house’s guest room (from Ikea a few years back, but I don’t think they sell them anymore).
xo
s
Megan @ Rappsody in Rooms says
Wow! I wasn’t expecting this but I really like it! Great choice! I love how you are always pushing yourselves to try something different. It really was a no lose project since you could have painted it if you hated it.
Ashley [7th House on the Left] says
Love the look of this!
kristi says
Oh my gosh it looks so nice with all the wood tones. Really really consider leaving the wood guys!
Katie says
Love the whitewashing!! Btw, I recently used this 1″ square brush for painting trim & it is AWESOME!! Had to tell you about it just in case you hadn’t used it yet.
Zibra 1 in. Square Moulding and Trim Brush(avail at orange or blue)
Love your blog:))
YoungHouseLove says
I heard about that! I’m going to have to give it a try!
xo
s
KathyG says
I like it. I’ve always preferred painted brick too. Just a simple preference, I guess.
And, I just painted an Adirondack and a glider (oh those slats!) and it was the best one. I had a bit larger one on hand as well to brush the middle, but this little square one was the best for the edges and trim pieces. I do think you’ll like it.
Theresa says
Katie, you are so right! Love that brush!
Julie @ Living on the Ledge says
Loving the whitewashed brick – you’re right, you definitely need to be 100% about those sort of things, but I 100% think you made the right choice here…very “you”!
Marie in BR says
I love the look, I was wondering how long before the brick got a treatment. Check out this picture of end painted logs. May look cute in your space. Might be a good kiddie project. I know my son loves to help paint.
http://www.theartofdoingstuff.com/painted-wood-a-summer-fireplace-idea/
YoungHouseLove says
So cute!!
xo
s
Patti says
Yippee! I was waiting for this post as I also have a dark red brick fireplace. I wasn’t sure what to do with it so I didn’t do anything and I knew you had this on your to-do list! Looks great, thanks so much for the tutorial. And your new veranda is amazing!
Emily says
Awesome work! Love the whitewash version of your brick fireplace this time around. I’m totally in the camp of “leave the wood be!” though. Have you thought about a lighter-colored rug? That might help? x
YoungHouseLove says
We’ve definitely thought about a grayer tone for the wood, a lighter stain or wash, painted wood, leaving it be, etc. I promise we won’t do anything unless we’re certain it’s the way we want to go!
xo,
s
Sarah says
As long as we’re talking about what to do with that hole, I vote logs, but take it one step further by painting them a la The Art of Doing Stuff http://www.theartofdoingstuff.com/painted-wood-a-summer-fireplace-idea/.
YoungHouseLove says
LOVE that!
xo
s
Sara Bell says
Where did you get your curtains?
We are moving next week (to DIY house #3 together as well) and my old curtains, which took me months to find, won’t fit the new living room. Gray is so hard to match! We have a gray sofa as well.
Love your blog! You have made me braver with color. Plus, I was able to share your deck recomendations with a friend this week who is doing something similar. :)
YoungHouseLove says
Thanks Sara Bell! They’re from Ikea a while back but I don’t think they sell them anymore.
xo
s
Tracy D. says
You might still be able to get them on ebay or Amazon. Oddly enough, there are lots of Amazon sellers who have old Ikea stuff that isn’t in the stores anymore. I just ordered some curtains that I never got around to buying when they were in the store from a seller on Amazon. Free Prime shipping too!
YoungHouseLove says
So good to know!
xo
s
Ashley says
Beautiful job! The room looks amazing and tranquil. :)
Lexie T says
What a difference! It will look so nice and fresh with the trim painted. Like a new room!!
Alison says
I love the whitewashed look on the fireplace!! I am secretly crossing my fingers that you keep the wood trim and maybe stain it darker or something, rather than painting it all white. Aren’t you tired of painting trim? haha. :)
ShellyP says
Hey Sherri. That whitewash effect looks so much better, fresh and modern. I think it’s a better solution than straight up painting the brick out entirely. That horrible salmon space is becoming transformed. I can envision the rest of the wood trim (windows, wainscoting and beams) being painted out and what a difference is will make. Karl seems too large for that space; proportion is so important in design. And, I can envision drapery panels that offer more contrast, are fuller and less casual. I know you want to upgrade how you have handled window treatments in the past and I look forward to seeing this room transform.
Bravo!
Caitlin says
Again, I’m always amazed at how such small changes can make such an enormous (and beautiful) difference. I wonder if Clara’s going to grow up thinking everyone’s parents buy and DIY redesign every room of their home.
Paula W says
I’m with you on white trim, just my preference. Looking really great! That is a big brick wall you addressed but the choice was really a great one I think. (Though your stacked stone link is pretty compelling down the line…). Onward!
Katie O says
Well, to be honest, I’m kind of bummed. I was pretty excited about the prospect of you whitewashing the brick because I thought it would look neat-o. But I’m just not a fan. It’s probably just the pictures, but the white paint on the fireplace makes the walls look off-white (dirty?) and just makes the brick look unfinished. I’m sure if you guys are thrilled with it, it’s rocking in person. Once you paint what you want to and add art, textiles, etc., you may make a liar out of me though!
Katie says
We have a wall of bricks in our house, but the mortar is black. Would the white-washing work on that part too, or would it look funny?
YoungHouseLove says
I think it should work by lightening everything up!
xo
s
Sandy says
To close the hole in the fireplace, can’t John just place some bricks with concrete at the opening? Yes I know I make it sound that simple and it may not be, but I can see it being closed with some bricks and then washing/painting it and you will never even know a hole was there. There’s gotta be something out there that can be done rather wait until you eventually tile or whatever you guys want to do.
YoungHouseLove says
Sure, I think we could do that too! Although now everyone is making me want to fill it with pretty logs or a basket full of folded blankets!
xo
s
Katie says
Hmmm sorry, I’m not a huge fan of this! I think it looks like you started priming the wall for painting but then didn’t finish. Perhaps the camera picks it up differently, but I MUCH prefer the look after only the first coat. I also think it clashes with the creamy wall color – they’re both around the same lightness, but different tones. Brick appears very cool and the walls appear very warm and they clash. Maybe you should have done the whitewash with your same wall color?
YoungHouseLove says
I think once the bright white color is on the wood trim it’ll all balance out (this wall color is in our foyer with wood trim and we love the look of the crisp white and the warm tan). Here’s hoping!
xo
s
Karly says
I vote for stripping the mantel and staining it a driftwood grey! But whatever you guys decide to do will look awesome as always!
Julie S says
I think you guys should take down that room-width mantel and pop a nice marble or stone surround over your fireplace hole. The current setup makes everything look so squat!
YoungHouseLove says
Ooh, I think I like that idea!
xo
s
Mia says
I second that thought
Mariangela says
Agreed! The mantle is a beautiful piece of wood that would look great left as is and repurposed into something else (steps, chunky shelving etc). Rather than paint it just to make it blend in better, it could be freed to flourish elsewhere. I think a surround like the one you built in your last house would also frame the fireplace better, he’d look more buff with extra definition :)
YoungHouseLove says
I’m loving this idea guys. Not to convince John the Carpenter… haha!
xo
s
Kathryn says
I think this room has officially entered ‘the middle makes no sense’ for me. Can’t wait to see where you take it!
Jennifer says
Glad you gave it a try. I think this will help set the whole room in motion!
kates says
I love white washed brick! If my next house has a fireplace I plan to white wash it!!!! The room is looking so much bigger with all that white!!
Marcie says
Just curious. When you paint the trim will you also be painting the window sashes (if they are wood) or leave them as they are? I’d like to paint some woodwork in our house but we have almost new window sashes color stained to match our oak trim. I really hate to mess with them.
YoungHouseLove says
Oh yes, white for those just like we did to all of them upstairs!
xo
s
Samantha says
That looks SO good! perfect example of how you can take an “older” “outdated” home and make it beautiful again. My husband and I LOVE DIY and home projects. we’ve been living in a newer home and hate that there is no character. I wish we had some projects!
IMO, the beams are beautiful! I havent read the other posts, so sorry if I repeat advice. I do love the idea of painting the trim and wainscoting, but you could always leave just the mantel and beams wood. that would still look great! I have a thing for white board, with gray walls.
Good luck on your project! Id kill for exposed beams!
Megan Clark says
Great change! I agree, the painted trim/mantel will really improve the wall color. I’m a firm believer paint can take on multiple looks based on what it’s paired with! On the fence about everyting being “too” white… what about wallpapering the wall behind the TV once the wood is painted? I think seeing some color beyond accessories would keep the room more balanced. Love watching the transformation either way! Oh, and where did you get those great pieces on the mantel, flanking the picture? Having a hard time finding affordable, white ceramics!
YoungHouseLove says
Thanks Megan! Those are from Pottery Barn on clearance a while back (they’re ceramic horns).
xo
s
Chris says
I seem to be in the minority but I really like the wood beams and trim. So much character and class.
Kassie says
Love the new look! We just painted our exterior bricks on our house. We contemplated it for 2 years and finally just did it. We are so glad we did! Anyway, yours looks great!
Susan says
The room is looking fabulous.
I did a double take when I saw the hole by the fireplace. Never noticed it before and you’ve been sneakily covering it with that frame. It would be an interesting place to put a large ceramic animal. ;-)
Nancy says
Looks great! I have been trying to talk myself into taking the plunge and whitewashing the knotty pine in our den. I am so worried it is just going to look like half painted walls and not as cool as it is in my head (or in the magazines). Great job just going for it!
Mia says
So was this an example where you walked into the room the next morning and just smiled? (as you once said about the 2nd house dining room and handmade curtains).
YoungHouseLove says
Haha, yes. Completely.
xo
s
danielle says
you guys AMAZE me. amaze me.
we’ve lived in our house for 2+ years and *JUST* painted our first room. just in the past couple of weeks.
it’s totally inspiring to see you make such huge changes in the house so quickly– you truly must both have an amazing gift for imagining what something will look like. i waffle back and forth so much that it’s hard for me to commit to something!!!
loving it!
YoungHouseLove says
Aw thanks so much Danielle, you’re so sweet! Best of luck with everything!
xo
s
Tracy D. says
I think you should live with the wood a little longer!! It’s SOOOO pretty as is. And looks like it’s in great shape. Of course, you should do whatever y’all want and what you prefer (obvi) and I’m not one of those people who think that painting wood trim is always wrong and a violation of some law of nature or something, but I just think it’s so pretty! Can’t wait to see what you guys do next though!!
bethblntn says
I love love love love love the white wash! This is new for you guys… on brick anyways, right? Your first house was painted brick not white washed right? what ever the case is, it looks so good. love the subtle look of brick with a nice cohesive color. so cute!
YoungHouseLove says
Yes, we painted brick in our first and second house, so this was our first go at the whitewash rodeo! Haha!
xo
s