Did you know you can give your whitewash your brick fireplace with paint you already have around the house? We were able to give our fireplace wall a fresh look in under a day and with no money spent!
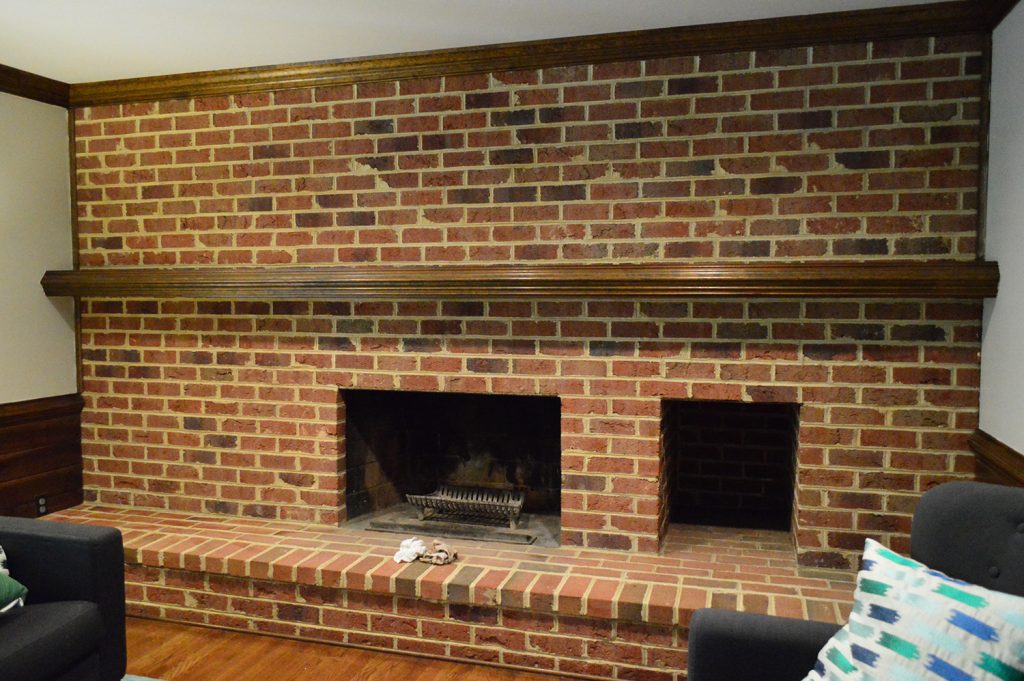
We don’t mind unpainted, exposed brick, but in all of our houses it’s been an unattractive orangey-brown brick – not that pretty rustic red brick you find in New York apartments. So in previous homes we’ve straight-up painted those walls because we LOVE the look and texture of painted brick. But after seeing a few whitewashed brick walls over on Pinterest and reading a few tutorials online, we decided to give whitewashing a spin this time. We figured if we didn’t like it we could always just paint over it!
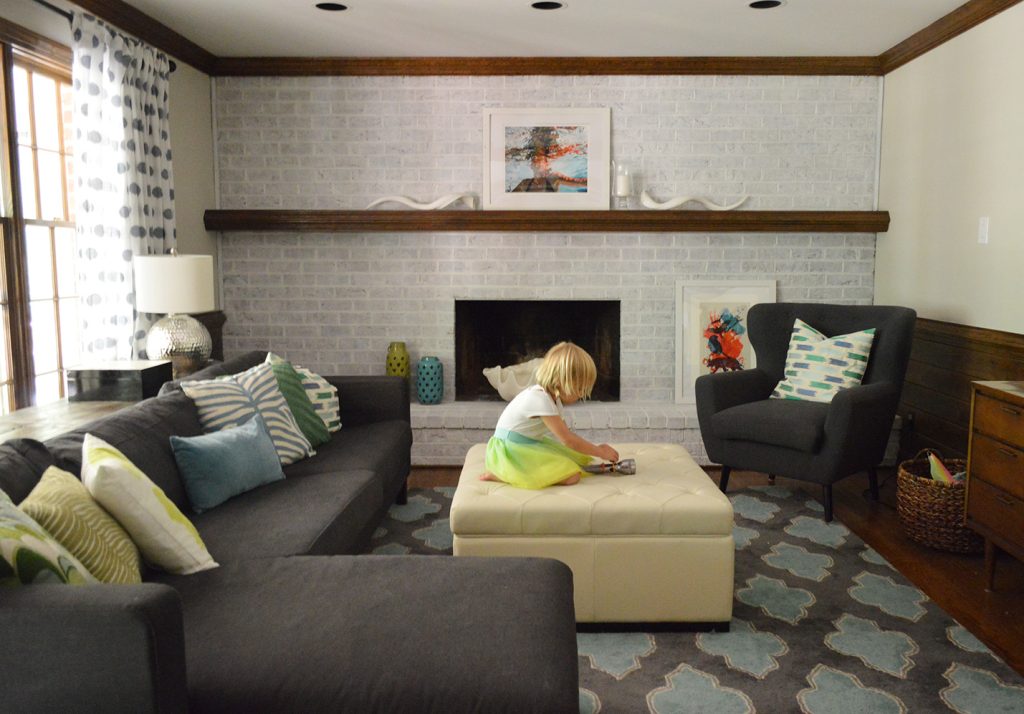
Luckily, we really like it! The room is far from done, and it might not be a forever thing, but for a day of work and a total cost of $0 we’re really pleased with the outcome.
Materials Needed For Whitewashing Your Brick
This supply list is short & sweet and probably includes a lot of things you have leftover from other painting projects:
- Regular white latex paint
- Paint pail or other container for mixing
- Paint stir stick, spoon, or other mixing device
- Paint brush
- Water
- Rags or old t-shirts
- Drop cloth and/or rosin paper
- Scrub brush or wire brush (optional)
They do make special whitewash paints and even more durable limewash applications for exterior use (similar to the paint we used when we painted our home’s brick exterior white), but for a simple interior project like this it’s fine to save your money and use regular paint you’ve used on your walls.
And, like the material list, the steps are pretty easy too. Here’s how I knocked it out in a day.
Step 1: Clean Your Brick
First, I wiped down the brick to make sure there weren’t cobwebs and old soot all over it – just a good once over with an old rag did the trick. However, depending on the condition of your brick, you may want to use a scrub brush or wire brush to remove any loose material or dirt.
Step 2: Create Your Whitewash Mixture
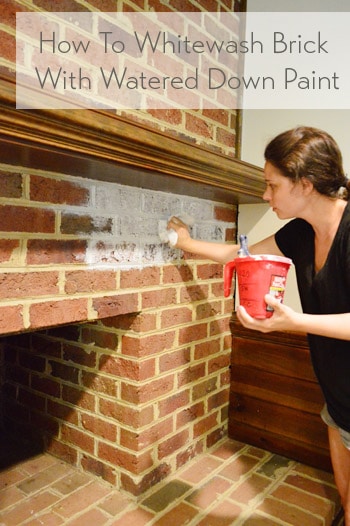
Next I mixed up a mixture of one part water + one part paint in my paint pail. I used Simply White by Benjamin Moore in an eggshell finish since had some leftover from a previous project. But any of these best white paint colors would work. The consistency was pretty drippy and watery. Imagine taking a gallon of paint and pouring out half of it and refilling that half with water.
Step 3: Apply With A Brush & Rag Technique
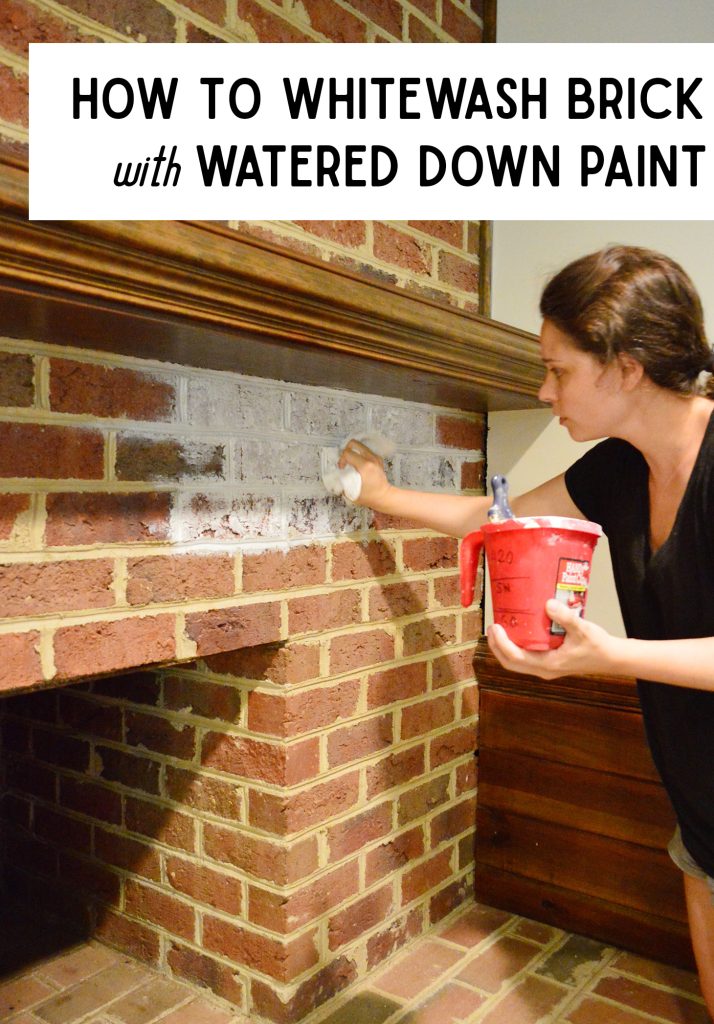
I used a regular paint brush to “wash” on a thin layer of this watery mixture over the whole surface, brick by brick, including the mortar. I moved quickly and sort of smeared it onto each brick with the brush, and then dabbed over it with a rag – just to remove any excess paint and absorb any drips (since it was so runny those popped up from time to time).
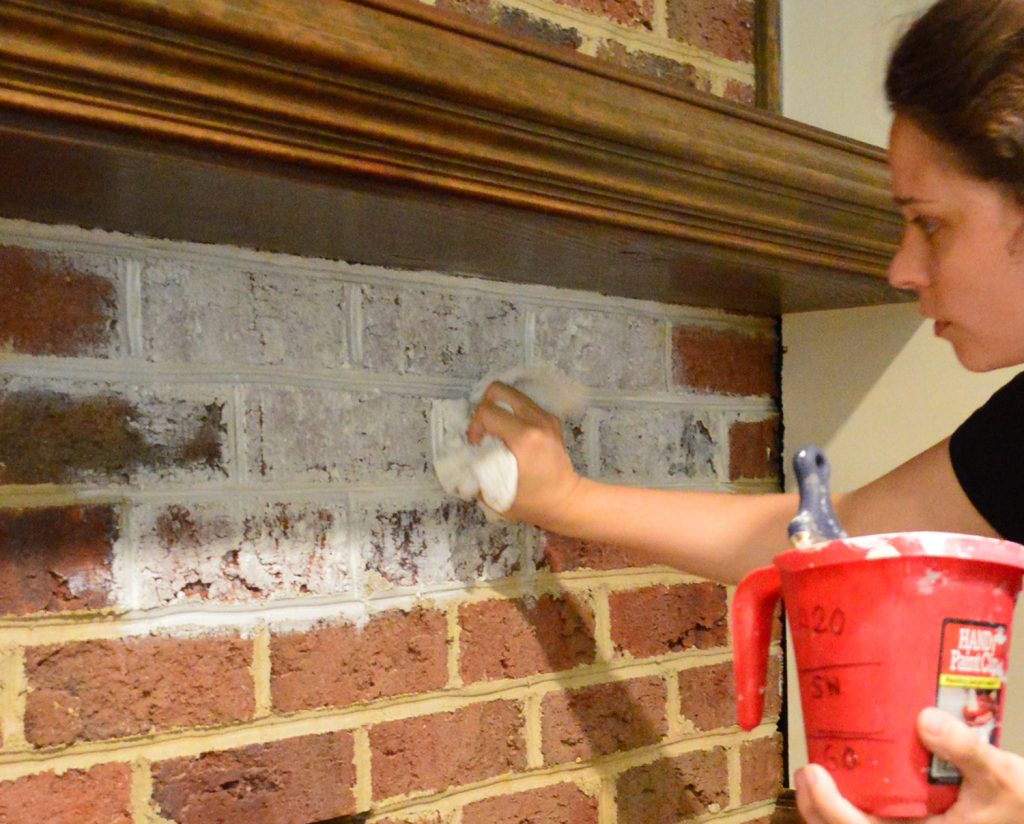
The dabbing took more arm strength than the washing-with-the-brush step, and I tried to work as fast as I could – just because I had heard that it could go pretty quickly and I couldn’t wait to step back and survey a larger area to see how it looked.
Here’s a quick video of the process for ya:
Note: You can also watch this video on YouTube.
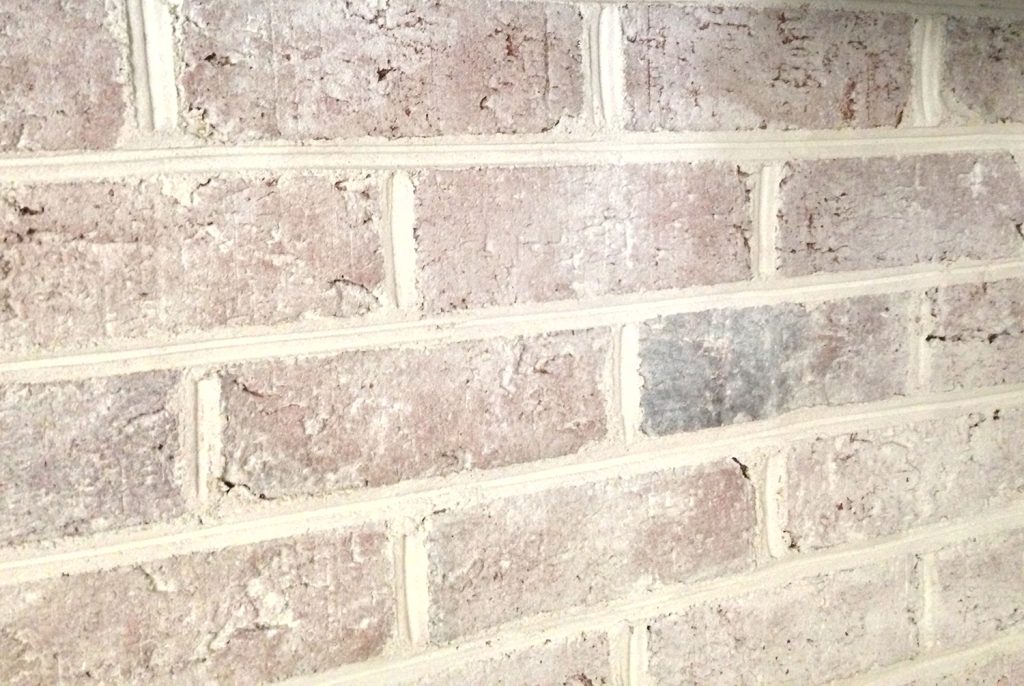
The bricks soak up the wash pretty quickly. When you first run your brush over them it may seem like you’ve straight up painted them white. But after you dab and the paint has a chance to soak in, the brick’s coloring comes oozing through.
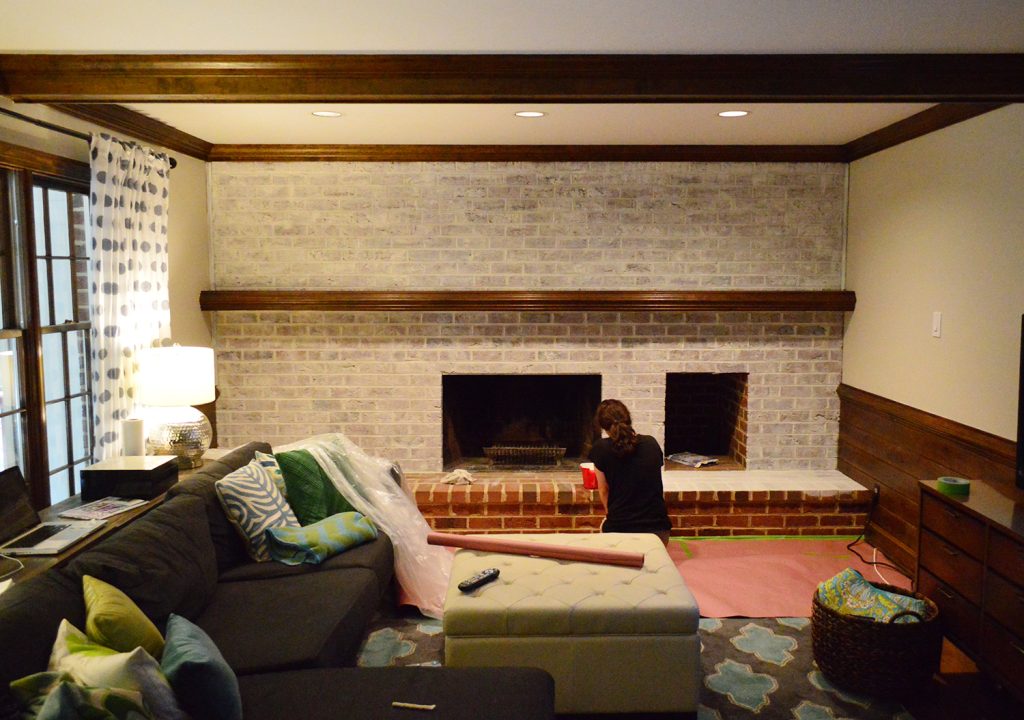
After finishing my first coat on the wall, I moved to the hearth and realized I was about to get drippy paint-water all over our wood floors. Oops! So I took a second to tape off the floor with rosin paper. It’s waterproof, which is nice because I didn’t have to worry about any drips soaking through to the floor.
Step 4: Let Dry & Evaluate
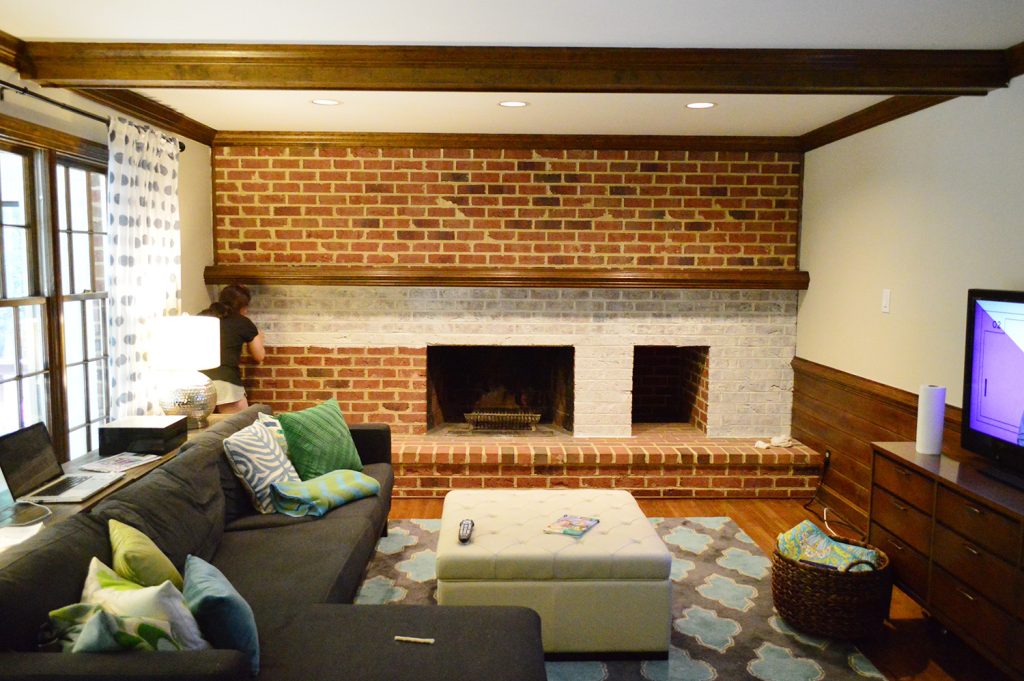
It probably took me about two hours to do the first wash and by then most of it had soaked in and dried. So, I stepped back and was faced with the question: should I leave it or do another pass? That’s the beauty of this technique – you can apply additional coats to make your whitewash more solid / opaque if you don’t like the original results.
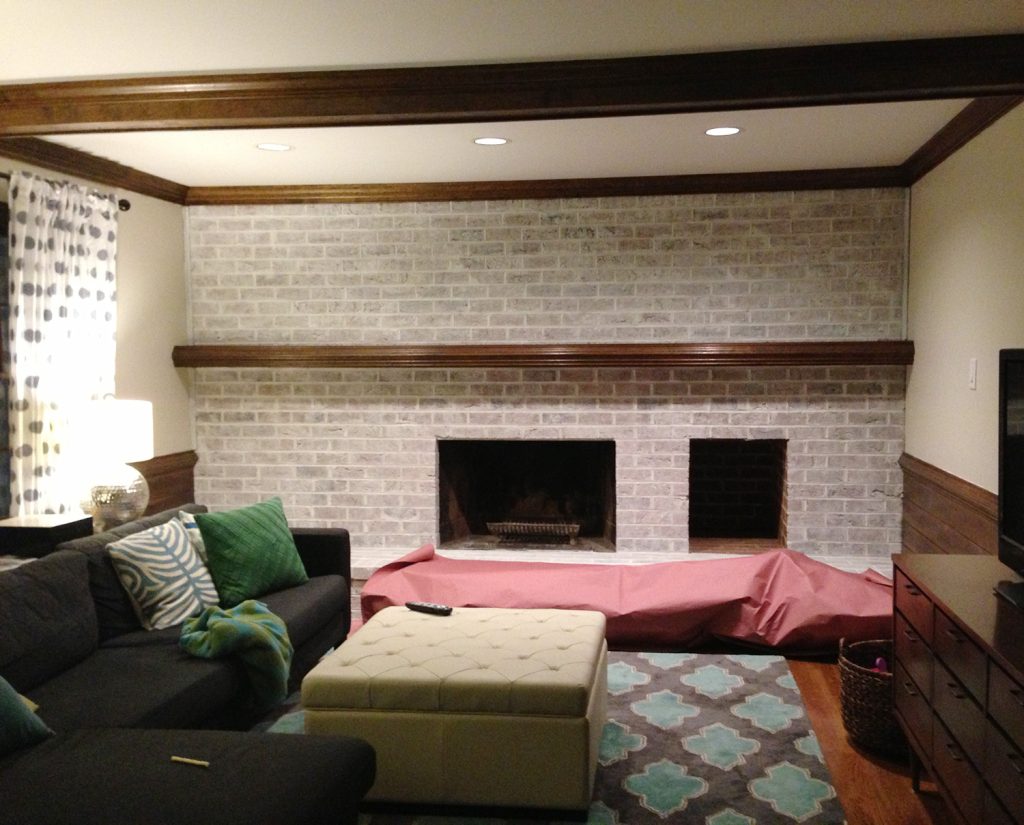
I decided that in person too much dark red and brown was still showing through in a few areas (it’s harder to tell in these photos) so I decided to go for a second coat.
Step 5: Apply Additional Coats As Needed
For my second coat, I mixed up an even waterier second wash and then went over the wall again – just to add a bit more haze. So if my first whitewash mixture was equal parts paint and water, this second mix was more like one-third paint + two-thirds water.
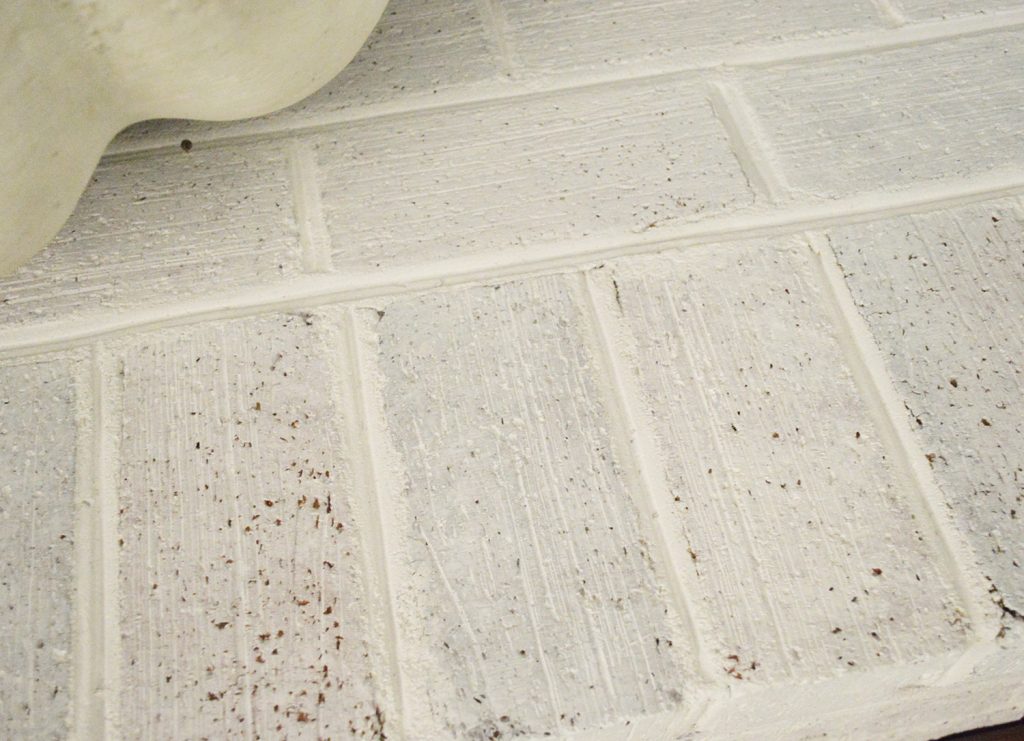
That coat was much faster – maybe an hour, tops. After that second pass, I was really happy with it. The room no longer felt as dark and cavernous, but the brick still had a lot of texture and detail in person (this photo makes it a bit harder to see than in person, unfortunately). I love the weathered effect that it gives without feeling too “faux finished” or “Medieval Times” (not that I didn’t love that place as a kid).
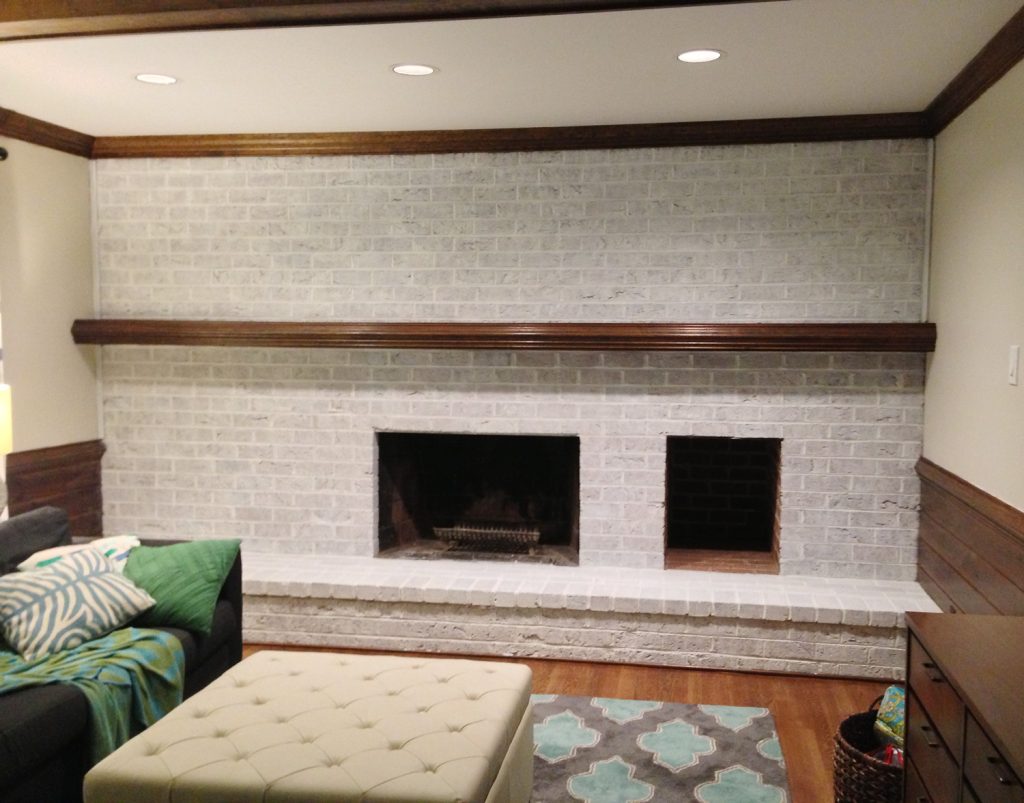
From afar the wall looks sort of chalky and textured and varied – as opposed to the glossy and super white result we would’ve gotten from painting it normally. When you get closer you see more of the pretty details of each brick. Some are a bit lighter. Some are darker. Some are craggier. It’s a nice mix.

We still have a long ways to go in this room, but whitewashing this once dark wall was a HUGE help in making the space feel brighter and less cavernous (which is tough, since it gets the least natural light of any spot in our house).
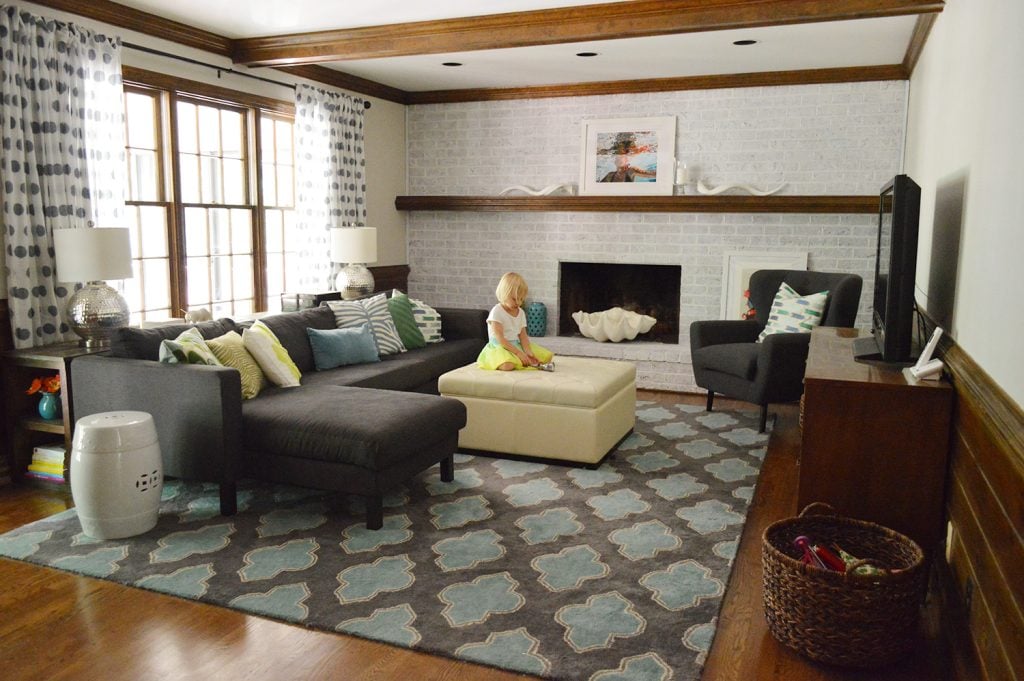
Either way, I’m glad the room is looking decidedly less salmon these days.
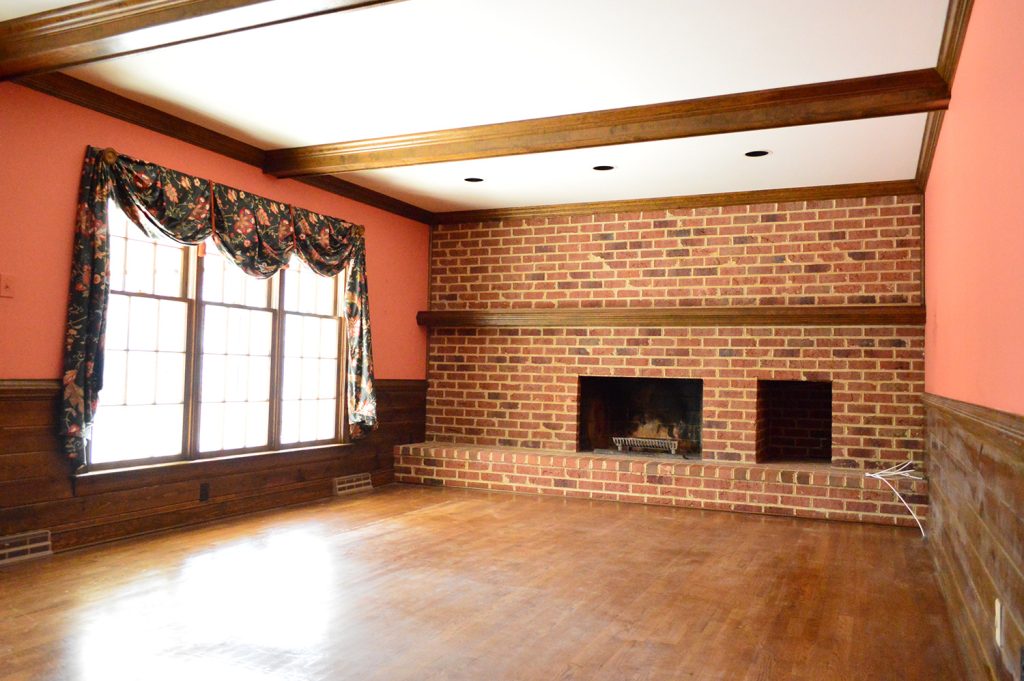
Some folks have asked if we’ve considered painting the wood beams, wainscotting, and mantle. We’re definitely leaning towards it, but we don’t want to rush into anything. I always say never to paint brick or wood unless you are 100% sure you’ll like it since it’s so hard to undo! Basically, wait until you can’t stand waiting another second to paint it and only then should you grab a brush.
Update: We Painted It!
After a few years of living with the whitewashed brick, we decided we needed to significantly lighting up the living room even more. So using a paint sprayer with painted the brick and wood Benjamin Moore Simply White, and it did wonders for the room.
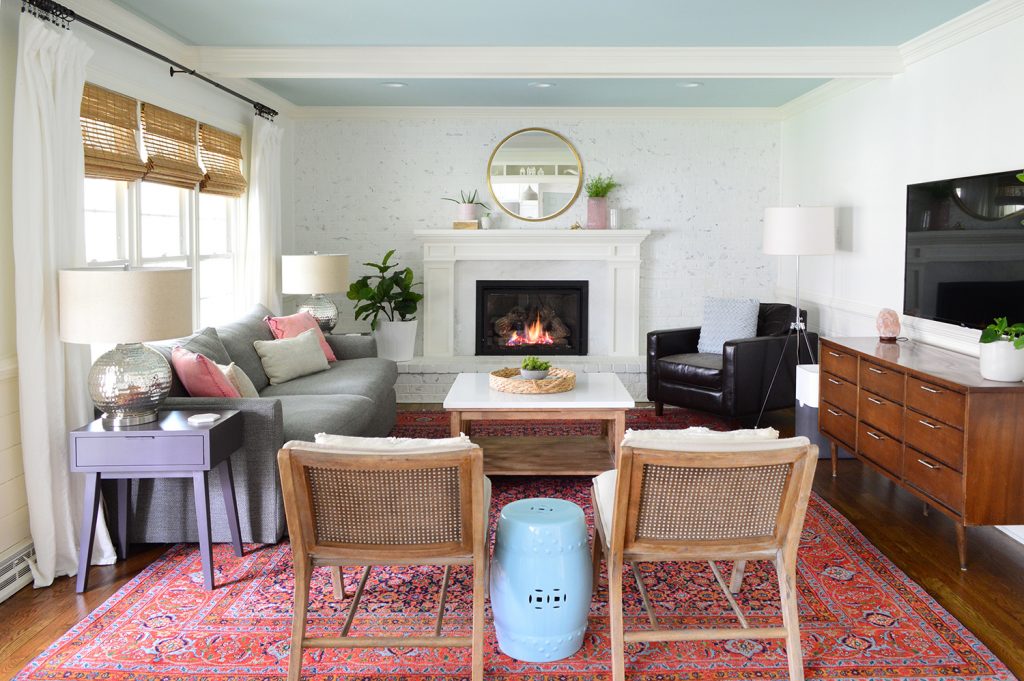
A whole lot else evolved in the room over the 7 years between the original whitewashing and when the above was taken (we constructed a new mantle, changed out some furnishings, etc), but we’re grateful that the whitewashing project gave us the confidence to make major changes to this space.
Update- We finally created this Shop Our House page to help you hunt down any furniture/accessories that you see in our house, along with all of our paint colors.

taria says
I have a tough time with painted brick and wood both. I like the wash better than full on paint. I don’t know how long it is going to take but I see a time when all the blogs are stripping a lot of the painting that has been done everywhere.
I hope you can make the natural wood work for you and don’t paint it. I know it will look terrific when finished though even if it isn’t my first choice.
Kelsey says
What sheen of paint did you use? Leftover semi-gloss from the trim? If so, does it look shiny at all? I need to do something with my eyesore of a fireplace, but I’m worried that a shiny coat of paint would make it stand out too much.
YoungHouseLove says
It was eggshell (leftover from the half bathroom walls). It’s very chalky and not shiny at all.
xo
s
Lauren says
I loooove it! I adore exposed brick and this looks beautiful. Airy but you can still see the variations in texture and colour. If ever I land a home with brick (it has to happen one day!) I would do the same.
annie @ anniehearts says
Wow you guys are on fire this week!
First the AMAZING sunporch (I see mountains of potential there!) and now the brick wall (I see mountains of potential there too!).
It’s all so thrilling! I can’t wait to see what you do next.
Annie XO
Mia says
Sorry if mentioned before: maybe use same color paint inside the stacked-wood-hole as used for the back of the built-ins?
YoungHouseLove says
Could be fun!
xo
s
Sarah says
I think it looks awesome! The one thing that stands out to me in the room currently is the table/ console behind the couch! I loved it in the last ginormous living room you had, but it seems far too large for the room & is eating up valuable space. The room would feel much larger with the couh against the wall, and end tables instead, no??? I get it though, as it is such an awesome piece, it would be hard to take out of there!
YoungHouseLove says
I agree that the sofa would totally work if it was pushed back but we just use that thing so dang much! It’s where we put everything since we don’t have a coffee table, ya know?
xo
s
Laurie says
Have you tried photoshopping the trim in white paint to see how you feel about it? I am in the paint it white camp for sure. However, my family room has original, real wood beams and one of my first projects was to paint them white. 14 years later I am kicking myself for it. I wish I had left them alone. However, we also had very dark wood paneling and I did paint that white and have never regretted it. My burning question really though is, do you regret cutting bangs into your hair? I haven’t seen you with bangs since your original photo so just curious if you are happy you did that?
YoungHouseLove says
Haha! I love that that’s your burning question! I wore them down for a few special occasions, but doing them everyday just didn’t work for me. My hair grows so fast they’re already completely grown out though, so I don’t think I regret them. They were fun every once in a while! Haha! As for photoshopping the room, I haven’t tried that yet but it sounds fun!
xo
s
Em says
I think painting the beams a glossy white would look great (especially if you’re going to coffer the ceiling), but please don’t paint the mantle! The rich wood is such a nice contrast on the newly-lightened brick.
Natalie says
Gorgeous! The white washed brick makes the room look so much brighter. Great job!
Joanna says
I agree with the previous poster about replacing the mantle. The current one doesn’t focus on the fireplace and makes the ceiling look low.
I love watching your house(s)evolve!
Tiffany says
It is looking awesome! I have been tossing around the whitewash idea for my own monstrous fireplace which is not as wide but 12 ft tall. I’m so glad you posted this because it’s given me the confidence to dive on in! :)
janice says
Looks great!
I have a brick fireplace in my LR and am debating painting it – but the LR walls are a light beige and I’m not sure white would be good for the fireplace, not even sure about whitewashed…..and so I haven’t done anything with it so far. . . . it only covers part of the wall (centered on wall) and only goes halfway up, and has a mantle that is painted white. Any thoughts? (anyone?)[oh, maybe I should post this in the forums]
YoungHouseLove says
Hmm, I would post a picture on forums or our FB page for ideas!
xo
s
Tirsa says
Loving the progress. I can’t wait to see all the wood painted and how you inject more color into the space.
You have inspired me to white wash the huge brick fire place in our den. It occupies a whole wall just like yours and has BLACK grout. Whitewashing sure seems less time consuming than painting.
Do you think it would be better to use a gloss paint white wash combo for the bottom part since it will be stepped on and brushed against with things, etc?
YoungHouseLove says
Sounds smart! I’d go semi-gloss for that!
xo
s
Abby says
Ah! I love it! I did the same thing and I am obsessed. I just need to build a mantle to finish it off.
http://mrsincrediblyaverage.com/2013/03/16/white-washing-brick/
YoungHouseLove says
Looks awesome Abby!
xo
s
Marissa C says
Thoughts on whitewashing vs limewashing?
YoungHouseLove says
I read about limewashing and it sounded awesome but being a paint girl myself (and seeing more tutorials for latex paint) I just felt better going with that method. It was really easy!
xo
s
Abby says
Ah! I love it! We did the same thing and I am still rubbing on it daily. Now I just need to add a mantle.
http://mrsincrediblyaverage.com/2013/03/16/white-washing-brick/
YoungHouseLove says
Looks awesome!
xo
s
Diana says
Ohhh…looking so much better!! Makes me want to buy my parents’ house/my childhood home and paint that brick fireplace. Well I’ve been thinking about wanting to buy it eventually anyways but you are giving me too many ideas…
Em says
When you guys first kicked around this idea, I thought it might look too shabby chic and wouldn’t look right in the room. But, I can’t believe how good it looks! Kudos to you guys on this. I don’t comment often, but couldn’t hold back on this one. Best project of your new house so far by a landslide (and yes, I’m including wallpaper removal in that group!)
YoungHouseLove says
Thanks Em!
xo
s
Shannon [Our Home Notebook] says
I love the white wash on your fireplace. It lightens up the room so much. So exciting to see this room come together.
Kim says
I cant wait to see the wood painted! I personally would choose the brick or the wood to paint and leave one natural. As there was just so much brick – it never looked like the fireplace was framed, it just sort of looked lost but with the wood the fireplace pops now so I would leave the wood as is or maybe stained darker. I think painting the wood too is going to make the room too white and sterile with no contrast but that is why I am dying to see it – I have such a hard time picturing things so I am intrigued to see the befores and afters to see which way I prefer. I think the contrast but who knows!
chez says
I like the whitewash. Adds some depth that is nice versus straight painted brick (we have a white painted brick fireplace). Are you going to paint or replace the mantle? It would look good in white. I think it’d also look nice to remove it and add a large rustic beam in its place for some contrast to the ceiling beams. Just an idea!
YoungHouseLove says
Yes, we’re considering both painting it or replacing it! Will keep you posted!
xo
s
Amy@TheBlissfulBee says
Loving it!! The room already looks SO much brighter.
xo, amy
Crystal @ 29 Rue House says
I think it looks great (can’t wait to see your plans for the wood trim/coffered ceiling play out :) and I also love that you’re sharing as you go. That is sort of the fun/mission of YHL (do you have an official mission?:) – to watch everything transform/change as it happens. I feel like I’m going to get serious here…Watching the process is part of the learning experience – it helps you see how things work together and how they don’t. Whereas when you just see a picture of a super nice room done by a fancy interior decorator it can sometimes be hard to see what makes the work so perfectly.
YoungHouseLove says
Aw thanks Crystal!
xo
s
Kathryn Griffin @TheDedicatedHouse says
Love, love, love it! Looks so much better! You know, you guys can really knock the projects out. Very impressed with how much you’ve gotten done in the new abode. Wishing you a happy week! Toodles, Kathryn @TheDedicatedHouse
Laura says
I love, love, love painted brick, so this looks awesome. So much better than before. What a quick way to drastically change the look of a room.
Sylvia says
I have been dreaming of whitewashing our brick chimney for weeks now! So glad to see a post from you guys about it!
My house has a brick chimney running through our living room and master bedroom (so not a full wall of brick or anything – just the chimney) what are your thoughts on colour? Can I get away with white? Or should I “whitewash” with the same colour as the walls to help it blend in? The current dark brick is just so dark & dreary that anything is going to be an improvement?
Love your blog & book! Thanks for sharing!
YoungHouseLove says
I think you could do white or a soft wash of the wall colors. Both could probably look great!
xo
s
ElleB says
I think the mantle and beams are worth waiting on painting…in the darker wood finish they add some interesting architectural detail to the space (though your typical white is always awesome!)
Mahareen says
I love the whitewashing effect on the brick, an improvement over the bare brick fireplace for sure! However, I agree with someone who said earlier that it looks like the wall is just primed and waiting for a coat of paint. I think culprit is not just the contrast with the wood beams but also the contrast with the wall color. Maybe a whitewash with the Edgecomb gray would look more pulled together? Anyway, the room looks way better than salmon!!
YoungHouseLove says
Thanks Mahareen! I think once we do the trim & wainscoting bright white that will tie the crisp white tones of the fireplace in with the wall color (we have that wall color in the foyer with bright white trim and doors and it’s such a pretty and soft mix). We shall see!
xo
s
Mahareen says
I do love myself some bright white trim – can’t wait to see it!
Mahareen says
Love me some bright white trim – can’t wait to see it all done!
Suzanne says
Yay! The white washing made a huge difference. I’m definitely on the paint-the-wood bandwagon, so I can’t wait until you guys get started on that!
Claire says
I love the way this looks! Beautiful and SUCH a huge improvement from those salmon beginnings…. I really love how natural it still looks, but so much more polished. And LOVE how you covered that awkward second hole in the fireplace with that picture! I saw the second hole in the “during” pictures and was like “whoa where did that come from??” then did a speed scroll back up to see what you did with it, and that picture right over it is pure genius! The room looks beautiful!
Ethne @ Wom-Mom says
My sweater is salmon-colored today. In memoriam. So glad that the Petersik house is leaving those colors for clothes these days! The brick looks good!
YoungHouseLove says
Haha! In memoriam. That reminds me of The Talking Dead when they go over the zombies that die in slow motion. Hilarious.
xo
s
Kelly says
I emailed you guys about three years ago about painting a dark red brick fireplace white since it sucked all the life out of the condo that my husband and I had just moved in to. Sher-dog’s advice? If I think it will brighten the space and improve it, DO IT. And. I. Did. It made the biggest difference in the world! More people commented on the white brick than I can even count and it made me feel so confident! Now, fast forward to present day and our family has grown with the addition of one handsome little man named Max and we just moved into a new house that has a red brick fireplace that’s about to get a slap of whitewash up in his grill. You guys are amazing!!! xox
YoungHouseLove says
Aw, I’m so glad Kelly!
xo
s
Stephanie Geary says
Could you do something like this on a working (firewood) fireplace? Or would it need to be fireproof (do they even sell that?)
YoungHouseLove says
Oh yes paint and whitewash works for a wood burning fireplace, just don’t do the inside of the firebox!
xo
s
Jenna says
Love it! Thank you so much for doing this project. We’ve lived in our house for 4 years and I’ve been holding off on painting our orangey-red brick fireplace in our kitchen. As you said, we wanted to live with it for a while and be sure it’s what we wanted to do. I’ve always loved the whitewashed look and had no idea how easy it is (or sounds, haha). Maybe now I can work up the courage to go for it! Thanks guys!
Karen says
Uh-oh, am I the lone dissenter? Sherry, of course you guys have amazing taste, and I just adore this blog , and yeah it’s easy to criticize behind a computer screen. Just my opinion. But I need to be honest.
The finished look kinda seems like you’re in-between coats! It doesn’t look “finished” to me. It looks like you guys did a coat, and you’re waiting to do the other coat. IMO, I think one of two things should happen:
1. Paint it completely & fully white
OR
2. Rough it up a bit, so it looks old and deliberately rustic. I would rub off some white in different areas – not all of it, just some, to make it look worn.
Am I banned now?
YoungHouseLove says
Haha, you’re definitely not banned! In person it looks rougher- we mentioned we just can’t seem to get a shot that looks true from far away. Will keep trying fo sho!
xo
s
Hanna says
One thing I noticed was that on my work PC it looked very light — at first I thought you had just painted it — but when I checked this morning from my husband’s home PC it was much darker. I actually thought you had gone through and taken new pictures. (But how did they get Clara to sit in the same position? LOL) I must have my screen brightness turned higher, or my contrast lower, on my work computer. Anyway, you can see the color variations much clearer on the different screen. :)
YoungHouseLove says
So funny!
xo
s
Dani says
Wow, that really makes the room look a lot bigger! I really like it a lot. Although if you do ever decide to go to the stacked stone look, I can tell you it’s a pretty easy project. We did it on our fireplace (which just had a little builders mantel, so we had a build a 2×4 frame for the tile). You can see a quick pic I snapped of it here: http://www.danimiller.com/blog/wp-content/uploads/2013/08/2013-08-20-13.12.19.jpg
YoungHouseLove says
That’s awesome to hear!
xo
s
BeccaK says
I kind of like the look so far, although the holes are creeping me out (they look like your wall has possessed, misshapen eyes)! :) I think the wall color will work better once the wood trim is painted, too – the room is really coming together!
Jenny D says
I like the whitewash, but those walls need some color!!
Momlady says
Don’t let the detractors get you down! The fireplace looks amazing. When the wood is painted a crisp white it will tie the whole thing together (and will make the wall color “make sense”). I think it will also help the room “relate” to what you’ve started in the foyer and have described as your vision for the
rest of the house. You are giving the house a clean/classic base which will give you so much more room to play with texture and colors! Keep up the good work!
Sarah says
Man, some commenters are really hating our the YHL projects. I’m not a big fan of this particular one but to say that “you are ruining this house for potential buyers” is totally missing the point. This house was bought as a HOME for THEIR family, not to guess what a potential buyer may like when/if it’s up for resale. They are decorating it the way they want, just like most DIY home bloggers (and home owners) do, and those that like their style (or even just them) tune it to read and follow the progress.
On occasion a project will be posted that’s not my particular taste, doesn’t mean I go bashing people, Sherry and Jon never said I had to whitewash my brick, just that they did it and love it. I think I’d like them less if I thought they were DIY’ing based on what they thought readers and others want to see, or what’s soley on trend vs. what they really love. That’s how you get diversity in DIY home blogs and diversity in ideas.
I don’t get why those that dislike the blog or YHL style, continue to read on and then post passive agressive comments…why waste your time, unless you in fact have nothing better to do?
Just sayin’
Christa @ BrownSugarToast says
Wowza! I can’t believe the difference already! And you haven’t even been living there that long! So impressive. It looks so, so much better already. And, btw, I LOVE how you took the sliding doors off the porch. Can’t wait to see more of what you guys come up with!!! :)
Emily says
I know someone earlier commented about it, but I would be really interested to see a photoshop-ed picture with the wood in the room painted white. I understand wanting to lighten it up and match the other trim in the house, it just seems to me like you would lose the architectural detail of the dark mantel/ceiling beams. Have y’all considered painting in phases?
YoungHouseLove says
Oh yes, we’ll most likely chip away at it in phases! Thankfully we’ve pinned a ton of rooms with white wainscoting, mantels, trim, and beams (it seems to be the most common look by far) so we think it’s a really standard thing to do – and it just happens to be what we’re most drawn to. In our first living room (which we probably loved the most of all, haha!) we had painted trim and brick and paneling and beams and we just loved how cozy and warm that room was for us.
xo
s
Cara says
Love!
Theresa says
When I saw the picture of the brick whitewashed I was surprised how “eh” it looked. Then you put in the close-up. I can imagine the whole wall looking that fabulous. The salmon cave is no longer! (sorry I just called your room a cave but it seemed pretty dark) But one question, did you wash the wood part of the wall? That part looks dry and dusty in the last photo but pretty and glowing in the others.
YoungHouseLove says
Must just be that photo! We didn’t do anything to the wood part yet.
xo
s
Suzanne says
That really changed to look of the room a lot more than I anticipated. I was anxiously awaiting this project. Looks great!!
Theresa says
And I just saw your ;) under the heading…. Thanks and right back at ya!
YoungHouseLove says
Haha, thanks Theresa!
xo
s
Rebecca M says
I think Silver Fox from BM would look awesome on the walls now with the whitewashed fireplace! Either that or some other sort of medium gray.
Anna says
There is a wonderful product out there for all of you complaining about broiling hot or freezing cold sun rooms. Several companies manufacturer “mini- split heat pumps” which are the answer to easily heating and cooling any extra room in your house. While they need to be installed by a HVAC person they plug into existing outlets. As a Richmonder, also, my screen porch was enclosed almost four years ago and I am still singing the praises of my “mini”. That and huge windows I can open make my life happy.
YoungHouseLove says
Sounds awesome Anna!
xo
s
Laura says
I love the way the paint is updating your new living room. I know its not my house, but I loved the color you painted your second house’s living room beams with the gray color… yall really want to do white beams this time?
YoungHouseLove says
That’s how we’re leaning right now, but we love the idea of a light blue ceiling between them!
xo
s
Paige @ Little Nostalgia says
Oh man, I have ants in my pants for you guys to start painting that wood! It’s amazing how different the wall color looks between this room and the foyer, and it’s all because of that trim. I hope you have it on the front burner! :-)
Nadia says
Holy cow! That room that fireplace just upgraded that room to Elle decor status!! So jealous!!