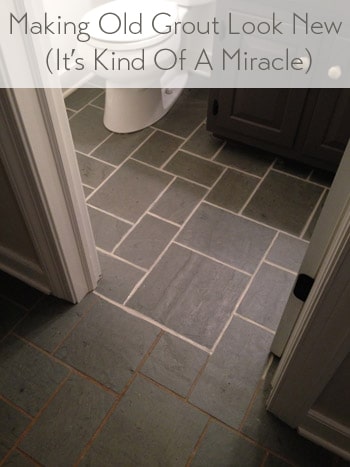
The discolored and dirt-stained grout in the tile floor of our foyer looked super old and gross, but after trying nearly a dozen cleaners and cleaning tricks we nearly gave up. Then we finally find THE SOLUTION to making the grout look white and clean again!
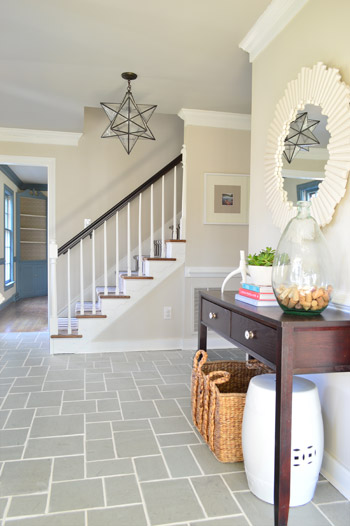
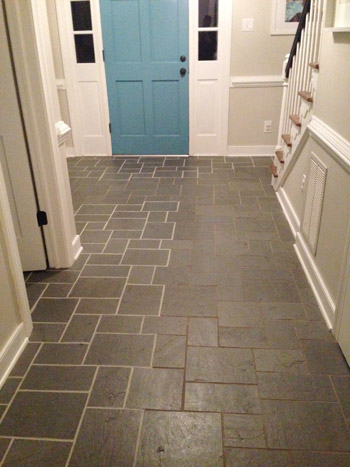
Now that we’re done, you can see how the view just got a heckova lot better around here. The crisp white grout lines play off the white trim and make the whole space feel newer and cleaner.
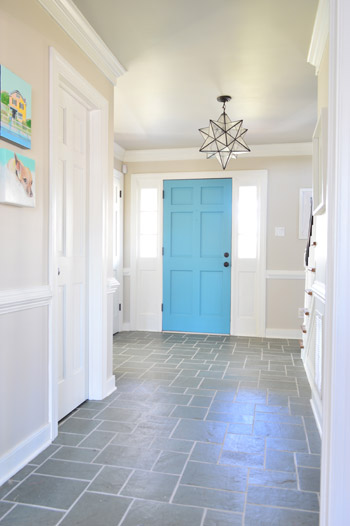
The funny thing is, it wasn’t actually cleaning that did the trick. So if you’ve got a similar issue with discolored or stain grout, here’s our official intervention: stop scrubbing! Well, maybe give scrubbing a fair shot, but don’t be discouraged if it gets you nowhere. There’s another way!
Cleaning Tricks That DIDN’T Work
As you might recall, for the past six months that we’ve lived here, it has looked like this.
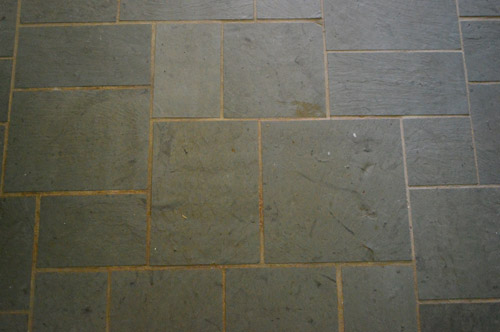
I gave nearly every method under the sun a shot to make that grout look clean. After repeatedly scrubbing the heck out of it, I knew that it was actually very (very, very) clean… it just was so discolored and stained in certain areas, that no amount of blood, sweat, tears, or elbow grease could make it look that way.
Some of my attempts to clean grout included (but weren’t limited to):
- various baking soda paste mixtures
- various white vinegar solutions
- copious magic erasers
- specialty grout cleaning floor sprays/potions/scrubs
- bleach pens
- oxygenating cleaners like Oxiclean
- Mrs. Meyers powdered cleanser + a wire brush
- Barkeeper’s Friend + a wire brush
- a borrowed steam mop
- scrubbing with a stiff bristle brush
- lots and lots of muttered cursing
The Solution To Getting White Grout Again
By this point I did what most people would do. I gave up and ignored it for another few days (what’s a few days after six months of no-dice results?). And then I finally faced facts. The grout either needed to be scraped out and regrouted entirely (which makes for a pretty messy job, especially in the main hallway of our house which connects the entire upstairs to each room downstairs) or it needed to be refinished.
Thankfully a few of you tipped me off to a product you’ve used with success called Polyblend Grout Renew. Let me just skip to the punchline: it worked, and I wish I had tried it before spending six months scrubbing my mind out.
The cost? A cool $12 from Home Depot. (Update: it’s closer to $20 now, but there are more affordable grout pen alternatives available.) Can I get a what what? Note: this might sound like an ad for the stuff, but Grout Renew doesn’t know us from Adam – I’m just beyond grateful that it worked.
Choose Your Grout Paint Color
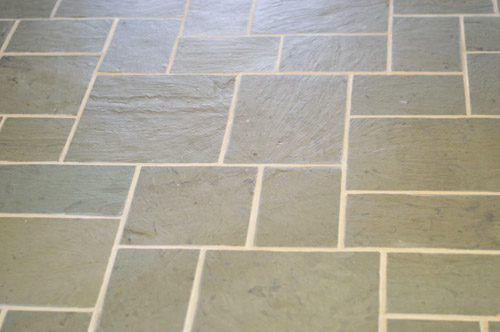
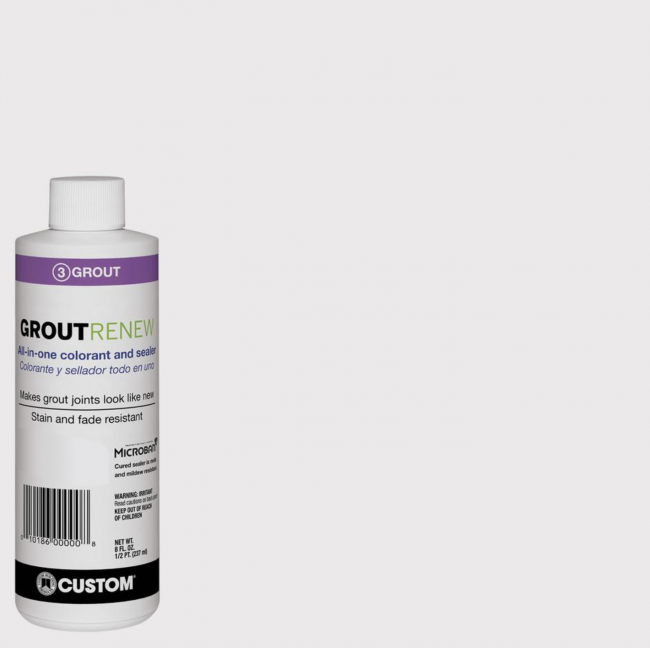
GroutRenew comes in several colors now – over 3 dozen, in fact, including several shades of white and off-white. So you may be tempted to go for the brightest white to get the cleanest, freshest look (that’s “Artic White” pictured below). However, just like paint colors, the brightest, whitest version may not be best for you.
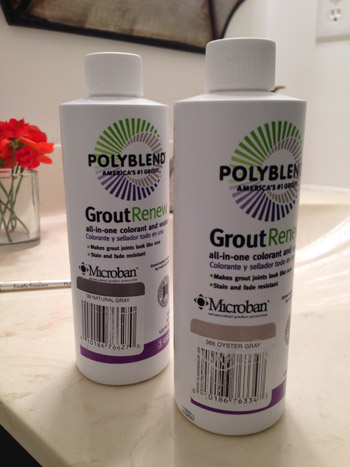
Be sure to take some time to look at your room, your tile, and your lighting to make sure you’re choosing something that blends well with your space. You can always test out a few colors too before committing to one. John and I actually considered two colors – Natural Gray and Oyster Gray, which both look pretty dark compared to the brighter whites. We had seen a neighbor with darker grout in her slate floor, so we thought it was worth considering.
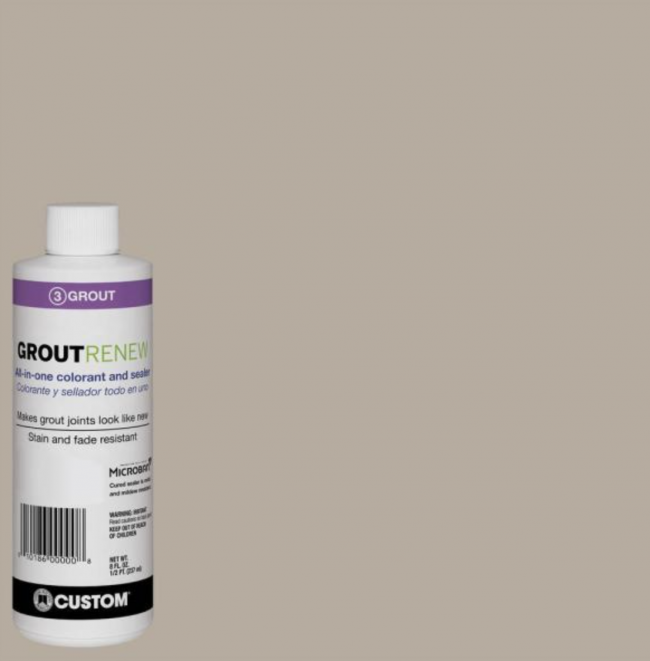
In the end we chose Oyster Gray (shown below) which is still a mid-tone Ivory color – definitely not a bright white. But it looked the most natural and still seemed very bright in contrast to the dark slate tile, without looking artificiall white. Any brighter and we worried it would look like someone in a Crest Whitstrips ad! You know, almost too blinding.
Oh and the Grout Renew was low odor and low-VOC, so this pregnant lady could get down with it. I did wear a respirator, along with opening windows, just because I’m into added ventilation and bad Bane impersonations.
GroutRenew Alternatives
This is the only product we’ve used, but there are some others on the market if this particular one is not available. Lowe’s sells a similar product by MAPEI that comes in a squeeze bottle. Amazon also has a well-reviewed Grout Pen product that comes in a white or beige option. Again, we haven’t personally tried those, but they may be some alternatives to consider if the PolyBlend is not available to you.
How To Apply Grout Paint
The downside to this solution is that it can be time intensive (and patience testing) depending on the size of your surface. For this floor, it took nearly eight hours to apply. But since I had easily spent 25 hours trying various stain lifting methods before resorting to this, well, eight hours with a bottle of Grout Renew was a small price to pay for VICTORY.
Step 1: Clean Your Tile & Grout
I know I said scrubbing wasn’t the solution, but it part of the process. I’ll pause while you laugh since I had already done that TEN MILLION TIMES. But like any surface you’ll be painting, you want to make sure it’s clean of dust and debris. So at least we’re not talking a heavy-duty scrubbing, just your regular washing to remove surface dirt should do.
Step 2: Pick Your Brush Or Application Tool
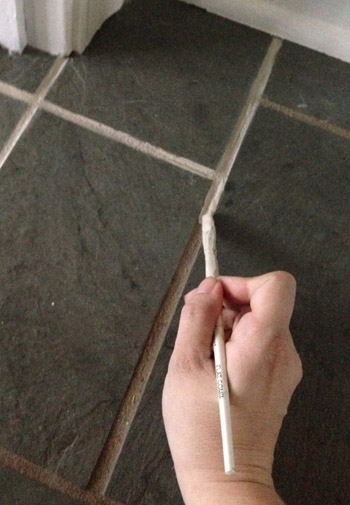
The instructions suggested using an old toothbrush to apply the GroutRenew it into the grout lines and then let it dry for 24 hours. I went with a thin craft brush instead because I had way more control (read: way less mess on the tile surface). The thin paint brush was also easy to dip directly into the bottle when I needed to load up with paint.
Step 3: Plan Your Starting Point & Exit Route
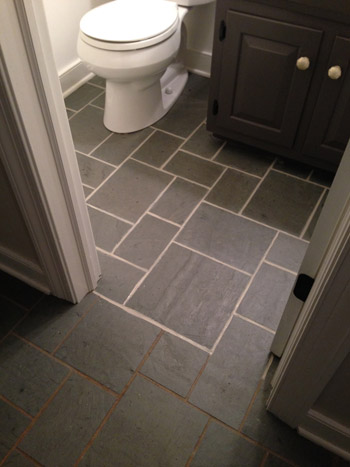
If you’re painting a floor, like we were, you’ll want to sure you don’t paint yourself into a corner (or at least if you do, you can carefully tiptoe across your tile without stepping on the cracks). I started in the half-bathroom because I figured I could work my way out of the room and close the door behind me so it could dry.
It was the opposite of fast. But it worked. Slowly I eked my way out from around the toilet and right out the door, which took about an hour and forty five minutes.
Step 4: Be Ready For Mistakes
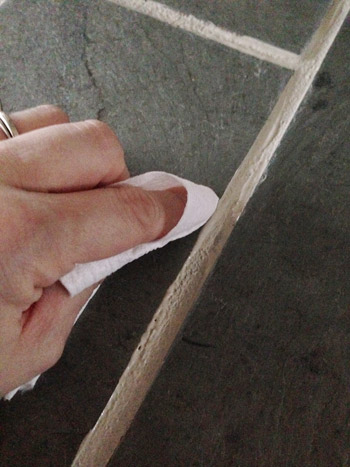
Even with a small craft brush there were still times when it got on the surface of the tile, and there was a very short window for wiping it off before it set (and then had to be scrubbed with a fingernail, which was a huge pain) so I literally would do one or two cracks at a time and then quickly follow up to smooth both sides of the seam out with a small piece of toilet paper (this would remove any from the surface of the tile as well as make the sides of each seam nice and straight looking). A paper towel or clean cloth would work as well. That is, if toilet paper isn’t fancy enough for yo?u.
Step 5: Be Patient & Pace Yourself
Being pregnant, the bathroom was all I had energy for on Day 1. Day 2 involved three more hours of line painting and wiping, and I opted to do 50% of the foyer in a strategic way so we could all still walk on the other half of it. Here’s a shot to show you how hilarious John is. I said: ok, get creative with this picture so my giant respirator doesn’t look weird. I like his version of getting creative – just lop off the whole head area.
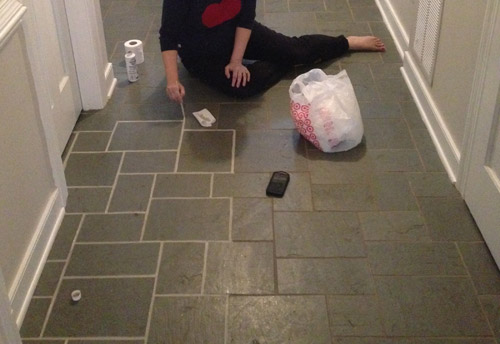
The second day was the hardest day by far, just because I was still kind of sore from contorting my pregnant body around in the small half bathroom the day before, and the little knobby parts of each of my ankles were dragging on the tile as I scooted around like a dog with fleas, but it was all worth it. Worth it and then some!
Day 3 was another three hour process, but it was the most exciting day because I could see the light at the end of the tunnel. The end of the longest-running house battle that I had ever waged was near. I just worked my way around the foyer doing the other half of those pathways that I had done the day before, and I ducked into that last closet while pausing occasionally to fist pump and work on my clean grout acceptance speech (“I’d like to thank the academy, and the grout gods who invented this cheap bottle of miracles and unicorns”).
Step 6: Let It Dry
After each application process, we gave that section a full 24 hour drying period and made sure nothing got wet for 72 hours (since that was another warning on the bottle). It’s a good deal lighter than the old grout was, which still makes us say “whoa now” when we walk through the hallway, but we think it’s just our eyes adjusting. Maybe after 6 months our brains just can’t get over the fact that it finally looks clean!

We also had about 1/4 of a bottle left all of this, which was great in case we need some touch-ups down the line. I’ll definitely update you guys if anything funky happens, but so far it has been great. I mean, just look at how far it’s come from the before:

Update: After nearly two years of use, even with semi-frequent moppings, muddy shoes/paws, and a whole lot of foot traffic, our grout still looks identical to when I applied this stuff (you can see an updated picture that we shared after six months of use here). For the folks who can’t find it in stores, here’s an affiliate link to it on Home Depot.com. There are also alternatives like grout pens on Amazon.
Originally Published in 2014
Psst- Wanna know where we got something in our house or what paint color we used? Just click on this button:
*This post contains affiliate links to things we have actually purchased and love*


Nikki says
Oh my gosh… we need this! We have a 1950’s home with really great, funky tile bathrooms (one shades of green and one shades of apricot/pink), but the grout is pretty gross. We’ve tried most of the methods you listed above, but nothing seemed to have any effect whatsoever. We have teensy-tiny tiles, so this method will take a long time, but you know… we can do this! Thank you!
Lisa@Double Door Ranch says
I’ve had a bottle of Grout Renew in my tiny master bathroom for literally six months waiting for me to have the motivation and patience to “dude, get on that already.” You beat me to the punch again (no surprise there!) But maybe this is the kick in the pants I needed to finally Nike swoosh Just Do It. Looks fab!
YoungHouseLove says
Haha, Nike swoosh it, Lisa!
xo
s
Julia says
I tried to look it up, but couldn’t find anything about whether I could use it in the shower too? What do you think? Thanks!
YoungHouseLove says
I believe it works for that, just make sure to clean it well beforehand (so old soap residue doesn’t mess with how it sticks) and give it the allotted drying time before getting it wet (no showers for 72 hours).
xo
s
Beth says
I used this stuff in my shower (it has stone tile so I couldn’t use any harsh cleaners on the stained grout without damaging the tile plus the grout was colored, not white, to start with). It took me a couple of weeks of 2 hour stints every few days, but it really does make a difference. Sometimes, I just stop to admire it! If I don’t replace my tiled kitchen counters, I’ll use it in there too. It’s holding up well so far (it’s been about 5 months), but I did use a spray sealer afterwards, since it IS the shower and would be wet a lot and I really don’t want to have to do it again!
YoungHouseLove says
That’s awesome!
xo
s
Emilie says
Do you know if that would work on a tiled kitchen counter (toxicity?)? This is what I’m at war with right now :-)
YoungHouseLove says
Hmm, I’m not sure it’s food safe (I think it would tout that on the label if it was).
xo
s
Angela says
Whoa mommma! Such an amazing difference it makes, right? I used the exact same product on my dark gray, might-as-well-be-black grout with tan tiles a year ago. It does need some touch-up in a few heavy-traffic areas, but it was so very worth it.
We used Tile Lab Cleaner & Sealer on ours afterwards, and every couple of months since just to keep the color nice and protected…seems to be doing the job!
YoungHouseLove says
Thanks for the tips Angela! So good to know!
xo
s
Christy says
So happy you just did this post – your hallway looks tremendous now! I bought the same product a few months ago and have been putting off actually breaking it out and using it in two bathrooms. It’s great to see/hear about someone else’s experience with it, especially whether it actually works or not. Both my baths have tiny 1″ tile, so I’ll be on the floor for a good long while – will learn from you and pad my ankles beforehand!
Gabrielle says
That looks amazing!
Lee says
Looks SOOO good!
Question – do you need to seal it since you went lighter to protect it? would love to know… Great work.
YoungHouseLove says
It doesn’t seem to call for any sealer on the bottle, but someone else who used it commented to say that she seals it once in and while and it holds up awesomely, so I might try it!
xo
s
Kristen says
I used the Polyblend Grout Renew in my bathroom over the summer and it already looks dirty again in the traffic areas, boo! I made sure to let it dry well and haven’t used harsh cleaners on it. I know the tile and grout had already been sealed, so I wonder if that’s why it didn’t stay. I hope yours lasts!
YoungHouseLove says
Oh no, I bet that’s what it was since it says using it on sealed stuff might not have the same results. We had the opposite reaction (our slate seems unsealed, so getting it off of the slate if it dried there was rough since it was so porous, so that’s why I did really fast tile wipes as I went, just one or two cracks at a time).
xo
s
Stefanie says
Wow what an improvement! I have been on the REPLACE THAT GROSS TILE bandwagon from day 1 but it doesn’t look half bad now. I still think that updating it with something else down the line would be the way I would go but this has definitely made quite the difference.
Good job!
Patti says
Absolutely amazed at the difference! Beautiful!!
Stevie says
So did you just dip the brush straight in the bottle? I’m very interested in doing this!!!
YoungHouseLove says
Yup, it was kinda messy at the end (when I had to dip it deeper into the bottle) so if I wasn’t such a lazy prego lady I probably should have poured it into a bowl. Haha!
xo
s
Lauren says
Any chance that sealing the grout will make it last longer and make the inevitable “dirtiness” easier to clean down the road?
YoungHouseLove says
I think it has a built-in sealer so it’s not necessary, but someone else says she used it and then seals it once in a while and it holds up awesomely, so that easy last step only seems like it could help!
xo
s
Julie Moon says
I have a similar problem in our bathrooms….50 year old tile and grout but the grout lines are SO THIN. I can’t imagine being able to do that on my thin lines.
Ashley P says
I rarely comment but I have to say that the transformation is really incredible – and from something so simple. The house really does look brand new. Really great work, guys!
YoungHouseLove says
Thanks Ashley!
xo
s
Erin @ One Project at a Time says
Wow! I couldn’t help with the scroll up, scroll down. Scroll up, scroll down. It’s amazing what small touch ups like grout clean up (and paint touch up, new outlets and covers, new hardware, etc…) can do for a space! I was interested to see how you guys were going to make it work, but I LOVE your tile now!
Shannon says
That looks SO awesome! I have used this stuff before with great success, too! Its awesomeness in a bottle. I think the last pic needs a ‘when we bought it’ vs. today pic of the foyer. I am so amazed at how you guys just keep chipping away at everything!!! You guys are awesome. And you get extra points for doing this while pregnant – I don’t know that I could have been convinced to spend that many hours on the floor when I was pregnant – but it sure was worth the work because it looks amazing!
YoungHouseLove says
Haha, now I’m craving that old before shot next to the new one too! At least I can put them next to each other on our house tour page!
xo
s
Sassafras says
Now RUNNING to tile areas in my house to see if any want doing! Even with how good this looks I don’t think it’s going to make the olive green & goldish (which reminds me of barf – WHAT in the heckles were they thinking?) tile in my kitchen look any better, but it might be worth a shot.
Lauren says
Oh, and I used this stuff on our dingy kitchen as well (after cleaning all the grout lines with white vinegar which worked for us) and you’re right the results are dramatic and so rewarding!
Jenn C says
Looks great! I so appreciate these types of posts. I’ll be needing to do this for my foyer. Did you have to follow up with a grout sealer? Or is the Polyblend have a built-in sealer?
YoungHouseLove says
It doesn’t say you need a sealer on the bottle, but someone else said she uses one occasionally and it has held up really well so I’m tempted to try that now.
xo
s
Keeley says
This is great! I’m pinning this in case we ever need it for our bathroom tile! Your makeovers are always inspiring and this one seems like something I could actually do.
I can tell you’re really enjoying your new home. We moved into a larger home around the same time you did and I’m enjoying watching your transformation.
YoungHouseLove says
Aw, thanks Keeley!
xo
s
aimee says
This is so helpful! I pinned this to save when our grout needs a pick-me-up! Thanks!
John says
What a difference! Looks brand new!
It will probably keep the grout intact longer too. Do you know how it will hold up to cleaning and polishing of the floor?
YoungHouseLove says
It’s supposed to hold up well as long as you don’t use abrasives (we don’t clean with those anyway) so I’ll definitely keep you posted!
xo
s
Sarah says
I’m sooooo excited!!!! I have been fighting ugly grout for the last 2 months and I just wasn’t sure what else to do…I actually bought some very scarey looking acid at lowes but just can’t bring myself to use it bc the warnings were so scarey!
Jenna says
I had a bathroom that wasn’t sealed right and the “dirty” grout drove me NUTS! I, like you, tried so many different things and nothing worked. Over a year ago my husband did some research and found that product and did it to our bathroom and it is so much better and has held up wonderfully. It was so nice to find an easy fix as I was very close to saying heck with it and stripping all the old grout and regrouting!
Ashleigh P says
YHL strikes again! I had JUST decided that the only way my 40+ year old grout would ever look clean again was if I scraped it all out & started fresh. I’m headed out now to pick up a bottle of this awesome-sauce! Can’t wait to see sparkling white grout in my hall bath! Thanks guys!!!
heather says
The amount of patience you had for this astounds me. I literally would NOT have done that in any scenario I can think of short of being so frustrated I became determined to win over it. The most patience I have for anything is hand seeding my garden and weeding it and that just about tests it sometimes (especially the weeding, the seeding is relaxing and exciting). I even crochet because knitting just takes too damn long and requires too much patience for me. I bow down to your pregnant ladyness for taking this on. It looks awesome. You might have found me with a sledgehammer to the tile.
YoungHouseLove says
Haha!
xo
s
Kimberly Helton says
Wow!! It looks so great. I love the way it renewed the slate tiles. I’m glad you found something that worked. Keeping this product in mind. Thanks for sharing!!!
Erica B says
Next time use an old toothbrush, and a damp sponge to wipe up the mess. It goes much faster!
YoungHouseLove says
Thanks for the tip!
xo
s
Suzanne says
I have used Grout Renew in Snow White in my tile covered bathroom and it made a HUGE difference. (which I could post before and after here but they are in the forum).
After having it down for a while the Grout in the shower is still perfect. The tile grout surrounding the sink is perfect. However the tile on the floor is showing some dinginess again. It’s definitely going to need touch ups but better than it was!
Nancy50 says
What a transformation! I am genuinely ecstatic for you and sending my stink eye over to a certain snarky group who knows who they are. Way to go Petersiks!
Rachel S says
Is it just the photos or does the new grout color make the tile look less blue and more a dark grey than it did when it was grungy? I love the outcome, i would have to say i am now on team keep the tile! Your level of gettin it done – while pregnant!- really amazes me Sherry:)
YoungHouseLove says
Yes, in person it looks less blue too! In fact I’d describe it as slate gray now! I think the brown stains were making the tile look cooler/bluer by comparison, but with light gray grout, the tile just looks dark gray now (no orangy/brown tones to make it blue-ish). I think removing the blue wallpaper and trim helped get rid of that “blue tint” too!
xo
s
Alex says
And with your ceiling color… ME-OW!! It looks SO good, youngsters, seriously! The grays play off each other so nicely now! Great job!
Michelle M says
You give me hope for the dingy grout in my kitchen/entry hall! There are spots where I can see the original grout color but I can’t get the rest of the floor to match, no matter how I scrub. I’ll have to give this a try.
Cheryl says
Eek those floors! I have to admit I was trying hard to look past them while you guys improved all around them, and now…they look absolutely fantastic and better yet, the updates and decor in the room stand out instead of that crazy floor!
How on earth you spent so much time crouched and bent with baby boy P’s elbows and knees poking you in the ribs and hips I will never know! Power to you momma, time for a day at the spa!
YoungHouseLove says
At one point I think he was in there like “really mom? you’re all up in my area” – there were little pokes like “I need some room” – it was pretty cute.
xo
s
Erin says
I know you said some of this tile is broken but i love the slate look so much. And I love it even more now! Amazeballs good!
Abby K says
I absolutely LOVE it! Just flabbergasted at how awesome it looks and hoping that you guys leave that rad slate tile there now! I think I remember you saying you were considering pulling it out down the line, and sheesh, it just looks amazeballs now! WTG Sherry & baby!
Lauren O. says
As a renter, a lot of times I can only enjoy your posts and dream of the day when I actually own something to which I can make serious changes. This is something I can actually do, as my husband frequently hears me holler “I hate this bathroom!” at least a couple times a week due to the dirty looking grout in our apartment. I may actually pop up to Home Depot at lunch today to see if I can find this. (As former NY’ers, I’m sure you can appreciate how the NYC Home Depot’s don’t always have quite everything that those in the suburbs do :)) It’ll only be my fifth trip in six days, which is totally normal, right?
YoungHouseLove says
Aw, I’m so glad! And yes, that’s totally normal. We’re like a moth to a flame when it comes to HD too!
xo
s
Holly says
Oh I’m going right to Home Depot for a bottle of magic! Been battling our grout -entry, halls, kitchen, laundry, bath, all connected with same awful 13yr old grout for the past 8yrs! Any idea if this stains or how it holds up?
YoungHouseLove says
According to the reviews we linked to and a bunch of comments on here it seems to hold up well! Everywhere we read about it, it has a ton of 5 star ratings.
xo
s
Katie says
Love this, looks so fresh and bright! Do you think this would work for tile in a shower? I have grout in our shower that has been giving me the side eye for years!
YoungHouseLove says
I’m not 100% sure but I don’t remember the bottle saying it wouldn’t work. I’d read it to be sure, but I think it should!
xo
s
Julia Kent @ The Domestic Blonde says
WOW… What a difference! I would say the front hall/foyer is complete now – that’s the finishing touch it needed!
Julia says
Wow, it’s impressive how much a difference that makes!! The tile looks brand new, and fits in with your new decor so well! I’ll remember this product if ever I need it – luckily the previous owners of our house used a dark grey grout on all the tiles we have, that seems impervious to dirt and stains so far, phew!
Angie says
This really looks like a million bucks. Kudos to you for being on your hands and knees for EIGHT HOURS while pregnant!
Erica B says
Holy amazeballs!! I cannot believe the difference! Well done Petersiks :)
Alison says
Wow! Looks so much better! You’re a brave woman to sit on hard tile for that long while being pregnant. Dedication!!!
Christina says
Great post from a fellow slate foyer owner. I attacked our grout with the help of my poor mother and a solution that warned could burn your skin off. Didnt really work, so this will be a must try.
Another issue I’ve been battling with our slate, is that is seems to have an old waxy coating on many tiles. As if a wax/shiny coating was once on and has worn off in some areas more than others. So no matter how clean, it looks dirty. People have said to reseal it? But I prefer the matte slate look rather than a sheen. Have you encountered this? Or know of a way to fix it?
YoungHouseLove says
Does anyone else have this issue with ideas or tips for Christina?
xo
s
Alice says
My mom’s house has slate from when they built it in 1982. She always put wax on it so it was shiny. She finally decided that the wear and up keep of shine wasn’t worth it. So she bought wax stripper. It was very messy and time consuming. About three times applying it and washing/ scraping it off. The wax stripper will make all the slate look white while it is working, when the wax is dissolved and wiped off the slate the slate will look dark. Once it is dry and all the wax is off it will be original color and matte looking. It was a lot of work to get back to matte. But so worth it!
Alice says
P.S- make sure you put a matte sealer on the tile/ grout after stripping otherwise it can get stained, etc
YoungHouseLove says
Great tip!
xo
s
Amber says
Holy smokes! What a HUUUUUUUGE difference!!
I used this stuff to give our nasty bathroom floor grout a face-lift about a year ago and after countless soaks from toddler and a preschooler who love to splash in the tub, to many’a moppin’- it still looks fabulous.
Great job, Petersiks!
YoungHouseLove says
Wahoo! So glad to hear that it still looks good!
xo
s
Ann says
LOOKS AWESOME!!!!!!!
So worth the HOURS on the floor! (said by person whose ankle bones are not rubbed raw from the tile)
What a breath of fresh air – it looks fantastic!
.:karen:. says
THANK you for this post. I cannot wait to go pick up some of this stuff to try. My list of failed methods is similar to yours and I had just given up. This would make a world of difference to our kitchen and entry way. Yay! :D Thanks and it looks beautiful. :)
Stacey says
We used this exact same stuff in our front entrance. LOVE IT. It’s been on for about 7 months now, and so far so good. We even sealed the grout with a separate spray sealer afterwards to give it an extra layer of protection (because I do NOT want to crawl around on my hands and knees for that long again). So far it seems like everything just wipes right off of the grout, which is wonderful. And my husband is pretty happy that I’m no longer begging to rip out the old tile!
YoungHouseLove says
That’s awesome! Love the tip about the sealer Stacey!
xo
s
Leiann says
Wow, this looks so awesome! When you first moved in and said you guys were maybe going to keep that floor I thought you were kind of insane because from the pictures it looked pretty dingy. But now that I see the grout transformation, I would for sure keep that floor! It looks so nice! :)