How you like them handles?
(Handles, apples. It’s all the same. Right Matt Damon? What? You don’t think Matt Damon reads this blog? Of course he doesn’t.)
Anyway, I’m back to share the hardware makeover play-by-play and a ton of pics that we couldn’t squeeze into our door-painting post on Wednesday. So fasten your seat belts. Oh yeah, it’s gonna get crazy. First I have a secret. The hardware on our sliding doors in the living room looked like this:
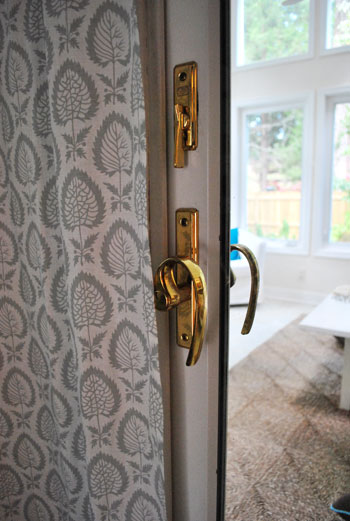
Le yikes, right? It’s all sorts of bad with the swoopy handle. If you look a little closer it’s not even shiny and new looking gold, it’s all rusted and neglected…
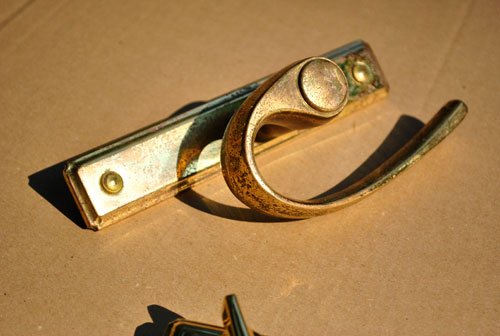
So as you can probably tell from the photo above (duh) down they came. We stripped the hardware off of both of the sliding doors in about five minutes (I took one side while John got the other one) by just unscrewing things on the front, back, and side to free them with a regular old philips head screwdriver…
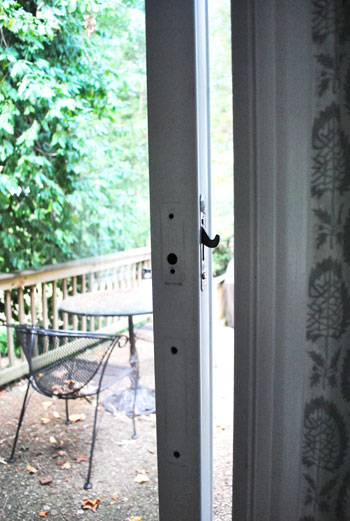
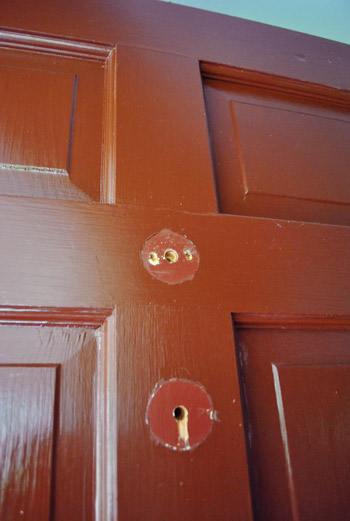
… and then we removed the doorknob and the rusty old door knocker on the front door (also with a screwdriver – there were exposed screws that we just removed from the back).
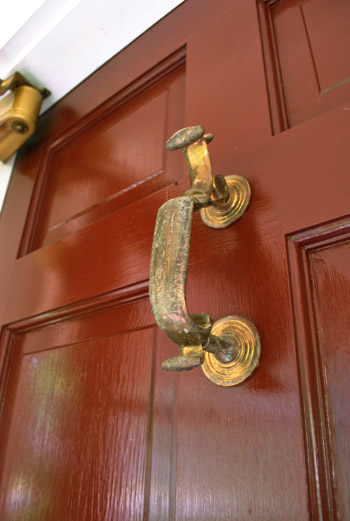
You can check out our door-painting post for more details on that stuff (like how we sanded the paint around the hardware that we removed so it was nice and smooth before painting).
But back to our pile o’ removed hardware. Here we have the sliding door hardware along with the doorknob, deadbolt, and the door knocker from the front door:
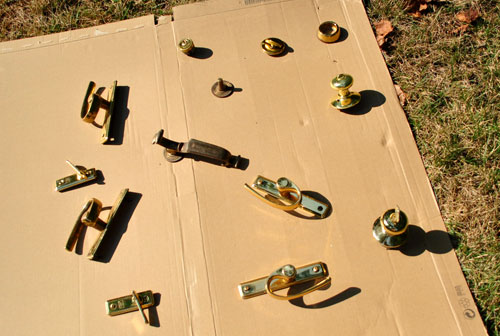
It was like a Gold Hardware “Where Are They Now?” Special on VH1. Some folks weren’t as crusty as others, but they were all well past their prime.
So after some decent amount of online research and chatting up the paint pros at Lowe’s (there’s a woman at the one near us who is phenomenally knowledgeable) we learned that the most recommended method for refinishing hardware (to gain the most durability and long-lasting finish) was:
- Sand as much of the hardware as you can with high grit (200+) sandpaper to rough it up
- Use a liquid deglosser (like this one) to degloss everything to get oils and sanded particles off of the hardware before spraying
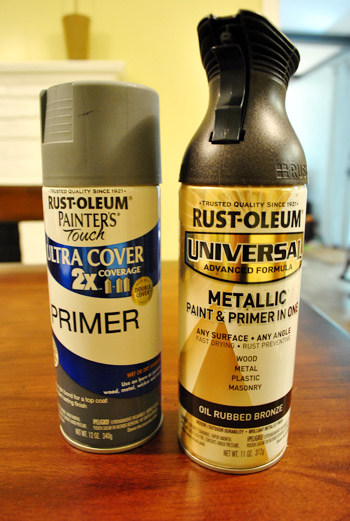
- Apply one thin and even coat of high quality spray primer meant for metal (we grabbed Rustoleum Painter’s Touch Ultra Coverage Primer in gray since we figured it would blend more than white)
- Apply two to three thin and even coats of high quality spray paint meant for metal in your color of choice (of course, our poison was: Rustoleum Universal Metallic All-Surface Spray Paint in Oil-Rubbed Bronze)
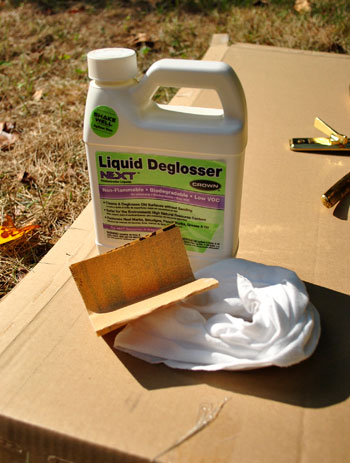
So I grabbed my high grit sandpaper and started on the first step: sanding.
Ahhhhhhhhh. Baaaad idea. The sandpaper left tons of obvious scratches in the gold finish that I knew wouldn’t completely be covered by thin coats of primer and spray paint. I should have taken a picture of the one side of the doorknob that I thought I ruined with the dumb sanding step but I was too busy freaking out. So naturally I made some sort of sound that resembled a walrus screaming and chucked the sandpaper as far away as possible while cradling/apologizing to my doorknob and promising him that I’d never hurt him like that again. Luckily I realized the knob would be installed with that part underneath, so only Clara-height children may be able to see the slightly roughed up texture on the underside. Whew.
Update: A few smarter-than-me commenters recommended trying steel wool or super high grit automotive sandpaper to rough up the surface, so I plan to try that next time. Just tossing that out there for anyone who might be doing this (who may want extra “insurance” that the spray will hold).
So it was out the window with step one, and on to step two: deglossing. I just used some rubber gloves and a rag to apply the deglosser and then let everything dry a little so it wasn’t soaking wet before moving onto step three: applying one thin coat of spray primer. But when I went to grab the primer I noticed something intriguing on the ORB can next to it. It said “paint & primer in one” right on the label. Duh. No need to beat a dead horse.
So I trusted my beloved ORB spray primer + paint to lead the way and just applied three thin and even coats to all of my hardware (that I strategically placed on cardboard so I could access all of the exposed parts by piercing the long metal interior hardware rods through the cardboard so they stood up). I will now repeat that thin and even is the key when it comes to spray paint. If you apply thin & even coats they won’t be globby and thick, and they’ll bond/cure very strongly, which will greatly reduce any issues with things flaking, scratching, or peeling down the line.
Oh and see that key? That’s a secret.
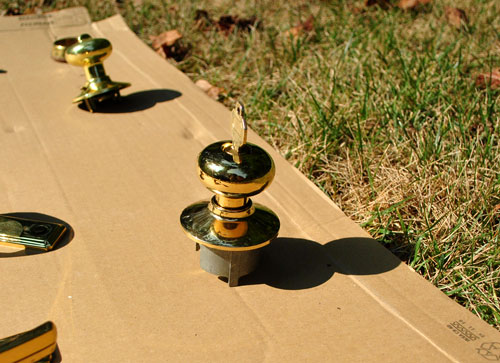
I decided I didn’t want to muck up the inside of my lock with spray paint, so I used a spare house key to block the spray from getting into the lock (while allowing me to access the rest of the knob). I didn’t push the key all the way in for fear that the top of the key would block some of the outside of the doorknob, so I just stuck it halfway in so it would block the interior part without inhibiting access to the metal facade around it. Then I just removed it and used it on the deadbolt’s keyhole when I sprayed that.
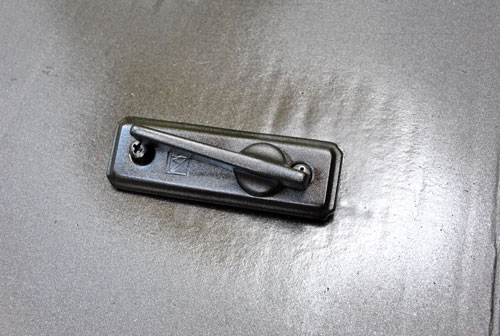
Oh and another spraying tip would be to put all of your screws into the hardware and pierce them through the cardboard so the ends of them get sprayed to match (like the two that you see below). Also, be sure to move things like latches back and forth between coats to make sure you can access all areas of the hardware with spray paint. Like this…
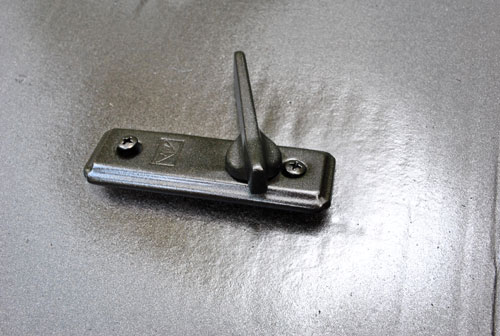
… and this:
About an hour later (I probably waited 20 minutes between each of my three thin and even coats, just to be sure it was nice and cured before piling more on) I was left with these beauties:
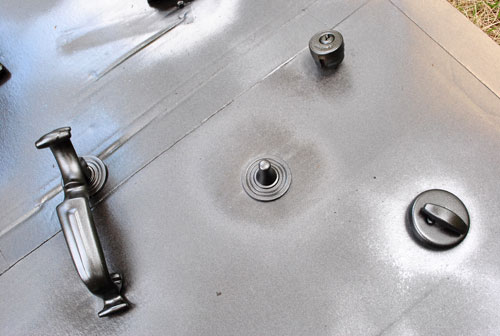
Who sees a winking face? Just me?
I probably waited six full hours after my last coat of spray paint before reinstalling anything. Just to give them a lot of time to fully cure and ensure that I wouldn’t scratch or ding something while putting them back on the doors. I can’t speak to the long-term durability of this process since it has only been… oh, about 48 hours. But I can tell you that reinstalling them went really smoothly and everything works just as well as it used to and nothing was even remotely marred or dinged during installation or in the past two days since.
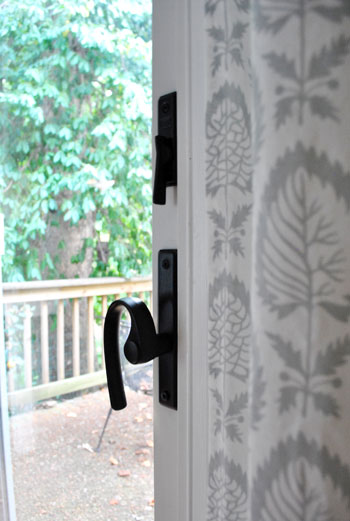
So I guess we’ll check back in with an update about how they hold up over the long haul (these doors are used every single day thanks to a dog who loves going in and out). But so far, so good. And it definitely beats buying all new hardware (we figured we didn’t have anything to lose in trying to make the old stuff work before resorting to trashing it and splurging for all new hardware).
Oh and it bares noting that things look pretty black in some of these pics, but it’s just because ORB is a mystical creature. So it’s hard to capture the true color that you see in real life (which is a rich metallic-y chocolate). Actually, the exterior sprayed shots above show the true color really well. It still looks like that inside, it’s just seemingly impossible to get it on film.
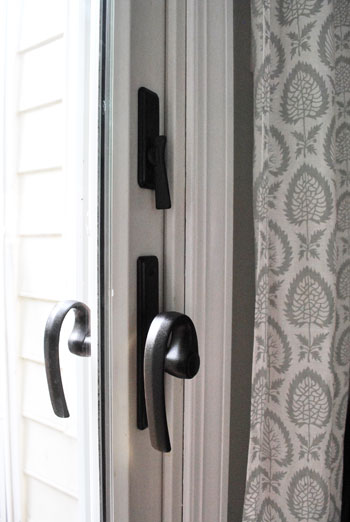
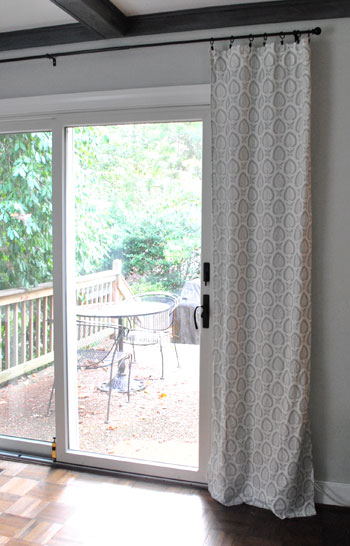
Perhaps the most exciting thing is that in taking this style quiz, the thing that I loved most about the room they said was “my style” was the white door with the dark hardware. And now it’s mine. All mine. Mwahahaha. (<– yup, I broke out my maniacal laugh)
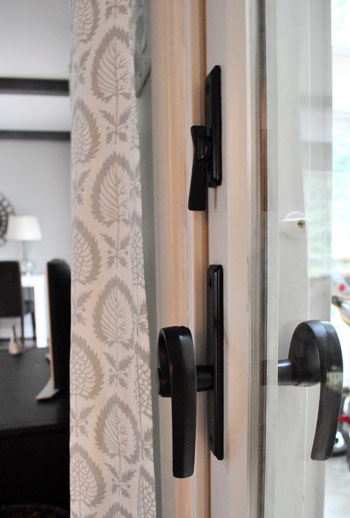
I think it looks delish with the oil-rubbed bronze curtain rods and the dark beams. And John digs it too (delish just isn’t an adjective he’s apt to use).
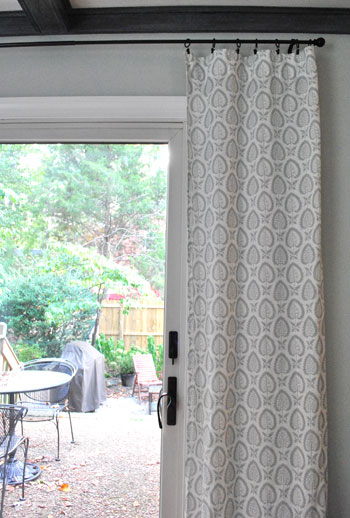
Me-ow old sliding door friend. My how you’ve matured. Well, as much as a twisty twirly old 80’s knob can really mature.
And you’ve already seen our freshly sprayed front door hardware, but let’s just revisit it for a moment:
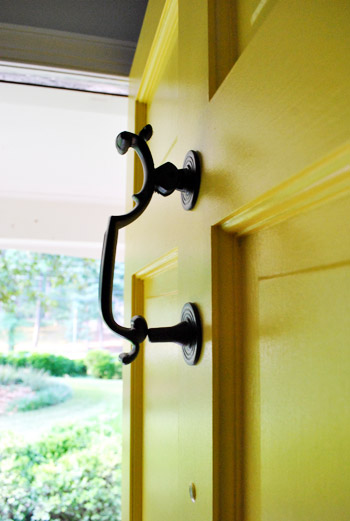
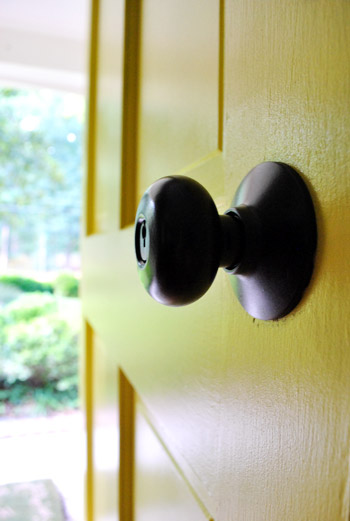
So yeah. We’re happy with our little almost-foiled-by-the-sandpaper process. Although I must admit that after I sprayed the underside of the knob, the scratches were hardly noticeable. So maybe if you’re a staunch rule follower (and not a freaked out walrus impersonator like me) you could get away with the sanding step. Either way, I have high hopes that the deglosser and included-primer will do their job when it comes to adhesion (especially since our old scratched and rusted fixtures weren’t too glossy or shiny to begin with).
As for the ORB finish: Hi my name is Sherry, and I’m addicted to oil-rubbed bronze. They say you can’t help who you love. But it could be worse. I could be addicted to sanding things, which would have been a cruel joke since sandpaper was the kryptonite of this project. I wonder why. Has anyone else successfully sanded their metal hardware before spraying it? Was it not all scratched up? Maybe it just looked “brushed” in the end? I just didn’t trust myself to do it all in one consistent direction (aka: not make a hot mess that was oh so obvious after the spray-job). So in summary, my method was just to: use a liquid deglosser (although I’ll also try steel wool or extra high grit sandpaper next time), lay everything out on cardboard standing up so it could be sprayed evenly from all angles, use a half-inserted key to block any keyholes, spray everything thinly and evenly in 3 coats applied every 20 mins or so, be sure to move toggles and locks so all parts of the hardware were sprayed, and let it cure for about 6 hours before rehanging it.
Oh and the total cost of this project was $6 for the spray paint (I was able to return the unopened can of primer and I already had the deglosser and that dastardly sandpaper on hand). But for someone who needs to purchase deglosser, you might want to budget four more dollars for that. Considering a new knob, deadbolt, knocker, and two locks and four handles for our sliding doors would probably come to about $200, I think we got one heckova deal. So I’ll let you know how they hold up. If they’re anything like our ORBed sofa legs (which we sprayed five months ago, and they still look mint) we’ll have bona fide jazz hands going on. So it’s probably only a matter of time before I really go nuts and remove every last interior brass door and hinge and go to town. Like I said, my name is Sherry, and I’m addicted to oil-rubbed bronze. Holla.
Update: Our handles are still holding steady. Check out the update post here.
Wanna know where we got something in our house or what paint colors we used? Just click on this button:
*This post contains affiliate links to items we have purchased and loved*


Becky says
I painted my front storm door hardware with ORB last year and LOVED how it looked! A year later, though, I have to re-do it because the ORB is chipping. I sanded last year with fine-grit sandpaper (steel wool would have been smart!). Maybe I didn’t do “thin and even”, and I definitely didn’t use a primer. I might also add a clear protectant layer. The nice thing about this kind of project is that, even if you do have to re-do it, it’s still not expensive or very time consuming!!
Love your tips!!
YoungHouseLove says
Oh yeah, I think thin/even helps it cure well and primer helps it grab on! Using a protectant on top might help too (we heard from someone who used that method in 2009 and it’s still going strong). Hope it helps!
xo,
s
Briel K. says
I kind of like the curved handles! I’m glad you painted them and didn’t get rid of them. :)
Samma says
Meeee too!
Mary Thomas says
Me toooooo!
Amy says
OOOOOOOOHHHHHHHH! We’re in the process of redoing the kitchen and pretty much the only thing that stayed is the door. I cringe every time I look at the hardware, but the thought of spending more money makes my heart hurt. Now I have a solution. Thanks for being the walrus sounding goddess you are!
heather says
Someone should definitely get you a bulk case of ORB for Christmas, out of being purely funny, yet useful. Very much something someone in our family would do.
YoungHouseLove says
Haha, I think John might be picking up a hint or two about that. Haha.
xo,
s
Claire says
Thank you so much for showing how to do this!!! My house is filled with horrible gold door handles and I wanted to replace them all…which would be a small fortune. Now I have a solution!! Yeah! Can’t wait to get started!!
toni from says
My family and I are currently renting in Raleigh, NC for the next 4 years, but when we move back to Washington State to our home (currently rented) I am so spraying all of my hardware to ORB. I was going to replace it, but this looks like a great idea, I will have to see how it holds up for you guys, but I have a feeling it will work brilliantly. Great job again $herdog!
Kristen @ Popcorn on the Stove says
Did you need to do anything to protect the ORBed knobs that’ll be outside and exposed to the elements? Or are you just going to see how it goes??
Love how they all look – especially the ones in the living room. They work so well with the curtain rod and the rest of the grey in the room!
YoungHouseLove says
It’s indoor/outdoor paint (I’ve used it on patio furniture, etc) so it should be all good! Here’s hoping…
xo,
s
Lindsey says
Can’t wait to hear how they hold up after a couple of months! I’ve been itching to ORB all the gold in our house!!! I’ve tried bathroom cabinet hardware and it’s held up so far.
Brittany says
I just ORB-ed a couple of brass lamps (after going all over creation to find me some more ORB). I roughed them up a little with sandpaper but used the finest grit I had and it helped get the shiny out but you couldn’t detect the scratches at all once it was all pretty and ORB. I’m sure your deglossing did the same job though, I just felt like roughing it up a bit would help the paint stick even better.
Allison says
Wow, this looks great! I even really like the curvy handle on the sliders now that it’s painted.
Site seems to be working smoothly from my end. Yay! Maybe you can relax a little after all your hard work/aging/marathon chat with the IT guys. Thanks for your dedication!
YoungHouseLove says
Whew. We think we have it all fixed (just took us four days to get there, but what can ya do?).
xo,
s
Sarah says
So, last night was my first attempt at spray painting some thrift store items. I had a wirey basket that was all tarnished which got the royal ORB treatment(same one you used in the pic above). I didn’t sand it at all, just sprayed away. My ORB can kept jamming up though which was extremely frustrating…the other item I’m so embarrassed to say, was sprayed too heavily. I know $herdog…thinly and evenly…I guess I just had a heavy trigger finger. So, if I sand that down after it fully cures and respray will that work?
YoungHouseLove says
I think so. I would let it fully dry, sand it down and see how it looks. If it’s smooth you can respray it (if it’s peeling and bumpy I’d keep sanding or strip it). Good luck! I definitely sucked at spray painting for a while so tit’s safe to say there’s a learning curve. You’ll get there though!
xo,
s
Meredith says
Is it wrong to love the typo in this response? (so tit’s safe to say…) Because it kind of made my morning.
YoungHouseLove says
Ohemgee. How did I miss that? Haha.
xo,
s
KathyG says
I have an ORB addiction too, I used 8 cans to paint a patio set w/chairs. Out of the 8, 2 cans sputtered and had problems with the sprayer.
Take them back, it’s just a bad batch. HD or Lowes will be happy to replace for you.
Since then, I’ve used at least that many more (did a patio set for a friend), and all were fine.
YoungHouseLove says
Oh yeah we sometimes get a bad can that won’t start (or sputters off the bat) and they give you a new one!
xo,
s
Elizabeth says
I just went to check out the source list to find out where you got the drapes in your living room and noticed you need to update the picture of your “current house” with your new door! Thank you for this blog, it is my favorite daily read!
YoungHouseLove says
Thanks Elizabeth! You’re right!
xo,
s
mp says
Actually, I have it on good authority that not only does Matt Damon read YHL, so does Ben Affleck.
YoungHouseLove says
Shut the front door.
xo,
s
Maureen says
Love this! ORB is on my shopping list for the weekend after my stop at IKEA. :)
Jamie says
The lady @ Lowe’s should have told you to use high-grit (like 600 – 1000) automotive wet-dry sandpaper. It will rough up the surface of metal without leaving deep scratches.
Love this makeover by the way! I’m already eyeing my sad brass window hardware with a glimmer of hope.
YoungHouseLove says
Smart, smart, smart.
xo,
s
SingleMama says
What an awesome improvement! I laughed at the “screamed like a walrus” :)
Jax says
What do you think the difference is in savings between painting and buying? Not to mention green points!
YoungHouseLove says
I took a wild guess at buying all new hardware for the front door and sliders and thought it might be about $200+ with the knocker and the deadbolts and the handles and knobs. Crazy, huh?
xo,
s
Penny says
Hi,
Love your blog but wanted to mention that it’s “deadbolt” not “deadbold” ;)
YoungHouseLove says
Haha, funny typo. Off to fix it. Thanks for the heads up!
xo,
s
Ann L says
Loving the ORB. I never thought I’d be a bronze person (oil-rubbed or otherwise) but after seeing you guys use it so often, I’m sold. We are planning a front-door makeover and our yucky old brass knob was going to be replaced with brushed nickel, but ORB it will be! If we don’t like it, it’ll only be $6 extra spent over buying a brand new knob…wish me luck! :)
YoungHouseLove says
Luck!
xo,
s
Liz says
They look great! I’ve just added this to my list of things that need to be upgraded in our house :) Thanks for posting!
Laurie says
I have those exact same sliding door handles….thanks for the idea, I’m changing them this weekend!!
Mel says
I actually really dig the swoopy handles…I’ve never seen any like that before! And they look even better now!
Lisa W. says
wow – that makes a huge difference! do you think that same technique could be used on nasty gold bathroom sink fixtures? hmmm…..
YoungHouseLove says
We’ve heard of others using it on faucets but you just have to tape off where the water comes through for health reasons (don’t want to drink from things that were spray pained). Good luck!
xo,
s
Patti says
I have a question about spray painting as I never have any luck with it. When applying the first thin coat, do you spray til it covers the old finish completely? I think I’m applying too much too soon. I would love it if you could post pics between each coat (but maybe that’s just me). Thanks so much for these tutorials!
YoungHouseLove says
Oh no way! Only by the end of second or even the third coat does it completely cover (and once it covers I’m done since I don’t want to put on too much and make it thick and gloppy). The first coat it’s just a thin haze, so you see a lot of the original finish coming through. And always keep your arm moving and the nozzle about 8-10″ away. You just want to “mist” things with the paint so it’s not drippy and heavy. It’s actually a great idea to post pics of each stage to explain that- I’ll try to remember to snap them next time!
xo,
s
Heather W says
My thoughts exactly…. I get nervous using the spray paint and using correctly but I am addicted. I love how it changes the look and is so cheap!
Please post beginning to end spray painting tips please…..
YoungHouseLove says
Will do! In the meantime you can find tons of spray painting tips here (just not photos of each coat, but I’ll have to snap some and share those soon).
xo,
s
Lara says
Yes! Please do, Sherry!
Rachel @ http://rachelrefurbished.blogspot.com says
First of all, “So naturally I made some sort of sound that resembled a walrus screaming and chucked the sandpaper as far away as possible while cradling/apologizing to my doorknob and promising him that I’d never hurt him like that again.” = BEST SENTENCE EVER TO APPEAR ON THE INTERNET. Seriously, so funny! Second, we are in the process of doing this at our house. We are not sanding, out of laziness. We don’t have the round knobs though. We have the scrollish type of handles. So the problem we were having was that they don’t stand up on their own to paint; they lean onto some part of their body, leaving a little mark. Instead of waiting hours between coats (because of impatience), I’m trying to fashion some sort of holder to stick the interior part of the handle/ lock down into. Think card board box with little circles cut into it to plop the handles into. Is there a better suggestion, besides just having patience? Also, in our house, the darn hinges are brass/ gold too! UGH!
YoungHouseLove says
I would rest the handle part on a rock so it stays balanced and you can spray all around it. Or you can do the box thing, I’m just lazy and I look around outside for what I can prop under something to hold it up. Haha.
xo,
s
Shelley says
Would turned over egg cartons work to support your handles? Just open them flat, flip them over (you could even cut the tops off the cups so the handles could rest down through) and spray paint away – if I’m understanding correctly.
Good luck!
Regards,
Shelley
YoungHouseLove says
Great idea!
xo,
s
Kim Skellenger says
I refinished our exterior and interior knobs last year, since my capital request for new ones was denied. :) They turned out great, but I used steel wool instead of the deglosser. It has been over a year and the interior doors have held up beautifully, however the front door did not. Lots of scratches and it appears to be just from our keys. With two kids in tow, my aim isn’t quite up to par. I might pull a mulligan and try your method with the deglosser, but it’s going to require a lot of sanding.
I have to say, that is one beautiful door! Nice work! :)
Heather Snyder says
We forgot to sand some cabinet knobs that were very glossy. It chipped off with in minutes if they were bumped. Went back through and sanded all of them to get the other paint off and rough up the surface. We were particular about it….just did it. The paint stuck and you can’t tell the difference between the sanded and nonsanded (minus the chipping of course). So you don’t have to be neat or nice about it. The spray paint will fill in the scratches.
janie says
FYI when things say “paint and primer in one” it just means they cover well, not that you can throw them onto a slick surface and have them adhere.
I was so relieved when you not only prepped your front door properly, but were going to do the same with your handles. And then you didn’t. Really, guys, you know you come up in google searches. Have a thought for the people who find you by google and think you’re authoritative, and for the future owners of their houses who’ll have to deal with the mess. Sandpaper and primer are your friends for oil painted surfaces and metal. And removing the paint that hasn’t stuck properly to your trim and panelling (not so much doorknobs, you’ll probably just ditch them) will be an absolute bitch of a job.
YoungHouseLove says
Check out the post for an update both in the middle and end about using steel wool to sand (which is what we plan to do next time, but weren’t smart enough to think of this time). Hope it helps!
xo,
s
Kate says
I so wish I had known it was possible to paint hardware — I could have saved a fortune! Instead we replaced all of our old brass stuff with an ORB version. Of all of the work we have done, I really think that the hardware update made one of the biggest differences in the overall feel of the place. Love it!
Stephanie says
Do you think this same process would work well for painting old patio furniture that has painted flaky off all over the place? I’ve been wanting to re-paint it but I want the new paint job to last a while and not have to re-do it every year.
YoungHouseLove says
You’d definitely have to get it smooth before spraying it, so maybe try sanding it down to a smooth base and then spray it? If you get it smooth and use the high quality spray paint it should last for years (we’re counting on our iron patio furniture holding the ORB that we gave it for at least the next 5+).
xo,
s
Torrie @ a place to share... says
WOW… What a difference a knob makes :).
Love the key tip, and really love the ORB finish and how it ties so nicely in with everything else.
Stephanie says
It was like a Gold Hardware “Where Are They Now?” Special on VH1. :) :) :) hahahahaha That was so funny! :)
Susan says
I’d say that there must be something in the water except that I don’t live anywhere near Richmond. I first jumped on the ORB boat a couple months ago when we were doing a cheapo kitchen makeover on a rental unit we own. http://thejohnstonkids.blogspot.com/2011/07/kitchen-cabinets.html Then just a few days later we spied a fantastic piece of original artwork at Goodwill that we loved but the frame was ugly. I wondered if I could ORB it and that Monday you posted your twigs and berries art. And after today’s post I may go and finish off the can on some of our doorknobs.
Leah says
I also have an addiction to the ORB. I’m getting ready to spray paint my fireplace front/doors/whatever-you-call-that-thing in ORB tonight. Right now it’s a truly awful shiny gold and black. I’m really, really hoping it turns out!
Alicia says
When we did all of the door hardware in our house a few weeks ago I skipped the sanding step. I also skipped the degloss, but that’s because our hardware was so NOT glossy that deglossing would’ve been a joke. We did have to take off 7+ layers of paint to get down to the base though. The trusty crockpot with water and laundry detergent paint stripping method did the trick. And now every single knob in our house (except the front door, which we’re still trying to figure out a plan for) is ORB and beautiful.
bridget b. says
looks great! definitely worth a try before springing for all new knobs. we replaced every brass knob and fixture in our house with brushed nickel and it cost a pretty penny. if i hadn’t wanted lever knobs instead of the round ones, i would have tried spray paint.
quick question: i would be worried that the spray paint would dry on the external movable part of the knobs in such a way that it would keep them from being able to turn. did you experience that at all?
YoungHouseLove says
Just apply thin and even coats and turn everything as you spray (like how I moved that toggle lock in the pics, I also turned the little locks and moved handles between coats, etc). Everything functions as smoothly as before!
xo,
s
Laura @ Starting Out Fit says
Thank you so much for posting this!!! I’m definitely going to be attacking my front door hardware now! ;)
Laurin says
I am SO glad that you posted this! I have been trying to convince my husband that we really can re-finish our ugly brass knobs and he thinks I am nuts! Not now! THANK YOU!
Wendy - Old Town Home says
I love the new look you guys! We’re actually going through the same challenges with our front door now too. We’ve been thinking, discussing, and dreaming about hardware for the last several weeks and can’t wait until we have a beautiful, finished result like yours.
http://www.oldtownhome.com/2011/8/18/The-Great-Knob-Debate/index.aspx
alexa says
We have been meaning to do this with all our doorknobs and hinges. They have paint on them from previous owners, however, so we will need to add that to our list of steps, most likely before sanding. Any recommendations on that?
YoungHouseLove says
We’ve heard that sanding the paint off can work, or soaking them in hot water (someone mentioned using a crock pot) can also work. I’d be nervous to get paint in my crock pot though. Haha. Maybe use an old one that you don’t use for food if you have one (or find one for $5 at a secondhand store for that purpose)?
xo,
s
Ashley says
Is it sad that I was looking forward to this post since I saw you removed the hardware from the door?!
I’ve been trying to convince my husband that we could do this without making them look terrible… and you guys have done it! Yahoo!! We’re planning to sell our house in about a year, and we’ve been trying to find cheap ways to do the little upgrades, and this is perfect!!!
Lauren says
Okay, now I’M obsessed with ORB oil-rubbed bronze… thanks a lot YHL :P
The handles look great! It’s amazing what a small project can do. Thanks for sharing :)
Mary Thomas says
From one ORB lover to another, congrats on your knobs going brunette in time for fall. This isn’t LA, not everyone has to be blonde, right? But aside from that, WOW, I just can’t say enough about the new knocker on the yellow background of the front door. Just pops. And I LOVE the new header.
I also make imitation walrus sounds. But I think only my husband knows that. :) Hope the office reno is going smoothly today and no more Groundhog Day crashings!
Kim says
Thanks for saving us from replacing our front and back door brassy knobs!
JennyB says
Ahhh, I’m swooning! I’m off work tomorrow and have so many things to ORB. Can’t wait!!
Karen says
I recently spray painted some picture frames for a frame gallery (inspired by you) that I am putting in my house. I am not smart enough to use gloves and ended up with very spray-painty hands. In case you were wondering, goo gone was amazing at removing the spray paint from my skin. One spray and a little rubbing with my other hand and all evidence of my fiasco was gone! It washed off really well too, with no greasy feeling after, and had a nice orange scent! Thanks for letting me share my (totally random, I’ve been waiting for you to post something about spray paint so I could share this) tip!
YoungHouseLove says
Haha- nice tip! I usually like to use rubber gloves like the dork that I am (yes with my black socks pulled up nice and high).
xo,
s
Emily says
WOW – I’m totally amazed at the difference and not to mention the price. So many ideas just WAITING for me to get my hands on around my house. And, it’s something as little as a door knob and handle – something I touch EVERY SINGLE DAY and never thought about renovating.
Thanks for sharing this one. I definitely need to try this!
Monica says
So glad you posted these instructions! I’ve tried twice now to spray paint my hardware, but never tried the deglosser. The first time around, the paint started rubbing off soon after the job. The second time I used a clear coat finish to hopefully make it last. The yellow door looks awesome!!
Audra says
They look great, but speaking from experience, sealing them with SOMETHING might be a good idea.
I discovered ORB 4+ years ago and sprayed all the hardware in my home, proud of my cheap update. In no time, though, it became scratched. None of it chipped, as in bad adhesion, rather it scratched. My kitchen cabinent hardware and doorknobs scratched from wedding bands, keys (or jingly keychains attached to the keys), etc. Now all that ugly gold is peeping out. I would be willing to respray it all if I could find a proctective coat that works well. I wish I had sealed them when I first did them and they might still look lovely. Maybe you will luck out and not have this problem.
Love the yellow door, very cheery and pure sunshine.
YoungHouseLove says
Thanks for the tip Audra! They just added the primer to the ORB formula (literally about a month ago, the stuff we used on Karl’s legs didn’t have it) so we’re hoping it’s even more durable with that formula change. We’ll definitely share an update with everyone if it scratches/chips or holds up though. And if it does have scratching/chipping issues we’ll likely sand it all down and start over and seal it- it’s more of an experiment at this point to see how it holds up. Haha.
xo,
s
Erica says
Looks great! A huge improvement from the Donald Trump-esque gold.
Dusa says
The swoop is totally sexy now…the door, not The Donald.
YoungHouseLove says
Haha, I don’t know. Somehow I think The Donald thinks his swoop is sexy too.
xo,
s