I’m not a runner, but I can make one. I used to run track and cross country in middle school and high school. I actually ran a 5:09 mile once (with the help of some downhill portions of a course and the fact that I was like 80 lbs). It happened once and never again (I usually clocked in between 6:20 and 7:10). But those days are gone (due partially to an ankle injury but mostly to laziness). Now I only run when I’m being chased. Or when I lose track of the baby. But making a runner? That I can do. You guys actually got a sneak peek of my recent runner creation in this picture from Clara’s party:
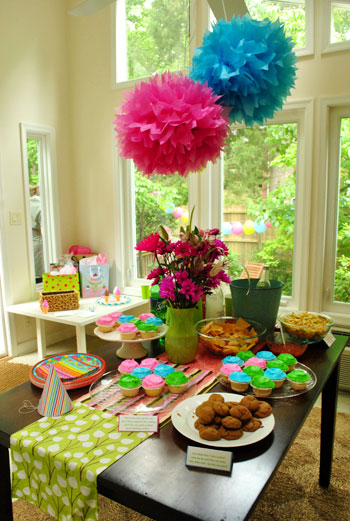
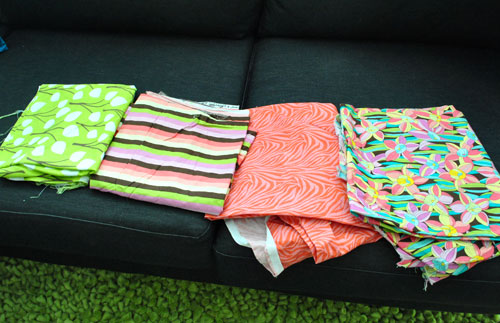
And let me tell you, it was child’s play compared to my big quilt project (nothing like a little confidence-building quick & easy sewing project to get your sew-mentum up). Yes, I just made a sewing pun for my mom. Happy birthday Momma (it’s tomorrow)! Anyway, here’s how it went. First I sorted through all of the leftover fabrics from Clara’s weekly photo project and picked four that I liked together (for a sort of cheerful and happy-go-lucky mixed & matched effect).
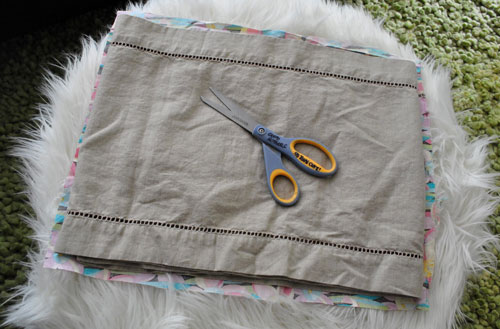
Then I found a runner that I already owned (from Target a while back) and folded it into quarters so I would have an idea of the size of each of the four squares of fabric that I should cut out (so that when sewn together they would equal the approximate width and length of the runner that I already had). I left about an inch of overhang on all sides to account for seams, so it looked a little something like this:
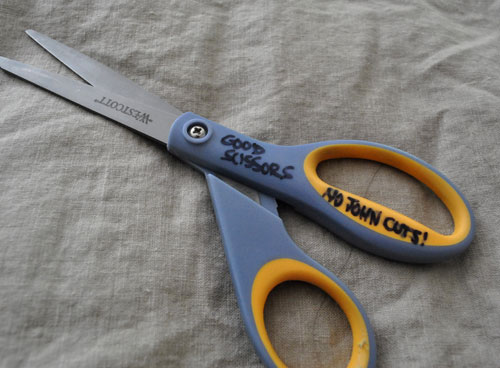
And for some reason I like to over-share, so I’ll point out how insane I am about my “good scissors.” I actually wrote this message on them with Sharpie because I was sick of John using the good sharp ones to do something crazy like trim a thick branch outside or slice open some crazy-thick plastic package. Do you like how it specifically says “no John cuts”? I think it’s hilarious. That’s like Kate Gosselin level micro-managing right there. But it works. John won’t touch these scissors anymore. And I love you for that babe.
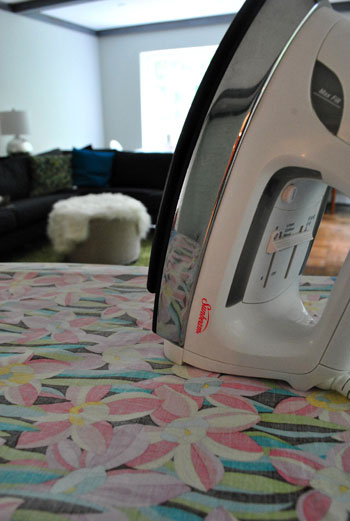
Anyway, next I ironed all of my four fabric rectangles so they weren’t all junky and wrinkled looking (they were already washed, btw, which is important to combat shrinkage – because nobody likes shrinkage).
Then I pinned each section together with the bad side facing out (which would create invisible seams – which are my favorite since they’re harder to mess up). Oh and to all of those who gave me the tip about pinning it perpendicular- I love it. I just somehow forgot so I’ll have to try that next time.
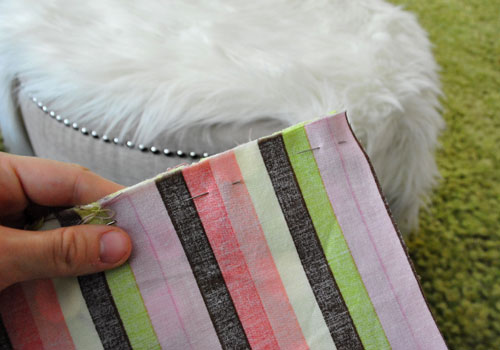
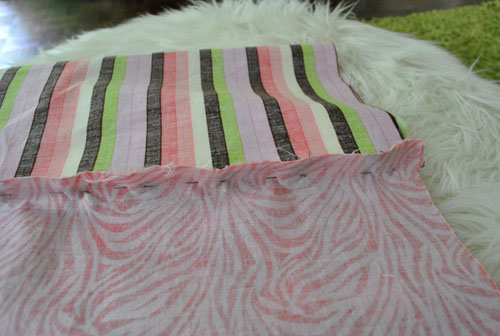
With it all pinned together it looked a little questionable for a while, but I (surprisingly) had faith that when I ironed and sewed those seams they’d look a lot less ganked up then they looked at the pinning stage of the game:
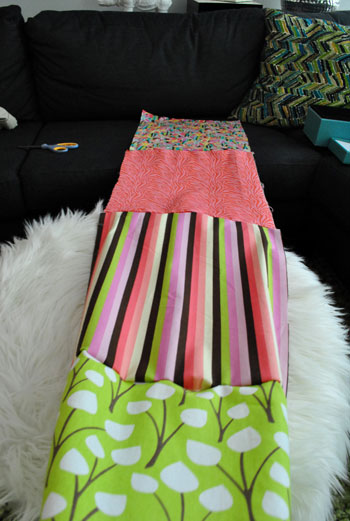
And sure enough, after a little bit of sewing things were looking a lot more promising. Who ever would have thought that me + sewing machine = something looking better than it did before. I’m telling you, this is serious growth for me as a person. I would have defined my relationship with sewing machines as tumultuous before this month. But times they are a changing. I might even have a tiny crush on Oh Brother.
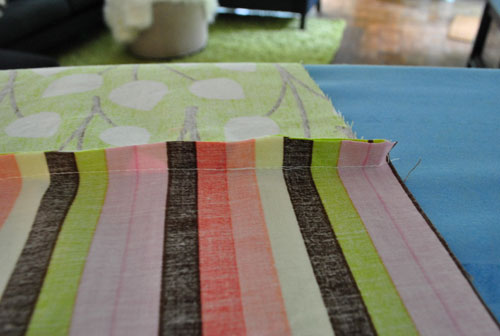
Anyway, then it was time to iron down those seams from the back so they would lay nice and flat and look good from the front (as opposed to looking all bunched from the front like a big ol’ runner wedgie going on under the surface).
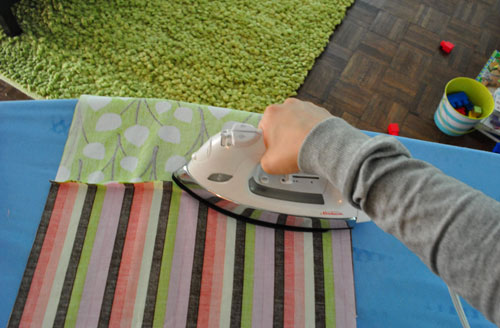
Then I ironed the outside seams on each end of the runner down to create the finished seams that would be seen from the front. I went straight to ironing because I was feeling gutsy (and didn’t feel like pinning the entire outside edge since the baby was about to wake up from her nap any minute and I was feeling all jumpy and why-the-heck-not about it)…
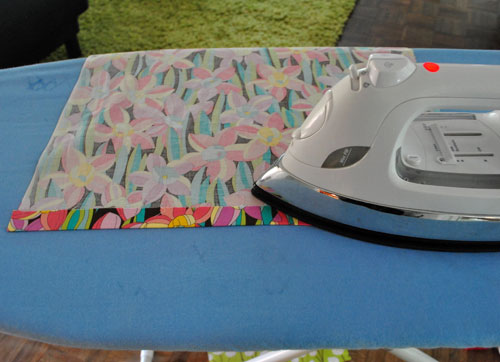
… and then sewed those two seams (these seams would show, which still kind of scares me but it wasn’t a big deal in the end- I just tried to go slow and steady and keep things nice and straight).
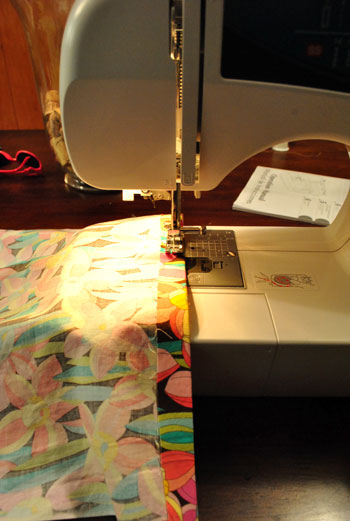
In about five minutes I had a nice tailored looking seam on both ends of my runner (without any pin usage – saweet). Then I had to deal with the unhemmed sides of the whole thing.
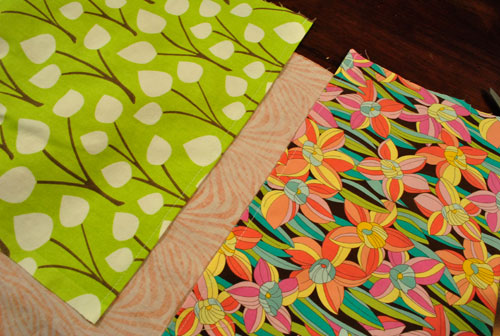
So I ironed them down too. I have to admit that not pinning felt good. Like I found some sort of shortcut to the next level in the video game of sewing.
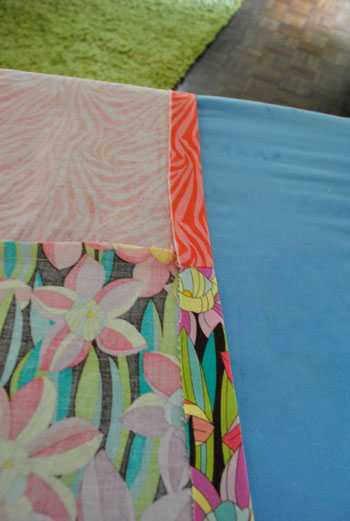
Then I just slowly and carefully stitched around my ironed edges to create a nice neat hem around the outside of the rest of the runner. Aside from my bobbin running out halfway through (which pisses me off every time, I’m not gonna lie), it wasn’t annoying or frustrating. I was almost – dare I say it? – enjoying the process.
Cue the collective gasp.
Anyway, after making out with turning off my sewing machine and removing my freshly completed runner, I just ironed the whole thing again, just to make sure it was nice and tailored looking. Houston, we have a runner:

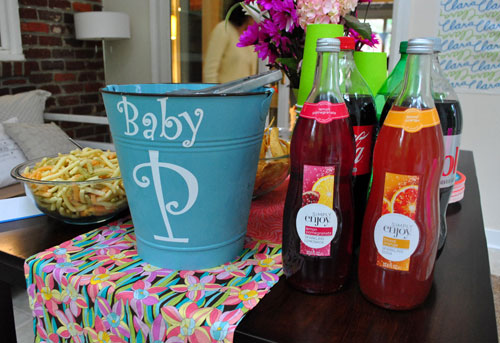
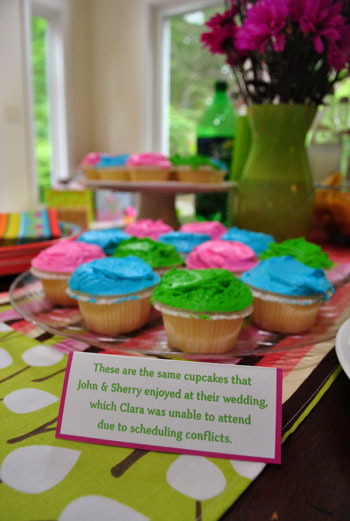
I hope to use it at lots of Clara parties to come. And probably for a bunch of other parties too- it’s just really happy and festive. It even looks kind of Easter-ish so it could work for a fun little egg dying party or something. Oh and the total cost = zero bucks (thanks to already having the fabric on hand). As for how long it took, I knocked it out in about 45 minutes to an hour. So it’s perfect for any beginners out there who want to kill me because they think I’m getting good at sewing. I’m not. I’m not even junior varsity. I’m the water boy of sewing. I don’t know the right terms for things, I make tons of mistakes as I go, but I’m telling you – just messing around until you end up with something you like is a surprisingly effective approach thus far. So take it as a sign that if a cursed sewing-machines-revolt-in-my-presence person like me can tackle some simple projects, you can do it too. Probably much better than I can.
Psst- Our baby-proofing adventures continue over on BabyCenter today. Can you handle the excitement?

Lauren @ CMYKrafty says
I totally understand all of your sewing frustrations, and how glorious it is to actually finish a project without messing it up! I have said many a time that I am going to throw my sewing machine out the window…
I’d consider myself a beginning-intermediate sewer, but I have learned this tip from experience: when you hem your edges, you’ll want to fold the fabric twice—basically tucking your raw edges under 1/4″ or so before you stitch your hem (instead of just one time and having the raw edge exposed). With handling and eventual washing, the exposed raw edges will fray.
Happy sewing!
Dani Marie says
LOVE your site! Just passed along the Versatile Blogger Award to you :)
http://danimariedesigns.blogspot.com/2011/05/two-new-awards-thank-you.html
YoungHouseLove says
Aw thanks so much! I tried to comment on your site to thank you but it wouldn’t go through!
xo,
s
Torrie @ a place to share... says
“Kate Gosselin level micro-managing”… Love it. =)
(love the runner too)
Brittney says
Hilarious about the scissors. I think that officially makes you a sew-er! My Mom was a spaz about her sewing scissors too. I think my brother saw his life flash before his eyes when he used the “good scissors” for cutting paper for an arts and crafts project. Haha!
Katie says
I love the runner, but I really love the scissors! My mom is also serious about her fabric scissors, but not quite as friendly with her message. In Sharpie she wrote on hers “If you use these, I will kill you.”
I guess after 30+ years of marriage and four kids, she realized that was the only message that would work!
Darlene says
“messing around until i end up with something i like” is totally my approach to making curtains. of course, i have spent a lot of quality time with a seam ripper…but i eventually end up with good enough curtains from, for example, a $5-on-sale urban outfitters tapestry or $2-per-yard clearance fabric. though, i am kind of waiting for you to tackle curtains so maybe i can get some actual instructions. :)
Caitlin says
There’s nothing wrong with having “good” scissors! Just about everyone who sews knows you need a pair of “fabric only” scissors. Don’t ever cut paper with them!
^_^
Meredith says
So this totally took me back to 4th grade, when we were using scissors for an art project and a boy in my class said how he “wasn’t allowed to use the scissors for cutting paper” and it came out that his mother had wigged out on him for using her sewing scissors on a craft project. Our teacher empathized with the mom and we got a long explanation of how there are different tools for different projects and sewing scissors are special…clearly, the lesson stuck. :)
Claire says
As soon as I read “scissors” I knew I had to comment to let you know about Gingher scissors… and then I noticed that someone else had beaten me to the punch.
I was taking a beginner sewing class and a friend let me use her Gingher scissors. I thought “How great can these scissors be?”. ummm… AWE-SOME!! The friend had gotten them at JoAnn Fabrics with a coupon. So that exactly how I got mine & I’ve never looked back! (and I did tell my husband to never ever ever use them unless he was cutting fabric)
So if you want some great scissors: http://www.gingher.com/
YoungHouseLove says
Thanks for the recommendation! They sound heavenly.
xo,
s
Emily says
I will second that! My Gingher scissors (regular & pinking shears) may be my very favorite possessions!
Ashley says
You should check out the book “One-Yard Wonders: 101 Sewing Fabric Projects” I was gifted it awhile back and have yet to make anything from it, but look through it often just dreaming about what I want to make when I have the time. There are so many cute projects in there that would be perfect for your fabrics…even adorable things you could make for Burger!
YoungHouseLove says
Thanks for the tip!
xo,
s
Becky G says
Ditto – it is an awesome book. It also features fabric from my second favorite blog, How About Orange.
YoungHouseLove says
I love that blog! I’ll definitely check it out!
xo,
s
Elesea says
I’m so impressed with your persistence. I’m a novice seamstress myself, and recently sewed through my finger (after which I promptly freaked out) in the midst of a project. I have been giving my machine the evil eye ever since. However, after hearing about your success I’ll have to give it another go! Great job on your runner!
Caroline says
Love the name of this post! So great.
kristen says
“sew-mentum”?? your momma must be so proud. ;D
you crack me up/inspire me, as ever, sherry.
RebeccaNYC says
Look how far you have come from that tangle of thread! sniff…so proud! Your scissor protection plan reminds me of many many christmases ago when I gave my sister a new pair of really good, expensive scissors. There she was, sitting next to the christmas tree, looking all angelic, with her two adorable children at her knee. When she opened my package, she brandished the scissors about yelling “do you see these scissors? do you see them? YOU WILL NEVER TOUCH THEM!!!” Scared the hell out of the kids. They are adults now, and they still won’t touch “the scissors”. Ah, good times…
amanda says
Haha, I have those same scissors and they’re the good ones at my house too.
And threading multiple bobbins at a time, why didn’t I think of that??! I’m getting very excited about sewing stuff now that I’m taking classes. I’ve done an apron, pillow and a makeup bag with a zipper and tonight is pj pants. Of course, my ideas probably exceed my skill, but I will stil try.
Did I miss it (I may have, I’m at sneaking at work), but where is the green runner fabric from?
YoungHouseLove says
All of that fabric is from JoAnn (on clearance or purchased with a 50% off coupon). Hope it helps!
xo,
s
Megan B. says
I have a pair of shears and embroidery scissors from Gingher (bought on crazy sale from JoAnn Fabrics). Those suckers are amazingly sharp and they can live in my sewing box, so they don’t accidentally get used on anything but fabric/thread. There’s a nice pair of Fiskers labeled “PAPER ONLY”, too. And then the kitchen shears on the magnetic knife strip. Plus some crappy scissors for cutting coupons or whatever. I think having that many scissors in the house helps prevent misuse, since there’s always one for the task!
Also, never give up on the sewing. Be patient and take breaks if you get too frustrated. Also, own a few seam rippers (since they’re easy to lose) for the inevitable mistakes. My home ec teacher was big on teaching us how to fix our mistakes instead of pushing for perfect work from the start. Makes things way, way less intimidating.
Jenny says
So super awesome, Sherry! I love that you’re running with it — especially because I can relate more to the ‘what if this doesn’t work out at all at all at all’ element in your home projects than in your sewing projects.
A counter-tip on pinning perpendicularly — I wouldn’t recommend sewing over them! You can do it, but there’s a chance the sewing machine needle will hit directly on the pin and one or the other can break, flying up toward your face…not safe! And who really wants to wear safety goggles while sewing?? It’s less likely to happen if you’re stitching really slowly, but doesn’t seem worth the risk to me.
Also, on the plastic-headed pins…then you have to think about them when you iron. Because they melt. I still use the better-safe-than-sorry metal pins (or just ironing — isn’t that awesome, how you’d have to iron anyway but it can also replace pinning! Yay.)
So glad you’re having fun with it!
YoungHouseLove says
Thanks so much for the tip! I have the all-metal pins just like my mom had. Haha. Didn’t even know there were plastic ones. How’s that for beginner? Haha.
xo,
s
Laurie says
I grew up in a household where the ‘sewing scissors’ were probably my mom’s most treasured possession! And of course, I have my own and everyone knows better than to use them for anything…What’s kinda fun now is I have my grandmother’s and mother’s sewing scissors…and they are all still off limits to everyone else!
Congrats on figuring out the sewing mystique…just keep on trying stuff til you figure out what works for you…sew over pins (we all do) but it can wreck a needle..but heck, just put a new one in! Hope you try some clothes for Clara while she’s still little…baby clothes are a lot of fun (and cheap) to make, especially summer clothes….
Have fun!
Sharon says
Love that you labeled the scissors. I had to do this too. I labelled my sewing scissors clearly with “SEW” but when my husband found them, he asked “why did you write my brother’s name on your scissors?” His brother’s name is “WES”!
YoungHouseLove says
Haha, hilarious.
xo,
s
Holly says
Love your new sewing ideas- I just got a Brother for my birthday and can’t wait to try out the quilt- you made it look easy! Although I’m sure I will throw a fit at some point and cry sewing tears because it can be so frustrating!
Thanks for the idea!
Susan says
You’re in good company. The bobbin running out of thread gets me every. single. time. It looks like we’re about on par in sewing skills, or perhaps you are a little ahead. It’s fun when it’s all done though, isn’t it?
Jason says
I have made some curtains for the bathroom with hem tape and an iron, but I have what may seem like a dumb questions.
How do you get the hem perfectly even when you fold it over to iron it? I always end up not folding/ironing it perfectly across the entire hem.
YoungHouseLove says
Hmm, I guess I just eye it and try to keep an eye on the runner as a whole and not just one small section so I don’t get to the bottom only to realize that I ironed a big uneven slanty hem or something. It seemed easiest to try to just iron a half-inch seam all the way around so it would look nice and straight in the end. Hope it helps!
xo,
s
Jason says
Maybe I need to be sure I am extra precise in the cutting of the fabric so that it’s perfectly square, could have been off a bit….
YoungHouseLove says
Oh yeah that really helps!
xo,
s
Colleen P. says
Jason, there’s a tool called a hem guage, they cost around $1 at fabric stores, and they usually go up to about six inches long. There’s a sliding plastic tab on one side, you set that for the hem width you want, and then just pin along at that length and press it well. It’s also not a bad idea to measure it from top to bottom (with a tape measure or yardstick, doesn’t matter which) to make sure that you have the same length all the way across your curtain.
I do have a larger tool called an EZ hem (made by Dritz), and if you’re doing window treatments for your entire house it might be worth getting one-this tool allows you to fold the fabric over the edge (it’s metal) and press directly over the tool-it’s got measured increments across the whole thing. They come in a size for dressmaking and a huge one for curtain making. The curtain making one is about $30, but often stores will have notion sales or coupons so you can end up paying a lot less. These tools are invaluable for saving frustration.
I hope I’m not overstepping my bounds here J&S, it’s just that I love to work with people new to sewing-it’s very easy to get frustrated learning a new skill set, but most things are an easy fix if you just get a little help now and again. Even if you only ever make curtains/drapes, you will have saved yourself hundreds of dollars.
YoungHouseLove says
Love it!!! All tips are welcomed with open sewing-machine-hugging arms!
xo,
s
Jason says
Colleen,
Thank you so much! I will look for this, because I think it will be very helpful for any fabric project I’m doing. Any tips for making a perfect straight cut in the fabric? I’m thinking they sell a roller cutter or something.
Maybe I can hire you to make drapes for me – custom seems to be the only way I’ll get something to fit :)
Colleen P. says
Jason you’ll be just fine, I promise! Drapes and curtains are the easiest thing to make because you really only have to worry about the length, not the width, because they are gathered onto the rod. As you’re already noted, you need your length plus whatever you use for your hem and header (bottom and top finished edge, respectively). I usually do a 4″ header and a 5″ or 6″ hem-nice deep hems make curtains hang better. This helps to figure out which end goes up, because some fabric has a one way design or looks different depending on how you hang it, so you want to keep track of top and bottom. I put a big fat safety pin at the top as I cut each panel and leave it in until I’ve got my header sewn.
I have a dirty little secret for cutting drapery fabric-I first make sure the cut edges are straight (and they’re not always, so don’t rely on that, not everyone that works in a fabric store can cut straight). If they’re not straight I fold the fabric over a bit at a time until the selvages (the finished edges of the fabric) line up on each edge and the fabric lies flat. I mark that with a pin on each selvage, then press it with an iron to get a line across-cut across this line. Repeat on the other end-as long as your selvages line up and the fabric lays flat, it pretty much has no choice but to be a straight line across the width of the fabric.
I sew the selvage edges first-fold under an inch and then another inch, stitch at the fold. Press press press press press with lots of steam-you’ll be glad you did! Then I fold under the top and bottom (cut) edges an inch, press it, and then fold down my header (top) and hem (bottom), and again, stitch on the fold. Definitely pin these after you get your inch folded under-the fabric on the bottom, facing the “feed dogs” on your machine, tends to pull through the machine faster, so pins help keep it from pulling too much-you’ll also probably need to hold the fabric and keep just a wee bit of tension on the bottom layer to keep if from feeding through too fast. This is something of a “live and learn” proposition-some fabric works like a dream, some fabric just wants to bunch up and cause you grief.
Whew! Another huge post! Hope that helps, and if you have any questions please feel free to ask, I don’t mine AT ALL!
laura says
A 5 minute mile!!!!!! good lord! I just started working out again in February and I am only down to an 11 minute mile! that is crazy fast! nice runner by the way :)
Sasha says
If your machine is the kind where the bobbin just slips in (not the kind where the bobbin snaps into a metal casing), I found a nice shortcut. Buy a 12 pack of bobbins at Hobby Lobby; they come in a color variety pack. I think they were less than $3 (and that was without a coupon). Since I bought that multi-pack, I have never wound a bobbin. I just change it out when I need a new color.
YoungHouseLove says
Hmm, not sure if my machine would work with that kind of slip-in bobbin. Off to investigate!
xo,
s
debbie says
I totally get protective of my good scissors too! I have a pair that are ONLY for fabric and have told the hubby not to touch them, breathe on them, etc. I keep them tucked away in my sewing basket so he won’t be tempted to use them.
Noah says
After wrecking my mom’s good sewing scissors by using them on paper and other things, my sister & I gave her a pair with an actual padlock on them and gave her the key so only she could open and use them!
Patti says
Great job Sherry, you’re starting to make this look easy! I thought you might like this blog, http://www.lilblueboo.com/, she sews lots for her little girl (along with other projects too) and I like that she always posts “how to” tutorials. Btw, any seamstresses out there know of a good quality iron to buy? I’m in the market for a new one. Thanks!
YoungHouseLove says
Thanks for the suggestion! Anyone know of a good iron for Patti?
xo,
s
Colleen P. says
Rowenta are very good ones, but a touch expensive-however, if you’re really into sewing they’re a worthwhile investment. Other than that, a good name brand iron that feels heavy when you lift it, with a big water tank, will usually do the trick. You want the weight for smoothing wrinkles, and you want plenty of water to make loads of steam, both of these features make less work for the person sewing.
(I’ve actually made a living working as a seamstress, so hopefully that qualifies me to answer the question!)
Rachel says
I recently ironed 8 yards of linen for our upholstered king size bed and headboard, and I could have kissed my Rowenta iron when I was done. The steam function is seriously the best I’ve ever used. It makes clothes look good too, especially the collars on hub’s shirts. Mine is the Rowenta Focus Microsteam Iron which retails for around $80.
YoungHouseLove says
Ok, you just made ironing sound like fun. Haha.
xo,
s
Patti says
Thanks for the help you guys, Rowenta it is!
Angie says
I’m so proud of your sewing accomplishments, Sherry. After seeing how you’ve grown to actually like your Oh Brother, it makes me want to learn to sew. I’ve inherited my grandmother-in-law’s sewing machine but have been too afraid to even go near it. You’ve given me the confidence to “never say never”. Thanks for that!
Melissa says
I have a suggestion that I didn’t see from skimming the comments. If you want your item to be durable in the wash, iron a narrow hem first around the edge, then iron a wider hem to contain that raw edge, which will unravel in the wash and cause all kinds of stringy messiness. Stitch between the folded edge and the hidden raw edge, just like you did for the runners. If you feel so ambitious, you could do this on the runners you made by just making a wider hem again. Alternatively, you could use pinking shears, but I prefer the double-fold method – don’t count on that being a technical term :)
YoungHouseLove says
Very smart! I love it. I’ll have to try it out next time!
xo,
s
Lindsey @Textbooks and Cookbooks says
Thanks for the suggestion about the documentary Catfish; my bf and I watched it last night. It was crazy and pretty bizarre in the end!
YoungHouseLove says
So glad you watched it! Wasn’t it one of those movies that just sticks in your head for a while! We’re still talking about it!
xo,
s
Rachel says
Haahaha: “Aside from my bobbin running out halfway through (which pisses me off every time, I’m not gonna lie)”
I’ve gotta say, Sherry, this HAS got to be one of my favorite posts. Brilliant. I love the tone… hilarious!
I think I can relate. I grew up with a super domesticated mother and have always been interested in these types of things, just never really good at them… or, well, as good as I think I am at them. It took me years to practice sewing and then I finally got my own for Christmas a few years ago and had the same issues.
At any rate, I LOVE you guys. Clara is cute as always. I’d clone Burger if I could. Keep up the good work!
Laura@JourneyChic says
Your runner turned out so well, and now I’m embarrassed – my sewing machine has been collecting dust for months after having been used once to make some pillow covers. You’ve inspired me, though!
candace @ thecandace.com says
A 5.09 mile – that’s insanely impressive! You must have ran at State with that killer time!
I’m loving your homemade runner and that you plan to squeeze in many birthdays and other celebrations with it.
YoungHouseLove says
I only did it once so I was an alternate. Haha. I don’t know what got into me that day, but I’m still waiting for that inner athlete to resurface. Hah.
xo,
s
Karen says
I mark my scissors, too! I got so tired of trying to cut fabric or wrapping paper after a certain someone has used them to cute wire or some such. LOL
Great job on the runner… those fabrics are so cute together.
A little tip for ya; If you open up the seams where the two fabrics are sewn together and press them down flat that way… they will lay even nicer and won’t bunch up after being washed. ;)
YoungHouseLove says
Thanks so much for the tip! I don’t know why I never thought of that but it makes perfect sense!
xo,
s
laxsupermom says
The runner looks fab! Love the pattern combinations. And I’m especially impressed with the mile time! Holy cow! As a former track & cross country runner who still occasionally gets out there, I have to know if that was a girl’s mile(1500m) or a metric mile(1600m.) The mile time I always give as my PR is for the metric, because guys can compare. Either way, though, it’s super impressive.
YoungHouseLove says
Metric mile! I don’t know what got into me! I only did it once and I’m still waiting for that inner athlete to come out. I was like 80 lbs at the time so maybe it was just easier to thrust myself forwards. Haha.
xo,
s
Jessica says
I think I need to mark my good broom like you marked your good scissors. I swear, as soon as I get a new broom, my hubby snatches it up and uses it to sweep the fresh cut grass off the sidewalks. It drives me insane!!! He doesn’t seem to understand that those little pieces of grass stay in the broom and end up all over my house when I try to sweep inside. I always give him my “old” broom for outside use when i get a new broom, but the new one still somehow ends up “outside” within a matter of weeks….I’m getting a Sharpie and going to town….lol
YoungHouseLove says
Haha- that happens here too! I like the idea of marking it. Or buying a hot pink zebra one that John’s not too keen on using outside in front of the neighbors. Haha.
xo,
s
Jessica says
That’s an even BETTER idea! Thanks! Now, where to find a hot pink zebra broom….haha
Emma says
Congratulations! Your runner looks great. I’m impressed by your quickly developing sewing skills AND your 5:09 mile (who cares when it was?).
alexis says
I started sewing a couple years ago when my niece and nephew were born. My mom is this big time seamstress (sewing for a living!) and growing up I have always been afraid to touch her sewing machine (or serger = best thing ever). I sarted sewing on one of those realllly old singer sewing machines (there’s not much you can mess up there, it goes forwards and backwards.) I would recommend a pillowtop dress for your first Clara clothing project!
Barb says
Nice job, Sherry. See….you are conquering this sewing thing!!! Keep it up, Girl!!!
B.
Amanda says
No pressure or anything, but Sherry you have to make this for Clara! http://pinterest.com/pin/27261260/ (or just for you!)
YoungHouseLove says
Oh yeah I love that!
xo,
s
Shannon says
What a FUN runner! I love that you call it the “bad” side of the fabric by the way :) Also, for slightly larger projects, I’ve started winding two bobbins right away to cut down on the Argh!-factor halfway through the project. Then you have one all ready to go and you don’t have to re-thread your machine again.
YoungHouseLove says
Haha, I never noticed that. Bad fabric! Time out for you.
And I love the bobbin tip. My mom gave me the same one!
xo,
s
Erin Erickson says
I have several pairs of “fabric only” scissors and I keep them on my desk. We have three pairs of kitchen shears and a pair of different looking regular scissors in the kitchen for things like opening mail, packages, etc. If one of those won’t work for my husband, I have him trained to come to my desk and ask “which scissors can I use?” How awesome is that? Now if only I can train him to clean his own bathroom…
I also started sewing with little experience and I learned as I went just like you. I’m giggling at your project because it’s totally something I would have done 3 years ago. (Except way more adorable!) So, I’m going to give you a tip from 3 years in the future :) If you want to wash it and save it to use year after year, you need to finish those edges. Either use a zig-zag stitch or you need to do the right-sides-together-and-turn thing. You could also double fold the hem. There are tons of fabric finishing techniques, the point is just to make sure the fabric edges are enclosed somehow so it doesn’t come apart in the wash! I think you did great, I just don’t want you to be disappointed if you wash it. If you hand wash it and hang it to dry, it will be fine!
I love your blog and I have little dogs so I love when you feature Burger too. It figures that it’s a sewing thing that would make me comment!
YoungHouseLove says
Thanks for the tips!
xo,
s
Patty says
Hi!
I just wanted to leave you a GREAT website for sewing:
http://www.sewmamasew.com/
There’s a ton of tutorials. Also – when you do your seams, next time, do two 1/2 inch turns at the edges (press between each fold) – the inside will then be nice and crisp and look store-bought (kind of like how a shower curtain is sewn if you look at the edges).
Sewing is so much fun! The possibilities are endless!
YoungHouseLove says
Thanks so much!
xo,
s
Annelise says
Nice job with the scissor labeling!! Now that I am sewing I understand why my mom always yelled at us about using her “good scissors.” As a tip, if you use pinking shears you can limit fraying at the seams when you wash the runner. Alternatively, you could sew the seams with a zip zag stitch and that will stop the fray as well.
Congrats on your sewing success!
Nora says
Get pre-filled bobbins! I bought a pack of 20 for my machine in white and black at Jo-Ann Fabrics (oh check out aisle temptations). I still have a bunch left but they are so nice for just popping in the machine. When they run out, I just refill them myself but it’s nice to have a bunch around. If I’m making something, I like to use a neutral thread even if it’s not exactly perfect, especially for stuff like the invisible seams.
And I totally have my own scissors. My mom gave me fabric scissors and I hide them from the BF so they don’t fall prey to cutting plastic packaging or metal or something boyish.
Lori @ Richmond, BABY! says
I just love how you’re using up the fabric. Great runner!
Bridget says
Off the wall question… I was wondering where I could find photo covers like you used for your wedding on the clothes line? Cutest idea ever btw
YoungHouseLove says
Those were actually three photo clear sleeves from Office Max that were meant for binders (they had three holes punched down the side) but I just cut out each of the photo pockets from the sheet so they could be hung individually. Hope it helps!
xo,
s
Emily says
The runner looks great!
I had the same problem with my boyfriend using my fabric shears for EVERYTHING, including trimming branches, bits of wire, etc. Then one day I took him to the fabric store, walked him to the aisle with the shears, and pointed out how much he would owe me if he ever used the scissors again. All is good and now he only touches the black kitchen scissors. I can almost see the thought process in his head as he thinks about what scissors to take.
Colleen P. says
I don’t know if anyone has posted this, but I have just a teensy pressing tip-when you want to press a seam open, first, press it flat, just like you’ve sewn it, then press to one side, and then press it open-I know it’s a few extra steps, but it makes for a better finished product.
YoungHouseLove says
I love that tip! Never knew that!
xo,
s
Bridget says
I love the way your brain works!!! I would never think of that! Thank you!!!!!!!!!!!!