Alternate post title: “In A Minute, I Have To Hairdry The Chair”
Guys, I did something crazy. Since we’d like to take our $25 hotel-ish dining chairs to a crisp not-patterned apple green (the curtains I want to make will be patterned, so I just want chairs in a fun color but without a pattern that I’ll tire of) I decided to paint them.
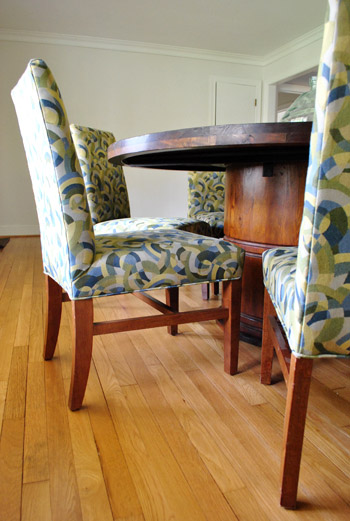
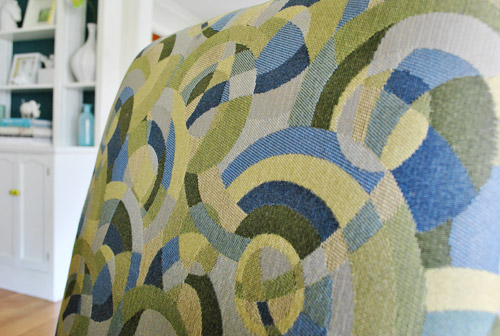
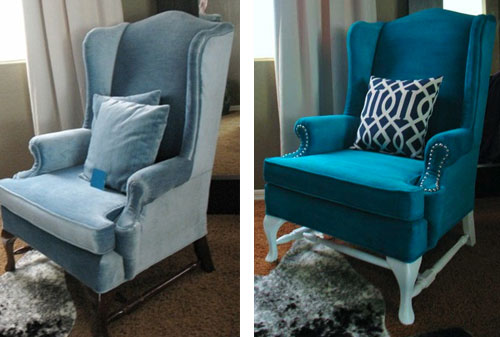
I know. Insane. But I didn’t think I had much to lose since the backup plan is to reupholster or slipcover them (both of which would still be entirely possible if I didn’t like how the whole painting thing turned out). I went into it as a hmm-this-experiment-should-be-interesting thing. Nothing was guaranteed and I felt like a crazy person the whole time. Yup, I was skeeeeered. I mean who paints a chair? Well besides a few amazing bloggers who have posted about how well it went for them. For example, this tutorial was up on my iPhone the entire time for reference and encouragement. Just look at Kristy’s amazing chair transformation. She did that with paint!
So here’s how it all went down. I pretty much just based my method on Kristy’s breakdown with a bit of flexibility since the directions on some of my supplies conflicted with a few steps. And speaking of supplies, here they are (that’s the Top Chef finale in the background BTW):
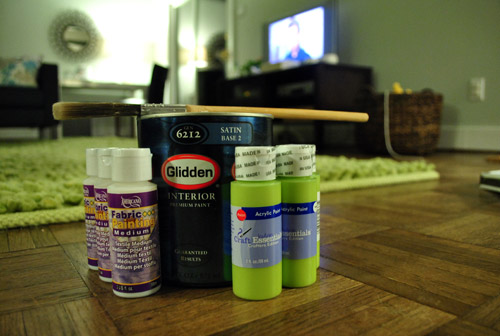
I got three tubes of “Fabric Painting Medium” and three tubes of acrylic paint in cheerful apple green from JoAnn Fabrics for under $10 total. I also picked up a quart of satin interior paint by Glidden in Granny Smith Apple (I thought it was meant to be since I’ve always talked about “apple green” chairs).
Then I just followed Kristy’s directions for the most part (admittedly not to the letter because I was also trying to adhere to the instructions on the back of my specific fabric medium, so I tried to walk the line between those and Kristy’s) and mixed one part latex paint and one part textile medium in a bowl. In order to get an even ratio I even got all type-A and dumped out the fabric painting medium into a measuring cup so I would know how much paint to add to keep the amounts equal. Here you can see that it was about a third of a cup:
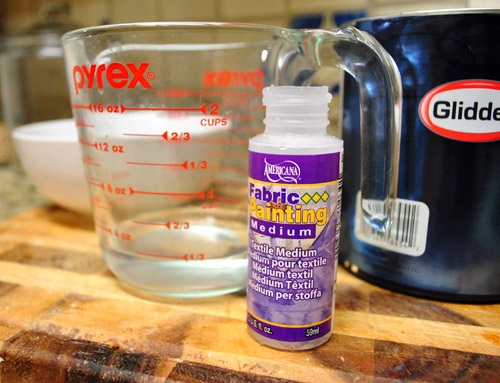
Of course I accidentally dumped way too much paint into the measuring cup so I had to pour a good amount back into the can, but I was definitely happy that I wasn’t just trying to eye things (would’ve had way too much paint in the mix).
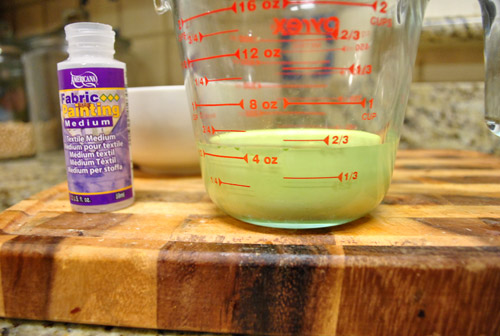
Eventually I got down to a third of a cup of latex paint and poured that into the third of a cup of fabric painting medium that I already had in the bowl.
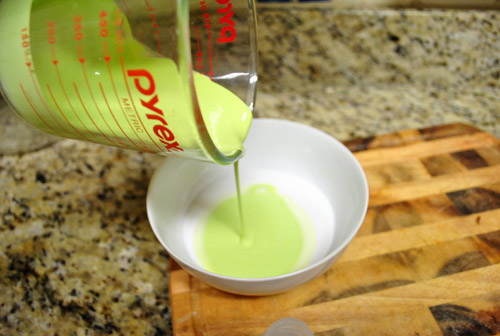
And mixed that up with a brush that I had on hand. I was a little worried because the whole thing was looking pretty yellow but paint is always kind of an odd color until it dries and gets darker.
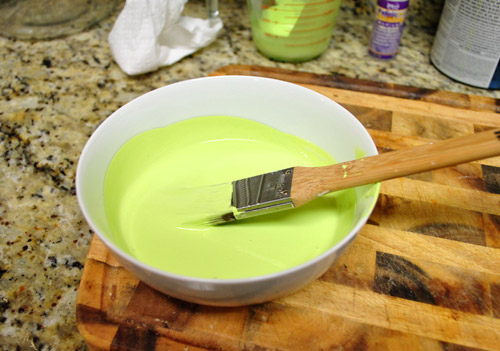
Then I added about a quarter of a cup of water to the bowl to thin things out a bit per Kristy’s suggestion. Next up was spraying down the chair with water (I reused an old cleaning bottle) so it was moist and ready for paint to glide over it evenly (instead of soaking up too much and getting all clumpy).
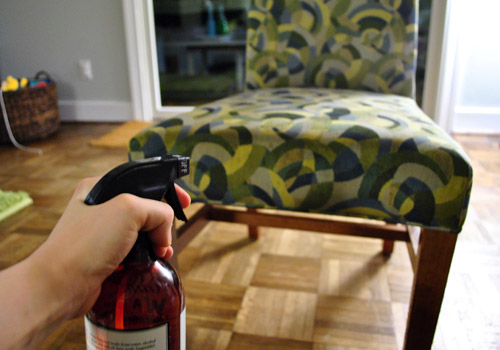
Here’s an in-progress painting shot that John grabbed over my shoulder as I went (I was too afraid of getting it wrong to stop and pose for a clear pic).
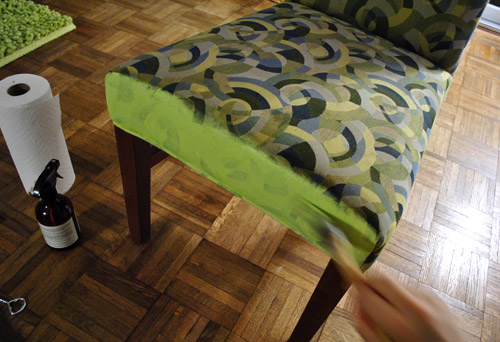
And here’s the after. Well actually I still had a few more steps left, hence the “wait a minute I have to hairdry the chair” title. John asked if I wanted to watch The Soup and I said, yup you guessed it: “wait a minute I have to hairdry the chair.” Which struck John as hilarious for some reason (I can’t imagine why) and he proclaimed that it had to be the title of this post.
The reason I was supposed to hairdry the chair was to set the textile medium (it needs heat, and when you can’t toss whatever you’re painting in the dryer, like a chair, you can apply heat with a hairdryer. But I reread the instructions on the textile medium tube and it said that I had to wait a day for the heat-setting step. So we watched The Soup and my crazy painted chair sat in the corner of the living room drying.
Here are a few first impressions:
- It’s way too neon and not as apple green as I’d like (my fault since I chose the color, but that could be fixed with different paint).
- Man, that took forever! Over an hour and a half to paint one chair (I applied a few even coats for better coverage). That factors out to 12 solid hours to do all eight chairs.
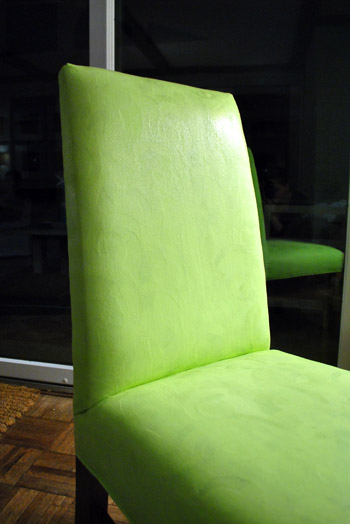
- It looks kinda cheap and those annoying swirls in the fabric still show through. See?
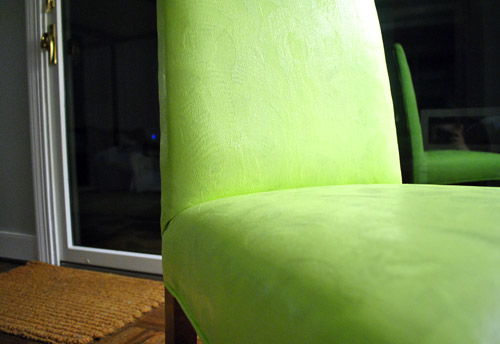
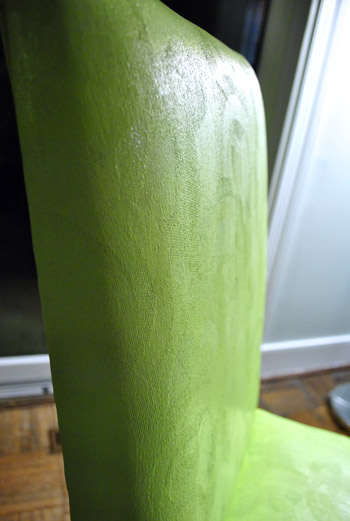
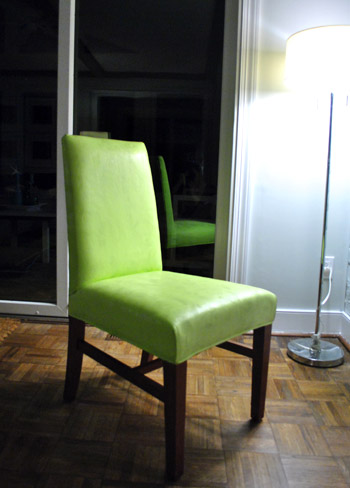
And here’s where we ended up after sleeping on it:
Slipcovering or reupholstering is a better solution for us since we’re not happy with the swirly texture that still shows through, the semi crunchy feeling (they’re not as smooth as vinyl, more like a rough burlap), and the odd look of painted seams (the flat parts of the chair don’t look as crazy, but the seams/folds in the corners just look gunky and unconvincing – as if they’ve very clearly been painted – since they have).
This method is obviously one of those it-depends-what-you’re-painting experiences. Because seriously, how amazing is that turquoise painted chair at the top of this post? I’ll save you the scrolling trouble. Here it is again (with a full tutorial here). So inspiring, right?

And although we didn’t have the same success, we’re glad that we tried this whole crazy process just to have it under our belts and share it with you guys (well, we didn’t end up applying the last coat of acrylic paint to finish things off because we decided to abort the mission, but I did later hairdry it to set it). And it’s definitely set for good, so for anyone wondering if a painted chair will rub off on the person who sits on it, nope. It’s just like how you can wear and even machine wash your painting clothes over and over again without worrying if they’ll smear. Once that paint is set into your shirt it’s hard and permanent (and the fabric medium is meant to help soften the paint so it’s less crunchy, in case you’re wondering about that additive).
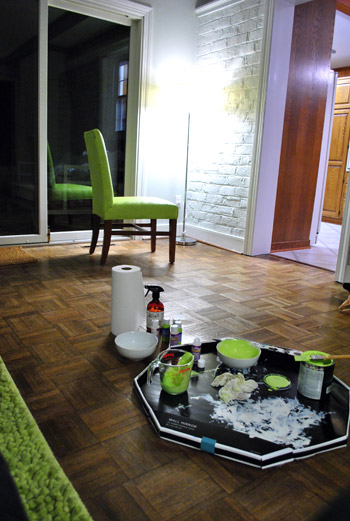
So as of right now the green painted chair is living in the crazy cluttered playroom while the other seven unpainted chairs are still hanging out in the dining room waiting for reupholstering or cheerful apple green slipcovers.
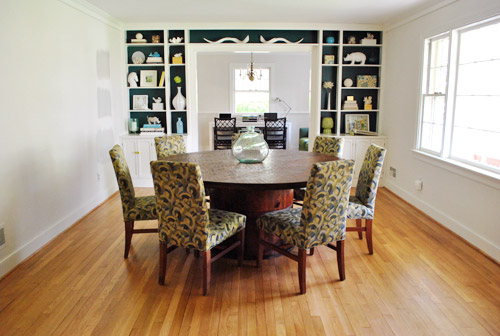
We’ll keep you guys posted as this crazy chair adventure continues. Who knows where we’ll end up (our guess is slipcovers but you never know)…
Psst- We’re talking about how kids never fail to want the only non-toy items within their reach (the remote, your cell phone, the keys, your sunglasses) and we’re divulging Clara’s very favorite (and admittedly very weird) not-a-toy toys over on BabyCenter.

beth j says
I know you’ve gotten lots of sewing tips today, but I thought I might as well throw mine in the ring too. I’ve sewn quite a while on old machines and new, some are good and some not so good. Personally I love my Husqvarna Viking – in the $300 range. Some things I have learned are that old thread is BAD, it breaks and jambs the machine. I prefer polyester and I like the Gutermann brand best. And never use bobbins that are not specific to your machine. They totally can mess things up. Good luck. It’s probably the machine and not you!!!
Beatrice says
Hey guys,
I just had a thought. I read about your experience and while writing my post on my sofa slipcover experience, I thought of you. Have you heard of Bemz? They are a swedish company, that makes slipcovers for discontinued Ikea sofas, armchairs, chairs etc. Maybe there is one there that would fit with your chairs. Good luck.
YoungHouseLove says
Oh yes we love Bemz!
xo,
s
Tamara Styles says
i think the images look great. i think this is one of those projects that you really have to either see in person to see the quality of it. Or try it your self.
Hyeson says
Parsons chairs are the easiest to reupholster, and I’m pretty darn sure you can tackle it! In fact, I found this video online for reupholstering a parsons chair, and I’m betting you can use it. Sewing is not my forte, either, but using a stapler is a cinch…. looking forward to seeing what you decide!
KathyL says
I don’t know, I went over and took a look at the painted stuff, I really think recovering them is the way to go. I can’t help but think how stiff it has to feel.
Sewing can be learned and you’ll love the ‘power’ of it when you master it!! love you guys.
YoungHouseLove says
Oh yeah, read the bottom of the post to see what we landed on (reupholstering or slipcovering). It seems to work for some people, but chair painting wasn’t for us!
xo,
s
Marian says
You guys should check out J.C.Penny online. I bought some slip covers for parson’s chairs like the ones you painted for about $12 a piece in a natural cotton color. Check these out (http://www2.jcpenney.com/jcp/X6.aspx?GrpTyp=PRD&ItemID=184197b&Nao=0&SearchRedirect=True&Ne=840+4+877+878+5+961+6+29+3+598+11+15+12+506+10+23+585+596+963+579+1031+8+1022+1014+18+904+903+969+833+949&NOffset=2&Ntt=slipcovers&SearchString=slipcovers&N=4294959029+4294964897&SO=0&PSO=0&cmAMS_T=XGN5&cmAMS_C=MERCH&cmAMS_Z=XGN5TOPOFRESULTS&CmCatId=searchresults) I bet you could use some dye and get them apple green pretty easy. If you guys are willing to paint chair fabric, this project would be a breeze.
YoungHouseLove says
Thanks for the tip! We’re looking for non-tie shorter versions but we haven’t checked JCP yet so it’s a great lead!
xo,
s
melissa says
pier1 has these green slip covers, although they are patterned……came across them looking at dining furniture tonight.
http://www.pier1.com/catalog/browse/0300.furniture/tabid/519/CategoryID/155/List/0/catpagesize/0/Level/a/ProductID/29182/ProductName/Green-Geometric-Dana-Slipcover/Default.aspx
YoungHouseLove says
Cute!
xo,
s
MaxK says
Hmmm…looks like we’re going to have to send you a refill bottle of “Counter Intelligence,” SP.
Glad to see you kept the gorgeous bottle, though!
xox, mk
YoungHouseLove says
Haha, you’re too kind! We’ll just pick some up at Anthro!
xo,
s
Denise says
Oh Sherry, I wish this project had worked for you. I guess all the “Velvet Elvis” paintings are proof that fabric paint and velvet are truly compatible. I don’t think you’ll be happy until you banish the swirls forever! Can’t wait to see what you try next. I know the end result will be beautiful.
Rosalyn says
Ok – Sherry, I know you said maybe not so much on sewing, but did you see Ana White’s tutorial for slipcovers for parson chairs? (Maybe someone mentioned, but didn’t read thru the comments – sorry if duplicate). Just wanted to share and encourage that you can do it!! Take a class and use this as your project ;-)
http://ana-white.com/2010/11/drop-cloth-parson-chair-slipcovers.html
YoungHouseLove says
Yes love it!
xo,
s
LibraDesignEye says
I want to commiserate with a fellow “no sewer” and advise my favorite slipcover company ever is BEMZ – you’ll want to know about them for Karl anyway – they make slipcovers for certain specific IKEA things aftermarket – so it is custom, but the price isn’t. IKEA has a parsons chair called Henriksdaal that I would be has about the same measurements as your chairs. You could check that out and then try an apple green BEMZ skirted or tailored slipcover. Sad to say, someone could even buy one and tear it apart then make your own with it as a pattern, but . . . you might enjoy the fine quality and great linen fabric choices they have in your favorite color. Swatches are free. I’m a fan and have Ektorp covers (dijon belgian linen has survived many washings, the dog, three boys, heavy use is an understatement) I think these are so nice they make people wonder if my couch isn’t Pottery Barn after all.
YoungHouseLove says
Love Bemz so much!
xo,
s
Tiffany R. Brown says
Oh wow! You actually tried it. I sent you that link on twitter. Well I’m not going to try it now. You guys are my guinea pigs. Off to the upholster my chair goes. It’s a wing back and I am not even touching that!
Kitty says
Phew! I was really sweating the thought of you painting the chairs. I just couldn’t see how that was going to work out and I was secretly hoping you would change your mind! I had visions of your family walking away from dinner with green bottoms. Check out some You Tube tutorials. I’ll bet you two will be sewing up some slip covers in no time!!!!
Brittney says
If you end up taking a sewing class and decide to do it yourself, Dana at MADE has a great tutorial for slipcovering her barstools in oilcloth (wonderful and wipeable) http://www.dana-made-it.com/2010/03/orange-you-glad-oilcloth-chairs.html
I’m sure you’ve already checked, but maybe the IKEA covers for their dining chairs would fit?
YoungHouseLove says
Oh yeah I LOVE that project!!!
xo,
s
Julia says
Hi Sherry, just wondering how you’re doing with the slipcovers project. I also need to make slipcovers for my dining chairs as the faux leather is starting to rip. I’m new to sewing as well and I’ve already made a prototype with some cheap white fabric. It looks okay, probably need to practice a couple more times before diving in with whatever fabric I end up choosing. Just wanted to know if you will have a post on this soon. You guys are so resourceful that I am sure I would learn a lot from you (from choice of fabric to technique). If this post is coming soon, I may just hold off before starting the project (buying materials and stuff). Thanks!
YoungHouseLove says
I am absolutely certain that I’m not skilled enough to sew slipcovers for those chairs yet (I just got my sewing machine and can barely make pillows and a small flag banner). So I’ll either find a friend who is a lot better at the ol’ machine than I am or buy some read-made ones that I can tweak to work for the look I’m going for (dye them, tailor them to fit a little, etc). We jump around a lot when it comes to projects though, so who knows when well come back to this project but we’ll keep you posted when we do!
xo,
s
Julia says
I used this pin and sew along the pins methods and it’s not too bad. http://isabellaandmaxrooms.blogspot.com/2011/03/making-drop-cloth-slipcovers.html
I’m a total novice in sewing like you. The only other project I’ve done before this is hem the length of a bedskirt. The difficult parts are the curved seams. I’m going to practice the hems on some fabric I have lying around or I may just hand sew the curved parts so that I have more control. Just wanted to share in case you want to give it another try!
heather says
Put the new Brother Machine to work!!!! If you can make a Sue Pillow you can cover a chair!! :) happy sewing!
Emily says
I LOVE that you use kitchen measuring cups and bowls for projects..my husband is CONSTANTLY getting on my case for putting paint, glue etc in our nice bowls! (That’s what a dishwasher is for right?)
Stewart Pillow says
Don’t know if you guys have ever heard of this, but I just found it while mindlessly browsing paint products online.
http://www.simplyspray.com/
-Stew
YoungHouseLove says
Woah- never heard of that. I wonder how well it works. Anyone ever try it?
xo,
s
Kristy Swain says
Just a heads up. Mentioned you guys twice on a post today (painted and dyed upholstery). Thanks so much for giving painting a shot!!
Kristy Swain says
Oh, that web address is http://www.hypheninteriors.com/2011/09/all-in-one-spot.html
YoungHouseLove says
Thanks! Off to check it out!
xo,
s
Kristy Swain says
I just wanted to let you and your readers know that I featured your chair on my page with examples of painted upholstery, even fails! I linked right to you so they could find more information on your blog. Hope you don’t mind.
http://www.hypheninteriors.com/chairs
YoungHouseLove says
Haha- thanks! So much fun to see all of those wins!
xo,
s
Rebecca C says
Thanks for the info. I actually want to paint my fabric roman shades in our bedroom. I am hoping it will turn out well. I want to change the color, but I also expect it will block out a little more light too. Either way, I am willing to try it out for a few bucks for paint. If I hate it, I will cover it with a layer of fabric. But they don’t show up too much as we have curtains over them. There aren’t really any good tutorials for paining shades, so I was searching painting chairs. It should be pretty similar, I hope. Anyway, thanks for the ideas!
YoungHouseLove says
Hope it works! Keep me posted!
xo
s
Angel says
You missed a crucial step that will complete your project and then you will probably really like it. I recently did a vanity stool and painted the fabric. It came out looking like gorgeous burgandy leather. What I did was sand with 220 grit sandpaper between coats. 4 coats of paint total. Then finished with 3 coats of paste wax to shine and soften the paint. The sanding will get rid of any burrs in the fabric. Hope that helps. Also you can use homemade chalk paint ( add 1 tsp plaster paris to each cup paint) I mix the plaster with warm water first then add the paint. I did not use the fabric medium, it is not needed. The paint has latex which is what gives it its flexibility. Take Care, Angel Day (furniture artist at Modern Relics in Yuba City Ca. Look us up on facebook):)
YoungHouseLove says
Thanks for the tip!
xo
s
Mama705 says
I saw a tutorial where they sanded the painted fabric. Maybe that would have helped?
YoungHouseLove says
Probably could have!
xo
s