Drywall mudding and taping in the laundry room is going (I think) well. We’re two coats in and past our first bout of sanding (we tried wet sanding so I’m excited to share how that went) but I’m still holding my breath a bit to get through the third (and hopefully last) coat and onto primer to be sure it looks as good as we think it does, since it’s that last step that tends to be the real test. So rather than split up our mudding and taping tutorial into two posts, I’m holding off until Monday to cover the process from start to finish (with video). So today we’re talking about money and insulation with Insulation Company Mclean VA.
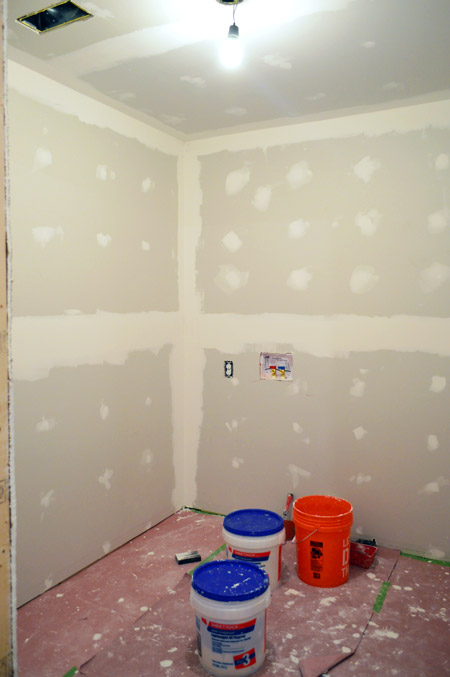
Drywall completion will actually mark the end of the tasks that we had gotten quoted by two contractors, so we thought this was a good budget check-in point to see what sort of savings we got by choosing to do more ourselves and hiring out sub-contractors directly. Here’s where we’re at:
- Framing (labor & materials): $360
- Electric (labor & materials): $400
- Plumbing (labor & materials): $375
- New dryer vent (materials & tools, since we did the labor): $87
- New HVAC vent (materials only, since we did the labor): $59
- Drywall & insulation (materials & truck/tool rental, since we did the labor): $298
- Drywall mudding (materials only, since we did the labor): $84
- Sub-floor (materials only, since we did the labor): $30
- TOTAL: $1,693
Our wallets are definitely feeling good about not having spent twice that on the contractor bids that we got (the first one was nearly $5K, the second was $3250). Looking at the line items on those estimates, it looks like we scored the biggest savings in two areas – framing and drywall. Together they accounted for over $2,000 in both contractors’ estimates, but we spent less than $750.
Of course our drywall is lower because we chose to do it ourselves (we did get a separate bid from a subcontractor and it was right in line with the contractors’ line items). Framing came in lower for a couple reasons, I’d guess. One just being that David is super nice, quick, and affordable. But also because we suspect that it’s the line item where the contractors put most of their fees and miscellaneous costs into. Because when you look at our plumbing and electrical costs, they’re not wildly cheaper than the contractor’s estimate (both were about $150 less). So still lower, but not as dramatically. Our other savings came from doing smaller tasks they worked into their bids, like laying the subfloor, redirecting those vents, adding the insulation ourselves, etc.
Long story short, we’re very grateful that the first half of the project clocked in at significantly less than we originally thought it would… because we still have lots of costs ahead of us: floor tile, cabinets, shelving, etc. Oh and one other benefit to the do-more-and-subcontract-a-few-things method is that we got to jump start the project much sooner, rather than waiting for an opening on the contractors’ schedules.
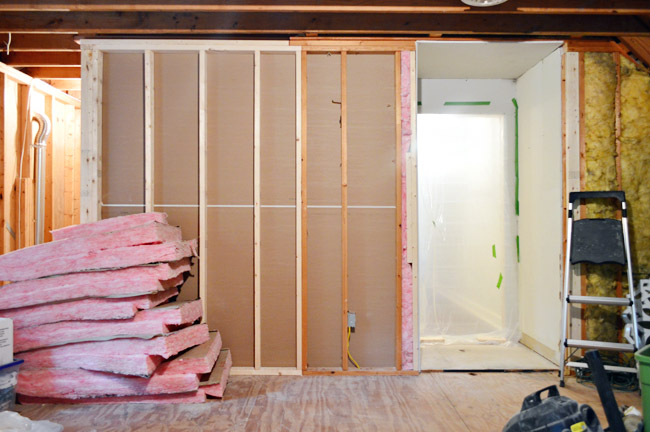
While we waited for my most recent coat of joint compound to dry, I took care of hanging the insulation around the outside of the laundry room. My understanding is that insulation on interior walls isn’t really required, but since this room is backed by an unfinished, unheated/cooled and otherwise uninsulated storage room (for now at least) we figured it was a good extra step to take. Plus it could help cut down on a little bit of the noise of running the washer & dryer once there’s a finished bunk-room behind it. So I watched this how-to video and got ready to get my install on.
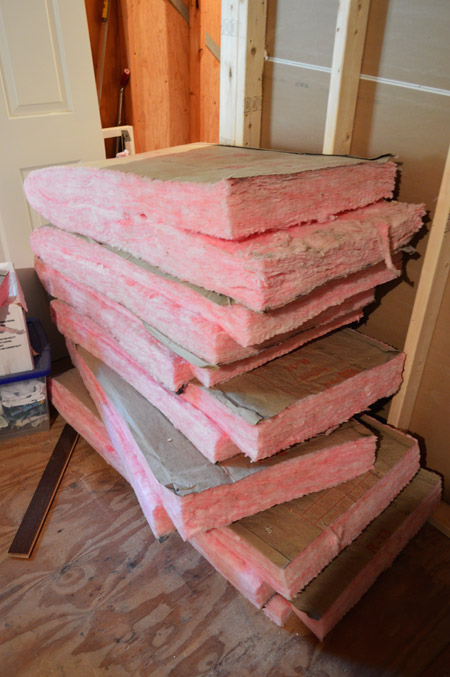
I picked up the above batts of insulation at Home Depot on my material run a couple of weeks ago. I chose batts because they come pre-cut for 2×4″ depth walls and 8ft tall ceilings like we have. They also come 15″ wide for 16″ studs, but I accidentally ended up bringing home the 23″ wide kind. ::smacks head:: And I didn’t realize this until I’d already unwrapped a package. ::smacks head again::
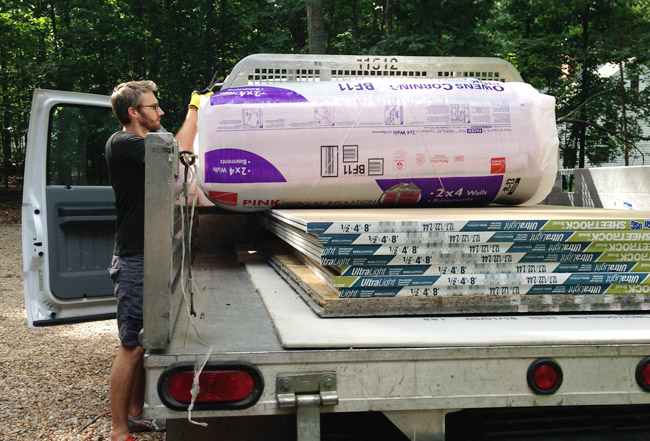
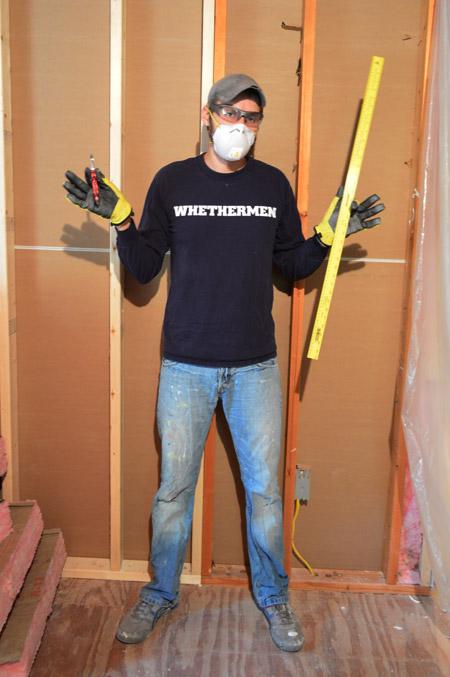
No biggie though – it just meant some more cutting, which is pretty straightforward. Although it does require a uniform of protective gear, including pants and a long-sleeve shirt to keep the itchy fiberglass off your skin. It’s a really fun outfit when working in an un-air-conditioned space in the summer. Dead eyes optional, btw.
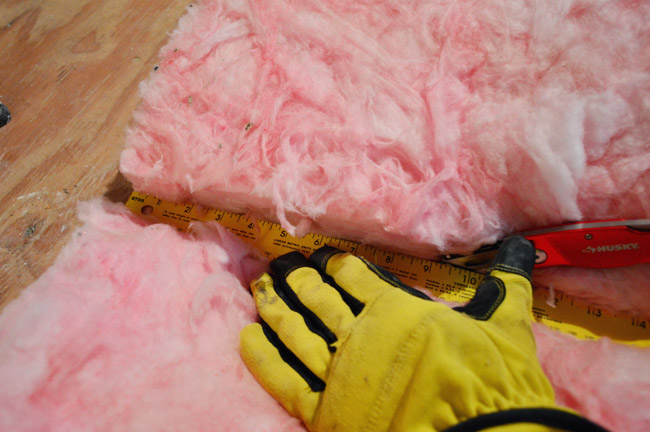
To cut them, I laid a batt facedown (i.e. paper side down) and pressed a straight edge into the pink insulation along the line I wanted to cut. Once compressed, it’s pretty easy to cut it with a utility knife.
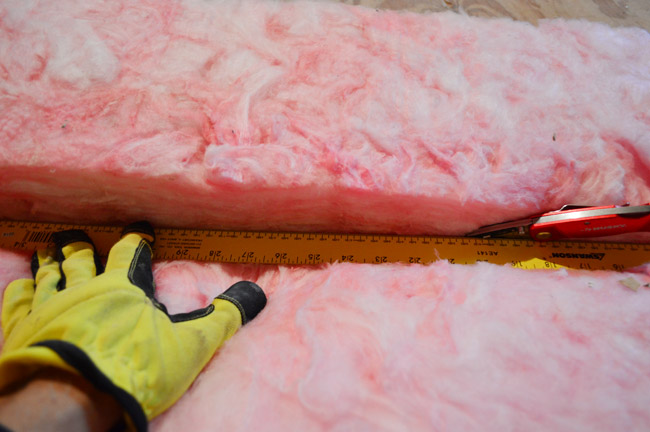
You can tell that the cut is working because the side you’re not pressing down with the ruler puffs back up. Sometimes I did have to flip it over and cut the paper a little in a few spots where my knife didn’t make it through on the first try.
The facing on the batts does have a bit of an overhang to help you staple the insulation in place. But facing is apparently highly flammable, so it says all over the place that it should not be left exposed. So I placed the batts face-side in (since we’re not sure when we’ll get around to finishing the storage room). Since I was careful not to cut mine too narrow, they held in place by themselves just fine, all it took was a gentle push into place.
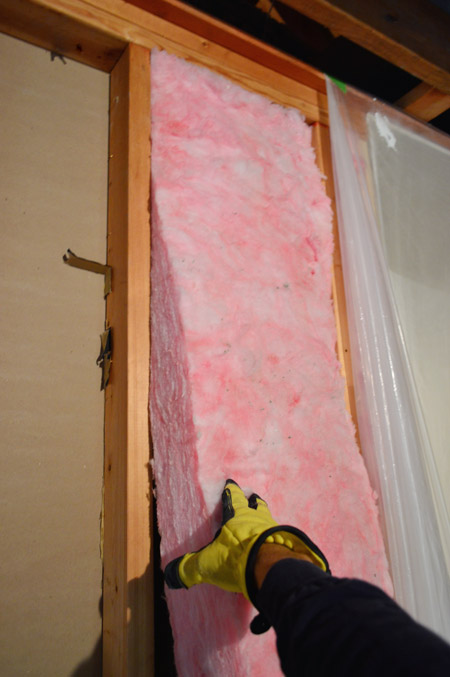
Occasionally I did have to cut around obstacles, like electrical boxes or laundry pipes. But I just tackled those as I went.
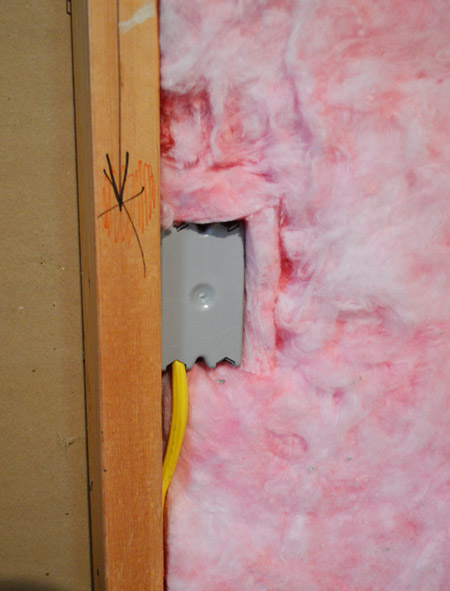
It was a pretty easy task – just a wee bit warm thanks to the conditions in the room and my sexy outfit.
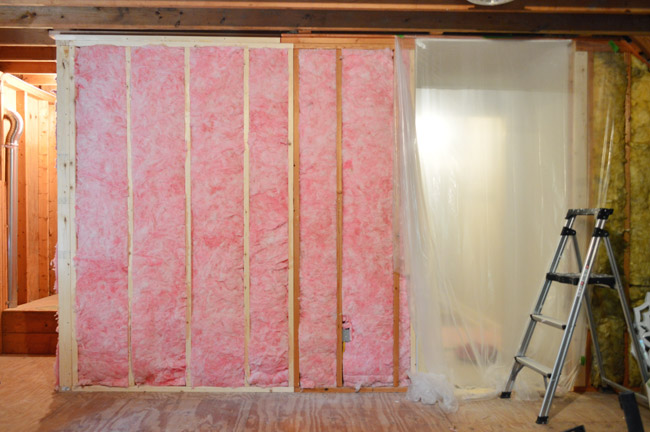
Although my adventures in insulating aren’t complete, since I still have to do something with the ceiling. I can access it somewhat easily from the stairs that lead up to the third-story attic space, so my first instinct was to do more rolled insulation or batts, rather than mess with blown insulation (which was up there originally over the old laundry area). The Jury’s still out though.
Now we’re going to return our attention to mudding and taping (and hopefully priming) so we can get this room ready for some flooring… which then makes it ready to get appliances plugged back in. I can practically smell the detergent!
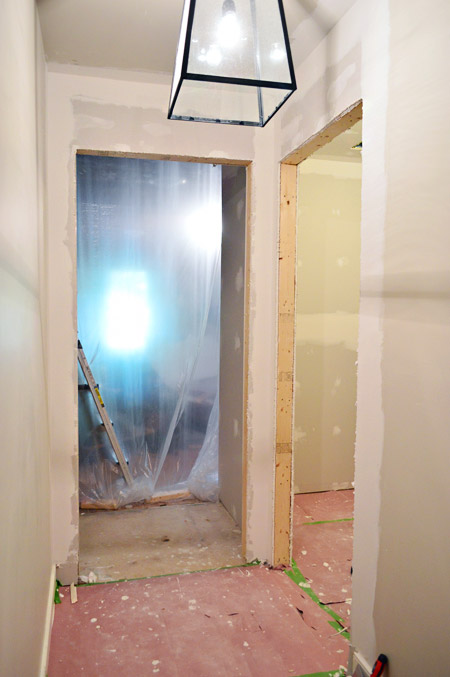
Does anyone else have any fun weekend plans? Wait, don’t tell me if it’s super fun, because I might fling some drywall compound in your direction.

Barbara says
Laundry room is looking good..and don’t you just love it when you can save money? I am very jealous of how awesome your room is going to be. Mine is in the garage and I am constantly having to clean the sawdust and projects off of my washer and drier.
We have spent the last few weeks remodeling our kitchen. For a minor remodel, it sure had been a lot of work! New countertops (granite to replace tile), new SS appliances, strip and stain the golden oak cabinets to a nice warm cherry, new glass tile backsplash with exposed hood. Right now we are looking a samples of backsplash to decide which we like. Once that and the hood are installed we will be done!
YoungHouseLove says
That’s so much fun! Good luck Barbara!
xo
s
Jane says
Happy four month old birthday to Teddy & family!!! I hope you get to rest & celebrate over the weekend. :)
You have done a super job on this humungous project! Your abilities abound! Thank you for sharing so much detail.
Emily @ Life on Food says
We are in the works to start a dry walling project. I am not thrill but hopefully your experience will show me it isn’t too bad.
YoungHouseLove says
You can do it!
xo
s
cynthia says
The facing on the insulation acts like a vapor barrier so in the attic location it should also be placed paper face down on the new drywall ceiling. If it’s paper face up then the moisture gets caught between the drywall ceiling and the paper…which is a good recipe for mold!! We found out about this because we needed to add insulation to our attic which had some existing loose vermiculite which was not being removed. We used several layers of unfaced batt on top of the vermiculite so there was no way moisture could get trapped.
YoungHouseLove says
Great tips! Thanks Cynthia!
xo
s
Susan Z. F. says
Looking good John & Sherry. Very impressed with your eagerness to DIY a drywall/taping adventure etc. It’s not an easy task. And your learning as you go/sharing what you’ve learned is appreciated. Thank you.
I’d like to go off topic for a minute if you don’t mind. I am in a quandary and must turn to the Petersiks (and their glorious readers) for advice.
We need to replace the door sweeps for two of our exterior doors and cannot find any that fit. We tried the website of the door maker which was surprisingly not helpful. Also tried home improvement stores, local hardware stores, specialty lumber stores here in NOVA where we live, and we’ve searched online. We’ve found lots of sweeps but a lack of variety and nothing that fits our doors. We hate to think purchasing new doors would be the only solution. Any suggestions?
Thanks so much for your time and help.
Susan
YoungHouseLove says
Oh man, that stinks! I was going to recommend some local hardware stores (we have one here called Pleasant’s and they have all sorts of random parts and extra bits you can’t find at Home Depot or Lowe’s) but it sounds like you tried that. Maybe check ebay or some other online vendor of parts? Anyone have a tip for Susan?
xo
s
kristen says
did you guys see that your favorite downtown pleasants is going to be a whole foods?
YoungHouseLove says
WHAT?! Oh no, where is Pleasant’s going?
xo
s
kristen says
sounds like they have the option to stay in the area but “the hardware chain would have to determine if it would be cost-effective to do so.”
to quote SNL, they could stay, but the rent would be TOODAMNHIGH!
http://www.timesdispatch.com/business/whole-foods-plans-richmond-store-near-fan/article_2af18230-d56c-11e3-948c-0017a43b2370.html
YoungHouseLove says
Oh no! You’re cracking me up with the SNL quote though – I totally read that in his booming voice.
xo
s
Laura says
Could you guys talk a bit about getting plans approved from your local government? And maybe if you have to get electrical/fire inspections? I’ve never done anything like this and I’m really interested. Maybe you didn’t have to submit plans because you weren’t changing the footprint of your house? I remember when you were building the deck at the old house it was sort of a pain.
YoungHouseLove says
Oh yes, permits are necessary for this type of work! Thankfully when you use subs you can negotiate who pulls them, so we had our licensed and insured electricians, framers, and plumbers pull the permits they needed. Some sub-contractors are more likely to make you do all the permit work (we did them ourselves when John built the deck as you remembered – so you can read about that experience here and here). You can usually check your county’s website for a list of things that require permits and give them a call if you have any questions.
xo
s
Nichole says
No fun weekend plans here! We’re doing (almost) exactly the same as you! We’re currently turning our 2 bedroom 2 closet (yep! just 2 closets in the entire house – one in each bedroom ..That does count the “closet” for storage under the stairs because it’s only big enough for a few pairs of shoes!) house into a 4 bedroom with 6 closets (6.5 if you want to add in the little one under-the-stairs)
We made 2 bedrooms and 4 closets out of a completely waste of space rec room in the basement!
We’ve been slowly working on this since January and I’m so excited to be at the muddling/priming/flooring phase! We have a 2 year old daughter who is so excited for her new room and playroom and I’m so excited to decorate for her! My husband is just so excited it’s almost done!
Your project is looking fabulous! Such a dramatic change but so practical! Good work!
YoungHouseLove says
Ahh, isn’t it exciting?! To have walls. WALLS! Who knew it could be so amazing? Ha! Good luck with everything!
xo
s
Diana says
You guys continually amaze me! Where do you get your energy? I can’t wait to see the space finished! :)
Diana says
These posts are making me very glad we are done with the drywall part of our bathroom remodel!! But really excited to see the result. I hope you love yours as much as we do ours!
YoungHouseLove says
Ahhhh! The excitement is palpable!
xo
s
Sarah says
You know, one thing I really admire about your blog is that you post the fun with the less-fun. You don’t gloss over the practical aspects of home renovations in favour of only posting the glamorous or funky stuff. Thanks for the well-balanced blogging!
YoungHouseLove says
Thanks Sarah!
– John
Julie says
For some reason, I find myself super excited about this project. Am I some sort of laundry weirdo? I love the design! I just wanted to mention ( and perhaps it’s in the plans or been mentioned before) that it’s important to put an on/off switch at the water connection, especially since the laundry is upstairs (and of course, to always turn it off when not in use). My husband is an insurance adjuster and has seen many homes flooded by broken washing machine hoses. Best of luck to you guys with this project. I can’t wait to see it finished!
YoungHouseLove says
Thanks Julie!
xo
s
Kylee says
Bring your drywall mud my way! We are in the process of drywalling our basement. We would love to mud it ourselves, but have not been able to master that skill. Perhaps you could provide a little tutorial with tips and tricks if you happened to have captured pictures/videos during this process?
P.S. – I love your paint technique to stamp the drywall for lights and electrical outlet placement. I will definitely be utilizing this trick!
YoungHouseLove says
Thanks Kylee! That’s on the agenda for Monday (we even made a quick video today for ya).
xo
s
Sarah says
Loving the whethermen representation! Wash John part of them?!
YoungHouseLove says
Yup, I was a Weathermen back in 2003 and 2004!
-John
Melissa says
Please post a video sometime! I graduated in 2002 but I went to a few Whethermen shows when I was in school.
Ali says
The new laundry room is going to be awesome ! Any sneak peeks on your tile choice, paint color, design for storage, etc ???
I’m proud of all your team work to make this project a success ! It looks original ! That’s tough to do !!
– Ali
YoungHouseLove says
Thanks so much Ali! We still have to swing through and pick up the tile for the floor (we ordered it a little while ago) and then I can’t wait to post it with the backsplash tile to show how they work together. As for the walls I think something light (maybe even the same color we used in the hallway) will look nice. Wait a minute… I smell a mood board…
xo
s
Kristine says
Yay! I love your mood boards! Can’t wait to see it!
Sarah says
I had no idea John was in the Whethermen,but the. Again it does explain y’all’s wonderful sense of humor! Go hoos!
Sarah MC says
I know I’m not the first to comment on it, but John’s Whethermen shirt might be my favorite part of this post! So glad to see some hard-core DIY going on chez Petersik!
Kara says
Is there any chance (if it’s not too much time/trouble) that you could start linking back to previous laundry room posts like you have done in the past with multi-step projects? (or am I missing it somewhere… so sorry if so!!)
YoungHouseLove says
Yes, we need to get batter about that! Next post we’ll try to have all the other posts linked at the bottom.
xo
s
Kate C says
When our friends had their house built, the contractor asked them to go into the house at night and put their cheek up against the wall and look at the drywall seams with a flashlight. He said it would be easier to see where the work needed to be further sanded, filled, etc. They marked the spots with a pencil so it could be found in the light of day.
YoungHouseLove says
No wway, that’s awesome!
xo
s
Dorothy says
You guys are making great progress but I’m wondering why you’re putting so much money and time into a laundry room, which was perfectly fine and a bunk room, which is certainly not necessary yet for your young children? Why aren’t you guys working on that kitchen? That would be the first place I’d throw money for appliances and subcontractors.
YoungHouseLove says
Ah, I’d love to work on the kitchen- if we could agree on what we want. We are still unsure about counters, orientation/layout, functional stuff, and even things like what color appliances we want for the long haul. So instead of feeling rushed into making those decisions we’re happy to percolate a little longer and tackle this laundry room in the meantime, where I think I’ll spend a whole lotta time now that Teddy’s here and we’re cloth diapering again ;)
xo
s
Lil says
You’re going to convince me that we can DIY our bathroom.
Taping/mudding looks good from here. :)
Kara says
Really loving this laundry room update post-series. I feared your new posting schedule would mean the larger updates would be few and far between (their my fav, what can I say, I love a good before-and-after!) but I’m happy to see that you’re still tackling the bigger jobs!
Kerry says
This is a completely unrelated comment…
I don’t know if you guys have a Zulily account but they had this dress on sale that reminded me so much of Clara’s room. I thought it might be something you would appreciate!
http://ap3.indulgy.com/post/IpBHDAK6T2/pink-raindrop-amelia-babydoll-dress-infan
YoungHouseLove says
So cute! It’s just like her wall!
xo
s
Ashley says
Ahhh! I feel your pain! This weekend I completed the first floor insulation installation (say that 3x fast!) of our 1300 sq ft new construction.
The first day I [insert headsmack] wore yoga pants and a tank top! Bad idea! But seriously– no air-conditioning in Alabama– yuck! The hubs kept aiming the fan at me to help out, but it just encouraged particles to blow into my face. (I guess I should insert another heacksmack here, since I was not wearing eye protection either).
Can you tell I started insulation two weeks ahead of when we had planned, on the fly, because I got bored? Haha!
YoungHouseLove says
Oh man, that sounds rough!
xo
s
Erica says
What are you doing about laundry while you are doing the reno?
YoungHouseLove says
Thank goodness for Grammy & Tom Tom! We bring a big load over once a week or so. Hopefully only for one more week!
xo
s
Brenna says
Love the Whethermen shirt… UVA memories! :-)
Sarah @ Sarah's Daybook says
Woohoo! You guys are so good. And dedicated!
I thought of you guys (well, Sherry) the other day when I saw a Burger-sized egg chair on SkyMall. I laughed. It looks a lot like the one that you guys have on your veranda!
Sarah
Darlene says
As someone already mentioned, the vapor barrier goes towards the “conditioned” side of the wall. When you’ve finished the other attic space, you can just peel the paper off the insulation and it will be . . . ta da . . . unfaced!
YoungHouseLove says
Thanks Darlene!
xo
s
Heather MacFeather says
Wowza! You’ll be washing clothes in no time. Even I can smell the detergent.
I hope getting the machines in a space that is now around a bit of a corner doesn’t end up being a pain.
Have fun tiling and painting.
Eliza says
I just love you two! You have lifted me/everyone up to a better place. We are all better off in our lives because of you and your blog and willingness to do something good in the world. I know you are having a ripple affect that you are completely unaware of……
YoungHouseLove says
Thanks Eliza, that’s so kind of you to say.
– John
Sassafras says
So wonderful that you’ve got a padded wallet!!! EXCELLENT!!! That’s one of the major reasons why DIY is so fulfilling. Your mudding and taping looks very professional to my untrained eye.
Weekend plans? Birthday party here at home today for one of my kiddos, going to an Expo tomorrow (free vendor goodies), then off to visit my children’s grandparental units on Sunday. Nothing too Too TOO exciting so no need to fling anything! :)
Ilse says
I recently (unknowingly) sat down with bare legs on a fiberglass covered bench. Those clothes might be hot but skin covered in fiberglass is so much worse ;) I eventually got it off with duct tape!
Looking good by the way, I think it’s awesome you are doing so many things yourself! Can’t wait to see how you’ll decorate the new room, I know it’ll be awesome!
YoungHouseLove says
Thanks Ilse, the tape tip is so smart!
-John
Rosie S says
There’s no doubt that dry-walling and finishing it all is a great money saver! We saved over $1000 doing a small hallway ourselves…but we won’t do it again! Well, I say that and I guess it is kind of like childbirth, after a while, we will forget the pain, and look fondly at the results and say….why not do it again!??!!? Looking good so far, guys!!! Know it will be wonderful when done!
YoungHouseLove says
Haha! So true!
xo
s
Joseph@littlehouseblue says
I thought your batts looked a bit large. Do you have plans for the off-cuts? Maybe other areas in the “bunk room” when you get around to it?
Do they not carry unfaced insulation at Home Depot? When you’re insulating interior walls like that you should be able to use unfaced since it’s within the envelope of the house. Unfaced is cheaper and should be better at blocking sound and you also wouldn’t have to worry about the facing being flammable or trapping moisture. I saw someone suggest Roxul (Acoustical Fire Batts) earlier which is another good option for soundproofing that also has fire resistant properties (but it’s more expensive).
YoungHouseLove says
Thanks Joseph! The in-store options were surprisingly limited. Someone mentioned that we could pull off the facing so it’s more like unfaced insulation before we seal things up. As for the extra, I set it aside in the hopes of using it down the line if we can.
-John
Joseph@littlehouseblue says
Yes, I’ve heard that’s true! I almost mentioned it but I’ve never actually seen it done so I don’t really know whether it works well or if it takes any of the fiberglass with it.
By the way, another thing to think about for any further insulating adventures: coveralls. You should be able to buy thin coveralls (they look like those chemical suits) that protect you from a lot of the fiberglass but remain pretty breathable. They should only be a couple bucks a piece at a hardware store. You can wear lighter clothes underneath and it should cut down on the heat a bit.
YoungHouseLove says
Thanks for the intel Joseph!
-John
Christine says
We just had ductless mini split air units installed in all the rooms this past week, and next week we have contractors coming to re-insulate the whole house. The price tag for insulating alone is $6k!!! They’re doing the blown insulation in the attic, and also doing something in the basement. I’m not really sure what they’re using down there. The sticker price definitely gave me a shock, but my husband said he’d much rather pay people to do it rather than do it himself. Hopefully this lowers our electric bill in the wintertime!
Patter Chen says
You could also use wood-wool. We used it in our zero-energy home and it it super easy to work with. It comes in panels the exact width of the standard dry wall. No need for protecting gear. The left-over can be burned when doing camp fires. Not toxic.
Makes us feel good every time we open our door.
Glass wool is just too difficult to work with can not nice if it needs to be replaced and such.
YoungHouseLove says
Sounds cool!
-John
Care says
Oh geez…I must be tired. I read this as “Insulating Walls & Padding Wall-ettes”.
I was thinking, what’s a wallette? Some kind of small wall that I’m not aware of?
Not too smart.
Looking great guys! Coming along so quick!
YoungHouseLove says
So funny!
xo
s
Lo says
Why didn’t you use moisture-resistant drywall in the laundry room? You should have. It is normally always used in places like bathrooms and laundry rooms where there are higher moisture levels.
YoungHouseLove says
Thanks Lo! We’ll update you if something crazy happens, but all the contractors/subs who bid this job said regular drywall should be fine, so we went with that (and thankfully we didn’t find any mold or moisture issues when we demoed out the old drywall).
-John
Keri says
Completely unrelated to this post, but I just had to blurt it out first: Are you guys (and Katie B.) aware of the Anthro outlet in Augusta? Someone wrote up a whole blog post which I stumbled upon earlier today. http://effortlessanthropologie.blogspot.co.uk/2014/08/yes-anthropologies-clearance-center.html
Anyway, the laundry room looks awesome already and I can’t wait to see the finished project!
YoungHouseLove says
Not a clue! Thanks for the tip, it sounds awesome!
xo
s
Nikki says
So we also live in the Richmond area and 4yrs ago we bought a house with an unfinished loft space (basically just like yours, except no step- just like a 1/4 of the second level is unfinished (??). We have been wanting to finish it ever since and when you bought your house and I saw the unfinished space I jumped for joy knowing that not only could we learn from/ follow you, but we could also use the same contractors you do!
The laundry room is like an appetizer, but I am eagerly awaiting the BIG project. :p
Melissa says
We’re working on insulation too, now. Yours is a lot more like new construction, ours is just trying to tighten up an old leaky house. (Air leaky, not water!) We had an energy audit and came in off the charts. Take your insulation “suit” and go crawling in a small attic with a caulk gun or can of spray foam on a slightly less hot summer day. Fun!
We’re taking it easy, though and doing a few hours a week instead of trying to get it done in a quick shot. So, this weekend, we’re taking our son to a “Crazy Monkey” obstacle course race (http://www.offnfunning.com/index.php/events/you-crazy-monkeyhome). This is one of the coolest organizations, every region needs something like it!
YoungHouseLove says
That looks awesome!
xo
s
Marlee says
I may have missed you mentioning it in the last few posts, but have you thought about putting up sound board to keep noise from the laundry room from your T.V. room, or noise from your T.V. room from the rest of the house? Seems like it would help the whole “surround sound” feel of a T.V. room to think about this now.
YoungHouseLove says
We definitely are toying with ways to absorb sound (adding carpeting in there, curtains also help, and maybe even something more heavy duty like you mention. Will keep you posted!
xo
s
Tori says
Just a gee-whiz, but another great way to get bits of fiberglass off you is to use some old panty hose and put it over… say your arm that has fiberglass on it, and just do a light rub over it and then slip it off. The panty hose pulls the fiberglass right off. I had an accident with some fiberglass when I was younger and my grandma knew exactly what to do! Grandma’s are always so intuitive!
YoungHouseLove says
Such a great tip!
xo
s
Susan says
Someone mentioned flax insulation? I (and many other people in my family) are horribly allergic to flax and flaxseed and the oil. Some paints contain flax and I have a terrible reaction. It’s turning up in all sorts of foods now. ugh. I can’t imagine having it in my walls.
I asked Katie but thought I’d throw this question your way, too. Any Pinterest challenges coming our way? :)
YoungHouseLove says
Never even thought about an allergy! As for Pinterest Challenges, we fell off when we moved to this house (can’t believe our last one was in the spring of 2013!) but it would be fun to resurrect them!
xo
s
Nicola Han says
Absolutely love all of your work. You are such an inspirational diy team and most importantly family x Since finding you I have tried a little diy myself- its going ok so far but I don’t think the painters have anything to worry about yet and I will stick to my day job- maths teacher to 11-16yr olds and I have been trying to record all of the lovely daily things with my family-sending postcards to ourselves etc. What can I say…sending a huge hug and thank you to you all x
quick question diy now…do you find with low voc paint it needs an extra coat? Painting almond milk onto natural calaco and a second coat will definitely be needed possibly third.
thank you once again for all that you do love from a sunny Northern Ireland xxxx
YoungHouseLove says
You’re so sweet Nicola! I love the postcard tradition. As for no-VOC paint being thinner and needing more coats, we have definitely experienced that, although it’s usually more like instead of one full coat and a second coat of touch ups (which used to work with thicker stuff) it just takes two full coats. I think we’ve only done 3+ when painting over something more intense (like dark blue trim or dark brick). Hope it helps!
xo
s
Nicola Han says
Thank you, hoping 2 coats will do it but good to know it isn’t just me x
YoungHouseLove says
Oh yes, I hear milk paint is pretty thin so that sounds right!
xo
s
Erica says
I did not know that you have paint colors with Benjamin Moore! So awesome!
YoungHouseLove says
Thanks Erica! We had so much fun curating a color collection in 2012 and 2103 with them. Wish we had a chance to do one this year!
xo
s
James Mason says
Looks like you have some sanding to look forward to… Has to be the best part of renovating :)
ombia says
It is probably not so common in the USA to built with good old brick? Every house I lived in Europe was made of brick and durable for many generations to come. And well isolated, also sound proof inside the house between rooms.
Your familiy photo on the right in super cute! But Burger is not to see :-(
YoungHouseLove says
Wow interior walls of brick are AMAZING! Here homes might have them on the exterior (ours does all the way around, which we love!) but I’ve never seen it on interior walls. As for Burger, I want a picture with him in it so bad! That profile pic was snapped at Clara’s birthday party, so he was inside hiding from all the guests – haha!
xo
s
Ally says
Awesome job so far! And great tutorial!
I can’t help but comment how inspirational you are. In earlier posts, you’ve discussed how when y’all got started, you didn’t know much about tools and DIY-ing, and now you’re tackling big projects that would normally be done by professionals.
Great work! Love y’all’s site!
YoungHouseLove says
Thanks so much Ally!
xo
s
Kate says
Hi Petersiks! The big weekend news here: WE ARE GETTING A HOMEGOODS! I just saw the sign and wouldn’t be nearly as excited it if weren’t for you and your awesome blog! Can’t wait until it’s open…and because buildings go up around here in no time at all, it should be soon!
xo K
YoungHouseLove says
That’s so exciting! Oh man, hide your wallet!
xo
s