The last four days have been nutzo in Patio Land for us (not to be confused with Temptation Island- remember that show?). The good news is that it’s nearly done. Like 90% done. But since I’m a bit low on energy at the moment (and we have to wait for better light to take more pictures), I’m gonna cover as much of our four-day patio-extravaganza as I can muster. The rest will come a bit later when we’re 100% finished (and have a chance to take about a million after shots from every angle).
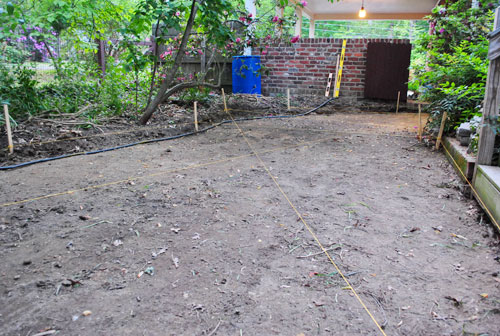
To recap: as of last Monday the area was all marked, leveled, and dug up.
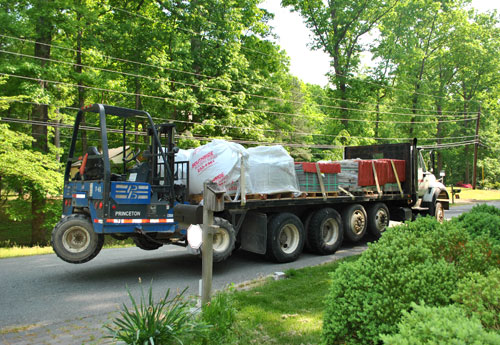
Then on Tuesday our nearly 10-ton delivery arrived via flatbed (300 square foot patios apparently weigh more than two elephants). As far as deliveries go, it wasn’t that eventful – except that the forklift (seen hooked to the back of the truck below) got a flat tire halfway through, so it delayed things a bit while the guy left to repair it.
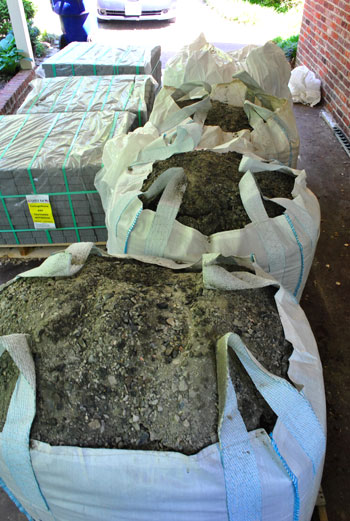
But eventually everything made it into our carport in one piece. If you’re keeping track, that’s three giant bags of fill gravel, one giant bag of sand, and three pallets full of cobblestone pavers (two of the rectangular variety and one of the square kind).
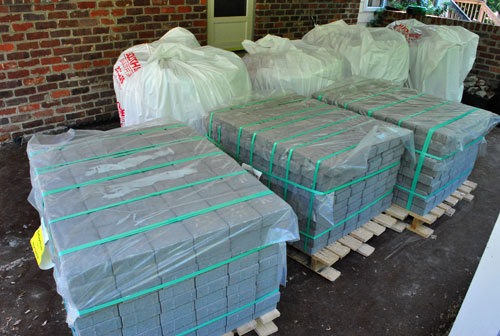
We picked a paver called CottageStone by a local company named Eagle Bay. Yup, it’s manufactured right here in Richmond and we discovered it just by asking for the most affordable paver cobblestones at a local stoneyard called Southside Builders Supply (it came out to be around $2 a square foot, which beat both Lowe’s and Home Depot prices by around 75 cents, which really adds up over 300 square feet). The color is a gray-ish tone that they call “Jefferson” (amongst other Virginia-tastic color names like “Blue Ridge,” “Chesapeake,” and even “Richmond”). It was pretty easy to make our color choice because we decided to do our best to roughly match the gray cobblestone pavers that are already in our driveway. So that’s how we picked our poison- er, pavers (read more about the cost of the whole project here). But enough about design decisions and money – let’s get back to the physical labor.
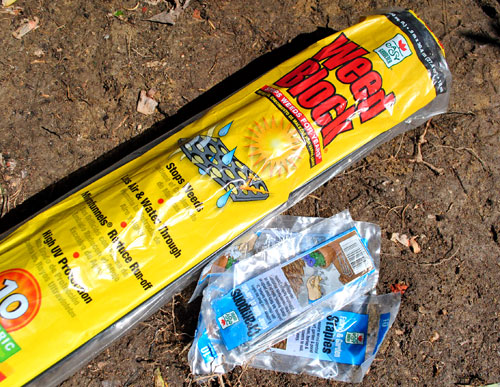
We took Wednesday off Project Patio because it rained, so Thursday was my next work day (while Sherry tended the blog, the baby, and brought me granola bars and water by the hour). As my trusty Lowe’s video and the saleswoman at the stone yard had directed me, the next step was to put down my weed blocker. I picked up this 300 square foot roll of Weed Block and ground staples to hold it down (weirdly called “Crampons”) from Home Depot.
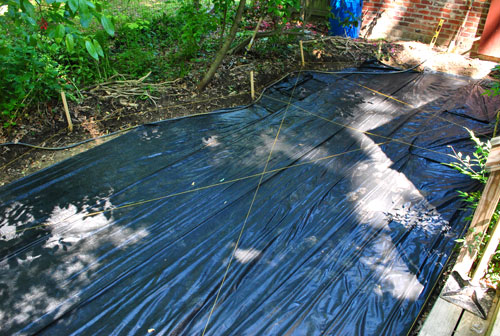
Since we know from experience that weeds and grass love to sprout up between paver stones, we wanted to at least discourage their appearance (although we’re huge rebels… just kidding… we like to follow directions or we start to hyperventilate). Here’s the area all covered in the Weed Block sheets just as recommended. It was pretty easy to cut it to size with scissors and then just stab each row into place with my crampons, so this step only took me about forty five minutes.
Next up: gravel. And not just any gravel – THREE EFFING TONS of it.
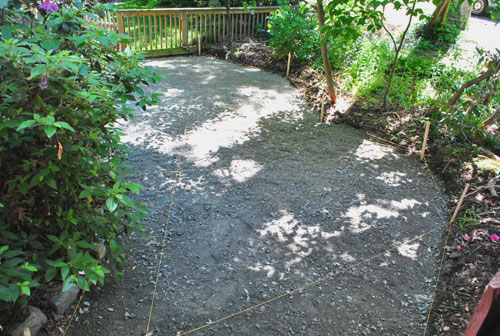
Laying this gravel basically consumed my entire Thursday. My wheelbarrow wouldn’t fit through the gate separating the carport and the patio area, so I resorted to carrying the gravel bucket by bucket (thanks to a spare 5-gallon paint bucket that we had on hand) back and forth all day. It was exhausting and disappointing (only because I fully expected to look like Hercules when I was done, but still found myself staring at my usual spaghetti arms). But in the end I was glad that I went the bucket route instead of using the ol’ wheelbarrow, because it allowed me to keep my nylon strings in place, which were invaluable when it came to ensuring that everything was nice and level with a slight slope away from the house (which is really important for drainage reasons).
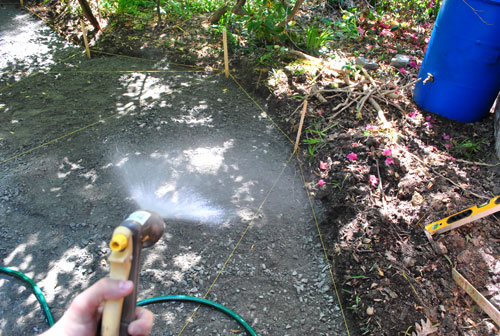
But my workout for the day wasn’t complete, because the gravel had to be tamped down. First I lightly misted the whole area, which started to turn the loose gravel into more of a cement-like consistency. I paid close attention to the Lowe’s video at this point in the process, which instructed me to make it moist enough to clump, but not to go overboard and get it too wet. So my advice would be not to go spray crazy and just look for that cement-like clumping action and then step. away. from. the. hose.
The tamping was a manual task again (sigh) because we opted to purchase a $30 hand tamper instead of going through the trouble / expense of renting a plate compactor (our car is small, we’re cheap, and I may have already mentioned that I wouldn’t mind bigger biceps). It wasn’t a particularly enjoyable task, but honestly at that point my arms were sorta operating on autopilot. And it was actually really gratifying. You can see how it turned my gravel pit into a flat, semi-solid, and ready-for-sand surface below. It almost looked like asphalt in the end. But sand would have to wait for Friday. Over seven hours of Project Patio was enough for me (and the sun was starting to set anyway).
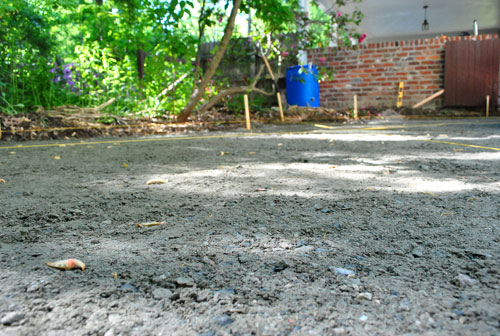
After taking Clara’s 51-week photo on Friday morning, I threw my patio pants back on and got to laying down a 1″ layer of sand. I couldn’t have done this part without the brilliant tip from the Lowe’s video involving two pieces of 1″ PVC pipe. Praise google.
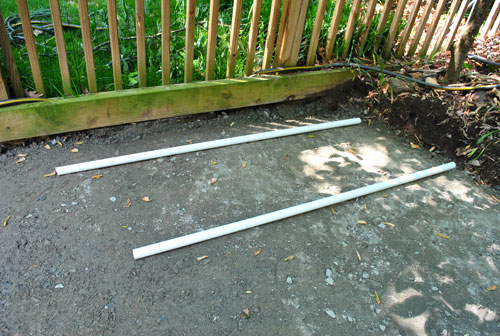
You basically lay them down side-by-side and then dump your sand over them.
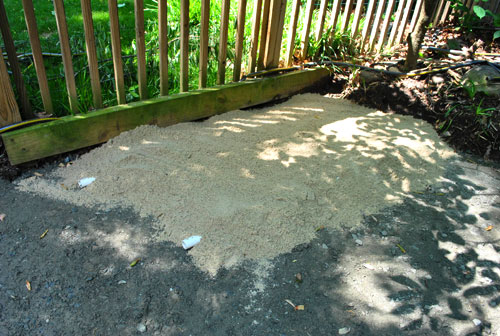
Then using a spare piece of 2 x 4 (or in my case, some extra trim molding) you scrape off the excess sand which leaves you with a flat, paver-ready surface of sand (which is exactly an inch deep thanks to the pipe “spacers”).
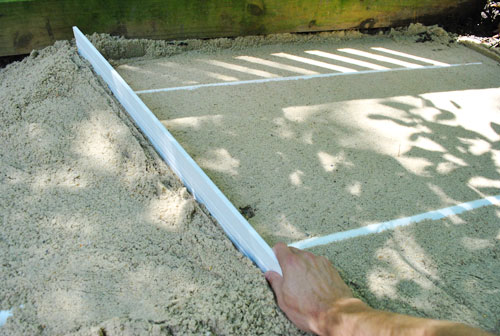
Then you carefully pull out the pipes and fill the empty “pipe lines” with a little bit of excess sand (by hand) for a totally flush look. Let’s just say it was a much faster process than the gravel was (since it only had to be an inch deep instead of three, which made it a lot faster to haul). Here it was half-complete:
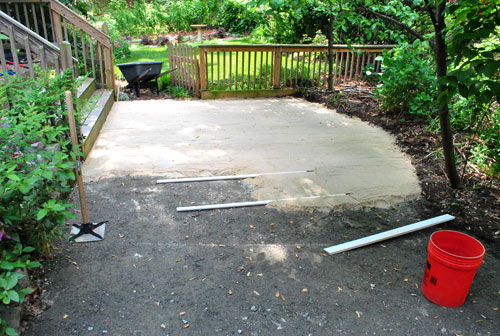
I would’ve finished faster had I not run out of sand at the very end. But fortunately a quick trip to Lowe’s for a few extra bags did the trick (notice the color change at the far end of the area?).
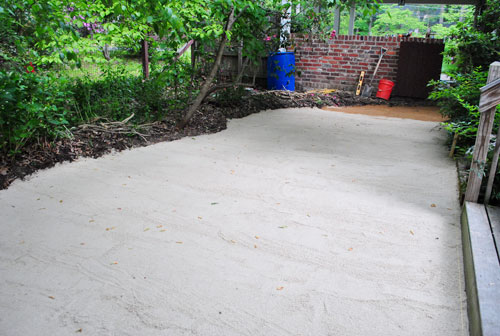
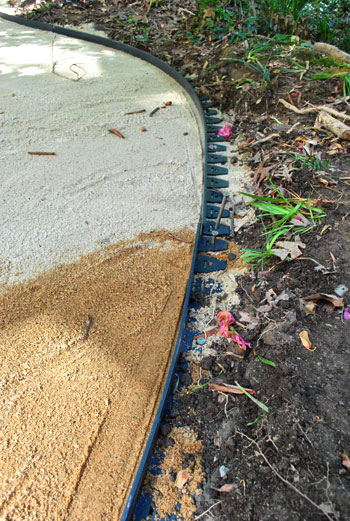
The last step before we could fiiiiiinally get to putting down stone was to install the plastic edging to hold all of our pavers in place (which will end up being virtually invisible once we backfill it with dirt/mulch on one side and pavers on the other). We had heard different theories about whether you should do this before or after you put your stone down (apparently it can work either way) but we thought it’d be easier to plan our curves with the flexible edging than with the heavy stones themselves. And we can tell you from experience that it was the right way to go for us – definitely consider adding the edging first if you’re doing any sort of curve and would appreciate a nice set guide to follow.
By this point it was about 4pm on Friday. I really wanted to call it a day, but Sherry and I were determined to get some of the pavers down so that we could at least start to see the patio come to life. So I charged forward and promised myself that I’d just put down the entrance area. A couple of hours later (yes, it was slow going at first), I had this:
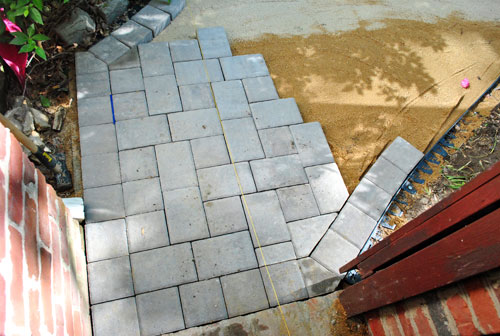
I’ll get into the ins and outs of cutting and laying the pattern in the next post, but below you can see things progressing slowly but surely. Sherry snapped this pic right after she put Clara down to sleep for the night (hooray for a 7:15 beanette bedtime, which gave us some daylight to work together on it- enabling us to move twice as fast during that narrow evening window). And thankfully we didn’t hear a peep from Clara (you know Sherry had the baby monitor outside on high, just in case). But Clara must have known we were busy making a patio for her birthday bash. Smart kid.
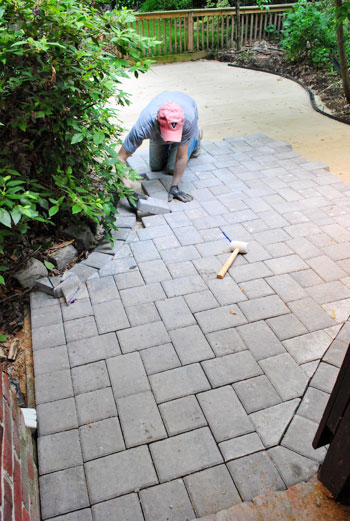
We both decided to put all the cuts on hold for the night so that we could focus on just filling the central patio area with as many whole pavers as our arms could carry (and avoid operating a wet saw in partial darkness as the sun began to set).
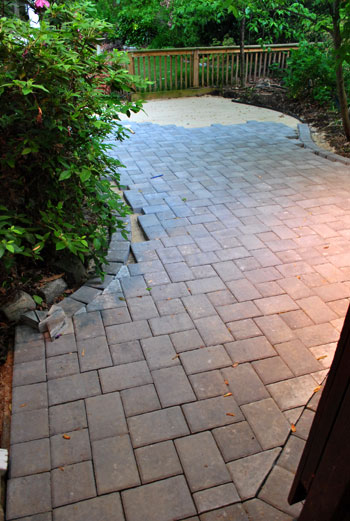
By some miracle, our energy held out ’til about 9:30, when we finally laid the last full paver at the far end of the patio. So you can sort of start to see how things are coming together, despite the darkness and all those missing stones around the borders that we still have to cut.
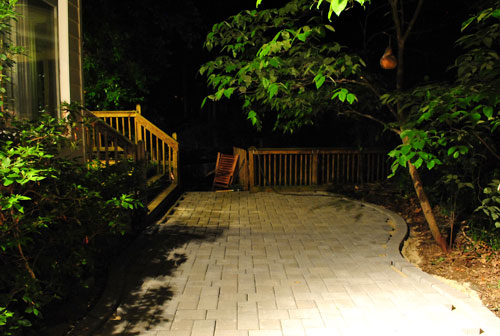
Our camera batteries only lasted long enough to attempt to snap a few totally normal pics of us “conquering” this task. So we just got a few blurry shots like this winner before the camera shut itself down:
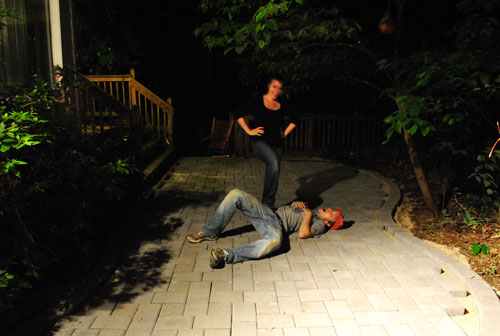
Notice how I chose the role of laying down and looking exhausted? I plead that so-tired-you-feel-drunk phenomenon that occurs after a loooong day (when everything makes you die laughing and you kind of lose your mind for a minute).
So now you know how the Petersiks spend a Friday night. Actually, we did cap it off with a Netflix movie (after a much-needed shower, of course). We saw Love & Other Drugs if you’re wondering. And we thought it was just as naked as the critics said, but not bad. Just don’t rent it with the extended family over the holidays or anything (awkward).

Emily says
Damn dude + dudette, you’re studly.
Ashley says
Lookin’ good! Great inspiration for the brick walkways we want to create if the historic registry powers that be say it’s cool. There’s a guy in Mechanicsville that lists brick pavers on craigslist every once in a while. They’re leftovers from the filming of HBO’s John Adams series. We’re slowly picking up our pallets (too afraid to load down a vehicle with much weight). Congrats on a great patio!
Meghan says
Good thing you have Clara to keep you on track reminding her of her party!! Awesome job!
And I 100% agree on the movie…parts may have been uncomfortable to watch with ANYONE.
Jen says
Wow! Thats starting to look amazing you guys!! Congrats!!!
Kim@superchyc says
You guys kick bottom!! *Can’t say b-u-t-t, thats bathroom talk (thus it can only be used in said bathroom) according to my son circa 2003 when he was just a wee little thing – pardon the pun*
I’ve been wanting to expand my 10×10 concrete patio to the entire length of the back of the house but the gravel and sand steps have deterred me thus far…maaaaaaaaaaaaaaaaaaaybe now I have a little bit of motivation after watching John (and Sherry!) rock it out on Jazzy Jeff this past week. Maybe, hmmm, the wheels are turning…
Ashley says
This patio rocks my world.
And Sherry you’re looking oh so SKINTY these days! :) All of this D-I-Ying keeps you in ship shape!
YoungHouseLove says
Haha, you’re too sweet. I always mention that some of it’s editing. When one of those “bad angle” shots comes up you bet I delete them before they see the light of day. I’m vain like that. Haha.
xo,
s
Meghan, RVA says
Awesome job, guys. Inspiring, as ever.
(Sort of off-topic: my husband and I have decided to make our own custom-built cabinet for our craft shows, that will breakdown mostly flat, and fit into our “new” 20 year old station wagon. I showed Phil some of your Kreg-Jig-confidence-building “you can do it!” posts, and we bought our own jig yesterday. We cut all the wood to size last night, and I’m hoping that by the time I get home tonight, he’ll have our three boxes built. Like I mentioned above, thanks for the inspiration!)
YoungHouseLove says
Wahoo! Go Meghan (and hubby)!
xo,
s
MandyP says
It looks amazing!!!
courtney says
lovely. the curves around the edges are beautiful – and ambitious.
my hubs has finished our cuts or backfilling the edges but our patio is starting to shape up, too. funny, we were both trying to finish projects before our daughter’s birthday parties. hooray for spring babies!
http://davidcourtneyandcamryn.blogspot.com/2011/05/brick-by-brick.html
YoungHouseLove says
Wow- yours looks beautiful!
xo,
s
Giulia says
You are a machine…I can’t believe you mangaged to pull all of that off in such short amount of time. Kudos!
Totally had to laugh at your movie comment – could not agree more!
jo says
You guys are amazing! I wish I could get all that done. I have this really messed up stone walkway that we inherited with the house (which we bought not inherited). I’ve often wondered how to fix it. My tiny little attempts at fixing have not made me happy. Now I see what a huge task it will be, but maybe I’m inspired? If I can find the time and money.
Jordan@the2seasons says
Looks great! Ours is almost finished as well just some more cuts, put the sand to seal and we will be enjoying the patio. I am sure you can’t wait to finish and enjoy it for the party and all of summer.
Lori and Ethne at wom-mom.com says
what a job and what a workout! IT LOOKS GREAT!
Lori
http://www.wom-mom.com
PS: My husband and I really liked the movie, but totally agree–no extended fam when watching!
Cara says
WOW, this is some of the best DIY work I’ve ever seen! I’m so impressed. Virtual fist bumps to y’all!!
RebeccaNYC says
My back hurts just reading this post. Well done, John!!
Christa M says
Hmmm…the camera battery didn’t hold up…I have a feeling we will be seeing a time-lapsed video of the laying of the pavers!!!! Cause that would be really cool and it’s been a while since you kids have given us one of those ;)
The patio is turning out to be beautiful! I am sure you will be enjoying it all of the time! I know I would be!
Great job guys! Can’t wait to see the after! oh and that video ;)
YoungHouseLove says
We wish! A time lapse video would have been so cool but since this has been a 20+ hour project we just didn’t have the mind strength to keep the camera charged and running in a consistent spot (it only holds two hours of film at a time, so it would have been a lot to stop and upload film every two hours). Maybe there will be a sexy patio video like the console table one though. Haha.
xo,
s
Christa M says
Oh, I’ll be just as happy with a sexy patio video…make sure to get a lot of that curve action :) show em off!
YoungHouseLove says
Haha, she does have some nice curves. If we can finish them…
xo,
s
Jennifer C. says
Looks GREAT! Can’t wait to see pics of the par-tay!
Patti says
Wow, just Wow! This project is major league hard work and can easily get fouled up, so kudos and bravo to you my blog friend.
Jess says
“crampons” are also the name for some type of climbing equipment used on places like Mt. Everest. I’m reading a book about a kid who climbs Everest to my 6th grade class and they pretty much fall to pieces everytime I say “crampon” because it rhymes with tampon. Ah 6th graders…
YoungHouseLove says
Hahaha, what does it say about me that I giggled too? We also died laughing while John was tamping because he said he was “getting his tamp on” – say it out loud. It’ll all make sense.
xo,
s
Megan says
Beautiful job! You are ready for BBQ season :) (Although, in VA, it might always be BBQ season?)
YoungHouseLove says
Haha, pretty much. Although Nov- Feb might be a bit cold.
xo,
s
Emily says
Looks fantastic! Inspires me to start a patio project of our own! Almost though, that work looks hard!!!
Sara says
This looks absolutely amazing! I am wondering, when you cut the last little end bits, will it be done or is there another layer that goes on top to fill in the little cracks between the pavers to make them permament? I guess I’m wondering how the paver stones stay in place if they are just placed there on top of the sand?
YoungHouseLove says
There’s more sand piled on top and brushed into each crack and then you spray it down with water to set it all. Details when we get there! Can’t wait.
xo,
s
Sharon in NYC says
Wow, wow, wow and also, WOW! Hats off to an amazing accomplishment. That is some serious hard labor. Congrats on a job well done!
Carrie says
You guys are CHAMPS! It looks awesome =)
Betsy says
You guys are AMAZING!! I am so utterly impressed right now!
AnnaA says
WOW!
Things like that makes me superimpressed! And gives me hope for the day when me and Husband will do just that in our front yard.
Great work!!
L says
IMHO, Love and . . . was a bad movie, and not just for the skin. I gave up halfway through.
“John P. and the Patio”, however, has kept me entertained for a week now, and I’m still hanging on every frame.
Y’all are A to the mazing! And the patio looks marvelous.
Marla says
ok, I know where I am going when we’re ready to tackle this project in our backyard. Lots of great tips here! Thanks!
Anne says
WOW that is amazing. And it will feel that much better to you when you sit outside and know you did all the work! Incredible.
Keri says
The patio looks great! I’m so inspired, I’m thinking about extending our tiny patio.
Jess says
The patio looks great! I can’t believe how quickly you’re getting it all together. :)
On a side note, your decision to DIY the patio has convinced me that we should wait until we move into a house of our own before we attempt to create our own. The hubs and I had contemplated putting a small patio in the yard at our rental (which we would remove in a few years when we move), but your project has officially put ours on hold. I’d hate to have to do all the work to remove it shortly thereafter!
Kristin says
that seriously looks awesome!!! i can’t wait to see it all finished! i am so impressed! you guys now are making me consider doing it for my house…man, my husband won’t like that ;-)
Michelle G says
WOW WOW WOW!!!! how awesome you guys! what a difference. clara is going to wake up and go “whaaaa???”
Van says
looking good!
Lynsey says
A-mazing! After doing some research into laying our own patio last year, I think you guys have created the most helpful how-to guide on the world wide web. Thanks for sharing it all! It is really beautiful!
E @ Act Fast Chef says
WOW! That is just incredible. You should be so proud of yourselves. I can’t wait to see the final product!
- Sarah :-) says
Wow guys, it looks awesome!! Now I’m feeling a tinge of patio envy.
Heidi says
Great job on that patio! What did you guys do with the tiny spaces on the edges that looked to small for the bricks? Do you have to cut the bricks or something?:S Yikes.
Ps. Wasn’t the movie funny?
YoungHouseLove says
Yup, those holes that you see around the permieter are filled in with cut pavers (thanks to the wet saw). More on that soon!
xo,
s
Cara says
Looks awesome. Want to come to Atlanta and do my yard next? :)
YoungHouseLove says
I think he might be busy. Haha. It’ll probably take a year or two before John can look at gravel again.
xo,
s
Irene says
Wow! that looks amazing. It makes me believe that we can actually do with with our walkways.
Jenni says
This is excellent! My husband and I have been trying to figure out what we should do with our teeny-tiny backyard. After seeing your play-by-play, I think we could TOTALLY do this! Now all we need to decide on is when, since outdoor summer projects in southern Texas are not all that exciting. But we are one step closer so thank you!
Rachel says
Great work, John. My favorite part of all was your reference to your patio pants. LOL. Did you come up with that in you so-tired-you-feel-drunk state?
Love and Other Drugs was actually better than I expected. Amid all the nudity and innuendo there was actually a good message!
YoungHouseLove says
Haha, I think so. He wrote this post laaate last night while propped up on the sofa with cushions for his poor sore muscles.
xo,
s
Stacie says
Wow, looks amazing!!! Great job!
karen says
so just you two did this?? no help from a friend or family??
You guys did such an amazing job!! WOW!!
My husband and i did something like this once..but had some help from his friend and his dad here and there! Clara will be soooo happy to play out there!
Speaking of…1 week to go!!!! I hope you had a fabulous Mother’s Day Sherry!
YoungHouseLove says
Yup, John’s dad did stop by to look at it from the carport- haha. But other than some familial moral support (they’ve cheered us on and called to see how each day has gone) it has been 99% John and a little bit of me. Oh and we did have two friends come dig up some of the liriope in the very beginning stages just because they wanted to take it home with them. Haha. Free labor in exchange for some unwanted green stuff = the sweet spot.
xo,
s
Catherine says
Wow, I am so impressed! This looks so professional, even in this unfinished state :) You two never cease to amaze. Can’t wait to see the finished product/birthday party stylings!
OMG-YHL says
I just wanted to pop in to say I love you guys. You manage to make a task I would normally find confusing and boring totally intriguing and do-able.
laxsupermom says
Wow! You guys work so fast – totally my heroes! The patio is looking amazing! Can’t wait to see the final reveal. Thanks for sharing.
Lila says
Wow, the patio looks amazing- obviously. I can’t wait to see Clara’s party pics. I’m busy planning Simon’s first birthday party too, our babies are just a few days apart in age I think. Simon’s is May 18th.
YoungHouseLove says
Wow- just four days apart. Clara’s b-day (and party) are on the 14th.
xo,
s
Andrea says
You guys are Seriously Amazing… I look at my puny house projects, then I look at what you accomplish, and I am just awed. Go YHL!
Theresa says
Awesome. I know I’m late but kneepads can be your best friend. Great Father’s Day gift idea. Buy them once, love them forever.