Alternate punny post title: Joist to the world. (I’ll pause while you golf clap)
Good news! My dad made it back from my grandma’s house in West Virginia so operation double-up the girders and bolt them to the posts was able to commence with him at my side. As I started to tell my dad “Okay, you’re going to hold the board in place in the air while I drill pilot holes…” he cut me off and suggested we just put both girder boards on the ground, nail them together and that way they’d both rest on the notched posts – no air-hold required. Smart. I knew there was a reason I picked him as a father.
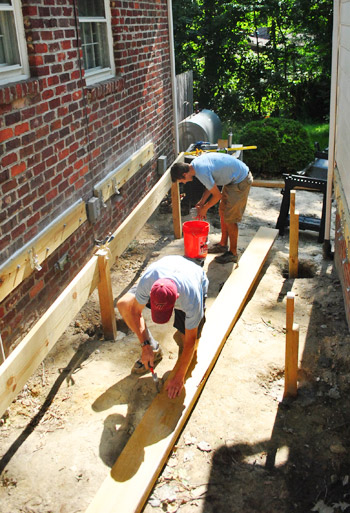
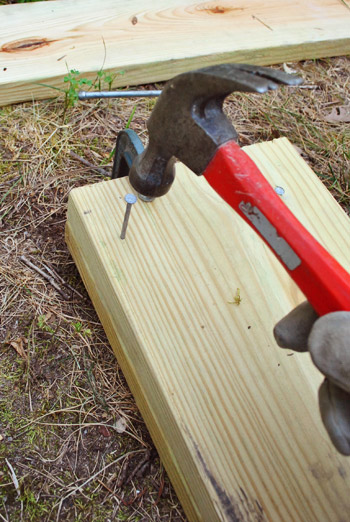
So we clamped the girder boards together so what-would-become-the-top-edge was perfectly lined up (boards are never perfect, so even two boards marked 2 x 10 might be slightly different widths). Then we nailed them together.
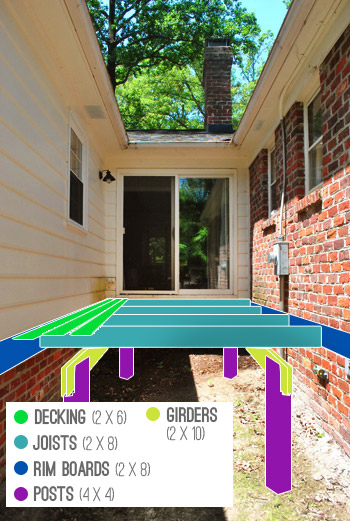
To refresh your memory about how this deck will come together, here’s this handy little graphic that hopefully makes it a bit more clear:
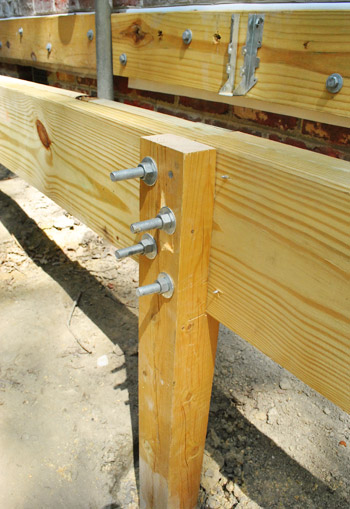
Next we were able to rest the now double-thick girder on the notches and proceed with bolting them together. Our county requires us to use “two 1/2″ through bolts” – which meant I had to drill 1/2″ pilot holes through about 4.5″ inches of wood – which was a little bit of a challenge since my longest drill bit was barely that long.
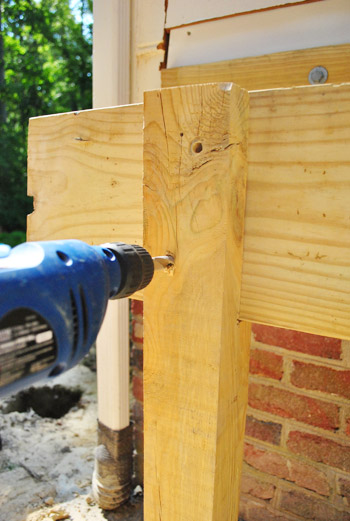
But we got it done and were able to slide the bolts through with a bit of hammering, and then tightened the nuts on the other end.
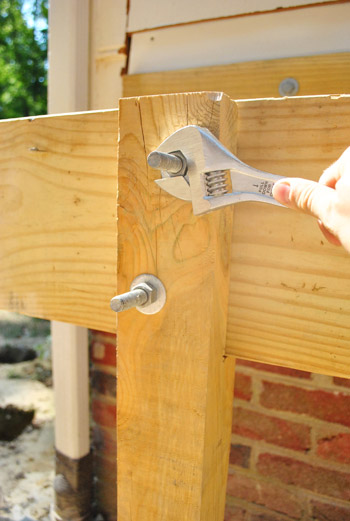
It was actually a remarkably simple process, and it probably took us about two hours to do the whole thing. Not necessarily a short time when you’re standing in 95-degree morning heat. But, I’d say it’s the first part of this process that has actually been faster than we anticipated.
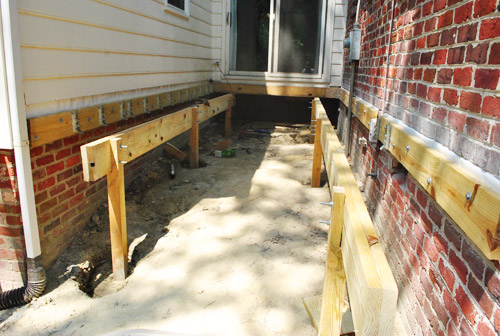
Oh, and here you can see how we joined the girders on the long side where it’s actually two sets of boards that butt up against each other on one post. It’s like a through bolt party up in here.
Since our morning was going so speedily, I even convinced my dad to help me go ahead and get the diagonal girder and posts measured, cut and set in place.
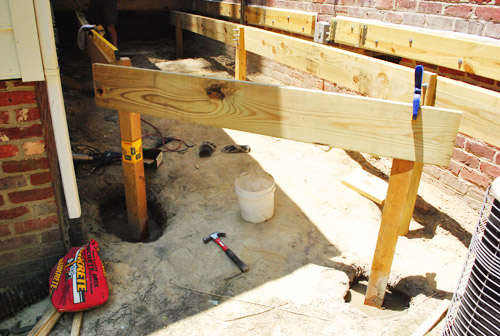
So by about noon we were looking at having accomplished pretty much our entire goal for the day.
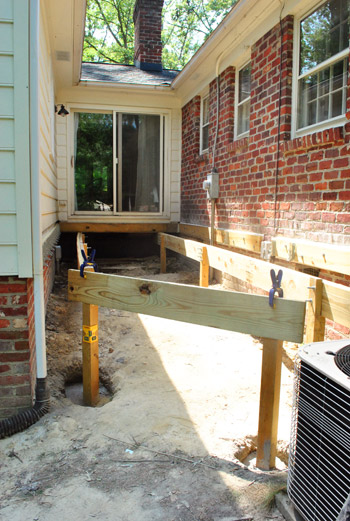
Does that mean we get to stop? Of course not. Well, it did for my dad since he had other things to do at home. But after taking a breather (by which I mean working on something else inside with Sherry for a couple of hours) I returned to my slowly-getting-completed deck for my next step: laying weedblock and gravel.
A bunch of you guys have recommended taking some weed-preventative measures and I figured this was my last chance to have easy access to the entire space under the deck (since adding joists will mean lots of new obstacles). So I removed one existing obstacle – the diagonal girder that we hadn’t bolted in yet.
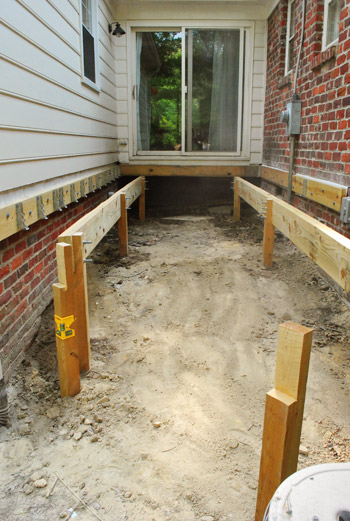
Next came the weedblock. Using some leftover from Clara’s rock box plus another $12 roll from Home Depot, I was able to cover the whole area without a problem. I have mixed feelings about weedblock (since my experience has been that some weeds just grow on top of it instead of under it) but I figured it’s better than nothing. And for about $15 (including the ground staples to hold it in place) it’s worth giving it a shot since it’s the recommended method in our area when it comes to dealing with the ground under a deck.
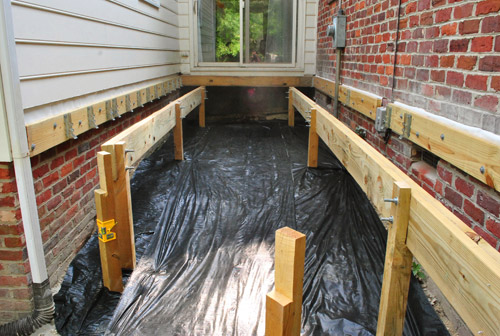
Next up was covering the area in gravel, since it’s harder for weeds to grow in a soil-less environment (and pests will like a weed-block-and-gravel-filled area a lot less than a damp-muddy-and-weedy spot to hide). My original plan had been to get a delivery of rocks from the same stoneyard where we bought the gravel for our DIY patio, but I forgot to place the order and then was too impatient to wait. So instead I picked up two car-loads of this bagged gravel from Home Depot (it was marked down from $3.38 to $2.50/bag, saving me about $35!).
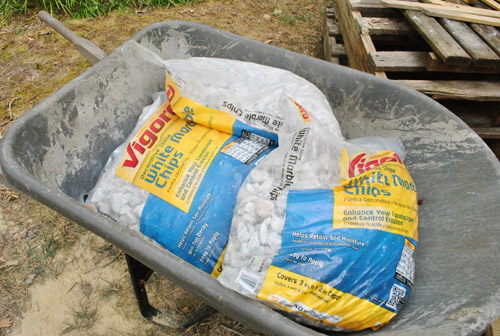
It wasn’t necessarily easy hauling all of it from our driveway to the other side of the house where the deck is going in (again in near-100-degree heat) but by this point I had become pretty accustomed to being sweaty and gross (and the people at Home Depot were unfortunately accustomed to seeing me that way). So here’s the space slowly filling up with rocks…
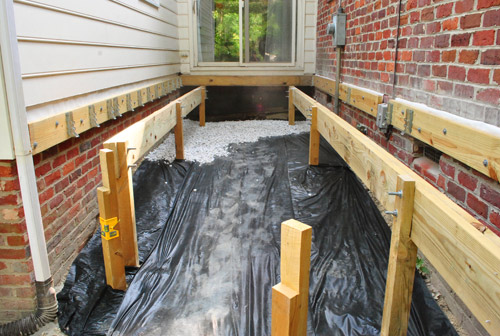
Almost there…
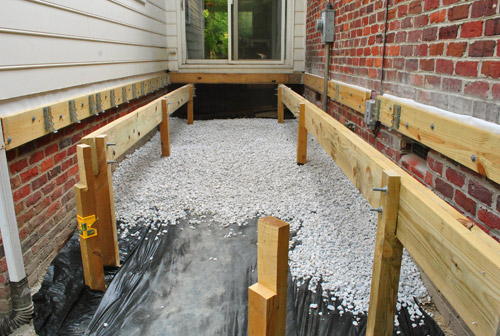
…and complete. It took me 40 bags total. I know I’ll need more once I put the stairs in, but for now I’m just going to cross that bridge when I come to it.
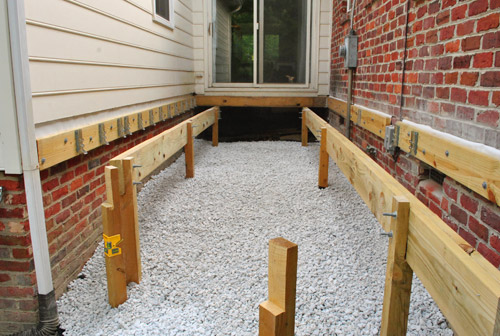
It was about 7:30pm by the time I finished getting my rocks down, so I called it a day. Though I was almost excited enough to keep going because my next step would be joists… which meant it would finally start looking like a deck.
So the next day – despite being more sore than I’ve been in recent memory – I bucked up and got my joist on. Each of my joists would be about 7.5 feet long, so it meant trimming a smidge off of my 8 foot long 2 x 8″ boards.
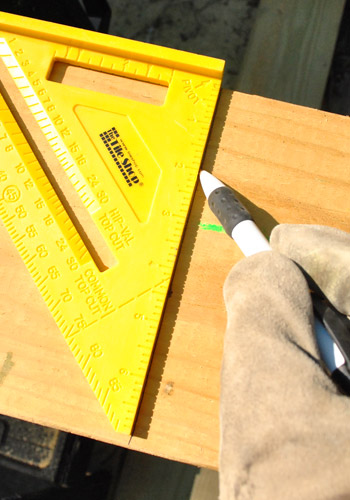
I mainly took this picture of me marking my cut because every time I did this my eyes kept catching the word “PIVOT” in the corner of my straight edge and this scene from Friends would replay in my brain.
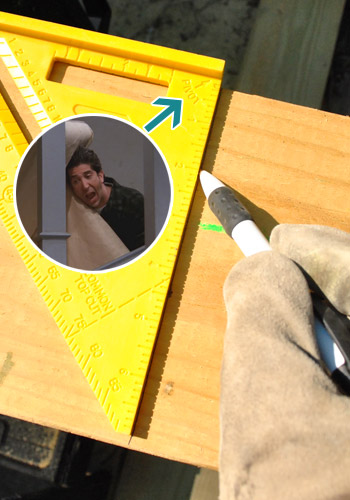
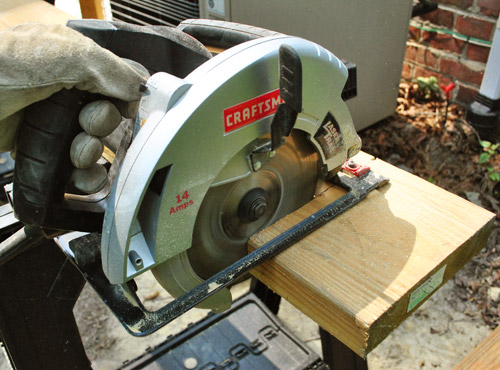
Anyways, once Ross was out of my head, I got to cutting with the circular saw – who’s like my new best buddy on this deck project.
Once cut, the joists actually just rest on top of the girders – so there’s no additional support needed to keep them up. But I did have to add some hangers on either side to give them some stability side-to-side. I had already installed all of the hangers on the siding side of the house, so it just meant adding them on the brick side.
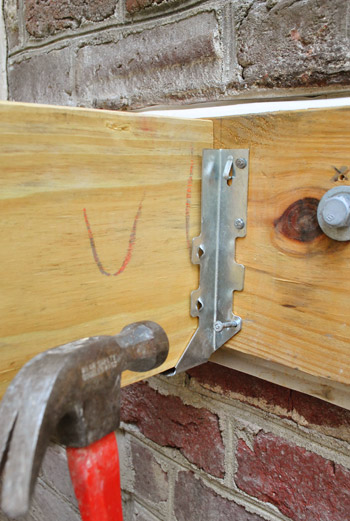
And since these hangers were no longer about keeping the hangers up, it was actually more critical that I nail them in on the side (thanks to the handy angled-nail guides already in the hanger).
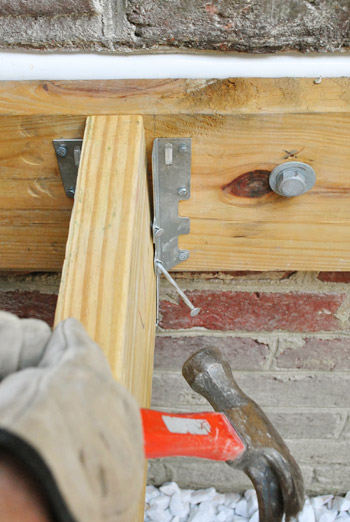
This was by no means a swift process (each hanger required 10 nails) and it didn’t take me long to wonder if I should’ve bought a nail gun for this project. It wasn’t much longer after that that I was actually pretty certain I should’ve bought one. But alas, I just kept plugging along – thinking of how I would look like Hercules when all was said and done (spoiler alert: this did not happen, strangely enough).
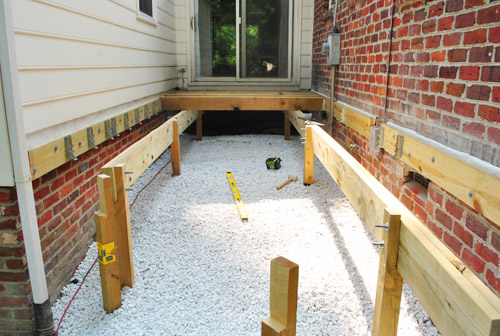
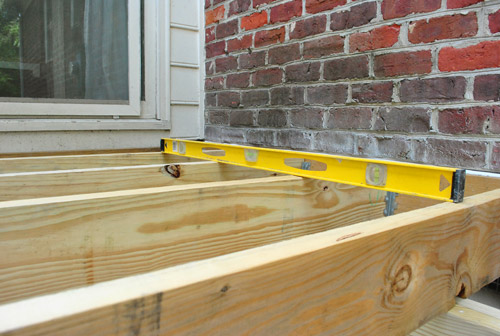
As I added each joist, I double-checked my level as I went. If they weren’t level (while accounting for a slight slope away from the house for drainage) there wasn’t a whole lot to be done since my girder was already set. But doing this did help me spot one board that was too warped to use (it curved up on one end). And had anything been too crazy un-level I could buy (or rent) a planer to scrape a bit off the top of the offending joist.
Here’s Clara watching me build what she now called my “pretty pretty deck.” Not the adjective I would choose myself, but as long as she’s showing interest in the project – I’ll take it.
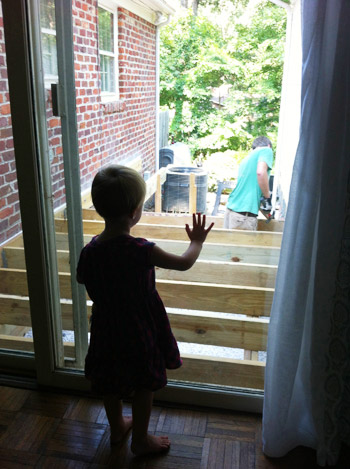
Slowly but surely more joists joined their joist-y brethren and the space started looking more and more deck-ish.
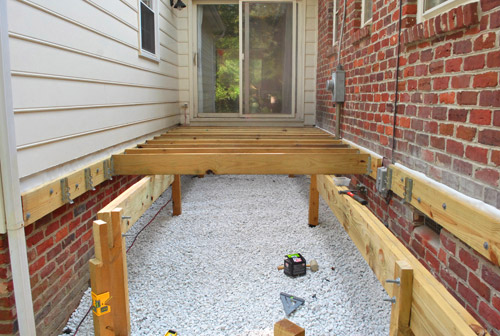
When I got towards the end I did have to go ahead and bolt the diagonal girder in place, since the joists on the end would need to rest on it.
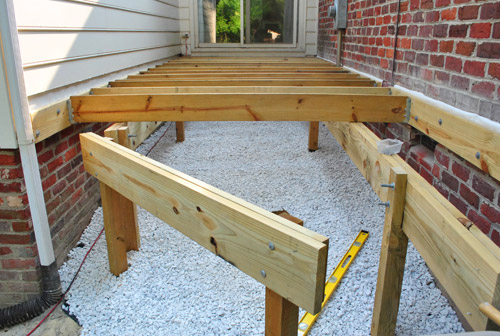
And finally, about four hours later – all of my joists were in.
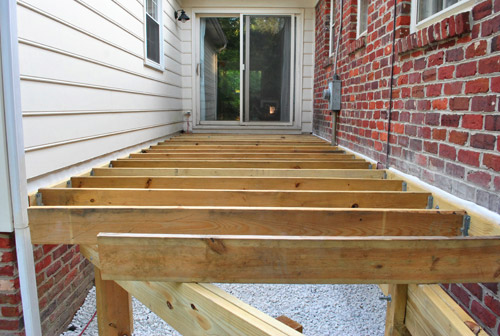
I still have to add the rim boards along the exposed edge. It will be a bit complex because this is where I have to be precise about the angle I cut, so I didn’t have the mental juice left to tackle it after such a long day. And for now I just left the joists on the end extra long (once I’ve determined my angle, I’ll use the circular saw to cut them more precisely).
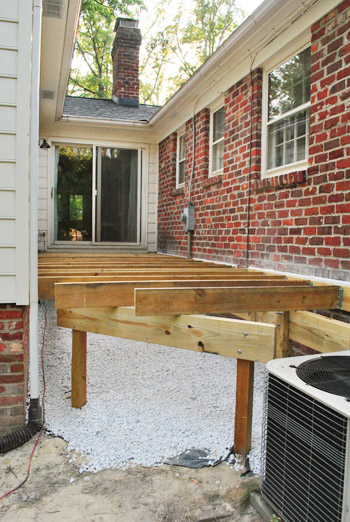
Not too shabby though, right?
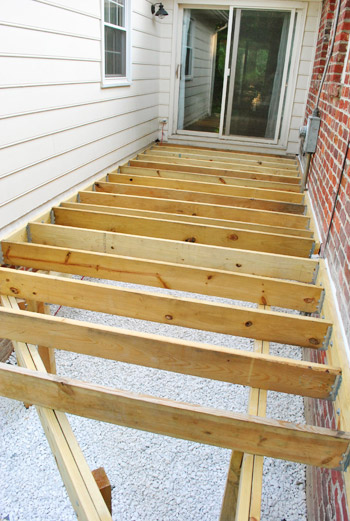
Before the day was through, I couldn’t help but test out my new creation a bit. You know, to make sure it actually could hold some human weight.
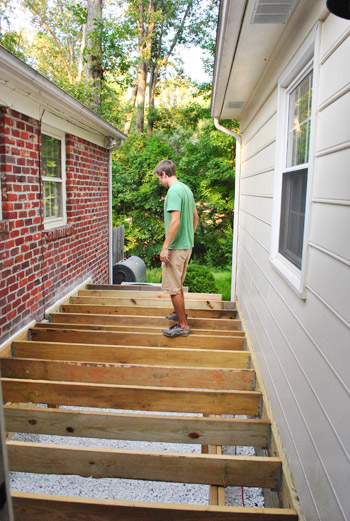
It did! So I broke out a little happy jig. Call it my “Happy Happy Joist Joist” dance if you will.
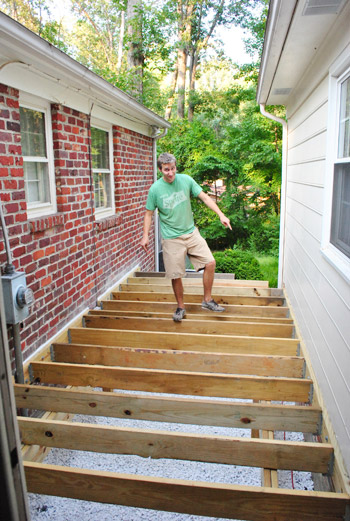
Once I get those rim boards in, my next step is deck boards. I can’t tell you how excited we are to finally be at this step. This project has taken much longer than we anticipated (for which I blame equal parts on ourselves, inspectors, heat, and the lack of an army of helpers to speed things along). Oh well, that’s DIY for ya. It’ll totally be worth it when we’re sitting out there sipping lemonade, right? What have you guys been up to this weekend? Any outdoor or indoor projects that are finally turning a corner and looking like they’re closer to done than undone?
Psst- Wanna catch up on all of the deck action? Here’s where we shared our vision for the space, then we removed the plantings and the old balcony, followed by selecting our materials and documenting our first day of building progress. Then we dug our post holes, and then learned that we failed our first inspection. We revised our plan and dug more holes (which got approved) and proceeded to set posts. Whew, all caught up.

Sarah @ One Sweet Heat says
I just spent way too much time on YouTube watching Friends clips after clicking on your link! hahaha :)
Rrachel says
Looking good!!
It was 90-plus degrees and humid here, but my pregnant self persevered a whole bunch of gardening. Then, on a whim, I decided to sand the dresser that will go in our baby girl’s nursery. As soon as it cools down enough for paint to dry, I’ll be spray priming and spray painting it an aqua blue!
Gina says
That’s so exciting! I completely know where you’re coming from! We’re re-doing our deck too! We’ll be blogging about it soon. We just framed it yesterday (Sunday, in case you forgot it’s Monday today.) It felt so good to finally see that done! Now for the fun (expensive) stuff :)
Good luck on your ventures!
heather says
Decking will be so exciting for you guys! You’ll get about three boards on and start dancing on it even more haha. It’s the best part. This weekend was crazy for us. The boys got two of the walls built and braced up on our addition (that spans both the old and new addition), all of the rafters cut (yep, they cut them – crazyness. Then last night as had TORRENTIAL downpours which were totally unexpected, so at 2:30 am we had a rainstorm IN the house. Thankfully most of it was in the older part but at once point it started coming in on top of my soaps (yep, just about lost a ton of product but thankfully I managed to save it despite some of it getting wet, I got to it in time) as well it’s the room we’re keeping everything that CAN’T get wet.
Hard to explain how we fixed it, but it will definitely be up on the blog later. Yikes. Haha. I just laid there after and laughed. It’s definitely one of *those* stories.
YoungHouseLove says
So glad you fixed it!!
xo,
heather says
haha well, fixed is a relative term haha, more like re-routed. If it rained again we’d be screwed again until the roof is up.
Koliti says
WOWzer!! Awesome!! You are totally transforming that once-unused-space into a beautiful retreat right outside your door.
John, you may think that you’re not accomplishing your deck as quickly as you’d like, but for the rest of us we’ve just barely nailed one nail or dug one post hole – Whew!
I hope that you are still staying well hydrated (as you showed in a previous post) while you are working. And ideally your body probably wants you to go inside past noon. Please take care of yourself.
Despite some minor set-backs, how glad are you that the first inspector who came out to your house brought his A-game, was on his toes, and caught the areas that you needed to re-work? You are now able to enjoy a well-deserved “happy” dance.
YoungHouseLove says
Yes, still drinking lots of fluids and thanking the deck gods that our new plan is not only approved by the county but designed by them- doesn’t get much more secure than that!
-John
Peggy McKee says
Two suggestions:
1 )move that big piece of concrete out from under the deck–while you still can–even if all you can do is move it to somewhere else on the property.
2) make sure you have a way to get under the deck if necessary, e.g. to relocate feral kittens, etc. In my case, I used screws instead of nails in certain places for (relatively) easy access.
YoungHouseLove says
Thanks for the tips Peggy!
xo,
s
Katy @ The Non-Consumer Advocate says
I feel for ya’ dude. All of our home improvement projects seem to follow your lead.
They’re way more complicated than we initially thought.
They cost more than we budgeted.
Weather will be an issue.
Entirely less interesting than humanly possible.
And then, when we’re thisclose to finishing everything we hit some complicated snag and we close up shop.
Man do I hate this kind of DIY project.
Katy
P.S. I am super impressed with how organized and smart you’ve been with building this deck. You will enjoy it forever and a day.
Christine says
Wow, looks great! I can’t wait to see how you guys trick it out with furniture, pillows, pots, etc. For some reason, I can see a lot of apple green in that space. Now I want a random “slot” in our house, too! Way to make something awesome out of something a little unusual. And to persevere in this heat! I feel a little guilty watching it go up from the comfort of my air conditioning and computer screen!
Sam says
It’s looking fantastic guys! My uncle does decking professionaly, amongst other things, and I’ve always admired how quickly he and his guys throw it together. Usually he has a team of three or four and it makes it so much easier.
Can’t wait to see it finished, it’s going to make so much more sense of that space!
Lauren says
Do you guys have any plans for the air conditioner to make it less of an eye sore? We live in a 3 story back-to-back townhouse (ie: surrounded on three sides) with a balcony off the 2nd floor living room. As such, our air conditioner had to be installed on our 10×8 balcony. I’m thinking a slatted wood cover (obviously with proper ventilation) that lifts overtop of the air conditioner would be less ugly and perhaps practical as a side table/potted plants on top. Would love to know if you guys had any similar plans. The deck looks great so far!!!! Way to go John!
YoungHouseLove says
Thankfully once we add the deck boards and the railing (or a planter that we’re debating working in there) the air conditioner will be completely hidden from view. Will keep you posted as we go to share where we end up!
xo,
s
emily says
you’ve been waiting for WEEKS to make the “happy happy, joist joist” joke, huh? :-)
my inner mom is fah-reeking out about working in that heat though. please be careful, you two!
Erin @ WriteTasty says
Great progress! Lemonade is not far away! I dream of the day when I have a deck of my own. Fingers crossed for my next house!
Julia at Home on 129 Acres says
I’ve done joist hangers by hand and it is an Herculean task–even if you don’t get the Hercules look. :) The deck is looking great. I’m starting to feel like we’re turning the corner on our basement reno finally, so I know the excitement and satisfaction (and relief?) you feel when you’re finally making progress.
lainey says
So freakin’ pumped for this deck………lol
Eve says
Does Clara look a little taller in that pic? Your gal is growing up!
Marissa C says
Hmm…wont you need a nail gun to put the planks in? I say it’s worth the investment!
YoungHouseLove says
I totally agree! I’m gunning for renting one or buying one (pun intended, haha).
xo,
s
Susan says
I was refering to something on your blog the other day to my husband and i refered to you guys and “my friends John and Sherry” without even thinking about it. The best part was my husband knew exactly who I was talking about and didn’t even make fun of me for refering to you as my ‘friends’ even though i have never met you. Deck looks awesome! It will be such a nice space, can’t wait to see how you will style it!
YoungHouseLove says
Aw, that’s sweet!
xo,
s
Valentina says
I can’t believe how much you, guys, can do on your own. This deck project is blowing my mind! Here’s a question, though: had you known how to use an auger before you rented it at Home Depot? I need to reseed my lawn this fall and was wondering about the dethatching machine, available for rent at Home Depot. Scared stiff about it. Plus there’s all this advice online about knowing how to use a tool before renting it (so you don’t wreck up like a hundred rental hours before finally getting the job done). I don’t know any DIYers as avid as you, so I’m hoping you can offer any tips that could ease my anxiety. I would really-really appreciate it! Really-really!!!
YoungHouseLove says
Nope, this was my first time! But my dad had used one about 30 years ago when we built a deck on our childhood house, and I watched a few videos online to prepare. Wasn’t too hard – I mainly use google and ask folks who might have some experience for advice!
xo,
s
Nimali says
That is looking awesome!
Makes me want to build a deck…onto my apartment. damn.
Leyna says
Not gonna lie–seeing as how I don’t have the intestinal fortitude to tackle a major building project yet, my eyes start to glaze over just a tad as I’m trying to follow along with the technical posts involving lots of numbers and words like “girders” and “joists” (for years I thought my dad was saying “Joyce” and I was like–wow. Some lady named Joyce made a BIG impression on the construction industry!). But I read carefully and thoroughly nonetheless, hoping I’ll learn–and no better way to get my attention than a Friends reference. PIVOT! Deck’s looking awesome–way to go.
Jessica says
Holy moly! That’s going to look fantastic!
Amy says
Wow! You are so close to finishing the deck! It looks great! Any outdoor furniture/decor ideas yet?
YoungHouseLove says
I have a few ideas in my head – will have to make a mood board and share them all! Can’t wait for those deck boards to go down!
xo,
s
John says
Looks nice. Weeds shouldn’t be a problem as long as you don’t shoot the grass from the mower under the deck. You could spray paint the bolts for extra protection even if they are galvanized.
YoungHouseLove says
Thanks for the tip John!
xo,
s
Ryan says
Hi guys, great project!! Just wanted to add something that might be worth checking out on the your engineer’s drawings or asking your engineer – Do you need to support your joists in joist hangers on your ledgers? Your joists should be able to cantilever the short distance past your posts and beams toward your house, not needing to be hung in the hangers. If left as is, your posts (& foundations) will eventually settle differently than your house, pulling your joists down where they are attached along the beams. If they can be unfastened from the ledgers, you’ll have to add blocking so the joists don’t fold over.
I’m not an engineer by any means, but thought it was worth mentioning as it can’t hurt to ask prior to inspection time :)
YoungHouseLove says
Good question, Ryan. I’ll try to double-check with the county inspection office ahead of time – but the method you see here (with the hangers) is what they advised me to do as a means of attaching the joist to the rim board (aka ledger) to help keep my joists from warping side-to-side. It was suggested by both the engineer and the inspector who came to the site so I’m hoping I’m in good shape!
-John
Ryan says
Thanks for commenting back!! My worry is that if your posts settle 1/2″ or more, and you haven’t gapped the underside of your joist hanger that 1/2″+, you’re now supporting your joist load in your hanger… exactly what you had intended the first go ’round which they didn’t like!! Solid blocking between your joists above your beams and gapping the end of your joists at the rim board would let your deck settle, expand & contract all on it’s own and not structurally affect your house. I’m completely surprised your engineer suggested to keep the hangers in play, possibly flip them over and don’t nail them to your joists?? This would keep your lateral support but let them settle in time, possible option!! Hope it all goes well, keep up the good work!!
PS. My wife got me hooked on following you guys ;)
YoungHouseLove says
Gotcha, Ryan. We’ve actually got the inspector coming by tomorrow to double-check things for us before we go any further. Thanks for watching out for us!
-John
Ryan says
Perfect!! Glad I can add my $0.02 worth… for what it’s worth!! I’ll be watching to see how your inspection goes, keep us posted!!
YoungHouseLove says
Will do!
xo,
s
Janel says
That PIVOT!!! scene from Friends is my favorite scene ever. I laugh out loud just thinking of it. Thank you for making me laugh out loud at my computer screen in the middle of a Monday workday. I look like a total goof :)
Nora Rose says
Totally not taking my BF’s hoarde of power tools for granted any more. Whenever I see you guys do something like hammer nails or twist nuts and bolts, I just want to leap through the screen and hand you a tool. Albeit my BF is a mechanic and “supposedly” they are used at work, and an air compressor takes up a lot of room. Maybe you could find a used one on Craigslist…
YoungHouseLove says
Yes, or we’d love to rent one just to get ‘er done!
xo,
s
Courtney says
Totally feel you on those rocks! When we bought our house the previous owner had removed the above ground pool but left the 900+ sqft of river rocks that surrounded it and came right up to the house. I was feeling especially cheap so I decided to remove them via the ol’ shovel and wheelbarrow method. It was brutal, and of course there’s no easy way to dispose of those things so now we have river rock mountain in another section of our yard. If you ever need rocks for another project free ones are just a scenic drive to Maryland away!
Jill says
Craigslist those, lady! You’ll have so many people vying to cart away your rocks!
Kate says
Love you guys! The PIVOT mention just made my day. I moved two weeks ago. Whenever we got a bit grouchy (which was a lot since it was 100 degrees and I lived on the third floor) someone would yell PIVOT, PiiiVOOOOT! And it would instantly cheer everyone up.
The deck is looking great, congrats on your progress so far.
Regina says
John- Oh My Gosh! I couldn’t believe the reference to the friends episode of the “Couch Pivot” its my favorite and if you haven’t seen the blooper of that episode its a MUST SEE. Everytime i see the word pivot i think of that blooper.
Debbie C says
Amazing. Every time I see a post about the deck I am so glad it’s you and not me! So much work, but it’s looking great!
Carli says
Looking so great guys!! The whole project is unfolding nicely!
Missy G. says
Bwahahaha… one of my most favorite Friends episodes. Although I think I laugh harder at Chandler’s reaction to Ross’s “PIVOT, PIVOT, PI-VOOOT!!” It’s the “shut up, shut up, SHUT UGHHHHHPP!” Bwahahah, oh, I’m dying. Thanks for the laughs this morn, John. :)
Stacy says
Wish the morons who built our deck had used weed block or put something down under the deck because we have these ugly weeks growing up through our deck constantly. Since our deck sits lower to the ground and has lattice work screwed in around the bottom, it makes it impossible to get to the weeds and kill them. I’m not 100% sure what’s under the deck and honestly don’t want to know. I just wish whoever built it had thought to do that. When it comes time to repaint, we may have to take a few boards up to be replaced and at that point we’ll probably do something about the problem, but for now… well, it is what it is.
John says
If the stairs prevent you from getting below the deck, you may consider cutting a removeable panel in the deck and screwing it down. You may want to add a small hole to help lift it out.You always want access to it.
YoungHouseLove says
Thanks for the tip John!
xo
s
tae says
it looks great! congrats on your progress so far! out of curiousity, do you need to stain the joints/girders/etc on the underside of the deck before the decking goes on? how will the underside of hte deck withstand weather?
YoungHouseLove says
Thankfully all of this wood is pressure treated, so it’s made to stand up to weather of all kinds! John’s dad used the same method (only staining/sealing the top of it after assembling the deck and giving it some time to acclimate) and it has held up for over 30 years!
xo,
s
Suzanne says
Aw, this post makes me miss our outdoor space!! Looks like you guys are doing great, I hope you get to enjoy some lemonade and mojitos soon!
John says
Use low VOC stain, I used Thompson’s water sealant on my fence and the smell was awful for a day! The semi-transparent stain requires higher VOC for protection than a solid stain.
Jessie says
JOIST TO THE WORLD indeed!
Man, you are kicking some deck tail!
simply amazing! :)
Pat E. says
looks so great! I’ve got a question about the windows. Those on the brick side are the guest bath and “playroom,” right? and I believe the other side is the master bedroom. Do you think that you may need to change window coverings to provide a little more privacy since family/friends on the new deck can easily look into these rooms? (and you probably don’t know yet, but you may want to consider it.) I’m so excited to see all of the progress! Go John & John’s Dad!
YoungHouseLove says
The windows are the hall bath, guest bath and guestroom on one side and our master on the other. Right now all of the rooms have blinds (and the bedrooms have curtains) so that’s all we think we’ll do privacy-wise for now. It’s just up to the occupants to put them down when they’re ready (well, we leave them down in the bathrooms).
-John
Jill says
John, instead of a nail gun, look into a palm nailer. They’re more versatile (most nail guns will work with only one size nail – palm nailers can take a variety), fit into tight spaces better (seriously, yo), and are cheaper (mine was around $130, I think?).
My palm nailer was my favorite tool until I got my miter saw, and now I am torn.
YoungHouseLove says
Thanks for the tip, Jill!
-John
Suzanne says
Wow! Good Work, John! I just hate seeing you do so much alone! (most guys would have quit long ago until help arrived!). But I think you may be taking the Y part of DIY a little too far! Besides dad, aren’t there some brother in laws, or cousins, or neighbors you could barter some weekend help with?
YoungHouseLove says
I could wait for folks to come over and help (a few others have offered) but I’m impatient. So often times I duck outside “just to do one small thing” and it ends up being a full day of work (and a full day of blog-and-Clara-wrangling for my beautiful/patient wife). But we’re happy to finally be moving along so it actually looks like a deck out there!
-John
Sarah M says
We’ve spent the last few days putting up a pergola in our backyard…and I agree – it is so exciting when it finally started looking like a pergola! We did a lot of putting up and taking down, so at the end of each day it looked like we had done so much less than we actually did. But, all we have left is a layer of slats on the top to add some shade (much needed in Southern Arizona!).
I’m glad your joists are working out to be level. We put in the rafters of the pergola, and the top was not at all level (due to different sized 2×6 boards) making it impossible to put the shade slats on top of them. We considered renting a planer, but ended up just rearranging the order of the rafters. Surprisingly it worked! Those moments are the joys of DIY!
YoungHouseLove says
So glad that worked! Such a lucky break!
-John
Stefanie says
Excited to see the deck come along! I can see it now – the joists really do help with the vision.
My husband ripped apart our kitchen this weekend. Not all of it – just counters and backsplash. The cabinets suit our purposes just fine, for now. He took today off work and he’s thinking he should have the granite slab cut and laid in by the time I get home…we’ll see though, DIY always takes longer than you think!
Christy says
Bahaha! I totally caught the ren and stimpy reference! Yalls little girl looks adorable watching daddy through the window! Good work on the progress!
Char says
Often when there are measurements and tools mentioned in your posts, my mind turns THIS:
“doube-thick girder on the notches” INTO “double-gibberish fog brain”.
Or THIS:
“drill two 1/2″ pilot holes” INTO “drill 3x (a+b) = airplane”.
Is there a name for that phenomenon? Blog Brain? Or maybe DIY Disorder? Either way, you guys are totally fantastical and I love reading your stuff. :)
YoungHouseLove says
Bwahahahahahahahah. Comment of the day for sure. Maybe comment of the month.
Hilarious.
xo,
s
Allison says
Have you seen the bloopers clip of the “pivot” scene? even funnier!!
Allison says
Didn’t mean to put the video IN the comments. I just linked it.
YoungHouseLove says
Haha, I love it!
xo,
s
Katie says
PIVOT…died laughing when I read that. Good luck on the deck!
Stephanie N says
Congrats on the progress! Next pictures will be an actual deck!!!! Right?
:)
YoungHouseLove says
Here’s hoping! Might just be deck boards halfway done (depending how long they take). We also have to do the stairs and the railing, but we’re finally moving right along!
xo,
s
elspeth says
You guys are doing an amazing job!