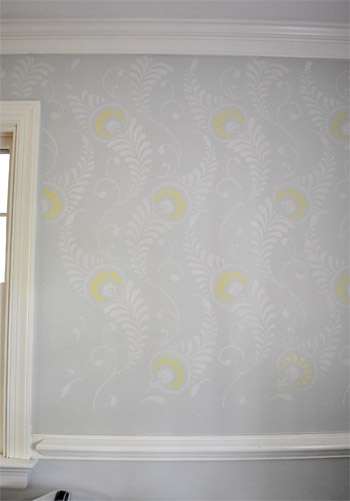
All week I imagined a big office stencil reveal post here. Sadly, it’s not done yet. Oh DIY, why do you take such pleasure in toying with my emotions? Quit playing games with my heart, home improvement. But regardless of the fact that it’s not exactly a quick project, it’s looking awesome and totally going to be worth the blood, sweat, and tears (all three of which have occurred, incidentally). So hopefully by this weekend I’ll be doing some celebratory Rocky laps around the house (yes, with music blaring and fists in the air) and I can share photos & deets of the whole shebang on Monday. Woot! Until then, here’s a still-needs-to-be-finished wall (the bottom edge above the chair rail is still on the agenda):
In the meantime, how about a bloodless-sweatless-and-tearless project in the “quick, easy, and free” vein? See, John had this genius idea that we should try to get an ombre effect on paper (that we could then frame) using food coloring. Namely soaking it in food-colored water and waiting for it to travel up the page and potentially upping the intensity by adding more color to the water and letting it soak a bit less for a two-toned effect.
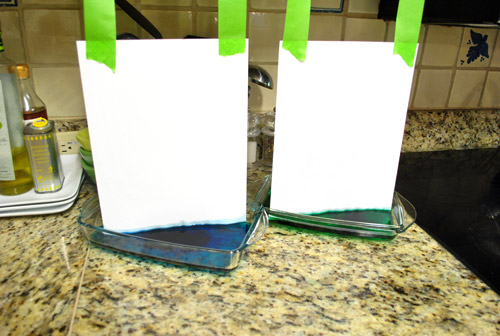
Yeah… that didn’t work at all. Zero travel-age back up the paper. Just wetness. Haha. So…
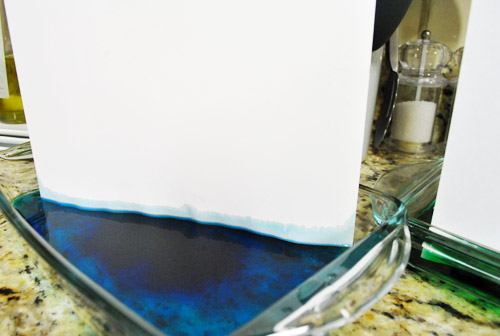
… fail!
But we had some fun messing around with drips and drops, just to see what we liked. First I made an ode to Dexter with a few drops of red food coloring.
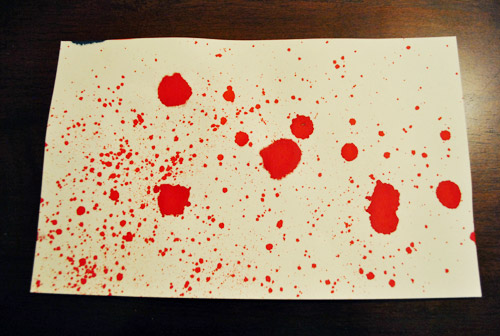
How fun would stuff like this look framed all over the house for a Halloween party? You could even take regular family photos and splash “blood” (aka: red food coloring spatters) over them to weird the observant people out at your little shindig (or use a red sharpie to create the effect on clear transparency paper and place it over them so as not to ruin the original prints/photos).
Anyway, then we started messing around with drips down the page but we really fell in love when we hit on this simple collection of dots (we were using regular old card stock by the way):
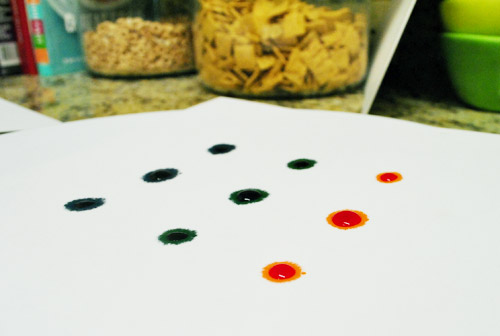
All we did was make three dots of each color next to each other (squeezing a bit harder on the middle one so it was a wee bit larger). Then we just waited for it to dry…
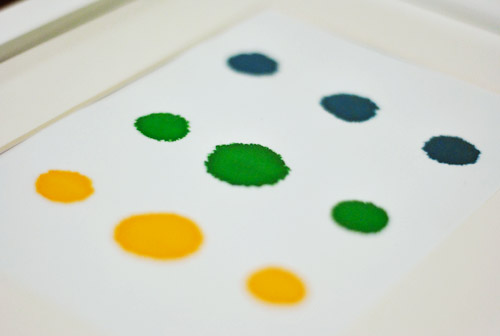
… and framed it…
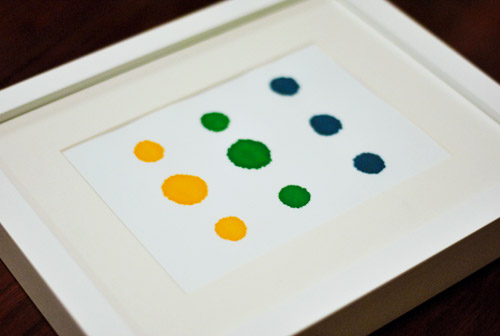
Bam, an instant zero dolla (holla!) “food coloring masterpiece” for our always-changing gallery frame wall:
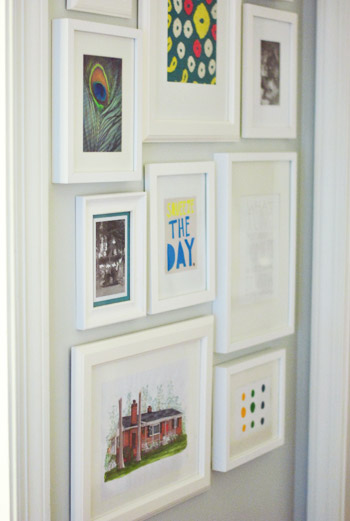
I actually love how it picks up on the circles in the fabric that we framed a few feet up (in the middle). And it’s so fun to tell people who come over (and just stand in front of that wall for twenty minutes) that it’s just drops of food coloring. I can’t really explain why, but it looks kind of exotic and collector-ish. So it’s always fun to see the look on their faces when they realize it was done in five minutes with cupcake baking supplies.
Anyone else going to try their hand at some food coloring art? Or throw a Dexter-themed Halloween party? If so, I would LOVE to see pics of any and all faux blood spatter that you use as decor! Geek for life.
In other news, that might be the shortest post I’ve written in about a year. Hootie hoo for trying to meet some recently mentioned goals. We’ve definitely had our share of long beefy posts this week, so sometimes a quickie here or there feels nice too. Wait, that didn’t come out right.

Nichole@40daysof says
A quickie – hilarious! I totally get the connection between you and Katie B. :)
Azar says
Looks like you were trying to do chromatography, (http://en.wikipedia.org/wiki/Chromatography_paper). I just skimmed the comments and people are right, watercolor paper will probably be high quality enough to make that work. Also you will want to try to use a solution that is a little more complex than food coloring. Ink will have more components in it that will travel up the paper at different rates and give a more exiting effect than food coloring.
Lindsey d. says
Sherry, I’m a little disappointed.. I completely expected a link to a Backstreet Boys video in that first graph. :)
YoungHouseLove says
Haha, sorry! How could I have missed that opportunity.
xo,
s
Clare says
Dear Sherry,
I think you should frame a little lock of Clara’s baby mullet.
YoungHouseLove says
Love that idea! Haha. Don’t think I didn’t save it! It’s in the baby book…
xo,
s
Sarah in Indiana says
Hey, clever idea for some fun free art. As to stenciling–man, so time consuming. It is kind of a downer. But I think using a mini roller instead of dabbing the paint on with the stencil dabber made it go quicker for me than it is for you. I just off-loaded the paint onto a paper sack before I rolled it on, so it would go thin and even. You’d probably still have to do the grellow with the dabber, but it might save you some time!
YoungHouseLove says
Yeah I’ve seen other folks using a roller I’m just such a chicken! The stencil company’s instructions said dab with a brush so I’m so scared to deviate. Haha. So lame.
xo,
s
Sarah in Indiana says
I was scared it wouldn’t work, too! I bought some of those dabbers as a back up, but I tried it with the roller first. I figured if it didn’t work I’d just paint over it and start over. But it worked like a charm, so I just returned the dabbers. It might not work so well to switch horses mid-stream, though. Good luck with finishing it! Maybe you’ll get sculpted arms out of the deal, too. :)
YoungHouseLove says
Haha, yeah I’m hoping for Madonna arms. Just used to this method so I figure I can finish ‘er off and try a roller next time. If there is a next time… haha.
xo,
s
Ashley @ A {Blonde's} DIY Life says
Ohhh I love the ombre paper idea!! I bet it would work if the paper was already wet! Did you all try soaking the paper in water first!?
YoungHouseLove says
Nope but that would probably work – especially with watercolor paper!
xo,
s
Rachel says
Cute dots! It’s a bummer the ombre effect didn’t work:( Good idea though!
Chaucea says
Seeing your food coloring project made me think of a really fun and easy-to-do tie-dye technique using Sharpies and rubbing alcohol that creates some pretty cool, multicolored results. This technique can also be done on paper.
Some tutorials I’ve found on this subject:
http://www.crapivemade.com/2010/08/sharpie-tie-dye-t-shirts.html
http://www.stevespanglerscience.com/experiment/sharpiepenscience
http://www.doliferight.com/2008/04/15/how-to-tie-dye-with-sharpies/
YoungHouseLove says
Love it! Fun.
xo,
s
Kayleigh says
Where did you get that peacock print? I love it and need one! lol. I love you guys and your home. Its so great to see people’s houses as labors of love. Im in the process of doing so in mine, but I feel it neverending.
Kayleigh
@ The Gotta Have It Girl Blog
YoungHouseLove says
That was from Etsy. Don’t remember the vendor but we blogged about it. Maybe search peacock birthday Etsy and it’ll come up?
xo,
s
kathy from ct says
Don’t hate me but there is a MUCH faster way to stencil. Make a glaze with some watered down paint and cheap glaze from Home Depot. Practice a little. Then use an almost dry roller and you’ll be done licketty split. You are killing yourself – and taking up much valuable blogging time:) Really, you can do it.
YoungHouseLove says
Haha, thanks! I’m just following the stencil directions and it’s coming out so well. Almost there! I can do it! Haha.
xo,
s
Katie says
Ummm…if you’re really going to do the whole running around the house-Rocky-victory music thing…I totally want video…not just pictures. Haha. Can’t wait for the big reveal!
YoungHouseLove says
I might allow that to happen. Maybe. But only due to sheer delirium and insanity.
xo,
s
Ashley says
Hi guys! Do you just collect picture frames here and there from places like IKEA? Have been trying to find good white frames with mats and such, but they always seem a bit pricey. We have a huge wall in our hallway that I’d like to decorate with frames like yours. Thanks! :)
YoungHouseLove says
Yup, almost all of our frames are from Ikea, Target (on clearance) or thrift stores/yard sales! Hope it helps!
xo,
s
Sandra says
Perfect implementation of K.I.S.S!
Good luck with tonight’s stencilfest!
josy says
Oh my gosh — try food coloring and oil and water! See examples: http://unplugyourkids.com/2009/02/02/marbelized-paper/
YoungHouseLove says
Love it! So fun!
xo,
s
Janice says
Off-topic of this post, but I just saw this pop up in my RSS feeds and thought of y’all: http://www.ikeahackers.net/2011/09/built-in-play-kitchen.html
YoungHouseLove says
Such a sweet idea! Love it!!
xo,
s
Kimberly says
The food coloring art looks great! And I love a short post every now and then. Some of my favorites from the archives are super-short.
Abbie P. says
Wow! First off, I LOVE the office wall. You’re doing an awesome job! I may have to add it to my pinterest collection when you post the finale. :) Secondly, that print of the peacock feather on your hallway wall…I have the exact same thing! I found it somewhere online and saved it onto my computer and then had it printed somewhere. I’ve been thinking of getting a bigger version of it. I love it! Craziness that you guys have the same thing. :) and the food coloring is genius…Keep up the good work!
Jenn says
I’m sure some have probably suggested it, but I would try using a damp rag paper like rives BFK (you can probably get a sheet at michael’s and it’s oh-so-soft). Let it soak for about 5-10 min and then blot between a few paper towels. I would think that may help (then again, you may just have the same result with 8$ worth of paper…). Hmm, worth a try!
YoungHouseLove says
Another great suggestion!
xo,
s
Dani says
Another zero dollars project?! Wow, creativity to you guys is just like a bird, like a friendly bird that embraces all ideas and shoots out of its eyes all kinds of beauty.
You guys watch 30 Rock, right?…
Right?
Okay, in case you don’t, Liz and Jack decide to exchange zero dollars gifts for Christmas, and this happens:
YoungHouseLove says
Hahaha. Love 30 Rock!
xo,
s
alexh says
oo damien hirst-esque
Di says
Your food coloring project made me laugh out loud… Circa 1986, I won the citywide science fair (in my age group) for my Color of Ink project. If I remember correctly, I believe I used paper towel colored at the bottom with various colored sharpie markers, dipped in a variety of solutions. I vividly remember the beautiful rainbow colors inching up the sheet. Most colorful introduction to science ever!
YoungHouseLove says
Haha. Love it!!!
xo,
s
Arianna says
Great idea – incidentally if you go to ritdye.com and go under “dyeing techniques” they tell you how to do all sorts of different stuff including the Ombre technique you wanted. I was wanting to try it on some pillowcases!
YoungHouseLove says
Love that! Thanks!
xo,
s
Ann @ The Domestic Domicile says
This is such an amazing, simple, and best of all FREE DIY! Who knew food coloring could look so great. Love it! Thanks for sharing!
Ashley says
Love it! I tried my hand at paint chip art (inspired by your bedroom artwork!) but wove narrow strips together for a different effect. It’s not framed yet, but I’m lovin’ it so far!
http://marriedinthemiddleofnowhere.blogspot.com/2011/09/current-diy-project-paint-swatches.html
YoungHouseLove says
So much fun!
xo,
s
Jessica @ Quirky Bookworm says
1. Chuckling about the “quickie” :)
2. Love the idea of food coloring! I was cleaning out our garage yesterday and found a blank canvas. I was pondering what to do with it, but I think maybe you just gave me the answer!
Lisa in Seattle says
I am surprised somebody hasn’t mentioned Amy Lau’s amazing Dexter-inspired dining room from Elle Decor: http://www.elledecor.com/image/tid/4109 (I hope the link works!).
YoungHouseLove says
Love it!!
xo,
s
Sarah says
so clever and simple!:) I think that would look great as a little gift card. Maybe green and red for the holidays? Can’t wait to see the stenciled walls! I’m hhmming and hawing over whether to stencil the floors in my girls rooms but blood sweat and tears doesn’t sound too fun…
YoungHouseLove says
Ooh the gift card idea is fun! Or wrapping paper! So much fun.
xo,
s
Libby says
As far as the ombre effect, maybe use a pretty scrap of linen, that will for sure give the desired result.
YoungHouseLove says
Love that idea!
xo,
s
Rena says
All I could think was Twister – the old game:)
Donna Jean says
What kind of paper did you use? I love the dots and would like to try something like it. Sorry if you’ve already answered this question, but I didn’t have time to read through all the comments :o(
YoungHouseLove says
We just used card stock. Hope it helps!
xo,
s
Haley says
Just wanted to stop by and tell you that I absolutely LOVE the stenciled walls! I stenciled a focal wall in my old bedroom with a similar stencil. Four hours plus two people working at it! Stenciling is no joke! Keep up the good work!
P.S. I’m trying to grow my blog and was wondering about when you guys first started Young House Love how you asked people to guest post?
Thanks!
YoungHouseLove says
We actually have never had guest posters (so all 2,000 posts are written by me or John). Why? Because we’re crazy. Haha. And we love to “do it ourselves” – haha. We actually just didn’t figure out a format for others to post and write (and we’re bad at asking people for stuff- haha). But we’re kind of oddly happy to have this be our little diary. So I guess that’s of no help whatsoever! Haha.
xo,
s
Haley says
Thats okay! I have been going back and forth with the “to have guest posts to not have guest posts” debate for a little bit now. I’m also bad at asking people for stuff so I thought I would just check and see if you guys had a method that worked for you. As a new blogger I loved reading about how you guys run your blog and would love to read some more!!
YoungHouseLove says
Aw, good luck with everything! Happy blogging…
xo,
s
ashlee says
you should see the ‘sneak peek’ preview of my kids’ playroom. you would LOVE LOVE LOVE all the artwork i’ve framed. unfortunately, something went weird with my camera and i can’t upload the pics :( but you gosh, you should see them! they are absolutely adorable representations of their imaginations.
YoungHouseLove says
Can’t wait to see the pics!
xo,
s
ashlee says
ps. but YOU GOSH should say but OH GOSH, just in case you’re wondering. haha.
YoungHouseLove says
Haha- figured it out.
xo,
s
Pip says
This reminded me of marbling paper as a girl – something with ink in a tray of water…. But it seems more fun to use shaving cream& food colouring in this tutorial! http://ahandmadechildhood.blogspot.com/2010/12/how-to-make-marbled-paper.html?m=1
Keep the faith with your stencilling project! You can do it! Go Team YHL! Where are my pompoms? :)
YoungHouseLove says
That does look fun! Love it.
xo,
s
Kymberly says
Ok, I really wanted to ask questions for your big Q&A, but life got in the way (that pesky life). I do want to say #1: I read you guys every day and your perkiness is appreciated and really does rub off (at least a little) so thanks for that from my whole family. #2: I love the redesign and think it fits your style and tone really, really well. Feeling you even more now. Questions: #1: Any chance there is a reason we haven’t seen any pictures of $herdog from the waist down in a lonnng time? Strategically placed stencil/chair etc… or am I crazy? Ok, maybe you can’t answer that one (I’m headed for deletion aren’t I?), I’m just throwing it out there, been wondering for a while…#2 What happens (to the blog) when your house is perfect and adorable? At the rate you’re going it can’t me more than a few years off…What then? Remodel, move, come do my house? That’s it, love you guys!
YoungHouseLove says
Sorry, not prego!!! Not allowed to be for another year (doctor’s orders!). Maybe I’m just shy about how my middle looks post baby? Haha. Or we just shoot pics of projects in process, most of which involve arms and faces instead of bellies and legs. Haha. As for what we’ll do when our house is done, well, our last house took us 4.5 years to “complete” and it smaller so we figure we have a few more years! Haha. Who know what we’ll do then. Maybe we’ll go in on a rental house or beach house with some family members. We always say we didn’t know we’d be doing this five years ago so we have no idea where we’ll be in five more!
xo,
s
Melissa S. says
I think it would be easier to pry the chair rail off the wall and scootch it up a few inches and nail it back on. ;-)
YoungHouseLove says
Haha. Almost. There. I can see the light at the end of the tunnel!
xo,
s
Tonya A. Howard says
Expanding on what Lynette said, regarding the chromatograph, put the water, rubbing alcohol, food coloring solution and paper in a container with a lid. It will mimic a TLC (Thin Layer Chromatography) development chamber. Science rocks!
YoungHouseLove says
Yay science!
xo,
s
Jen A says
Check out this amazing food colouring craft from “Can’t Stop Making Things”.
Thanks “Can’t Stop Making Things”! :-)
http://www.cantstopmakingthings.com/2010/10/paper-weave.html
YoungHouseLove says
LOVE IT SO MUCH! Seriously amazing.
xo,
s
Christine says
Even thinking about doing that narrow strip above the chair rail scares me! How are you going to do that? I think you should frame the stencil and hang it on your gallery wall when you are done!
YoungHouseLove says
I just do it the same way I go up to the ceilings – just holding it and gently dabbing just the part above the molding. Haha. Slowly but surely!
xo,
s
Catherine G says
This is totally off subject, but I caught your segment about radon on America Now this afternoon — I was like I “know” them! Anyway, it reminded me that I should get a test too! BTW, in case you didn’t know– Clara is absolutely adorable! Love your site — tons of inspiration!
YoungHouseLove says
Thanks for the heads up about America Now! That’s actually a clip originally produced for our local news (you can read about it here: https://www.younghouselove.com/2011/05/my-mothers-day-proof-im-crazy/) so I guess they’ve just picked it up. Cool!
-John
Callie says
Chem nerd alert – you can use markers (not permanent ones) on coffee filters for a cool chromatography demo – draw on the filter and then dip an edge so the water wicks up the filter. The various colors used in a certain marker color with “flow” at different rates for a very cool effect. Use the wick…
YoungHouseLove says
Sound like fun!
xo,
s
Andrea says
Love the ombre idea! Have you guys seen this lampshade from Martha Stewart? I think it’d look gorgeous in the office (or perhaps the new kitchen)!
http://www.marthastewart.com/how-to/ombre-pendant-lampshade
YoungHouseLove says
So pretttttty!
xo,
s
Allison says
I know that it works with coffee filters.
Erin says
I think that the food coloring travelling up the paper will work – but the paper has to be saturated, first. Don’t ask me how I think that would work, but just figuring…LOL.
sonya says
what did you use to squeeze the dots? They are perfect circles
YoungHouseLove says
Just the food coloring containers (they had those squeeze tops so I just let a dot out for each one).
xo,
s
Michelle Morgan says
I love the dots and the Ombre thing would have been awesome if it worked out. Did you ever think of using a painting tray for the ombre look? It’s got that nice slant, maybe that would help give that effect. Start with very diluted colored water then gradually add more color and pulling the paper out at the same time… just a thought.. oh and watercolor paper might work the best for it.
Ps, I have know idea if someone has already mentioned doing that. I didn’t want to read through all the comments.
YoungHouseLove says
Another great idea!!
xo,
s
Phoebe says
I’d definitely suggest getting a thicker paper and wetting the entire page first. Just so it’s damp. A thick weave would help, too. Then stick it bottom first in the food coloring!
Lauren says
I happened across this page the other day and if you decided to have Dexter Party here are some good ideas http://www.mentalfloss.com/blogs/archives/35987 ! I love Dexter, but I cannot watch it before bed…nightmares galore :) Thanks for the great blog! I love reading about the things you do! It gives me confidence to try to make things on my own! Next stop…curtains………..!
YoungHouseLove says
Love it! Haha. I have Dexter nightmares and wake up and say “cool!” – so weird.
xo,
s
Delia says
I teach chemistry camp for kids in the summer and we do something similar. We use a marker (not permanent) and draw a line on a paper towel then you dip it in water below the line. The capillary effect on the paper towel pulls the water up and separates the colors as it does. If you do use sharpie you have to do it with rubbing acohol to get the same effect. Don’t know if this will give an ombre stripe but worth experimenting with.
Samantha says
Umm…not sure if you are aware, but Tori Spelling mentions you on her website. Even famous people love you guys! WOW. Here is the link:
http://www.torispelling.com/post/redecorate-a-room-in-five-steps
YoungHouseLove says
Isn’t that amaaaazing?! Totally blew our minds.
xo,
s