What party? The decking party, that’s what. Never been to a party where people put decking down? Then you have not lived, my friend. But come to think of it, my party didn’t have any guests so maybe I’m the one who should reconsider my definition. Anyways – let’s talk deck boards, since I gave you this sneak peek of my progress last week:
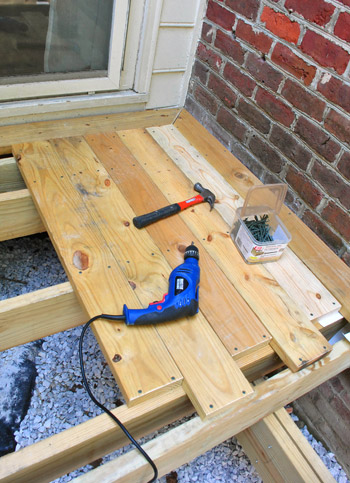
As you may be able to tell from that photo, we bit the bullet and went for the “zippered” seam pattern that we saw at our local art museum.
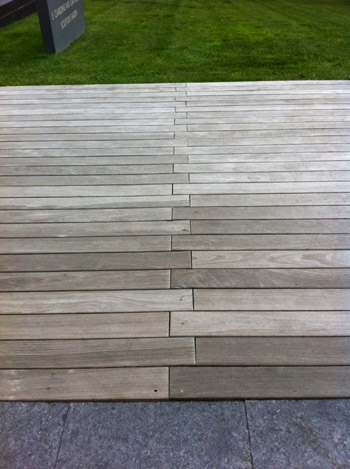
But before we talk about planning for that, we actually had two commonly asked questions on our last post, which were:
- What made you guys chose to go with exposed screws instead of hidden ones?
- Is it ok to lay decking boards that close?
So without further ado, those answers for ya:
- Sherry and I both grew up with decks with traditional exposed screws and they were beautiful and held up for decades, so we’ve decided to keep it classic and just line up all of our screws like the zippered seam deck that we included above as our inspiration (it’s hard to see, but in person the screws are visible, they’re just all very clean and nicely lined up instead of randomly drilled in). Not only was this choice something that we thought would be easiest, we also thought it would be the most functional (we can easily tighten any screws that might get loose over time since they’re so simple to access from above).
- And as for the board spacing, since we’re using pressure treated wood the local engineers/designers said can be placed pretty close (pressure treated wood is known to contract over time). So there are no worries about things being laid too close (and it’ll all shrink up over time – so we’ll end up with gaps for water drainage and leaves to fall through, etc).
But even before laying our zippered seam, first we had to plan for another feature of our deck design – the “picture frame” border. That’s when you basically add a, well, frame around the outside of your deck with boards that run parallel to the edges (meeting at mitered corners) and then fill in the interior with the rest of of your pattern. Since most of our decking would run the long way (parallel to the brick siding), this meant adding some boards at either end that ran parallel to the sliding door. We figured it was one of those touches that would make it look a bit more polished. But it did take some extra planning since I needed to make sure all of our boards still screwed securely to the joists below.
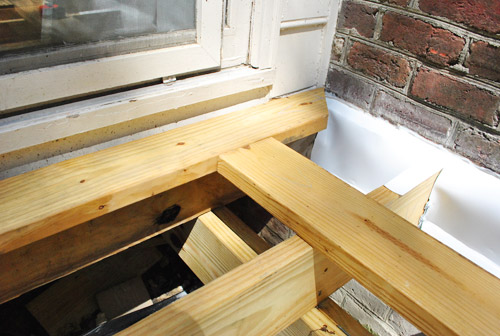
To make sure all of my boards ended on a joist, I actually had to add an additional joist here since my “frame” board rested across the entire first joist, leaving the deck board hanging out to dry (it’s one of those code things to attend to to ensure things are really secure for the long haul).
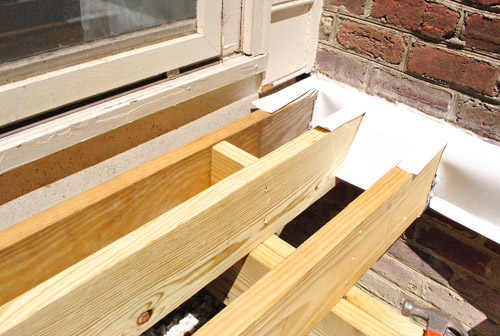
You can see I also added a small block of spare 2 x 8 between the two joist so the frame board had another place to rest on / screw into.
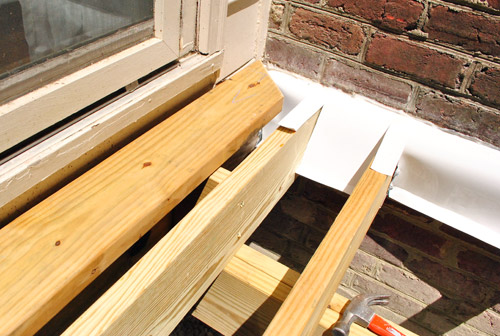
You can see better here how the picture frame is starting to shape up. I actually only did these two sides to start with (rather than the entire frame) since I figured I’d work my way out from here.
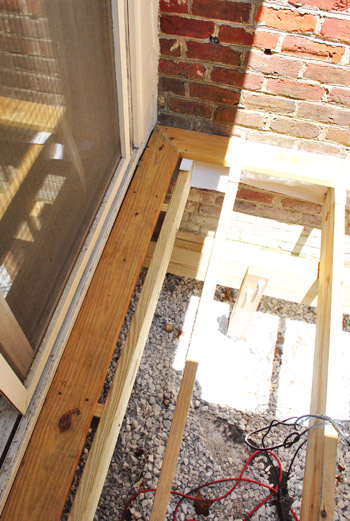
But before I could start adding more deck boards I had to actually add two joists to help me achieve the zippered pattern. We wanted the boards to be staggered about 5 inches at the seam, which didn’t jive with my current standard-joist set up (which were 16″ apart).
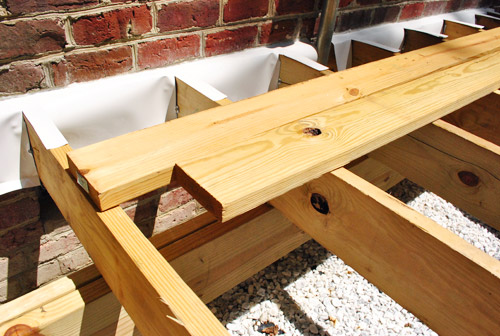
But no biggie here either. I just added two additional joists (one shown below and another at the end of these boards) and I was ready to go. I could’ve added these when doing the rest of the joists, but Sherry and I wanted to wait until this step to decide exactly where on the deck we wanted the zippered seams to be (because of the length of the deck we’ll have two of them). We chose the spot that we did because it’ll help define the area where our outdoor dining table will eventually go (it will be centered between the seams so they’ll be visible on either side of the table like in this rendering).
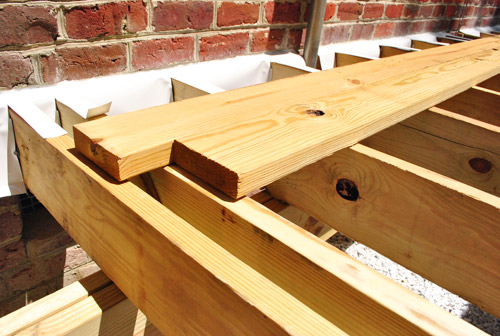
So with all of my extra support added, I could finally start cutting boards, laying them in place and screwing them in. Ha. Lay. Loo. Yah.
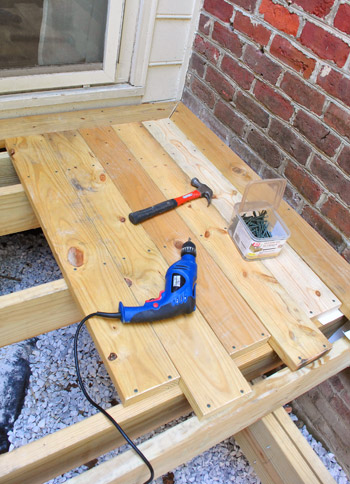
You may notice that we’re using pressure-treated 2 x 6″ boards for a decking instead of the 5/4″ stuff. This wasn’t really a conscious decision – it was just what 84 Lumber suggested when they gave us the quote. But I’m glad we went with it because in the long run it should help the deck feel more solid and warp less.
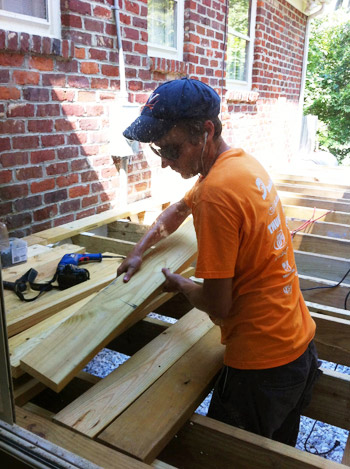
Here’s the first section of the deck nearly all laid in place with the zippered seam on one edge. At this point I had only screwed in the ends but planned to go back later and put the rest of the screws in (I’m putting in two screws everywhere a deck board meets a joist). I had already read in our county that all deck boards must span at least four joists, which is exactly what these do. Whew.
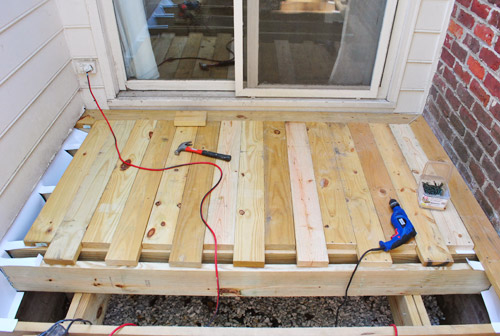
When it came to the last board I got sort of lucky. I wasn’t sure if I was going to be left with a sliver of a space to fill – giving me both an awkward look and the challenge of filling it (had it been less than 2 inches I probably would’ve just substituted one 2 x 6 for a 2 x 8). But luckily my 2 x 6s fit almost perfectly as-is. I did have to shave about a 1/4″ off the edge of the frame board. But since that edge is hidden under the siding it didn’t really matter how clean or perfect my cut was. And yes, our siding still needs some sanding / caulking / power washing / repainting. Haha. It’s on the list!
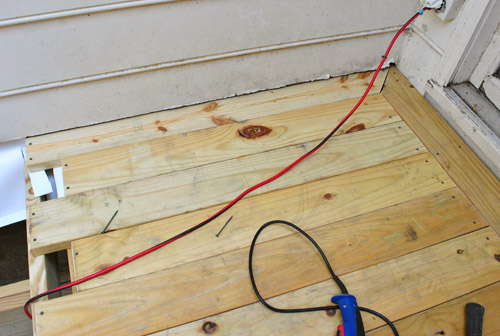
With my first (albeit small) section done, I was feel pretty excited. On to the middle section where I’d just be placing full boards (10 feet long) in place.
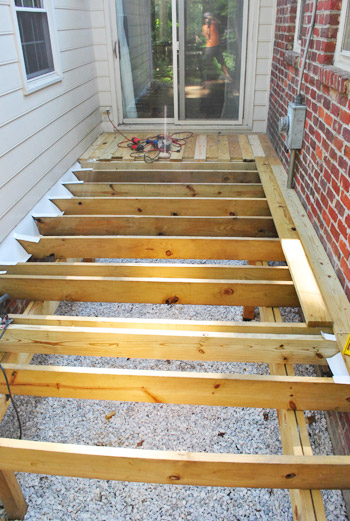
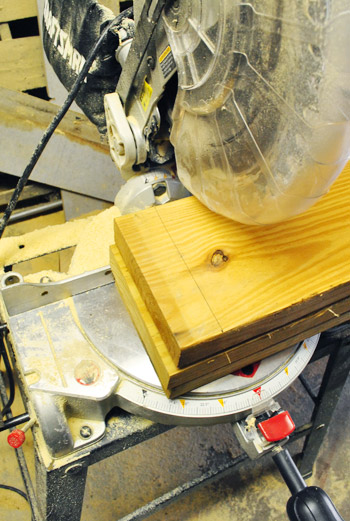
Well, this is where my planning got a little off. The end joists that these boards were supposed to rest on were a little less than 10 feet apart. Less by 1 and 1/8th of an inch to be exact. That meant I had to trim every single 10-foot board by a smidge so that the ends would rest exactly at the middle of a joist to be screwed into place. Not the worst thing that could ever happen (since I was able to cut three at a time) – but it was still a bit of a time suck.
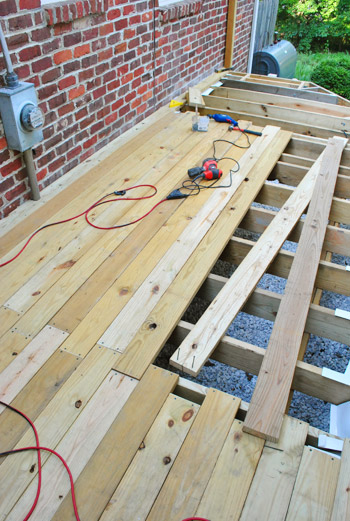
By the end of my first afternoon of laying decking I had gotten this far before the sun started to set and it was time to close up shop for a late dinner with the wifey (who had been blog/Clara wrangling all day along with churning out some last minute book edits).
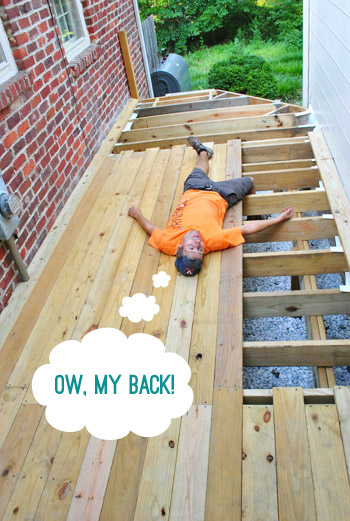
But first I had Sherry snap this picture to represent how I was feeling after my first day of board laying. For starters, I was feeling accomplished that I had finally created a solid platform. This thing is actually starting to feel like a deck!
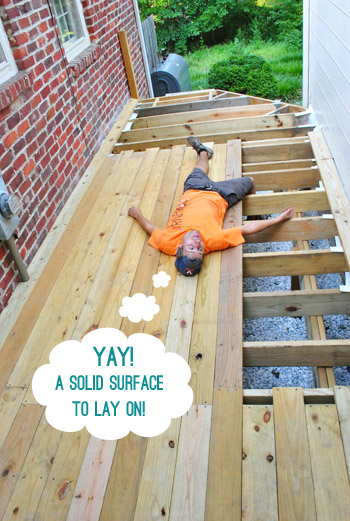
Secondly, I was feeling pretty darn exhausted. It had been nearly a full day of work and although it wasn’t nearly as scorching as some of my previous days of work out there, it was still August in Virginia – which means heat and humidity were my party guests all day.
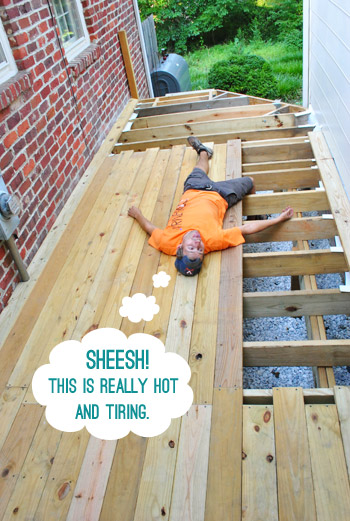
Last but not least, I was in pain. Why? Because after who knows how many hours of walking atop these joists without issue… I fell. Early in the day I was carrying a 2 x 6 and I didn’t put my foot squarely on a joist and it slipped off. I fell through, but caught myself when my back connected with one joist and what can only be described as my “lower buttock” hooked around another. It hurt. But I’ll take a bruised lower buttock over a stinging middle groin any day. (Seriously, I was a couple inches off from having a great America’s Funniest Home Video submission). So I’d say it was a mix of bad luck and good luck going on during that fall.
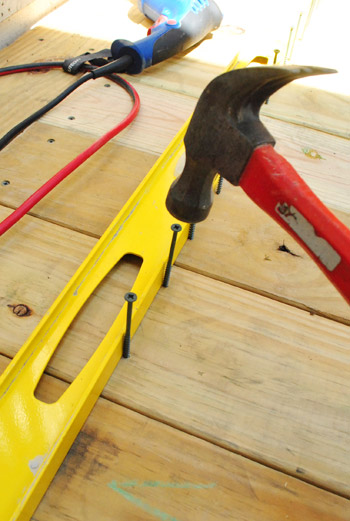
But I got some food in my belly, milked my injury to the wifey, and got a good nights sleep before heading back out the next day to pick up where I left off (and take some better process pictures along the way). For instance, here’s how I was setting my screws. Rather than pre-drilling all of my holes, I just used a hammer to get the screw stuck in the wood (and a level as a straight edge to help keep them all lined up) before taking my power drill to them.
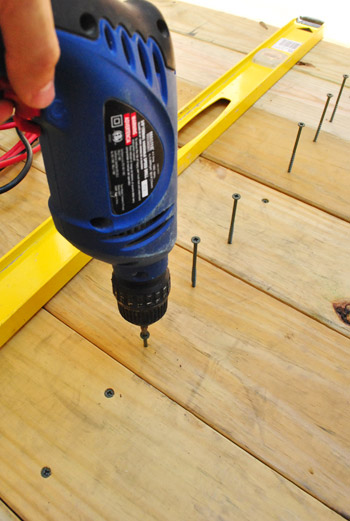
Drilling isn’t as simple as I’d like, since 84 gave me screws with a standard top and they tend to slip and strip a bit more than I’d like. Some of you had suggested getting screws with the star-shaped bit, which I definitely would’ve preferred. But at this point I’m just plowing through with what I’ve got on hand.
Summer was back in full force on this day and it was too brutal to be out in the sun so I (very cowardly) just worked in the shaded area. So even though I still had screws to set in some of my boards from the previously day, I went ahead and kept adding more boards. Oh and I checked which way the boards “cupped” since that always makes a difference when laying things like decking (more on that here).
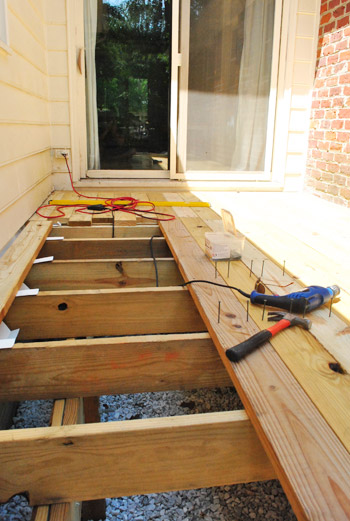
One other challenge that kept progress from being lightning fast was dealing with warped boards. When you’re using 10-foot long boards it’s virtually impossible to get one that’s perfectly straight. So often I’d set one end and find the other looking like this.
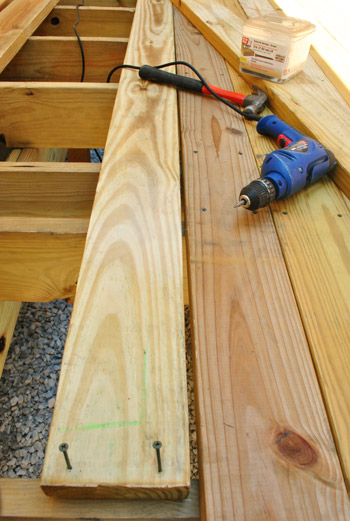
So to conquer the gap, I’d set my screws in the deck board far enough so I wouldn’t have to hold them in place (but not far enough that they’d come through the other end yet). Then I’d use my body to force the board against the other. Sometimes this was pretty easy to do. Sometimes it took everything in me.
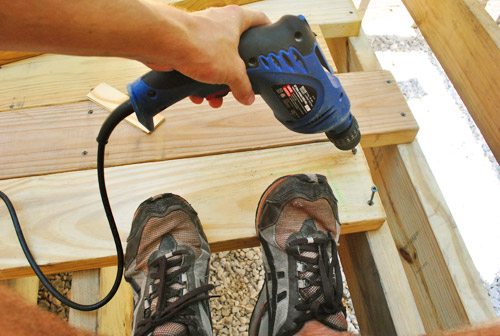
But once I had it where I wanted it, I used a free hand to drive the screws in and secure it.
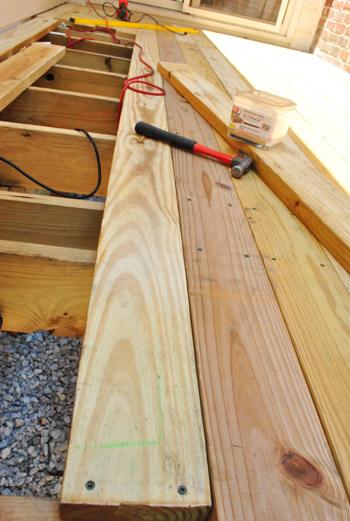
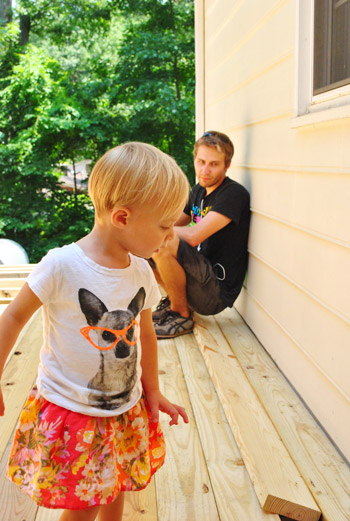
I almost finished the middle section and was about to trim the side of my frame piece so it would fit when I had to pack things up because we had an appointment to get to. I asked Sherry to snap one picture of me and my sweaty self when Clara pushed past Sherry for her first trip on what she calls “the pretty, pretty deck.”
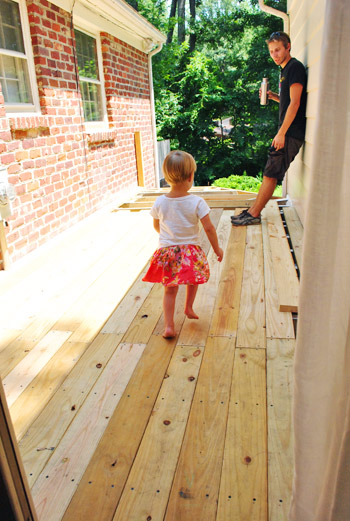
I guess she just wanted to get a closer look at my progress…
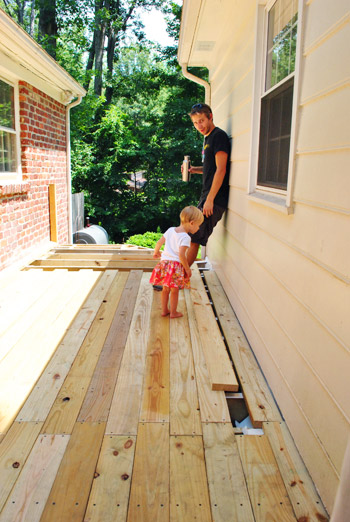
… which she appeared to approve of.
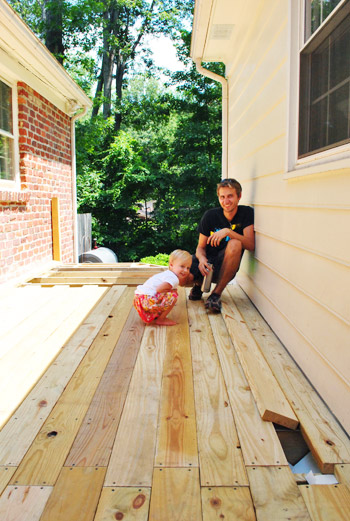
But it really turns out she just wanted to mooch off my water.
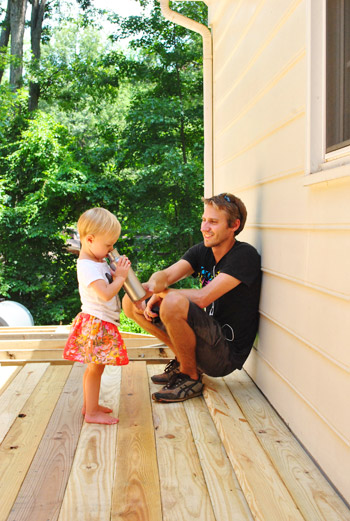
And cast a keen eye on the area I still had to finish. Maybe she was playing the role of the inspector?
But she finally headed back in so Sherry could get her shot. Sadly it doesn’t capture exactly how sweaty I was (okay, maybe you guys aren’t sad about that). Let’s just say I had literally soaked through every piece of clothing – shirt, shorts, boxers… even my belt was damp. Sherry had a good time wondering how the heck a belt can get wet (Sherry: “wait, so you sweated through your boxers, through your shorts, and through your belt?!?!” Me: “I’m a man! Doing manly things on a hot day!”)
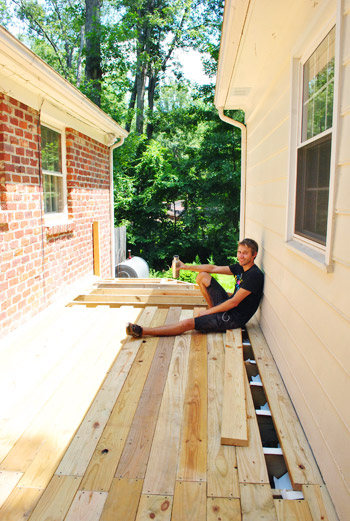
But it was totally worth it. We’re especially in love with the zippered seams, and we think when the wood shrinks up a bit and we stain it, it’ll be even more noticeable (like the inspiration picture we included up top). As for the schedule, I probably have one more day of deck laying (since half of these boards are still missing screws through the middle) before I can move on to the final phase: the railing and stairs. Which means the finish line is almost in our sights – assuming the weather cooperates. Although by now I’ve worked in heat advisories and thunderstorm warnings, so the forecast isn’t really fazing me that much anymore. Hope I didn’t just jinx myself. Hurricane season is upon us after all…
What have you guys been working on lately? Anyone else ever manage to sweat through a leather belt? Or have a two year old come out and examine their work?
Psst- Wanna catch up on all of the deck action? Here’s where we shared our vision for the space, then we removed the plantings and the old balcony, followed by selecting our materials and documenting our first day of building progress. Then we dug our post holes, learned that we failed our first inspection, revised our plan and dug more holes (which got approved) and proceeded to set posts. Next it was time to install our joists, do a bunch of last minute prep for deck boards, and whip up a mood board with our design plan. Whew, all caught up.

Tracey says
So I worked at a concrete and masonry supply house for 7 years. The summer months were (obviously) our busiest and just about every day when I had to count down the cash drawer there would be nasty damp dollars in the drawer. I was always grossed out, cuz I was thinking the money had just been in their pocket near the sweaty underwear they had just sweated through thus I was touching some random guy’s sweaty crotch money. Then one day I was working out at the counter and a guy took his wallet out… His LEATHER wallet and took out a competely damp $20 and handed it to me. It was one of those “Oh” moments. So… Carry on with your nasty damp belt, John. At least the only person it’s impacting is you! (And Sherry, but she loves you, so it’s different.) ;P
YoungHouseLove says
Hahahahahahahahhahaha, I love that story. Thanks for the laugh! And I hope he at least looked a little sheepish when that happened. Haha.
xo,
s
kari macleod says
Looks fabulous! Worth all the blood, sweat and tears!
Elizabeth says
Looking good!!
Colleen in MA says
Looking good! Have to admit I scroll by all of the step-by-step pics (fairly certain I won’t ever be building a deck myself :) to get to the John and Clara pics. But I do love these posts because they remind me that Rome … or a deck … or any big DIY or home improvement project … don’t get built in a day. You are the king and queen of patience.
Francie says
It’s going to be such a charming little space once it’s done!
PS After you responded to my last comment I was “starstruck” for like a week :) It also happened to be my first comment, although I’ve been following your blog since almost the very beginning. Thought you might appreciate that!
YoungHouseLove says
Aw, you’re so sweet! Thanks for reading our blog Francie!
xo,
s
tae says
looks so fabulous. you guys are amazing. the mood board just needs a lounge chair for john :)
Krystle @ Color Transformed Family says
I really like the zippered seam and that you guys put so much thought into how the deck should look. It’s gonna be a great space.
Clara rocks her Burger shirt. I absolutely love it and would consider buying it if they had it in adult sizes.
Kassie says
It looks great. Good job John!
Lucy says
We ripped out our old and crabby deck not so long ago (in fact we nearly had a deck-destruction party!)… you guys are doing a fab job on your replacement – it looks fantastic!
Love Clara’s “inspection” too, future career in town planning perhaps? ;-) x
Liz C. says
Looks great! I can’t wait to see the finished product!!!
LOVE, IT!!
Sara says
The zipper look is really neat! And you do look exhausted! Great progress.
And yep, I have a two year old that inspects lots of things. If I leave a cupboard opened, a shoe upside down, she comes over, inspects the situation, looks around, and puts it back in proper order.
Jennie says
Hi, Youngsters.
I am a longtime fan of YHL and just wanted to give you a heads-up about pressure-treated wood, which I see you used for your deck. Although pressure-treated wood containing arsenic (CCA) is no longer supposed to be sold for residential applications, the other pressure-treated wood which is sold for home use is still treated with chemicals which resist mold and insects, etc., in other words, bad stuff. I would never walk on it in bare feet, and I would never work with it without using gloves and/or washing hands immediately afterwards. (And it is really not a good idea to use it for vegetable gardens, e.g., raised beds.) Is the new stuff as bad as CCA treated wood? No, but it’s by no means benign. And the chemicals do leach out of it when exposed to water. That said, we have treated lumber on our decks, but going barefoot on it, sitting on it, etc., is a no-no for us. I know you guys are sensitive to the issue of chemical exposure, so I thought I’d pass this on, even if it is after the fact.
You guys are doing a terrific job! Best wishes for continued success.
Jennie
ps: And if you don’t use coated screws/nails, you must use stainless screws/nails with pressure-treated wood, otherwise the metal interacts with the copper (?) checmicals and corrodes.
YoungHouseLove says
Thanks Jennie! We got your email too and shot you back a reply! The screws are definitely to code for the materials we’re using (they check that at inspection!) and although we’ve learned from the local lumber yard who provided us with the wood that it has some sort of eco safety certification (can’t remember the name) it never hurts to be careful! No more barefoot beansie on the deck for sure – and we plan to seal it with something super eco as well!
xo,
s
Lisa Dreissig says
The deck looks great – It ties the two spaces together! Excited to see how you finish it!
cindy says
Looks great. I tune in every day to see the progress. Perhaps a box fan might provide a little breeze while you are working on the deck. You can buy them at Home Depot for about $20. Might be handy after the project, too.
YoungHouseLove says
I like that idea! Might keep the belt dry! Haha.
xo,
s
Stephanie says
That deck is looking mighty fine. I love the zippered seam. Very cool.
The best part for me is how much thought you’re putting into the deck and its design and function. Sometimes people don’t think these things through and the result isn’t nearly as fabulous. I can’t wait to see the finished deck. :)
(One example, the BUILDER for my townhouse put a window right in the way of the deck stairs. The previous owner actually screwed it shut. I’m guessing people were hitting their heads on the open window.)
keri says
wow….i’ve been that sweaty, from doing manly outdoor things, and it makes taking a shower the best thing in the whole wide world.
Christina @ Homemade Ocean says
My dad built a deck for my high school graduation party….over ten years ago. It was a much bigger project than he expected and he was still working on it while people were arriving for the party. He didn’t finish putting up the railing….and has never touched it since!!!
Looks awesome guys, those decks are so much hard work. At least you had an adorable inspector!
Sam M. | Atkinson Drive says
The deck is looking amazing – I love the zippered seam!
And I laughed pretty hard at the “Ow, my back” photo because it reminded me of the Jimmy Fallon Auto Tune at the Emmy’s…don’t know if that’s what you were going for or not, but it was awesome.
We’re working on built-ins for our family room media center!
http://www.atkinsondrive.com/family-room-built-ins-part-3/
YoungHouseLove says
They’re looking awesome!!
xo,
s
Linda says
Sherry, all I can say is you so lucked out when you met John. You must be so proud of him – heck, I am and I’m just sitting in an office in Chicago.
And you couldn’t have a cuter site manager than Clara!
YoungHouseLove says
Heck yeah! The funny thing is that when we met one of the things John told me is “I’m not handy” – so funny how things change!!
xo,
s
Karen F says
that’s hilarious, Sherry!
Jenn D says
Awww Clara! Love her skirt. And I think her hair looks like it’s growing on the sides. :)
Karen F says
Once again, you guys have amazed me with your vision (starting out with a blank area and making it awesome). I mean, I sort of got it from the renderings, etc…but to see it almost complete – wow. It’s going to look amazing when it’s finished, and I can’t wait to see it all YHL’ed out! Nice work, John!
p.s. the pics of Clara are priceless!
Chelsea says
You guys are such an inspiration!
Kathleen says
Not much sweating going on in my house. Although I did touch up some ceiling paint, caulked a crack, hung some shelves, decorated those shelves and planned out where to hang some artwork all in my son’s bedroom over the weekend. I am SO CLOSE to calling his room done, done (as opposed to almost done or done for now). Just hang the artwork, paint a canvas something abstract, make some pillows and fix his closet door latch. I might possibly add in some hand made roman shades later on as funds become available. Yea!
Mandy S says
Its looking so awesome!! can’t wait to see the finished product. Those zipper seams are my favorite part
The Mrs @ Success Along the Weigh says
That zippered seam is gorgeous! I know you guys will be so relieved when it’s done!
Gabriella @ Our Life In Action says
LMAO!!!! Love the multiple captions.
The deck looks great. Wonderful job you guys! You may have already covered this so I apologize for the repeat question but are you thinking of staining it or painting it?
Gabriella @ Our Life In Action says
Sorry – I see that you guys are going to stain it. Next question – what colour? :-)
YoungHouseLove says
Hah- not sure yet! Probably something that compliments the brick/mortar without being too light or too dark. Will keep you posted!
xo,
s
kathy says
I know you guys are do-it-yourselfers… but around our neck of the woods, large scale projects (including painting a large room) ALWAYS involve parties!!
seriously, anytime the hubs and I need something done (like re-building our wood deck last year, digging fence holes this year, & painting out ‘great room’) we call up any number of our closest friends & family and make them help us. Food & drinks are always provided and since it’s people you like to hang out with anyway, it makes the work not seem so much like a chore!!
Unfortunately, I don’t think we’ll be able to fit 6+ people in our narrow bathroom next year (that’s the next big demo)
YoungHouseLove says
Haha- I love that!
xo,
s
Tamryn says
Well done John, looks great so far. looking forward to the seeing the deck party :)
Kevin says
Hey I know you mentioned this already, but I wouldn’t rely on board shrinkage if I were you. My dads house had a deck like this where the previous owners put in a deck but the boards didn’t shrink. Rainwater pooled on the boards allowing algae to grow and making them quite slippery. They had drilled holes in the boards for drainage but it didn’t help much. If your boards don’t shrink, just run a skill-saw down the length of the boards with the blade depth set to board width to make enough space for the water to drain.
YoungHouseLove says
Thanks for the tip Kevin! Funny enough in the few days since we started laying deck boards they’re already shrinking up a bit since it has been so hot! So it looks like we’ll be ok- but thanks for that tip just in case!
xo,
s
Ashley @ sunnysideshlee.com says
It’s looking fantastic! Great job, John!
Amy @ PaintWineRepeat says
WOW! It looks amazing. You guys introduced me to the zipper seam and I am in love! What a neat and innovative design for deck boarding. All that hard work is paying off!!
Wes says
1. that is SO much work, good job!!! I am amazed at your perseverance!
2. Clara’s outfit is the cutest thing ever, I want her wardrobe! No joke, when I see her clothes I think, “I’ve got to incorporate more color and prints into my wardrobe”
Diana says
Glad John recovered from his fall! The deck looks great…and inspector Clara approves!!
Ally says
Your daughters haircut is so stinkin cute! Love it, love your family!! Comin at ya from San Juan Capistrano, CA
PennySmith says
So is the planned staining just a looks thing, since it’s so much extra regularly scheduled work, and doesn’t add life to treated wood? We debated (just redid the rail and boards (not supports-they had quite a bit of life left) to the deck of the house we just bought. Decided on Thompson’s to avoid having to hand apply/brush stain to rails ever couple-a years. That idea just makes me cringe. :)
PennySmith says
(that inspo pic looks like the natural color gotten from aging of treated wood-since it grays out. But really smooth!)
YoungHouseLove says
Yes, we’re definitely thinking about staining and sealing vs. staining although we lean towards staining for a slightly darker look (it’s so bleached now that it doesn’t flow well with the dark floor inside of our house that connects to it) although you’re right about maintenance! We’ll definitely keep thinking it through for a few months since we don’t have to make the call til then! We do know that we want to use some sort of eco sealer, so that should be fun.
xo,
s
Nette @ This Dusty House says
I’d never seen zippered seams like this before, but I gotta say, I think it’s a great choice! The deck is looking great.
larisa Shevchuk says
This deck is so lovely and I can see you enjoying yourself on it for so many days and nights… and you will always look back and say “remember, how we were building it”?
Brittney says
Looking good!!!
Debbie says
Looks great!
Lisa says
Great work! I love the zippered seam pattern. I’ve never seen it before, but now that I have, nothing else comes close. I’ll keep it in mind for when the deck we inherited with our house needs to be replaced.
Laura says
My husband is a farmer in the Mississippi Delta, and sweats through a leather belt on a daily basis. Gross, but true. We do some serious laundry ’round these parts. I have to say I do love a sweaty man because a sweaty man means a HARD WORKING man!! Sherry, you should keep him…sweaty belt and all hahah!!!
Deck looks great by the way!
YoungHouseLove says
Amen Laura! John’s my hero!
xo,
s
Wrenaria says
Good job, Jon! Impressed you’re doing this without any assistance from a friend. Looks like Sherry’s got her own personal Superman.
Really loving the zippered seams. Lovely choice.
STC says
Just curious–are you planning to use the deck for certain activities (you mentioned some al fresco dining) and the patio for others? Or you’ll just go where the mood strikes?
YoungHouseLove says
Yes, we think the deck will be more for dining (we’ll move the BBQ over to this side) since it’s right off the kitchen. Meanwhile the patio is off of the living room/sunroom so it’s more for casual stuff like Clara’s chalk and rock box playing, Burger’s sniffing around, sitting out and reading, etc).
xo,
s
Amanda says
Your deck looks so awesome – I love the time and thought you guys are putting into the details (in true YHL style of course!). We won’t be doing our deck until next summer, but I’ve been trying to keep it pretty in the meantime (and I’ve definitely been taking notes from you – we just added zipper seams, even though Brandon doesn’t know yet). Just posted about our quick updates today in fact :-)
http://kissletsathome.com/2012/08/07/quick-deck-update/
Amanda says
*added zipper seams to our list…I should really read my comments a couple of times before I hit submit.
YoungHouseLove says
Haha, I hope Brandon approves!
xo,
s
JebberA says
Nice work John! Superb. Here in Canada we have Robertson screw heads which are square. Meeeeow! Sexy little strip-free things, they are.
YoungHouseLove says
Those sound awesome right about now!
-John
Jess says
Where is Clara’s adorable skirt from?!
YoungHouseLove says
Gap clearance rack about six months ago?
xo,
s
Christine says
That looks great! Please tell me you are stringing your wedding lights back and forth overhead!!
YoungHouseLove says
That’s the plan! Although we hear glass ones can break in the wind so we might have to get plastic ones if we have any issues! Don’t want shards of glass on the deck!
xo,
s
Kelly says
John, you’re simply amazing! What a great job you’re doing on this deck. Hope your butt/back is okay. That fall sounded nasty. Keep up the good work.
Can’t recall that I’ve ever sweated through a belt, though…
Amy @ a new old house says
Wow! The deck is looking great- amazing progress!
Jen says
I wonder how many extra elephants (or Claras) you can put on that deck with the extra joists now! The deck is looking great!
YoungHouseLove says
At least half of one more! Haha.
xo,
s