So sorry to everyone who requested an update on this sooner! We first shared our new house to-do list back in May and later updated it at the end of July, so this check-in is well overdue. But one fun thing about going longer than you meant to before updating a list is getting to cross things off like crazy. Picture me grinning maniacally for a far too extended period like the people in this video who think they’re getting their photos taken while the camera’s really on video mode.
These posts came about when people asked us how we organize all the stuff that we have on our to-do list and we explained that we basically have one long run-on document that we update as we go. They said “share it!” and I said “aight, boo” and now we update it every few months, just to see where we’re going and to take a moment to appreciate what we’ve accomplished. I love lists like this because even when it feels like we’re all over the place and some projects are taking forever, seeing nearly 90 things crossed off after five and a half months of living here is pretty dang exciting. And addicting. Just looking at this list makes us want to dive into about five more projects simultaneously.
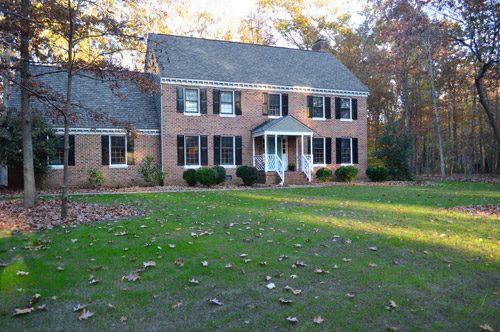
– The Front Yard (20% Complete) –
To Do:
Remove the trees that are dead/decaying/diseased beyond repair (an arborist and a home inspector helped confirm which ones should go)Get all exterior siding and trim repainted (there’s peeling paint, some rot, etc)Dig up all the quickly spreading ground cover(we still have some mulch beds to tackle, but the parts we graded and seeded are groundcover free)Aerate, level, and seed the yard- Make planting beds up front and mulch and plant them
- Transplant some of the crowded/overlapping boxwoods on either side of the portico (around the back or into other planting beds out front?)
- Redo old cracked concrete walkway from the driveway to the front door (add curves and pretty planting beds on both sides)
- Add some nice hard-scaping around the front (we’re so inspired by this house’s landscaping – so we’d love to add some raised stone beds)
- Plant a few green dwarf maples (it’s our favorite thing that we planted one at our previous house – you can see it in this post under the window on the right)
- Add low curved brick borders on either side of the driveway wired with lights (some of the houses nearby have ‘em and we love them)
- Get the driveway paved
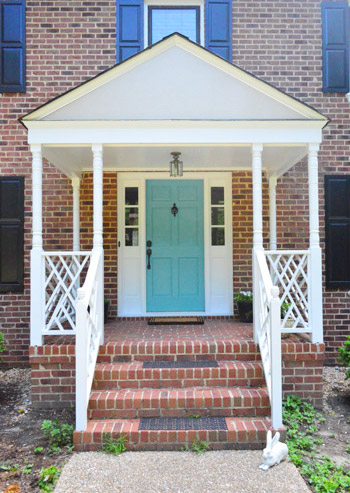
– The Portico (25% Complete) –
To Do:
Repaint the portico and sidelights (peeling paint = everywhere)Paint the front door- Arch the portico ceiling (it’s low and one house up the street has an arched ceiling with a gorgeous hanging lantern)
- Add a few planters, a new double-wide door mat, new porch lighting, etc
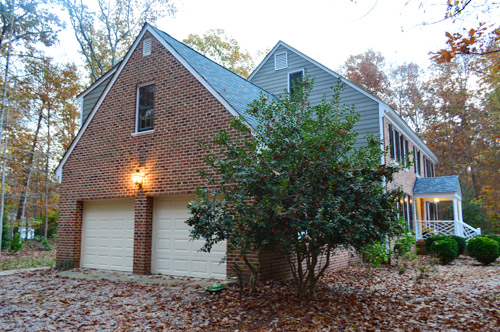
– The Garage (3% Complete) –
To Do:
Change out the tiny/rusty light over the garage doors(we attempted this, hence the 3% ranking, but we’re not sold on it, so we might return/replace it)- Repaint garage doors and add some nice hardware to beef them up
- Add a pergola over the double garage doors with vines creeping over it
- Finish the interior of the garage with drywall to create a workshop on one side and storage around the perimeter (add pegboards, shelving for paint and tools, etc)
- Reuse kitchen cabinets in the garage (they’re dinged up in a bunch of spots around the doors and frames, but would be great for the garage)
- Redo the four steps that lead from the garage to the kitchen (remove old carpeting and paint them? rebuild them completely?)
- Build a box on casters for scrap wood storage in the garage (we need a system to keep it from being all over the place)
- Maybe we should get old lockers and paint them fun colors and remove some of the doors for storage? (love these!)
- Possibly add plumbing for a utility sink out there (we’ve always wanted one in our “workshop”)
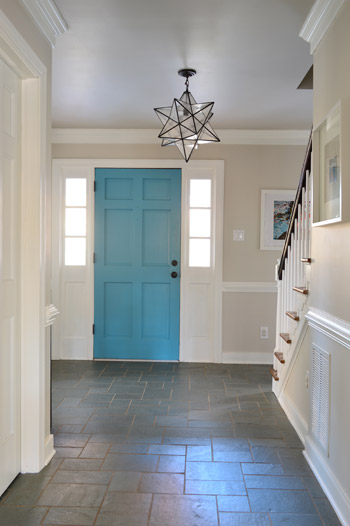
– The Foyer (70% Complete) –
To Do:
Remove the doors that block the flow into the kitchen (and the pretty view out the back windows that will someday be french doors)Paint blue trim, doors, and sidelights
Remove wallpaper and repaint the wallsReplace the old foyer lightTurn the extra toy closet in the foyer into a craft and toy closet for Clara- Repaint the foyer ceiling
- Replace tile? (only if it’s unsalvageable – there are a few areas where it’s pretty beat up)
- Turn the other foyer closet into a shoe/coat closet with some functional built-ins
– The Stairs (90% Complete) –
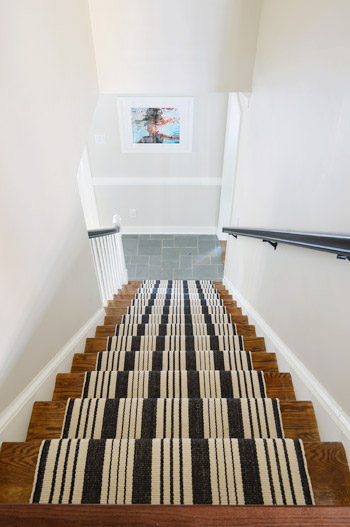
Remove the old carpet from the wood stairsPaint blue railing spindles and trimStain the top rails dark to match the runnerPaint the walls and ceilingPaint the stair risersInstall new striped runner with a rug pad under it- Hang some art
- Possibly hang a big chandelier overhead since the ceiling is so lofted above the top of the stairs
– The Half Bathroom (35% Complete) –
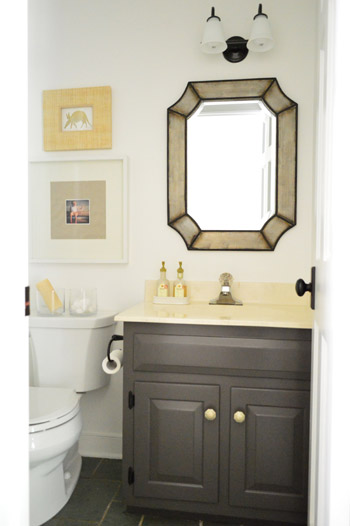
To Do:
Remove wallpaperRepaint all blue trim (and door)Upgrade door hardware & hingesPaint wallsNew mirror (something larger and higher – John can only see up to his shoulders now)Paint vanity (use odor blocking primer)Upgrade lightingReplace leaky faucet- Replace vanity & seashell sink (Phase 2) Note: We like to live with kitchens and bathrooms (and give them smaller budget-friendly updates) for at least a year before doing any major gut-jobs or renovations (this helps us get a better feel for how we use the space, and allows us to save our pennies for something thoughtful that we won’t regret (more on that here)
- Replace unsalvageable tile floor? (Phase 2)
- Here’s a shocker since this house is covered with old wallpaper, but we’re actually flirting with adding some cool new wallpaper since there’s no tub/shower in there (grass cloth? something charming like this or this?). Could be fun! Or a tiled accent wall could be fun. (Phase 2)
– The Dining Room (7% Complete) –
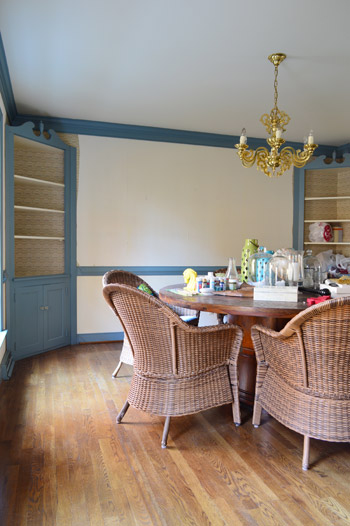
To Do:
Clean and reseal the wood floors- Upgrade built-ins (remove scrolly tops? build up to ceiling? paint white?)
- Paint all of the blue trim
- Remove
the wallpaper(I’m about halfway done, hence the half-crossed off line) - Repaint the walls
- Upgrade lighting and curtains
- Add
furniture, a rug (?) and art
– The Living Room (10% Complete) –
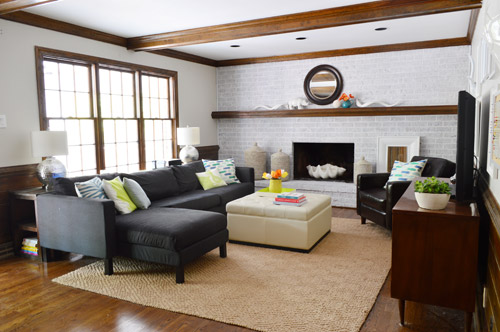
To Do:
Clean and re-seal the wood floorsPrime and paint the bright pink wallsTake down the old curtainsWhitewash the brick fireplace wall- Prime and paint the thick woodwork that wraps around the bottom half of the room’s walls (we LOVE it, and think it’ll be gorgeous in white)
- Figure out window treatments (bamboo blinds + curtains? printed roman shades?)
- Add more recessed lights to evenly light the room (there are just three near the fireplace)
- Turn the overhead beams into a coffered ceiling (like this)
- Build/find a nice big built-in-looking cabinet that holds the TV?
- Get gas logs after we save up our bucks (Phase 2)
- Add stacked stone or built-in molding around the fireplace? (Phase 2)
– The Office (7% Complete) –
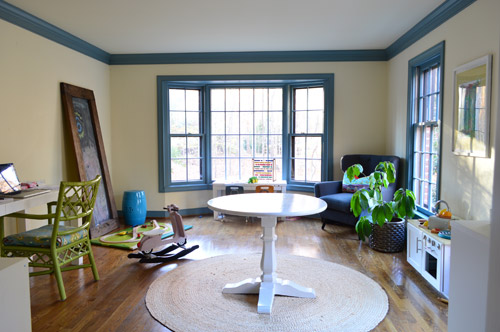
To Do:
Take down the old curtainsClean and re-seal the wood floors- Paint walls and trim and ceiling (don’t mind that little white table in the middle of everything, we were using that to shoot something)
- Add a double desk work area somewhere – perhaps coming out from the middle of the left wall like a peninsula (or the right wall between the windows)?
- Bring in storage (bookcase, file cabinet, etc) – possibly cool build-ins around the bay window?
- Add curtains/window treatments
- Hang art & create a brainstorm-zone on the walls (bulletin board? chalkboard?)
- Add two large potted plants (lemon trees? fiddle leaf figs?) in front of the two front-facing windows
– The Kitchen (7% Complete) –
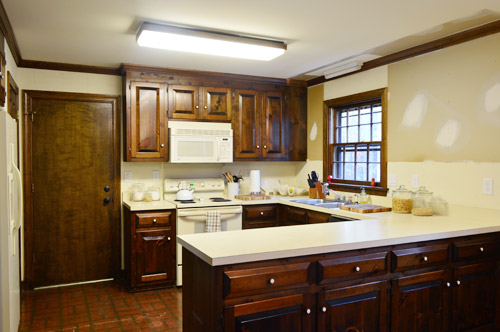
To Do:
Take down the old curtainsRemove the wallpaperRemove shelves thank flank the sink windowand add shelves thereMove the cabinet over the fridge forward so it’s accessibleGet a table for the eat-in area- Paint the walls
- Update the old kitchen lights
- Paint the pantry door and the door to the garage
- Prime and paint the woodwork and trim
- Paint the cabinets (they’re too beat up to keep forever, but they’ll eventually end up in the garage when we do a full kitchen reno)
- Remove almond microwave over stove and add an inexpensive vent (put microwave in pantry?)
- Convert giant triple window behind table into french doors leading onto the deck
- Open the wall between the kitchen & living room and add built-ins on either side (sort of like the dining room built-ins in our last house)
- Full kitchen reno for Phase 2 (replace the faux brick vinyl floors, damaged cabinets, laminate counters, old broken appliances, etc)
- Perhaps try our hand at heated floors under some fresh tile (that might spill into the foyer and hall bath if we can’t salvage that tile)
- Organize the pantry with pull out drawers and bins and containers (and replace the door with frosted glass?)
- Amp up the “command center” area across from the triple windows
- Paint the new kitchen french doors and door to the sunroom (black? charcoal? soft turquoise? white?)
– The Sunroom-Turned-Veranda (80% Complete) –
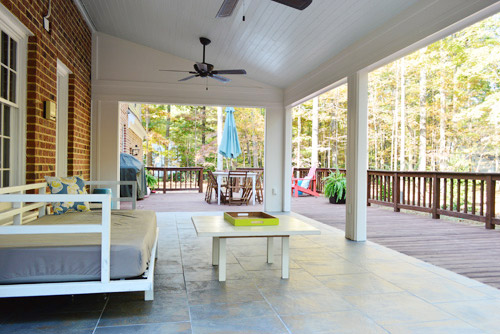
To Do:
Rip up old carpet and paddingPermanently remove the broken base heaterConvert sunroom to an open covered porch with new columns and no more sliders (many of the sliders are bad and the posts are rotten)Loft the ceilingAdd beadboard to the ceiling and paint it soft blueRedo the electrical to get two fans in therePaint all the trim, window trim, walls, and the french door into the living roomRetile the floor with outdoor-safe stone to upgrade the old concrete floors so they’re less slick, more level, and less stained- Add sconces to the posts around the room
- Build a box to hide the wires that creep down the brick wall near the french door
- Furnish the room with deck-friendly outdoor furniture
- Build a brick outdoor fireplace off of the sunroom after we open it up? Kind of like this, but different…
– The Master Bedroom (15% Complete) –
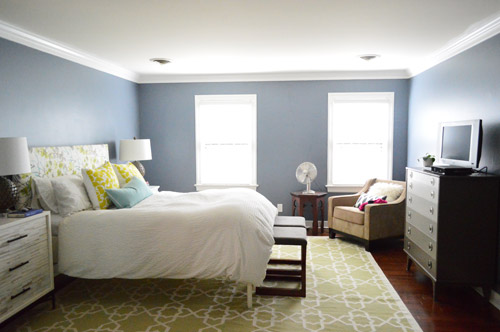
To Do:
Remove old carpeting and install hardwoodsRepaint all of the cream trim and doors white
Add faux wood blinds to all windows for privacy/light blocking
Repaint the walls- Repaint the ceiling (or even plank it or wallpaper it like this for texture?)
- Add built-ins along the entire bed wall (with an integrated window seat, hidden storage, and a nook for the bed to tuck into)
- Add a ceiling light fixture (there’s nothing in there)
- Bring in art, curtains, etc.
– The Master Bedroom Sink Nook (50% Complete) –
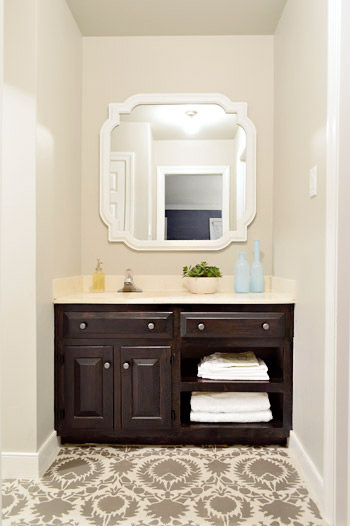
Rip up the carpet in sink area (we didn’t put hardwoods there because we eventually want to tile it)Replace the mirror over the sink for something biggerPaint the walls and the trim and the ceilingStencil and seal the subfloor (to tide us over until Phase 2)Add some simple shelves to the empty side of the vanity for balanceStain/paint the vanity and add new hardware- Phase 2 (a full reno where we knock down a wall and combine the master bathroom with this sink nook area)
– The Master Bathroom (15% Complete) –
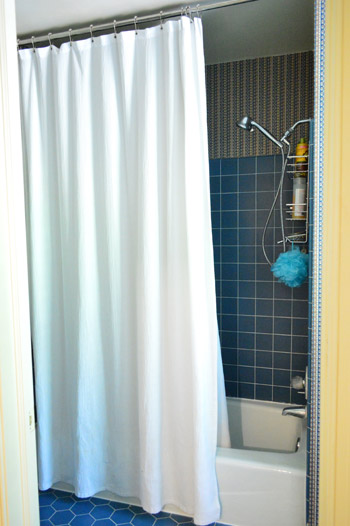
To Do:
Remove the glass shower doorBring privacy to the window with some blinds
- Remove the wallpaper
- Paint the walls and trim and ceiling
- Replace the bathroom mirror & upgrade the lights
- Completely redo the master bath down the line for Phase 2 (the fun blue hex floor tile is in rough shape and we want to expand the footprint into the sink nook area so it’s all one space (soaker tub? tiled shower as well? double sink? should be fun!)
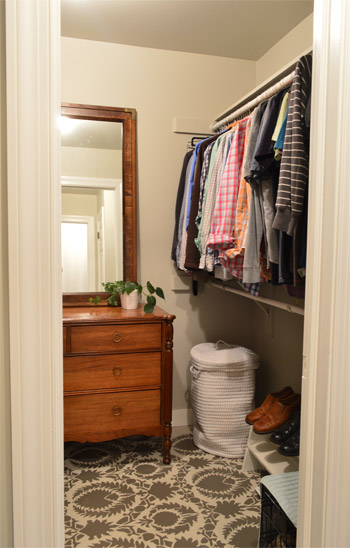
– The Master Closet (40% Complete) –
To Do:
Repaint all of the cream trimPaint the walls and ceilingRip up the carpet and stencil the subfloorPhase 2 (we’ll either extend the tile from the bathroom or the hardwoods from the bedroom into here, just have to decide if we’re moving the door or not)- New light fixture
- Organize/build out/pimp the entire space (we’re envisioning cabinetry with drawers, shelves, rods at different heights, etc)
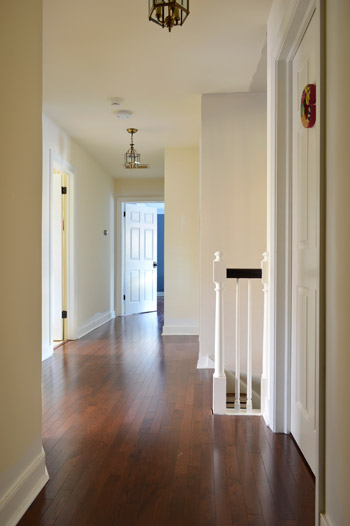
-Upstairs Hallway (60% Complete) –
To Do:
Remove old carpeting and install hardwoodsRepaint all of the blue trim and doors glossy whiteGet all new hinges and door knobs (they’re not only bright brass, many of them are rusted/corroded so they can’t just be sprayed)Upgrade to a Nest thermostat (we hear nothing but great things about them, and John is drooling for one)Stain/paint the bannister and posts- Paint the walls and ceiling
- Replace the old hallway lights (or paint existing ones? not sure)
- Convert hallway linen closet into built-in open shelves or cabinets with shelves over them (sort of like this?)
- Add crown molding
- Add thick wood wainscoting (like we have in the kitchen and living room) to the upstairs hallway to break up the long space?
– Clara’s Room (50% Complete) –
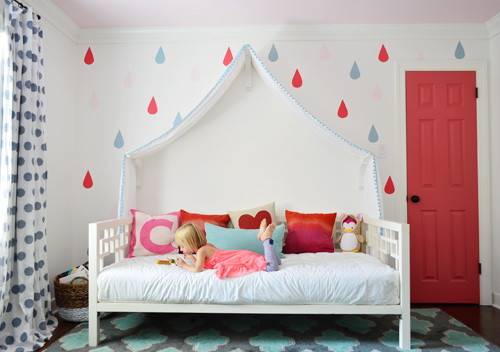
To Do:
Remove old carpeting and install hardwoodsRepaint all of the blue trim and doorsAdd window blinds & curtainsPaint the walls and ceilingMake a canopy wall for Clara’s bed (with lights)Paint the door to her closet bright pinkAdd crown molding- Hang art & bring in things like her play kitchen when the crib moves to the nursery
- Make entire wall of built-ins somewhere?
- Build a bench seat in Clara’s deep sloped ceiling-ed closet nook with beadboard or shaker shingles on the ceiling and wallpaper on the back wall (we want it to feel like a little playhouse within her room)
- Add a ceiling light fixture (boo! there’s nothing in there!)
– Future Nursery (10% Complete) –
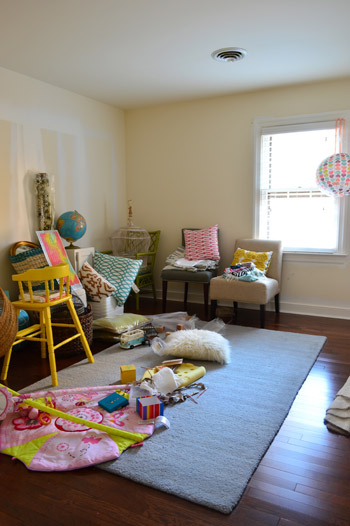
To Do:
Remove old carpeting and install hardwoodsRepaint all of the mauve trim and doorsAdd wood blinds (for light blocking)and hang curtains- Furnish the room (we’re going to hold off on major decorating decisions until we find out what this bun of ours is in early December)
- Repaint the walls and ceiling
- Add crown molding
- Add a ceiling light fixture (boo! there’s nothing in there!)
– The Guest Bedroom / Craft Room (10% Complete) –
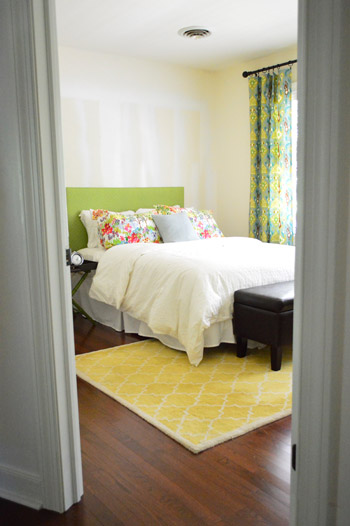
To Do:
Remove old carpeting and install hardwoodsRepaint all of the cream trim and doors- Paint the walls and ceiling
- Bring in
a bed anda dresser/desk that can accommodate my sewing machine & crafting stuff so this room can multi-task (it has the prettiest view/light – I’d love to creep in there and sew/paint on Sunday afternoons) - Organize and build out some craft/gift wrap shelving in the closet (lots of shelves and bins, etc)
- Add crown molding
- Add a ceiling light fixture (nope, there’s nothing in there either!)
– The Hall Bathroom (5% Complete) –
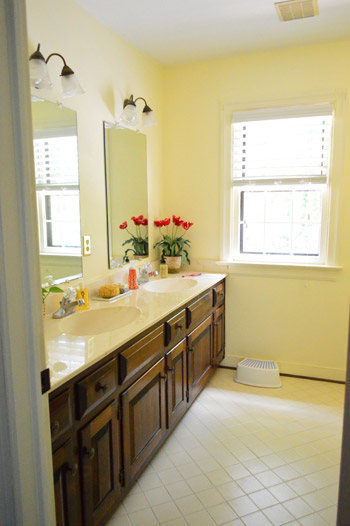
To Do:
- Paint
the door andtrim - Paint the walls and ceiling
- Replace the faucets and mirrors and lights for a mini-update (Phase 1)
- A complete redo is in order (Phase 2) since the old tile is stained/cracked and the tub & fixtures leak. Maybe we’ll do herringbone slate? Marble? Extra long rectangles of tile like this?
– Laundry Nook (10% Complete) –
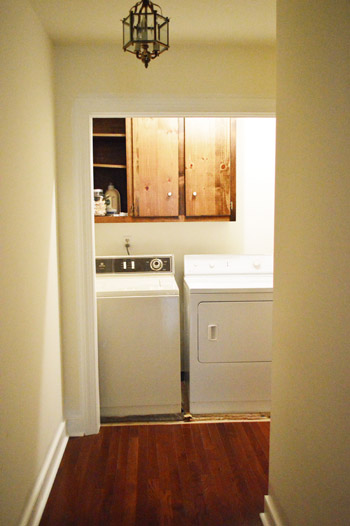
To Do:
Remove old carpeting and install hardwoods- Lay a more washer-proof flooring under the appliances like tile (we ended the hardwoods right in front of them so we could use something more water-safe in there)
- Completely redo the nook (new doors for noise control, updated energy star appliances, new counter, new cabinets – or more cabs if we re-use the existing ones)
- Add a swanky tile backsplash and some great art/lighting (I want to make it a fun little surprise jewel box at the end of the hallway)
– Unfinished Storage Room (0% Complete) –
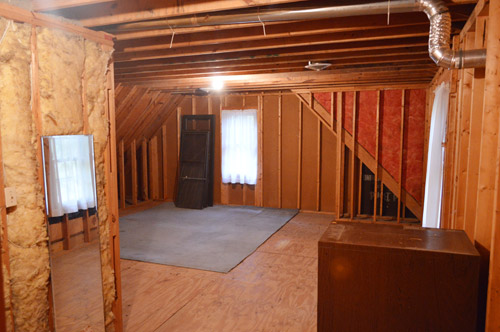
To Do:
- This will serve as an awesomely large storage room for a while (we have no current need for additional finished rooms), but down the line we’d love to finish it – maybe as a movie room / bunk room for older kiddos? This’ll be waaay down the line, but we dream of:
- Adding drywall
- Getting flooring
- Adding lighting
- Possibly enlarging the windows to let in more light
- Building out the closets (so there’s still some storage under the eaves)
- Furnishing the space with built in beds, a TV, a big sectional for lounging, etc – wahoo!
– General Whole House Ideas (7% Complete) –
To Do:
- Slowly upgrade all lights in the house to LEDs to save energy
- Replace all of the gold/wallpapered/off-white switchplates and outlets in the house (we’ve replaced around 15% of them so far)
- Upgrade to nicer frames, drapes, sheets, and curtain rods over time (they’re not cheap, but we’d love to be “grown ups” someday – even if it takes us 10 years or so to get there!)
– The Back Deck (50% Complete) –
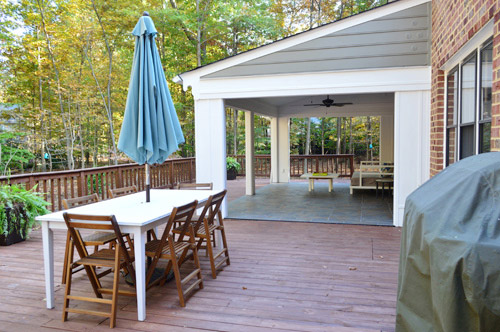
To Do:
Remove the giant oak tree that’s practically growing into the housePatch the deck hole after the tree is removedStrip and stain/seal the entire deckReplace any rotten/ warped boards as we go
- Add double wide stairs off the back of the deck that line up with the new french doors that we’ll add off of the kitchen
- Possibly build a pergola for more architecture and shade off of the back of house where the future kitchen french doors will be (square to the sunroom)?
- Build outdoor furniture like a table or lounge chairs for the deck
– The Backyard (15% Complete) –
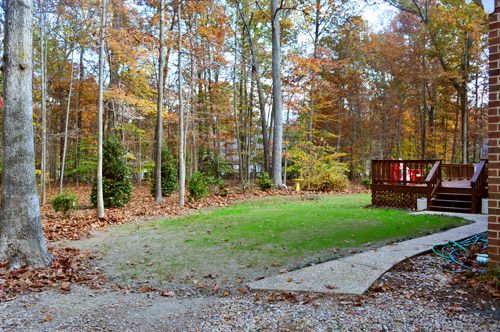
To Do:
Remove random slate pieces from the backyardAerate or level the yard
Seed the yard in the fallPlant large holly bushes for privacy from the other houses that our wooded lot backs up to- Transplant a few things for a better layout, like the pretty peony bushes in the middle of nowhere (not pictured)
- Reseed again in the spring/fall
- Build a fun wooden playhouse for Clara
- Plant an edible garden (not sure what the deer won’t eat, so I’ll have to do some research)
- Build a swing set
- Redo the old cracked concrete walkway between the garage and the deck
- Add more privacy plantings around the rest of the yard – tiered trees, bushes, and flowers (we plan to save up for these and add more each year)
- Build some raised planters and hardscaping
- Possibly add a patio area somewhere around the deck?
- Make a wooden lean-to in the corner of the backyard with Clara and then plant some vines to grow around it to make a cool little hideaway
- Build an air conditioner cover with wood boards like this
Thankfully the journey is a lot more exciting than the destination is for us (more on that here), so if our list makes your brain fog up: 1) sorry about that, and 2) we’re a weird breed of human who actually loves stuff like this (we upgraded our house for fun for years well before this ever became a job of ours). We’ve also learned that taking things one day/project/victory at a time keeps us from getting too overwhelmed, so if you’re wondering how we choose what to do next or how we avoid getting overwhelmed, we just do whatever sounds fun and whatever works with our current budget (barring anything that needs to be moved to the top of the list for safety or other extreme-urgency reasons). We also jump around a lot, which seems to keep our momentum up. For example, right now we’re:
- halfway done peeling wallpaper in the dining room
- just getting our Phase 1 kitchen makeover rolling
- contemplating wall colors for the hall bathroom upstairs and the guest room
- beginning to brainstorm what we want in our office to make it functional for two people (and to add a lot more storage/work space)
So that’s what’s next on the agenda. How do you organize your house-related to-do lists? Do you use your smart phone? A good old fashioned notepad? Is it all up here (points to head)?

Jamain says
Whew! Quiet an extensive list. You guys crossed off so much in such a short amount of time. Going to get our list started today.
We moved into our house last year and had the flooring changed out, the walls painted, our master bath extended a wee bit, and had the kitchen cabinets changed out. Going back to one of your older posts, yes, I kind of wish that we would have taken things a bit slower with the kitchen. The cabinets were soooo old and icky (I have a thing with old cabinets and hardware) that I really wanted them to be gone. I think they were original to our 1984 house. Now, we’ve decided that, in a couple of years, we would like to open up the kitchen to the dining room, change out the cabinets again (long story), and add a pantry and breakfast station.
There is still so much I want to do, hence, the list. Keep up the energy you two. Looking forward to your daily posts :)
YoungHouseLove says
Thanks Jamain! Congrats on getting so much done since moving in last year!
xo
s
The Orchard says
Hi,
Be careful what colour you choose for the nursery! My sister was told at her 20-week ultrasound that she was having a girl. However, when she had her baby a few days ago, it turns out it is a BOY! Thankfully, they painted the nursery green, but she has a TON of girl clothing that she has to put away!
Good luck!
YoungHouseLove says
Oh my gosh! That’s a surprise!
xo
s
karen @ paperfancy.com says
We HUGE list makes me really anxious!!
Shelley @ Green Eggs and Hamlet says
Thanks for sharing your updated list, I always find it so inspiring. And, a big pat on the back to you two (as always!) for doing so much in just the first few months you’ve lived in your house.
My husband and I have big plans for our 1970s two story house but haven’t done too much in the two years we’ve lived there. And now that we’re spending a few months in Australia for work, all DIY has stopped. Can’t complain about living down under, though!
YoungHouseLove says
That’s so exciting Shelley! We’ve always wanted to go there!
xo
s
Lynn says
Can’t wait for the planting beds!!! I plan make some myself this spring and I will be paying VERY close attention! :)
Stacey says
Hi Sherry! I noticed in the kitchen update photo that you guys don’t have a dish drainer, do you have an awesome way of hiding one or do you just let your dishes dry in the dishwasher? My kitchen is shaped exactly like yours, and I’ve been looking for a way to free up more counter space, mainly by getting rid/or hiding my bulky dish drainer. Any tips? Thanks and I love the blog! :D
YoungHouseLove says
We just use the dishwasher for most things and then for pots and pans we lay out a towel and let them air dry on that. Totally bulky and not cute but big pots and pans don’t really fit on most dish drainers anyway. Ha! We dream of a huge deep sink to hide stuff though… someday.
xo
s
Erica says
My list is all “up here” most of the time. But occasionally I write things down on paper. Then I lose them. :-) Luckily, most of the big stuff is done in my house, and I just have the bathroom left as a major project, and then finishing off a few other things. Though that bathroom won’t be finished anytime soon! :-/ I am so thankful for ‘phase 1’ upgrades though- I have at least come up with a way to live with the dirty, cracked beige tile! :-) Of course, this list of mine is ALWAYS GROWING. Shesh.
Harmony_g says
The more work i see done on this place the more it really transforms it. It is really starting to feel less like ‘the new place’ and more like ‘YOUR place’. that’s really great and i love watching the transformation.
Kasey Befeler says
When you wrote you jump around a lot at the end of this post, that is literally what I pictured you guys doing-ha! But you have so much energy!!
YoungHouseLove says
So get out yo seat and JUMP AROUND!
xo
s
Lindsay says
Hey Sherry and John – love your blog and these posts – I am also a list-maker at heart. Quick question – and forgive my ignorance – what exactly constitutes “grown-up” frames and curtain rods? Are your current ones not holding up well?
YoungHouseLove says
They just sort of look/feel chintzy to us over time, so something a little beefier and more well made would be nice (for example, our frame corners have cracks, some of them have a lot of glare, etc).
xo
s
Cherry says
What a detailed post!I am trying to improve my home environment to feel more comfortable,this post does great help for me.Thanks.
Lisa says
Wow your list is out of date! When you get back to this you are going to be thrilled with the items you get to cross off.
YoungHouseLove says
WOOOOOOO!
xo
s