The toilet in our hall bathroom has rocked a little bit from the day we moved in (the inspector even noted it on our little home inspection form). Some people can fix this with plastic shims or tightening bolts, but we quickly diagnosed the issue as a rusted bolt under the toilet flange. That’s a fix that requires removing the entire toilet and replacing the bolt, so it took us a while to get to this to-do task. But here’s how I finally decided to seize the day toilet and show this rocking throne who was boss!
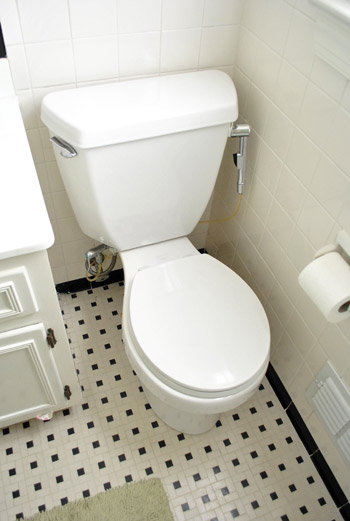
The process is similar to our toilet installation tutorial, but that project didn’t involve removing an old toilet first. So today you’ll get to see the fun part of removing an old, somewhat grody wax ring (along with some uncomfortable close-ups of the Petersiks’ potty). Sounds like fun, right? Don’t say I didn’t warn you. Let’s start with turning off the water.
Materials For Fixing A Rocking Toilet
Removing and reinstalling a toilet involves pretty basic hand tools (no power tools!) that most homeowners will already have around their house. The only thing you’ll probably need to buy at the store is a new wax ring kit, which is
- Flathead screwdriver
- Wrench
- Hacksaw
- Small putty knife
- Bowl, sponge, and/or paper towels
- New wax ring kit*
- White silicone caulk
*We always recommend buying 2 just in case… and make sure it’s the KIT that comes with bolts!
Step 1: Turn Off Water & Drain The Tank
Start by turning your water supply line valve clockwise to turn off the water. Try to do this by hand to avoid breaking the valve. If it’s stuck, try spraying WD-40 or even olive oil to lube the connection (don’t remove the screw!)
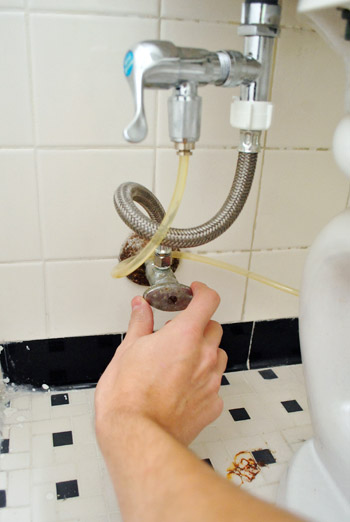
With the water off, flush the toilet to get as much water out of the tank and bowl as possible. Then use towels or a sponge to sop up the extra water by hand. And no, I won’t show you a picture of my hand in the toilet bowl.
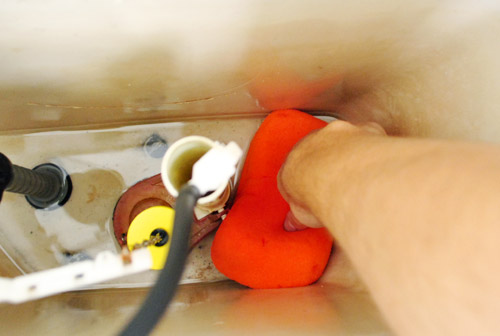
Step 2: Detach The Supply Line
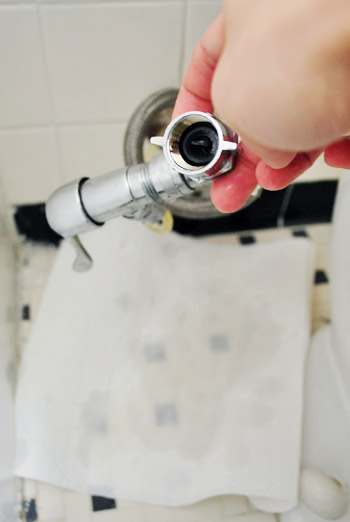
Once things were pretty dry, I unscrewed the supply line from the bottom of the toilet tank. We’ve got a diaper sprayer attached so ours looks a bit crazier than your average toilet, but the idea is basically the same.
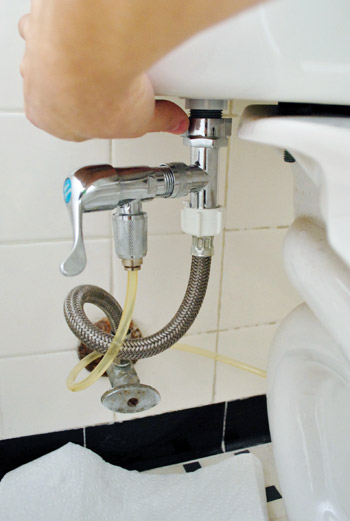
There was a bit of water leftover in the supply line, so I had some paper towels on hand to soak it up.
Step 3: Unscrew & Remove The Toilet Tank
Next up was removing the tank, which is bolted to the bowl in three spots. I was pretty much able to do it with a screwdriver all from the top, but I did have to unscrew the nut from the bottom side at one point.
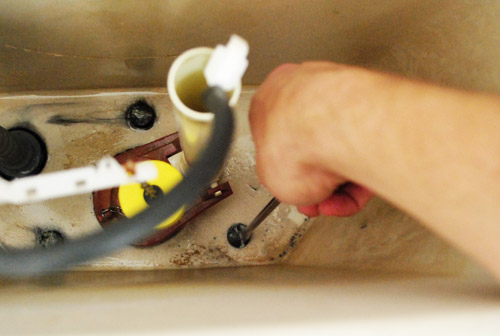
Once it was unscrewed, I lifted it up carefully and set it down somewhere soft and out of the way. In this instance, that meant an old towel in the bathtub. Oh yeah – we’re a classy operation ’round here.
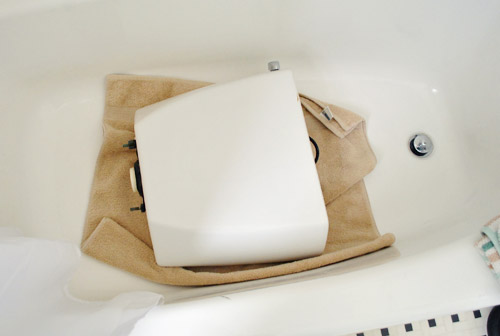
Speaking of classy: here’s our topless toilet.
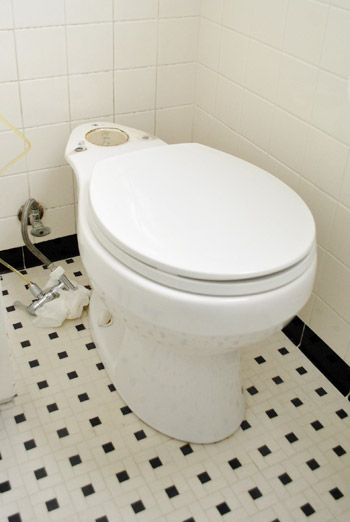
Step 4: Remove The Toilet Bowl
To remove the bowl, I used my wrench to unscrew the bolts on either side – this particular guy was the culprit for the rocking situation that got us into this whole mess:
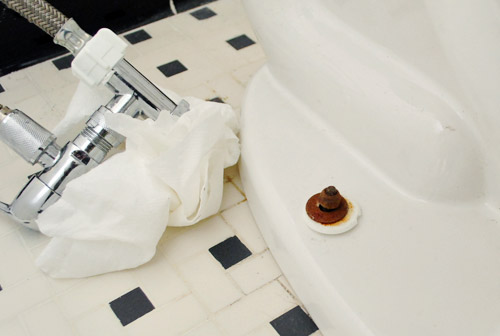
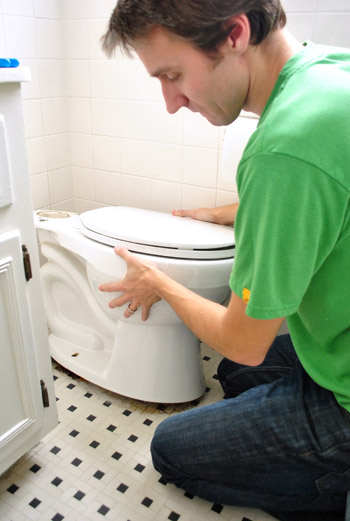
With both bolts unscrewed, I used a gentle rocking motion to detach the toilet from the floor. It’s stuck to the floor in place by a wax ring (just wait for that beautiful picture – it’s coming up!). But once you’ve got it unstuck, the bowl comes up pretty easily.
Step 5: Plug The Sewage Hole
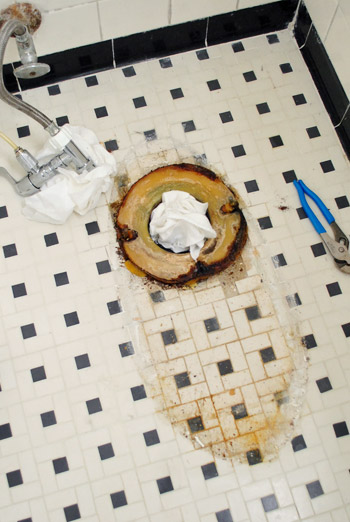
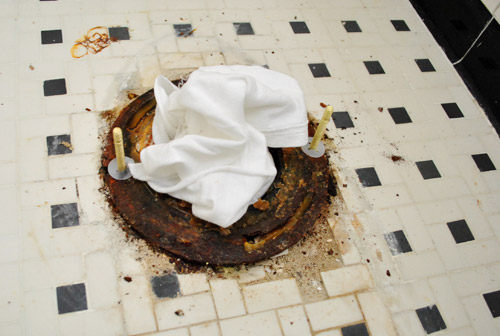
And here’s that beautiful picture I teased. If you’re eating breakfast, you might want to stop scrolling. You can see I plugged the hole with an old rag to minimize the odors creeping back up and assaulting my nostrils. You just have to be careful not to put it in so deep that it gets lost into the sewer system. You might anger the Ninja Turtles living down there.
Step 6: Scrape Away The Old Wax Ring
Since the old wax ring had to come up to make room for the new one, I got to scraping it with a plastic putty knife. This is probably the grossest picture of the post, so please accept my apologies. But rest assured that it’s just wax and rust – nothing more.
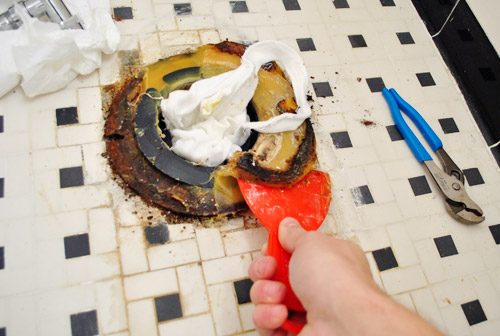
Oh, and I made sure to remove the old rubber reinforcement ring too. This comes in some wax rings, so it shouldn’t be left in place (our new wax ring had one in it).
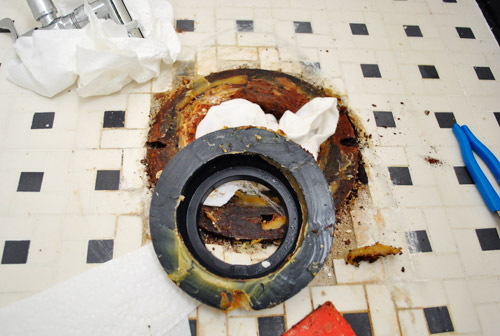
I also had to clean a little bit of the wax off of the base of the bowl too so it was all pretty looking. Well, pretty is probably a stretch.
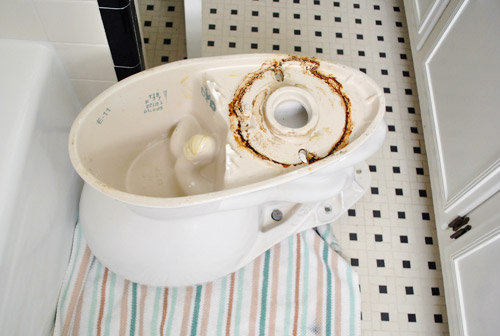
Step 7: Put The New Bolts & Wax Ring In Place
Here’s the new wax ring kit. It came with new bolts and everything for a whopping $7 at Home Depot.
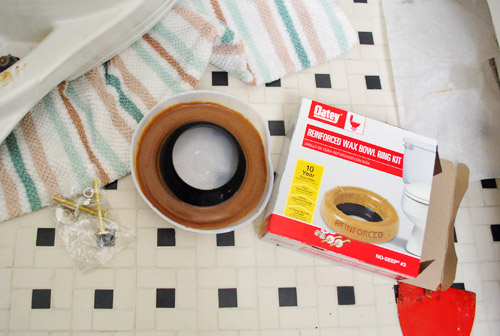
The new ring gets stuck to the bowl, not the floor. I just pushed it slightly down over the opening at the bottom of the bowl. Be sure to have an inquisitive chihuahua double-check your work.
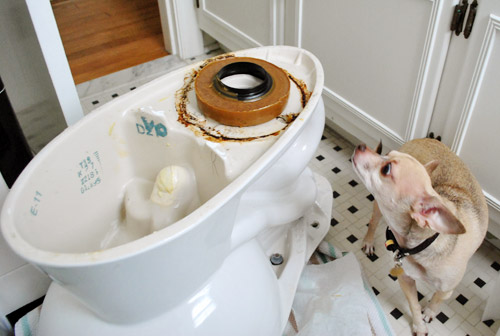
Oh, and of course the new bolts had to go into place around the flange (that’s the steel piece attached to the floor – ours is very rusty). And remember to pull up the rag right before you put your toilet back into place (so as not to meet the wrath of Ninja Turtles living in our sewers).
Step 8: Set The Toilet Bowl Back In Place
Then came the tricky part – which I’ve been known to mess up in the past – putting the toilet bowl back into place. It’s tough only because:
- They’re a bit heavy and
- You have to line it up perfectly over the bolts
But if worse comes to worst, you just pull it back up and try again (though if you’ve squished your wax ring too much you may need to put a new one on). That’s why I always buy two wax rings just in case. Better to spend an extra $6 to save a trip to the store (or risk a leaky toilet). Plus you can always return it the next time you’re at the store if you don’t end up needing it. Oh and this step can be helpful with two people (Sherry did once she was done taking this picture!)
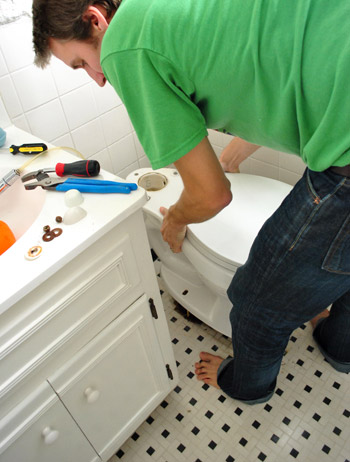
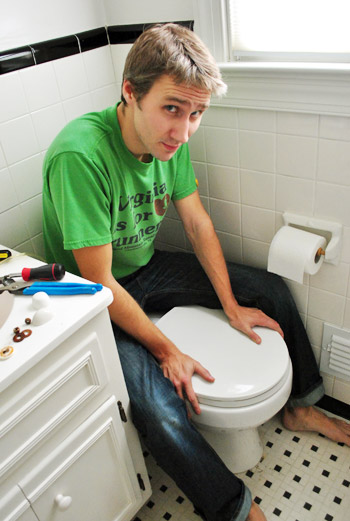
Once we had the toilet placed and straight, well, I sat on it. This little bit of pressure squishes the wax ring into place to ensure that we were getting a good seal. I wish I could say this is the first post that featured a picture of me on the john, but alas…
Step 9: Tighten The Bolts
Once it felt pretty set, I went to work bolting it into place. You can see how the new bolts stick up nicely through the holes in the bottom of the toilet bowl. Note: that is not a hairball on the floor, it’s a weird rust stain that has been there since we moved in. So we plead the fifth.
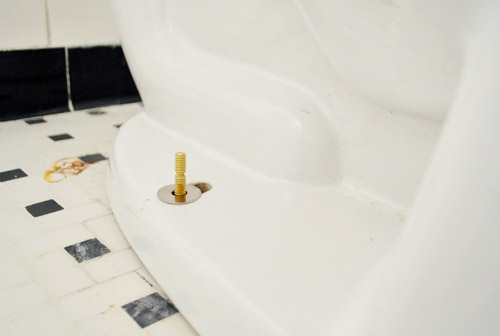
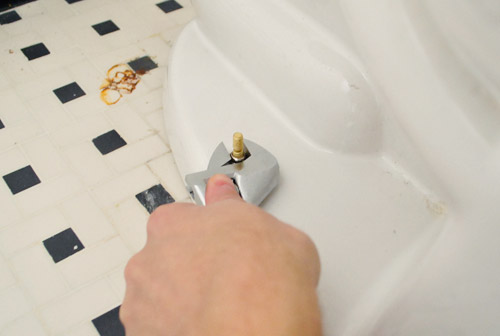
I hand-tightened the nuts most of the way, but used a wrench to finish things off. The thing about a toilet is you don’t want to over-tighten because it can easily crack the ceramic. So just be sure to do this slowly and go back and forth tightening each side a few spins for an even installation. You can also break out a level if you really want to make sure.
Step 10: Cut Off Excess Bolt Length
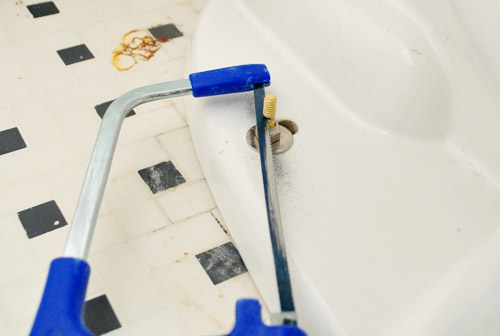
Your bolt will likely be a bit too long for those little plastic covers to fit over them, so use a hacksaw to saw off any extra length.
Step 11: Reattach Your Toilet Tank
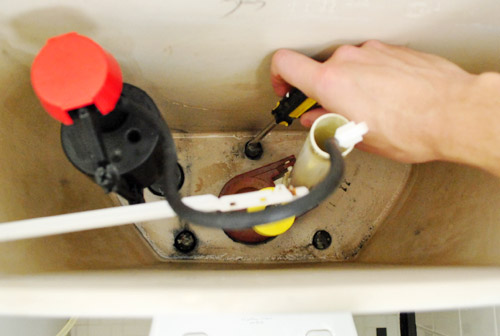
Bowl securely in place? Check. Not rocking anymore? Check. Now it was time for some tank action. I put the tank back into place on top of the toilet and screwed it in. Again, not too tightly because I didn’t want it cracking. But enough so that it felt secure and I didn’t think it would leak.
Step 12: Reconnect Your Water Line & Check For Leaks
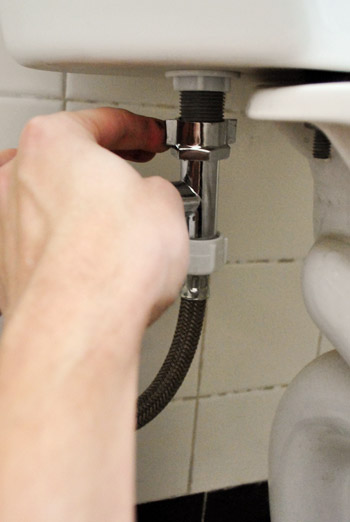
And last but not least, I reconnected the water supply line so we could refill the tank and bowl. Be sure to check for leaks around the base of the bowl, the bottom of the tank, and where the water line is connected.
Step 13: Caulk Around the Base Of the Bowl
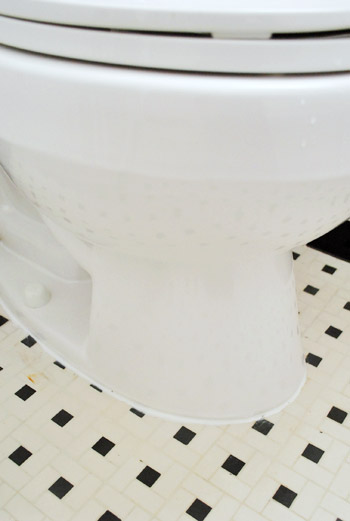
All of that checked out okay, so I ran a line of caulk around the base of the toilet. I only did it around the front 75% of the bowl so that if a leak were to happen in the future, it could escape out the back and alert us to the issue (that’s a little plumber’s trick we learned a few years back for ya).
BONUS: Add A Dual-Flush Converter Kit
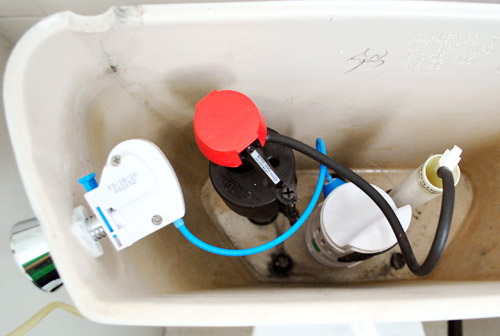
This is usually where a toilet replacement adventure would come to an exciting conclusion, but we used this as an opportunity to install a dual-flush converter kit to this toilet.
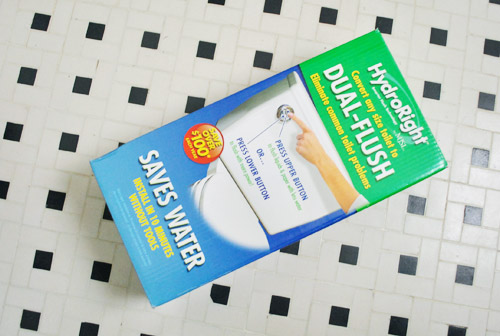
We did this in our last house so you can read our more in-depth dual flush toilet conversion tutorial. But basically, this $25 converter kit lets you take a normal toilet and give it two flushing options: a lighter flush for, um, lighter “activities” and a fuller one for the, you know, other stuff. Hooray for saving water (and money) and pretending your toilet is from the future.
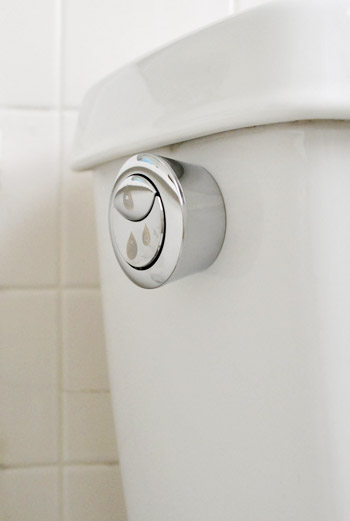
The installation was a cinch compared to the whole wax ring replacement stuff. Here’s a shot of the finished product.
And for the grand finale – and “after” shot of our now fixed, now dual-flushing toilet. Sure, it looks pretty much the same. But just try sitting on it. It’s soooooo much better. No more seasick-esque motion. No more shouting a warning to guests who head down the hall to use the facilities.
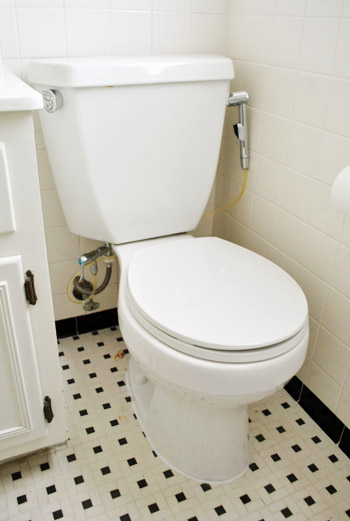
And admit it, that diaper sprayer on the right is hardcore. Like our toilet is wearing a little holster or something…
Psst- Now that I’ve assaulted your eyes with toilet pictures, check this out (it’s much cleaner and sweeter).

Autumn says
Ok, so I was totally eating breakfast while reading this… Haha! But thanks for the tip on caulking only 75%. We’ve been needing to caulk around our toilets, but never would have thought of that!
sherry says
I’ve been following you for about a year and everything you do is awesome! But I agree with the posting about John being barefoot. I know lots of folks don’t like to wear shoes in their home, but it might be a good idea to have “safety” house shoes. I used to be the same way and started following FlyLady.net, a homekeeping/organizing group. One of their suggestions is to wear shoes in the house. It is wierd, but just wearing shoes has changed my mindset about certain housekeeping tasks. I thought about it way back when you removed the granite “desk” countertop. I look forward to your daily posts and would hate for us all to miss one due to a toe or foot injury.
YoungHouseLove says
I like the idea of house shoes! We just take our shoes off at the door but a pair of clean ones for inside tasks sounds like a good idea.
xo,
s
Donna says
Take some salt, baking soda, and lemon juice, and it comes out in seconds.
Angelique says
I second Valerie’s tip. Bar Keeper’s Friend is the bomb! (does anyone say that anymore?)I use it to clean my enamel kitchen sink all the time.
Karen F says
just wondering, how long did this all take? I’m curious, because I’m sure we’ll be replacing a toilet at some point in the fairly near future. Great post – I love how you make this stuff entertaining!
YoungHouseLove says
Hmmm, I’d say probably a little over an hour. Maybe 90 minutes? Of course it was faster than my first time since I knew what I was doing, but also slower because I was taking lots of pics. So maybe that evens out?
-John
Karen F says
thanks – I’m sure it would take me twice as long as it took you, pictures or no pictures! :)
Kate says
I have to send a shout out to Bar Keepers Friend (BKF). I learned of it when I bought a Le Creuset pan and needed to make sure I used something that wouldn’t damage the porcelain but would get the stains out. Then I learned that it’s also great for cleaning Pyrex dishes. I collect vintage Pyrex and there was always some sort of baked on brown funk caked on. I’ve used it on my vintage Mixmaster collection as well. For Christmas I received a stainless steel cookware set that has a copper core and the BKF works wonders on that as well. Oh, and my stainless steel sink too.
I recommend wearing gloves when you use it. Not because it is a super dangerous chemical but because it can be sort of rough on your hands with prolonged use. Nothing a little hand lotion won’t fix though.
They also sell a liquid BKF and I keep some of that on hand but I do prefer the original powder. Follow the instructions of making a paste and letting it sit for a minute and then scrubbing it away. Depending on the severity of the stain it may take a few applications. I’ve never had it damage anything in the years I’ve been using it.
I’ve been able to purchase it at Williams-Sonoma and at Target (lower level of the cleaning supplies). They were comparably priced so I just get it wherever is most convenient to visit when I need more.
I sound like a BKF cheerleader now.
Penny says
One time when my husband was replacing our toilet a BIG OLD ROACH crawled up out of the hole. Yes, I screamed and cussed. I would much rather have encountered an angry Ninja Turtle.
YoungHouseLove says
Oh my gosh. Scariest story ever.
xo,
s
Lauren Wuchte says
I went to a Christmas party one year with a white elephant gift exchange………..and I got a wax ring. It was older than I was and covered in “things” that gifts should not be covered in. Needless to say, I tossed that IMMEDIATELY. I will fork over the $6 if I ever need one…
YoungHouseLove says
Oh my gosh! Eeks.
xo,
s
tracy a says
well, who knew i’d feel like saying so much after a post about the toilet? i love that you missed a spelling error (strop, instead of stop)…helps me feel like you guys are just like the rest of us even more than your posts a while ago intended to do just that! not that i ever doubted your “normalcy” or anything. i also love that you guys use a diaper sprayer. good for you for figuring that one out on kid #1…it took me an entire child of cloth diapering to figure out that little miracle existed! i’m also interested in knowing how you like your new flusher. our landlord installed one and so far i have hated it! i hope you have a more flushed out experience! thanks for the post!!
YoungHouseLove says
Thanks for the spelling tip Tracy! All fixed!
xo,
s
Angie says
This post made me laugh because it reminded me of “the see-saw toilet ride” at my old job. The toilet in the ladies room was somehow connected to the toilet in the mens room just on the other side of the wall. If a lady was sitting on the toilet in the ladies room and a man sat on the toilet in the mens room the ladies room toilet would literally lift up a couple of inches!! And conversely, if a man was already on the toilet and you didn’t know it, you would drop a couple inches when he stood up! It was eventually fixed, but it definitely made trips to the restroom an adventure :)
YoungHouseLove says
Haha, crazy!
xo,
s
Beverly says
Hi love your blog. I use a rust stain remover that works great. I have literally squirted some on a white sweatshirt with rust spots and they just disappeared. I also used it on a plastic kids picnic table. The brand name is Whink Rust Stain Remover, it’s a brown plastic bottle usually in the laundry section. Best stuff I’ve ever used.
Melanie P. says
We have the same dual flush converter that we put in our master bathroom. I don’t really see a difference in 1 vs 2, and our toilet bowl now has a rust problem. I’m seriously scrubbing the rust away every other day. In my defense, my husband installed it, and I’ve tried backtracking to see if he messed up somewhere, but I have no clue. Did you have any experience like that?
YoungHouseLove says
Hmm, that’s so odd! We haven’t had a rust problem on the two old toilets that we installed it for in our first house. Has anyone had an issue with rust? Any ideas what it could be? Could it be a seal issue from the tank or something? Anyone?
xo,
s
caitlin says
toilet related question i can’t seem to find the answer to:
Can you take your existing toilet and rotate it so it faces a different direction? My bathroom is oddly set up but this one thing would make it so much better. But where are the bolts, exactly? Are they in that steel part on the floor, are they in the floor? I just want to rotate it 90degrees…but I can’t find this answer on the internet at all!
Thanks :D
YoungHouseLove says
Hmm that’s a toughie! I think there are fixed slots on one side and adjustable slots on one side so you should be able to – although you won’t be sure until you take everything up and have a look at what your dealing with when it comes to the flange in the floor.
xo,
s
Crystal says
Hey guys, I love the Clara and Burger videos! What type of video camera do you use? And what type of program do you use for editing? Just curious :)
YoungHouseLove says
We use a Flip camera and edit videos with iMovie (comes free with Macs). Hope it helps!
xo,
s
Stewart Pillow says
A rust stain on the floor!!
Dang.
Now you have to move all over again.
Juuust kidding! We all know that floor wont last forever in there!
~Stew
Jen says
I love that you added the dual flush but had to comment because it is pretty much a standard feature of toilets here in Germany. In my apartment which has a super old toilet and plumbing configuration there is a dual flush and in most public rest rooms. When I visit the US, I now notice the bowl full of water and wonder why there is no dual flush so it is nice to know the after market upgrade is cheap and easy.
YoungHouseLove says
Yes, we keep hearing how behind we are on it. Let’s go everyone! Let’s get dual-flushers so we can catch up with Europe! Haha.
xo,
s
carla says
For the rust try Whink. I know you don’t like chemicals (I don’t either) but this stuff is truly a miracle and no scrubbing even involved. I got it at Walmart in the aisle with the furniture polish type products I think. Took rust right out of the carpeting where my old filing cabinet had been sitting and rusting – just squirt it on and the rust disappears. Check first to see if it is safe to use on the tile though.
YoungHouseLove says
Thanks again for all the tips everyone! So nice of you all to share!
xo,
s
ruthy taylor says
I had no idea you could buy converters to replace the normal flush…I thought that would come with a whole new toilet! I’m gonna make the hubs go out and buy one!
Allen says
“Be sure to have an inquisitive chihuahua double check your work.”
This should totally be the byline of your blog. Perfect summation of this reader’s experience; Light, happy, helpful!
YoungHouseLove says
Ha! I like it.
-John
Jennifer Hohner says
This is perfect. we are getting our floors reglazed next weekend and we need to remove the toilet for that. thanks for giving us a ‘how to’. I’m also excited to learn that we can just install a dual flusher, we considered buying an new toilet, but now we don’t have to :)
Melissa says
Perfect timing! The toilet install is up next on our bathroom job. It’s nice to have a refresher on how those things go together. http://www.msgfun.blogspot.com/
I had no idea that you could get the dual flusher as an after-the-fact add on. Might need to do a little “loo re-do” treatment ourselves on the other bathroom once we get the re-modeled bathroom all wrapped up!
Steph N says
I’m going to join the chorus for trying Bar Keeper’s Friend on those stains.
It worked wonders on the rust stains on an ancient enameled cast iron tub in my old house, and I like it as a general bathroom cleaner.
Regan @ RenovatingRothenbergers says
I’ve never heard of a dual flush before! I’m definitely looking into this . . . thanks!
Cara says
I’m most impressed that you can get your diaper sprayer to hang in the holder. I finally gave up and just rest ours in the sink.
And, it sounds like you have lots of options for the rust stain. But, I’ve had good luck with CLR. The Coke trick makes me nervous because I’m never sure what else it will eat. It works great on car batteries, though!
Erin says
Well, I kinda wish I hadn’t read this post on my lunch break but…I loved the Ninja Turtle reference. Cowabunga!
YoungHouseLove says
Haha, I forgot all about cowabunga. Let’s bring that back.
xo,
s
Sara says
Our bathroom adventures involved calling a plumber…our basement shower and bathroom flooded due to a certain ‘female debris’ caught in the pipes. We had just finished updating the bathroom equipment, sink and toliet, and had to take the toliet off to have the drain snaked. Everything turned out fine, and lessons were learned. If your floor is lower than most, you have to add an additional wax ring minus the flange for the proper fitting. Also, ‘female debris’ should never, ever, ever be flushed, always thrown away. That part was not my fault, that was actually left over from the previous owners, but for the sake of everyone else, let this be a lesson!
Carol says
I know you guys are constantly trying to dispel the myth that you do everything perfectly but seriously – YOU DO EVERYTHING PERFECTLY. Great job on a $26 toilet upgrade.
YoungHouseLove says
Aw thanks Carol! Not even close, but you’re sweet!
xo,
s
Donna says
I have to agree, Carol. The kitchen cabinets look like they were professionally painted. I just did mine, and it looks like I gave my five year old a paintbrush and let her have at them! :(
Lessie says
Love this post! You make me feel like I could actually do this! I appreciate your (unintentional) support and encouragement!
Leslie says
Wow, thanks for the how to!! We have needed to replace a toilet for a while now and thought we’d do it ourselves. However you’ve totally convinced me to hire someone else to do it!! *smiles*
amanda n says
Aw, we had that exact tile in our bathroom in Birmingham. :)
Lilly says
Seriously u guys are hillarious. It’s y I love this blog u blog about everything I swear before I take on any projects at home whether they be small or big I always consult with ur projects first. It’s funny because my hubby does not read any blogs what so ever he bearly knows how to use google (lol) but everytime we are going to do something he ask “did u read ur blog (he calls ur blog my blog because it’s my favorite) to c how we are going to do this?” Anyways thanks for all the tips.
Jeanette says
We have several toilets to replace in our home…they are all about 20 years old…thank you for the post! Also, love the dual flush thingy too. I will try to remember that when we finally replace ours.
Lilly says
Oh and about the rust stain I recomend using “Bar keepers friend” I love this stuff and it only cost like $2 @ ur local supermarket.
Amanda says
Ok so while everyone has lots of rust cleaning tips, I have a completely random, but post related question. Where did John get his shirt? :)
YoungHouseLove says
That’s from Ragged Mountain Running shop in Charlottesville. I’ve seen them in a lot of local running stores though!
-John
Julia R says
I just wanted to say that I had no idea you could buy the two-stage flushers separately and install them on any toilet. That is going on my to-do list FOR SURE. Thanks for that great tip :)
Kat says
Thanks for the step by step process. I have a wobbly toilet and would love the dual flush button. I’m still leery of tackling the project. I’m in a 1950’s building and the old flimsy shut off valve jutting out of the plaster with no visible pipes scares me. I just imagine breaking it off and having water shoot out everywhere for hours until the plumber can come. Even though your project looked easy I think I’ll save up for a plumber to do mine.
Trey says
Next toilet install (or for others)… instead of having Sherry on the floor guiding the bolts… i’ve found that 2 drinking straws (red from Sonic are the best b/c of size/color) over the bolts are the perfect guides…
YoungHouseLove says
Great tip Trey! Thanks!
xo,
s
Meg says
I foresee needing to do this exact project next week – working on our bathroom a little at a time, and it’ll be floors (ie moving the potty) next week! It’s like you knew I’d need a step-by-step how-to. ;-) Oh, and I know you’ve received a lot of suggestions, but lime and salt might work (it may also work the same as lemon juice or baking soda – at least they’re green ideas!). Good luck!
http://www.thegoodhuman.com/2007/04/09/spring-cleaning-101-the-natural-way-to-remove-rust/
YoungHouseLove says
Thanks for the tips y’all! Smooch.
xo,
s
Rebecca says
The sponge to get the extra water out is a great idea! I am sad to say we used a 1/4 measuring cup (that was going for the trash anyways after our move) or sometimes old t-shirts of my husbands to soak it all up. Good way to get rid of the old crappy shirts he still holds on to. We will be doing this very thing this weekend. The caulk idea is good to know, I would much prefer a leak behind our toilet instead of all over the front on our new tile.
Queenie says
This is off topic and even may have been run by you but I kept going back to yesterdays post then the light bulb clicked ,did you ever concider running crown molding around the top of the pantry and refrigerator cabinets ?My home came with it installed and I have roughly the same distance from top of cabinet door to top of cabinet so the molding is raised and pin nailed across the bottom(top of cabinet) and over hangs the top perimeter of the cabinets and it changes the entire look .
YoungHouseLove says
Oddly enough we planned to do that the whole time and then held it up and it looked bad! I think it’s because we don’t have many upper cabinets (just three tall ones in the entire room) but in other spaces with more upper cabinets it looks really great!
xo,
s
Lesley says
Whoot whoot for the diaper sprayer! I couldn’t have gotten this far (15 month old cloth diaper wearer) without it! It serves double duty for hosing down the tub after cleaning!
Kelley says
Nice job! I got rust off my counter with Soft Scrub (the kind with bleach). I let it sit overnight and scrubbed it off in the morning. Not sure how this would do on the floor, but worth a shot. I would caution people who have colored counters, tile, etc, since it has bleach in it, but your floors should be fine since they’re white. Good luck!
Lauriane says
Uh-oh… looks like John is barefoot again while moving heavy stuff around! ;)
You guys have fun in my home state of Oregon btw!!
Brandi says
This post came at the perfect time for us – we’re reno-ing our tiny master bathroom and I’m looking for easy ways to make it even more awesome. Excellent tip on the neato dual flush, I didn’t know you could buy those seperately instead of buying a whole new toilet with the fancy dual flush on top of the tank. And our powder room toilet has been rocking since we moved in 4 years ago, now that I know how to fix it I can finally put it down on the honey-do list ;)
YoungHouseLove says
Aw, good luck Brandi!
xo,
s
Katie Lee says
I completely understand leaving something on the to-do list for far too long. For us it’s usually the projects that don’t give us a glamorous result and the areas we know least about. Congrats on tackling the toilet!
Lindsay B says
Yay for toilet fun!
Ok, so this is unrelated. And a little creepy. But I’m going to share it anyway. Last night I had a dream that you guys were giving free tours of your house. So my family and I went up to Richmond for the tour (which ended up being a weird hybrid of your old house and new one). And then halfway through Sherry told us to get out because she had a headache. Ha! No more reading your blog right before bed!
YoungHouseLove says
Haha- no way! I’m mean in your dream! Haha.
xo,
s
Stacey says
I would suggest that anyone thinking about a dual flush converter kit to make sure it will work with your toilet before buying it. Check the length of the overflow tube.
We got the converter kit after reading your first post about it (has it really been that long ago?), but our overflow tube is too short to let enough water in for the “small” flush to work properly. I guess we could get a new overflow tube, but it’s such a hassle to take it all apart again. On our second toilet we got a kit that let us calibrate the water flowing into the tank on a refill, so we’ve saved that way.
It’s a great idea though, and after seeing them while traveling in Europe I wish it was more of a standard here.
YoungHouseLove says
Great tip Stacey!
xo,
s
Jennifer says
I know you guys usually like to DIY/Home remedy stuff – but if all that fails try this:
http://www.shaklee.com/products.php?sku=00430
Its all natural – all their stuff is! (like I know you enjoy) and I SWEAR by it all around the house!!!
Hope this helps :)
YoungHouseLove says
Thanks for these tips everyone!
xo,
s
mirka says
I love seeing your progress in the kitchen and it looks beautiful. My husband will appreciate this post since our bathroom toilet is in trouble. I would love to see what you guys have done on the outside, what kind of decorations do you have now that Christmas is over but it’s not yet spring?
Thanks,
Mirka
PS.I’ve said this before and I’ll say it again, I can’t wait to get your book.
YoungHouseLove says
Aw thanks Mirka! We have pops of color just showing up everywhere, like on our kitchen cabinets and in the new bright art in the kitchen and we have colorful pillows on the couch. I think we’re definitely itching for spring! That’s all inside though- we haven’t done a thing outside except pack up the holiday stuff!
xo,
s
heather says
I want to note that I wish John and fixed the John while wearing Long John’s, or maybe a Johnny but that might have been slightly inappropriate given the open to the wind back they have.
YoungHouseLove says
Hahahahaha. Nice.
xo,
s