Alternate post title: Look how domestic my wife is.
I don’t know why I’m writing this post since Sherry is the mastermind/executor of this project. Maybe just to brag about her mad ironing skillz? I just watched the baby and approved comments while she did her thang for the better part of the day yesterday. The first step was cutting our 12.5 yards of our on-sale $8.49/yard yellowy green fabric (more info on that here) into perfectly sized panels for each side of the two bedroom windows (leaving enough leftover for one closet panel). Lucky for us, the living room rug made a great guide for keeping our cuts straight and our corners square. Especially since it’s 8′ long – so it was easy to lay a tape measure next to it so Sherry could cut five 90″ panels without breaking a sweat. As for the width, we left them the same width as the bolt itself, which was around 61″ wide. This means two panels can easily be drawn to cover each of our 39″ windows without feeling too taut or stretched.
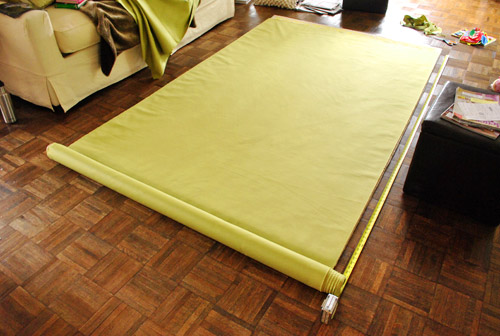
Within about fifteen minutes she had cut all five 90″ x 61″ panels (two for each window and one for the closet) and we realized that we apparently cut it very close when buying those 12.5 yards (pun intended). This is all that we had leftover:
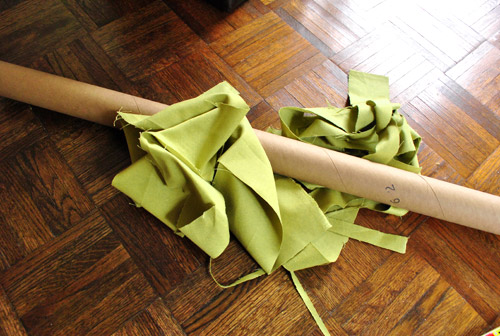
Not necessarily a bad thing (since we’d hate to dole out cash for more yardage than we needed).
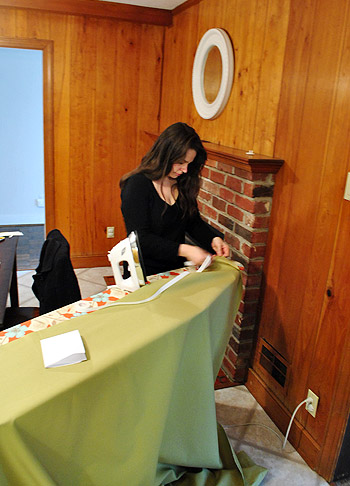
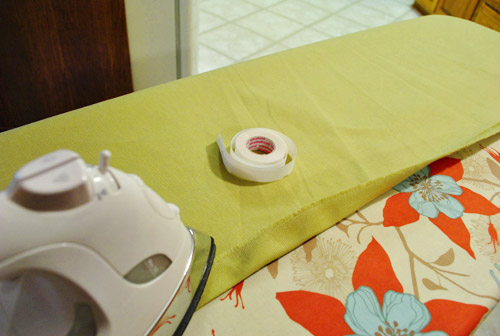
Then came hemming, which Sherry tackled using her favorite trick: heavy duty no-sew hem tape. Read more about that process and learn how to make DIY curtains in general right here (for even more iron-on hem tape info, we made a video of the process here and we have even more in-depth pics of its use here). It basically involves ironing, peeling, folding, ironing, and moving onto the next seam.
It wasn’t exactly a quick task to hem all four edges of all five panels (Sherry kept yelling out “1 down, 19 to go” which got old by about “3 down, 17 to go”) but getting that nice finished edge is certainly worth it. Plus, Clara and I kept the ol’ ball and chain company in the kitchen by singing, approving blog comments, and, um, eating while she ironed the day away. Quick, everyone freak out, Sherry’s hair is down:
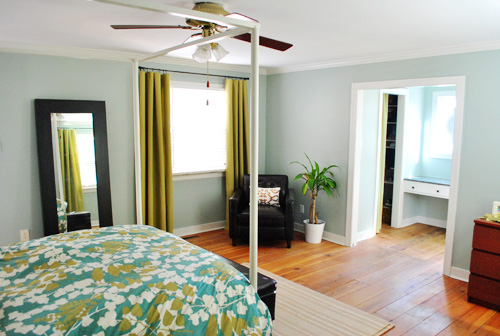
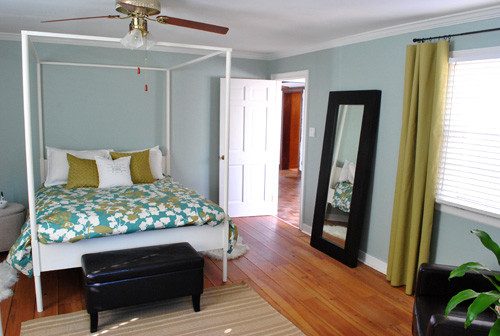
But let’s fast-forward through all of the tedious stuff (the ironing, the clipping of curtain rings to each panel, and the hanging of all three curtain rods, which you can learn more about in this post of yore) and get to the fun stuff: the finished product.
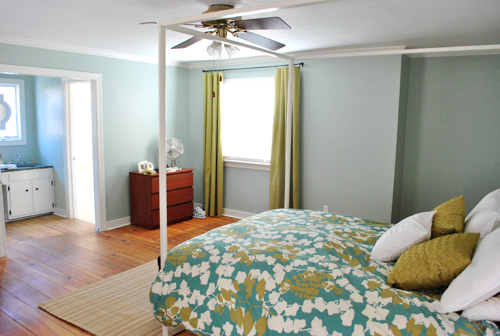
Oh and don’t mind the dresser or the fan or the lack of wall art and everything else that’s amiss. This room is definitely one of those works-in-progress that we’re taking one day at a time.
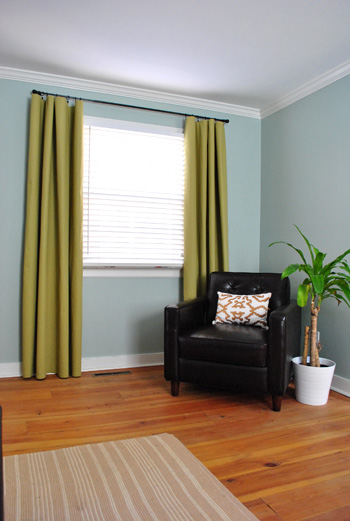
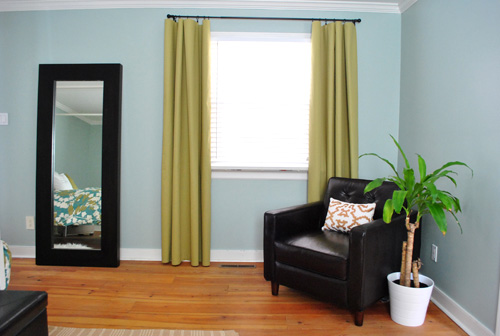
We’re really happy with how our DIY curtains turned out. And it should be no surprise that we chose to hang them higher and wider than the window itself to give the whole thing a bit more height and presence. We’ve actually had a reader tell us that she dreamed about us and Sherry mentioned something about hanging curtains “high & wide” in the dream. How crazy/hysterical/awesome is that? Nice catch phrase, babe. Who wants a “high & wide” bumper sticker?
Sometimes we like curtain fabric to “pool” a bit on the floor, but after looking at it both ways we decided to let these babies barely graze the floor boards. It kept them looking crisp and modern (and created that cool loopy draping effect, which didn’t happen as much when I held the rod lower and they bunched up on the floor). So that would be our tip. Clip your panels to the rod and then move the rod around on the wall to pin down the perfect placement. That way you can raise it and lower it by hand and eye everything until you find the perfect height. Then just mark your curtain brackets and hang them right where you like them best – so your panels graze or pool to your heart’s content. It definitely beats hanging the rod and then clipping up the curtains only to find out they look all dorky and short.
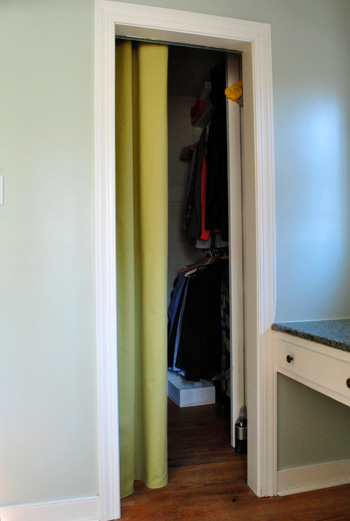
We also hung one panel on the inside of our closet to act as a less-intrusive alternative to the bi-fold door that used to be there. Most of the time it’ll sit pulled to the side like this:
But if we ever need to conceal our mess (or duck in there for privacy if someone’s over but we need to make a quick change) we can pull it closed like this:
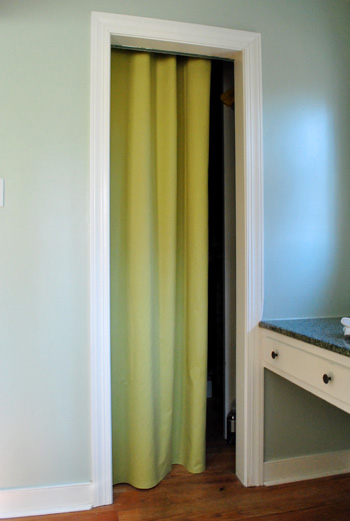
It’s kinda like a mini dressing room in there now- there’s even a light. And Sherry gets a kick out of picturing Clara doing puppet shows and other stage-related things from within the closet when she gets bigger and has that amazing imagination that only kids have.
Oh and if you’re wondering, here’s how it’s hung from the inside. We placed the rod high enough so that it’s not seen from the outside, and wide enough so the curtain can be completely closed (for privacy) or fully opened (so it’s not in the way of anyone walking in or out). It’s kinda the best of both worlds.
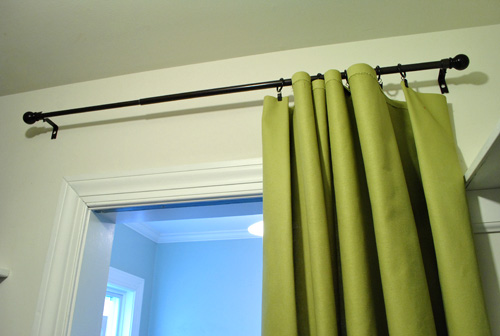
Oh and we got our oil-rubbed bronze curtain rods and ring clips from Target (aka Tar-hay) for cheap. It was around $40 for all three rods and all five packs of ring clips thanks to a few sales going on in the curtain aisle (and the 5% off we get for using our Target card). We love ring clips because they make curtain-creating a lot easier (no grommets or sleeves or pleated details to deal with, so you can literally clip up bedsheets or tablecloths as curtains if you’d like, or just hem fabric on four sides like we did). We also like ring clips because they’re particularly kid-safe. Should Clara decide to go crazy and try to swing on them like a monkey, the clip will release the fabric, which will fall to the floor while the rod and the rings will remain on the wall. Gotta love a safety feature that looks this good.
As for the finish, Sherry prefers oil-rubbed bronze rods (even in a nursery) because she says they’re “like eyeliner for the window.” And I have to agree that I like the look too- especially with the deep wood furnishings that we gravitate towards (along with some white things and even some painted pieces). But again I ask, why am I the one writing this post? Makeup references & hemming aren’t exactly my forte.
Anyway when it comes to the panels, beyond the function, height, and softness they add, we’re really happy with the color. Which means those three days of fabric hunting were all worth it. The yellowy green tone does exactly what we wanted it to do – it brings out the golden-green color of the bedding without matching it exactly (Sherry has this song she likes to sing called “Matchy-Matchy, Tackly-Tacky” which came about when she was imitating her sweet Italian mom, which is always amusing). But getting back to the curtain color, we’re glad we went a bit greener (instead of browner or yellower) than the bedding, because it looks nice and fresh against the Caroline Went Clubbin’ Aqua Carolina Inn Club Aqua wall color (get that joke here) while still obviously relating to the color in the duvet.
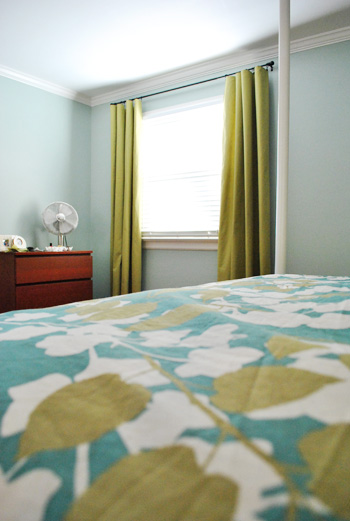
The curtain color also goes nicely with the new pillows that we snagged purloined for the bed too. So between them, the curtains, and the bedding we feel like we’ve got that golden green color sufficiently injected into the room. Now we can start layering in some other colors and textures for a little dimension and interest. Eggplant? Navy? Charcoal? Inky blue? Who knows where we’ll end up. But let the fun begin. Oh yeah, and pardon the missing nightstands, bedside lamps, etc. They’re also on the ol’ to-do list.
We definitely still have a lot more things to do in here (and we’re happy to take our time), but it really has come a long way in the past seven weeks or so. We almost don’t recognize this bedroom shot taken right after we moved in:
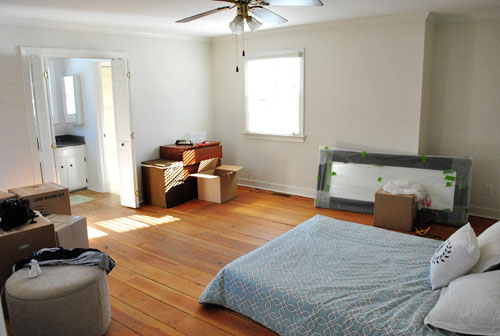
Oh, and last but not least, we thought you might appreciate a little “behind the scenes” tidbit. Sometimes we have to work around a sleepy chihuahua who refuses to get out of bed. Such a diva. But at least Burger doesn’t mind when I make the bed right over him. And our new fluffier duvet makes him nearly invisible. Yup, he was hiding in bed the entire time we shot these after pics.

And so ends the curtain diatribe that is this post. The whole process – as long as it was – has given us a bit of curtain fever. At least that’s what Sherry’s calling it when we drive by fabric stores and she presses her nose against the car window and says things like “I’ll never let go” in her best Rose-from-Titanic voice. We need them in a bunch of other rooms and we’re determined to choose bold and patterned textiles to add some serious interest. Because we definitely don’t want to end up with white Ikea curtains everywhere again (not that we don’t love ’em, but we’re just ready to have some fun and take some risks). So don’t be surprised to find us posting about our fabric store adventures again sometime soon. A guy can only listen to those Rose-from-Titanic impressions for so long before parking just to make it stop.
Psst- Burger’s totally letting fame get to his head. Check out his big DogMilk interview here.
Psssst- We just announced this week’s giveaway winner, click here to see if it’s you.

Ashley says
Great writing! Love the inside information about your diva chi – we have two! Curtains look great and after reading all three hem tape/curtain posts, I think I’ll finally get on some for our place! Thanks for the inspo!
Becca C. says
I love the curtains! I wish I had that kind of patience/domestic talent :) Very impressive!
Tiffany T. says
Um Love it!! Love the curtains, Sherry’s hair down…love the pic of Clara playing in the pillows. It all makes me happy! Weird that even though I don’t know yall personally it sure feels that way. I’m always interested to see what yall are gonna do next!
Rachel @ No Need For Speed says
I just wanted to say that y’all are the coolest.
Tiffany T. says
Wait is the heat hint from the iron??
YoungHouseLove says
Yup. That thing was fired up for hours (it help auto-shutting itself off). Haha. We didn’t want it to be too obvious, so we went for a more random clue. Hence the mention of heat.
xo,
s
Julie Ball says
Everything you two do is just SO amazing! I am of the “scare-dy cat” type; who is afraid to do much more than paint walls (in neutrals only of course!!:)
I have one question – what are your plans for the “parkay” (sp?) floors in your new home? I can’t decide what I would do with them…keep, re-do? Thoughts?
YoungHouseLove says
We definitely have someday plans to refinish all of the splintering and mismatched wood floors in our house, but we’ll definitely live with them a while to decide what finish we’re most enamored with.
xo,
s
Tanya from dans-le-townhouse.blogspot.com says
Those curtains look great! Definitely a huge change overall since when you moved in.
Isabelle says
The curtains look beautiful! I want to be domesticated..:) Any advice for a 94 inch window? The width is throwing me off? Would you put two panels together? Any help is much appreciated! Thank you!
YoungHouseLove says
If you’ll be drawing them for privacy (we don’t since we just use the blinds) you might want to just hang two panels per side (4 total) so they can drape loosely and not look too taut. But if you just want them to add height and softness and will also be using blinds like we do for privacy and light-blocking, we’d just do two panels like we did on our windows. No one will know they’re not as wide as they could be.
xo,
s
Sarah K says
My rule of thumb is about twice as wide as the window if you actually plan on drawing them closed, and still want it to look “full” when you’ve done so.
If you have a really wide window just put two curtain drops on each side. That’s what we did in our living room.
Kiran says
Super envious of your bedroom. Please come over and design one for me! Mine is in shambles :D
Hilary says
swoon! I love the curtains. It might be just enough to inspire moi to attempt my own. I DIY nothing so this would be monumental.
Janene @ OneRun says
Wow! Things are really starting to come together… I love those curtains – I won’t lie, I was a little skeptical about the paint color with the bedspread, but those curtains really MAKE it.
Love the burger lump. I often find Moka lumps in my bed.
Shannon says
I love it! However, now that you have them up I have ask again if you found any issue with the blinds sticking too far out from the window casing/wall. Are you able to close the curtains easily w/o getting them caught up on the header? I love our new white blinds but don’t know how I feel about them sticking further out than my curtains . . . . ~Shannon
YoungHouseLove says
Hey Shannon,
Thankfully they slide easily and the blinds don’t get in the way at all. We did notice that the blinds had a clip on header (sort of like a plastic valance at the top) that stuck out a lot more, which we removed when we hung the rod. They still look nice and finished and they protrude less without it, so we’re glad to have tweaked them a little bit by removing it.
xo,
s
Lesley says
Burger will soon need body guards!! I can picture him in shades and a trench coat walking down the street as his body guards shun the paparazzi =)
Sarah vL says
Hey Sherry, did you see these white porcelain fruits on Gilt Groupe today? I saw them and immediately thought of you! :)
http://www.gilt.com/sale/home/curated-by-desig-520/product/59564498
YoungHouseLove says
Love them. Of course. I’m totally predictable when it comes to my white ceramic obsession.
xo,
s
Michelle says
Looks great. Really ties the room together. I also love the reference of a curtain rod as eye-liner! haha
Jenny says
I have a question about your curtain rod. Do your curtains get stuck on the part of the rod (the point where one rod is inserted in the other). I have the same rods – with “drop cloth” curtains – and ring clips – and the ring clips get stuck where the rod goes from small to big. Am I missing something on the rod?
Really like your curtains the how the room is coming along.
YoungHouseLove says
Hey Jenny,
That seems to be par for the course. Ours do momentarily drag over that point where the rods meet but it’s not much of an issue for us. Especially since we use our blinds for privacy and light-blocking, so for the most part our curtains just stay open. We love that they add softness and height to the room along with some fun color, so that was the main goal.
xo,
s
Erin says
The curtains look great! I love the color palette for your room.
PS- I wish Sherry would call and sing her “Matchy-Matchy, Tackly-Tacky” song to my husband. He thinks everything should match perfectly, and it makes me want to hurl. (Don’t worry; I get my way most of the time, despite his cookie-cutter-perfect-match preferences.)
KellyAnne says
Navy! Navy! Navy! It’s a great winter color but it also screams “summer” paired with crisp, white Ed. Eggplant wouldn’t transition nearly as well through spring and summer. Obviously whatever you do will look wonderful, but I just had to through that out there.
Abbie says
LOVE the curtain fabric choice! Do you mind sharing the name/ item number of the fabric?I had actually ordered the same duvet from West Elm the day before you guys posted about your purchase and was super excited to have made the same design choice as you pros did! I’m enjoying watching your visions evolve!
YoungHouseLove says
Hey Abbie,
Unfortunately we don’t have any name or number for it, and the girl at Hancock put it on a fresh bolt for us to take it home, so there’s no info. It was the only fabric of its color or kind in the upholstery area (the one with bigger bolts for home projects, not fleeces and cottons for clothing and quilting) so hopefully that helps!
xo,
s
cappy says
Love the curtains and that they are kid friendly-which has been a thing I struggle with in our house and making it safe. On a side note, (and so sorry if you covered this 1000 times) your mirror in your bedroom-is that kid safe? I am looking to buy a mirror like that but worry my tazmanian toddler will have it on the floor shattered. Even with a close eye on her, she somehow still manages to find the things not safe for her. Great post!
YoungHouseLove says
Hey Cappy,
Yes, we baby proofed that mirror like crazy! Here’s that post for ya: https://www.younghouselove.com/2011/01/claras-room/
xo,
s
L says
She and others mean the standing mirror in your room not the one hanging above Clara’s crib. How did you baby-proof the floor mirror in your room so it cannot be knocked over by a baby/toddler?
YoungHouseLove says
Ohhhh got it! Thanks for the clarification L! They actually sell wall anchoring kits for TVs and bookcases and mirrors so we used one of those for that. Got it at Home Depot!
xo,
s
megan @ a life's design says
Fabulous job! I will have to use this technique for the house we are moving into tomorrow, yippy!
For Susie and her radiator I remember seeing Rambling Renovators cover theirs like this…http://ramblingrenovators.blogspot.com/2010/09/enhancing-entry.html
Amanda says
The curtains look great!! I love how your bedroom is coming together. Your color choices all sound interesting – I love a good charcoal or navy, but I know whatever you do will look amazing. Your decorating is making me want to go buy all new furniture and curtains – ha!
mary W. says
Hilariously stated! One of my favorite posts ever. Did you ever think your beginning blogger days would turn into Sherry’s hair comments and burger lumps? Curtains look fab! Color is very reminscent of an earthy 70’s turned 2011 eclectic cool vibe, very chic!
Barbara says
Call me weird, but the name for “yellowish-green” is Chartreuse!
YoungHouseLove says
Why yes, yes it is. I guess it’s just too fancy for John. But it’s definitely the right word.
xo,
s
Gina says
I like the term “grellow” myself (a-la cb2 :)
YoungHouseLove says
Ooh that one’s such a goodie. We’ll have to work it in.
xo,
s
Chicago Cuisine Critique says
The room is coming along great. It’s very warm, and inviting, but also has that relaxing feeling. Nicely done.
Ashley says
How far apart do you clip each ring to the fabric. I love the ring look, but when I tried it the fabric didn’t lay right. I am not sure if I placed them too close or too far.
Thanks!
YoungHouseLove says
Hey Ashley,
We had 7 rings on each panel and we just placed them with one on each end, one in the middle and then the other two were added at equal intervals between the space on each side of that middle one. Around 9-10″ apart I’d guess. Hope it helps!
xo,
s
Gina says
Thank you for asking this! I was having the same problem!
Becky says
The curtains are awesome and add sooo much to the room! That tape is awesome for pant hems as well!
Catherine says
Funny you should mention a reader having a dream about you because I totally had a really elaborate dream about you two last week. It was completely weird. (Not inappropriate-weird, just weird-weird.) I think it’s because I’ve been drifting off to sleep with visions of house projects dancing in my head, and you guys are such inspiration. But yeah, still weird.
Anyways, love how the bedroom’s shaping up!
Lindsey says
See… I love LOVE LOVE the oil-rubbed bronze. I always want to integrate it into the house. I found these awesome oil rubbed bronze faucets that i wanted to put in. All of my other fixtures however are brushed nickel. I dont want to switch everything out. How do you deal with this as I notice you have the oil rubbed bronze rod, but your other fixtures (bathroom faucets etc) are “silver/chrome/nickel”?
YoungHouseLove says
We mix and match with abandon! We just try to make sure there’s more than one occurrence of each material so nothing looks like it’s the odd man out. For example, lamps and fans might be brushed nickel but all rods will be oil-rubbed bronze so they both feel “balanced” and equally represented in the room.
xo,
s
heather j. says
You may have already answered this question in another comment, and I missed it…
I am planning on removing the doors & going with curtains for a couple of closets in our house, and I really was dreading the tension rod look. I love the idea of having them attached to the inside of the closet…brilliant! What did you use? Just a cheap curtain rod?
Megan says
Wow! Looking mighty-mighty! ; ) Its so great to see your spaces coming together…I feel like I get to live vicariously through you guys and your projects that I wouldn;t have the time (or necesarily the skill) to do myself! Thanks for sharing with us! :)
heather j. says
duh…never mind…you covered it in the actual post…thanks!
Jason says
They look so great! I love how the rings make them easy to open and close and pleated. I bought these cheapo sailcloth curtains from Target and I have to say I love them because they have these tab backs so they hang on the rod pleated not sheered on the rod entirely and bunched up. I did hang them higher than I should have in hindsight, I mean I like the rods high, but the curtains need to be longer I think so I’m going to take the hem out and try a little teeny hem.
Anyway – I keep seeing pictures of your brick fireplace(with a hair down Sherry!) and brick in the sunroom unpainted and I really think it pops, especially in the sunroom. I know you love painted brick but any chance you’ll try unpainted in those two rooms? Especially since you’ll probably paint the kitchen panelling and because you have some painted brick in the family room already? I have left mine unpainted and like the contrast against the white mantel, etc.
YoungHouseLove says
In all honestly, there’s not much of a chance. We just think it feels dark and heavy and sucks the light out of those rooms. We just like what we like! But we definitely subscribe to the “whatever floats you boat” theory. We hope everyone makes choices they love for their own home! So unpainted brick is enjoyed by many and we’re in full support of that too!
xo,
s
Danielle says
Love the new curtains! Combined with the wall color, they really make the space look fresh and modern. Kudos!
I’ve never used that hem tape, but will definitely have to give it a try sometime soon. It sounds soo much easier than the old measure,pin, sew method. Thanks!
Oh, and could you please send some of that sunshine up to us in Michigan??
cappy says
Thank you for the baby proof post reference! Did you actually screw that large mirror to your wall?
YoungHouseLove says
Hey Cappy,
Yes, if you click that link we shared it’ll go into details in that post. We screwed it into the wall in two places at the bottom with anchors (it’s also anchored from the top). More details in that post though. Hope it helps!
UPDATE: Realized you meant the mirror in our bedroom and not the one in hers. They actually sell wall anchoring kits for TVs and bookcases and mirrors so we used one of those for that. Got it at Home Depot!
xo,
s
L says
Thank you!!
Can you shoot a pic of how that looks? I am curious how anchoring a mirror like that works. How is it able to angle out from the wall at the bottom still?
YoungHouseLove says
Yup, we’ll have to write a post about it soon!
xo,
s
Julie says
I think cappy is referring to the large mirror in your master bedroom–not the green mirror in Clara’s room. Is the large floor mirror in your master bedroom baby-proofed in any way?
YoungHouseLove says
Hey Julie,
Yep, duh. Finally figured that out. We anchored it with a system for TVs and bookcases from Home Depot. Hope it helps!
xo,
s
JODY says
PERFECT! I love the curtains- I also love that your rooms look so polished and uncluttered! You know when to stop, a problem I think lots of people have- overdecorating and using STUFF just because they have it! Also I enjoy your Burger stories! The “Burger Lump” looks just like our “Wally Lump!” Apparently Bosties and Chihuahuas have a lot in common!!
Hayley says
Love the curtains, but also love that black mirror standing in your room! I’ve been looking for one just like. Where is yours from?
YoungHouseLove says
That was a sweet wedding present from the hubs (he wanted me to be able to look at myself in my wedding dress before heading out the back door to get hitched in the backyard) and it’s from West Elm. But we’ve since seen a nearly identical one from Ikea that’s cheaper so hopefully that helps!
xo,
s
Corrie says
Crazy enough, I’ve seen one at Wal-Mart recently that is in their Better Homes & Gardens line.
Sophie says
The curtains ended up looking great, love the colour and how it compliments the walls.
Also, Sherry’s hair looks so pretty down! (:
Carmen says
I love, love, love the curtains with the wall color. Perfect!
Bryn says
ps – I highly recommend you guys getting a sewing machine! It’s so easy to learn how to sew and luckily home items are the easiest of all (most of the time they just require a straight line). I just made some skirted tables for our master (see here: http://bit.ly/fJSivf ) and I’m making some pillows today. It’s a lot easier than standing at the ironing board!
YoungHouseLove says
Cute!
xo,
s
Claudia says
Are you kidding me? No closeup of Sherry with her hair down??? Massive!FAIL
LOL J/K
YoungHouseLove says
John’s lucky I let him put that terrible pic in to begin with. I’m surprisingly vain.
xo,
s
Christy says
Gosh, you guys are so inspirational, and you are both GREAT writers. Love reading your posts, love seeing your ideas, just love. love. love! Thanks!
Bobbi says
My biggest pet peeves when people hang curtains…. they don’t iron them first! Then they ask, “What do you think?” I’m too nice to say, “Looks like you forgot to iron those curtains.” And two years later… still not ironed. URGH.
Good see “see” someone not forgetting the crucial ironing step. :)
Laura says
Looking great!!! The room has definitely come a long way. The colors are really coming together… soft enough, but with the perfect punch!… I am still in love with the painted white mirror in the window. The geometric shape it adds looks so awesome in your nook. Kudos!
Christine Thompson says
I L-O-V-E the way your bedroom is coming together. It’s so elegant and yet so fun at the same time. I can’t wait to see the ultimate finished product. =)
Melissa @ HOUSEography says
They look great! Very inspiring because I think I’m going to end up making new curtains for my son’s room. Cannot find anything I like! I’ll have to experiment with black-out liners though.
Jessy says
ok, so I will join the camp of “not so sure about the color of the curtains with the wall color”, I wasn’t going to say anything because it is kind of rude, plus it’s not my house. Boy was I wrong. After seeing the pictures, it looks amazing! You guys have a really great way of adding sophistication to your decorating, plus you get the look of being collected over time, and not “designed” or a bedroom in a bag. Love it, looks great, and now I am getting ideas…
Krystal says
Love the curtains, but I have a question about the curtains rods…did your’s not come with a middle bracket, or did you just not use it? When my step-dad hung all the curtain rods in my apartment, he also installed the middle bracket, but I don’t have valences so I’m forced to stare at those eye-sores every day (like right now…my eyes just gravitate towards them).
YoungHouseLove says
Yup, they came with middle brackets but our windows weren’t too wide so we figured we could live without it. The rod supports itself really well without it!
xo,
s
Gina says
We have the same issue…those middle brackets make it impossible to ‘cheat’ off center windows too, but without them, our rods sag. Maybe we just need to try a different brand of curtain rod…or maybe we are just blessed with very wide windows? How wide ate the windows in this room I wonder?
YoungHouseLove says
If you’re cheating things, why not cheat the support bracket too! We used one on our living room window in the old house but we cheated it too so things looked centered and the rod was supported. Worked like a charm!
xo,
s
Gina says
39″…sorry, should have paid closer attention. How wide did you end up hanging the brackets, though? Maybe I’m going too wide…
YoungHouseLove says
Our brackets are about 65″ apart and there’s no rod sagging. Perhaps it’s the type of rod (we get ours at Target). As we mentioned above, we used to have a support bracket that was seen in our living room but we cheated it so it looked centered and we didn’t mind it that much at all. Hope it helps!
xo,
s
Stephanie @ AHomeWest says
I used hem tape on a diy shower curtain several weeks ago but have not needed to wash it yet, obviously. So, I’m wondering if it would hold up to washing and drying if ever needed.
Have you by chance laundered any of your hem tape creations?
YoungHouseLove says
Hey Stephanie,
You can scroll back for more info on that but we haven’t had an issue. We do wash on cold and tumble dry or line dry to keep them from getting hot (and possibly shrinking or getting goey from the hem tape).
xo,
s
Lexi says
You all are great! An hour at lunch is just not enough time to catch up with the Petersiks! Love what you all are doing with the room and can’t wait to see what you do next! You all have definitely given me lots of inspiration to work on my master bedroom! :)