Happy Friday, y’all! We’re painting the foyer today (pics on Monday – woop woop!) but I realized that I forgot to share two bathroom related happenings. And one’s a giant oops moment, so this should be fun.
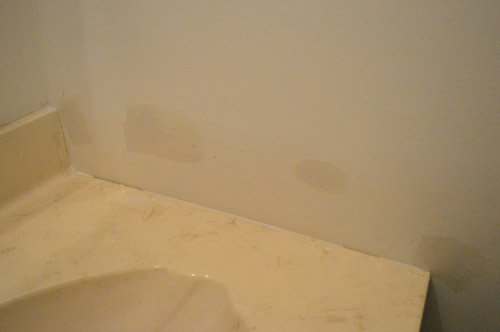
First of all, it’s fitting that this thing is called a vanity because I did a little surgery and removed its love handle. It’s hard to see in some of the more recent photos of the bathroom, but this one shows it loud and proud:

That slab of counter against the right wall just felt imbalanced to us, and it’s actually a pretty simple DIY project to remove it. So if you have a side-splash thing that you’re not in love with (most modern sinks these days don’t have them at all and the walls are just fine) here’s how we gave ours the boot.
First we fired up the ol’ liposuction machine manual screwdriver and shoved it under the side slab, trying not to dig into the top of the sink (remember you just want to loosen and remove the side slab, not ding up the sink underneath it). You can use a rubber mallet or even a hammer to tap the screwdriver under the panel along the top seam, bottom seam, or even the side seam like this:
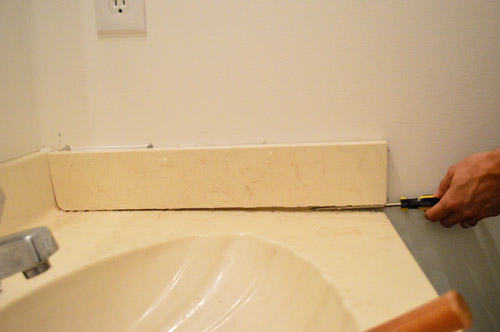
Eventually it got loose enough for us to yank it right off, although we were left with four puncture marks in our wall – along the top seam – where the screwdriver dug into the drywall.
Here’s where I said to myself: Self, don’t panic. Breathe in. Breathe out. You can do this.
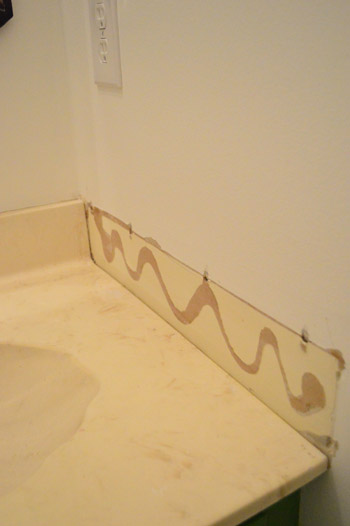
I grabbed a sanding block, just to get off any chunks of glue or drywall that weren’t flush with the wall. Then I got my spackle and a 2″ putty knife (I like Dap Crackshot Spackling paste, not only because the name is entertaining but because it does the job). Using the spackle knife I just smoothed spackle over the entire area that I wanted to smooth out, building it up just a smidge beyond the wall in all areas so that when I sanded it down it would be smooth and flush again.
After it dried (I usually wait about 5 hours just to be sure), I got my sanding block again. I prefer a block since it has straight edges which can help you keep your wall straight instead of ending up with something wavy and pitted. This will be dusty, and you might panic because often when you sand something smooth there are a few little low spots or dings that come through and you’re all “man, I just want to paint this and be done with it” – but RESIST my friend. Put the paint brush down.
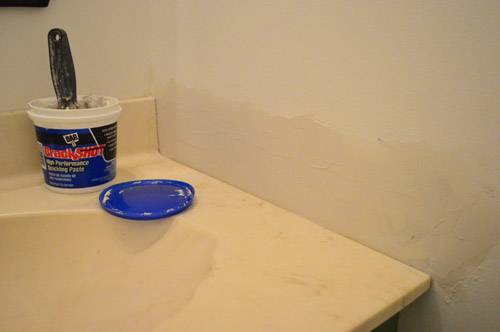
Wipe down all of the sanding dust and then go back with your spackle for a second pass at those dings and low points. Trust me, this ten minute second step is the difference between a smooth wall and an annoys-you-everytime-you-look-at-it wall. Here are the spots I spackled again, just to get them nice and flush.
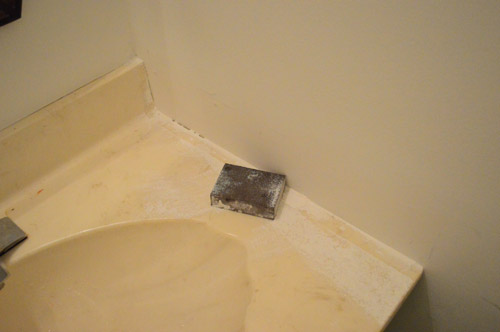
After it was all dry, once again I used my sanding block to sand them smooth. Then it was time to caulk a nice clean line between the vanity and the wall with white paintable silicon caulk (paintable is key, and for brands I like Dap). That’ll keep any water from rolling down the side of the vanity, so it’s a nice “housekeeping” step – plus it just looks nice and finished. As for application, I just squeezed a line of caulk down the wall into that crack and then used my finger to smooth it out a few times until it was clean and unassuming.
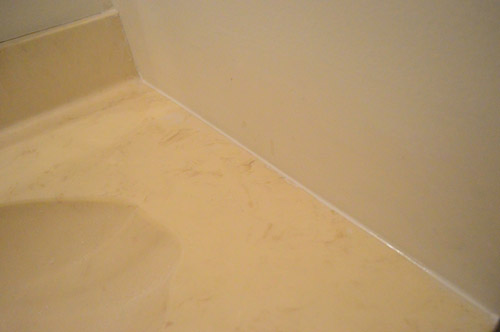
Then (and only then!) did I allow myself to grab my paint brush and touch up the wall so it was nice and seamless. This was one of those lessons I have had to learn over time. You will never, ever be in the mood to do that second pass of spackle (“gee, there’s nothing I feel like doing more than spackling and sanding this wall that I already spackled and sanded”) but it makes all the difference in how smooth it looks in the end. At least for a bugged-by-dings girl like me.
Speaking of smooth, we spilled half a quart of the Baby Fern paint that we used on the vanity (and then painted over) right onto the concrete floor in the garage. Whoops.
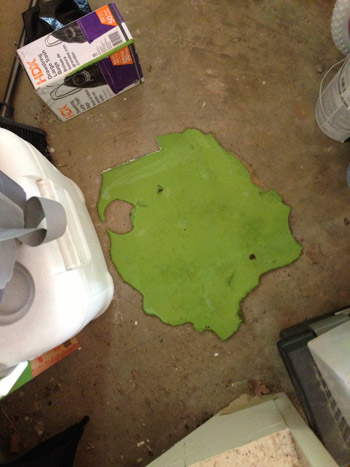
There was panicking. It was a hot gelatinous mess. While we struggled to remain calm we both came to the same conclusion: let’s not touch the paint at all. Let’s not try to clean it up or thin it out or add water or anything. Let’s just let it sit there, and hopefully once it dries it’ll be a thick enough glob that we can peel off like a giant latex sticker.
So we waited about a week for it to fully dry, and then we yanked on it…
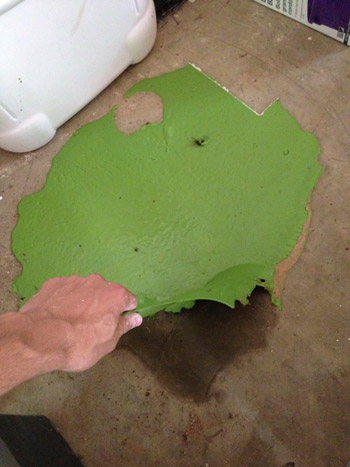
Wouldn’t you know it peeled right up in nearly one piece (there were a few spots we peeled off a second later that were left behind). There initially was a big brown wet-looking mark under it, which you can see in the picture above, but we hoped that once the mass of latex was up off of the concrete it would just dry itself out and go back to being normal looking.
Well lookie here. Besides a few slightly tinted spots, it’s not noticeable at all. In fact we’ve since moved all the stuff that was framing “the scene of the crime” and we can’t even really pick out the spill spot anymore.
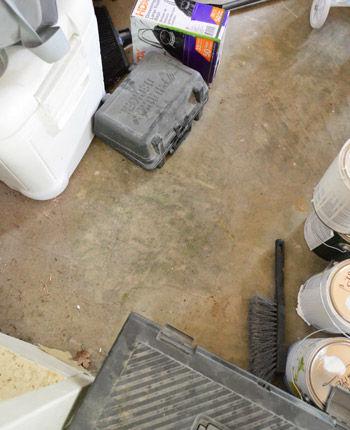
I still kind of can’t believe our leave-it-and-peel-it-later approach actually worked. And I’m endlessly grateful that it was so easy (even attempting to wipe that up when it happened might have taken a while and resulted in a giant mess). So when in doubt, just do nothing and wait a while and hopefully whatever problem you have will peel off like a sticker. Well, I guess that advice doesn’t work for everything, but for a giant goober of paint in the garage, it was a pretty darn good outcome.
**********************************
Psst- We’re trying out a new little bonus feature on Friday posts by ending with four fun projects, chats, or questions going on over on the Forums. You know, just in case you don’t want to go back to work just yet…

|
 |

|
 |
 |
|||
| by ElizabethAnn | by KatyRICEdesigns | by KellyLawler1 | by ArtisanDesarts |

|

Leave a Reply