In addition to our 1400 square feet of indoor space, we’re lucky that our house also has some pretty great outdoor spaces – including a large second-story deck off of our family room. Having all of this bonus living space up in the trees has quickly become one of the “rooms” we’re most thankful for, and you’ll see why in this post.
It was raining when we bought the house back in February so we didn’t spend much time out here, but you may remember this before photo that we shared along with all of the exterior before & afters back in May. You know, before we painted the house and replaced all of the rotting deck boards with Trex and those shaky old railings with new not-shaky ones (more on those updates here).
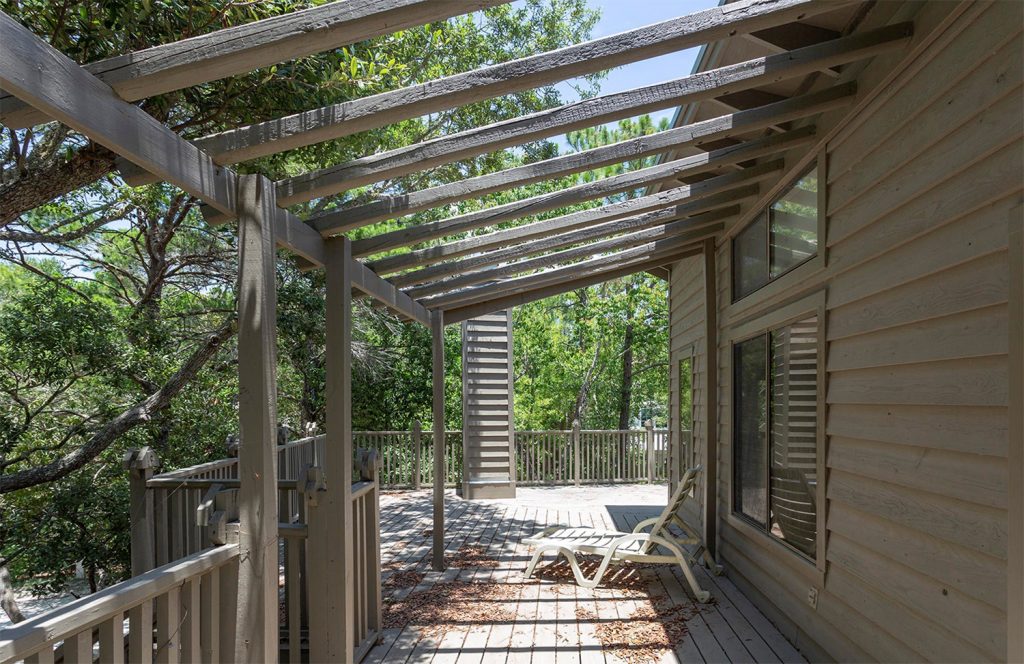
A lot of old features – like the pergola and the chimney, both of which we removed as part of repairing the rot and water leak issues – disguised how big of a space this deck truly is. In a sense, it’s the largest “room” in our entire house, which has posed some layout challenges for us as we figure out how to make the deck useful to us (but not furnished just for the sake of being furnished – more on this in a moment).
So before I dive into all the what and why of this space (including some tricks we employed to keep it low-maintenance) we thought this video would give you a better idea of exactly how big the deck is and how we’ve created some distinct “zones” (two of which are for real, and one that’s more of a “just for now” thing – but more on that in a second). You can watch the video without sound, btw – it’s just a walk-through of the deck – no talking – so you can get a better feel for the space than photos can really capture). Plus, you can see how the deck transitions from its daytime look to its evening look (that’s something they say on Project Runway a lot, right?).
Note: You can also view this video here on YouTube.
Such a big outdoor space can be a double-edged sword if you’re not careful about thinking through how you use it and what you actually need. It’s great to have a ton of “bonus” square footage, especially in a climate like ours where outdoor space can be used nearly year-round (I’m typing this post from that outdoor dining table that you see in these photos – and it’s a glorious and very comfortable 68 degrees out right now).
But let’s rewind and fill you in on our past: over the last ten years or so, we’ve realized that we were chronic under-utilizers of outdoor spaces (perhaps the one exception being the small backyard at our beach house which is where we realized we loved a smaller but private feeling outdoor space with thoughtful pieces that were selected to be as functional as possible). Otherwise, over the last decade, our outdoor areas typically became just another space to maintain and clean, without much actual use in between a few random events per year.
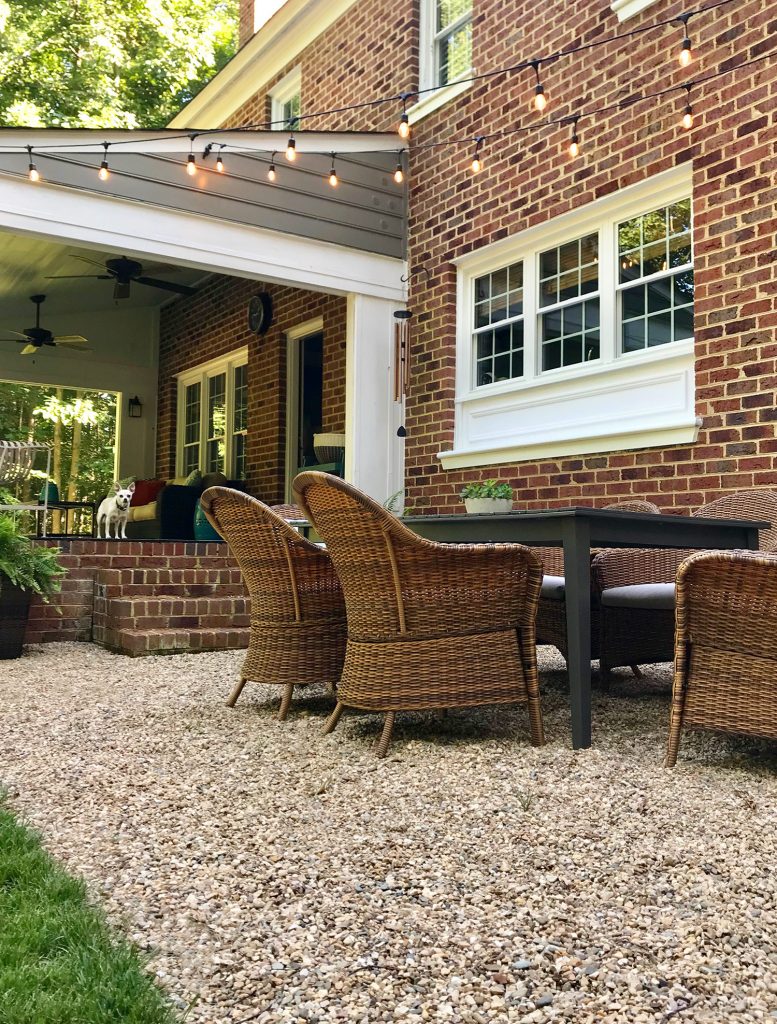
A notable example is the outdoor dining area in our last house, where I’m certain we spent far more hours blowing leaves and pressure washing the cushions than we ever did actually dining. The chairs had fabric cushions that didn’t dry quickly, so having a meal out there took more planning & prep than we’d like, so it just never became a regular habit.
What this outdoor setup at our last house essentially taught us is that we do better when our outdoor spaces are easy to use and ready to be enjoyed at a moment’s notice. So I’ve been a real stickler for making sure we don’t fall into that trap again here – and that we aren’t blowing money on outdoor furniture or decor that looks good but isn’t highly usable (aren’t I such a fun husband?).
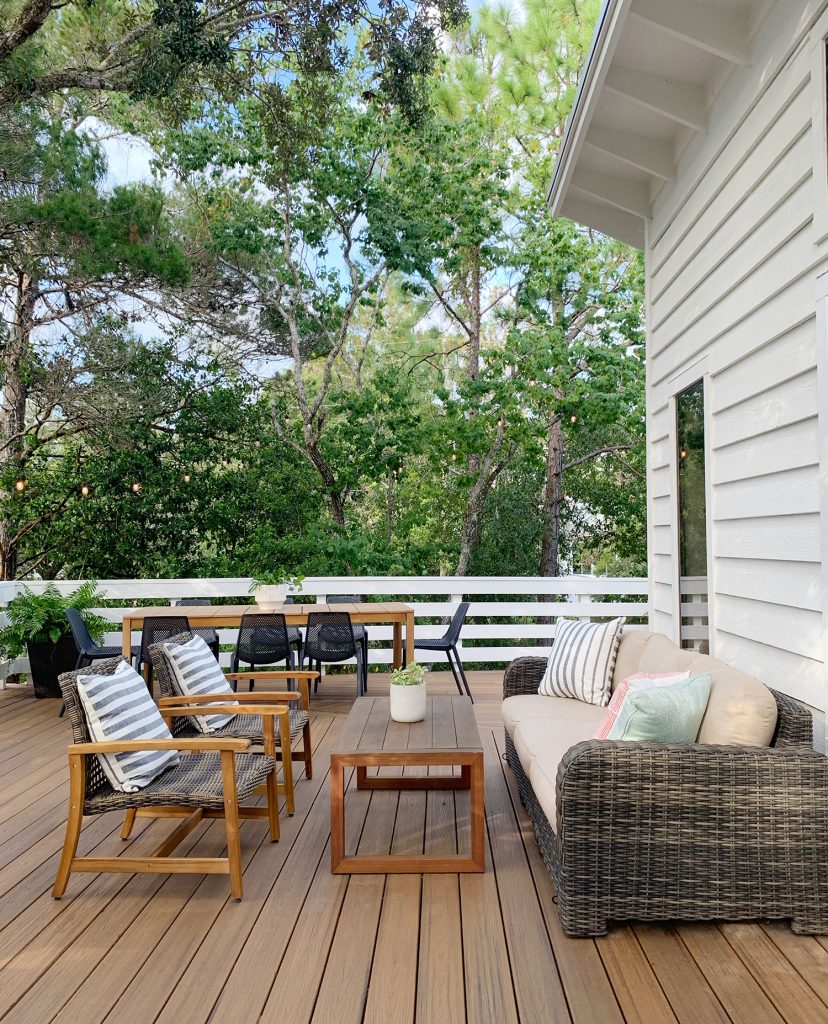
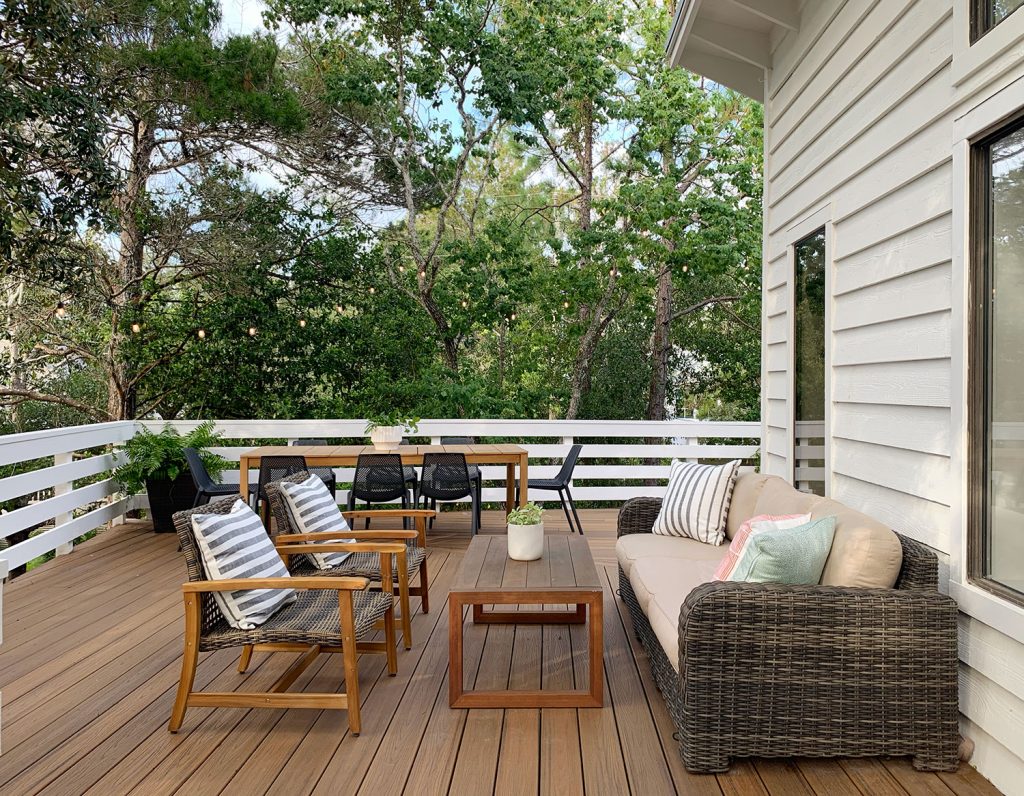
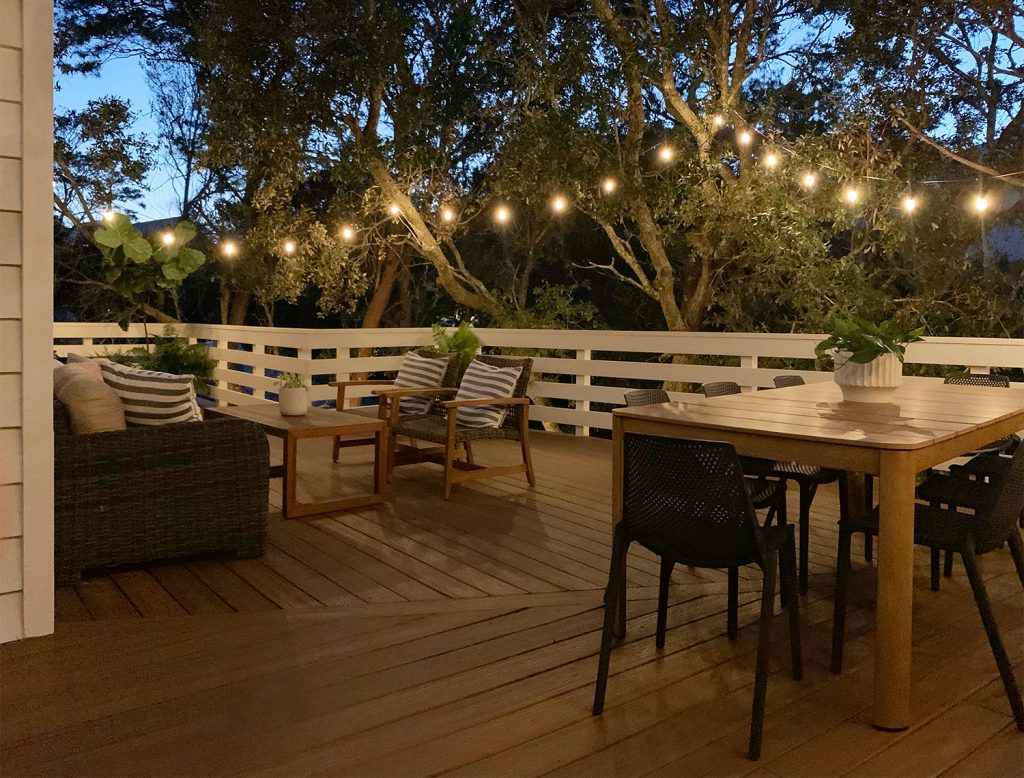
Thanks to my resounding chorus of “let’s talk about function first,” so far I feel like we’ve done a great job at being super intentional about what we’re doing up here. We’ve created (1) a comfy lounge/conversation area with an easy way to ensure the sofa is never soaked, (2) an outdoor dining/game table and (3) a placeholder TBD zone, which I’ll explain more in a second. But it involves some trash. Yes, trash.
The conversation area is anchored by this outdoor sofa we brought with us from Richmond. It’s around 7 years old at this point and has been holding up great, partially thanks to an annual pressure washing of the cushions. It used to be on our covered porch so this is the first time it has been fully out in the elements (although the way it sits against the house keeps it in the shade almost all day). All that shade is great for staying cool while lounging, but we realized it was keeping the cushions from drying out as quickly as we’d like…
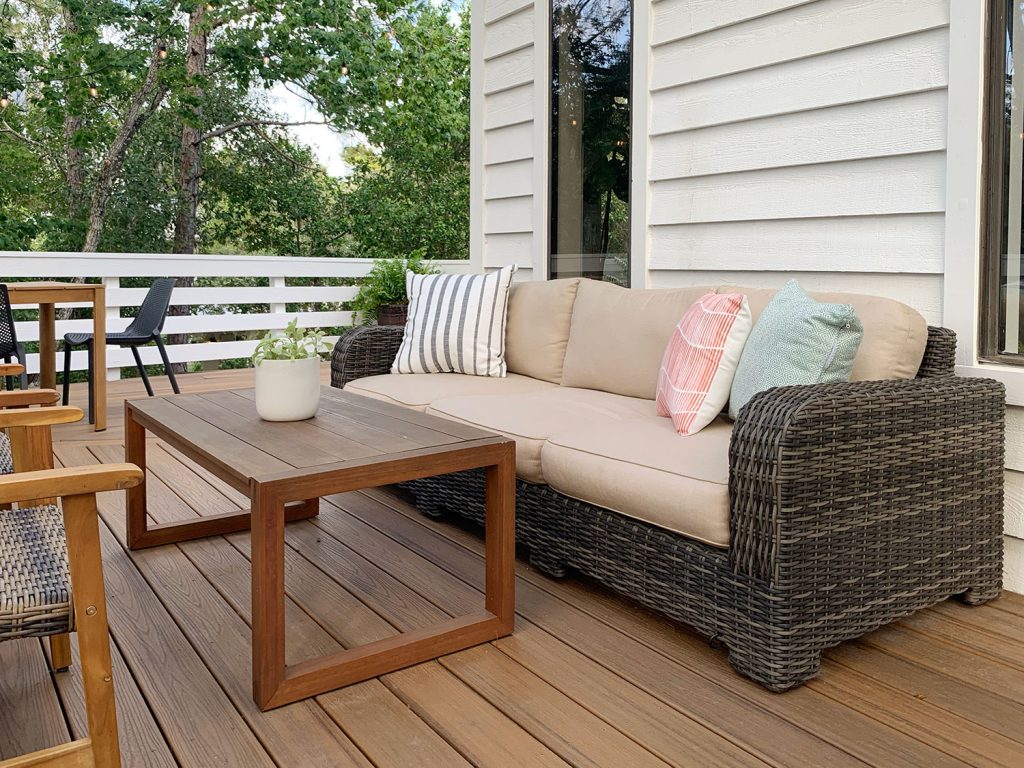
… so part of our low-maintenance, easy-to-use mission involved finding a way to keep the cushions dry so they could be used, in the words of Shakira, whenever and wherever. So we devised a somewhat unusual but very simple solution:
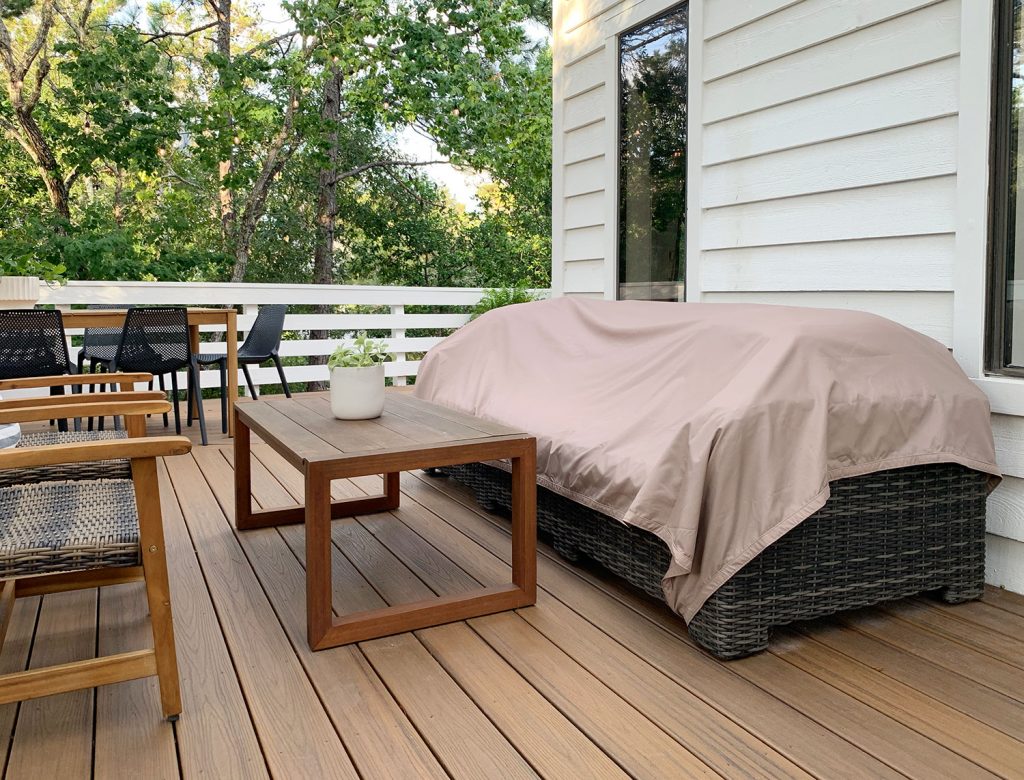
I have a love/hate relationship with furniture covers. They do their job, but they’re often so bulky that they’re cumbersome to take on & off, their folds can collect water, any excess fabric on the ground can get grimy, plus you have to find a spot to stash them when they’re not in use. So I was determined to find a cover that was lower-profile and easier to wrangle for this outdoor sofa. The eventual answer? This $35 waterproof sun sail shade.
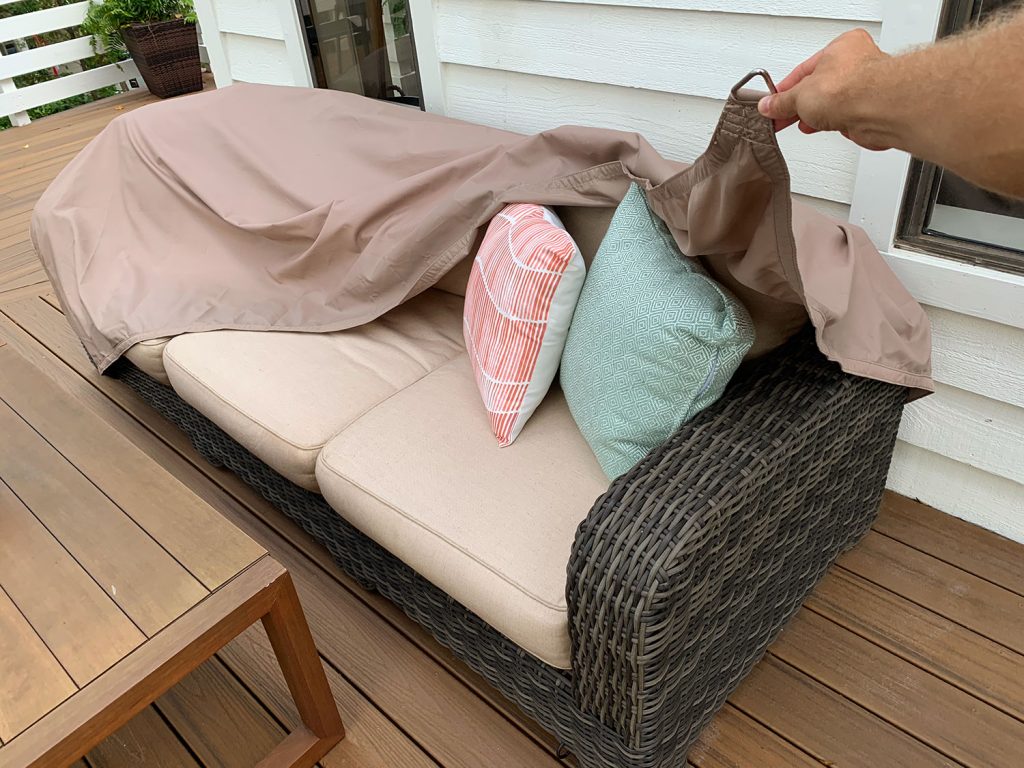
It’s one of those fabric shades meant to be stretched over a deck or porch to offer some shade to the area below. But it was listed as 100% waterproof and available in a size that was perfectly suited to cover the cushions without a lot of excess fabric in the way (this is the key). It means that it’s quick & easy to pull on and off, and when it’s off we can stuff it behind the couch, completely out of sight. In fact it’s back there in all of the after photos in this post – and even the video.
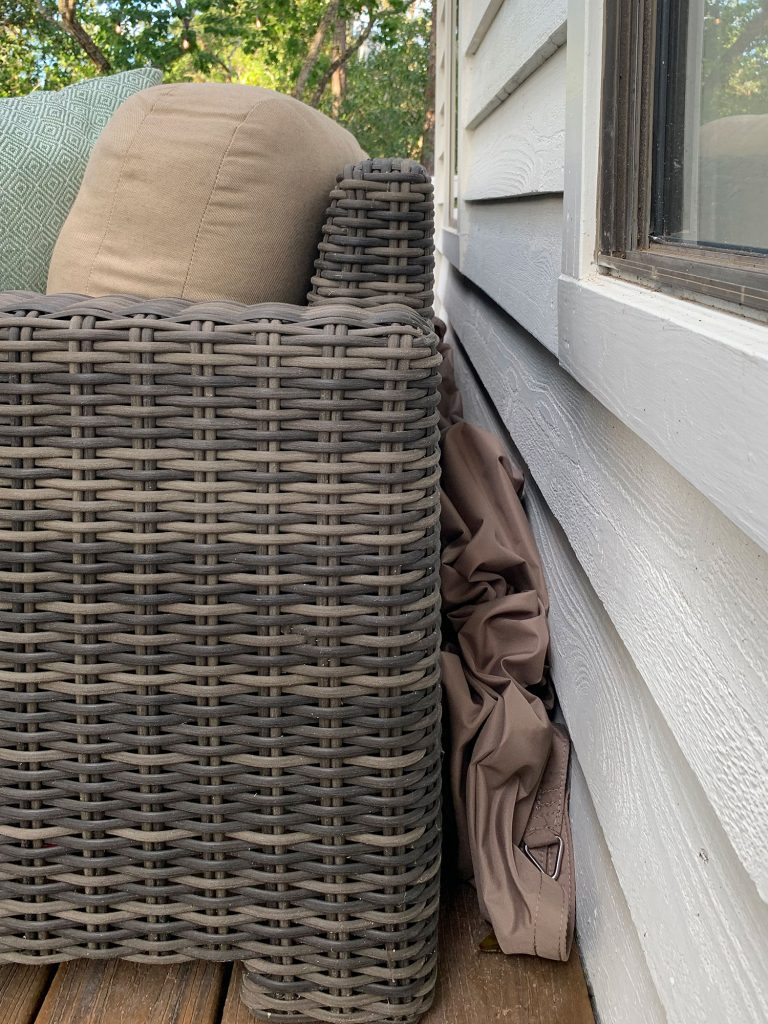
To keep it in place we just ran two short bungee cords under each end of the couch, with each end hooking onto one of the metal rings sewn onto the corners of the shade.
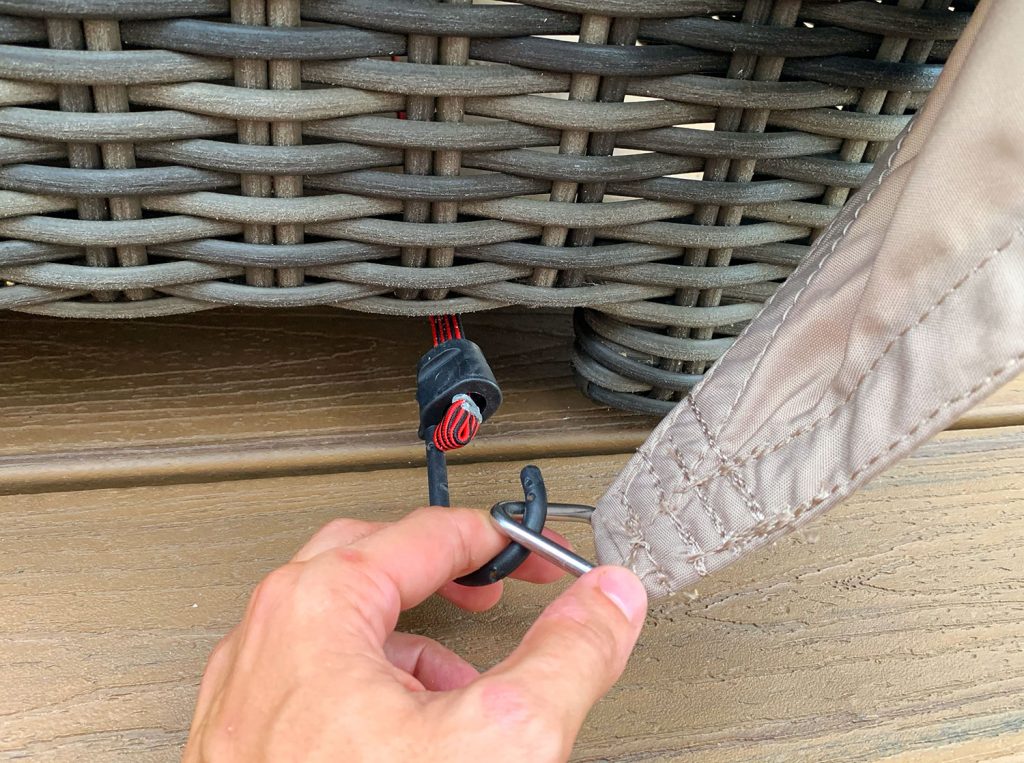
If you look closely at some of the pictures you can see how we keep the bungee hooked on the bottom of the couch when the cover is off, just so we don’t lose the bungee under the couch. Not that it’s hard to retrieve if it slides under, but this just makes it super quick to pull the shade back over when we’re done relaxing and hook it back in place.
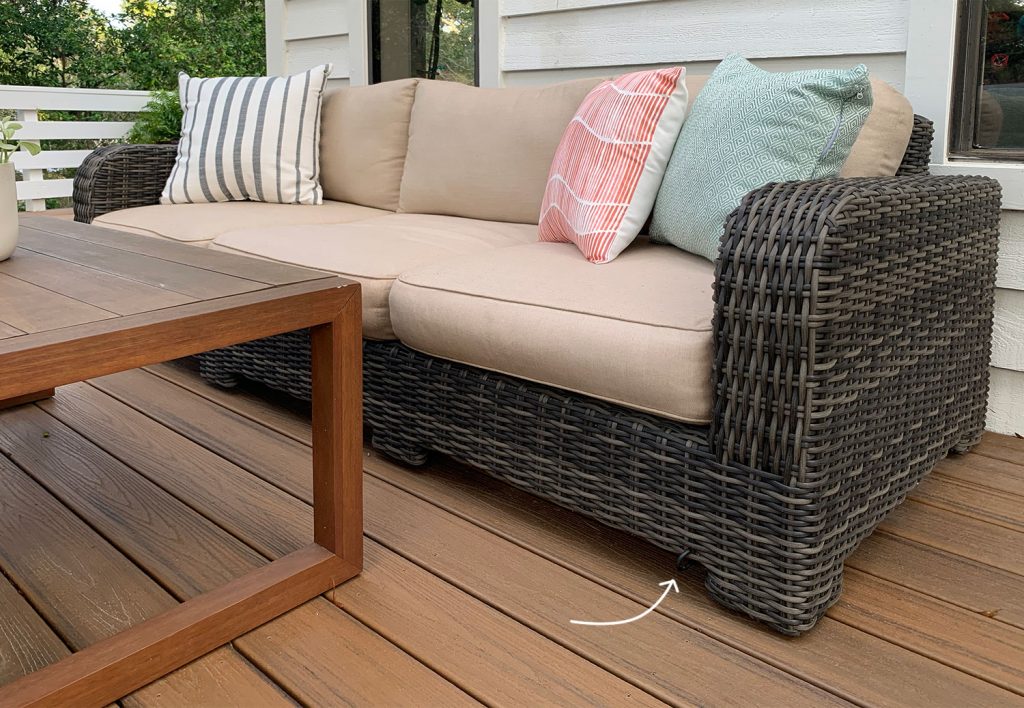
That’s probably more than you cared to know about how we keep our cushions dry (but it has felt a little bit life-changing, so I’m very proud that we figured out something simple that actually works & that we can keep up with). Ok, but on to the other items that complete this conversation area.
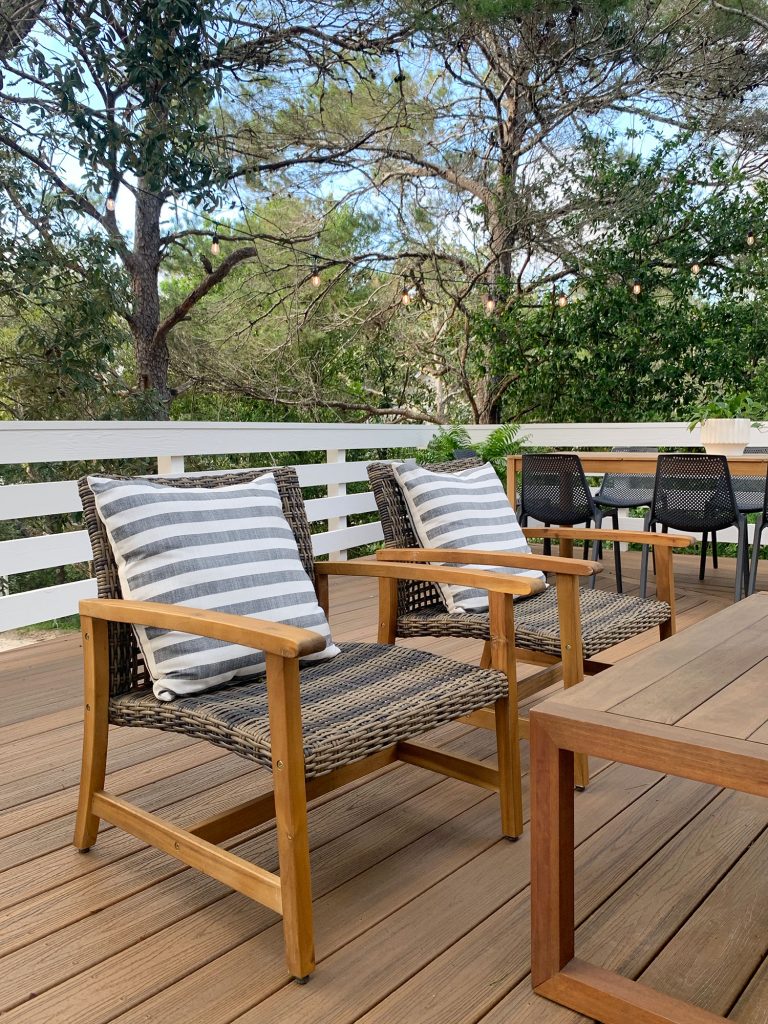
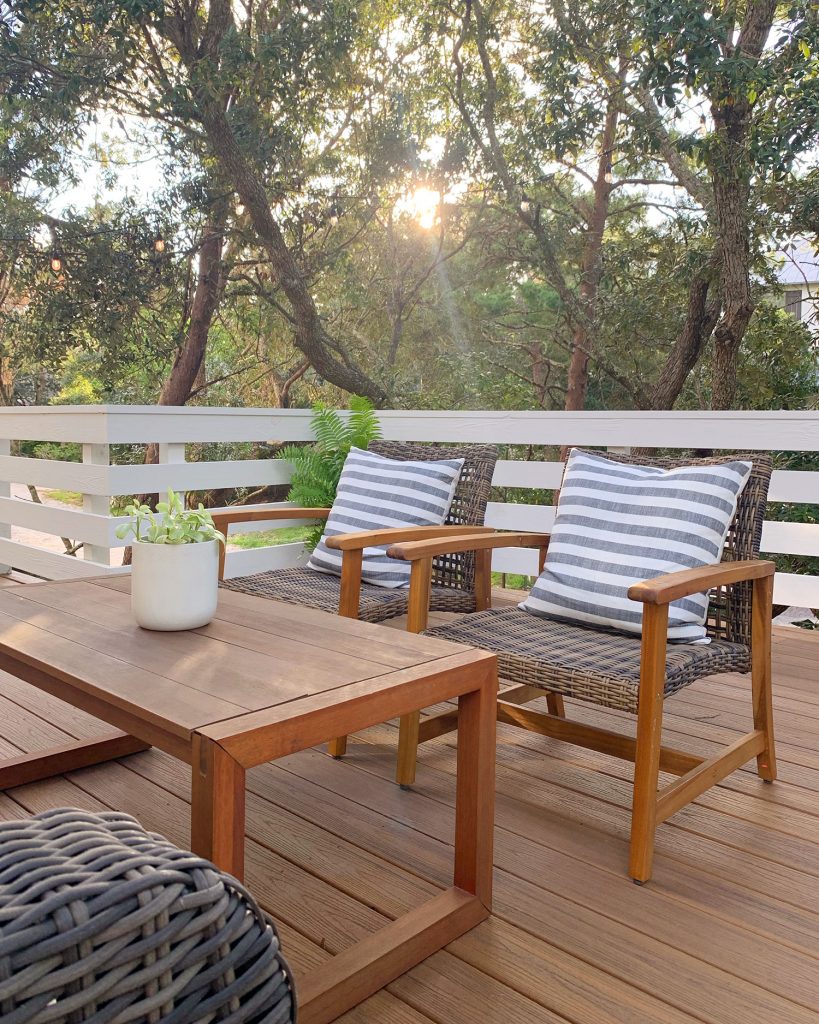
Originally we just had the couch, but we knew we wanted to create an outdoor seating area of sorts, so we purchased this outdoor coffee table and these wood & wicker chairs that are made by a completely different company, but luckily mimic the weaving pattern of the couch.

They’re SUPER comfy (I sized all of these photos while sitting in one before moving over to the dining table to type this up) but they’re quite deep, so we picked up two of these large 22″ outdoor pillows to fill out the back. The pillows don’t retain water (there’s something about our sofa cushions that are more dense, but these are lighter and they dry so fast). Our plan had been to toss them under the sofa cover if they stayed wet, but even easier, they can just stay out because they’re fast-drying little pillow prodigies.
Beyond this seating area is our outdoor dining/game space, which we talked a little bit about on our podcast. Our old wood table virtually disintegrated in our hands as we tried to load it into our POD while moving (some of the leg connections had rotted through completely so it came apart in our hands when we tried to lift it). We decided to learn from our mistake and purchase this faux-wood table that’s actually aluminum (it’s currently sold out but hopefully will come back into stock sometime).
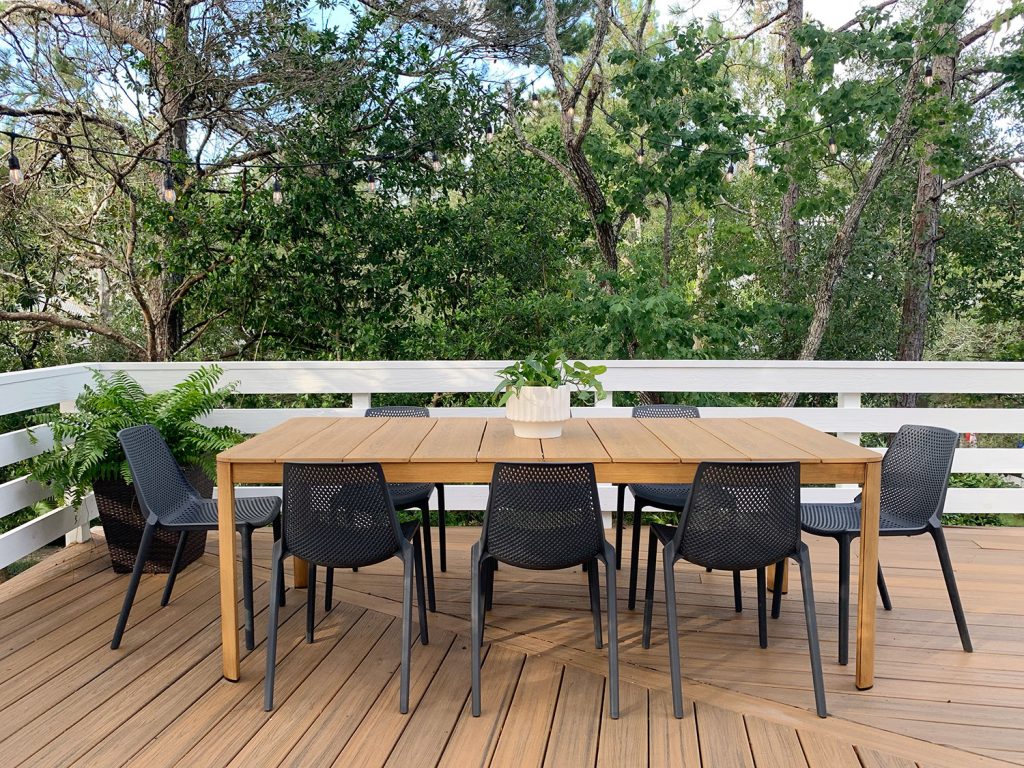
By opting for aluminum, not only won’t we have to worry about rot, but so far it has actually been very easy to keep clean – and since it stays shaded most of the day, we haven’t had any issues with it being too hot, even in the peak summer months.
And having learned our lesson from our old moisture-loving cushioned chairs, we chose these black molded chairs that not only aren’t cushioned, but actually have tons of little holes to keep them well drained and ready to sit on. We got two sets of four, so that once we can have people over again, we can host some fun meals with friends & family as well as some game nights up here.
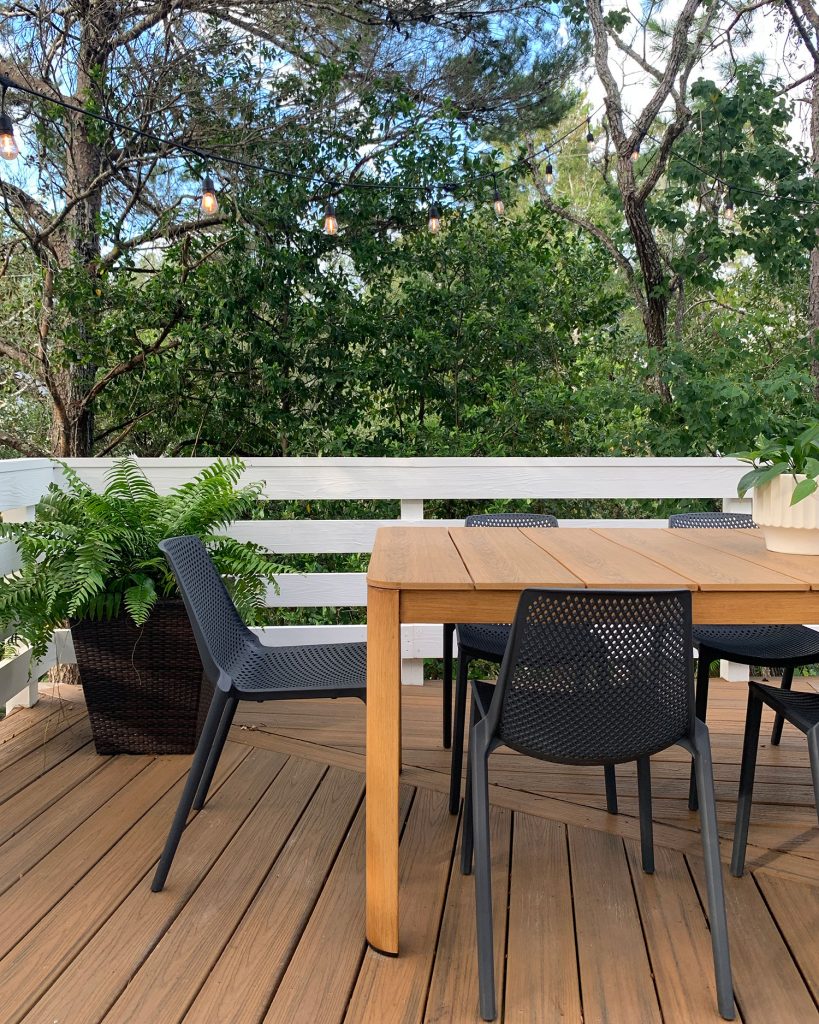
We’re happy to report that this table has probably gotten more use in the last 3 months than our last one got over the last 3 years. We’re by no means eating every meal up here (the kitchen table gets a ton of use too) but it gets so shady and nice up here in the late afternoon that it has become a taco night tradition to eat up here, and as well as being a favorite “work desk” for Sherry & I with a laptop – and it has also become our favorite family game spot in the evenings.
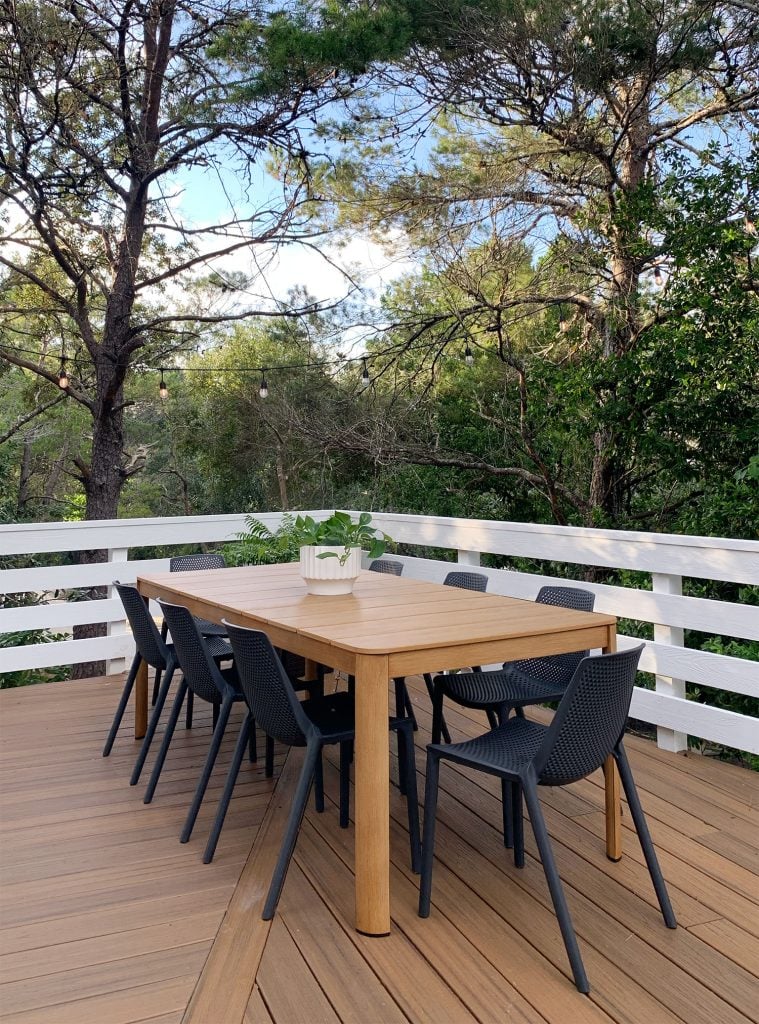
Now that you’ve seen the lounge and dining areas, let’s talk about that placeholder TBD spot I hinted at. Because even with these two spaces taking up a big part of this deck’s footprint, we still had a sizable empty space next to the couch. We debated several uses (a hammock? a potted garden?) but we didn’t want to spend money to fill the space just to fill it (you know, instead of being sure about what function we wanted from it before reaching into our wallets). So you may be asking what those extra black and white chairs are doing there in the photo below…
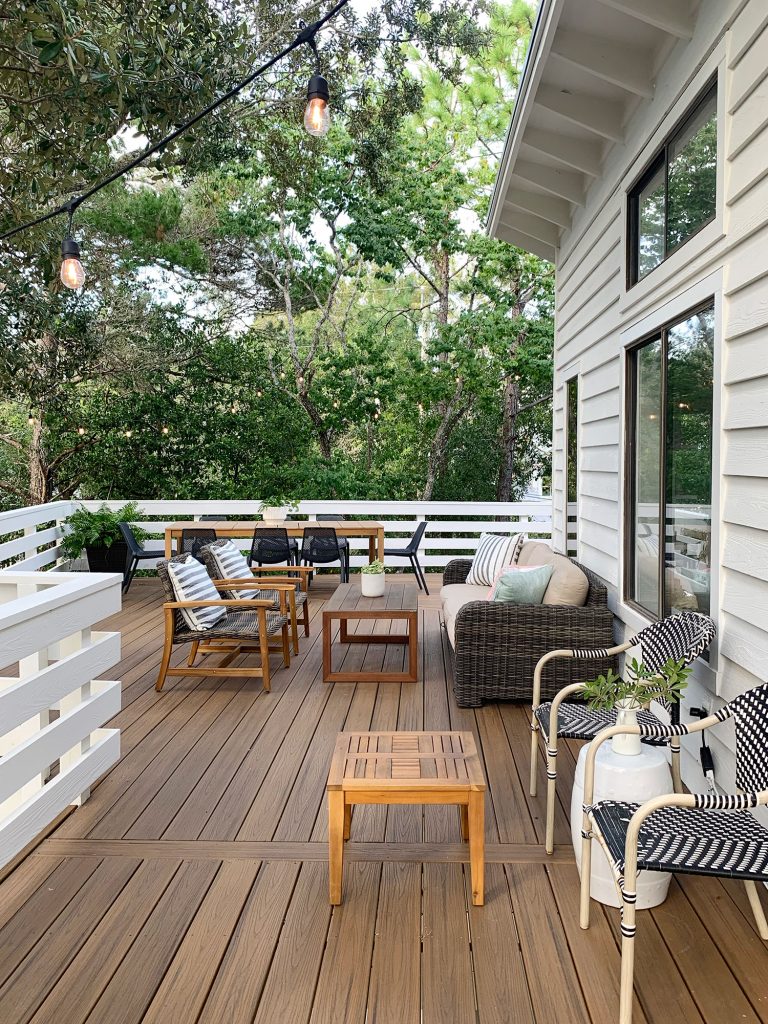
Well, that’s where the whole “trash” thing comes into play. Sherry literally plucked these chairs out of someone’s trash pile on the curb (can you tell we’re the classy neighbors?). While I’ve been beating the “let’s not waste money on stuff we won’t use” drum, Sherry has been eager to do something and essentially argued that they were zero dollars and she did all the heavy lifting herself to get them home. So this is our compromise for now.
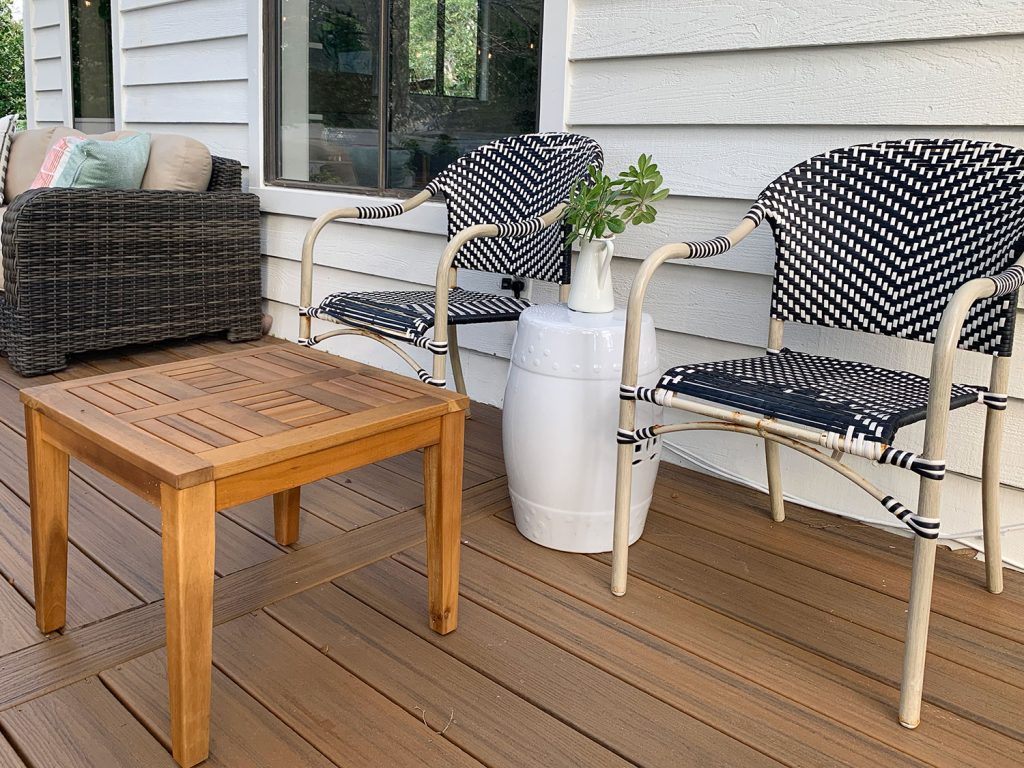
We spent nothing for this bonus little area (that wood side table came with the outdoor armchairs, and we already owned the drum stool). And while both of us agree we definitely don’t need another seating area up here, it’s helping us start to visualize what (if anything) we’d eventually like to buy for this spot. Weirdly enough we’re both leaning towards some sort of cushionless double lounge chair for laying down and reading or napping outside.
But for now, just having something here makes our itch to fill it less urgent, giving us more time to be sure that’s really what we’ll find most useful. Plus maybe these chairs will find a spot down by the eventual pool that we’re going to add, so who knows (some of the caning needs to be repaired, but my crafty wife thinks she might be able to fix them).
The last thing I want to tell you about this outdoor space of ours is that the string lights make the entire space 97% more charming (they’re actually the first thing we bought for the deck).
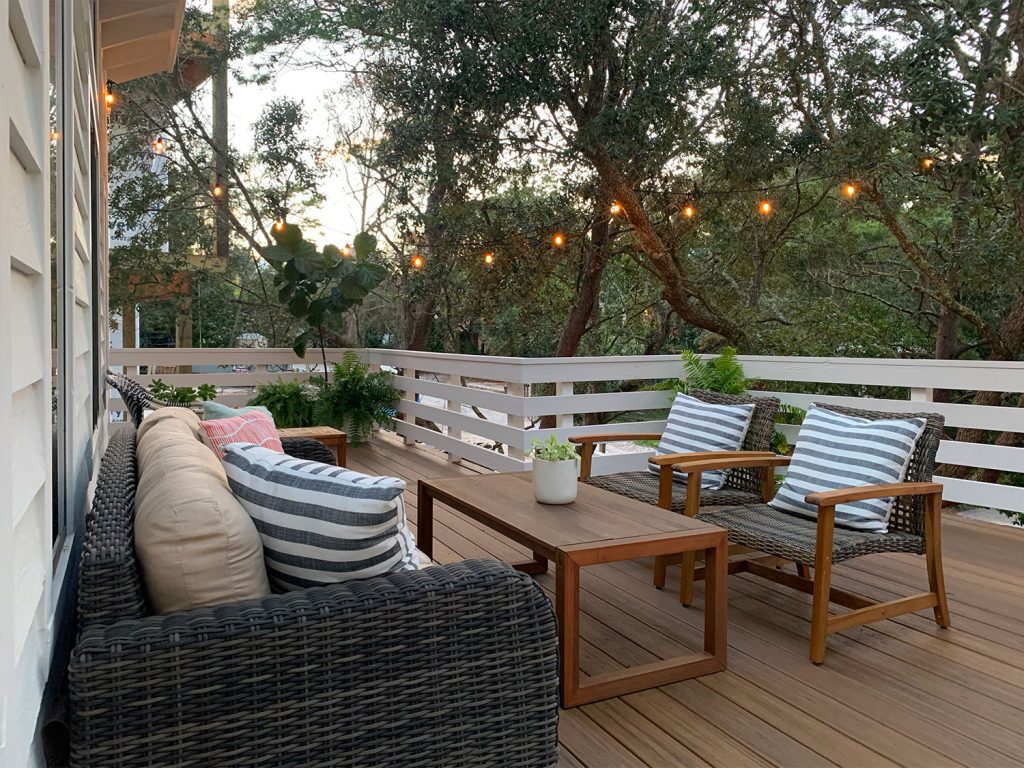
The photos do nothing to demonstrate this phenomenon, so scroll back and watch the video to see what I mean. The awesome thing about this second story deck is that, because it’s a full story above the ground and is surrounded by the trees, it feels like this magical pocket away from the street below us (even the mosquitoes seem to not want to fly up that high to bug us). And the perimeter of lights only adds to that nestled feeling.
We used a total of three 50-foot strands of lights. We originally hung them zig-zagging back and forth from the house to the trees (just looped behind branches) but our first thunderstorm taught us that trees sway and, well, houses don’t. The lights didn’t break, but they popped out of a lot of their hooks, so we rethought our approach.
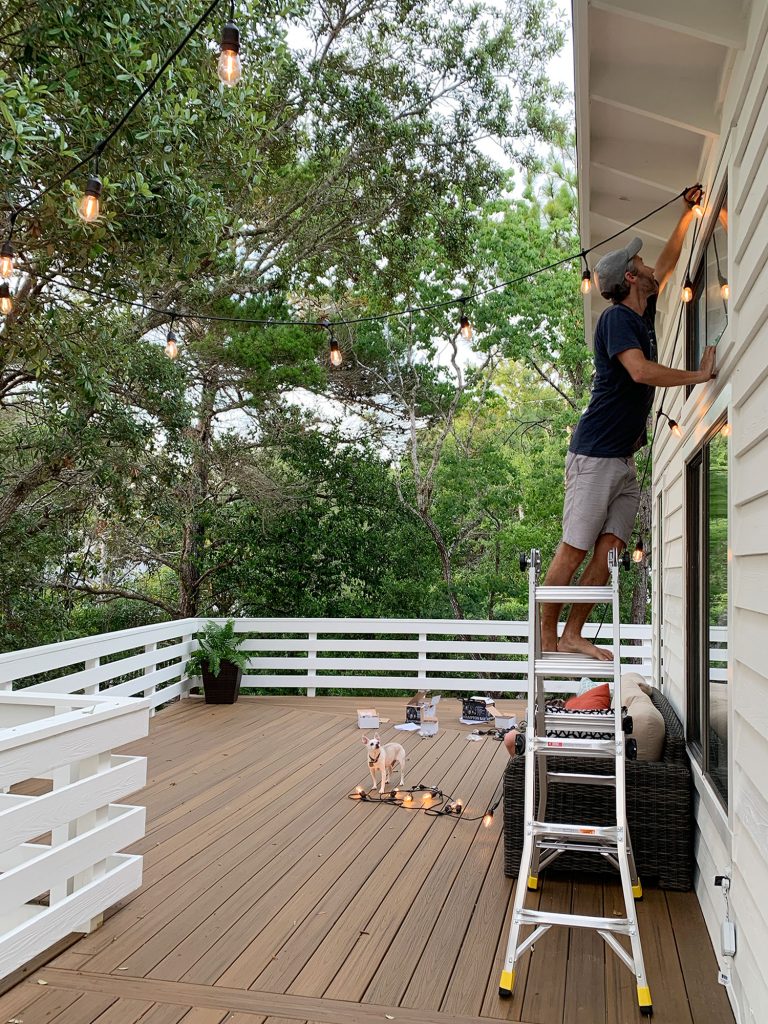
Our revised plan has worked well for the last few months – and it was just to keep the lights entirely looped around the trees (they all sway together, so that seems to be a smart update). I used a very sophisticated cup-hook-screwed-to-the-end-of-an-8ft-board device to weave the lights throughout the trees while standing safely on the deck, and we have a smart outdoor plug to operate them on an automatic schedule every night (this outdoor timer is a low tech way to accomplish something similar, which is what we used for the string lights at the duplex).
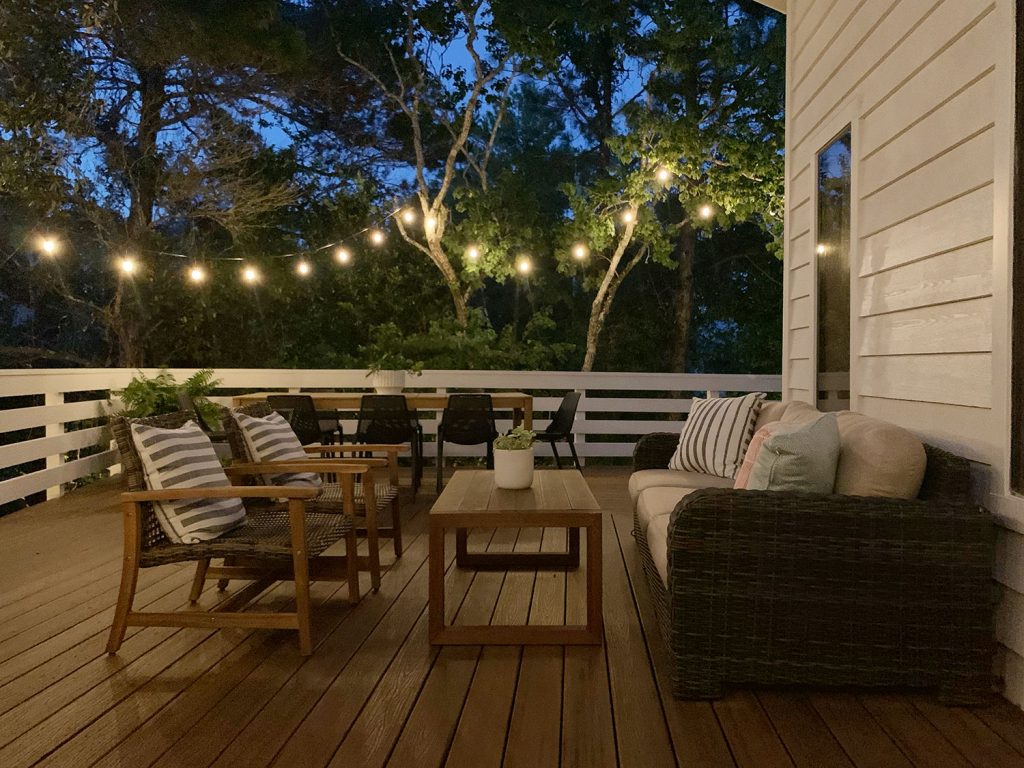
I wish pictures could capture how peaceful it is up here, especially when we get to catch glimpses of the pink sunset skies through the trees.
If all these pictures of this outdoor space are making you curious about the other outdoor zones that we have here, you can get some info on our front porch (and the space that we call our side porch, which leads to our outdoor shower) in our original exterior before & after post. And here’s a look at how we refreshed the outdoor shower itself. All three of those areas have seen some good progress over the last couple of months (mostly in the name of more plants – but also with things like paint & address numbers and stuff) so we’ll have to get some updated photos of those on the blog.
In the meantime, we’ve been waiting for the arrival of an item that has been back-ordered which will hopefully be coming next month for the side porch (which involves a little hanging daybed that we’re planning to build) so cross your fingers, because ever since Sherry laid eyes on this hanging daybed in Costa Rica we’ve dreamed of having one of our own.
P.S. You can see all of our Florida house progress right here. From the 1,400 square feet that we have inside, to our outdoor progress (and the planning/reno that we did from afar) you can get all caught up pretty quickly.
*This post contains affiliate links, so we may earn a small commission when you make a purchase through links on our site at no additional cost to you.
