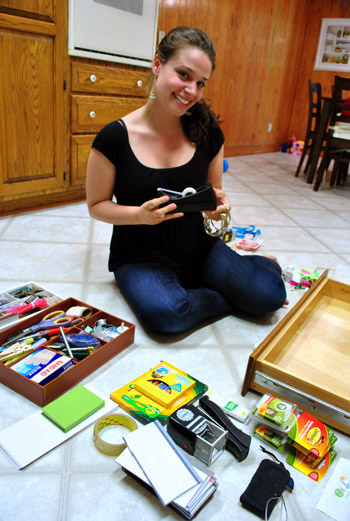
Sherry’s junk drawer switcheroo was actually just the beginning… the beginning of our kitchen makeover. At least the first phase of it.
With our self-imposed six month waiting period running out earlier this month, we finally started putting some plans into action last week (we like to force ourselves to live with things for a while before doing anything drastic – you know, so we’re sure to remove/demo/open the right things after some thought). The plan: to do sort of a “Phase 1” kitchen makeover where we work with as much of the existing kitchen as possible first (aka, keep the cabinets, the countertops, the vinyl floor, the paneling, the beams, etc). Then down the road we’ll enter “Phase 2” (where we do a more invasive reno after saving our pennies and really thinking about what we want/need and what we can keep/work with). But for now we’re happy to ride the Phase 1 wave (and see where it goes and how much our “refreshed” kitchen will meet our needs before jumping the gun on Phase 2 down the line).
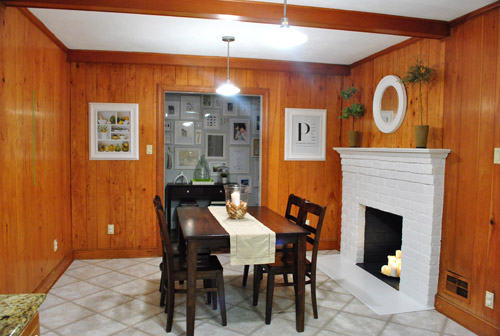
Here’s a taken-recently shot of the kitchen as it looks now for reference.
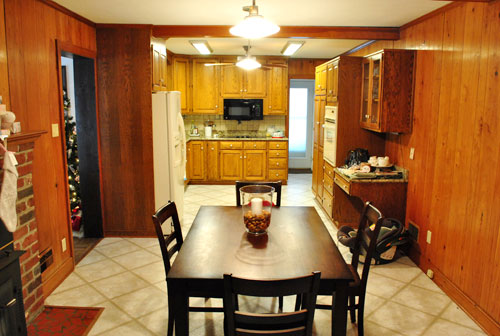
And here’s a taken-a-long-time ago shot from the other direction (see the stockings and the tree?) to refresh your memory. Apparently we don’t take many photos of the room from that direction, so this one is the most recent:
And now here’s the Phase 1 breakdown. Even this first phase has a lot of steps to it, so it won’t necessarily be a quick task (we plan to tackle it on and off as we have the funds/energy). But here’s a quick rundown of what we want to eventually accomplish (not necessarily in this order):
Remove woodstove insert from fireplace<– done herePrime and paint fireplace<– done here- Remove the desk area to the right of the oven to make room for a nice wide doorway into the dining room (we’ll be adding an island so a desk is redundant)
- Prime and paint all that dark paneling
- Open the aforementioned double-wide doorway between the kitchen & dining room (which will line up with the big dining room window for balance – so it looks like it has always been there) <– we’ll need a pro and a permit for this
- Swap the too-low-hanging microwave over the cooktop for a proper hood (the current microwave isn’t to code and causes steam to go everywhere but into the vent)
- Replace the wall oven with a wall oven/microwave combo
- Prime and paint the cabinets
- Completely redo the backsplash
- Overhaul and update the lighting (buh-bye florescent lights)
- Add an island full of storage and seating space where the current kitchen table resides (since the wide doorway to the dining room will make large gatherings at our big round table in there nice and convenient)
So as you may have guessed, Sherry’s junk drawer shenanigans were all in preparation for removing that desk area and the cabinet above it. Why? Because our future mega-doorway will slice right through it otherwise.
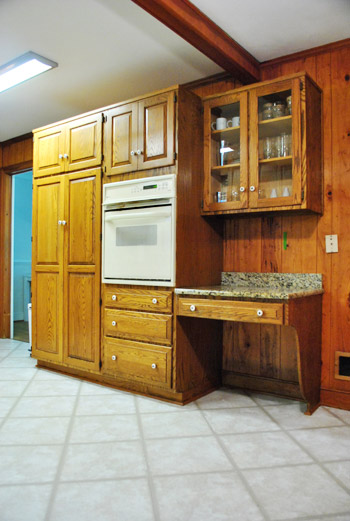
Can you see below where we’ve begun to tape off the future opening with green painter’s tape? We actually have had those pieces of tape up for months- just to live with them and see if we like that placement. And after 60+ days of consideration we’ve come to the conclusion that it’s the perfect location for the doorway, since it’ll open up the kitchen to the dining room while mirroring the width of the front window in the dining room on the other side for some nice balance. We don’t mind losing that one upper cabinet and desk area for the sake of a nice open kitchen and dining room along with a much larger island full of storage (and desk-ish usage if the mood strikes).
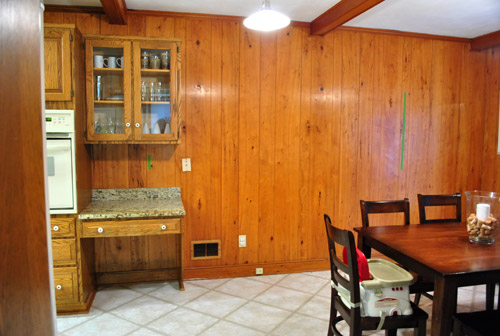
Obviously we could have worked around this cabinet if we wanted to, but so far that desk has only served as a junk magnet (kind of like the kitchen table that we’re desperately trying to keep clear). And we’re not short on upper cabinet storage at the moment so there’s lots of room for stuff to relocate (and you already saw that we had a few empty bottom drawers to put to use here):
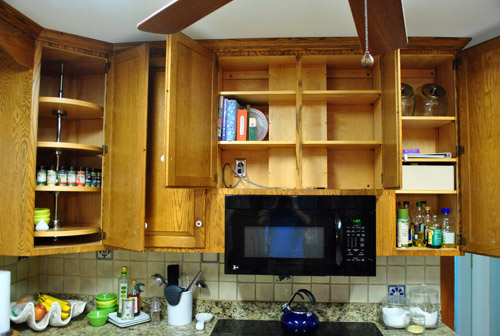
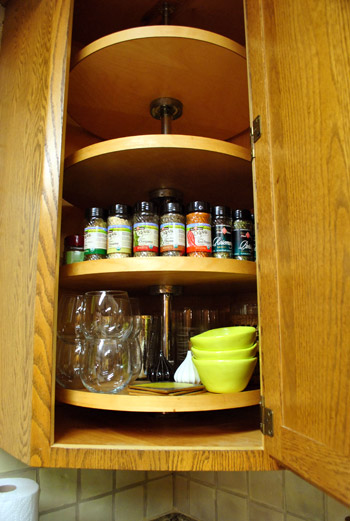
In fact, we had no problem transplanting all of the things in that glass upper cabinet (full of obedient items according to the wife) into our mostly bare lazy susan’d cabinet. Here they are all packed into the bottom tier (with upper space to spare):
Not to mention that once we add a nice big island we’ll have tons more when it comes to stash space in this room. So with the junk drawer and upper cabinet all clear, we were ready for this little slice of our kitchen to come down. Like yesterday.
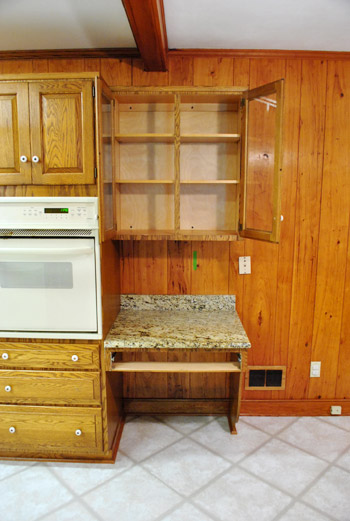
The upper cabinet was a cinch. First we removed the doors so there was no shattering of glass or slicing of body parts in the process. We’d like to find a use for these (we love a glass-fronted cabinet) – though they unfortunately don’t fit any of our other kitchen cabinets for a quick switch. Boo. Might rehang the whole thing in another room though. We’ll keep you posted.
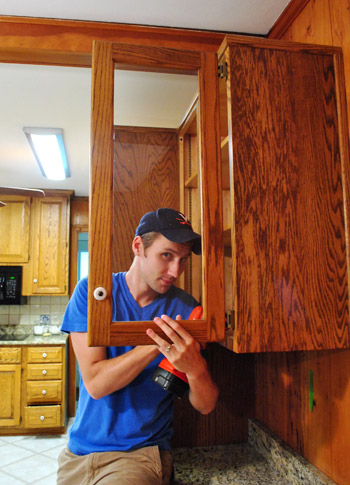
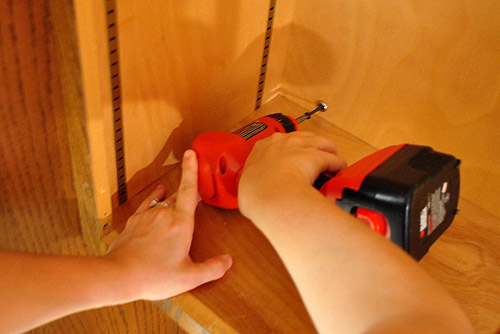
Then I supported the weight of the cabinet while Sherry unscrewed it from the wall and the cabinet next to it.
And just like that, the cabinet came down in one remarkably light piece. I was so unphased by the task that I even broke out my smirky Vana White impression. Look at that creepy lopsided half-grin. It reminds me of a face that Mystery (aka: The Pick Up Artist) would make. Anyone remember that show?
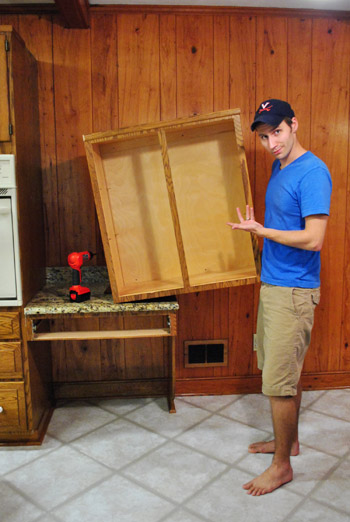
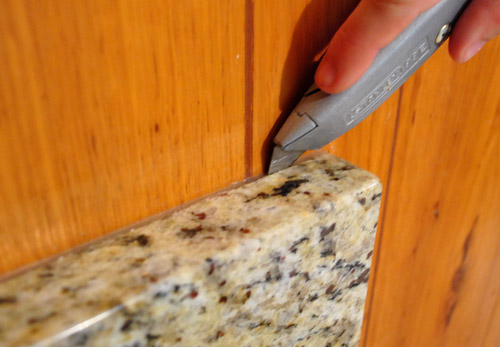
So the top cabinet was a cinch. But the little desk area below was a slightly different story. Sherry approached it the same way that she removed the granite backsplash from our bathroom (seen here). First she used a razor to slice through the silicone caulk holding it in place.
The backsplash part came off pretty easily (with a little prying with a screwdriver and a hammer used chisel-style to get behind it).
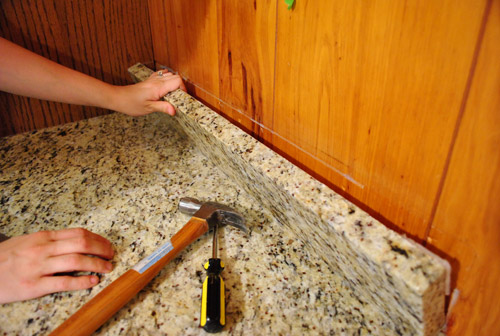
Then Sherry sliced the clear caulk holding the counter to the wall as well as to the other cabinet and the drawer below it – assuming it would just lift right off.
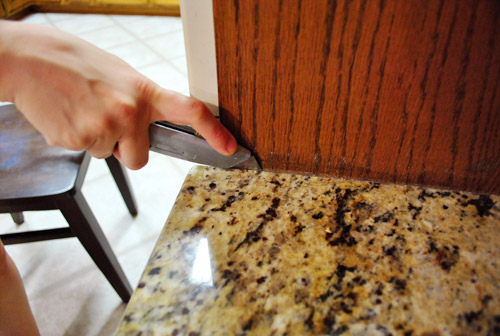
No dice. We tugged and shimmied that sucker with all of our might. We sliced the caulk again and again. We shimmied a few more times (just for good measure). And finally, in one strong tug, the whole thing (granite and drawer) tipped over onto the floor – nearly pulling us down with it as we struggled to keep it from slamming to the ground. Man, granite is HEAVY. This is my tired face. Note: Wear shoes when demo-ing. Barefoot = stupid and not recommended. Shame on us.
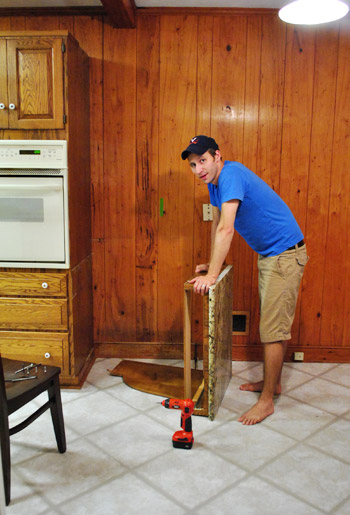
But at least everything was gone (and we still had all of our toes). There was some residual damage left in its wake – like some missing trim and some glue on the remaining cabinet. Both are semi straightforward fixes (we just have to scrape off the glue, use wood putty to fill holes, sand and stain things to match, and add back the missing trim up top).
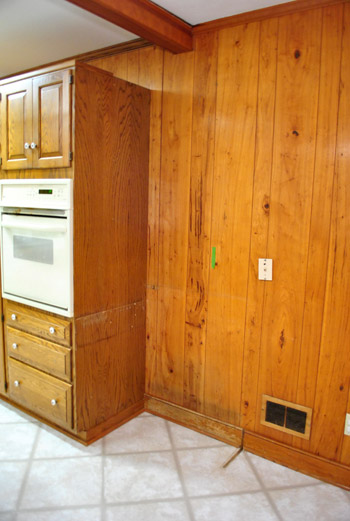
Since we eventually plan to paint the cabinets we may not even bother with all the sanding and staining, but we’ll definitely tend to the trim.
The most notable “damage” was the hole in the floor where the leg support once sat. We had hoped that the flooring went under the desk’s leg, but nope:
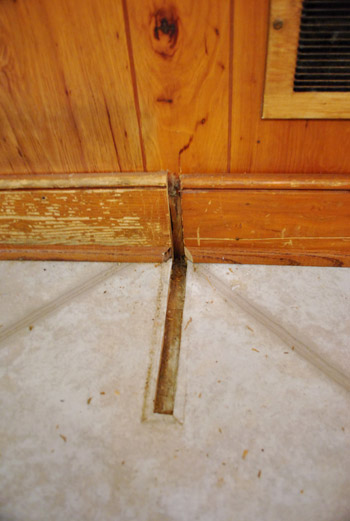
Lucky for us, the previous owners had left some spare vinyl floor tiles behind. So all I had to do was scrape up this old damaged tile (which was VERY thick, by the way)…
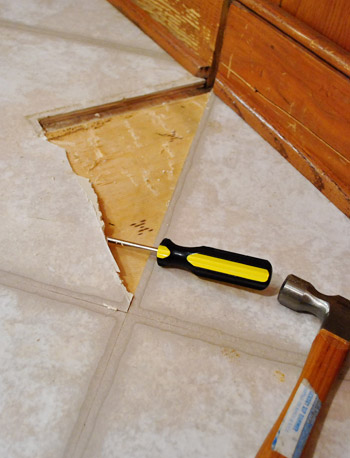
… to reveal something very interesting indeed: original hardwood flooring (wahoooooooo! picture me doing flips and cartwheels and clicking my heels in the air) underneath a thick layer of plywood. Perhaps I should add “restore old hardwood floors” to our kitchen to do list? Nah… that’s more of a Phase 2 project since it’ll necessitate removing all the lower cabinets and appliances which sit on top of the vinyl and plywood layers. Plus we’re not certain it runs all the way through the kitchen (this part of the room used to be a family room, so it stands to reason that there’s not any hardwood under the main part of the kitchen – I guess time will tell).
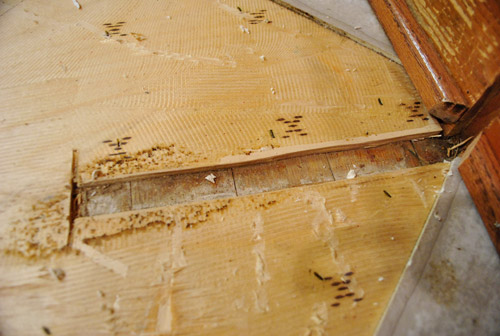
But back to the floor tile replacement task at hand. After I removed that tile and went crazy over the hardwoods, I just measured how much of the tip I needed to cut off of my replacement tile, and then used a razor to make my cut:
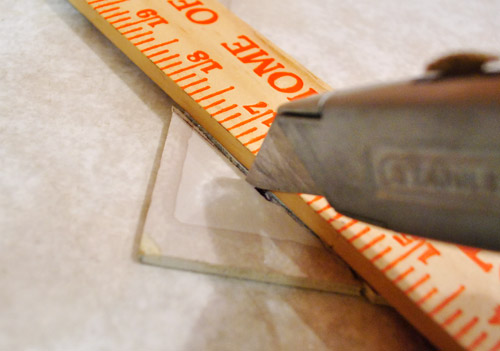
This isn’t the type of vinyl tile with a peel-n-stick base, so I just relied on the leftover glue residue on the plywood below (of which there was plenty) and slid the new tile into place.
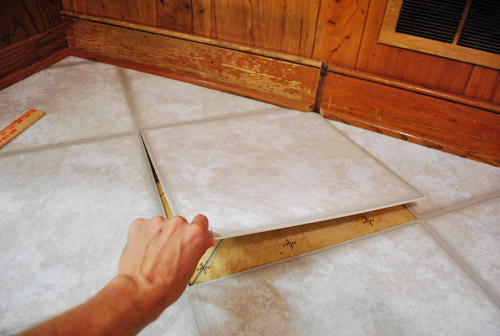
Then we sat Clara’s carset on that tile for a while to hold it down while the glue took hold. Now it’s nice and secure. And it looks like new, right?
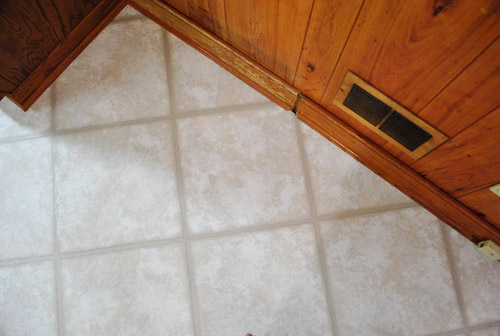
Well, except for that gap in the molding. But luckily I was able to reuse a perfectly sized piece of quarter round (that had been nailed to the front of the desk) and Sherry broke out her mad spackling skills to bridge the gap in the baseboard (along with some other cracks and holes in the paneling).
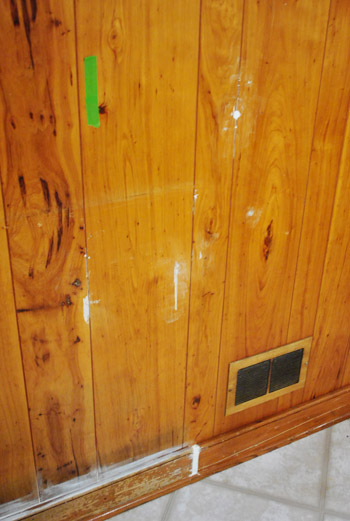
Of course, had this part of the baseboard not been on the “to be removed” area of the wall (our doorway to the dining room will be right here), we probably would’ve gone the more professional route (buying some baseboard, cutting it to fit, and nailing it in instead of caulking the gap). But this works for now since it’ll all be gone-zo when we open up the doorway to the dining room anyway.
And now that we’ve got this cabinet gone and those ugly caulk spots all over the wall, I guess that means it’s time to prime and paint (we learned that opening up the wall calls for a permit – which might take a while – so we’re happy to brighten up that dark paneling in the meantime). Sayonara dark paneling. But more on that later… well, sooner rather than later if all goes well. In fact, we’re probably priming as you read this.

Tara DeWeese says
Looking good guys! I just wanted to share something I heard about the other day… a way to make paneling not look like paneling. You may already know this, but apparently you can spackle the grooves in paneling before painting, and you’d never be able to tell it was ever paneling in the first place. Just thought I’d share. Can’t wait to see the finished product!
YoungHouseLove says
Oh yeah we have heard of lots of folks who do that. We personally love the look of painted paneling (to us it’s like painted brick- and the grooves just add texture and interest). But it’s a great option for those who hate those vertical lines!
xo,
s
Myrna says
I noticed a heat vent in the place where the doorway will be cut. How will you handle that?
YoungHouseLove says
We’ll share those details as we go (we’ll be bringing in a pro since it’s a load bearing wall and we need a permit and all that jazz). At our last house we just removed a vent in the wrong spot from down in the crawl space (since opening the wall helped with circulation, no part of the house was too cold or warm without that one vent thanks to the added air flow).
xo,
s
kimmie says
Haha, I totally loved your reference to Mystery from The Pickup Artist. That show was HILARIOUS!!
You guys are seriously so inspirational. Can’t wait to see how the kitchen turns out afterwards!
kimb says
I don’t know if you have seen this, but here it is just in case you wan’t to make your on chair covers.
http://hammersandhighheels.blogspot.com/2010/10/diy-chair-covers-simple-step-by-step-to.html
Also I just slip covered my couch and I used canvas painting drop cloths way cheeper then material and it dyes well. Just a little fyi.
YoungHouseLove says
Love it!!
xo,
s
Ivana Marjanovic says
The thing I like the best about this plan is that it will give so much natural light to your kitchen :).
YoungHouseLove says
Wahooo! We can’t wait!!! We want to take photos of the room at the same time of day and camera setting before and after we open the wall. We think it’ll be insanely brighter after the wall comes down!
xo,
s
Kay Gervais says
Oooh, so glad you’re getting to the kitchen. I’ve been in my mid-60s ranch for 3 years (with the same dark, orangy paneled walls in the kitchen-dining area), and I can’t commit to a plan for the ugliest room in the house. I’m counting on you for inspiration (aka ideas to steal).
Mary says
We had a small corner desk in our kitchen topped with granite that was shaped like an upside down L with the with the lower L part being very narrow. Not very functional. So when we did a recent kitchen mini-remodel we had the narrow L cut off and put the granite back in the same space with a ‘regular’ base cabinet underneath.
How about using the cabinet as a small wet bar topped with the granite?
YoungHouseLove says
Unfortunately we’re certain we want the doorway to go right through the area where the cabinet was- but we’re going to hold onto the granite and the cabinets for a bit to see if we have a spot for using them somewhere else. We love working with what we have!
xo,
s
OnMon says
Wow! I’ve been waiting for the doorway widening magic for a while – can’t wait to see what happens! Also, “new” hardwood floors are VERY exciting! Though that brings me to another point: I hate to be nitpicky but you guys have been guilty of saying “linoleum” instead of “vinyl” a few times in this and other posts…linoleum does actually have some earth-friendly cred (since it’s made from flaxseed) and some different design options from vinyl (since it’s got those natural patterns instead of just the imprint of the vinyl design). It’s still debatable whether it’s more earth-friendly than say, cork, since I believe it does offgas. But my understanding is that linoleum production is at least slightly less evil than vinyl (totally non-renewable and polluting) – so it shouldn’t be so maligned as a material. Give credit where credit’s due!
YoungHouseLove says
Oh yeah- it’s totally vinyl. Sorry for the slip. All fixed.
xo,
s
Kelley says
Question?
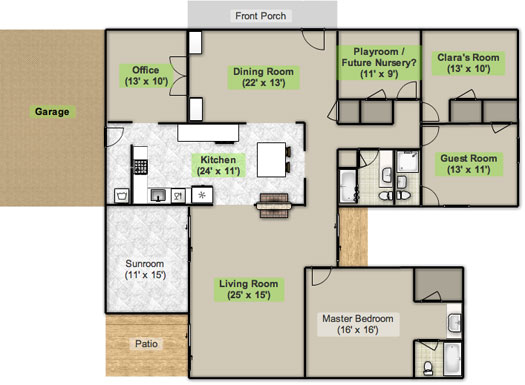
Are you all moving Clara’s room in the future? I noticed in the floor plan that what I thought was the current drop all room was labeled as Clara’s room. I’m so nosy, I’m curious.
YoungHouseLove says
Yeah we made that floor plan a while back (before we moved and decided to put her in the smallest room so the bigger one could be her big girl room someday (and allegedly a playroom before then). We should update that floor plan. Someday…
xo,
s
Amy says
Hey guys, just wanted to wish you loads of fun and luck with your painting of the panneling.
For our first wedding anniversary, (7.5 yrs ago) we did the same thing and ended up doing a color called bone white (which was a soft taupe) and then white trim.
We loved it. Can’t wait to see the progress. Makes me want to do more in my house. But alas, I am 36 wks prego with out 3rd boy and a wee bit tired.
Love your blog :)
Charlotte says
I’m so excited that you two are starting your kitchen makeover! I too am planning a surface remodel of our kitchen (paint, tile and maybe counter tops) and can’t wait to see what sort of tips and inspiration that you guys offer :)
Sarah says
Yay!! So excited to read that you’ll be adding an island, as we are moving into a new house in July and the FIRST thing on my list is a kitchen island huge enough for us and our 4 kids to eat around/hang out at!! So please don’t keep us waiting too long to tackle that one so we can copy your ideas!;) do you know if you’ll be making it yourself?
YoungHouseLove says
We have no idea yet! We’ll probably either top something readymade (like a giant filing cabinet or buffet) with a new counter or build something from traditional cabinetry. Or something else that we havent thought of yet. Haha. We just try to take it one project at a time around here. But when we get there we’ll share every last detail!
xo,
s
Rosemary says
Scanned through the messages and didn’t see this, but can you close the door to the office from the kitchen? That would give you more counter space in the kitchen. Do you really need 2 doors to the office?
YoungHouseLove says
We generally love an open floor plan, so the more flow the better. We actually use the doorway from the kitchen to the office most (and have lots of spare cabinets already, not to mention the storage we’ll gain from the island) but thanks for the idea!
xo,
s
Christine B says
Yay for the desk area being gone. I think those are so pointless in kitchens. Can’t wait to see the rest!
for2mform.wordpress.com
Alicia says
Hi, I have commented several times on your blog, but I love it. My husband and I bought our home from his grandfather and he is a frequent visitor…he lives 3 houses away with his girlfriend. I’m struggling to feel like our house is our own rather than just where we live. I was wondering how you guys make your lists of things to do to transform your house into your own…any advice would be super helpful…thank you and keep up the awesome work!
YoungHouseLove says
We have one always-growing masterlist and we just tackle whatever we’re in the mood for (and have the money for). Keeping it loose and hopping from room to room keeps it from getting too overwhelming. And not having too much pressure or structure keeps it fun. We just take things one project at a time. Good luck with your place!
xo,
s
Anne says
I can’t wait to paint ours white too! Very good idea to live with it for a while before making any big decisions. My favorite part of today’s post is John’s cap! Wah-hoo-wah!
Caity says
Woo I’m excited for a big makeover! Can’t wait to see what you guys do.
P.S. All I could see when I read this post was little eyes watching you take down the cupboards ;)
Sadie says
I am SO excited for this transformation!! Got the new issue of BH&G today and the owner of one of the feature homes used marine paint on her old cabinets. They said it’s really durable, which is always a good thing when you have a baby and a dog. Just thought I’d pass along the tip :)
YoungHouseLove says
Ooh I’ll have to look into that. Thanks for the tip!
xo,
s
Jennifer says
Way to go! You know, looks like we have the exact same kitchen flooring as you do. Those tiles are super durable! When we renovated our kitchen, the tile held up remarkably well for vinyl. Excited to see how your kitchen space evolves!
LYM says
Did you paint the floor in front of the fireplace or did you replace it with something?
Whatever the case, the fireplace looks great and I’m super excited see each project you guys do to make it all come together!
YoungHouseLove says
We painted it (and added poly for protection). You can click back to that fireplace painting post (linked in the bulleted list) for more deets.
xo,
s
Ryan says
I see everyone’s on the shoeless demo bandwagon. I’ve been wondering if John even owns shoes and socks. I can’t remember when I first noticed it, but the boy is barefoot in 99% of your pics.
It’s like John’s feet have become the 5th star of YHL (after Sherry, Big John, Clara and Burger).
maribel says
I read this post early this morning, didn’t get a chance to comment until now. The shot of John with maybe flexing his bicep was and is hilarious. Love you guys…so happy to have found you. You are the first blog I read next to Mrs.B.
Jessica W says
I recall that show quite clearly. A friend of mine was actually on it. His name is Scott, and he still has awful social skills!
YoungHouseLove says
Wow- you knew someone on The Pick Up Artist! So exciting?
xo,
s
Kim says
Hey guys, I’m just wondering what you think you might do when it comes to the floor. We have tile in our kitchen and are thinking about installing hardwood planks (to match the rest of the flooring in the house). We figure that we could bust out the tiles that are exposed, but then there are the tiles underneath the bottom cabinetry… and we have heavy slabs of granite counter like you guys. When you get to the point of switching up your flooring, do you think that you’ll actually remove your bottom cabinets to change the flooring under there, or will you leave what’s hidden underneath in place and just rip out what’s visible? I hope that makes sense!
YoungHouseLove says
I totally understand your question because I have the same one. I’m not sure what our options are (we’ll probably do a bunch of research and ask around) but it seems that if we truly want that hardwood floor exposed and refinished and looking seamless we’ll have to remove those bottom cabinets to get rid of that plywood and vinyl flooring layer. Sounds difficult but gorgeous (and already there) wood floors might be worth it- especially down the line when we’re ready for Phase Two! We’ll keep you posted…
xo,
s
KathyL says
http://the-gypsy-feet.blogspot.com/
lol, you can send the pics of John’s feet here…
YoungHouseLove says
Haha- will do.
xo,
s
Isabel says
I used to live with paneling and vinyl floors… Oy. Sometimes I wish I could go back in time and see the aesthetics of the period when that décor was all the rage. I know tastes change over time, of course, but it truly baffles me to think paneling and vinyl was the look to have. I’m excited about seeing a fresh coat of paint doing wonders in the kitchen. The den transformation in your old house still amazes me to this day!
stacey says
Can I share my kitchen wisdom/experience with you? We had an oven/microwave that was an all in one unit when we moved into our place.
When the microwave died, the whole thing had to be replaced.$$$$$ So I strongly recommend getting a separate oven and microwave and having them trimmed out to look cohesive but you can replace them separately.
YoungHouseLove says
We’re definitely considering that too (along with the possibility of a microwave in the island (that locks so Clara doesn’t microwave a fork or the dog, haha). Should be interesting to see where we end up…
xo,
s
Tia says
Obviously you want to get rid of the panels completely one day, but have you thought about doing a white stain to make them more pleasant in phase one? I remember Sarah Richardson did this in her super pretty cottage http://www.hgtv.ca/sarahscottage/
YoungHouseLove says
We actually love the look of painted paneling (we did that in the den of our first house as soon as we moved in and it was always our favorite room). Whitewashing or staining it is definitely another way to go though- and Sarah Richardson can do no wrong in my book!
xo,
s
Tracy says
You might reconsider the microwave/oven combo unit. The life expectancy of the microwave is generally far shorter than the oven, and should the microwave portion break, it’s pretty expensive to have it fixed (as in you should probably just buy a whole new combo unit) With most appliance companies only offering a year warranty, that’s quite a gamble to take. I would research service rates thoroughly before you make a decision.
YoungHouseLove says
Thanks Tracy! Others have recommended this as well so we’re going to consider a number of other options as well. We’ll keep you posted!
xo,
s
Kim says
Just did a kitchen reno and it’s great. However, the architect talked us into putting the microwave in the island. We have older children, so we thought it would be good for them, too. It’s terrible. You have to bend down to see the controls and pulling hot plates or whatever from under counter height? NOT good. Highly recommend against it.
YoungHouseLove says
Thanks Kim! We heard that from another couple we chatted with. Good to think about!
xo,
s
Suzanne says
A low microwave needs to be DRAWER type, so it rolls right out to you. And it’s the BEST. I can’t imagine a regular microwave just installed in an island, that couldnt’ possibly work well.
YoungHouseLove says
Ooh that sounds fancy.
xo,
s
Kim says
Happy to share experience! I think the only microwave that would work in an island would be a drawer microwave-cool but waaay too pricey. The thing is I doubted it from the beginning, but she really wanted us to give it a go first. Done, and DONE. We are putting the microwave on the counter and retro-fitting a regular drawer into that space.
Liz K. says
The thing that impresses me the most about Team Petersik – and that I’m trying to emulate – is that you finish every stage of a project. I would probably have shrugged off the broken floor tile, figuring the whole floor would get replaced…. eventually. But it’s so much better to have each stage neatly done so you don’t feel a need to rush through to the next step.
I’m resolving to start going through my house looking for unfinished projects. :)
Colleen says
Congrats on starting the kitchen, I’m so excited to see the reveal. I obviously need to get myself on a project because I just spent way too much time worried that the opening you’re cutting in your wall will allow you to see all the way from your picture window through to your family room. I don’t mean it as creepy as it sounds – I am not a curtain/blind closer either and in our house I didn’t really account for all the pedestrian traffic so I have to close blinds now and I really hate that. Since you guys think of everything I’m sure its already been a consideration but I thought I’d mention it!
YoungHouseLove says
I think we’ll just add some faux wood blinds on the big picture window in the dining room and close those for privacy at night. So I won’t have to do every window in the house, just that one.
xo,
s
Claire @ Claire K Creations says
I can’t wait to see what it looks like when you guys have painted and taking out that wall will make an enormous difference. How exciting!
Yes John in the first pic I did think you were brave with no shoes on!
Miller Callen says
Can’t wait to see what you do w/ kitchen phase 1. I’m in the process of painting my kitchen cabinets (again). This time, BM Moonshine, thanks to YHL rec. Then repainted walls SW Creamy, thanks to YHL. And, my computer cords are all nice & tidy in a box on my desk, thanks to, that’s right, YHL. Geez. I sound like a stalker. So appreciate you guys sharing your good taste w/ the rest of us. Now I just need to jump on the VOC bandwagon since my kids have roamed around the house all day telling me how much they love to sniff the paint fumes. Great.
MS says
Not sure if you guys picked a color yet, but we used the perfect grellow at our old house in our kitchen…very similar to that inspiration photo. It is called Lettuce Alone by Olympic. Goes on neon yellow, but dries the best grellow color. We used it in our kitchen and dining room and I’d highly recommend it!
YoungHouseLove says
Thanks for the tip!
xo,
s
Jennifer says
Love the blog… I read it multiple times daily, and comment often. I just did a home renovation myself, and my husband and I happen to be architects. Just a quick observation… it worries me that your new island is going to be too bulky for the paths of travel through the space. I know you have your hearts set on it for the storage, but it just seems that you are opening up the wall to the dining room, only to create a barrier with the island, as well as blocking the fireplace. Seems that a freestanding table or a more delicate solution in that space would keep the rooms open and airy! I trust that you have a vision (since all of your transformations are amazing), but I’m curious about your thoughts on this? Maybe a nice, casual seating area to take advantage of the fireplace?
YoungHouseLove says
We don’t want to keep the dining table since when we open the wall we’ll have a big round table right next to it in the adjoined room, so we’re sold on the idea of an island for nice casual gather-round style (perhaps an airier, smaller one than average to keep things open though).
xo,
s
Jennifer says
I always thought painted paneling looked like wainscoting or beadboard- just on the entire wall. I dig it!
Patty says
What about the flooring after you open up the wall to join the kitchen and the dining room? Are you going to do anything to join/transition the wood floor and the vinyl floor tiles?
YoungHouseLove says
Since we discovered the same hardwood flooring that runs through the dining room under the vinyl tiles in the kitchen someday we hope to refinish that so it’s seamless (with a small wood transition that’s stained to match) but until then we’ll probably just add a wood transition to match the hardwoods in the living room (which is what we have on the other side of the kitchen where the vinyl flooring connects to the hardwoods in the living room). Hope it helps!
xo,
s
Cheryl says
Just a help for you….I get the panel bleed thing….it happened to me…just half wall wainscoting….but horrible..three coats and two primers later (yeah kilz was the best) anyway, here’s the biggest tip…our friiends who are professional painters told us to skip the sanding etc…paint the wood first with Laquer thinner , let it dry and prime and then top coat….seriously works…I have done all the old brown trim in the house and it worked….so before you start to paint your cupboards, try it….and the heavens will open and a hallaleuja chorus will sing….
Kentucky girl says
Looking good…. My husband says to go in your basement and if you have the proper ceilings to look, you might be able to tell from below if the hardwood runs through the whole kitchen. Good luck!
YoungHouseLove says
Great tip! Thanks!
xo,
s
Melissa says
Glad you already know it’s a bearing wall and won’t be surprised. :-) My house looks like the same layout as the original of your house except swap the bathrooms with one of the bedrooms (I’m in Stratford Hills). And…my house has a wide doorway in the center bearing wall in the exact location you want yours…never know what you might find in that wall!
Also, I have hardwood in the same spot you found yours (which is in my dining room) but not in the kitchen. I have hope for you though.
YoungHouseLove says
Now that would be amazing! If there had been a doorway there before? Yeah, that would blow my mind! As for the hardwood, oh man- we’re nervous but crossing our fingers. Time will tell I guess!
xo,
s