Let’s talk about a mini makeover that involved a whole lot of hiccups. It was alllllll the way back in January that we decided that this mirror on our master bathroom door could stay (unlike the one on our guest bathroom door, which got the heave-ho since the person on the toilet could see THEIR ENTIRE BODY in it). But we figured the bedroom mirror could stay (since it doesn’t force you to stare at your reflection while on the porcelain throne) on the condition that we’d create a thicker frame around it to give it more presence so it looked less like one of those big flimsy $5 mirrors that you bring to college. Not that there’s anything wrong with those (we were both very happy to cart them off to school), but we like to think we’ve since graduated from that look. But yeah, even though this plan was hatched in January, it has taken us until September to actually do it. Oops.
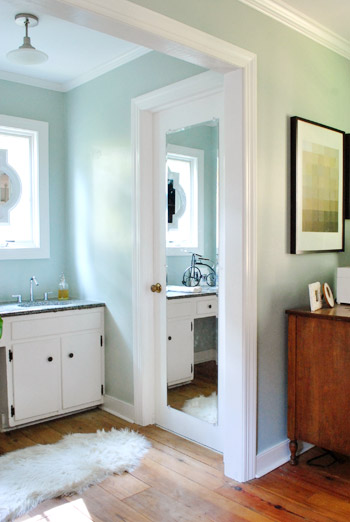
We’re glad we kept it, since it has been very functional (double-checking outfits, fixing hair, flexing – you know, the usual) but the basic plastic clips weren’t much to look at.
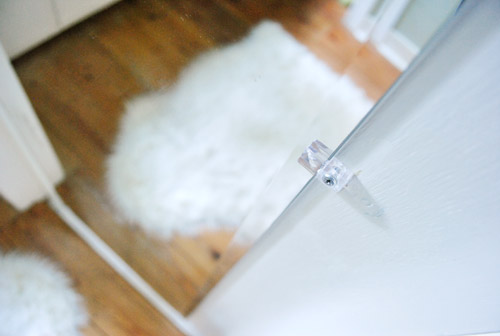
Having seen lots of other bloggers upgrade their mirrors with trim (like Layla & Kevin, for example) we were confident that it’d be a pretty easy task (FYI, this is what I like to call “foreshadowing”).
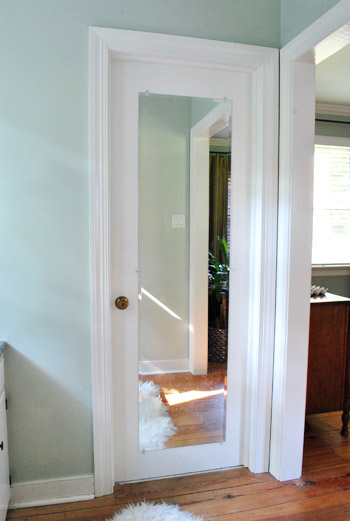
First I took the door of its hinges so I could work with it laying flat. The basic plan was: remove mirror, reattached with glue (so plastic clips wouldn’t be in the way of trim), cut molding with miter saw, and glue to door around mirror. Simple, right?
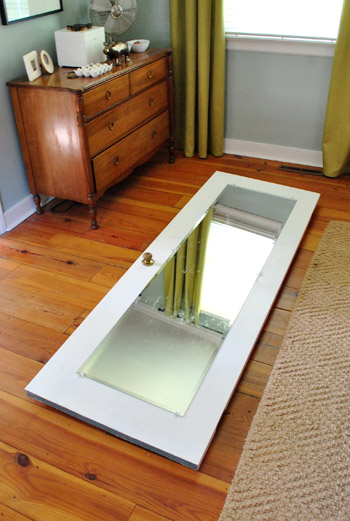
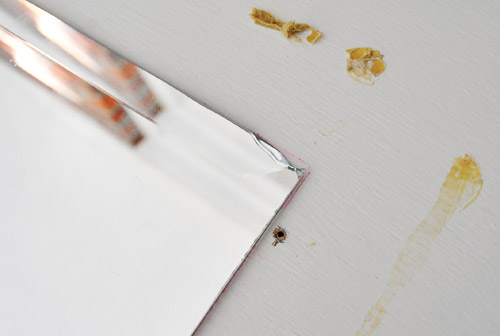
Before removing the mirror I traced the outline with a red pen so we would be sure to glue it back on in the right spot. I didn’t care about marking the door since this part would eventually be covered by trim.
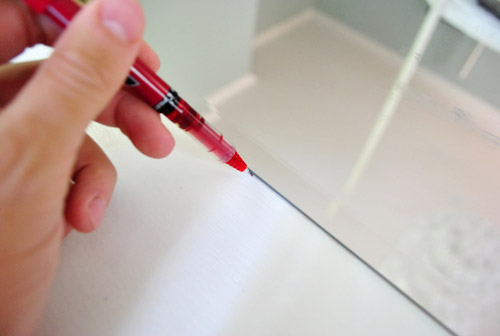
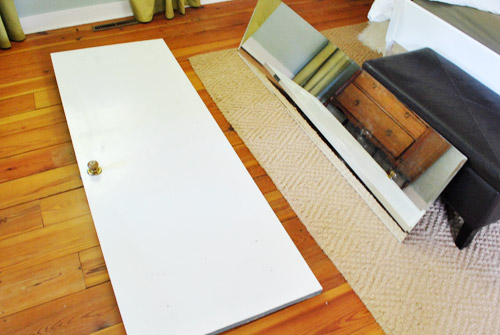
With the clips unscrewed and removed, the mirror came off no problem (though part of me secretly hoped it had already been glued in place).
We picked up this Liquid Nails Mirror Adhesive at Lowe’s for about $5. It’s apparently designed not to damage the reflective coating on the back of the mirror (which is why we used it over other adhesives, which could cause visible-through-the-mirror marks over time). Oh but before we used it we sanded the back of the door where the mirror would be glued (since it recommended doing that to rough things up before gluing any painted surface).
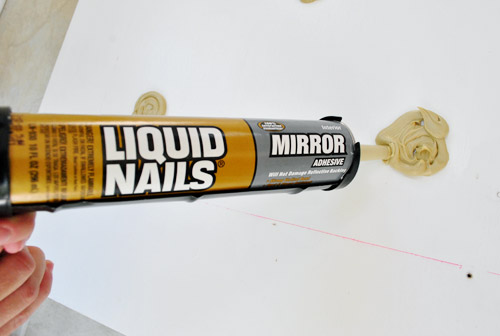
Since it was kinda stinky, we moved our mirror-gluing operation into the sunroom where I happily got to squirting blobs of adhesive as I remembered the instructions suggested (hint: more foreshadowing).
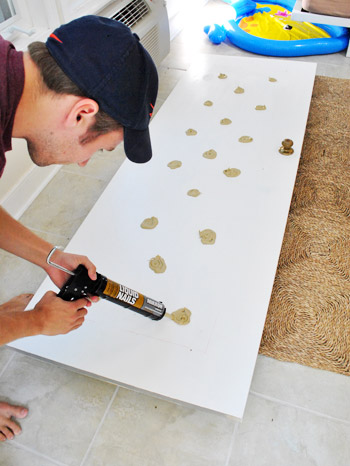
With Sherry’s help, we put the mirror in place, pressed it down and left it alone to dry for 72 hours.
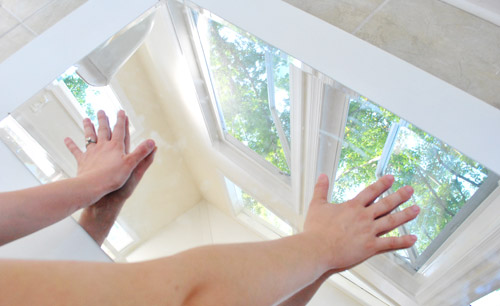
At Lowe’s we also picked up some trim that looked made for this job (though I think it’s actually meant for the top of beadboard). The groove in it was perfect for laying flat over the edge of the mirror.
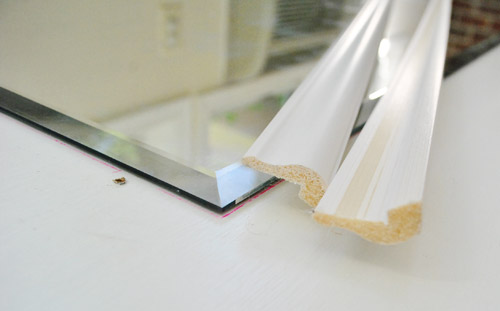
Well, long story short, after measuring and cutting all of the pieces (and just moments before gluing it down) we stepped back and realized it really wasn’t much of an upgrade. At all. It just looked even more like one of those cheap $5 college mirrors. Oh, accidental regression – I love how you sneak up on us.
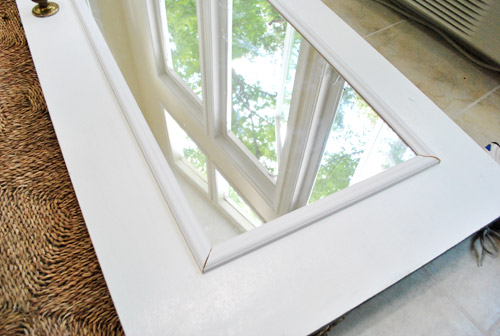
So with about $10 in trim down the drain, I went back to Lowe’s and found some heftier stuff that still sported enough of a lip to sit nicely over the edge of the mirror. Instead of about an inch and a quarter of width, this trim was nearly three inches wide. We landed on that size because anything thicker would potentially run into the doorknob, but it was almost twice as thick as the too-thin trim that we tried first.
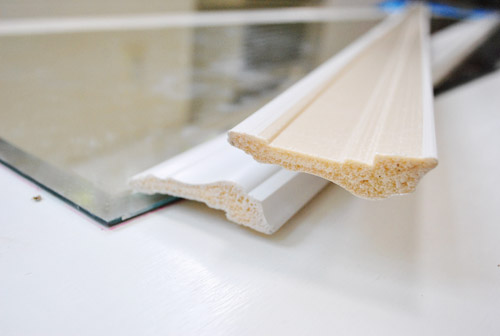
We obviously wanted the mitered corners to match up with the beveled corner of the mirror. So to help me find my cut lines, I placed a piece of painter’s tape along the line of the bevel to effectively “extend” my corner. Then I marked where I wanted to make my 45-degree cuts using my miter saw.
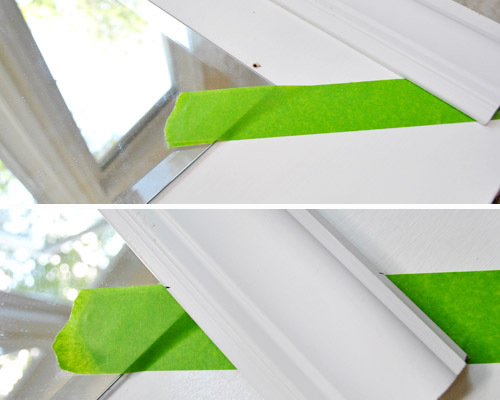
With all of my cuts made, I double-checked to make sure everything lined up nicely…
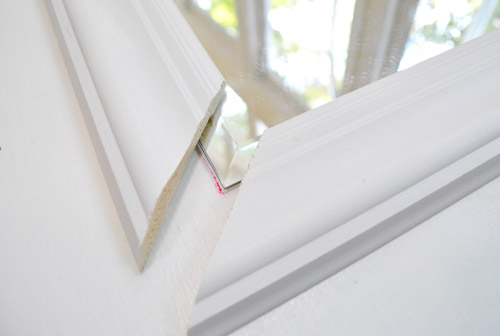
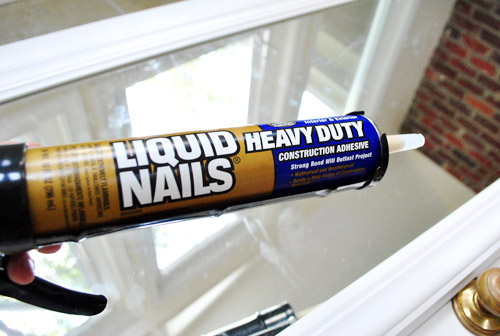
…and then broke out some heavy duty Liquid Nails to glue all of the trim in place. Normally I prefer nails or screws over glue, but I went out of my comfort zone on this one since screwing or nailing next to a mirror made me nervous and everything on the Liquid Nails tube insinuated that it could handle the job.
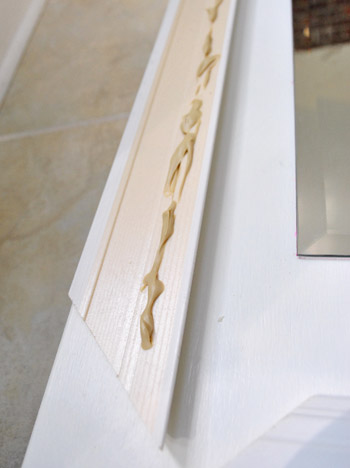
I squirted out a thin line of adhesive on each piece of trim (on the side that would sit against the door, not the mirror) and carefully laid all four pieces in place.
Just to be sure nothing shifted during drying, I taped each piece down. Can’t be too careful, right?
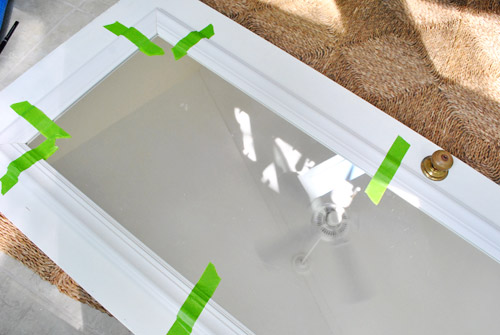
Well apparently I could’ve been more careful. After letting the trim dry for a day (the mirror had set for 72 hours at this point), I eagerly reattached the door (keep in mind that we’d been living bathroom door-less for about four days thanks to the false start with the too-thin trim) and took a celebratory shower.
Maybe it was the steam from the shower? Maybe it was re-hanging the mirror too soon before things fully cured? Whatever it was, moments after I finished get dressed after my shower – the mirror slid off the door, busting off the bottom piece of trim in the process. The other three pieces stayed in place, which thankfully kept the mirror from toppling over onto the floor. So the only damage to the mirror was a chipped corner that would be covered by trim anyway. But Sherry and I did nearly hyperventilate when we heard a crash from the bedroom and ran in to see what happened.
I didn’t take many pics of the “aftermath” because I was kinda grumpy about the whole thing. Not only did I have to redo everything (including having to scrape off all of the old glue), but I wasn’t quite sure where I had gone wrong.
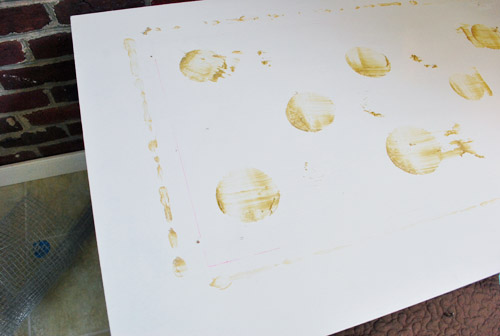
Well, re-reading the directions on the back of the mirror adhesive offered some clues. Like “Do not use this product without a permanent support system. ” Oops. Plus some parts about letting the glue set for a full week and applying it to the mirror back, not the door (though I doubt that second tip made much of a difference since it gets on both surfaces when you mash them together) might have come into play too.
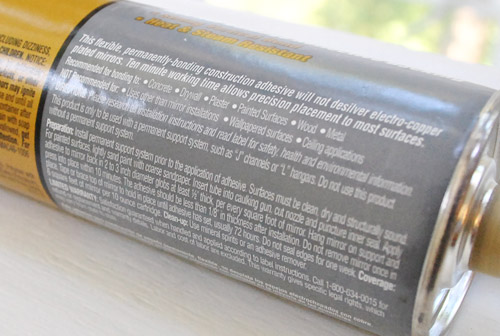
So in doing this a second time, I was determined to follow the directions. This time the adhesive was applied to the mirror… generously but in less large globs (Sherry called the first ones “cookie sized” but I’d describe these more as golf-ball-sized (and not as thick, so it could cure more easily). In addition to the blobs described in the directions, I criss-crossed some lines too, just to be safe a crazed man who couldn’t handle another mirror failure.
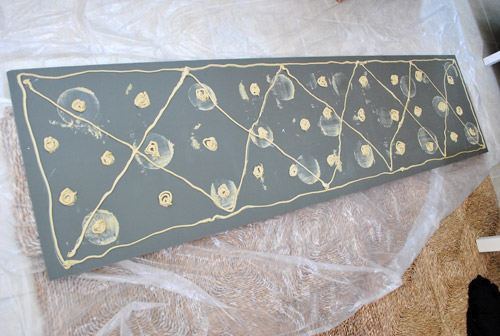
As for a permanent support solution, I wasn’t about to re-install the clips since the point of this whole glue/framing method was to avoid them (and the trim wouldn’t look great with big lumpy clips under it). So I improvised and carefully added some small finishing nails around the edges of the mirror. They went into the door nice and solidly, and the head provides a nice little rest/stop for the mirror. They might not work as a support solution all on their own (if there weren’t trim and glue also coming into play) but I was banking on them being enough to keep it from sliding as easily as it did after just two days of setting without any other support going on.
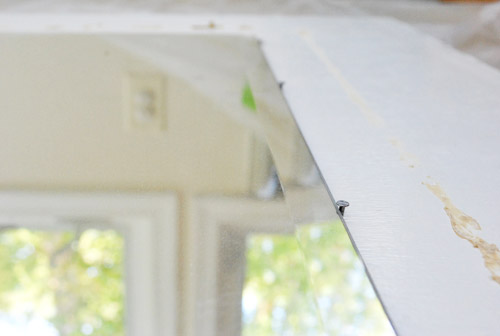
So with the mirror re-glued and nailed in place, Sherry and I started to countdown SEVEN FULL DAYS of letting the glue set. Even though it meant a full week of a door-less master bathroom, it felt like a necessary sacrifice if I didn’t want to do this a third time. And that’s how Captain Careful rolls.
On the seventh night (I feel like I’m telling a bible story all of the sudden) I actually stood the door up in the sunroom to do an overnight test (before putting the trim on again). To be extra safe, we placed the door on a big pillow so the mirror would have a soft landing if it decided to detach itself and slide down towards the floor again. Luckily, it didn’t. It passed the seventh night test! So the next morning I reglued all of the trim in place, let that dry flat on the floor for about five nights (more than three recommended in the instructions because we were out of town) and FINALLY put the door back on its hinges… just in time for Clara to resume her favorite activity: gazing at herself and shouting things like “sah pretteh!” and “iss baby!”
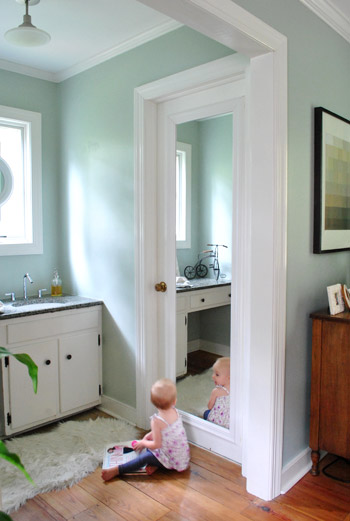
After all of the trouble that went into the project, I’ll admit that it doesn’t feel like the biggest and most life-changing payoff, but it’s definitely an upgrade. The white trim on white door doesn’t really “pop” in photos, but in person it’s a nice layered architectural detail that ties into the big quatrefoil mirror that we hung in front of the nearby over-the-sink window. And the goal of this project was just to finish the raw mirror edges more nicely, not draw lots of attention to it or anything (so painting it a color would just make it compete with other things like the mirror over the sink which, no offense to our newly trimmed fella, is much more interesting). So we’re kinda glad this update is of the subtle variety.
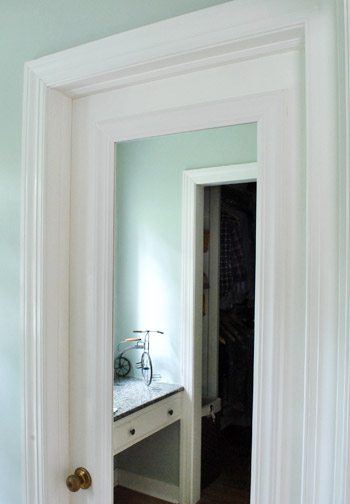
More than anything, I’m just glad to have the project successfully completed, to have some privacy returned to our bathroom and to no longer have to stare at those clear plastic mirror clips. Yep, now we can stare at more important things… like the doorknob that needs updating (probably with a can of ORB since my wife is so smitten).
As for the total cost, the second batch of thicker trim was $12, so the entire cost of the project with mirror adhesive should be around $17 if you don’t mess up and buy ten bucks worth of too-thin trim (which we hope to repurpose someday in some capacity…). Update: we just learned that Lowe’s & Home Depot will take trim back (even if it has been cut, as long as it’s over 12″). So here’s hoping we can recoup the $10 that we spent on that too-thin trim.
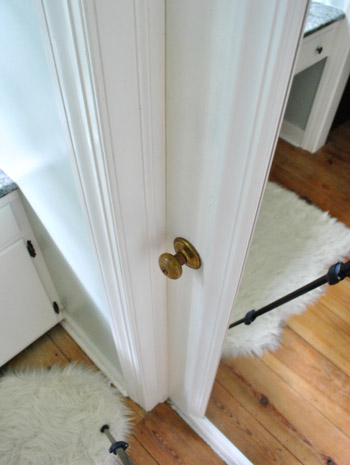
Have you guys make any subtle changes lately? Or encountered an “easy” project that had more hiccups than you ever thought possible? I’m happy to report that as of this posting, the door has survived five nights without falling down (even with a handful of steamy showers). Success! At least for now. We’ll keep you posted if things take a turn for the “ahhhh, I just heard a loud crash in the bedroom.”

Allyson says
This reminds me of a fun DIY project I got myself into when I was about 17. My mom mentioned she wanted to take down the wood paneling that covered one wall in her living room, and I was over ambitious and went for it while she was at work, thinking I would surprise her. All was going well, the wall behind it was nice solid wall and just needed a little Spackle from the nail holes, until of course I found the reason they put the paneling up. The room on the other side is an addition, and I came across a WINDOW that they decided would be easier/cheaper to just panel over. A window with a wall behind it is not attractive, at all. I knew my parents were going to have my head! Good thing I’m handy and my dad had a lot of tools and scrap wood in the garage. I framed it out with 2x4s and screwed a sheet of wood into the frame and painted everything up before my dad got home. He helped me attach an mirror from an old dresser using gorilla glue and basic clips. Turned out to be a pretty decent surprise for mom! It’s in the background of this pic: http://www.seekinspirecreate.com/wp-content/uploads/2011/09/pete.jpg
YoungHouseLove says
Woah- way to get creative. I love it. And I love the big bird in the picture too. Haha.
xo,
s
Melanie says
Looks like a very nice improvement. Really, I don’t see any reason why the finishing nails shouldn’t hold up just fine. They’re not all THAT much different from the mirror clips. /thumbs up
Amy J says
I was just going to comment that I was surprised that you hadn’t ORBed the doorknob and lo and behold the first commenter already said it – too funny.
Crystal says
So– I was just drifting off to sleep last night when I heard a loud thud– of a mirror falling off our bedroom wall. We bought the same product and also did not read the instructions. Our mirror was originally hung from Ikea, has a decorative shaped edge and came with special metal clips that have springs but it fell down in the recent earthquake– rather than try to rehang the clips which would require new drywall anchors and some patch work on the old holes we thought liquid nails would do the trick and hide the damage. We used a board to support and some tape to make sure it stayed on the wall but after 24 hours we were feeling confident that it was “stuck for good.” oops.
YoungHouseLove says
Oh man, that stinks! I feel your pain!
xo,
s
Sarah says
What an epic tale! Lol. It’s always the smallest projects that take the longest. I’m notorious for wanting to see the end result before things are fully cured or the paint is fully dry. You may call me Imperial Impatience!
Jill says
Pretty sure all of my small projects turn into a big hassle. I am my Father’s Daughter. :)
I just love that Clara says “sah pretteh!” Sooo cute! :)
Good job w/ the mirror, John-boy. You gave it the ol’ college try the first time and the second time was the charm!! (Just like some people have to try getting through college more than once. I don’t know why I’m on this college thing. Maybe the $5 dorm mirror? I dunno. Going back to sleep…at my desk now. lol)
Melanie @ Mailbox Journey says
It looks great, it looks like it belongs there.
Renee says
I had the same thing happen to me, twice! The master bedroom has 2 closets with sliding doors that I added mirrors to. I used the same liquid nails and waited the whole time, but both mirrors fell off! Luckily neither one broke. I ended up using the ugly plastic clips with the plan to use molding eventually like you did. Good to know you still had to use some nails for support, but I wonder how they will hold in hollow-core doors since I had to use anchors for the plastic clips. But we’re busy with renovating 3 bathrooms before baby comes, so we’ll see if we ever get to the molding.
Thanks for sharing your trial and error! Love the look of the chunky molding!
Krystle @ ColorTransformedFamily says
As I was reading I wondered why you didn’t paint the trim ORB along with the knob. After reading several comments I see you do intend to ORB the door handle. Should have know! I do like the white frame though… I wouldn’t be opposed to adding a pop of color to it.
rosemary says
Hey! In the movie Colombiana with Zoe Saldana there is a huge house in the first scene that has several quatrefoil frames. I thought of yours everytime I saw one haha. Great taste!
YoungHouseLove says
We’ll have to add it to our netflix. Haha.
xo,
s
rosemary says
It’s still showing at the movie theater but Netflix should have it by 2012 haha.
YoungHouseLove says
Haha, I’ll have to wait a while.
xo,
s
julie says
I don’t think it was the lack of support system, but rather the bathroom paint that was probably on the door to begin with. Was it shiny? It could have made the door a non-porous surface…hence the glue had nothing to stick to. I bet if you had sanded the door a bit to knock the shiny down first it would have stuck…..speaking from experience..and my own loud crash from the bedroom…:)
Anyway, it looks awesome, and I still love the way you treated the window in the bathroom!
YoungHouseLove says
Oh yeah, we didn’t detail that part (will add an update) but we sanded the back of the door since it was painted, just to rough things up as it said to do on the adhesive packaging. Maybe it just wasn’t a good enough sanding job to begin with…
xo,
s
Taylor @ TheProposalEnthusiast says
Haha! Glad to see Clara is just as much of a Bethenny Frankel fan as Sherry! So funny that she is reading Naturally Thin. Great Book!
alg says
Dan & I always joke that the can labeled “easy” is usually full of worms. Glad it doesn’t only apply to us!!
Nice job, though. Totally doesn’t look college dorm-y any more :)
Katie Blais says
i love this post … it made me feel i wasnt alone in my home improvement hiccups which seem to happen to me a lot … right now in my basement i have a half stripped sticky bureau that I need to figure out how to repaint! I think the door looks great, a small upgrade that makes a big differnce :)
Bboss says
That’s what my husband calls a “3-beer project”. Usually the more frustrating it becomes, the more beer required. Of course, we do our projects on weekends. It would be tougher if that were our bread and butter.
YoungHouseLove says
Haha, the term “3-beer project” has us cracking up over here. Love it.
xo,
s
Liz says
It looks great! Sometimes the small updates make a big difference; it looks like you bought the door that way. Anyway, “easy” projects that go awry are the story of my life. I have a saying: “How hard could it be?” And it ALWAYS turns out to be harder, take longer, and be more expensive than I thought it would be.
sara says
Guess it’s too late to state this now and not sure how true it is… the place that cut the mirror for the top of our nightstands told us not to use liquid nail to adhere it, that eventually it will eat through the backing of the mirror and you will have foggy spots, hope this doesnt happen to yours though…
YoungHouseLove says
We actually used their adhesive that was specifically made for gluing mirrors since we also heard other kinds can eat through it and make foggy spots!
xo,
s
Jessica fielhauer says
When we were building our master bathroom we had a similar mirror disaster, but with more devastating results. The husband followed the same steps that John did (with the initial huge globs of glue adhesive), only our mirror was a large one that went over the double vanity. After waiting the designated amount of time, we excitedly removed the tapes and temporary supports, gazed at our reflections and watched the monster of a mirror crash down. All within 3 minutes. The thing shattered leaving us with many little bits, but nothing usable.
After bemoaning our loss and picking up the pieces we hunted down a second one on craigslist, took it to a glass shop to get the thing chopped down to size, then reattached it to the wall using much smaller (but more numerous) globs of mirror adhesive, and sorting out the permanent support structure beforehand. And being overly cautious we gave it close to 2 weeks to finish curing before even thinking about testing the hold.
So yeah, I feel your pain.
YoungHouseLove says
Oh man that stinks! I’m so glad you guys were ok, and that the second mirror was the charm.
xo,
s
Rachel @ The Avid Appetite says
I love the new look. I hate when seemingly small/easy projects end up being a major time and energy suck…I’m secretly glad that I’m not the only one this happens to :)
laura says
Just an FYI if you do decide to ORB the doorknob… Your previous ORB adventures convinced me to ORB all the doorknobs in my house as well as the various latch parts/lock plates. It’s been a week and the knobs are holding up well, but be aware since ORB is basically paint anywhere that latch parts rub together will probably chip off (just like regular paint would). I didn’t really think about that at the time, and while I don’t regret ORBing the doorknobs, if you are very particular the chipping/scratches on the latch plates it might bother you.
Still a BIG improvement from the bling-tastic brass we had going on in our house previously.
YoungHouseLove says
Thanks for the tip Laura! Did you sand/steel wool them before spraying? That might help the paint grab on and stay there a bit longer without flaking. Not sure if you did that though…
xo,
s
Torrie @ a place to share... says
“Captain Careful”… “bible story”… “ORB”… This “subtle” update kept me very highly entertained =).
On a serious note, I wanted to ask if the nails are pressed into the mirror- or if they are close but not actually touching it.
This weekend, I’m (well, my husband) is hanging a full length mirror on our bedroom door and I’ve love to share this with him, and include the trim as you have done here. It makes such a nice difference.
YoungHouseLove says
The nails are very very close but not touching it. So if it started to shift it would rest on them. Hope it helps!
xo,
s
Melissa says
That’s actually a great idea. I have a cheap-o, college-y mirror that needs to go somewhere…so back of a door it is!
Also, I think Clara might be the most hilarious baby ever. I routinely laugh at her little videos, pictures, and I love how you guys write out the things she says. (“Sah pretteh” literally made me laugh out loud!)
Sarah K says
When I was in boarding school we used heavy duty double sided tape to glue up our mirrors. To remove them later, you slide fishing line behind the mirror which slices through the tape & you just scrape it off the door. I’m thinking the tape + molding should do the trick.
Sarah @ Redhead in Ruffled Flats says
I feel as though every project I do has many hiccups, probably because I’m just beginning this whole DIY process. Whenever I mess something up, I think “John and Sherry would have done this flawlessly on the first try,” but then I realize you both are humans, not born DIY-ers and that, like today, things go wrong for you, too. I think my problem is that I’m a perfectionist so even the slightest hiccup makes me very upset. I don’t know what I would’ve done if I had to wait as long as you did to see if a project I did worked out right – I probably would’ve given up, so good for you for trucking on!
beekeebear says
Subtle changes in our new house: we’ve slowly been replacing bisque receptacles with white ones, put our family room lights on a dimmer, and installed a timer for our outdoor lights–which also meant we had to switch to decorator switches (in white!) in our foyer to fit the timer doo-dad.
Christine says
The mirror looks great. I recently framed up my naked mirror in the main bathroom. It had a lot of extra unforeseen steps as well.
http://casa-de-christine.blogspot.com/2011/09/all-framed-up.html
Skye @ Neathering Our Fest says
OOOH that is one sexy camera tripod leg in that last picture! Yeow!! :)
I am so glad you posted this – I have been dying to frame out the mirror in my bathroom to make it a little more custom and it has those metal clips that lie flat against the mirror on the bottom and the ugly plastic ones on top. I think I can just glue the mirror and replace the plastic clips on the top with the flat metal ones and that should do the trick but I would have never expected it to fall after that seriously strong adhesive! I guess I will just have to tape the mirror to the wall while the glue dries? Anyways – you have definitely given me something to prepare for! :) Happy Wednesday!
YoungHouseLove says
Haha, I thought that random tripod leg was funny too.
xo,
s
Layla says
Whoa! Holy nightmare project Batman! :-O
We didn’t do any extra securing or waiting for things to cure, and those suckers are stuck on there big time! Weird!
So glad you finally got yours to work and thanks for linkin’ to us today!
Kevin and Layla
YoungHouseLove says
So glad your stayed up without any issues. Lucky ducks.
xo,
s
Gina Lee says
No offesne intended whatsoever… but keeping it real, to me, this was WAY too much EFFORT for WAY to little EFFECT. Just my humble opinion, of course! I give you an A+ for effort, and to each his own! I love MOST of the stuff you kids do!
YoungHouseLove says
Haha, we definitely didn’t expect it to be so much effort, but wanted to detail all the speed bumps that we encountered to keep it real (as opposed to leaving out all the bad stuff and acting like it was an easy update). Sometimes it’s comforting for other DIYers to know that not everything goes as planned and mirrors jump off the wall. Haha.
xo,
s
raeann says
this made me feel a little better about myself, because most of our home improvement tasks include MANY hiccups. and, sometimes coming here makes me feel worse, because you guys seem to have more happy accidents, than hiccups. ;)
glad it worked out – we actually have the exact nick in our mirror, but it doesn’t have a frame around it!
Megan S says
WOW!!! I think that makes a HUGE difference! Hats off to you guys! I really despise those clips, our cookie cutter home has them in both bathrooms and we plan to go through mirror mate since ours are so large. Great job guys!
Layla says
Wonder if it had anything to do with the fact that our doors just had 7 year old primer on them, and not paint?
YoungHouseLove says
Hmm, that definitely could be. We sanded the door a bit to rough up the paint, but primer might grab the glue a lot more firmly to begin with!
xo,
s
Katie @ Newcomb HOme says
When I was reading this I was shouting (in my head – I’m at work) “Pile books on it!” I made a mirror once and I’m convinced the liquid mirror glue only worked because I piled about 10 textbooks on top :)
Putting the nails around the mirror is a great idea. Thanks!
YoungHouseLove says
Haha, I love the book tip.
xo,
s
Melanie says
Do you think this type of mounting would work on a wall? I have a giant mirror over a vanity that has those awful plastic clips. I think my biggest hesitation would be gluing it to the wall.
YoungHouseLove says
I’m not sure. I’d be scared that it wouldn’t cure since you can’t lay it flat. Maybe try asking the pros at Home Depot or Lowe’s to see what they recommend for wall mirrors?
xo,
s
Cathleen Pearson says
John-We just did the same thing to a big octagonal mirror we hung on the fireplace. What we did was mount the piece of glass to the wall directly with those ugly plastic clips. Then we cut 8 pieces of trim molding to fit around each side. My husband cut out little holes in the back so the plastic clips would fit inside and the trim would be flush against the wall. Then for added support he used a nail gun and shot nails through the trim into the wall. That thing isn’t going anywhere. Can’t be too safe with little ones around on the floor. Maybe you could nail your trim around the mirror directly to the door (then paint over it with white to hide the nails.)
YoungHouseLove says
That’s a great idea! Then I could just caulk the little nail holes. For now it seems really firmly in place (thanks to the nails holding the mirror up around the perimeter under the trim) but I always love a backup plan.
xo,
s
Alisa D. says
Love your writing style and humor! The newly reinforced mirror looks great!
Sheela says
Here’s another possibility to consider if you do something like this again. Lowe’s sells foam crown moulding that’s thick (nearly 3″). I framed a mirror in our half-bath with this crown moulding. The mirror is mounted to the wall with a metal lip that sits on the backsplash. My husband cut it on the mitre saw flat (not standing up, like you would if you were putting the moulding up on the wall), and then I attached it together as a frame with a combination of glue and staples (from a staple gun on the back). I then painted it white with my trim paint (even though it comes in a white color, I needed it to have some water protection, and the back of the trim, which is reflected in the mirror, is yellow, so i painted that white too.)
I haven’t hung it yet, but when I do, I’ll use the Scotch Mounting Putty – this stuff:
http://www.amazon.com/Scotch-Adhesive-Putty-Removable-860/dp/B000AN7EW4
I used this to hang some picture frame moulding in a bathroom, as well as to tack down pictures in that same bathroom. This stuff works really well, and it’s removable. And since the foam frame is so light, it should hold well with the putty. Actually, I also used the putty on another type of foam frame that I put up on a mirror in the bathroom, and it’s doing fine. You can get the stuff at AC Moore (or I’m sure at another craft store), and it’s about $2 for a pack. I’ll use the whole pack to hang my foam frame. And even if the foam frame fell, it wouldn’t be heavy and damage anything. And the biggest plus is that you don’t have to remove the mirror to do this, since the foam is wide and has a little bit of give and can go over the clips or metal lip or whatever is holding the mirror up.
And by the way, your new mirror frame certainly looks nice! So glad that it’s staying put now!
YoungHouseLove says
That’s another awesome option! Good luck with it!
xo,
s
Kim says
I’m just curious-why is there a blurred out picture in your bedroom? I guess the obvious answer is you don’t want to show the contents!
YoungHouseLove says
Haha, that’s paint chip art I made a few weeks back (but it does look like something blurred out or pixelated- too funny!). Here’s that post for ya: https://www.younghouselove.com/2011/08/nine-dolla-pillows-more-free-art/
xo,
s
Kim says
Oops! Sorry! Now I won’t be trying to figure out what it’s a picture of!
YoungHouseLove says
Haha, no worries. Too funny that the paint chip art looks like something that we blurred out.
xo,
s
marci lambert says
it looks good! i’m nearly finished with a similar project – my new (to me) house has large bathroom mirrors and i wanted to add molding around them to finish them off. i had a friend cut the wood for me and i used liquid nails to glue it directly on the mirror. that’s all that i could use because of the way the mirror is inset into some tile. anyhoo, it mostly worked, although one board did fall off (remember i had to do everything vertically — these are big mirrors that i was afraid to take down). i realized i needed more adhesive on that board and that solved my problem. now everything looks good (i still need to caulk a bit and touch up the paint). my advice is to slop on the liquid nails, but not too close to the edges or you’ll see it reflected.
Melissa@Julia's Bookbag says
The door-with-newly-trimmed-mirror looks GREAT; I think it’s a tiny change that has huge impact! My favorite thing though about this post? The Captain Careful line and Clara’s comments about herself…oh that is gonna make me smile all day!
Kim Bauer says
I’m sure you’ve covered this before, but might I ask what color is the paint in your bedroom? It looks like the perfect shade on soothing blue. Love the door mirror!
YoungHouseLove says
Thanks so much! It’s Carolina Inn Club Aqua by Valspar (color matched to Olympic no-VOC paint).
xo,
s
Kim Bauer says
Thanks so much! I’m always on the lookout for soothing yet fun blue and green paint. :)
margaux says
love the door re-do! I always laugh at the guest mirror post because I remember going to a hotel that had that same “problem” and remember thinking as I was doing my biznez, “well that’s an angle you don’t see everyday.” HAH! Glad you thought better for your house guests!
Angela says
Glad to see you mention the knobs in your comments. I recently switched out every 1979 icky faux brass textured knob in the whole house for a simple updated brushed satin one and it made the biggest difference of ANYTHING I have done. After one full year of remodeling that really is saying something!
Beth says
Thanks for sharing your successes and mishaps! I have a mirror like this in both our bedroom and the bathroom, so I love this project. Plus it looks like something even I could tackle :) Do you think it would be possible to create a frame for a cheap mirror like this that is sturdy enough to lean against a wall? I feel like that would be cheaper and way more fun than buying a giant and sturdy framed out mirror. Luckily I have two mirrors to play with I guess!
YoungHouseLove says
Oh yeah, I would just glue it to a piece of plywood and then frame out the sides so it’s nice and chunky!
xo
s
Kaely says
This had a much better ending that our bathroom mirror story. The first time we replaced the mirror in our hall bathroom we chose a pivot mirror where you screw the supports into the wall and then clamp the mirror to the supports. I liked the airy feeling of having some space between the wall and the mirror…
Unfortunately we live very close to the train tracks and have a raised foundation and our whole house shakes from the train 6 or so times a day. The day we installed the mirror we heard this huge crashing noise, ran upstairs to find the mirror in the bathtub (about 3 feet away). The train had just gone by, the mirror shook out of the brackets, rolled across the toilet and crashed into the bathtub.
So no more pivoting mirrors for us and everything hanging on the wall is either screwed into the studs or using earthquake hardware to make sure it doesn’t go anywhere.
YoungHouseLove says
Oh my gosh- so scary! Glad no one was hurt.
xo,
s
Jen says
I think it looks lovely!
Holly says
This is such weird/great timing. This past weekend, inspired by this blog, I decided to change my dining room light fixture. I am a newbie at all this but after reading a couple of times how simple it is to change a hanging fixture, I thought it’d be a great 1st project. Well, three hours later everything was up but the light didn’t work. Two hours after that, with help from my husband, it was finally working. Five hours to hang a fixture??! I was feeling pretty bummed and wondered if this type of thing (it’ll only take me minutes, its so easy!) still happened at your house. I’m sorry for the frustration but it gives me hope that house projects will get easier and everybody still has a tough time every once in a while!
YoungHouseLove says
Haha, oh yes, we remember those days – and still have them (as evidenced by this dang mirror- haha). Sometimes the little easy things can take longer than things you expect to be super annoying (like painting a room, which can be surprisingly smooth). Ya just never know, haha.
xo,
s
Kate says
I think it’s pretty funny that a lot of the comments are suggesting ORB-ing the “ugly” doorknob, because that is the same doorknob I am switching out all of the ones in my house to! For my house, I really like the antique brass, rounded knob look. Much better than what was there before – fluted shape, scratched, and originally-shiny-but-now-tarnished brass. I’m just not an ORB girl.
I do love seeing and hearing everyone’s differing styles though. It would be boring if we all had the same cookie-cutter houses!
Sarah says
Lol. I love John posts, they’re always such epic battles!