Let’s talk about a mini makeover that involved a whole lot of hiccups. It was alllllll the way back in January that we decided that this mirror on our master bathroom door could stay (unlike the one on our guest bathroom door, which got the heave-ho since the person on the toilet could see THEIR ENTIRE BODY in it). But we figured the bedroom mirror could stay (since it doesn’t force you to stare at your reflection while on the porcelain throne) on the condition that we’d create a thicker frame around it to give it more presence so it looked less like one of those big flimsy $5 mirrors that you bring to college. Not that there’s anything wrong with those (we were both very happy to cart them off to school), but we like to think we’ve since graduated from that look. But yeah, even though this plan was hatched in January, it has taken us until September to actually do it. Oops.
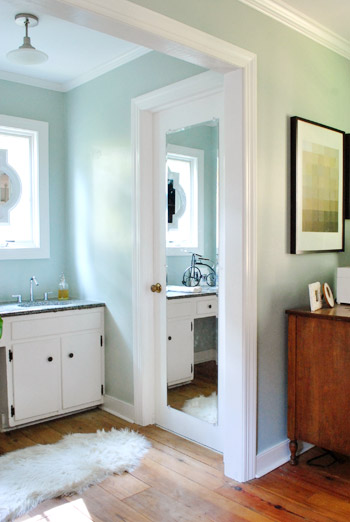
We’re glad we kept it, since it has been very functional (double-checking outfits, fixing hair, flexing – you know, the usual) but the basic plastic clips weren’t much to look at.
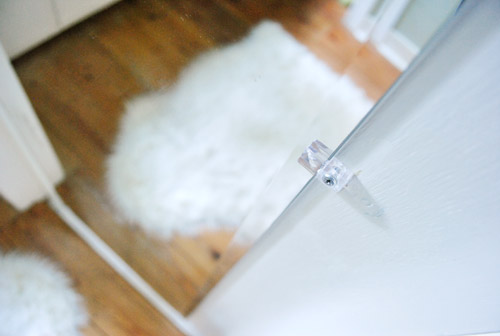
Having seen lots of other bloggers upgrade their mirrors with trim (like Layla & Kevin, for example) we were confident that it’d be a pretty easy task (FYI, this is what I like to call “foreshadowing”).
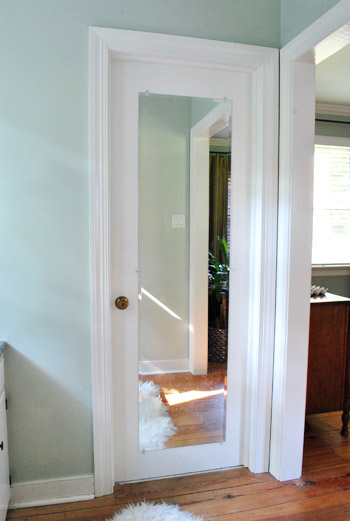
First I took the door of its hinges so I could work with it laying flat. The basic plan was: remove mirror, reattached with glue (so plastic clips wouldn’t be in the way of trim), cut molding with miter saw, and glue to door around mirror. Simple, right?
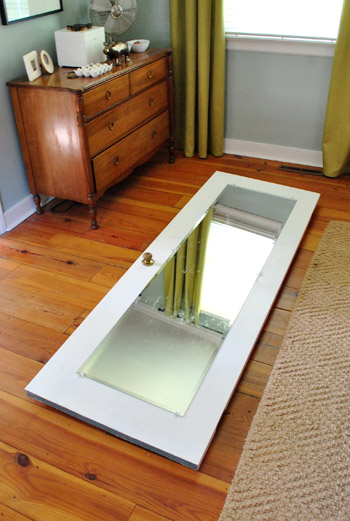
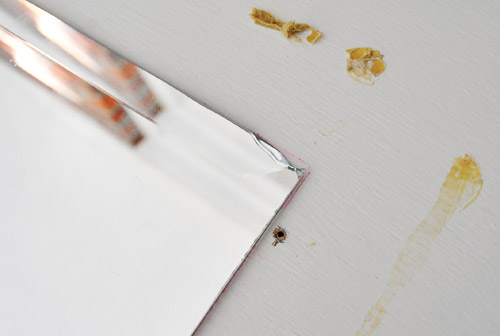
Before removing the mirror I traced the outline with a red pen so we would be sure to glue it back on in the right spot. I didn’t care about marking the door since this part would eventually be covered by trim.
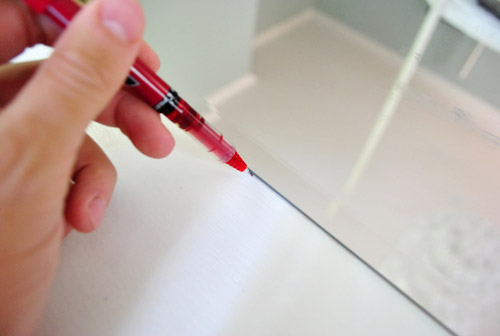
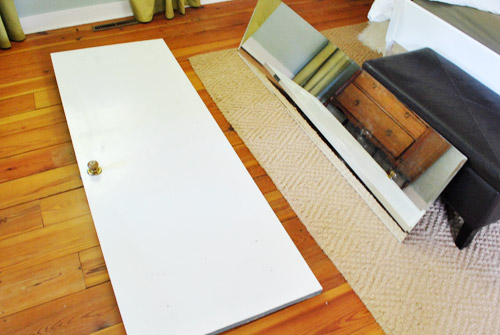
With the clips unscrewed and removed, the mirror came off no problem (though part of me secretly hoped it had already been glued in place).
We picked up this Liquid Nails Mirror Adhesive at Lowe’s for about $5. It’s apparently designed not to damage the reflective coating on the back of the mirror (which is why we used it over other adhesives, which could cause visible-through-the-mirror marks over time). Oh but before we used it we sanded the back of the door where the mirror would be glued (since it recommended doing that to rough things up before gluing any painted surface).
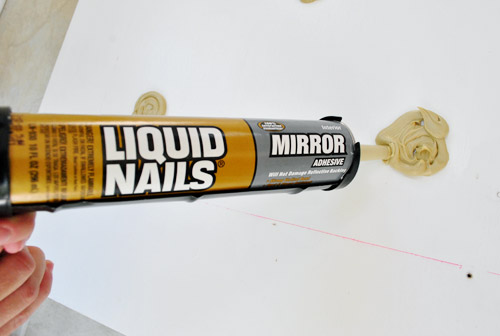
Since it was kinda stinky, we moved our mirror-gluing operation into the sunroom where I happily got to squirting blobs of adhesive as I remembered the instructions suggested (hint: more foreshadowing).
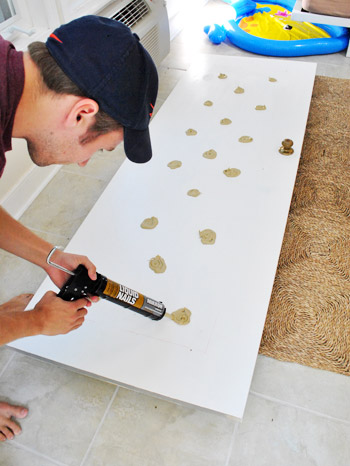
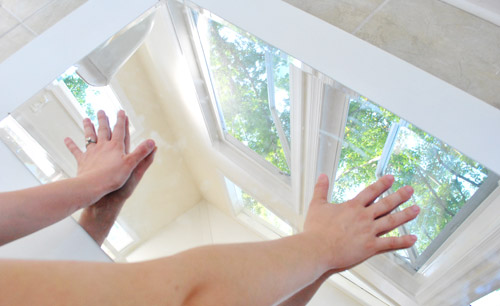
With Sherry’s help, we put the mirror in place, pressed it down and left it alone to dry for 72 hours.
At Lowe’s we also picked up some trim that looked made for this job (though I think it’s actually meant for the top of beadboard). The groove in it was perfect for laying flat over the edge of the mirror.
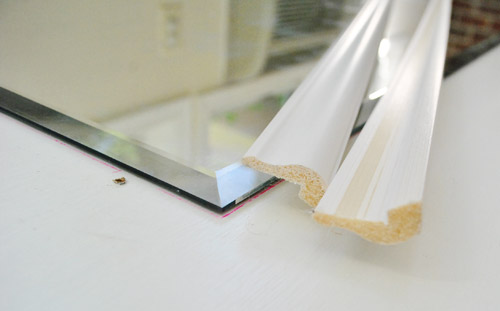
Well, long story short, after measuring and cutting all of the pieces (and just moments before gluing it down) we stepped back and realized it really wasn’t much of an upgrade. At all. It just looked even more like one of those cheap $5 college mirrors. Oh, accidental regression – I love how you sneak up on us.
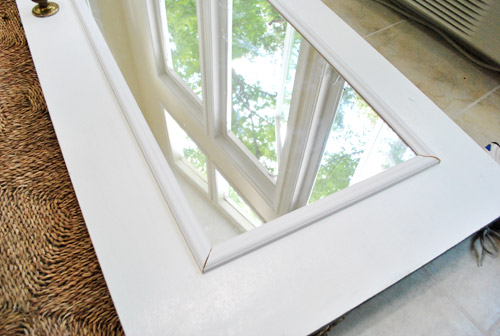
So with about $10 in trim down the drain, I went back to Lowe’s and found some heftier stuff that still sported enough of a lip to sit nicely over the edge of the mirror. Instead of about an inch and a quarter of width, this trim was nearly three inches wide. We landed on that size because anything thicker would potentially run into the doorknob, but it was almost twice as thick as the too-thin trim that we tried first.
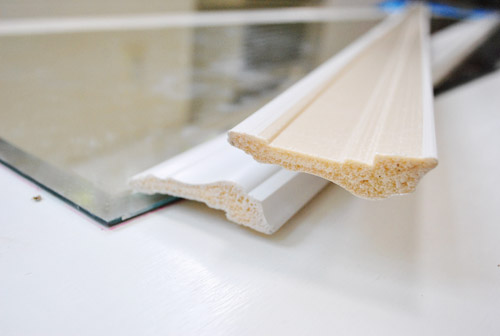
We obviously wanted the mitered corners to match up with the beveled corner of the mirror. So to help me find my cut lines, I placed a piece of painter’s tape along the line of the bevel to effectively “extend” my corner. Then I marked where I wanted to make my 45-degree cuts using my miter saw.
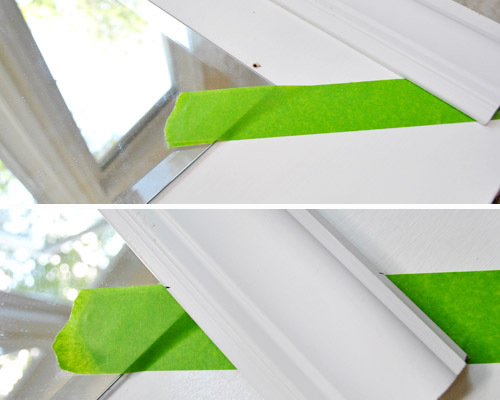
With all of my cuts made, I double-checked to make sure everything lined up nicely…
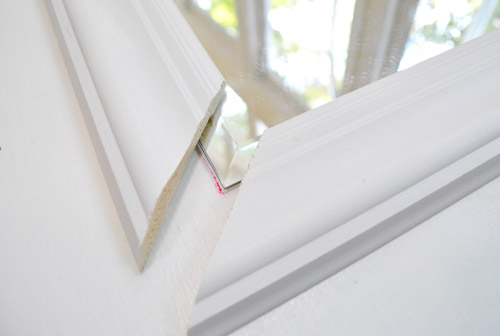
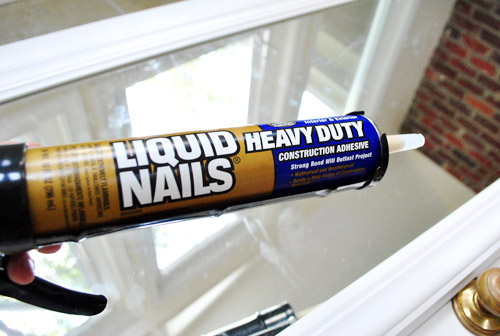
…and then broke out some heavy duty Liquid Nails to glue all of the trim in place. Normally I prefer nails or screws over glue, but I went out of my comfort zone on this one since screwing or nailing next to a mirror made me nervous and everything on the Liquid Nails tube insinuated that it could handle the job.
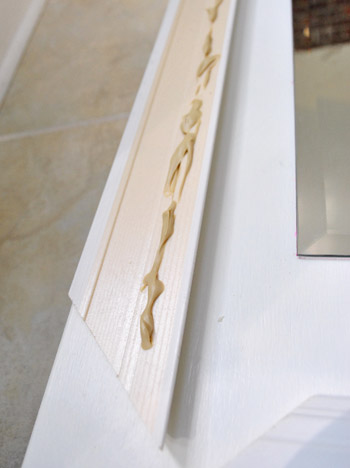
I squirted out a thin line of adhesive on each piece of trim (on the side that would sit against the door, not the mirror) and carefully laid all four pieces in place.
Just to be sure nothing shifted during drying, I taped each piece down. Can’t be too careful, right?
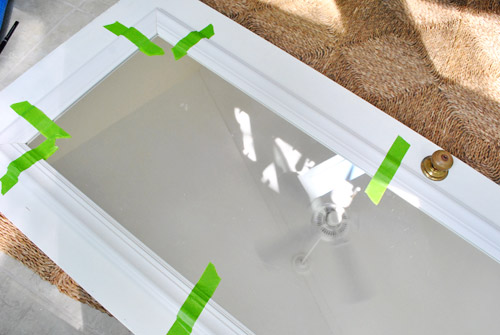
Well apparently I could’ve been more careful. After letting the trim dry for a day (the mirror had set for 72 hours at this point), I eagerly reattached the door (keep in mind that we’d been living bathroom door-less for about four days thanks to the false start with the too-thin trim) and took a celebratory shower.
Maybe it was the steam from the shower? Maybe it was re-hanging the mirror too soon before things fully cured? Whatever it was, moments after I finished get dressed after my shower – the mirror slid off the door, busting off the bottom piece of trim in the process. The other three pieces stayed in place, which thankfully kept the mirror from toppling over onto the floor. So the only damage to the mirror was a chipped corner that would be covered by trim anyway. But Sherry and I did nearly hyperventilate when we heard a crash from the bedroom and ran in to see what happened.
I didn’t take many pics of the “aftermath” because I was kinda grumpy about the whole thing. Not only did I have to redo everything (including having to scrape off all of the old glue), but I wasn’t quite sure where I had gone wrong.
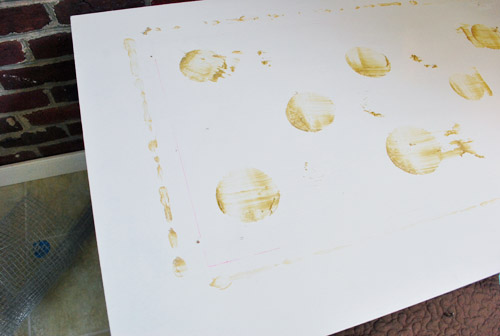
Well, re-reading the directions on the back of the mirror adhesive offered some clues. Like “Do not use this product without a permanent support system. ” Oops. Plus some parts about letting the glue set for a full week and applying it to the mirror back, not the door (though I doubt that second tip made much of a difference since it gets on both surfaces when you mash them together) might have come into play too.
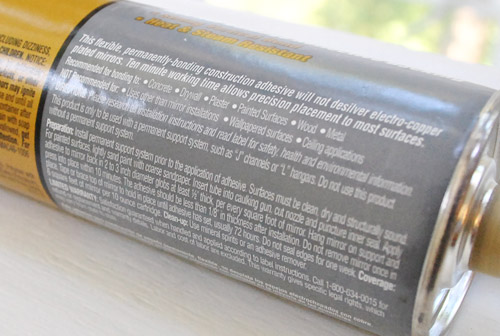
So in doing this a second time, I was determined to follow the directions. This time the adhesive was applied to the mirror… generously but in less large globs (Sherry called the first ones “cookie sized” but I’d describe these more as golf-ball-sized (and not as thick, so it could cure more easily). In addition to the blobs described in the directions, I criss-crossed some lines too, just to be safe a crazed man who couldn’t handle another mirror failure.
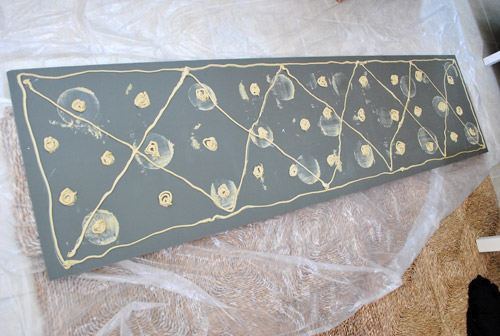
As for a permanent support solution, I wasn’t about to re-install the clips since the point of this whole glue/framing method was to avoid them (and the trim wouldn’t look great with big lumpy clips under it). So I improvised and carefully added some small finishing nails around the edges of the mirror. They went into the door nice and solidly, and the head provides a nice little rest/stop for the mirror. They might not work as a support solution all on their own (if there weren’t trim and glue also coming into play) but I was banking on them being enough to keep it from sliding as easily as it did after just two days of setting without any other support going on.
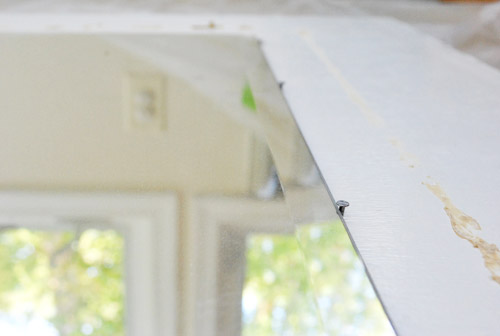
So with the mirror re-glued and nailed in place, Sherry and I started to countdown SEVEN FULL DAYS of letting the glue set. Even though it meant a full week of a door-less master bathroom, it felt like a necessary sacrifice if I didn’t want to do this a third time. And that’s how Captain Careful rolls.
On the seventh night (I feel like I’m telling a bible story all of the sudden) I actually stood the door up in the sunroom to do an overnight test (before putting the trim on again). To be extra safe, we placed the door on a big pillow so the mirror would have a soft landing if it decided to detach itself and slide down towards the floor again. Luckily, it didn’t. It passed the seventh night test! So the next morning I reglued all of the trim in place, let that dry flat on the floor for about five nights (more than three recommended in the instructions because we were out of town) and FINALLY put the door back on its hinges… just in time for Clara to resume her favorite activity: gazing at herself and shouting things like “sah pretteh!” and “iss baby!”
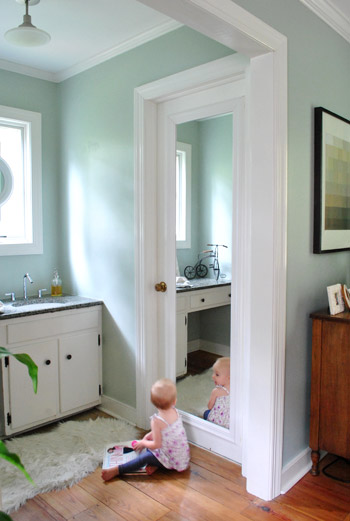
After all of the trouble that went into the project, I’ll admit that it doesn’t feel like the biggest and most life-changing payoff, but it’s definitely an upgrade. The white trim on white door doesn’t really “pop” in photos, but in person it’s a nice layered architectural detail that ties into the big quatrefoil mirror that we hung in front of the nearby over-the-sink window. And the goal of this project was just to finish the raw mirror edges more nicely, not draw lots of attention to it or anything (so painting it a color would just make it compete with other things like the mirror over the sink which, no offense to our newly trimmed fella, is much more interesting). So we’re kinda glad this update is of the subtle variety.
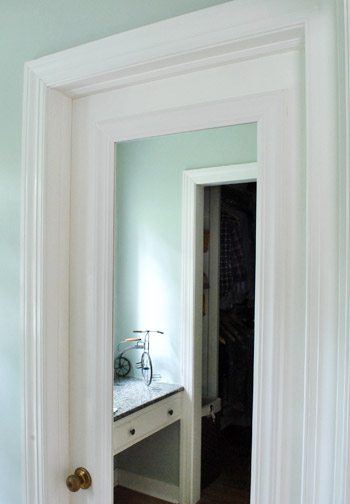
More than anything, I’m just glad to have the project successfully completed, to have some privacy returned to our bathroom and to no longer have to stare at those clear plastic mirror clips. Yep, now we can stare at more important things… like the doorknob that needs updating (probably with a can of ORB since my wife is so smitten).
As for the total cost, the second batch of thicker trim was $12, so the entire cost of the project with mirror adhesive should be around $17 if you don’t mess up and buy ten bucks worth of too-thin trim (which we hope to repurpose someday in some capacity…). Update: we just learned that Lowe’s & Home Depot will take trim back (even if it has been cut, as long as it’s over 12″). So here’s hoping we can recoup the $10 that we spent on that too-thin trim.
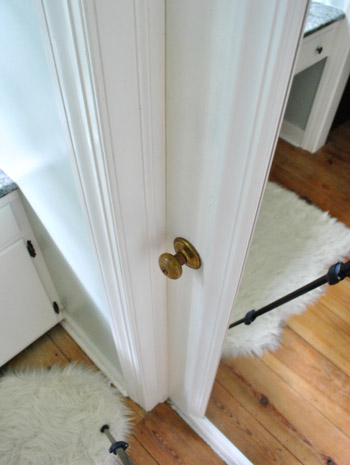
Have you guys make any subtle changes lately? Or encountered an “easy” project that had more hiccups than you ever thought possible? I’m happy to report that as of this posting, the door has survived five nights without falling down (even with a handful of steamy showers). Success! At least for now. We’ll keep you posted if things take a turn for the “ahhhh, I just heard a loud crash in the bedroom.”

Donna Jean says
In our house, ceiling fan replacement seems to require way more work than you would think it would. We live in Richmond, do NOT have central air (although we have a couple window units) and have (really inefficient) baseboard heat – ceiling fans are a must. The only 2 rooms that do not have ceiling fans are the bathrooms. So far we have replaced 4 since 2008 (we’ve been in the house since 2006 and lived with ugly fans for 2 years).
The first ceiling fan ended up taking about 2 weeks (yes, I said WEEKS) and a giant hole in my living room ceiling to be able to replace the fan. (My husband actually does know what he’s doing – it was due to really shoddy and downright dangerous electrical work on the part of the former owners that caused it to take so long). But it’s beautiful and low-profile (important when you have 8ft ceilings and a 6’5″ husband!)and I love it.
The next 2 only took about 2 hours total for both fans (that was a very welcome surprise – after the first time we were prepared for it to take a month!!) The 4th one took a couple days – that fan hangs between trusses and the support bar broke just as my dear, sweet husband was almost done hanging the fan. So he had to take the entire fan apart to take it down and cut a slightly larger than already present hole in the ceiling (at which point I’m pretty sure I cried, but then I saw that it was a much smaller hole than what he had had to cut in the living room and I felt a little more at ease). Once he installed the new (and much sturdier) support bar the rest of the installation went pretty smoothly, and the hole was small enough that base of the fan completely covered it, so at least there wasn’t patching involved this time!
We have one fan left to replace and I would like to do it soon, but we have to wait til we get to that in-between time weather wise – so we don’t die from heat (especially since the fan is in the kitchen) and so that we aren’t just heating the small area in front of the heater. And when we can potentially spend a couple weeks with little lighting in the kitchen!
Why can’t simple projects be just that?
karen says
good job..it’s those little details that really make a big impact.
ruthy says
geez..I would’ve been so frustrated!! But the trim does look lovely. :) We’ve made lots of subtle changes…adding molding to our floor/wall thresh-hold…painting the kitchen just a shade off of the original color…and tiling a small space in my kitchen…
http://discoverystreet.blogspot.com/2011/09/kitchen-project-part-1.html
Kate says
Even with all the hiccups, it is posts like these that remind me how great you are at what you do. In my home, the mirror would have just stayed with those little plastic clips for all eternity because I probably wouldn’t have even noticed that they didn’t look so chic — but you guys have an eye for the little things that can make a big difference. Well done and keep up the good work! :)
samantha says
i love the idea of spray painting our functional but not pretty shiny gold doorknobs ORB, any tips on doing this? which paint do you recommend?
YoungHouseLove says
We’ll detail all the tips whenever we tackle it! The basic method is sand with high grit paper, spray them with primer + paint in ORB, let them cure a while, and put them back on. You can also use a spray sealer to make them more durable!
xo,
s
Erika says
Oh my gosh we have had this type of thing happen to us so many times and it’s really frustrating. I am so glad you guys stuck with the project and made it right. I have a garage and closets full of half-finished projects that just made me crazy before I could get through them. I also wanted to share a mirror frame I did in our last house. We had one of those old mirrors with the round plastic holders in each corner. The tile was fitted around the mirror, so removing it seemed like the wrong thing to do. I just used base moulding and industrial velcro to attach everything. It came out pretty nice.
http://www.flickr.com/photos/kitschdesigns/2738010377/in/set-72157607093983734/
Your mirror looks great! I think we might have to try this on some of our door mirrors around here.
YoungHouseLove says
Ooh yeah that turned out awesome!
xo
s
Paige says
We had big plans to update our bathroom over the weekend. The mirror in there is glued to the wall (and part of it is behind the vanity, ugh), so it would have been a big, multi-step process to get it down. We started “easy” with the light fixture, but the original one was installed incorrectly and didn’t want to come off the ceiling! It took us about 2 hours to switch it out. After that, we were like, “Ya know what, maybe we don’t want to take out the vanity and pry the mirror off the wall today.” Baby steps. Ha ha.
I blogged about the stuff we ended up changing instead:
http://finalclothesout.blogspot.com/2011/09/diy-nipping-murphys-law-in-bud.html
Sherry says
Ok, so I’m an intermittent reader, but lately, I’ve been reading the blog a lot – and wondering – when you run into a hiccup or have to get new supplies – do you instantly go run that errand? For example, if you find that you need a different size screw or a different color paint – do you run directly to Home Depot (or Lowe’s or wherever) and get that specific thing – or do you wait until you need several things from Home Depot and make one trip?
I tend to do the latter, and find that it really makes me crazy because I end up doing a million little projects at the same time – but I’m wondering if you guys are constantly running in and out of stores?
thanks so much for your blog! I love reading your daily adventures and you give such detailed thorough advice I find that I use you guys as a reference all the time!
YoungHouseLove says
It really depends on Clara and how the blog is doing. If Clara is awake and it’s a peak time for comments (around 11am for example), nobody’s going anywhere (since one person is on Clara duty and another person is on blog duty and Clara’s morning nap is impending so no one would want to duck out with her at that moment). But then again, nobody is usually working on projects at that time anyway (since someone is being a stay at home parent and someone is answering comments/sizing pics/writing posts and doing other desk-job stuff. So usually Clara is asleep for the night when most projects get done (most times after 7:15pm on nights and weekends) so in that case John can run out for stuff while I stay at home (since Clara is sleeping). Sometimes we’re just too tired after a long day with the bean though, so we put it off until the next morning and then during her morning nap John can run out for supplies while I do blog stuff while Clara’s napping.
xo,
s
Wendy says
I can totally relate to the “easy” project having more hiccups than ever thought possible. We’ve been working on the vestibule in our 1880’s victorian row house for nearly a year! What we thought would be a “simple” project, given the space is only 3′ x 3′, has snowballed into a huge reno with more setbacks than we can count.
We had a huge weekend though, and finally got to the point of installing our newly painted turquoise front door. http://www.oldtownhome.com/2011/9/7/Laboring-the-Weekend-Away-On-Our-New-Front-Door/index.aspx All that’s left is the installation of french doors and new house numbers, and we can consider it done!
YoungHouseLove says
Oh my gosh it’s GORGEOUS!!! The antique details and the cheerful color are to die for!
xo,
s
keri says
the minute i saw the glue “foreshadowing” i knew where this was going – from experience. we glued a beautiful 6 foot by 4 foot mirror, which my father insisted did NOT need clips, and i removed the support boards after only 48 hours…about 2 hours after removing the supports and tape, i heard a large crash…
thankfully, the mirror didn’t break, scratch or chip itself – BUT IT DID SPLIT MY BATHROOM COUNTERTOP! The mirror was stronger than the faux marble top. A year and a half later, still working on a plan to make an invisible seam between the cracked piece and the rest of the top. le sigh.
YoungHouseLove says
Oh my gosh that’s crazy! Who would have thought that would be the thing to break?!
xo,
s
Sarah says
Oh! Now I wanna see Clara talking to herself in the mirror – got that on video? :-)
YoungHouseLove says
Haha, we’ll have to try to catch her. Whenever the flip camera comes out she promptly stops doing whatever cute thing she’s doing and tries to grab the camera!
xo,
s
Amanda says
Thanks for sharing! I like the way it turned out!
Renae says
I had to leave a comment because we did the same thing (a la Kevin and Layla) to our blah hollow-core doors. I JUST said to Ryan last night (no lie!), “I’m kinda worried that the mirrors are gonna fall off some night in our sleep.” To which he responded, “They’ve been up there for three weeks, I think if they were going to fall they would have fallen by now.” See i’m paranoid because we haven’t gotten around to putting on the trim that will hold them in place yet. He’ll laugh that this showed up on your blog today. :) Silly coincidence.
Donna says
It looks great!! – I have a big mirror project in my future… Actually two! And now I think I can do it!
Kelli says
I can’t believe you guys posted this today…it’s meant to be! Our bathroom is currently mirrorless-I looked at the wall instead of myself this morning while brushing my teeth- and we had NO idea how to reinstall/frame in the old mirror. The only step we’ll have to change is doing it on a flat surface…we can’t exactly lay our wall down flat. But I’m thinking we can use the old plastic do-hikkies until it cures, then take them out and replace with some finishing nails.
Thanks for posting!
Alison says
I think it looks fantastic. I’m so glad you guys take care of trial and error for the rest of us;)
Melissa M says
Y’all know you are gonna ORB those doorknobs. Don’t try to pretend otherwise. ;)
I like the upgrade – though it is subtle, like you said, it adds some nice depth. The pictures actually make the mirror look inset/embedded in the door because of the trim, which looks pretty cool!
YoungHouseLove says
Haha, but of course!
xo,
s
Kathlyn says
Great job! All the hiccups paid off :)
Amy says
Thanks for sharing! This is so timely, as we’re brainstorming ideas ourselves for a door mirror in our 1958 rancher. But our mirror happens to be rounded at the top and bottom, so that it’s slightly oval-shaped — it’s very old and cool, but we haven’t thought of anything other than clips to hold it in place. If you have any brilliant ideas, I’d love to hear them!
P.S. Another thing I love about this project: The stability! We have a son about Clara’s age, and one reason I’d like to do something like this in our house is to keep mirror and son from colliding. :o) Great idea, all around!
YoungHouseLove says
Oh man, I wish we had an awesome idea for an oval mirror. My only thought is to see if they sell anything sort of bendable in the trim aisle (maybe made of plastic but cut to look just like wood molding) that you can use to frame it since it’ll have flex? Then you can paint it all out to look just like white wood trim? Good luck!
xo,
s
Stacia says
Looks great guys! This post made me laugh so much (WITH you, not at you ;-) of course). I am sure someone already suggested it, but, I think that thinner trim is just dying to become another white picture frame in your growing collection.
Wendy says
I always use PL Premium products when gluing. I have glued pegboard to my cement garage walls and also 2×4’s that hold all my garden tools. It is construction grade and works in a few minutes although you have some time to reposition it. Just make sure that you never want to remove the item that you glue. I know some people that have used it for baseboards and regretted it!
YoungHouseLove says
Thanks for the tip! We’ve never used that stuff, but it sounds super strong!
xo,
s
jeannette says
SAH PRETTEH
Helen & Noel-John in NZ says
well it looks great now it’s done! :) We have a couple of mirrors mounted this way on doors in our house and we love them too!
We are in the process of redecorating our lounge, dining room and kitchen, not a wee little job, a huge big one!
Amz says
Am I the only one who giggled at this?
“since screwing or nailing next to a mirror made me nervous”
Sorry, it’s the inner preteen boy trapped in my brain.
YoungHouseLove says
Oh man, how did I miss that? Haha.
xo,
s
Ashley @ DesignBuildLove.co says
that is awesome!
freefalling says
haha!!
It’s an epic tale.
I felt like I had split the atom when I made a charcoal chimney from an old tin for my bucket bbq.
I was king of the world, baby!
http://makingstuffwithfreefalling.blogspot.com/2011/08/charcoal-chimney.html
YoungHouseLove says
Haha, congrats on the win!
xo,
s
Ashley @ DesignBuildLove.co says
what a difference trim can make for mirrors! That mirror went from looking totally basic to totally custom! NICE JOB guys! We redid the mirror situation over our guest bathroom vanity using recycled aluminum tiles and two beveled mirrors- all to form one uniform, unique vanity mirror (http://designbuildlove.co/?p=119)! :) I actually have been thinking I might need to custom frame the mirror that we’re working on for our home gym… hmm…
Beth @NashvillePug says
Every time I have used Liquid Nails (after my first mishap), I have always put something very heavy (weights, large books) on top of the glued object to really spread out the glue and seal the two objects together. I found this out after a small mirror fell off my wood shim sunburst. Live and learn! Looks great!
alex says
Hey!
your home makes me swoon…and make me want a house to fix up…
I know you guys said that you were going to somehow use the trim that didn’t work out…now…I don’t know how much you got, or if you’ve even thought about it…but you could trim your “built-in” office youre working on for extra…built-inny-ness?…look. :)
YoungHouseLove says
There’s not quite enough to do all of the trimming we need, but who knows – some if it may come in handy!
-John
Candice says
I think your mirror looks beautiful. On the subject of ORB, it is very popular in my house too. My roomie (twin sister Alice) and I changed all our hinges and doorknobs to ORB last year but were unable to find the correct hinges for our front door. We recently decided to paint the old hinges ORB but then realized we would have to take the door off. Well, that isn’t exactly fun for humans or pet kitty cats since the average temperature in Phoenix is 110 right now. So sister Alice shopped around on the Intenet and finally found the correct hinges in ORB for $11 including shipping. Needless to say, we we bit the bullet and paid about $11 for those suckers!
YoungHouseLove says
Haha, some things are totally worth it! It’s the small DIY luxuries that are the sweetest. Haha.
xo,
s
ashlee says
my most subtle change lately would be *finally* framing a beautiful picture of my girls jumping into fall leaves. framed with a white mat and ORB’d vintage frame. it’s absolutely gorgeous. the problem is – all the clips on the back are broken…so i can’t quite figure out how to keep the picture IN without it falling out the back. lol. but regardless, it looks great when it is laying on my bed. haha.
Sarah K says
Duct tape!
Jackie says
The finished mirror looks great.
You guys make me laugh…of course I am laughing with you, not at you. We recently had a similar mirror accident…only a vintage mirror inherited from my Grandparents was the victim :(. http://www.tealandlime.com/2011/08/huge-framed-mirror-made-from-beveled-mirror-tiles/
I hope you mirror lasts a long time. I have been wanting to do something similar on my closet door and I appreciate learning from your mistakes :)
YoungHouseLove says
Oh man, so sorry for your mirror loss! But the new one looks amazing!
xo,
s
Brooke says
The mirror looks great! Eventually I plan on framing my bathroom mirror. A week ago I decided to simply organize my pantry. But, after looking at pantries on Pinterest, I couldn’t resist making it an all out re-do. I thought it would take me a couple of days tops… it took a full week. It was so worth it though, now I have a pantry I can be proud of. Let me know what you think! http://lifeonagravelroad.blogspot.com/2011/09/hallelujah-pantry-is-finished.html
YoungHouseLove says
Wow- it looks so good in there! Congrats!
xo,
s
Laura Koivunen says
I love your narrative about this project, and the finished piece looks great! seems like the kind of complicated process that most of my projects take before completion :s
Lindsay H says
Once again John has me cracking up. My favorite line of this posting is the “never can be too careful…apparently you can…” Great job guys!
Andrea Phillips says
I’ve used that same adhesive and it actually never fully set up. Resorted to gorilla glue, worked like a charm on my shim starburst mirror.
threadbndr says
My (almost) full length mirror is inset into the English Art Deco wardrobe that I use as a coat closet (darn historic houses with inky dinky (or NO) closets).
But I also have one of those huge over the fireplace mirrors that @Heather Andrews has. I’ve never had the gumption to take it down. When I get around to stripping the wallpaper in that room, though, I’m not going to have a choice. NOT looking forward to it.
Shante says
It looks great!
Kelsey says
I’ve never thought to frame a door mirror, what a good idea!
Ann Marie says
I recently flexed my refinishing skills by sanding and staining our dining tabletop darker. It turned out amazing! So, feeling confident (maybe a little cocky…), I decided to tackle our curio cabinet. Let’s just say, 2 weeks later, it’s still sitting in the garage. Bane of my existence. I hate it when the simple things snowball out of control!
GreenInOC says
I think it looks amazing and well worth the effort.
That being said, I wouldn’t put forth the effort because more than anything I am LAZY! 10 days, 2 trips to Lowes, taking the door off the hinges 2x, etc… – OMG, you deserve a metal!
You may have already addressed this but my lazy bum is making a request – I would love to see before & after side by sides for posts like these. I think that, at least for people like me without an artist’s eye, it really makes a difference. You know, in case you have extra time for posts and all!!!
YoungHouseLove says
Thanks for the suggestion! We always mean to repeat the before pic down near the after to save you the scrolling (sometimes putting them next to each other on the same line makes them so small they’re hard to see). We’ll have to try to remember to bring the before down there more often!
xo,
s
Lindsay R says
i ran into your blog a while ago and i am so glad i found it again! what hard work you have put into your house and beautiful is every little detail!
i haven’t even thought about how to put a mirror to a door but it looks so clean. nice job! looking forward to future improvements.
erica says
Oh the “little” projects. We decided to start scrapping wallpaper in our office, future nursery. We’d done our bathroom and got it done in a day. With a wallpaper steamer and some excitement we figured we’d have it done in a day or two. That was Saturday that we started. We came to find out that there wasn’t just one layer of wallpaper as had been in the bathroom, there were two layers one had been primed over for the new wallpaper. We swear that some parts were attached with super glue. Slowly but surely we’re still working on it and our goal is to finish by this Sunday. We’ll see. It needs to be done by September 29 for our adoption home study visit. Yikes!
Brandan WH says
Very pretty! Looks much more substantial in the pictures (almost like you have a whole new and fancy door), so you must have done something WAY right! Gotta love those kinds of surprises!
Tracey says
I have to admit I love reading posts like this… Not because I love to see John in misery, but because every single one of our projects turns out like this and it’s comforting to know it’s not just us! Our latest adventure: Replacing interior slab doors. We went to Lowe’s and bought stain. Wrong color. My hubby went back and got different. Wrong color. Went back two more times. Was finally informed they no longer make the stain we used before. He had to custom blend the color from three different colors we had. Then after (FINALLY) staining and finishing the doors, my hubby came up to me and informed me the bathroom door doesn’t fit in the frame. Apparently doors were thinner and shorter back in ’66 when our house was built. So now he’s going to have to rip it down and hopefully not screw up the lovely finish. Good thing we kept the old doors up or we’d be peeing without privacy!!
Tracey says
P.S. – On a positive note, I told my hubby how you’ve been on an ORB kick, so we bought a can and painted the bright shiny gold (that matched nothing in our house) escutcheons on the crystal knobs for our french doors… They look AMAZING now. So at least we have that goin’ for us!
blake says
Oh yeah, I can relate. I’m a newspaper reporter in upstate NY and I have a home column. I just wrote my last column (http://bit.ly/nuwEcp) on a stupid DIY project that took way more work to undo than it did to do. Gotta love the trial-and-error approach!
Jenn Prather says
OK, you mentioned using the ORB on the doorknob?? IS that a pretty good option as opposed to replacing ALL of the door hardware in the house? All of our doorknobs are outdated and mismatched, and I want to replace it all, but thats a pretty expensive project! So, is spraying it a good option that would hold up pretty well?? I know you did it on the front door, Im just curious as to how you think it would hold up on doors that are used ALOT!
YoungHouseLove says
We’re definitely going to give it a try! We figure if the other option is buying all new ones we can at least try to save the stuff we have! We’ll let you know how it works out!
xo,
s
Michelle says
I found this in my random internet trolling and thought of your post. Having a patio similar to yours I understand the frustration with the weeds. I do battle with mine all summer long.
http://fullofgreatideas.blogspot.com/2011/07/natural-weed-killer-made-with-basic.html
Claire @ Claire K Creations says
At least we can all learn from your mistakes John :-).
I haven’t made any updates lately but this weekend happens to be the Council large item collection weekend. I sense some junk searching and makeovers coming on!
Ashley says
Saw these on ANTHROPOLOGIE and thought of you, Sherry. Too bad they are $34… sheesh!
http://www.anthropologie.com/anthro/catalog/productdetail.jsp?id=22522486&catId=HOME-KITCHEN&pushId=HOME-KITCHEN&popId=HOME&navCount=90&color=010&isProduct=true&fromCategoryPage=true&isSubcategory=true&subCategoryId=HOME-KITCHEN
YoungHouseLove says
Love those!
xo,
s