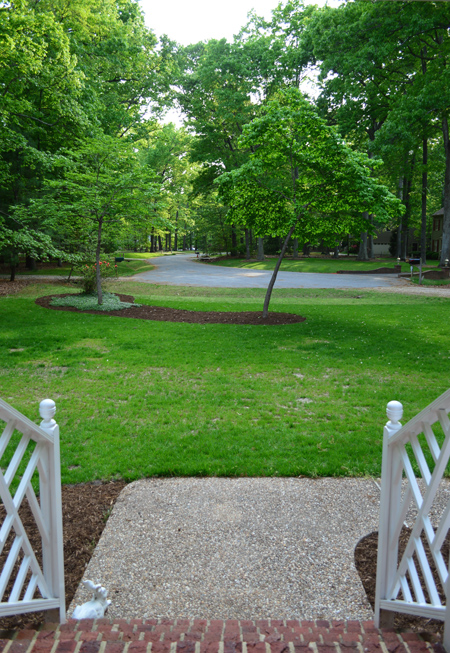
Let’s talk about planning planting beds, digging them out to crisp up the edges, spreading a truckload of mulch, and other fun curb appeal delights. Yes, with Clara’s birthday party coming up this weekend (more on that another day) we’ve been trying to give our landscaping a little attention. Mother Nature has done her job by cranking the greenery to eleven, so we’ve done some work to further improve the view from our front porch. And from this post title, you can probably guess what I’m talking about.
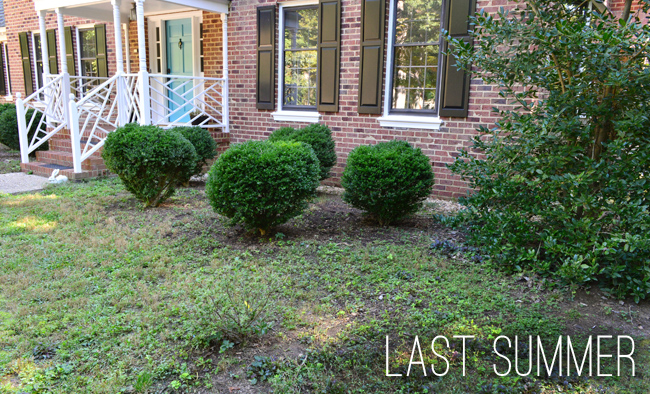
Let’s hot tub time machine our way back to last summer (after all, there is no classier way to time travel) when most of our plant beds were looking like this. A nice gradient from weeds to dirt.
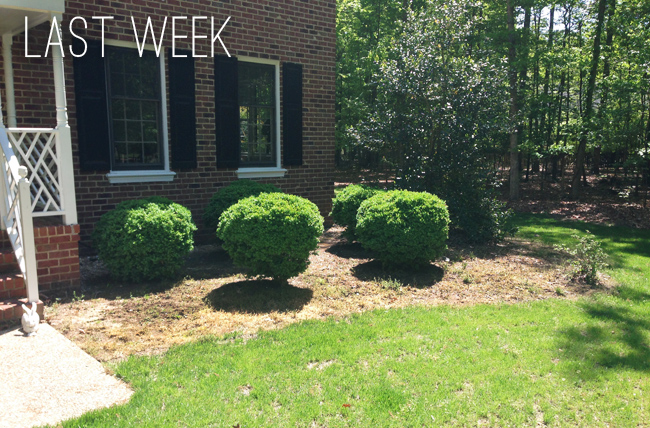
Our grass came in fairly well (not perfectly though, so we overseeded this spring and will probably aerate/seed again in the fall) but we didn’t get around to mulching. So by this spring, we had slightly better defined planting beds thanks to thicker grass surrounding them, but they were still looking pretty rough themselves.
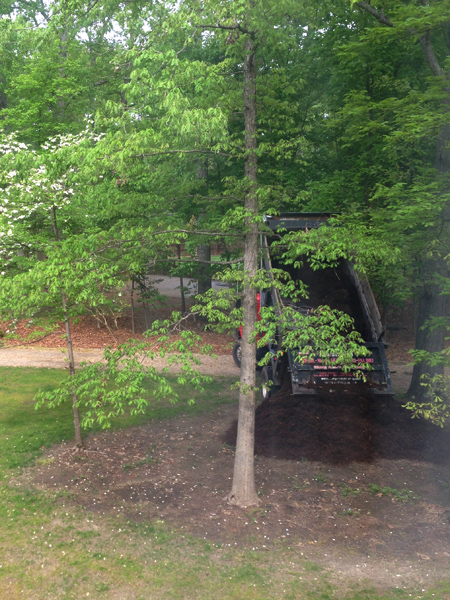
We looked into free mulch since some of you said that was available in your area, but came up empty. So after getting recommendations from a few neighbors and doing some math, we decided to get mulch delivered this year rather than haul a bunch of bags home from Home Depot. We learned that a 10 cubic yard delivery of basic hardwood mulch would run us $280 through this local company that a few of our neighbors used each year. We did the math and realized that even the cheapest stuff at Home Depot would’ve been $300+ for the same amount… and it would have meant hauling 135 bags home ourselves, so that made the delivery route a pretty easy call.
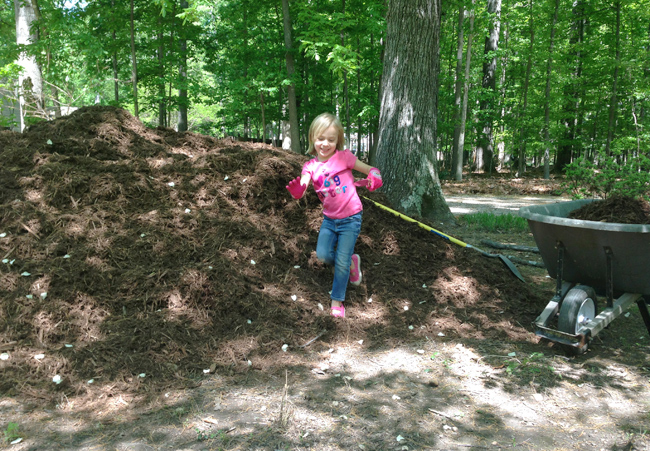
Not that there wasn’t lots of hauling involved. Instead of bags, I was shoveling wheelbarrow after wheelbarrow full, but at least I had a helper for a little while. Next time I’ll have to convince her to upsize her tiny trowel.
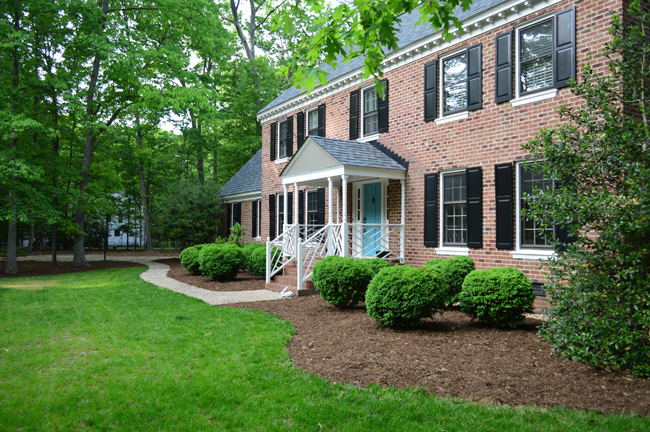
It took 2.5 afternoons, but by the end our landscaping was looking a lot better. We still have a ways to go (like actually planting more and taking care of some bare-ish grass patches) but at least we’re getting closer to that ever elusive “curb appeal.” Although we’re still not 100% set on the shape of these beds (we’re debating extending the one in the foreground along the outside of the path so we can plant things on both sides of the walkway eventually.
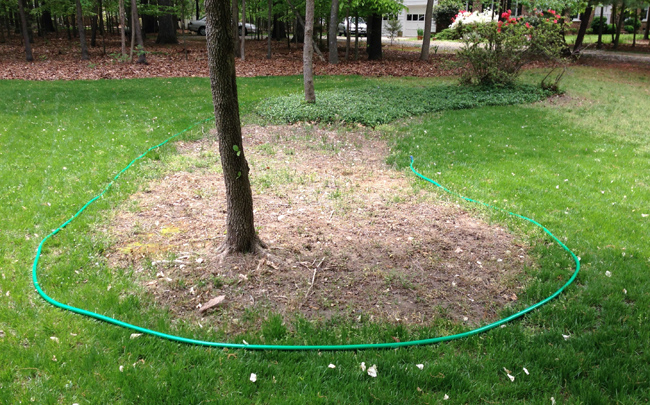
In addition to hauling and spreading, I also took a crack at defining the beds. Many of our neighbors have beautiful landscaping with crisp grass-to-mulch lines that we’ve long admired, so I thought I’d attempt the same look. I started by outlining the shape with a hose – intentionally going into the grass so it would be thick at the border.
Then I used this small edging spade to cut along the line, just digging out a small chunk as I went.
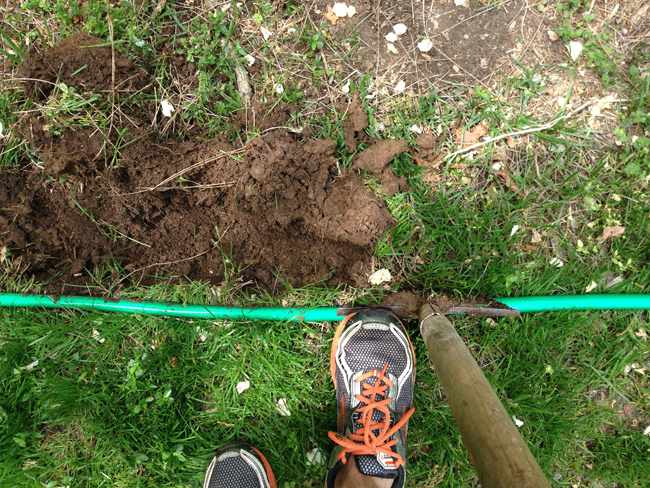
Next I went back along and dug up any grass in the area that I wanted to mulch. This not only helped to keep grass from eventually sprouting up in the mulch beds, but also recessed the whole bed below grass-level, so the mulch will hopefully stay more contained.
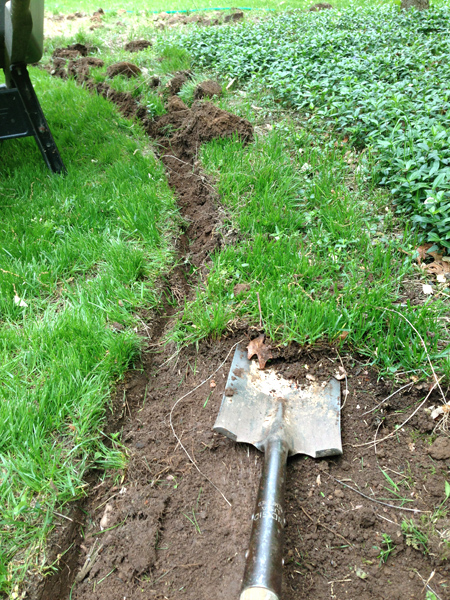
Here’s the bed all dug up and ready for mulch. I’m not entirely satisfied with my final shape, but I think once we add back some bushes or flowers it might make more sense. For now we’re just kinda working with what’s already there.
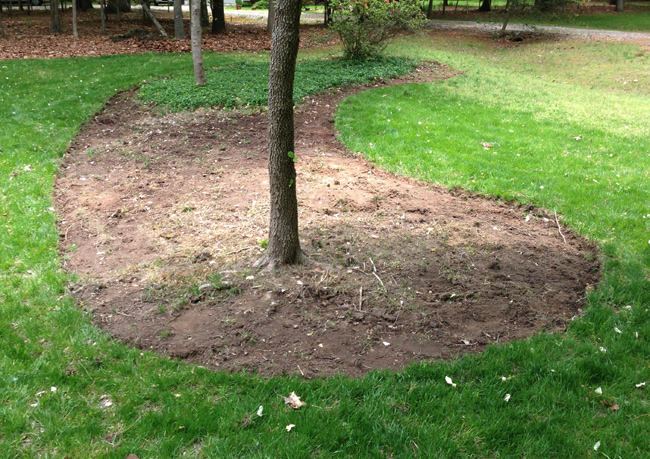
And here it is all mulched up and ready to party. Well, except for that sad looking azalea on the end there. He must be very popular with the deer.
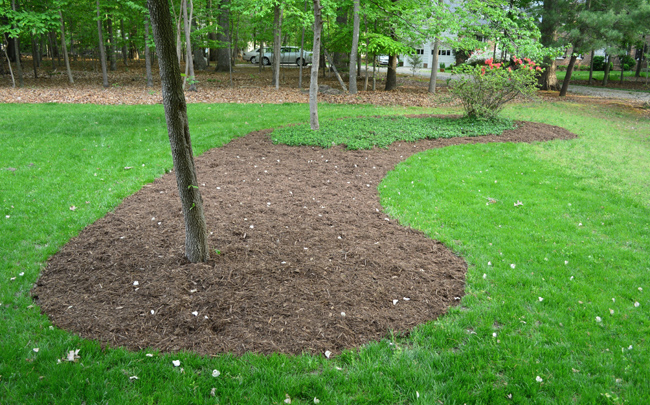
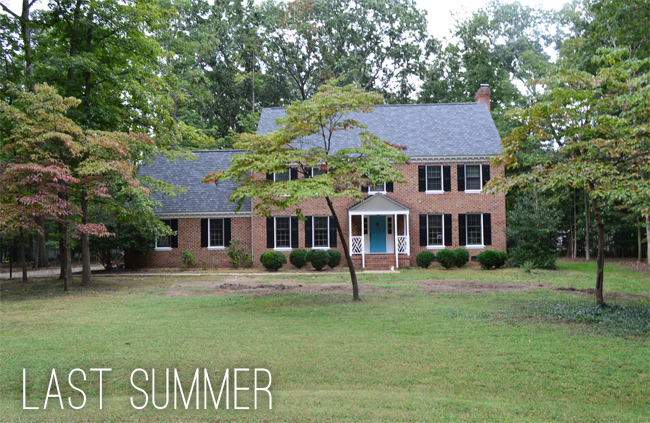
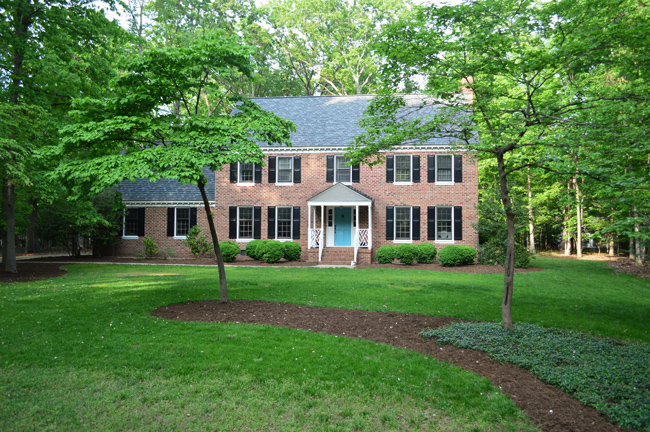
I won’t give you a bed-by-bed tour of the yard, but here’s another quick before and after progress look at how much things have evolved in the last nine months or so.
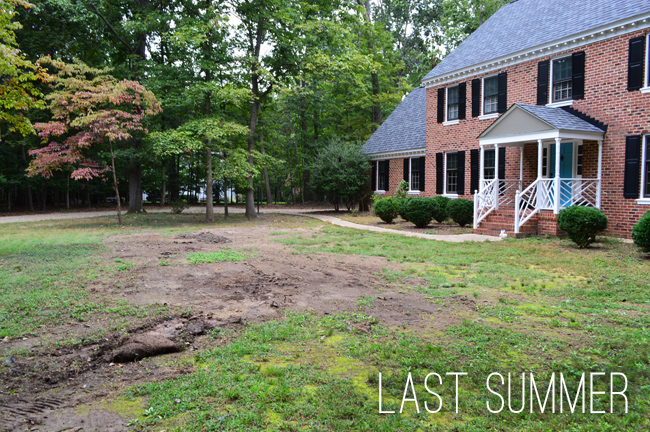
This picture makes me so grateful that winter is over.
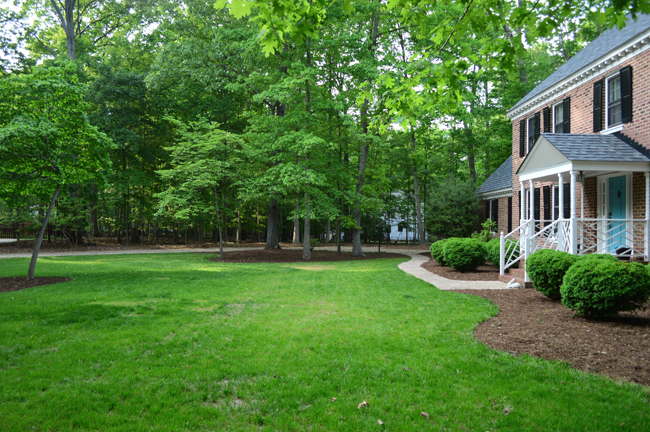
Ten cubic yards ended up being more than we needed (we did some rough measurements and used an online mulch calculator to get that figure) so I think next time we’ll just need 7 or 8 and we should be good to go.
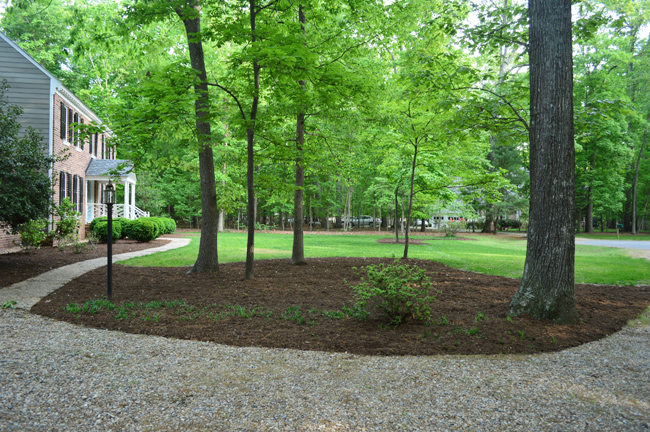
I used up the extra by mulching some areas in the backyard, and then spread the rest over the big bed in next to the driveway (in the photo above) to make it extra thick.
With this task done, we feel like we’re finally close to “Landscape Zero” where the property doesn’t look too neglected (tell that to the weeds in the driveway) but we haven’t really moved forward to getting those empty beds planted yet.
We’re actually thinking of hiring the landscaper who did our showhouse for a consultation since we really liked working with him. We’d do all the planting grunt work, but we think that talking to a pro about what should work with the deer and the light that we get would be worth the trouble. We really liked getting a professional opinion on our last house, which seemed to get the ball rolling over there, so we’re hoping it has the same effect here.
Is anyone else getting their hands dirty lately?
PS – Sherry made a Teddy’s Photo Project page (and a new sidebar button to lead you there) this weekend, complete with his three week photo and a few outtakes. We’ll be updating it with each week’s photo as we go, just like we did with Clara’s.

Melissa says
A few readers commented on what to put down before mulching to block weeds. Do you recommend weed fabric? Or is newspaper and/or cardboard the way to go?
YoungHouseLove says
We have tried using weed blocking stuff and gone without it and we don’t seem to have much of a difference most times (weeds sprout up above the fabric sometimes when we use it anyway), so we opted to skip it for these big beds. We’ll have to see how it goes!
xo
s
Stephanie says
My friend, a landscape designer, doesn’t think these actually work well (and we learned that too by trying it out before consulting her). It just ends up making the weeds harder to pull out. The key is to really dig out all the weeds and trill the soil before you mulch. Then put mulch down, and then add plants. The plants will make it harder for weeds to grow because the weeds will have to compete with the plants bigger root systems. I’ve found that I just need to get out about once a week and pull up a few weeds here and there (so a total of 5 minutes).
Parisgirl says
What a truly beautiful place you live! I love your home and your picturesque street.I put in three Teddy Bear Magnolias and they all died in the heat.
Joy says
Wow your yard is really coming together. ??
Julia@Cuckoo4Design says
Mulch always makes such a difference
Megan @ Our PInteresting Family says
It looks beautiful! Your front door really pops from the street too. I love that color.
Lauren says
What did you do with the grass/sod that you removed when enlarging the beds? I would like to enlarge / better define the borders in our yard, but I never know what to do with the extra dirt… Thanks!
YoungHouseLove says
We have a wooded back of our lot, so we just put that stuff behind a bush back there where it’s hidden.
xo
s
Stephanie says
Oh, your yard is looking amazing! I too spent the past weekend outdoors. I love that the kids can get involved too, even if it is just scooping dirt. I think it’s a great idea to hire a landscape designer. I learned so much about plants from my friend who is a landscape designer. Although it seems like an extra expense, you really do save a lot of money in the long run by selecting plants that will work well in your space rather than planting blindly and having to replace things that don’t work/get eaten by deer! Salvia ‘May Night’ is a great deer resistant plant, by the way, for your sunny garden spots. Plus it flowers all summer and is pretty drought resistant.
MB says
The yard looks great! We have 2 huuuuuge magnolias in our front yard. While they are beautifully green all year and have pretty flowers, they are super high maintenance (as in, dropping leaves NOW!). So putting yours in the back was a great idea. Anyway, can you come to my house to fix up my crazy yard???
YoungHouseLove says
Thanks MB! We had one in the middle of the yard (a big one, not a dwarf) at our last house, so we remembered how many leaves it dropped. They’re so pretty when they’re glossy and green though, so I bet yours are lovely.
xo
s
Cher says
Please don’t do the free mulch. My city offers free mulch delivered, and I made that mistake about 5 years ago, and my entire yard is now full of mystery wee that I am still pulling. Not worth it.
YoungHouseLove says
Thanks Cher! A few others said they got poison ivy from it. Yikes!
xo
s
bfish says
Also, we mix mulch with garden soil and other amendments when we plant trees and shrubs. Municipal free mulch is often green (just ground up recently) and until it ages it tends to draw water out of the soil which is no good for the new plants. The best use we’ve made of free mulch is to establish new beds, layering the mulch and soil and letting it sit there for a year or more. The extra nitrogen breaks down and improves the soil; then you can plant in it without danger of the mulch acting like a sponge.
Andrea says
Wow – it looks amazing! We are in the process of creating similar mulch beds, so this was very helpful. Am I the only one that was reminded of the Curious George episode of the same name…”Mulch Ado About Nothing”?! Perhaps I’m watching a little too much kiddo TV :)
Vicki says
Wouljd just suggest that a magnolia is a lifetime tree–meaning it grows as long as it is alive–although more slowly as it ages–
you are doing to have to do some tree pruning in the future to allow it best use of light/space…
Teresa says
Just wondering if you guys are considering installing an irrigation system sometime in the future? We installed ours about 10 years ago and I wouldn’t take anything for it. For us, it made more sense to put the money out upfront and invest in a system that would maintain our lawn, scrubs and plants. It usually helps with re-sale value as well.
I can tell you I don’t miss the days of dragging hoses around the yard all summer trying to keep everything watered and living. Then only to have them die anyway and shelling out more money to replace them.
Regardless of whether you have a irrigation system or not, one of the biggest mistakes I see people make here in central VA is that they cut their lawns too short! This not only promotes weeds, you lawn will not fair well once you hit a dry period. Your lawn mower blade should always be set at the highest height possible.
YoungHouseLove says
We had an irrigation system in our last house and didn’t use it all that much but it was awesome for establishing grass after seeding the yard, so we have definitely considered adding one here down the line!
xo
s
Mimi says
Why is it crazy to have a party for your child? Did you just usually order pizza and have Store bought cupcakes?
YoungHouseLove says
Yup, but I have to clean this wreck of a house instead of just meeting at the park ;)
xo,
s
Deb D. says
Looks awesome! Not sure if anyone suggested this already, but you can use the sod you dug up in the beds to fill in any bare spots in the yard. I’ve done this in the past with great success. Keep up the good work — I’m inspired to go dig in the dirt in my yard now!!
YoungHouseLove says
So smart!
xo
s
Susann says
Love it! Looks so green and so much neater than last year, all your hard work paid off. My only attempt at growing this year will be tomatoes grown in pots as I have no growing areas on my tiny property, everything is concreted in. I had good luck last year and see some tiny tomatoes growing so I’m hoping for the same this year. NOTHING like homegrown tomatoes in the summer!
Kim says
that looks so different! Iowa is a soggy mess right now, so on Sunday instead of working in the ground I fixed up some pots for the front step & back deck.
Sarah G. says
We purchased a home that had zero landscaping. We decided to hire a landscaper to do a huge plan for us. It included plant types, materials, bed shapes, a diagram, and number of plants. If the company would’ve done the work, the cost would’ve been around $7,000. That price was for half the house! We are doing all the work ourselves, but we did bite the bullet and pay $150 for the plan. Best money spent! Oh! and we decided to rent a sod cutter for $60 because we put in a lot of new beds with curvy designs. Since we are DIYing it, we are doing the whole yard plus 7 big trees for less than half the price the company quoted us! My suggestion is to definitely pay for a landscaping plan, but do the work yourself. It was so worth it!
Annika says
I love the garden-updates! You have so much potential here and so much space, and it’s looking great already. I feel inspired even though my own garden situation is the opposite of yours – my garden is pretty much the size of a fingernail… And oh – the magnolia! <3
Joanna Banana says
We did the same thing this weekend…MULCH. If anyone lives in Philadelphia, the city sells it at the organic recycling center in Fairmount Park for $40 a ton, which is super cheap. We got a 6′ bed truck full for $21 and had some to spare.
Celeste says
Look,John wearing shoes, lol!
Leslie says
Definitely coming along! Are you guys planning to expand the grass area in the back of the house to create more yard space, or make room for a play space? I practically lived in my back yard as a kid and loved the swing set, slide, and sand box my dad built for us (all out of wood!). John, you totally have the skillz to build something awesome for C & T.
YoungHouseLove says
We have a pretty big grassy spot on one side of the back (where the deck isn’t) and on the right side of the house, although we do debate extending the grass out back as well. We definitely want to make (or modify a secondhand) playset for back there. Can’t wait!
xo
s
Shelby says
The good thing about gardens is that you reap 10x what you sow. The hard work only makes it more beautiful and works wonders for the self too! Hard to find something as organically enriching as playing in the dirt.
Lily says
Ha! love the title. I used to think the smell of mulch was just awful until I started associating it with spring… kinda like coffee and its effects!
x Lily
http://whilemyboyfriendsaway.blogspot.com/
Susan Park says
Your lawn is so green! And with the trees your house is really picturesque. It should be in a movie! Really beautiful, good work!
Tim says
We just put in mocha mulch. It’s awesome and really makes colors pop
Monica says
Hi guys, long-time reader, a once-or-twice poster here. I love your new house! I was just wondering, though: You seemed to be much more eco-conscious before whereas now you’re quite a bit more lenient. It really didn’t come to my attention until this post. Any gardener will say that wood mulch actually isn’t good for gardens. Not only are they full of chemicals but they end up trapping too much moisture near the base of trees rather than fostering roots further out. As well, Scott’s products are notoriously full of chemicals (I’m sure there are some “natural” or “organic” versions but I don’t really trust the brand). Anyway, these chemicals will leech not only into your edible and cutting gardens, but into your neighbors’ yards, too. (Likewise to you when they use these type of products). I know it’s a vicious cycle and it is cheaper to just go commercial but I thought I’d check in since I really like how environmentally-friendly you’ve been and how you help people see that living green isn’t that difficult. Thanks for the posts and good luck!
YoungHouseLove says
Thanks for the tips! Never knew that about mulch or Scott’s (we used both of them in our first and second house as well, so they’re just what we know). We still compost, cloth diaper, and are a one car household as well as being in the process of converting our light bulbs to LEDs & adding dual flush buttons to our toilets. Sometimes we just don’t blog about things like composting if we’ve done a number of posts about it before :)
xo
s
Adare says
Did you do a post at all on reseeding your lawn? That’s on our to-do list and we have no idea that best way to go about it – what time of year, did you aerate, etc?
Thanks!
YoungHouseLove says
I think it’s good to aerate in the fall, although we don’t always do it. If you do aerate in the fall, follow that with reseeding (the bag will give you instructions if you’re over-seeding as opposed to seeding for the first time) and then water it. 7-10 days later that new grass should pop right up! You can also add fertilizer when you seed to get things going.
xo
s