Our recent road trip to see Katie and her amazing house gave us that tickle to get down to business when we got back home. You know how your DIY momentum is up and you’re moving right along ticking things off your to-do list and then the dust clears and you’re just spent and need a little break? Like, mehaps, a road trip? That seems to be the way it goes with us. When it comes to house progress, we tend to work in fits and starts. But then something sparks that get-back-to-business excitement and suddenly we’re done with our four-ish day Hammer And Paint Brush Hiatus and are refreshed and ready to go. Yeah, so that happened.
I guess being on the road produced that absence makes the heart grow fonder effect. Not that we were mad at our house, but we just weren’t raring to go when we left like we were when we got back. So the morning after our 9.5 hour drive I woke up early, sorted through a million (ok, a thousand) photos, wrote that shopping post that went up in the afternoon, caught up on comments/Facebook/Twitter/email, wrote this house crashing post for the next morning, and then it was dinner time. Then I up and made dining room curtains. And they might just be my favorite things in the whole darn house.
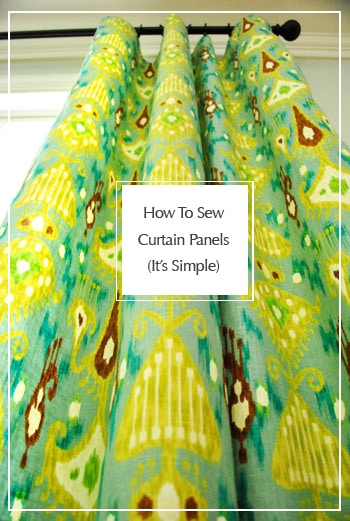
Seriously, I love them.
You guys know we’re into our hallway frame gallery a little too much (along with our giant bedroom light fixture and humongous gray sectional). And I adore my weird horse art and miscellaneous ceramic animal menagerie. But you’d think I carried these curtains for nine months and went through 48 hours of labor to bring them into this world – that’s how much I love them. And it only took me about an hour and a half – two tops – to make them. Wham, bam, thank you Katie (for the kick-in-the-pants inspiration that your gorgeous house provided).
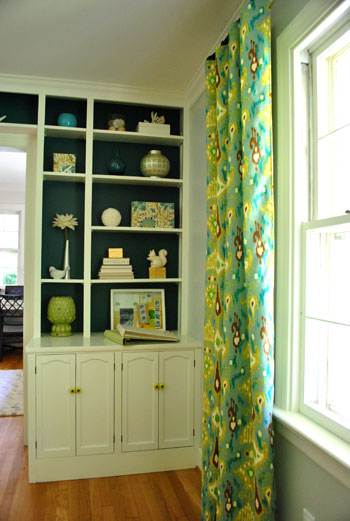
Here’s how it all went down. We already mentioned snagging this deeply discounted Robert Allen curtain fabric from a local fabric outlet called U-Fab (for any non locals, here’s an affiliate link to the same fabric on amazon). It was fancy schmancy designer fabric that I’d been in love with forever, but it was marked down to $12.99 a yard (as opposed to the original cost of $40+ a yard!) thanks to a bit of an irregularity in the fabric (a white stripe that ran down one side, which I knew I could work around).
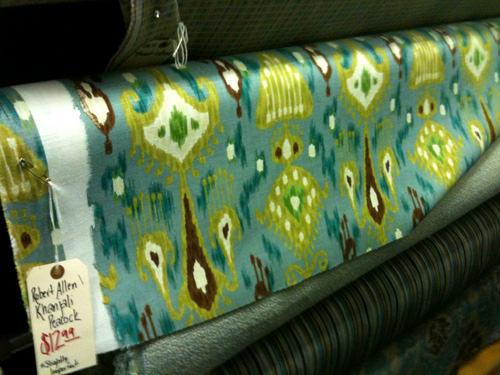
Since I wanted two 90-ish inch panels for either side of the big picture window in the dining room I calculated that five yards would do the trick, which factored out to $32 a panel (still not dirt cheap but a whole lot cheaper than the regular price of that fabric, which would have run me $100 a panel). Score.
We’re just not really curtain closing and opening folks (except in the nursery since we close the blinds and draw the curtains – anything for five more minutes of sleep) so we don’t plan to draw them shut (we add white faux wood blinds or bamboo shades when it comes to actually gaining privacy, although since we usually hang out in the back of the house when it’s dark enough to see into the windows, we’re not in any rush to add privacy blinds or shades just yet). But we do love hanging curtains high and wide to let the light stream in and add height and drama. Which means we didn’t have to worry about the width (since we’d need a lot more of that than what we had to cover the long picture window). And boy are these babies a fresh little slap in the face compared to the white Ikea Vivan curtains that we embraced in nearly every room of our last house.
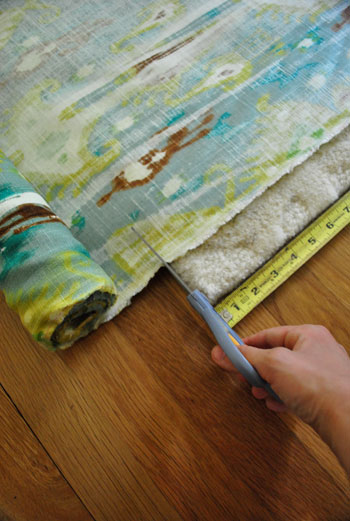
But on to how I made them. First I rolled out the fabric on a 5 x 8′ rug in our office (one of my completely not patented ways to get straight cuts since you can line up the fabric with the corners/edges of the rug to be sure it’s square before snipping away). Then I just pulled out my tape measure to see how long I wanted them (90″ each before hem allowances, which would make them about 87″ long after hemming – but then I add ring hooks which make them 90″ again):
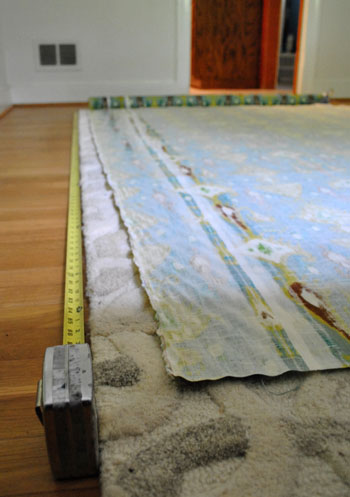
It was as simple as lining up the end of the fabric with the 90″ mark on my tape measure and then cutting the other edge against the rug at the 0″ inch mark, for a nice straight cut (sure enough, I was left with a nice 90″ long rectangular swatch of fabric).
When it comes to the width, I just usually go with the width that it comes right off the bolt (which is wider when you get upholster fabric like this- ours was 57″). But remember it had that defect running along one side of it, so I just cut three inches or so from that side (again I used the edge of the rug to get a straight cut). But I didn’t completely cut off the white part since I knew once I hemmed it, it would be completely invisible (even from the back). You can see the normal white edge that comes on fabric on the right of the swatch below and the irregular white defect on the bottom half of the left edge below:
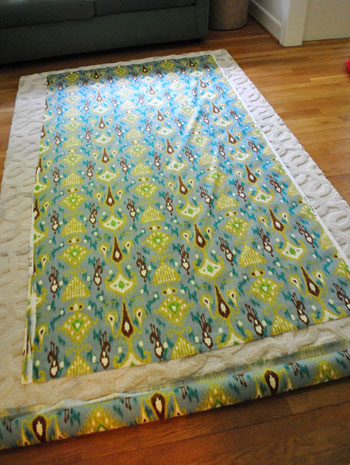
So there I had one 90 x 54″ curtain panel cut out, and just needed one for the other side of the window. So I laid the freshly cut one on top of the uncut remnant of fabric and used it as a template to create another panel of exactly the same size:
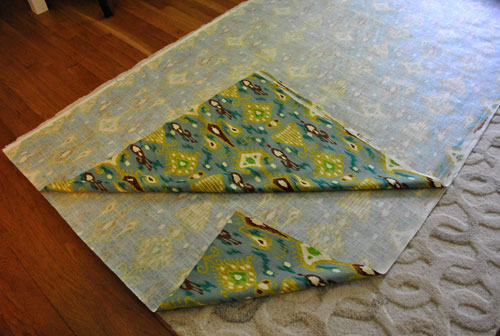
Then I washed both curtain panels so they would be “pre-shrunk” and easy to launder from here on out (one of our main goals is to have as many “washable” surfaces in the kitchen and dining room as possible). Oh but it’s always smartest to preshrink fabric before you cut it, I just knew I only had enough fabric to make two panels of this size so whether I washed or cut it first (or cut and washed it later) I’d end up with the same sized panels in the end. I grabbed them fresh out of the dryer instead of letting them sit there to keep them wrinkle free for the most part.
Next I had to decide between my trusty curtain-making method of using iron-on hem tape or the slightly scary idea of using Oh Brother (my new sewing machine) to attempt to do what I used to use hem tape for. After a decent amount of out-loud debate with myself, I decided to try my hand at sewing curtain panels- just to see if I could do it (but you can find full curtain making tutorials with hem tape here and here). Even without my hem-tape security blanket, I did break out the iron to make a half inch “seam” down one of the short sides of the curtain. It just seems like now whenever I dabble in sewing, I find myself trying to iron instead of pinning – just to see if it’ll work. Am I a rebel or what?
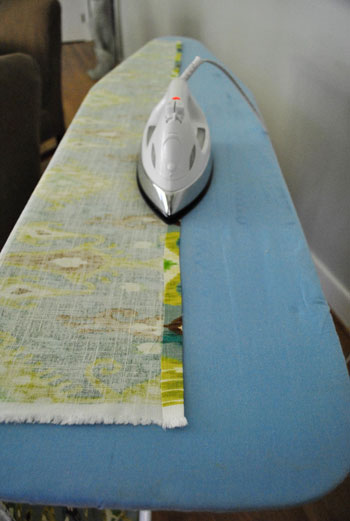
The ironed seam definitely stayed put while I dragged the giant fabric swatch back into the kitchen to sew the hem, so I happily skipped the pinning step and even boldly (well, maybe that adjective is a stretch) decided to try another hemming technique that some of you have commented to tell me about in previous I’m-a-shaky-little-sewing-novice posts. I took the ironed seam and folded it over one more time, then I sewed down the seam to create a nice finished looking hem (even from the back). That extra fold hid the raw cut edge of the fabric, if that makes sense. And even with my extra folding step, there was thankfully no pinning required. Sweet.
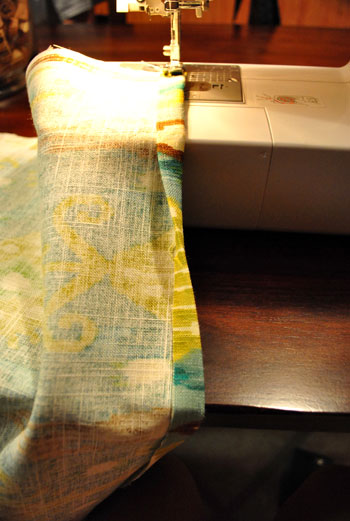
See, here’s what it looked like completely folded over as I sewed down the seam.
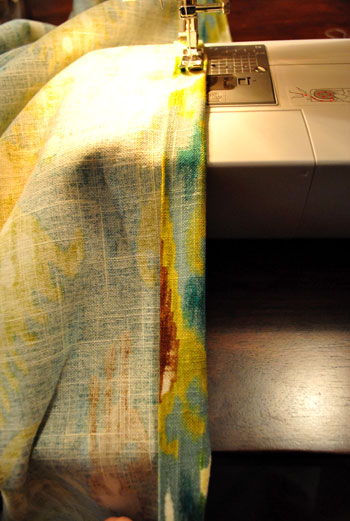
And this method surprisingly worked on all sides (I worried the long 90″ sides of the panels wouldn’t take to ironing and would need to be pinned, but it went just as well as the short sides). And as for the defect, you can see how when I folded the hem over one more time, it became invisible and I was once again left with a finished looking edge from both the front and the back.
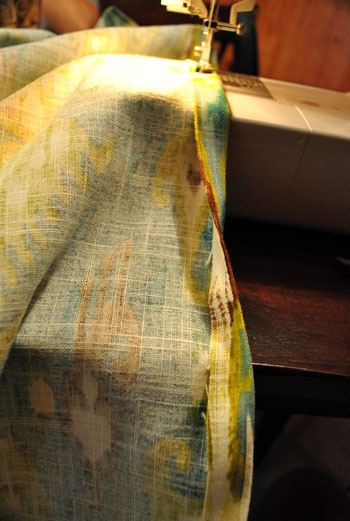
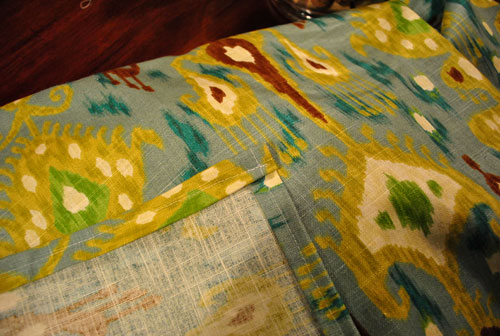
Here’s how the back of a corner looked once I was done with my quickie ironing-then-folding-then-hemming technique:
Then I clipped seven oil-rubbed bronze ring clips to each panel (from Target) and slipped them onto a super long oil-rubbed bronze rod. Oh how I love not having to sew a rod pocket or anything complicated thanks to the magic of ring clips. I ended up getting the curtain rod from Lowe’s since the ones at Target weren’t long enough – I ended up needing 144″ of length (that’s what she said).
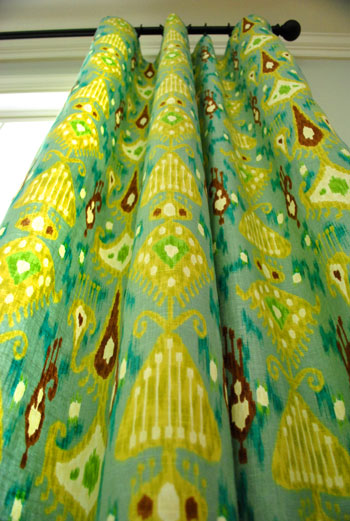
Our curtain hanging method (also not patented or even endorsed) is for one of us to then stand on a chair (in this case, John) while the other one steps back and looks at the length of the curtains and how they hit the floor while the chair-stander raises and lowers the rod ever so slightly until the floor-stander screams “perfect- don’t move an inch or I’ll kill you” and then runs up to hold a rod bracket under the perfectly held rod to measure the distance from the crown molding or ceiling that it should be hung to keep the rod right where it’s being held.
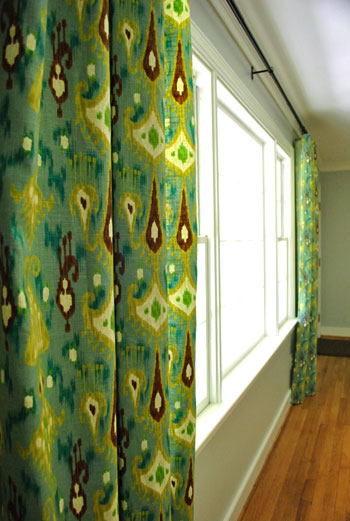
Of course this only deals with the height of the rod and not the width, but we typically like to go as wide as we can with the curtains so they drape in front of the wall instead of blocking light and hanging in front of the window. In this case we went as wide as our extra long rod allowed (19″ outside of the window molding on each side). See how the panel just kisses the window and blocks wall instead of light?
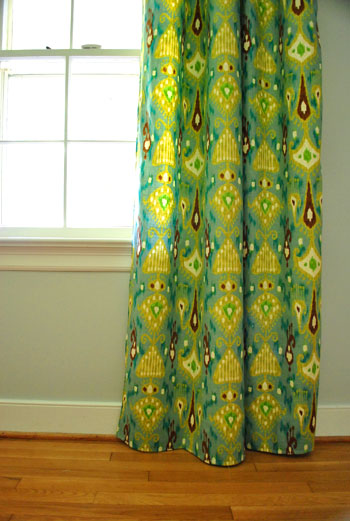
Oh and notice how the curtain also seems to just graze the floor ever so slightly? Poor John raised and lowered the curtain on that chair fifteen times until it was juuuust right. We’ve tried measuring the wall or the panel instead of doing the by-eye real-test (involving two people, a chair, and some serious arm strength and balancing skillz) but you just can’t beat the result. At least we can’t. So we keep going back to it. And I tell John he’s my Atlas when he’s up there holding the rod up. Gotta keep team morale up.

Here’s another rod shot for you. You can also see how the curtains just hang slightly in front of the window trim here as opposed to blocking the whole side window, which is only 20″ wide. Since we mentioned that we hung the panels 19″ wide on each side of the window trim, you can totally see how if they were hung flush with the trim they would block all but one inch of that 20″ side window. Which is definitely not what we were going for.
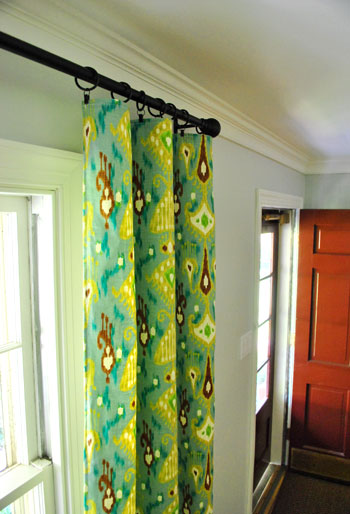
You’ll have to excuse all of the wide shots of the room in this post. Things like the curtains and the room in general are coming off greener/yellower than they are in real life (the green grass/trees/bushes outside were casting a yellow-green tint through the big light-filled window, and I was too lazy to photoshop it). John will definitely be in charge of photos of this room next time around. As for the true color of the curtains, it’s best depicted in the closer shots without a lot of window going on, like the ones above.
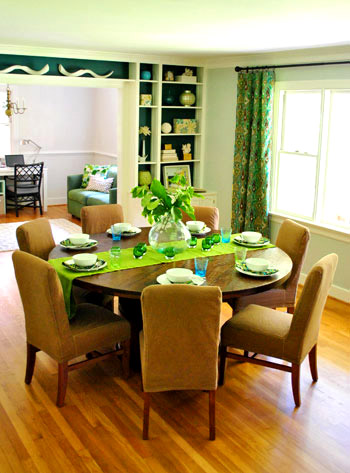
Actually this shot is probably the most accurate to what they look like in real life. I’d describe them as mostly blue with hits of green, chartreuse, white, and brown. Crazy busy but also crazy gorgeous if you’re me (and miracle of all miracles, John loves them too). Who ever would have thought that two white curtain fiends like us could branch out and embrace curtain color and pattern? I wonder if my mom will like these or they’ll finally be a choice that she won’t endorse. What say you, mom?
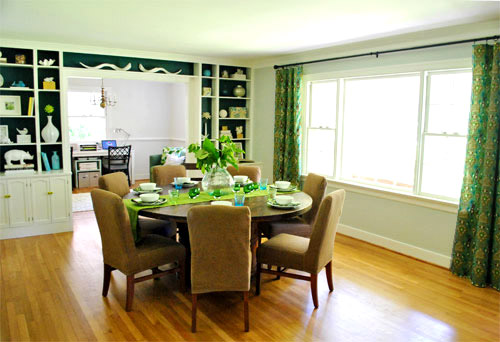
Here’s another wide shot where they look more yellow/green than they really do in real life (they’re more like a teal blue color when you glance at them from afar) but you get the idea. Oh and the dark rod ties into the other deep tones in the room (the chair legs and dark dining table, the deep color on the back of the built-ins, etc). So that’s why I chose it over stainless or white. I always think a dark rod hung high and wide is like eyeliner on a window.
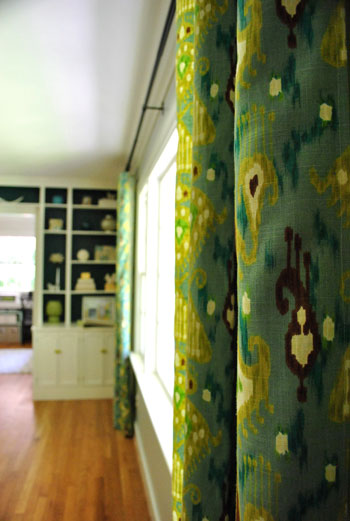
Mmmm, here’s a good shot of my favorite detail in the fabric. See those smeary turquoise blobs? They tie so deliciously into the slightly darker teal on the back of the built-ins. Yummy. Even the little yellow-green knobs that we added to the base cabinets of the built-ins relate perfectly to the pops of bright yellowy-green chartreuse in the curtains. Hooray for happy accidents like that (we had no idea what curtain fabric we’d pick when we snagged those babies at Hobby Lobby).
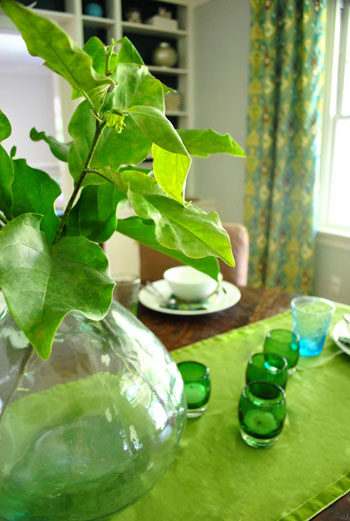
Oh yeah and I had some fun setting the table. Not that anyone’s coming over today. Or tomorrow. I just wanted to pull out a runner and some plates and cups and clip some random branches from outside. Why? I don’t know. Why do birds sing? I guess the colorful curtains got me hot and bothered enough to break out Sue the Napkin (times seven) and add some fun to the big empty wood table.
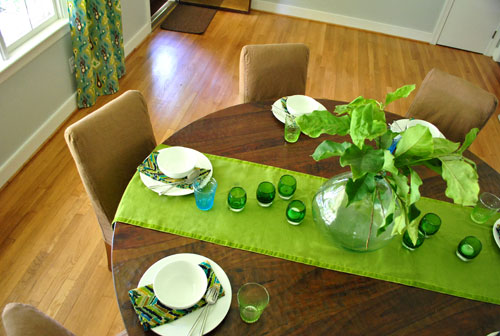
And guess what? I’m leaving everything there tonight. Just because I’m weird and I can’t wait to wake up in and morning and pad in there and smile. Kind of like how I paint a room and the next morning I run in and look at it again. Just grinning at the wall like a fool.
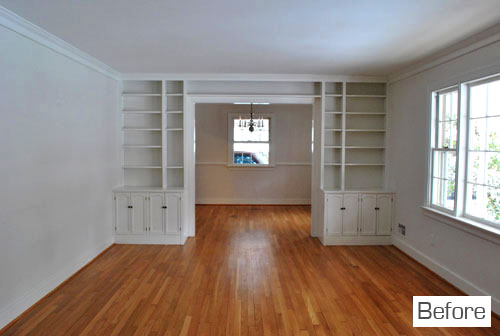
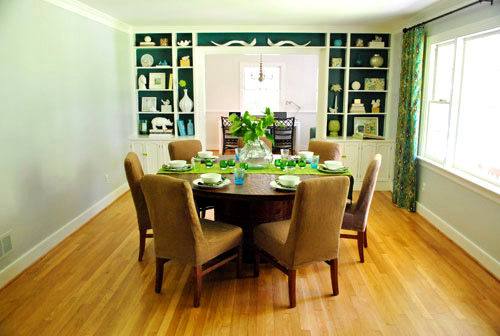
Isn’t it amazing how much of a difference curtains can make? Well, that and some rich color on the back of those built-ins. Here’s a little flash back to the room as it looked when we moved in:
And here it is now (albeit a little side-heavy with that bare wall on the left- for now):
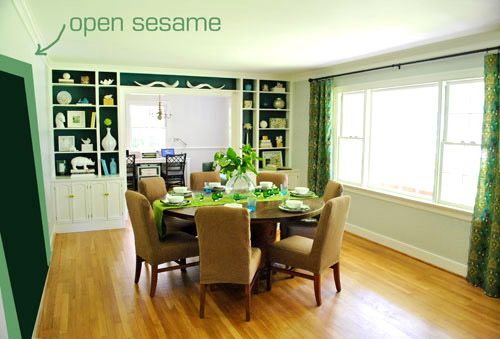
Thought I was done? Nope. One more thing. Here’s a terribly rendered depiction of the doorway that we can’t wait to add that will connect the dining room to the kitchen (we plan to mirror the size of the picture window so the whole room feels nice and balanced). And of course adding a big chandelier over our giant table will add a lot more function (the room doesn’t have any ceiling fixtures!):
It’s so funny to remember that this room was a formal living room when we toured this house (and the office was the dining room). In fact we dug up these old shots that we took during our first walk through:
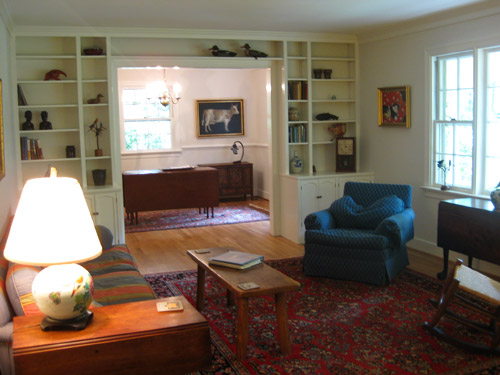
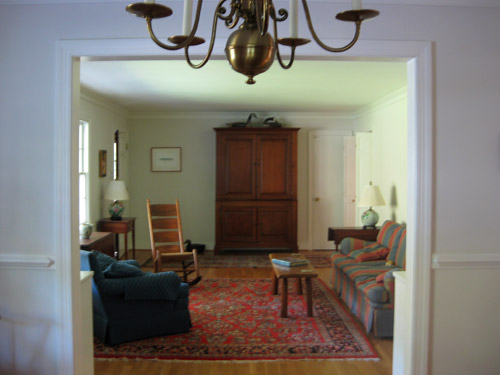
Gosh, that feels like a million years ago and it was less than six months back. As soon as we walked in we were struck by three things: we reeeally wanted the house, we wanted to change up a few of the rooms, and we reeeeally wanted the house. Yup, we were sold upon entry. I don’t think we ever got into the specifics, but the sellers weren’t 99% sure they even wanted to sell. In fact the night after we walked through the house for the first time they took their stuff out of storage. A sure sign to the realtor that they might take it off the market. Thank goodness it all worked out and they ended up accepting our offer.
As for looking past the way a room looks when you’re house hunting to see “the real space” we just completely discount furnishings and wallpaper and paint color and even entire room functions. That’s how we could look past the dining table and the sofa to almost immediately proclaim that converting the dining room into an office and turning the living room into a big spacious dining room would work more for the way we live. You know, since we have a huge family that we couldn’t cram into the former dining room, a giant living room in the back of the house (no need for two), and a penchant for open living and big wiiiide doorways. We just can’t help ourselves. Anyway, have you guys made any curtains lately? Knocked down any walls? Set the table for nothing but kicks?
Pssst – Soooo not a sewing person? I wasn’t either. Here’s a tutorial for making no-sew curtains with iron-on hem tape (and here’s another one for good measure).
Update – Wanna know where we got something in our house or what paint color we used? Just click on this button:


myhonestanswer says
A change of scenery always gets me itching to start on new projects too!
Adrien says
Oh, love them! That is such great fabric and the curtains are just perfect.
Steph @ Birdhouse says
They look gorgeous, Sherry! What a seamstress you’ve become! The whole room is amazing! So pulled together and cool now.
Michelle @ Ten June says
Yup. I set our dining table last night for no good reason except that I used my $10 off of $30 coupon at World Market and got some new linens. Hooray crazy girls like us.
The curtains look amazing!!
Kristen @ Popcorn on the Stove says
Love the curtains! The fabric is so fun and bright. It’s so inspiring to see that you can make them instead of buying them. It’s also nice seeing the room all done up. It’s so cheery that it puts me in a good mood!
BTW, if you ever wanted to make rings, you could just cut strips of the fabric, fold them over (so they make a loop) and sew them to the top of the curtains. That’s how our curtains are (although we lamely bought them).
Kristyn says
I love the colors & how they collide with the light from the window!
Amanda @ Our Humble A{Bowe}d says
Wow, the room doesn’t look the same! I love the new curtains. Definitely much more polished than without. I’ve sewn curtains in the past, but not in the past year. I actually have to sew a curtain for our kitchen soon, though. I’ve made a similar one for my office http://ourhumbleabowed.wordpress.com/2011/05/18/a-finished-office/ Actually, you might be interested in making some as another option to roman shades. They’re simple four hemmed sides (with a pocket for the rod at the top) and then ribbon is sewn on the sides to roll the fabric up. Super simple!
Tina says
LOVE the curtains! Its nice you both like them-no one likes my kitchen curtains except for me & one person who commented on my kitchen post! But I don’t care. They actually remind me of yours!
Ms. Bright says
OK seriously?!?!?!?! Remember, I told you the other day that I spied John and Clara @ Mary Jo’s?? I bought Khanjali Peacock, too. And there was ALOT more of it on the bolt before I did! Too funny!!
Mine was for a folding screen. Love it.
Your drapery looks fantastic!!
xo,
Ms. Bright
http://the-bright-life.blogspot.com
Cait @ Hernando House says
The curtains look great! And the shots from when you first toured the house look so strange after seeing your rooms come together!
Rebecca @ the lil house that could says
Seriously amazing Sherry! Those curtains brought everything together so well. It’s really crazy how fabric and some accents make everything make so much sense! The greens on the table make the brown table/chair/floors looks so much less obvious. And it’s awesome how the blues/greens are all tied in now. Love it! (as if you couldn’t already tell…)
June says
No way! I made almost the exact same curtains this week for my dining room! Same method (except I am obsessed with putting about a thousand pins in before I use the sewing machine), same curtain rod, and same rings. My fabric has a little more blue in it. We’re normally all white curtain people too. I keep going in the dining room to stare in awe at what a difference some bold curtains can make. Yours look great.
Mary @ Redo 101 says
Literally gorgeous! Love the fabric, loved that you broke out Oh Brother and went for it! One other trick I learned in high school home economics in the early 1800s :) is to iron under one edge, then immediately iron that same edge under again – making it completely ready to be hemmed and done. Keep up the good work, youngun!
YoungHouseLove says
Oh that makes sense- so no iron and fold, just iron, fold, iron. Got it.
xo,
s
KathyG says
I agree, I hate pins…iron, fold, iron.
But I l.o.v.e. your method of getting a nice straight cut. I’m always trying to measure and mark, and it’s a pain. I’m rug-cutting next time!
Diana says
These look great! I just love all the colors in this room.
I just made pillow covers for my living room pillows, and I am thinking of using the extra fabric to make a table runner (since my living room opens up to the dining room). I have the fabric for a valence draped over my couch, but I need to buy a pattern and enlist the help of someone who can guide me through the process. :-)
Nicole says
Love it!!
Adriane Wacker@FortheLoveofPainting says
You have inspired me to go make curtains…they look awesome!
Allyn says
Love those curtains!!!! We just moved and I have yet to figure out what to put on the windows in our living room. We did totally steal the fun bookshelf idea for some open shelves in the kitchen that I just painted a gorgeous marigold color. Behold, the power of paint!
Audrey Govekar says
the curtains are PERFECT! i want to learn to sew! go girl!
Linds Toc says
they are perfecttt!!! so in love with how this room has come together. great job guys!
Jenny says
Lovely! I can’t get over how great the curtains look with Sue the Napkin too! Well done!
YoungHouseLove says
Isn’t that funny? I always keep Sue in my purse but I didn’t even break her out when I grabbed that fabric (it was such a great deal I just went for it blindly). Thank goodness they’ve turned out to be such good “friends” – haha.
xo,
s
Alison says
Simply beautiful!
Lynn says
Oh, they are totally stunning: bravo for you! And those mocha slipcovers are the perfect counterweight; I’m glad you went for that colour, as it all works brilliantly together….
Claudia says
This looks awesome, guys! I love the vibrant greens and how it’s all coming together.
fd says
I get that table and those chairs now! Love it!
Melissa @ A Place to Nest says
Room looks great and the opening, whenever it comes, will really open up that space. Have to say- the 2 ducks “swimming” on top of the shelves in the old owners room made me laugh. From imitation duck swimming to your mustache antlers… that house has seen some animal action.
YoungHouseLove says
Seriously! We both have animal appreciation. Haha.
xo,
s
Heather says
Those are antlers???? I always thought they were ceramic snakes!
YoungHouseLove says
Haha, yup they’re big ceramic antlers from Pottery Barn a while back. But we lovingly call them The Mustache. Hah.
xo,
s
julie g. says
OH MY GOSH – there are not enough ways to say how fabulous your room has become. Layer upon layer of pure visual deliciousness!!! And when you open that wall surrounded by some chunky white moulding – that will complete it!!!
I am now thinking I need a sewing machine…
Emily @ Comfortable Home Life says
I just added “sew curtains for the bedroom” to my to-do list a few days ago. Your posts are so timely! Maybe after this post I won’t mess up royally! :)
Abby K. says
First off, thank you so much for ‘that’s what she said’…you gave me a much needed chuckle this morning! I can’t believe how WONDERFUL it looks with just the small additions of slipcovers and now curtains! Amazing :D I am loving the more dramatic colors and prints you are choosing in this house (I ADORE your old house, too) but it seems like you are really having fun with everything. I just discovered your blog about a week ago and I just think you both are wonderful! Thank you so much for being an inspiration! I can’t wait to see what you do next!!
Barb says
Magnificent Sherry….I can’t tell you how wonderful it looks. I love it as probably my favorite room so far. It has come together so beautifully.
BRAVO!!!
B.
YoungHouseLove says
Aw thanks Barb. You’re so sweet.
xo,
s
Lindsay says
Agreed! I LOVE the curtains, and I LOVE the table all set with such color!!
heather says
I LOVE those curtains! Now that the wedding is done I am dying to get more projects done, more than I can even explain. My kitchen desperately missed me, so the other night I made homemade ravioli’s completely by hand. It’s that same kind of “rearin to go” feeling where you completely overdo it because you’re totally pent up, and you love it.
I have a few recipes and a few projects up my sleeve – the next two are to make two lamps out of reclaimed hand turned table legs, and to make a blueberry brulee ravioli recipe I came up with on a hot car ride home.
Chocolate ganache with blueberry reduction anyone? What. I live in Maine. I like blueberries. I also have about 14 lobsters in my freezer. And we own two tractors. Stereotypes confirmed.
YoungHouseLove says
Haha, your comment made me laugh and it made me hungry. Lobster and ganache for breakfast? I can confirm that it sounds good to me.
xo,
s
Andrea says
Those really make the room! Everything looks fabulous…
Erika says
I have to confess, every time I read about your ideas for this latest house, I cringe a little. Obviously, you know what you’re doing, but the real gift you have is being able to visualize it when it’s all done (something I’m terrible at). I really wasn’t sure how the room was going to come together, but this last step is gorgeous! The door knobs, the curtains, the paint color on the wall and the bookshelves, I can’t beleive it. I guess I am really learning a thing or two! Ha!! :) What’s really helpful is having your color scheme laid out in advance. What a concept! :)
Kristen says
I totally agree with you. If you described all the pieces of this room, I would have said “… sure?” But put all together, it looks awesome. Fun, fresh, vibrant and very Petersik!
I drool over the built-ins every single time you post a picture of the space. Sigh. I can dream!
April says
I love the new curtains! It makes the room look finished in my book! Great job on them! I am the same way when we finish a small project around the house (especially if I sewed something) I can’t wait to check it all out again in the morning…and the next day and the next! LOL
Pamela says
That’s a brilliant idea to just buy enough fabric to hang on either side of the window! I’ve been holding off buying curtains because my windows are so large it’d take alot of fabric to cover the whole window but you have me inspired! Right now I only have cheap white blinds :(
Marymoo says
The brown slipcovers look great with curtains. The room looks so finished with a great easy elegance feel to it.
A pair of knee walls with columns would finish this off to delineate the space when you walk in the front door – with or without niches for additional storage.
Micha says
Curtains really make a room look and feel so more finished! I love how it all ties together now :o)
Sophie says
Seeing the table all set and the curtains hung…makes me think the chairs would look amazing in a similar colour to the paint on the back of the shelves. I don’t think they’d dominate then, especially with the curtains right next to them, but I think it would look polished and amazing. The brown is kind of distracting in its attempts to look inconspicuous, like a giant elephant sheepishly hiding under a white sheet to blend in?! Ha..I know what I mean. Dye the chairs again just to appease one reader…? Thanks ;-)
Also cannot wait until you knock a hole in that wall, and the curtains are beautiful.
Becky says
I think this is by far one of my favorite rooms in your house!! I adore the built-ins!! And those curtains just make the whole room come together so nicely!! It looks absolutely amazing!!
Diana T. says
Is this afternoon’s post going to be about a giant hole in your dining room wall? Seems like plans are getting more concrete for taking that wall down… :)
YoungHouseLove says
Haha I wish. I think we need to get a permit and we have some kitchen work to do on the other side before the wall can come down so it might be a bit of a wait. Oh well. Can’t wait.
xo,
s
bridget b. says
WOW! that room looks nothing like it did in your walk through! pretty cool how you guys transformed the function of the house and gave it younger, livelier look.
i’m loving how the chair slipcovers blend in with everything in the room. 2 questions:
when you open up the wall into the kitchen area, what will happen to the current standard door walkway in the dining room?
for a window that wide, i would be itching to place a third panel in the middle. what’s your rule of thumb on deciding between 2 or 3 panels on a wide window?
YoungHouseLove says
I like a middle curtain panel when there’s actually wall showing. Like when there are two large windows next to each other with a 3″ area of wall that kind of looks like a post? That’s where I’d hang the panel to cover the strip of wall and create the look of one big window. Since it’s one big widow without any wall interruption I opted for just two panels, which I think will be nice and balanced with the opening on the other side of the wall (which will have two sides and a top, so it’ll mimic the shape of the window with the curtain panels flanking it). Hope that makes sense! Oh and as for the current doorway in the dining room, that leads down the hall and to the bedrooms (while the new wider opening will lead to the kitchen just like the big knocked out area leads to the office) so we think it’ll all fit right in to just look like a room that’s open to a lot of other spaces, as is often the case in newer more open plan houses. Here’s hoping!
xo,
s
Laurie says
The 3 panels question is really interesting- I wondered about the width of curtains for a really wide window. I have a similar setup high and wide and never closed them, but if I were to try they would barely kiss and cover the window, so I feel maybe they don’t appear rich or wide enough, like I “cheated.” Did you consider doubling or changing up the widths?
The room looks fab.
YoungHouseLove says
I’m a work-with-what-I-have kinda gal (to make wider curtains would have had to buy more fabric which would make them 60+ bucks a pop and I’ve always just worked with the width of the bolt so I was happy to take the cheap/easy way out). If you like the look of something beefier and it’s worth it to you, it’s definitely a great option though! Especially if you’ll draw them shut.
xo,
s
Clare says
Holy shizballs I LOVE this room! This is my new favorite room in your house (so far). Like, in love. The curtains really just make the space feel complete. And I cant wait for the addition of the doorway. You guys rock!
Elise says
Oh my word, I am in love (doing my best imitation of a southern belle swoon). I just love seeing how the room is coming together for you guys! Now to convince my hubby that we need to get the same fabric for our dining room (mwa ha ha).
Shannon says
Finally, that room looks like YHL! Great job all around, guys!
ellen says
Those curtains look fantastic! You make me want to redo our dining room now! We just have store bought sheer panels (leftovers from the inside panels from our last house). I always have trouble visualizing a bold fabric print but you just showed how it works lovely! great job!
Melissa@Julia's Bookbag says
I adore those curtains! I adore that fabric! Beautiful job!! You are sooooo talented! Fabulous!
Christie says
If these curtains are your babies then I want to host the baby shower. They are freaking awesome! I also love the fact that you went the extra mile and set the table and gave us a visual for the future entryway and what the whole room will look like. This post has it all. Congrats on the birth of the curtain twins. ;-)
erika m says
This looks soooo nice! The brown chairs….so glad you went brown, it makes those curtains look that much better. Im curious what it looks like closed, is the whole window covered?
YoungHouseLove says
If the curtains are drawn the window is about 80% covered but we’re not curtain closing folks. We prefer to add blinds for privacy and just use curtains for color and height and all that jazz. Hope it helps!
xo,
s
bridget b. says
p.s. i love the way you immediately set the table to complete the space. that’s so something i would do.
it’s like playing house when you were a kid, but with your real life house!
Elizabeth says
LOVE, LOVE, LOVE those curtains. Great inspiration for our new house! Just need to find something bold like that in my color palette.
Laura says
Even though I never doubted it for a second, I still can’t believe how everything came together so gorgeously!!! I second that this is now my favorite room in the house (although the guest room is a close second for me.) I love love love it!! Sue looks so at home there, it’s crazy how you bought all those elements at different times and yet they look like they were made for each other. Don’t you love when that works out? =)
YoungHouseLove says
Yes! So much of this room was a happy accident (or at least a completely subconscious choice). Like those yellow-green knobs that we grabbed on a whim and the fact that Sue works with the new curtain fabric (it so easily could have competed and looked busy but somehow they layer right in). Whew. Total luck.
xo,
s