We’re back with our homemade nursery curtain panel how-to.
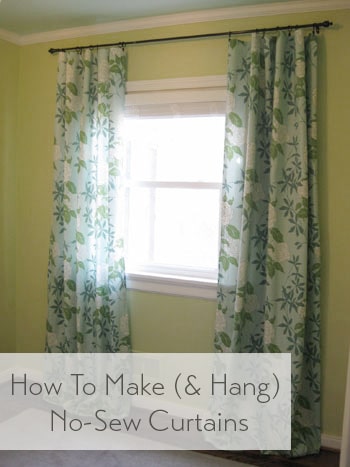
Remember when we revealed our punchy patterned find during last week’s shopping post? Well here’s how we took it from one big bolt of rolled up fabric by P Kaufmann…
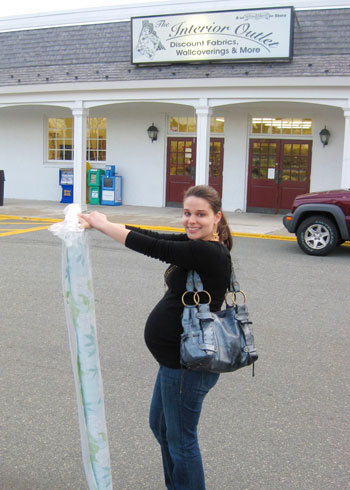
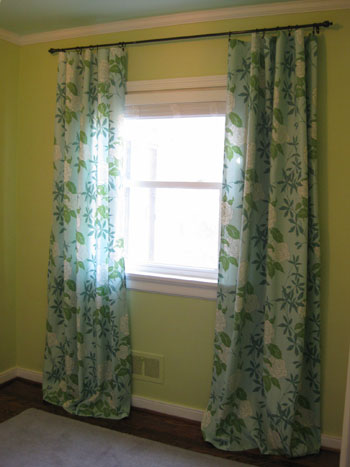
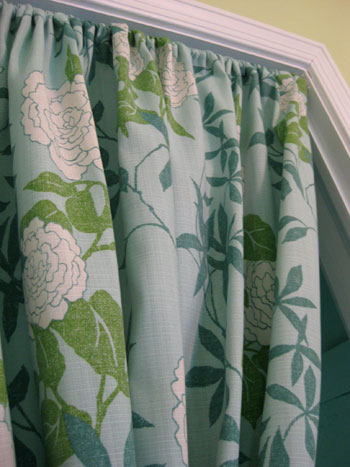
… to three gorgeous floor-length curtains (two for the window and one for the doorless closet). And probably best of all: there’s no sewing machine required. In fact, here’s my short and sweet list of supplies: tape measure, scissors, iron on hem tape, and an iron of course. Plus we even added a few kid-safe features so stay tuned for those details…
But before we get into all the dirty curtain-makin’ details, we should mention that we hope our baby sleeps well. So in the interest of aiding our little one in that area, we decided that we also needed to grab some sort of 100% light-blocking blinds or shades. So we trolled the aisles of Home Depot and found some chic white faux-wood blinds. We loved them because they felt almost like substantial wood shutters when they were lowered (a lot more solid than those thin plastic or metal venetian blinds) and they definitely would block any and all light when in use (and could easily be pulled up and out of the way to let light stream in during the day).
But here’s the bummer. Of course they didn’t come in the exact measurements of our quirky old house’s window (39 1/4″ wide in case you’re wondering). Sadness. But we soon learned that Home Depot could actually cut them down to custom fit our window perfectly- and the cutting service is F-R-E-E. That turned our frown upside down. So we give the guy in the orange apron our window’s odd width and he had our custom-cut clean-lined faux wood blinds waiting for us about five minutes later. The blinds weren’t super cheap at $37, but they look convincingly like much pricier white wood blinds and we know the darkness that they’ll provide will be priceless when we’re dying for one more minute of sleep.
Of course we also liked that they didn’t have those dangerous loopy pull cords (they were labeled as having “kid safe cords” that are actually separated instead of connected so they’re less of a strangulation hazard- no loop to get caught in). And of course we plan to keep them wound around one of those cord wrangling pieces of metal at the top right corner of the window far out of baby’s reach anyway, but we love the added loop-free design.
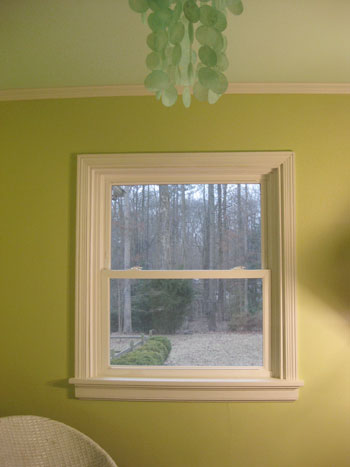
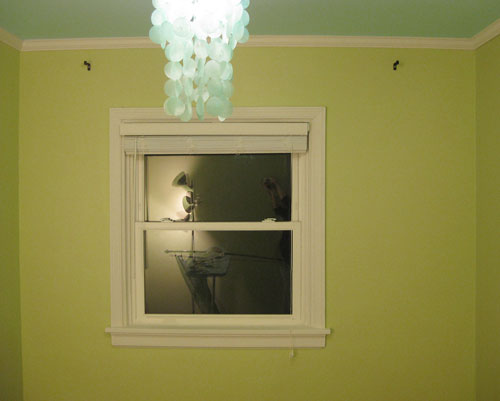
And since we love a before picture, here’s the window prior to our little curtain and blind fest:
John had the blinds up in about twenty minutes, but they definitely left a lot to be desired in the length department. They were actually a bit heavy to raise and lower, all due to the fact that they were at least two feet too long for our window, so there were a bunch of slats that just clumped together at the bottom of the blinds when they were in the “lowered” position. Luckily in the installation instructions they actually detailed how to shorten them to customize their length to fit any window. Nice.
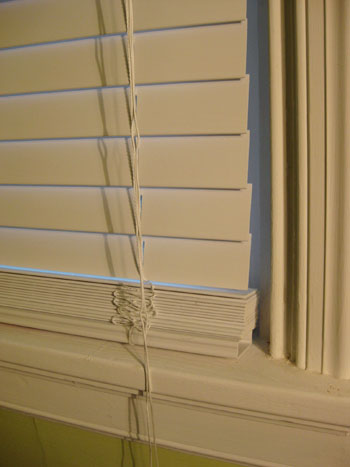
So John just followed the included directions and popped out these little plastic pieces on the bottom and could easily remove as many slats as he’d like and trim the excess string. Then he just popped the bottom pieces back on and we had an even more customized nursery blind that was a lot less cumbersome to raise and lower without all those extra slats at the bottom. Then, like a finely tuned relay team, John tagged me and said “your turn” and I began working on the curtains.
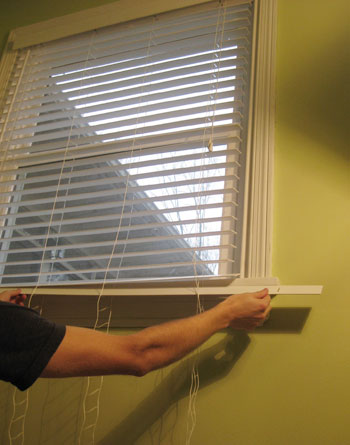
First I measured the approximate height that I wanted the curtains to be (just shy of 8′ for an almost floor to ceiling look) and added an inch and a half on the top and bottom to accommodate the hem. It was actually a nice clean measurement in the end because I determined that cutting two eight foot long sections of fabric would do the trick perfectly (since I wanted them a bit shy of 8′ but with the added hem measurement it brought them right back up to 8′ exactly). Hurrah for no quarter of an inch calculations!
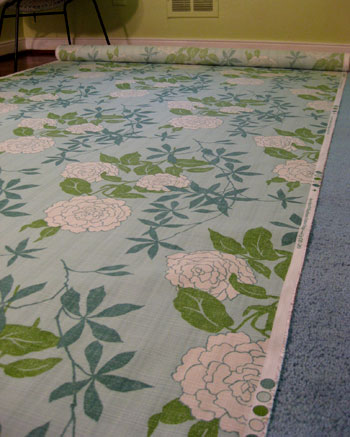
The other super convenient thing about measuring out my fabric was that we already happened to have our new 5 x 8′ rug on the floor… so to cut my 8′ long fabric sections, I simply rolled the bolt from one end of the rug to the other and cut a straight line using the edge of the rug as my guide. It doesn’t get much easier than that. And for the width I just left each panel as wise as the bolt allowed (so I didn’t need to trim those edges at all).
Then it was time for my trusty Heat N’ Bond iron on hem tape (I always grab the “ultra hold” variety). You may have seen us using it in this crib skirt tutorial from a while back and we’ve also used it to hem all the white Ikea curtains that we have hanging in the rest of the house. In short: I’m a hem tape black belt (the irony is that John does all the clothes-ironing in the house). Anyway it’s great stuff for leaving a polished and clean-looking edge (a lot more reliable then me with a sewing machine!) and it’s even washable and super cheap (we grab ours for a few bucks a roll at Michael’s). So I whipped out the ironing board, fired up the iron, laid out my big eight foot long fabric panel and had my scissors and hem tape on hand.
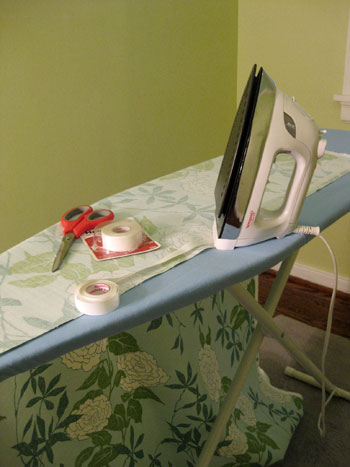
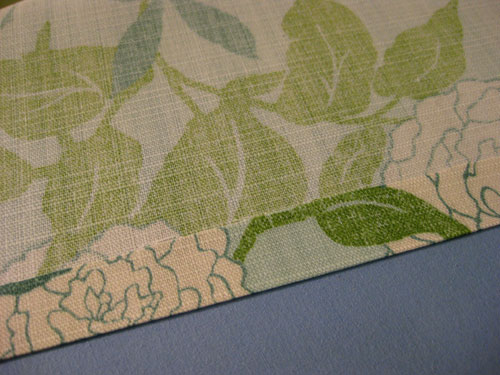
All it took was an easy-iron hem on each of the four sides of my fabric (for step by step hem tape instructions, just check out this post). Then I had a nice finished panel (without any rod loops or tabs) that I could clip up using my cheap-o oil-rubbed bronze curtain rings and rod from Target. Just look at how seamless and perfect that edge is! Much more even and less bunchy than anything I could sew…
Then I tagged John to get to work hanging the curtain rod with heavy duty anchors (so it’ll never come toppling down, even if over 100lbs of force is used) while I created a third curtain panel for the closet (this one only needed to be seven feet long). I also made a little rod pocket at the top of this panel (I just positioned hem tape about 4 inches below the edge of the fabric and ironed the fabric to that line of hem tape created a nice loop of fabric). Meanwhile John was already executing my let’s-cheat-our-off-centered-window-so-it-looks-more-balanced plan.
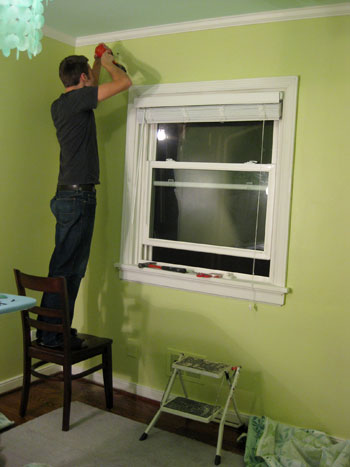
This angle gives you a better idea of what we were dealing with. See how the window is shifted a bit too much to the left? Well it’s nothing a curtain rod and some billowy floor length curtains can’t totally solve. I asked John to hang the left curtain rod support hook only about four inches wider than the trim on the left side of the window but requested that he hang the right curtain rod support hook about fifteen inches wider than the trim on the right side of the window.
This way, once we hung each of the curtain panels, we could cheat them both over to the right (blocking a bit of the window on the left side, but adding a ton of balance and polish to the room):
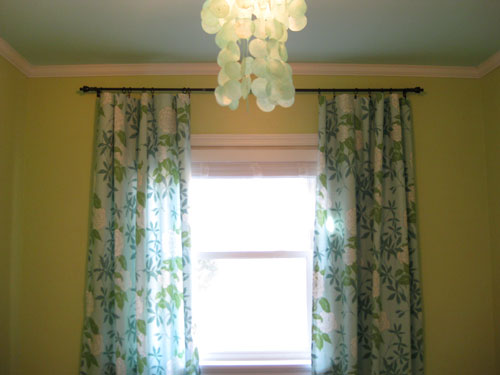
And we also mentioned in our shopping post that we snagged our simple oil-rubbed bronze curtain rod along with two packs of curtain rings on clearance at Target for less than $12 total. We love the height and the elegance that the shot of dark color brings to the wall, and love that it echoes everything from the mocha finish on the floor to a few of the darker wood accents that we’ll be bringing in to keep things from getting too sugary sweet and matchy-matchy.
Plus the clip-on curtain rings are actually something of a safety feature. Remember how we mentioned that someone could hang on those curtains without the rod coming down thanks to the use of some heavy duty anchors? Well we also realized that using clip-on curtain rings would allow for just the fabric panels to pull down if anyone got too rowdy and tried to swing from them (while the rings and the rod would most definitely stay put). We even tested them out by tugging on them a bit, and although it took pretty much all of my pregnant adult weight, sure enough the fabric was released from the rings and fluttered lightly to the floor while the rod and the rings stayed nice and securely in place on the wall.

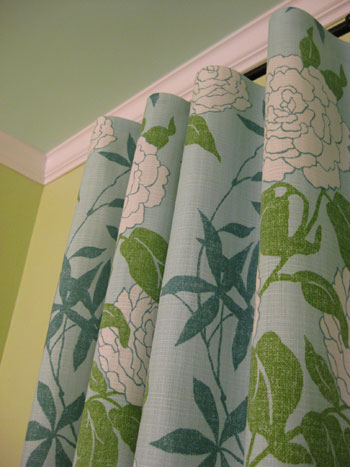
And as someone who has never used curtain ring clips before I just have to sing their praises. Not only are they nice little secret safety features, they also create such perfect little “waves” in the panels which result in such an amazingly high end look (and best of all, there’s no rod-pocket required, so you can hang any panel of fabric without worrying about extra sewing or loop-making).
Update: This P Kaufmann fabric seems to be discontinued now, but here’s an affiliate link to another fun oversized floral print on amazon for anyone looking for something similar.
Oh and we can’t forget our tiny little blue closet (thanks to John’s cute idea to bring the aqua color from the ceiling into the mini enclave for fun). Doesn’t the curtain panel add some nice pattern and sweetness to a closet that was formerly pretty bleak looking?
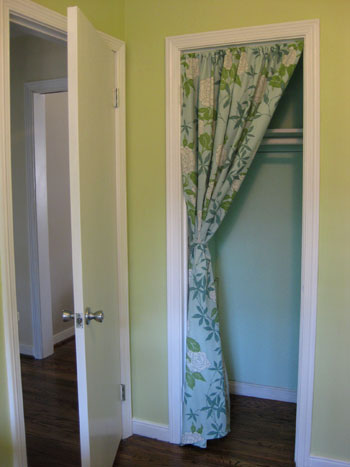
Maybe we should refresh your memory with a before pic:
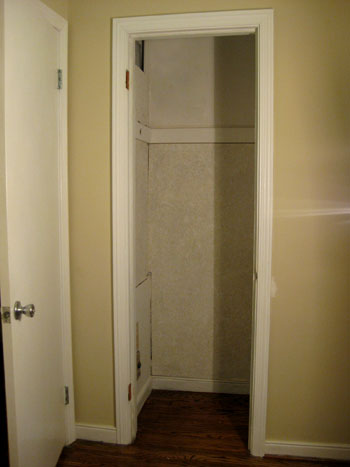
It’s looking better already, right? And of course we still have to add bins, baskets, and more hanging rods (along with some sort of storage piece on the floor of the closet).
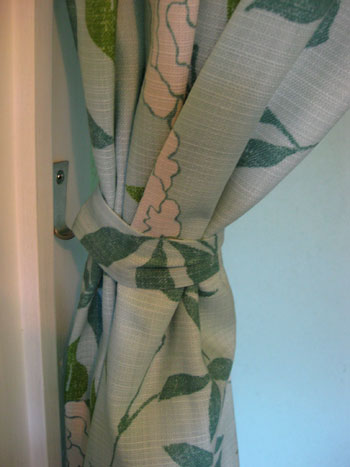
As for how we swagged our curtain panel so it’s mostly out of the way, we just hung it on a $3 tension rod (one that screws into both sides of the molding for more reinforcement than those that rely only on tension). Then we added a regular old Ikea coat hook that we already had on the left side of the closet’s interior trim. Next I made a little strip of fabric (using my trusty hem tape to finish the edges) and used that to create a loop around the curtain panel. Note: it’s safety pinned in the back so it can easily be removed and readjusted.
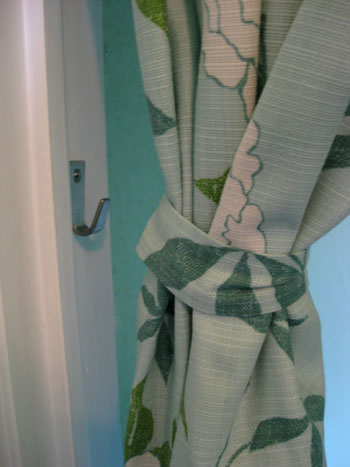
Then it was as simple as slipping my loop of fabric onto the hook on the side of the closet to hold the curtain off to the side.
So that’s the story of how we made our off-centered window look more balanced, blocked out all the light for less sleepless nights (fingers crossed) and added a fun pop of pattern to both sides of the nursery in the form of breezy floor-length curtains (which make the ceilings feel about a foot higher). Plus we only spent about $35 a panel (with almost an entire yard of fabric leftover!). Oh and it always makes us smile at our fabric luck when we recall that it’s actually indoor/outdoor fabric, so it’s a lot more stain and fade resistant than the average bear (although still completely washable). Which is a good thing when it comes to sticky fingers and goey faces…
But what about you guys? Have you made your own curtains before? Do you have a closet with a panel of fabric on a tension rod in lieu of a door? Spill the sewing (or hem tape) beans.
Psst – Wanna see our nursery progress from the very beginning? Here’s our painting post, our big shopping spree, and our crib hunting rundown.
Update – Want to know where we got something in our house or what paint color we used? Just click on this button:


susan says
I love everything about this. I love that your window looks centered. I love how the colors are all coming together so beautifully. And I LOVE that fabric!!! Oh my gosh do I love it. It all looks so beautiful!!! I love it! You probably already shared who the fabric designer is, but somehow I’m missing it. Will you please humor me and share again? Thank you! Sherry. I love that you aren’t ashamed of using hem tape that irons on and that you measured using your smarts (and that rug). You guys help make things so easy!
YoungHouseLove says
Hey Susan,
All we know is that the fabric is by P Kaufmann but because we got it from a discount outlet they didn’t have a name or a style number for me to share. Oh and it might help to describe that it’s from their indoor/outdoor collection. Hope it helps!
xo,
s
Robin says
Love your colors and draperies. It seems like a room she could really grow into. Very cute. I was actually looking for a shutter for our little one’s window due in June and could not seem to find something cost effective so I may hit the depot later. Thanks for the idea. Now off to get the sewing machine going and make some knock-offs of expensive cloth diapers. Yeah for babies and making stuff!
Misty says
WOW! great job John and Sherry! I absolutley LOVE the curtain fabric. I am not too good with a sewing machine and the tip about the hem tape will come in handy one day. Keep up the good work. I can’t wait to see the big reveal!
Savanna says
Love the room- so cute! I know I’ve seen the clip on curtain rings before, but it never entered my mind to use them for my past curtain-making projects. Our new house doesn’t have ANY curtains yet (thankfully we have blinds though!) so I’m definitely going to go hunt for some clip on curtain rings for at least a few of my new curtain projects!
Ann says
What an adorable room! I love everything, especially the curtains! I’ve never sewn or used hem tape for my own curtains, but I do have it on my list of things to try. You make everything look so easy.
tessabella76 says
Loving it! It’s girly without being too cutesy. Can’t wait to see more!
Emily s says
Love them!
I have a question – did you notice that any of your curtains “stretched” a little after they were hung up for a few months? Our bedroom curtains used to just kiss the floor and now they are actually pooling a bit…
YoungHouseLove says
Hey Emily,
Good question! This has to do with your curtain fabric so because ours are pretty tightly woven panels we don’t expect much “stretching.” But sometimes more stretchy fabrics like velvet or even just a flexible knit weave can do a bit more pooling after they hang for a while since the weight of them can pull them down a smidge. Maybe you can launder them to get them to snap back if it bothers you? Of course you want to check the fabric instructions first. Hope it helps!
xo,
s
GreenInOC says
Just discovered your blog from http://playamind.blogspot.com
Going though the “house tour” I am blown away – you guys have incredible vision and are true artists!
I so wish I had your talents.
Tina Rown says
Yes, I have made my own curtain before in order to window look more balanced. I hope the room will evolve as your baby grows to meet her ever-changing need
Amanda says
Wow! I absolutely LOVE everything you have done! The colors are perfect. I love the ceiling color and the chandelier. The curtains turned out perfectly. I can’t wait to see the finished nursery!
Katharine says
I LOVE it so far! I cannot WAIT to see the finished product! (And the new addition to the fam, too. :))
Tara Floyd says
Looking Great Sherry and John! Thanks for sharing the no-sew drapes. I will be sure to send some girlfriends over to check out these instructions. That way I will not have a line out my door telling me I have to whip out my sewing machine. I am just beginning to sew. So, far baby gifts for friends. I wonder if you could attach liner to the back of the drape material and still use the hem tape to hold both fabrics in place?
YoungHouseLove says
Hmm, that might be tricky. You could definitely do it but you might need to use two strips of hem tape per side. One to fuse the liner to the fabric and another ribbon of hem tape to create a finished hem around both fabrics for that edge. Hope it helps!
xo,
s
Jill Stigs says
Oh, they look wonderful! Great job. I am going to have to look into the ring option…..bet they close like buttah!
Julia says
The nursery is looking FANTASTIC so far! I love the curtains, the paint, the chandelier… EVERYTHING!!!
Susan says
I cannot get over how clever you were in making the off center window look balanced!! Its so simple and so perfect!!
I’m enjoying watching your nursery come together and can’t wait to see it all finished!!
P.S. Your trusty iron hem is also really useful in the large sheets for making things like fun applique shirts for your little ones :) Just for future reference.
Melissa says
Question – are you not planning to close the curtains, or do you just not worry about covering the vent? My vents are in the same place (yay 1950s RVA houses) and I was considering shorter curtains to avoid covering them. I don’t think it’s very likely to cause a fire because there aren’t actual flames shooting out of the vents, but it does seem safer not to contain the flow of hot air.
Really beautiful job! I was going to use Ikea curtain wire for my Stockholm Blad curtains because they have a tiny rod pocket and I want to be able to slide them, but I will definitely get some clips like you used!
Melissa
YoungHouseLove says
Good question! All of our curtain panels are stationary in our house (meaning we don’t open or close them at all)- we just love how they add height and soften the lines of a window. Instead, we rely on our blinds and shades when it comes to actually blocking light and gaining privacy, which also helps us avoid a few of the air vents under the windows (so there’s no fire hazard to worry about). Hope it helps!
xo,
s
SJ says
Hi guys, great post! Do you have any ideas on how to temporarily hem curtains since the hem tape is permanent? The reason I ask is because I am renting and scored some great linen sheers that I don’t want to permanently shorten (hoping for taller windows one day soon). Any ideas?
YoungHouseLove says
The Heat N’ Bond that we use is definitely long lasting and super permanent (even after years of use and multiple washings) so you might want to do something a bit less permanent like pinning them up to create a removable faux hem or even just selecting a height that you can use for any home (like 8 feet) and allowing them to pool in your space (assuming you don’t have extra high ceilings). Then you would have the option to hang them so they just graze the ground in a room with higher ceilings if and when you move. Hope it helps!
xo,
s
jen says
Great fabric!! Love it! Word to wise from one Mom to the next? Don’t sweat a dark vs. light filled room or a noisy house vs. a really quite one. You want to get the baby used to sleeping under “not so ideal” conditions ie; Noise,barking dog, lights, etc. Otherwise when you find yourselves out of the normal routine? Grandparents house, in the car, a friends house, a party? You’ll have your hands full trying to get them to nap or sleep.
YoungHouseLove says
Hey Jen,
Thanks for the advice! We plan to keep the windows open during “day sleep” like naps and of course will bang around (vacuum, let the dog bark a bit, etc) just to get super sleepers like my sister in law (she has three kids who can sleep through everything thanks to this method). But we would like to keep the room nice and dark overnight – just so baby P can tell the difference between day sleeping and night sleeping (and hopefully snooze for a nice long time when it’s dark!). Fingers crossed…
xo,
s
Nina says
Love the print you chose! I made curtains since I couldn’t afford the extra wide panels for a 9 ft. tall sliding door in the fabric I liked. I still have them 5 years later and just hemmed them to fit our normal sized windows in the new house. I also have sheers to cover the closet in the baby’s room. The closet doors were really heavy and not stable so we just took them out and put up sheers. Can’t wait to see the finished room!
Christen says
Do you think the hemming tape will work with a fabric lining in addition to the fabric for the curtains? I like the look of lined curtains and especially black out lining for bedrooms, but I’m trying to figure out the best way to do it myself!
YoungHouseLove says
Yup it should totally work! You’d just need to use two ribbons of hem tape per side. One to fuse the lining to the fabric and another one to create the hem that folds them both back at the edge. Hope it helps!
xo,
s
Kim at Yellow Brick Home says
Sherry, I swear by that iron-tape to hem curtains, yet I’d never thought to use it to actually seam an entire panel! Thanks for the simple tip.
Also, love that Home Depot will trim the blinds for FREE. Can’t beat that, and we’re currently in the market for new blinds. Our usual go to is Overstock, but we may have to give the depot a whirl.
Krissy says
Sherry,
I’m taking my closet door off – it swings into our already too small closet so this should give more room. I was planning on hanging curtains too but was thinking of doing them high & wide just like a window (covering the entire door/molding/etc. when pulled shut. Do you think this would be weird? wondering if I should hang it the way you two did.
Thanks!
YoungHouseLove says
Hey Krissy,
That could totally work! Especially if you hang curtains around the room at the same high and wide height. Hope it helps!
xo,
s
Christy says
Love the curtains, I like the curtain option instead of closet doors. I must try the no sew version of curtain making.. I am redoing the fabric shades I have in my bedroom. Not an easy project but money saving.
Joanne says
Beautiful job!!!! I was thinking maybe it would look pretty to put contrast ribbon to hold the closet panel.
YoungHouseLove says
That was actually our first instinct too! But we had so much leftover fabric that we just went the low-contrast route and used the same pattern to make that loop to hold the curtain back. In the end I think we like that it subtly blends in and isn’t a big feature since the pattern in our fabric is so bold to begin with and we didn’t want anything to compete with it. Hope it helps!
xo,
s
Megan says
I’ve hemmed curtains a few times before, and yours look great! I started with IKEA curtains, which come hugely long so you pretty much have to hem them. I used a sewing machine and it really wasn’t too bad (and I failed sewing in Girl Scouts!), but I got a great tip from a sewing-pro friend before I started – curtains will look even better if you use a really wide hem for the bottom – like, 4″ to 5″. If you look at professionally hemmed curtains, you’ll notice that the bottom hem is really wide. It adds a bit more balance than a 1″ hem that you’d typically use for smaller projects. Not trying to criticize AT ALL but next time, you can try a wider hem and see if you like it even more. I love seeing your nursery come together! I’ve been trying to convince my husband to take the doors off our closets for years, and he refuses. Maybe I’ll show him yours…
YoungHouseLove says
Thanks so much for the tip Megan! We’ll definitely have to keep it in mind for next time!
xo,
s
Mandi says
Oh my goodness! I just stumbled on your blog-I swear in real life we’d be best friends! I LOVE the nursery-we’re in the process of moving from apartment to house, and I’m shopping around for ideas especially for my toddler’s room. Were the rod anchors purchased seperately from the rod, and if so, where did you find them? (the hooks too… such a great idea! I just keep a short curtain now but those are so gorgeous!)
YoungHouseLove says
So glad you found our blog Mandi! The curtain rod and the curtain rings were purchased on clearance at Target and we picked up the anchors a while back at Home Depot (we always have a box of them laying around for jobs like this). Any basic anchors that will accommodate the screws that come with your rod should work really well. Hope it helps!
xo,
s
Stephanie says
I love you twoAND all the updates about the bean’s room. Even though I’m 21 and still live with my parents while I’m finishing school – I check the blog every day!
I want to take the mirrored doors (2) off of my closet and just lean them against the wall so I can access my closet easier. Do you think a closet with an opeining of around 5 feet would still be able to accomodate a curtain panel or would you just leave it open?
THANKS! xo Steph
YoungHouseLove says
Oh yeah it’ll look great! We love a long tension rod on a 5′ wide closet opening- and you can put two panels on it- one one each side. It’ll really soften things and look gorgeous!
xo,
s
Stephanie says
What an awesome room for a baby! What a lucky baby! :)
Vonda says
Speaking of Local! On RVANews.com, a local news source you probably have seen or been onto, you’ve been nominated under the “Best Overall Blog”. Just wanted to pass it along in hopes many of your loyal readers would get out and vote. Votes close 10pm on Feb. 19th. Here’s the link:
http://rvanews.com/news/rva-internet-awards-get-out-the-vote/25352
I’ve already voted for you (and for my neighborhood blog!)
Good luck!
YoungHouseLove says
Thanks so much Vonda! We really appreciate your vote! Off to check it out…
xo,
s
Laura says
Yay – your instructions on using iron on hemming tape are just in time for me to put them to use tonight! Thanks!
Sarah says
Hey guys! The nursery is looking great and I love the fabric you chose for the curtain panels. Do you know the name/designer of the fabric?
Thanks!
YoungHouseLove says
We know that it’s by P. Kaufmann but we don’t know the name or the style number since we got it at an outlet. Hope it helps!
xo,
s
Lacy S says
Cute curtains! Last summer I made my living room curtains with the sewing machine. They were incredibly easy to do. Instead of having them go on a rod, I used clip rings. I love the look of them!
One thing I might suggest is to add a liner. Before you know it, your curtains are going to be sun-bleached, and all that beautiful fabric design will fade away. If you line them with broadcloth or some cheap white fabric, it will keep them bright and beautiful. You could certainly add it to yours!
Have a great one!
Lacy
YoungHouseLove says
Hey Lacy,
Thanks for the suggestion! The fabric is actually indoor/outdoor fabric (we’re still thanking our lucky stars for that find!) so it’s actually fade and stain resistant since it’s made to endure lots of sun and general wear like any outdoor cushion would. Hope it helps!
xo,
s
Leigh says
Hi guys! I love all the nursery posts! Keep’em comin!
One question on your ceiling color – is it a true aqua? I looked at a swatch of the color you choose and it looked more green but in the pictures of your room it looks aqua. I love that color and I was just wondering if the color on my computer is way off…
YoungHouseLove says
Hey Leigh,
We would describe aqua as a light blue color with lots of green undertones and that’s exactly how we’d describe our paint color for the ceiling. People would definitely call it blue over green, but it has a lot of subtle green tones in it, which really helps it work well with the pear colored walls. We’d say that these photos are pretty true to life (if not a bit bright just due to lighting issues since some were taken at night). Hope it helps!
xo,
s
Leigh says
Thank you for answering my question. You guys are always so helpful!
Val says
Re Megan and the 4″ curtain hem: the extra fabric helps weigh the curtains down so that they will drape properly. It’s really helpful for light-weight fabrics that you don’t want fluttering all over the place. Just a little extra info on that. Looks like yours are plenty heavy enough to keep themselves in order.
I LOVE that fabric! And since you’ve got so much left over, maybe you can make some springy throw pillows or something.
Meredith says
Absolutely wonderful, par for the course. I would recommend though, instead of a safety pin (because they get bent over time if there’s too much weight, and they can just be a hassle) that you might want to try some stick-on velcro for the fabric strap holding your door curtain to the side.
Thanks for all your great ideas!
YoungHouseLove says
Great idea! We’ll definitely be upgrading from the safety pin soon.
xo,
s
Lisa @ lists in my pocket says
The nursery is adorable! Thanks for the tip on hemming curtains – gives me a lot of hope for making some of my own.
august says
Thank you so much for all your help. You always answer all my silly questions.
LauraC says
Can I just say that I’m still trying not to be insanely jealous about your GORGEOUS aqua capiz light – for $50!!!! Talk about perfect!! I’m trying to find something for our daughter’s room, but since we plan on having her share with her soon-to-arrive baby brother for a couple of years, I don’t want anything too girly. So I have no idea of what to put up there. But, what I reallly wanted to say was that it was interesting HD cut those shades for you. I’ve wanted them for so long, but didn’t think 2″ would work. (and they don’t make the faux wood in 1″) Also, Lowe’s said they wouldn’t cut them (unless they were a certain expensive brand) so I never even bothered to ask HD. So it was good to know that they did for you and that they still look good (even though they’re wider). But . . . out at WalMart today I found 29″ jute Roman Shades that are what I’ve been looking for for oh, about 8 months!!!!! I have looked all over, (at W-M before too) and they just didn’t make that standard size. So I don’t know what changed, but I snapped up 4 of them for our odd-sized windows, and I’m going to measure a couple other windows as well. So excited! So I guess I won’t be needing HD to cut blinds for me afterall!
Jamie says
Sort of a random comment but I like the way you painted the furnace vent the same colour as the wall.
Handy Man, Crafty Woman says
nice job! I love how you “balanced” the window. why do they make houses/rooms with such off-balanced windows; it drives me nuts! (I like symmetry.) :-)
Caitlin @ That House on the Corner says
Great work! I love the way you centered the window with the use of the curtains! I did a similar thing in our kitchen to make a small window appear bigger. However, I am not so sure about just seaming the curtains without sewing. I made my own curtains the same way, but followed through by sewing them. I honestly doubt I’ll ever buy curtains again :-)
Here’s the link to my project:
http://thathouseonthecorner.blogspot.com/search/label/sewing
Let me know how the seams hold up… it could be different in Virgina than hot southern California weather where the seam tape might un-stick.
Great job once again though~ I love the closet hook idea, our closet has a curtain as well because of an dresser that makes a door too complicated, so we might be adding that on ;-)
YoungHouseLove says
Hey Caitlin,
We actually hemmed the rest of the curtains in our house with Heat N Bond over two years ago and even through multiple washings they’ve held up great! We always buy the heavy duty strength stuff and follow the washing instructions on the packaging but it really seems to be a durable and long lasting solution. Hope it helps!
xo,
s
Amanda says
Those curtains are fabulous! Love the pattern – it works really well with the wall color. Great idea to cover that open doorway, too! I like how wrapped the loop of fabric around to fasten it on that little hook – clever!
I haven’t made curtains yet, but have seriously been considering it for some of our windows. I did, however, make a table runner with that no-sew adhesive and it turned out really well! That stuff is ingenious! It was a nice little test run before I buy a bunch of fabric to make any curtains with. Trying to pick out a fabric is so overwhelming though! Good choice on the indoor/outdoor fabric.
Erin says
Love it! I have been a fan of curtains on closets since college. For our first baby’s room we didn’t have a closet, but I actually took the door off the room (it was a 100 yr old house and the door didn’t even fit into the door frame properly). Instead I hung a shower stall sized tension rod in the door frame with breezy expresso silk-look curtains- draped them off to both sides and put a walk-through safety gate on the bottom. It was like a modern dutch door :) Our house was quiet enough that we didn’t need the door to be a sound barrier for him and it was fun to draw the curtain back to peek at him at night. More importantly, it meant I could fit a tall dresser right next to the door (where the door would have normally swung). It made the room feel so much bigger without having to worry about the swing of the door. Now that we have a different house he has a regular door, but I took the bifold doors off his closet and hung drapes on either side. It doubles as theater curtains when we want to do a puppet show and it’s so much easier for a toddler to open and close curtains than the finger-pinching bifolds!
As always, love the inspiration!!
Aimee says
I LOVE the curtain in lieu of a closet door. I have been in my house for 6 months now, and my bedroom was the first room I re-did. The closet doors just seemed so bulky, ugly, and boring. I used a simple tan linen curtain panel and a tension rod (both from Target) to create a billowy, softer cover-up for my closet mess. While my father thinks it “just looks like I can’t afford a closet door,” I think it makes the closet seem more special, somehow, and it totally fits in with the serene, natural feel I want my bedroom to have.
Sarah says
I love how your curtains turned out! The nursery is looking so lovely already! Your little girl is going to LOVE her room.
You inspired me to post a similar no-sew curtain project that I did (over a year ago) in our bedroom. I had the same closet idea – great minds think alike! We also tried our hand at making a cornice. We learned some things while in the process, but I love how the room turned out. Thanks again, for sharing your wonderful ideas and being an inspiration!
http://sohldesign.blogspot.com/2010/02/hand-painted-wall-art-custom-curtains.html
Paige says
The curtains look great! And this post came at the perfect time…I am just getting ready to order fabric for curtains in our master bedroom tonight. I already bought the hem tape and am really excited to try it out!
HeatherG says
So beautiful. It is so fun to relive vicariously through you two that very special time before the first baby. There is nothing like that in the world. Decorating a nursery together. Putting together the crib where this “new person” will sleep. I remember standing in the nursery before our first arrived and saying “someone is really coming to LIVE here… with us!” Such excitement for something you know is going to be wonderful….but just how AMAZING… you’ll soon find out. Thanks so much for letting all of us follow along:-) Best wishes!!!
Megan Daly says
Love your Blog. Love your nursury.
Just wondering where did you pick up the Super CUTE light fixture?? I love it and think it would be perfect for my little girls surfer room. :)
YoungHouseLove says
Hey Megan,
Just click the shopping spree link at the very bottom of the post for that info. Hope it helps!
xo,
s
meghan says
The fabric is PERFECT!!!! I love the colors so much for your sweet little gal’s nursery. Every detail is simple and lovely. Can’t wait to see the rest.