We’re back with our homemade nursery curtain panel how-to.
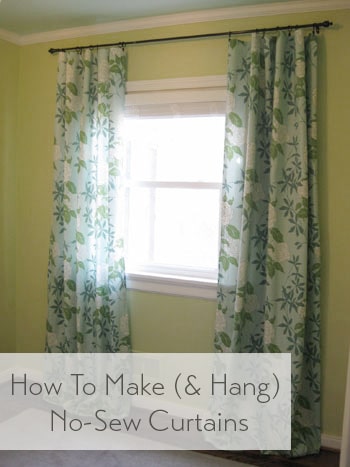
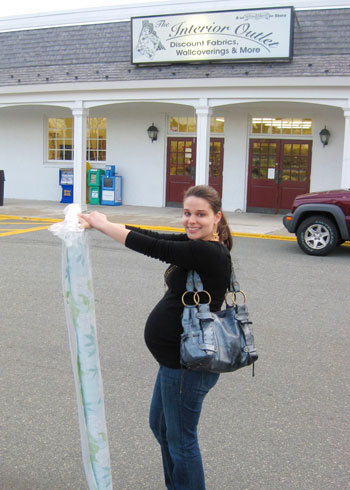
Remember when we revealed our punchy patterned find during last week’s shopping post? Well here’s how we took it from one big bolt of rolled up fabric by P Kaufmann…
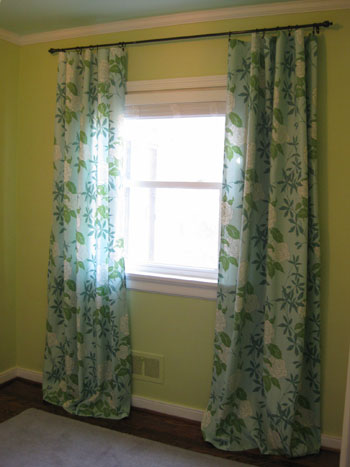
… to three gorgeous floor-length curtains (two for the window and one for the doorless closet). And probably best of all: there’s no sewing machine required. In fact, here’s my short and sweet list of supplies: tape measure, scissors, iron on hem tape, and an iron of course. Plus we even added a few kid-safe features so stay tuned for those details…
But before we get into all the dirty curtain-makin’ details, we should mention that we hope our baby sleeps well. So in the interest of aiding our little one in that area, we decided that we also needed to grab some sort of 100% light-blocking blinds or shades. So we trolled the aisles of Home Depot and found some chic white faux-wood blinds. We loved them because they felt almost like substantial wood shutters when they were lowered (a lot more solid than those thin plastic or metal venetian blinds) and they definitely would block any and all light when in use (and could easily be pulled up and out of the way to let light stream in during the day).
But here’s the bummer. Of course they didn’t come in the exact measurements of our quirky old house’s window (39 1/4″ wide in case you’re wondering). Sadness. But we soon learned that Home Depot could actually cut them down to custom fit our window perfectly- and the cutting service is F-R-E-E. That turned our frown upside down. So we give the guy in the orange apron our window’s odd width and he had our custom-cut clean-lined faux wood blinds waiting for us about five minutes later. The blinds weren’t super cheap at $37, but they look convincingly like much pricier white wood blinds and we know the darkness that they’ll provide will be priceless when we’re dying for one more minute of sleep.
Of course we also liked that they didn’t have those dangerous loopy pull cords (they were labeled as having “kid safe cords” that are actually separated instead of connected so they’re less of a strangulation hazard- no loop to get caught in). And of course we plan to keep them wound around one of those cord wrangling pieces of metal at the top right corner of the window far out of baby’s reach anyway, but we love the added loop-free design.
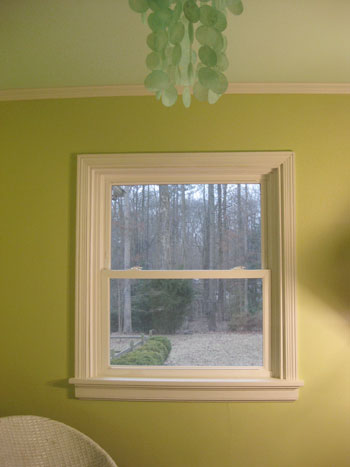
And since we love a before picture, here’s the window prior to our little curtain and blind fest:
John had the blinds up in about twenty minutes, but they definitely left a lot to be desired in the length department. They were actually a bit heavy to raise and lower, all due to the fact that they were at least two feet too long for our window, so there were a bunch of slats that just clumped together at the bottom of the blinds when they were in the “lowered” position. Luckily in the installation instructions they actually detailed how to shorten them to customize their length to fit any window. Nice.
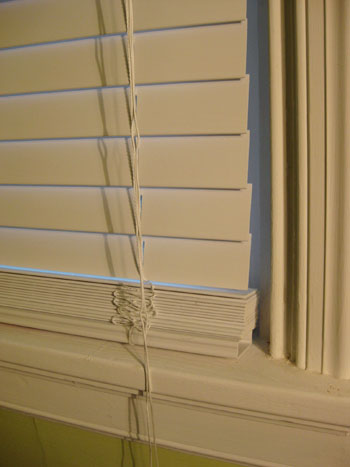
So John just followed the included directions and popped out these little plastic pieces on the bottom and could easily remove as many slats as he’d like and trim the excess string. Then he just popped the bottom pieces back on and we had an even more customized nursery blind that was a lot less cumbersome to raise and lower without all those extra slats at the bottom. Then, like a finely tuned relay team, John tagged me and said “your turn” and I began working on the curtains.
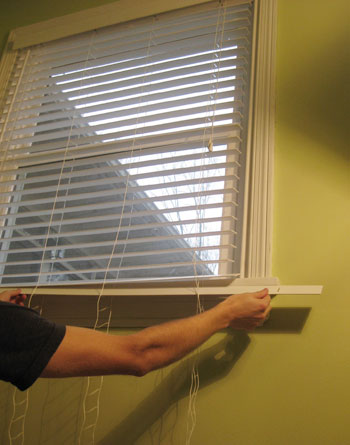
First I measured the approximate height that I wanted the curtains to be (just shy of 8′ for an almost floor to ceiling look) and added an inch and a half on the top and bottom to accommodate the hem. It was actually a nice clean measurement in the end because I determined that cutting two eight foot long sections of fabric would do the trick perfectly (since I wanted them a bit shy of 8′ but with the added hem measurement it brought them right back up to 8′ exactly). Hurrah for no quarter of an inch calculations!
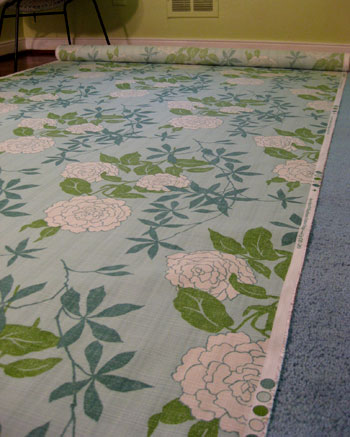
The other super convenient thing about measuring out my fabric was that we already happened to have our new 5 x 8′ rug on the floor… so to cut my 8′ long fabric sections, I simply rolled the bolt from one end of the rug to the other and cut a straight line using the edge of the rug as my guide. It doesn’t get much easier than that. And for the width I just left each panel as wise as the bolt allowed (so I didn’t need to trim those edges at all).
Then it was time for my trusty Heat N’ Bond iron on hem tape (I always grab the “ultra hold” variety). You may have seen us using it in this crib skirt tutorial from a while back and we’ve also used it to hem all the white Ikea curtains that we have hanging in the rest of the house. In short: I’m a hem tape black belt (the irony is that John does all the clothes-ironing in the house). Anyway it’s great stuff for leaving a polished and clean-looking edge (a lot more reliable then me with a sewing machine!) and it’s even washable and super cheap (we grab ours for a few bucks a roll at Michael’s). So I whipped out the ironing board, fired up the iron, laid out my big eight foot long fabric panel and had my scissors and hem tape on hand.
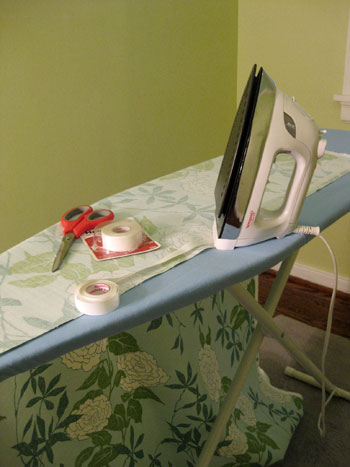
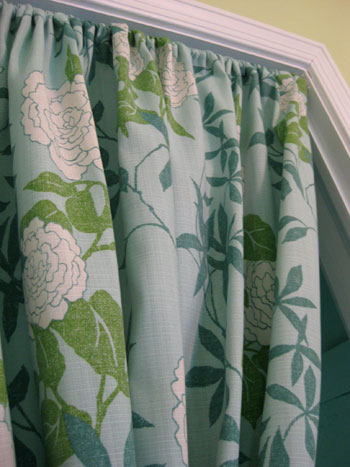
All it took was an easy-iron hem on each of the four sides of my fabric (for step by step hem tape instructions, just check out this post). Then I had a nice finished panel (without any rod loops or tabs) that I could clip up using my cheap-o oil-rubbed bronze curtain rings and rod from Target. Just look at how seamless and perfect that edge is! Much more even and less bunchy than anything I could sew…
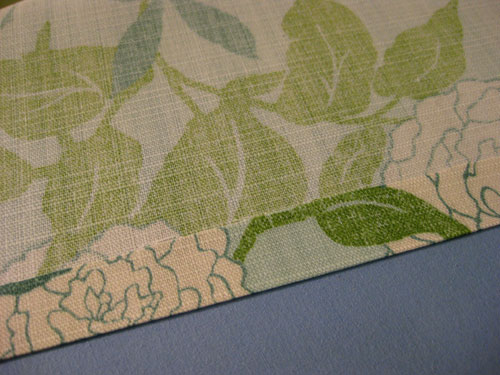
Then I tagged John to get to work hanging the curtain rod with heavy duty anchors (so it’ll never come toppling down, even if over 100lbs of force is used) while I created a third curtain panel for the closet (this one only needed to be seven feet long). I also made a little rod pocket at the top of this panel (I just positioned hem tape about 4 inches below the edge of the fabric and ironed the fabric to that line of hem tape created a nice loop of fabric). Meanwhile John was already executing my let’s-cheat-our-off-centered-window-so-it-looks-more-balanced plan.
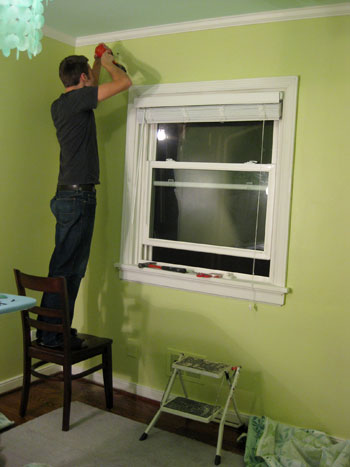
This angle gives you a better idea of what we were dealing with. See how the window is shifted a bit too much to the left? Well it’s nothing a curtain rod and some billowy floor length curtains can’t totally solve. I asked John to hang the left curtain rod support hook only about four inches wider than the trim on the left side of the window but requested that he hang the right curtain rod support hook about fifteen inches wider than the trim on the right side of the window.
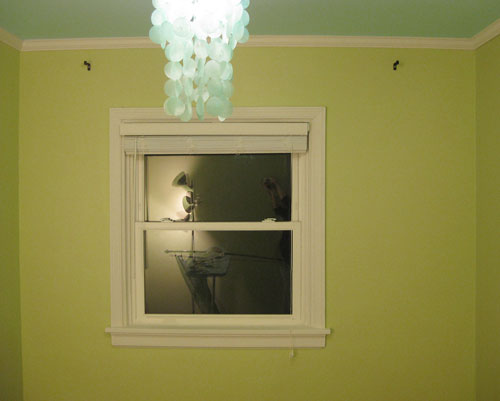
This way, once we hung each of the curtain panels, we could cheat them both over to the right (blocking a bit of the window on the left side, but adding a ton of balance and polish to the room):
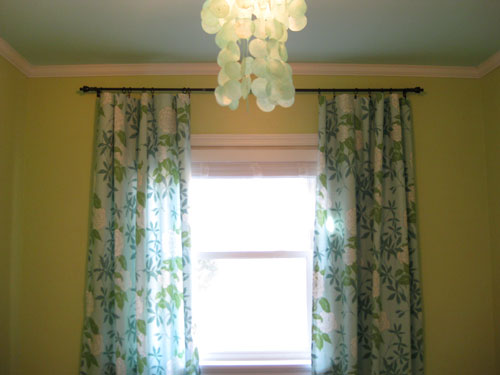
And we also mentioned in our shopping post that we snagged our simple oil-rubbed bronze curtain rod along with two packs of curtain rings on clearance at Target for less than $12 total. We love the height and the elegance that the shot of dark color brings to the wall, and love that it echoes everything from the mocha finish on the floor to a few of the darker wood accents that we’ll be bringing in to keep things from getting too sugary sweet and matchy-matchy.
Plus the clip-on curtain rings are actually something of a safety feature. Remember how we mentioned that someone could hang on those curtains without the rod coming down thanks to the use of some heavy duty anchors? Well we also realized that using clip-on curtain rings would allow for just the fabric panels to pull down if anyone got too rowdy and tried to swing from them (while the rings and the rod would most definitely stay put). We even tested them out by tugging on them a bit, and although it took pretty much all of my pregnant adult weight, sure enough the fabric was released from the rings and fluttered lightly to the floor while the rod and the rings stayed nice and securely in place on the wall.

And as someone who has never used curtain ring clips before I just have to sing their praises. Not only are they nice little secret safety features, they also create such perfect little “waves” in the panels which result in such an amazingly high end look (and best of all, there’s no rod-pocket required, so you can hang any panel of fabric without worrying about extra sewing or loop-making).
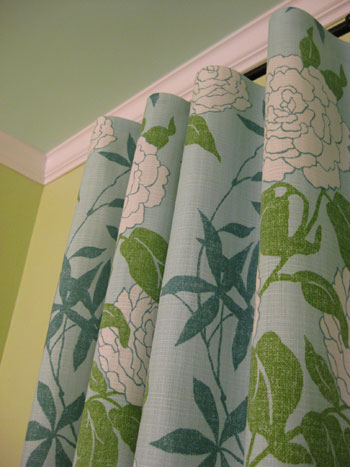
Update: This P Kaufmann fabric seems to be discontinued now, but here’s an affiliate link to another fun oversized floral print on amazon for anyone looking for something similar.
Oh and we can’t forget our tiny little blue closet (thanks to John’s cute idea to bring the aqua color from the ceiling into the mini enclave for fun). Doesn’t the curtain panel add some nice pattern and sweetness to a closet that was formerly pretty bleak looking?
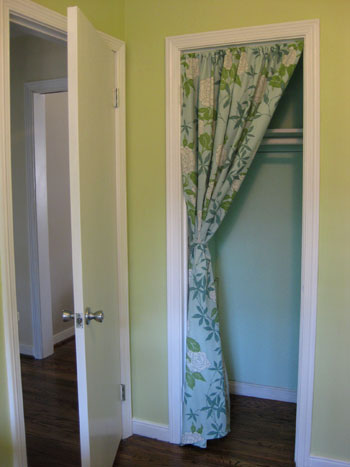
Maybe we should refresh your memory with a before pic:
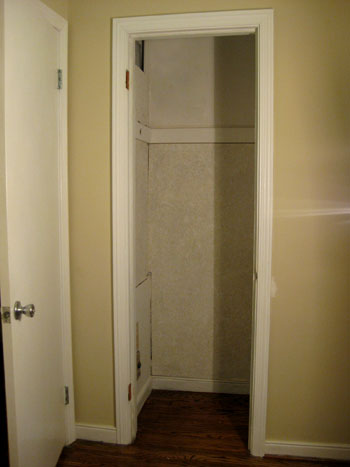
It’s looking better already, right? And of course we still have to add bins, baskets, and more hanging rods (along with some sort of storage piece on the floor of the closet).
As for how we swagged our curtain panel so it’s mostly out of the way, we just hung it on a $3 tension rod (one that screws into both sides of the molding for more reinforcement than those that rely only on tension). Then we added a regular old Ikea coat hook that we already had on the left side of the closet’s interior trim. Next I made a little strip of fabric (using my trusty hem tape to finish the edges) and used that to create a loop around the curtain panel. Note: it’s safety pinned in the back so it can easily be removed and readjusted.
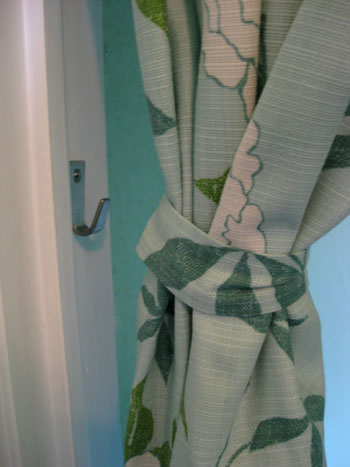
Then it was as simple as slipping my loop of fabric onto the hook on the side of the closet to hold the curtain off to the side.
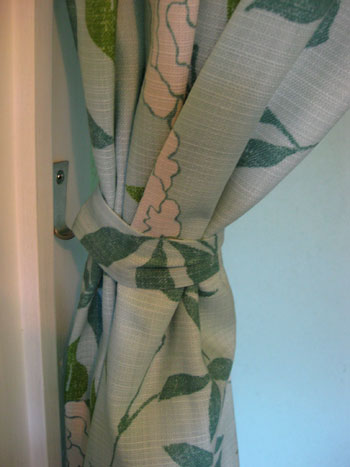
So that’s the story of how we made our off-centered window look more balanced, blocked out all the light for less sleepless nights (fingers crossed) and added a fun pop of pattern to both sides of the nursery in the form of breezy floor-length curtains (which make the ceilings feel about a foot higher). Plus we only spent about $35 a panel (with almost an entire yard of fabric leftover!). Oh and it always makes us smile at our fabric luck when we recall that it’s actually indoor/outdoor fabric, so it’s a lot more stain and fade resistant than the average bear (although still completely washable). Which is a good thing when it comes to sticky fingers and goey faces…
But what about you guys? Have you made your own curtains before? Do you have a closet with a panel of fabric on a tension rod in lieu of a door? Spill the sewing (or hem tape) beans.
Psst – Wanna see our nursery progress from the very beginning? Here’s our painting post, our big shopping spree, and our crib hunting rundown.
Update – Want to know where we got something in our house or what paint color we used? Just click on this button:


Shunta says
do you have a sewing machine recommendation for a beginner? Thanks! I’m trying to stay under $100 if possible. Maybe slightly over.
YoungHouseLove says
Hey Shunta,
As we explained in the post, we actually used iron-on hem tape and not a sewing machine- so I’m definitely not a sewing machine expert. Perhaps going on amazon.com or target.com and seeing which ones have the highest buyer ratings would be a good way to get a recommendation? Hope it helps!
xo,
s
anne marie says
Gosh, Sherry! Your comments about adapting the room as your baby grows make me think that your readers are being awfully hard on you and John! I wish you didn’t have to defend your intelligence and ability with those disclaimers – you’ve certainly already proven them with your creativity and your fearless DIY ACTION! Anyway – bravo to both of you for adding ‘articulate & diplomatic blog moderator’ to your resumes! ;)
YoungHouseLove says
Hey Anne Marie,
No worries! People are definitely being kind and sweet to us. We love our readers! We just know kid-related posts bring out the safety police in all of us, and since we’re the captains of that club we just want to make it totally clear that we’re definitely going to guard the bean’s health with our lives (and we’d never put design before baby P!). Sometimes it’s just easiest to point things like that out there right off the bat. Hope that helps to explain why we do what we do- we’re just helpless oversharers who want to explain every detail that we possibly can!
xo,
s
Stephanie @ Geezees says
Love the curtains!
Beautiful nursery!
meryl rose says
I have been sewing up a STORM the last couple of weeks and sewed curtains for 5 rooms in our house, only 3 more rooms to go and I’m DONE! Curtains with fabric that you actually picked for the room make you feel much better than not so pretty hand-me-down ones….
Linda says
Love every.single.thing! Your curtain trick is great, in fact, now I know what to do with our off center sliding door in our family room!! We also have those blinds in our whole house and we just love them, so I’m sure you will too!
Christina J says
Hi there! Your little Beanette’s room looks amazing!!!! Love that color combo! Wow! Very sweet and serene! I’m a blue/green person so I love how you tied it all together with that great fabric! Part of our DIY kitchen re-do last summer was transforming a small coat closet (which had no biz being in the kitchen soaking up garlic-y cooking smells and such…yuck) into a pantry! But we ran into an unforseen issue at first – since my lovely, handy boyfriend installed new tile floors in the room, our old closet door was now too long to fit. So rather than cuttting down a good door, and realizing I could use this as a chance to be creative :) I decided to hang a curtain up instead. Went to Ikea, snagged the wire line and metal clips as well as funky kitchen-esque, fruity printed fabric! It became the perfect pantry door and is such a neat transformation in the room I’m in the most! I confess I have not hemmed the curtain properly yet but after your last post am motivated to add the seam tape this weekend. (Or maybe it will be a good project for tomorrow since we’ll be snowed in here in CT!) Well just wanted to share and say thank you to you guys as always, for sharing your projects and great ideas!!!
Marianne says
Hi there !
I LOVE those colours and the fabric pattern is lovely, it gives a really serene look to the room (and well done about the closet !). I’m also putting together a nursery (I’m due in June), and I’ll use lime and aqua colours (we won’t know the sex of the baby until the birth), I’ll send you pictures when it’s done, I’d love to have your opinion !
Keep having fun with the baby’s room and thanks for sharing !
Cheers from France
Marianne
jenny says
so cute!
daoes says
i think the color is very elegant! i love it, now have some idea
Korie says
Its really coming together! I can’t wait to see it all finished. I’m a little bummed though; the pics you posted make the walls look lime green instead of soft celery!
YoungHouseLove says
Don’t be bummed! If you grab the paint swatch you’ll see that it’s a very soft pear green color- restful and soothing with a bit of fun. We just took many of the photos at night without natural light and didn’t adjust the color before we uploaded them so they’re harsher and more intense looking than they really are. For the big reveal we promise to take them during the day and make sure they look more true to life. Hope it helps!
xo,
s
Amanda says
I love your fabric/color/light choice!!
Now, as the mom of a ten month old hellion, I do see you hemming those curtains up from floor length, or wrapping them around the rod while baby plays…otherwise, they are just getting ripped off the rings. Soon. Not like I’ve had this happen….last week…….
YoungHouseLove says
Hey Amanda,
Yup, we’re definitely all about adapting the room for baby P as she grows- and we’ve already talked about the possibility of hemming them up a bit in the future when she’s more mobile. I guess only time will tell what kind of baby we’re dealt!
xo,
s
Stacey says
Hi! Love the room! I have been thinking about making curtains for our bedroom makeover I am currently in the process of. I was going to sew, but don’t even know how to put thread in my sewing machine!! So this post is perfect for me.
I was wondering what kind of fabric the curtains are? I saw some fabric in the store yesterday, but felt it was too thin and would droop in between the clips…does that make sense?? Wondering if you have any tips?
Thanks!
YoungHouseLove says
Hey Stacey,
Even thin fabrics (like sheers) can be held up by ring clips so I doubt that whatever you found would be too thin for the ring hooks to support them. You might want something thicker for a more substantial look with heavier draping, but thin curtains can also look nice and breezy in a room. Our curtains are definitely on the “substantial” side and have the look of a thick cotton weave: roughly as thick as linen but not nearly as thick as dense upholstery fabric or velvet. Hope it helps!
xo,
s
Shunta says
Thanks!! I am SO going to use the hem tape on curtains. Wasn’t sure if it I would be able to use it on shower curtain (heat/moisture) any thoughts on that? Thanks!
YoungHouseLove says
Hmm, with the heat and moisture you might want to use the Heat N Bond and then sew over it to make it even stronger. That way you’ll get a nice clean looking hem first with the tape (no bunching) plus the added security of the thread.
xo,
s
Andrea Melberg Thompson says
As I read, I just knew you would address the blind cords!
–Also, wondered if your closet door drape would be more functional if you sewed a snap, or put velcro on your little tie back, instead of having to un-pin when you want to release it.
–Finally, one suggestion as your get storage baskets for the closet/room and etc – I suggest you have one storage holder/container for “Too Big” clothes you get as gifts/on sale the baby beaner will grow into and “Too Small” so that as she grow, they get placed inside and not BACK in the drawer (which happens when you are too busy, too tired, etc with kids), The “Too Small” would be an EASY collection place before going to long term storage, being passed on, or etc. I keep meaning to do this for my kids, as it is a constant problem! You all are so organized, you probably already considered this, and have thought up cuter labels then “too big” and “too small”
–TAKE CARE!!!andrea
YoungHouseLove says
Thanks for the suggestions! So helpful!
xo,
s
Nancy Shirley says
You might want to use that extra length of fabric to make a valance to take the place of the long curtains when the beanette alias “Tarzan” starts swinging! Or you can hang the long curtains sideways using the clips when (if) you want shorter curtains. Of course your daughter might be a compliant little thing or she could be a holy terror! You never know! Keep well! And thanks for sharing, I enjoy your blog very much!
YoungHouseLove says
Hey Nancy,
Yup, we’re definitely all about adapting the room for baby P as she grows- and we’ve already talked about the possibility of altering the curtains in the future when she’s more mobile. I guess only time will tell what kind of baby we’re dealt!
xo,
s
Sandy says
So exciting to see the nursery coming together. Love all of the choices that you’ve shared so far with us readers! The curtains are gorgeous – love love love the fabric! And I’m completely with you on singing the praises of those little curtain rings/clip thingys. I use them too!! I’m not at all a sewer, but I’m definitely intrigued about using the hem tape! You can make it look so easy (like everything else you do!) that I’m even thinking that maybe I can do it too!
Felicity says
Funny, we hung the same faux wood blinds this week in our kitchen, bathroom and hallway. We also just finished hanging the curtains that I made a couple weekends ago. I definitely didn’t go for the iron tape route, holy cow was that a project! I used light block lining and am really hoping it makes a difference with our heating bills since we’ve decided to reglaze all our old windows this summer in lieu of going the replacement route. Can’t wait to see more photos of the baby bean’s nursery!
Jacci says
Hey – way to customize some window treatments on the cheap :) Love it! Bean is going to just be oozing with newborn style – that’s not all she’ll probably ooze with, either ;)
XO,
Jacci
elizabeth says
No I have never made my own curtains. But you have really inspired me. For one, I always have the hardest time finding the perfect curtains for my windows. Maybe if I go out and look at fabric to then make my own it’ll be easier. Another thing your post helped me alot with is that I have the same problem with an off center window and now I know how we will deal with it. Gracias!
Taylor says
Excellent solutions for the non-sewing community!!!! I’m so excited to have options now! Have you ever made pillows or pillow covers this way? Trying to pull together a nursery with some fun fabric from IKEA…(Fredrika)…I found your bedskirt post (THANK YOU) is there a pillow one?
YoungHouseLove says
Good question! There’s no pillow post yet since we haven’t attempted one… yet. But we’re sure it would work the same way. Just iron the hem tape on three out of four sides of the pillow cover and then either sew on buttons for the forth side or stitch that one shut somehow (since it might be hard to iron the last edge shut since you usually make the seam with the fabric when it’s inside out- which would be hard to do once it’s stuffed with batting or a pillow). Hope it helps!
xo,
s
Angie Harpole says
Hi there!
I happened to be working on a window project at the same time. Yesterday I created a roller shade and then posted the instructions here.
http://www.bryceandangie.com/2010/02/make-your-own-roller-shade-in-under-2.html
This shade was very simple and very cool looking. Took me about 2 hours and cost about $20.
I am still a bit new at blogging, so please overlook my formatting issues! :)
YoungHouseLove says
Thanks for the link! We’ll definitely drop in on you to see what you whipped up!
xo,
s
Katie says
I made a curtain “door” for my closet when I was in college. I lived in this creaky old house with three friends. Unfortunately, I drew the last straw in picking rooms and got stuck with last choice — a tiny cube with two entrance (through a roommate’s room or the bathroom) and no closet. Luckily, my landlord took pity on me and built a closet in one corner out of some spare drywall he had laying around. But there was no door, so I got to work and made a lovely lavender curtain with lime green ribbon at the top to tie it to the curtain rod. Funnily enough, I painted the walls of my room about the same color as your nursery! I loved that curtain door, and I actually still have it folded away somewhere.
Jill says
Love love love the nursery and the fabric you chose is amazing! I’ve been searching the comments to see if you’ve posted the name of the fabric…to no avail. I’d love to use the same fabric in my little girl’s room. Thanks so much!
YoungHouseLove says
Hey Jill,
The fabric is indoor/outdoor fabric made by P. Kaufmann. We don’t know the style number or name since it hails from an outlet. Hope it helps!
xo,
s
Jill Peterson says
Thanks so much for the information! I am now on a fabric hunt…which is my favorite part of decorating. Have a great day!
Jamie Lee says
I have a question for you two: When you took the door off what did you use to cover the parts of the frame that have cut-outs for the hinges? Did you just paint it and hide it with the curtain? Did you cover it with a piece of wood? Or did you do something else all together? I’d love to know! We just removed the door to the linen closet in our bathroom and now we’re faced with what to do with those hideous cut-outs.
Thanks so much!
xoxo,
Jamie Lee
YoungHouseLove says
Some putty can easily fill the recessed holes where the hinges and the jam used to be. Then just sand things down and slap on some semi-gloss trim paint for a seamless look. Hope it helps!
xo,
s
Jamie Lee says
Thanks Sherry! We were hoping that would work!
Angie says
I want to start by saying that I’ve been reading your blog fo awhile and I’m in awe. Just picture me bowing, saying “I’m no worthy. I’m not worthy.”….But I have an observation/suggestion: I noticed that your panels around the window (clever trick BTW) pool a little bit, so how about making the closet door panel a little bit longer so when you tie it back, it also pools? Right now, it looks a little short/flooded….just a thought:)
YoungHouseLove says
Hey Angie,
Good eye! The closet panel actually pools just as much as the window panels when it’s hanging straight down on the tension rod, but when we swagged it diagonally to hold it back it lost a bit of length being stretched across the doorway that way (so it doesn’t look as long). Ideally it would be a bit longer to totally match the windows but we’re not super matchy-matchy people so we don’t mind the slight difference in length at all. In fact it might stay cleaner since it doesn’t drag as much on the ground!
xo,
s
Sarah says
Hi,
So, I really like our blog and your house and your lil baby bump! very cute all of it, makes me want to be pregnant again! Anyways……my question is about the hem tape schtuff….if you were going to have a bakcing on your curtains, because you live in the tundra of northern MN…how would you go about doing it and use hem tape? I am terrible sewer and want to make/sew the curtains in my 1-year old daughter’s room, but i need to have a backing on them for the winter…and the summer….so, do i have to sew together the backing and the fabric and then use the hem tape or can i use the hem tape soley??? sorry i f I am confusing! :)
YoungHouseLove says
We bet if you picked up the heavy duty hem tape that we used in this post you could probably get away with not sewing anything at all (or you could sew things to reinforce them after using the hem tape which is still a lot simpler and less lumpy and irregular than trying to sew them by hand along if you’re as bad at sewing as we are!). Of course it depends on the type of fabric and how heavy it is, but our curtains were very thick and it worked like a charm without any sewing at all. We would use the iron-on hem tape to hem all sides of the curtain panel and hem all sides of the liner panel (separately so they’re exactly the same size) and then connect each of those together with the hem tape around the perimeter- just like you would if you were sewing them (so both sides have finished edges and look polished). Hope it helps!
xo,
s
sarah says
THANK YOU!!!! :) And yes I am really that bad at sewing…..probably A LOT worse than your skills!
Karen P says
I would not rest until I found this fabric online! And thanks to your most recent Charlotte roadtrip post I found it at Mary Jo’s Cloth Store. For everyone who has been asking it is called Emma-Horizon by P. Kaufmann and they have it for just $7.98 a yard!!!
Karen P. says
My fabric came today!!! It is even more beautiful than in your pictures. Now I just need to turn it into curtains – you wanna do it for me? :)
YoungHouseLove says
So glad you got your fabric! Send pictures of the finished product!
xo,
s
Carmen says
I just popped by to check out the dresser for your nursery and got drawn in with all of your nursery posts. I love it! The curtains are fabulous! And the green mirror…beautiful. I love everything. I love how you’ve made a baby girl’s room with no pink at all! :) You made making your own curtains look very easy. I think even I could try this.
Becki says
Hey guys!
I just re-did my son’s bedroom and had a curtain dilemma that I solved that I thought might be of interest to you.
I wanted white curtains, but I wanted his room to be dark (he’s 4 and has always been a “rise with the sun” kid, so I try and trick him!). Before I would always just nail up black fabric behind his blinds, but that was hard because I could never let natural light in when I wanted it!
So, I followed some of your creative genious and still got my white panels, but I also got clip rings for my black fabric to go behind the curtains! So the white panels are in front, and the black fabric is tucked behind them on the rod with clip rings so I can easily move both panels out of the way!
I thought you might be interested in that come beanette time if you are trying to figure out a way to make her room darker without it ruining your design!
YoungHouseLove says
What a simple and smart solution! Thanks so much for sharing.
xo,
s
Jan says
I just discovered your blog and am really enjoying it! I love how you ‘unbalanced’ the curtains in order to balance the window in the room. But I must say, John, it’s neither safe nor a good idea to use a chair for a step stool. They do flip over very easy and when you least expect it! I know from experience – ouch!
Erin K says
Thanks for the tips! I just made my own curtains for our 1/2 bath and a valance for a bedroom using that hem tape. I can’t believe how easy it was and how great they turned out!
Courtney says
Would you be willing to tell me the brand/pattern name of the curtain fabric? I love it and have a couple of projects in mind where it’d be perfect!
YoungHouseLove says
Just click the word “here” that’s a link before the first image in the first paragraph of this post (it’ll take you to a site with the fabric info). Hope it helps!
xo,
s
katie says
Thanks so much for sharing this with us, amazing idea and I am for sure trying this!
Alyssa Allen says
I want to use your method to make valances for my new kitchen. Would you mind sharing how you made the pocket for the curtain rod on the closet curtain using the iron on hem tape? Thanks for all the inspiration!
YoungHouseLove says
We just hemmed three sides of the curtain panel normally and instead of creating a hem at the top of the panel we placed the strip of iron on hem tape about 4-5″ below the top edge so that we could loop the fabric and iron it into place to create a pocket to accommodate the rod. Hope or helps!
xo,
s
Alyssa Allen says
Thank you. I will give it a go!
Ann says
I absolutely love this website! I appreciate the step-by-step instructions AND info about where to buy the products used. Hate it when home decorating magazines snobbishly tell its readers that a design element is “to the trade” only! Not you guys; you rock!
Bridget says
love it! I do sew but I also love the iron on stuff for the quick fixes. I love the clip on curtain rings idea… never heard of those. Where did you find them?
YoungHouseLove says
Hey Bridget,
They were on clearance from Target. Hope it helps!
xo,
s
Helena says
Congratulations on the baby and on the beautiful nursery. I have been following your blog for some time, and it’s just beautiful what you are doing with your house!
I am completely in awe of the curtains, since I have been looking for something nice and affordable for some time, and the idea of hemming them myself with tape just made my day.
I have a question though on how hot the iron can be? and do i need to buy materials that withstand very hot temperatures for this?
Thank you
YoungHouseLove says
All of your answers will be on the hem tape when you pick it up- it tells you what temp to set the iron on (we think it’s the “cotton” setting) and it definitely stands up to very hot temperatures once it’s applied. It gets super hot in our sunroom (probably around 120+ degrees) and the curtains we hemmed in there look mint – even after a long time. Hope it helps!
xo,
s
heather says
Thank you! I LOVE this! I have never heard of those clips either. Are they curtain rings with a clip attached?
YoungHouseLove says
Yup, they’re small curtain rings with a clip to grab the curtain panel. We got them at Target but we’ve seen them everywhere- they’re such great little inventions!
xo,
s
jen says
I just found your site and I love it!! My fiance and I are starting our house hunt and I’ve gotten a lot of great ideas from the two of you> Now when we look at a space I can actually see different possiblities. Thank-you!! ps we have a little Min Pin named Roxy she looks soo much like your little burger ( I will absolutely be using some of the little touches you’ve added for him in our own space)We look forward to seeing more blogs!
jen and Kev
Ontario, Canada
Pamela Mortazavi says
Hi there,
I stumbled on your site while looking for some ideas for my borther’s kitchen. Congrats on the baby! As a new Mom myself I wanted to call to your attention the safety hazzards of using blinds in a child’s room. I don’t want to scare you, but would suggest you find an alternate means of blocking the light.
All the best!
YoungHouseLove says
Hey Pamela,
Not to worry! They’re actually 100% kid safe blinds with cords that aren’t a loop so there’s no strangulation hazard. Of course we care much more about Clara’s safety than anything else!
xo,
s
J says
I would like to use the hem tape on some curtains, but want to line them with another fabric so they hold out more light. Have you ever tried that? I’m not sure if it would be possible.
YoungHouseLove says
Hey J,
We’ve never tried it but we’re sure if you use the heavy duty stuff it should work out perfectly. Good luck!
xo,
s
kristin says
So how are the curtains working out? Does it let through too much light for the baby to sleep? I’m looking around for nursery curtains at the moment and love the fabric idea.
YoungHouseLove says
They’re working out really well! We actually use the faux wood blinds to block the light at night, and pull the curtains closed just for an extra layer of darkness. She sleeps like a baby! Hope it helps.
xo,
s
MelissaG says
I LOVE this fabric…..I know it’s personal preference but how do you think this would be in a living area? I am in desperate need for window treatments for my dining area but am concerned because you can see the dining from the kitchen and living room…they are all connected basically. Do you think it would be too much? I’m going to have to find a use for this fabric otherwise! Thanks!
YoungHouseLove says
We can’t even tell you how much we love this fabric- and not just for a nursery. We say go for it!
xo,
s
hillary says
How many yards of fabric would it take to make the curtains?
YoungHouseLove says
We used the width of the bold for each panel and the length was easily figured out by measuring the ceiling height (8 feet). Since we wanted them slightly shorter than that for a nice floor to ceiling look, we realized we’d need just short of 8 feet of fabric for each panel (meaning it would take 16 feet to dress the window, which is around 5 and a half yards total. Of course we picked up more than that because we made the closet curtain too (which was an additional 7 feet of fabric since it’s not as tall as the window panels). Hope it helps!
xo,
s
Amanda Stoker says
I like the idea of centering my window by moving the rods as you did, but is it weird if ours are really off center and one is 22 inches from the wall and the other side is 44 inchs? Would that look crazy with us trying to center? I love the blog and appreciate your advice! Thanks.
YoungHouseLove says
No way! You can totally cheat that and no one will be the wiser. Good luck!
xo,
s