We’re back with our homemade nursery curtain panel how-to.
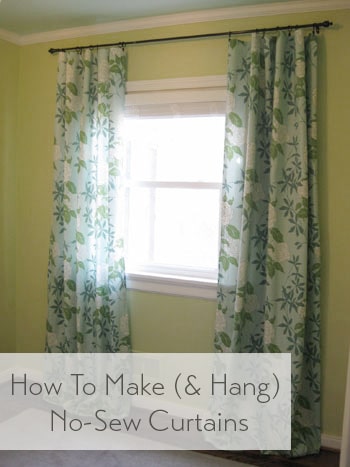
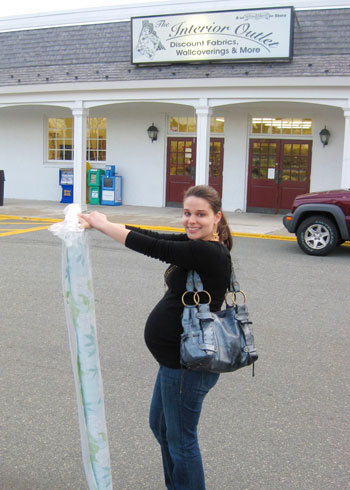
Remember when we revealed our punchy patterned find during last week’s shopping post? Well here’s how we took it from one big bolt of rolled up fabric by P Kaufmann…
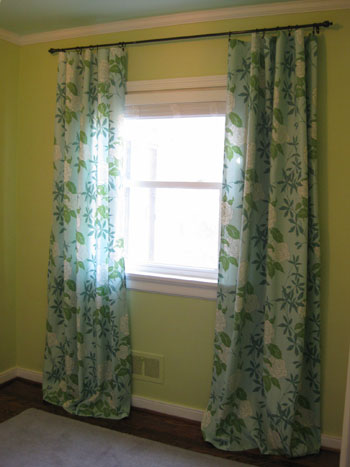
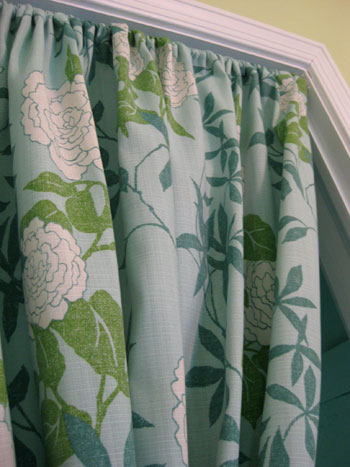
… to three gorgeous floor-length curtains (two for the window and one for the doorless closet). And probably best of all: there’s no sewing machine required. In fact, here’s my short and sweet list of supplies: tape measure, scissors, iron on hem tape, and an iron of course. Plus we even added a few kid-safe features so stay tuned for those details…
But before we get into all the dirty curtain-makin’ details, we should mention that we hope our baby sleeps well. So in the interest of aiding our little one in that area, we decided that we also needed to grab some sort of 100% light-blocking blinds or shades. So we trolled the aisles of Home Depot and found some chic white faux-wood blinds. We loved them because they felt almost like substantial wood shutters when they were lowered (a lot more solid than those thin plastic or metal venetian blinds) and they definitely would block any and all light when in use (and could easily be pulled up and out of the way to let light stream in during the day).
But here’s the bummer. Of course they didn’t come in the exact measurements of our quirky old house’s window (39 1/4″ wide in case you’re wondering). Sadness. But we soon learned that Home Depot could actually cut them down to custom fit our window perfectly- and the cutting service is F-R-E-E. That turned our frown upside down. So we give the guy in the orange apron our window’s odd width and he had our custom-cut clean-lined faux wood blinds waiting for us about five minutes later. The blinds weren’t super cheap at $37, but they look convincingly like much pricier white wood blinds and we know the darkness that they’ll provide will be priceless when we’re dying for one more minute of sleep.
Of course we also liked that they didn’t have those dangerous loopy pull cords (they were labeled as having “kid safe cords” that are actually separated instead of connected so they’re less of a strangulation hazard- no loop to get caught in). And of course we plan to keep them wound around one of those cord wrangling pieces of metal at the top right corner of the window far out of baby’s reach anyway, but we love the added loop-free design.
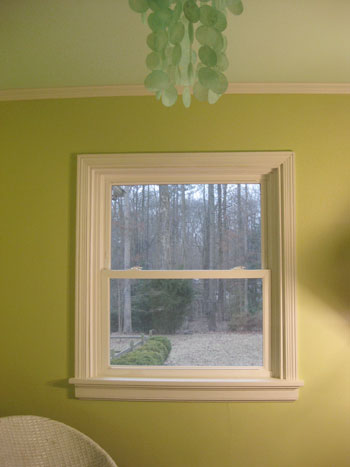
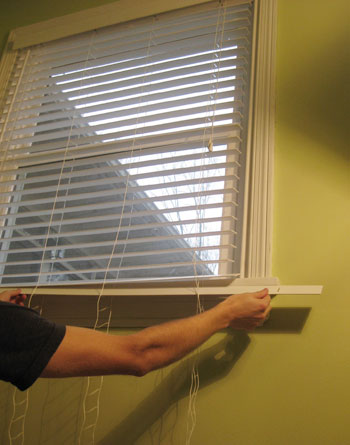
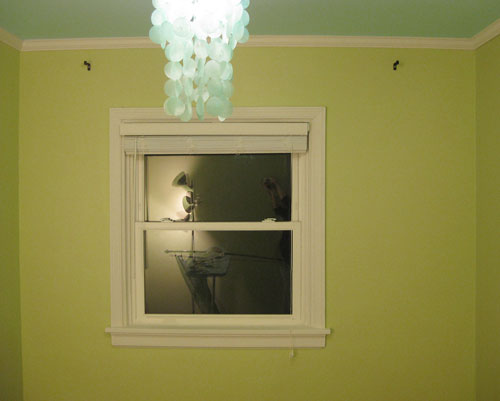
And since we love a before picture, here’s the window prior to our little curtain and blind fest:
John had the blinds up in about twenty minutes, but they definitely left a lot to be desired in the length department. They were actually a bit heavy to raise and lower, all due to the fact that they were at least two feet too long for our window, so there were a bunch of slats that just clumped together at the bottom of the blinds when they were in the “lowered” position. Luckily in the installation instructions they actually detailed how to shorten them to customize their length to fit any window. Nice.
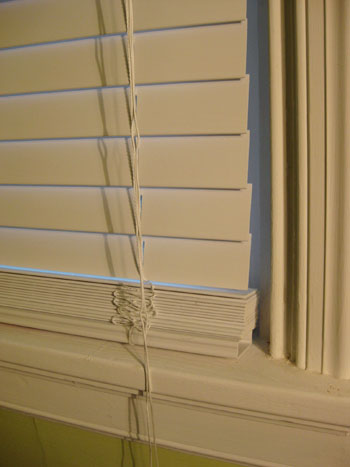
So John just followed the included directions and popped out these little plastic pieces on the bottom and could easily remove as many slats as he’d like and trim the excess string. Then he just popped the bottom pieces back on and we had an even more customized nursery blind that was a lot less cumbersome to raise and lower without all those extra slats at the bottom. Then, like a finely tuned relay team, John tagged me and said “your turn” and I began working on the curtains.
First I measured the approximate height that I wanted the curtains to be (just shy of 8′ for an almost floor to ceiling look) and added an inch and a half on the top and bottom to accommodate the hem. It was actually a nice clean measurement in the end because I determined that cutting two eight foot long sections of fabric would do the trick perfectly (since I wanted them a bit shy of 8′ but with the added hem measurement it brought them right back up to 8′ exactly). Hurrah for no quarter of an inch calculations!
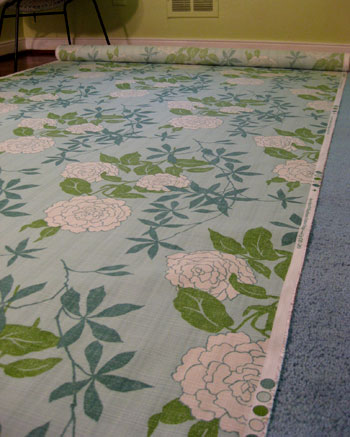
The other super convenient thing about measuring out my fabric was that we already happened to have our new 5 x 8′ rug on the floor… so to cut my 8′ long fabric sections, I simply rolled the bolt from one end of the rug to the other and cut a straight line using the edge of the rug as my guide. It doesn’t get much easier than that. And for the width I just left each panel as wise as the bolt allowed (so I didn’t need to trim those edges at all).
Then it was time for my trusty Heat N’ Bond iron on hem tape (I always grab the “ultra hold” variety). You may have seen us using it in this crib skirt tutorial from a while back and we’ve also used it to hem all the white Ikea curtains that we have hanging in the rest of the house. In short: I’m a hem tape black belt (the irony is that John does all the clothes-ironing in the house). Anyway it’s great stuff for leaving a polished and clean-looking edge (a lot more reliable then me with a sewing machine!) and it’s even washable and super cheap (we grab ours for a few bucks a roll at Michael’s). So I whipped out the ironing board, fired up the iron, laid out my big eight foot long fabric panel and had my scissors and hem tape on hand.
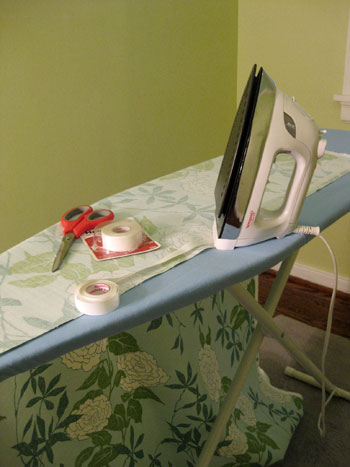
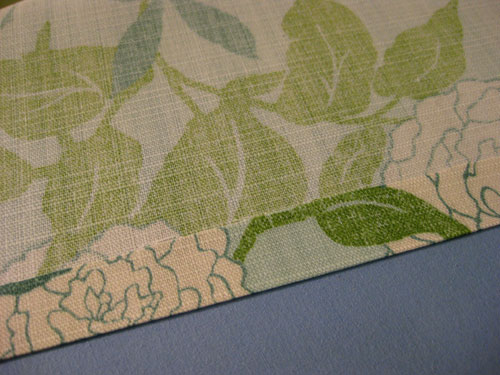
All it took was an easy-iron hem on each of the four sides of my fabric (for step by step hem tape instructions, just check out this post). Then I had a nice finished panel (without any rod loops or tabs) that I could clip up using my cheap-o oil-rubbed bronze curtain rings and rod from Target. Just look at how seamless and perfect that edge is! Much more even and less bunchy than anything I could sew…
Then I tagged John to get to work hanging the curtain rod with heavy duty anchors (so it’ll never come toppling down, even if over 100lbs of force is used) while I created a third curtain panel for the closet (this one only needed to be seven feet long). I also made a little rod pocket at the top of this panel (I just positioned hem tape about 4 inches below the edge of the fabric and ironed the fabric to that line of hem tape created a nice loop of fabric). Meanwhile John was already executing my let’s-cheat-our-off-centered-window-so-it-looks-more-balanced plan.
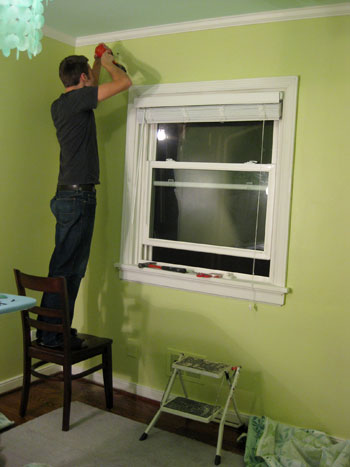
This angle gives you a better idea of what we were dealing with. See how the window is shifted a bit too much to the left? Well it’s nothing a curtain rod and some billowy floor length curtains can’t totally solve. I asked John to hang the left curtain rod support hook only about four inches wider than the trim on the left side of the window but requested that he hang the right curtain rod support hook about fifteen inches wider than the trim on the right side of the window.
This way, once we hung each of the curtain panels, we could cheat them both over to the right (blocking a bit of the window on the left side, but adding a ton of balance and polish to the room):
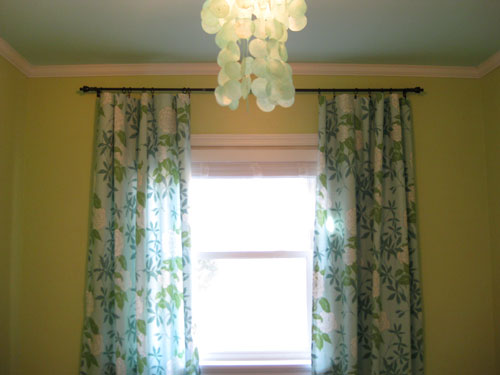
And we also mentioned in our shopping post that we snagged our simple oil-rubbed bronze curtain rod along with two packs of curtain rings on clearance at Target for less than $12 total. We love the height and the elegance that the shot of dark color brings to the wall, and love that it echoes everything from the mocha finish on the floor to a few of the darker wood accents that we’ll be bringing in to keep things from getting too sugary sweet and matchy-matchy.
Plus the clip-on curtain rings are actually something of a safety feature. Remember how we mentioned that someone could hang on those curtains without the rod coming down thanks to the use of some heavy duty anchors? Well we also realized that using clip-on curtain rings would allow for just the fabric panels to pull down if anyone got too rowdy and tried to swing from them (while the rings and the rod would most definitely stay put). We even tested them out by tugging on them a bit, and although it took pretty much all of my pregnant adult weight, sure enough the fabric was released from the rings and fluttered lightly to the floor while the rod and the rings stayed nice and securely in place on the wall.

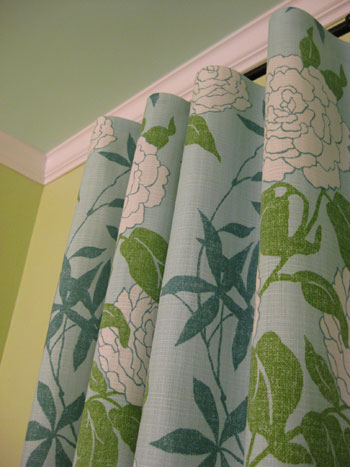
And as someone who has never used curtain ring clips before I just have to sing their praises. Not only are they nice little secret safety features, they also create such perfect little “waves” in the panels which result in such an amazingly high end look (and best of all, there’s no rod-pocket required, so you can hang any panel of fabric without worrying about extra sewing or loop-making).
Update: This P Kaufmann fabric seems to be discontinued now, but here’s an affiliate link to another fun oversized floral print on amazon for anyone looking for something similar.
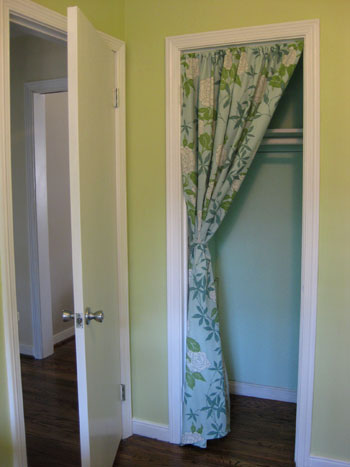
Oh and we can’t forget our tiny little blue closet (thanks to John’s cute idea to bring the aqua color from the ceiling into the mini enclave for fun). Doesn’t the curtain panel add some nice pattern and sweetness to a closet that was formerly pretty bleak looking?
Maybe we should refresh your memory with a before pic:
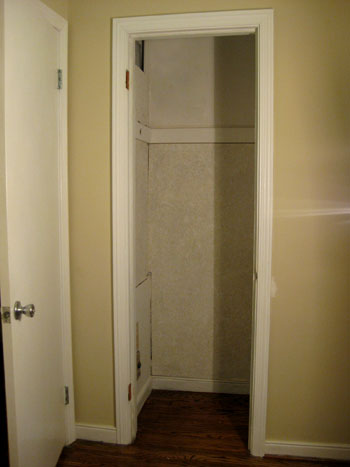
It’s looking better already, right? And of course we still have to add bins, baskets, and more hanging rods (along with some sort of storage piece on the floor of the closet).
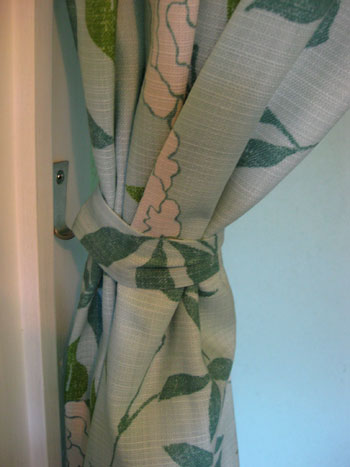
As for how we swagged our curtain panel so it’s mostly out of the way, we just hung it on a $3 tension rod (one that screws into both sides of the molding for more reinforcement than those that rely only on tension). Then we added a regular old Ikea coat hook that we already had on the left side of the closet’s interior trim. Next I made a little strip of fabric (using my trusty hem tape to finish the edges) and used that to create a loop around the curtain panel. Note: it’s safety pinned in the back so it can easily be removed and readjusted.
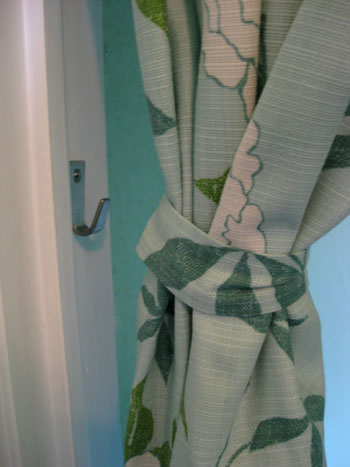
Then it was as simple as slipping my loop of fabric onto the hook on the side of the closet to hold the curtain off to the side.
So that’s the story of how we made our off-centered window look more balanced, blocked out all the light for less sleepless nights (fingers crossed) and added a fun pop of pattern to both sides of the nursery in the form of breezy floor-length curtains (which make the ceilings feel about a foot higher). Plus we only spent about $35 a panel (with almost an entire yard of fabric leftover!). Oh and it always makes us smile at our fabric luck when we recall that it’s actually indoor/outdoor fabric, so it’s a lot more stain and fade resistant than the average bear (although still completely washable). Which is a good thing when it comes to sticky fingers and goey faces…
But what about you guys? Have you made your own curtains before? Do you have a closet with a panel of fabric on a tension rod in lieu of a door? Spill the sewing (or hem tape) beans.
Psst – Wanna see our nursery progress from the very beginning? Here’s our painting post, our big shopping spree, and our crib hunting rundown.
Update – Want to know where we got something in our house or what paint color we used? Just click on this button:


Jennifer says
I love these curtains. Just wondering: I noticed that you didn’t hang them as high as the curtains in your other rooms. Is that because you don’t have the bamboo blinds in this case? How high above the window are they?
Thanks,
Jennifer
YoungHouseLove says
We actually made the curtains first and clipped them to the rod and then John got up on a chair with the rod and raised and lowered it until I liked the drape of the curtains (I wanted them to pool a bit on the floor). That’s how we determined the rod height that we wanted. Oh and they’re about 15″ above the window. Hope it helps!
xo,
s
Lindsay says
Hello! I was just over on today’s post and laughing to myself at how you have to repeat your comment responses, so I hope I’m not doing that here (I read through most, first)! I’m feeling brave enough to do curtains but am wondering about covering a sliding door. If I need two bolts of fabric wide for each panel, is hem tape a viable option for down the middle?
Sorry to make you the expert on hem tape…
Thanks in advance!
YoungHouseLove says
Good question (it’s one that we haven’t gotten!). We’d actually recommend making four panels and not hem-taping them together so they still feel billowy and breezy and they all can be pulled closed. Hope it helps!
xo,
s
ginai says
Hi,(Congrats on your new BB Clara!!) love your blog! love all of your re-do’s!
I do have a question about your nursery curtains!
when cutting your fabric/panels, did you line the second panel up with the first to keep your patterns straight? or just cut the next piece?
I looked at the pics but I couldn’t tell.
I have some material and I want to try your method of making curtains, and was curious as to if I should line up my patterns of the flowers as to so they will match?
thanks in advance!
ginai in atlanta.
YoungHouseLove says
We didn’t line anything up or anything, just measured the length, cut it to create one panel, and then remeasured the same length and cut the bolt of fabric again to create the second. It was such a large and random pattern that we didn’t worry about keeping things lined up. Hope it helps!
xo,
s
Michelle B. says
I love your blog and have been following it for some time now!
I realize this post is from a couple months ago, but I have a quick question about how you made the curtains. I would like to make my own shower curtain and I wonder if you think this method would work for a shower curtain? I love the no sew option!
Thank you so much!! I love all of your inspiration and daily posts!!
YoungHouseLove says
For a shower curtain you might have to sew over the hem to reinforce things since you’re dealing with moisture and steam. Hope it helps!
xo,
s
sylvie says
Great tutorial and the curtains are perfect for the room!
Question about the length of the curtains – I noticed that there’s a heat register below the window. Any concerns about blocking that with the long curtains? We have one on the floor by the window that I worry about – perhaps unnecessarily.
YoungHouseLove says
Hey Sylvie,
Luckily since we hung our curtains high and wide they don’t interfere with the registry. We do close the light blocking blinds at night (which end above the heat register at the sill) but the panels stay in place on either side of the window so they never block the air. Hope it helps!
xo,
s
R says
Hi! I found your blog not too long ago and have spent countless hours catching up on everything! I LOVE how you have links/tabs for everything…so convenient. Anyway, I seriously never comment, but I just had to say that I love all the details you give and you two are such great writers, you seem so nice and clever and witty. As I was reading thru the comments on several of your posts it seems like some people are hunting down the flaws in your projects and pointing out where you may have gone wrong (even typos??) a smidge more than telling you how AWESOME everything is! I have a 2.5yr old and a 3 month old and both have floor length curtains and we’ve never had an issue. I don’t think you necessarily need to be prepared for kids hanging from curtains, or ripping things down or otherwise ransacking your home. Although I’m sure it happens sometimes. :) Just keep doing what you’re doing!!!
YoungHouseLove says
Aw thanks R! So far so good with the curtains!
xo,
s
Kristin says
Revisiting this post since I am now working on some no-sew curtains for our nursery. Could you tell me 1. what size of clips did you use? and 2. how many clips did you use for each panel?
We have corner windows in our nursery (4 windows total) so I will need alot of clips, but I like the way yours are waved and wondered how many clips it took to get that look.
Thanks!
YoungHouseLove says
Hey Kristin,
There were 14 clips in the pack so we used 7 on each side. They’re around 2″ long including the ring and the clip. Hope it helps!
xo,
s
Tara says
Hi! I am just loving your blog!! Question about the curtains. We have a big window in our living room with the clip hooks. The curtains we have are not working because they are not wide enough. We need to open and close the curtains in the morning and at night. How do you know how wide the fabric needs to be and also what can I do as you will see the back of the fabric from the outside of the house. I hope this makes sense! I have been on your blog for the last hour-you guys are amazing!!
YoungHouseLove says
Hey Tara,
You can choose to line the back of the curtain with a fabric that looks good from out the window if the back of the fabric that you choose doesn’t look great (ours look good from outside since they basically just look white from that side so we left them be). As for needing to pull them shut, just measure the width of the window and make sure the panels are at least as wide as that measurement (ideally they would be a good bit wider than that so they can still have some drape to them when they’re pulled shut instead of being super taut and barely covered). Hope it helps!
xo,
s
Heather says
Being at the tailend of a renovation, the one thing I have held out on due to drywall dust, saw dust and other fun things that got kicked around, were the curtains. I bookmarked this post for future reference and finally put it to use the other day!! Super easy and they look GREAT! Managed to grab everything – fabric, rods, and clips – for 60-70% off at Jo-Ann Fabrics during their big July 4th sale. So not only was it easy, it was cheap. Double DIY bonus. Thanks for sharing such a great project.
Lisa says
Do you find that the faux wood blinds are very heavy? I have heard that they are heavier than any other type of blind (even the real wood ones).
YoungHouseLove says
Not really, especially since we took out the extra slats. We use them every day and we don’t seem to mind it.
xo,
s
Elise says
Sherry,
You may not see this since this post was so long ago but I’ve had the post starred in my google reader waiting to make some curtains for our bedroom. I want to use your tutorial but I’m not sure how much fabric to buy. If I wanted to make 8′ curtains like you did, how many yards of fabric do I need?
Thanks so much!
YoungHouseLove says
If your want them to be 8′ long, that’s 16′ of fabric that you’ll need to cut in half (with a few extra inches added in for hemming). So getting 6 yards should be plenty to make two curtains (cut in half that makes two nine foot long panels of fabric, which leaves plenty of room for hemming with fabric to spare). Good luck!
xo,
s
Elise says
Hello!
I was wondering if when you’ve washed curtains you’ve hemmed using heat and bond you’ve had any issues with the raw edges fraying? I noticed you left the salvage edge onto the sides, but what about the bottoms on these and other curtains in your house?
Thanks!
YoungHouseLove says
We’ve washed them according to the instructions (delicate and tumble dry low) and they’ve all been great!
xo,
s
Katie says
Love this! How did you attach the curtain rings to the curtain? Can’t wait to get some fabric!! Thanks!
YoungHouseLove says
They’re clip on rings. Sold at Target!
xo,
s
Lisa W says
I love how you centered the curtain on the wall even though your window isn’t. The place where we rent is odd and has the windows like 5 inches away for the corner, and a huge expense of wall to the other side of it. I don’t think that idea will work, but I’ll continue to brainstorm!
Carrie says
maybe balance it out with a mirror that’s the same size or some art.
Christy Panzarella says
I haven’t ever purchased fabric. I clicked your link, but it says no products available. Does all fabric come on a roll that wide? Could you share some dimensions, so I know what to buy for this project?
YoungHouseLove says
Hey Christy,
We’re not sure exactly how wide the roll was since we got it a while back and the link doesn’t work anymore for us to check, but we have seen this fabric sold in a number of places and it always appears to be the same sized roll, so if you find it anywhere we would just buy it and assume it’s the same width as the stuff we got. We’d guess it was about 55″ or so – but that’s just a guess. Hope it helps!
xo,
s
Judy says
Hi Guys!
I love this fabric! Would you happen to know the name or brand of fabric this is? Or which stores I could look at? Is it a drapery fabric or cotton?
Sorry for the numerous questions in a row!
Thanks!
Judy
YoungHouseLove says
Hey Judy,
So sorry the link is no longer working so we can’t give you much info other than it was made by Waverly we think and we found it at our local fancy fabric store (not a chain, just a fancy upholstery place). It’s actually outdoor fabric (so it’s fade and kid-resistant) which might help. Good luck in your search!
xo,
s
Maggie says
Hi guys…I love this idea for curtains, and I’m going to attempt to do the same type of thing in our entry way. I am just really confused as to how you go the dimensions / figured out how much fabric you needed. Would you be able to explain (and as detailed as you can get)that to me? I’m a total newbie to all of this. :)
YoungHouseLove says
Hey Maggie,
Just decide how long you want them to be and add up your yardage. We made our panels as wide as the bolt (so we didn’t need to do any trimming down since that was easiest). And when it comes to length, if you want to make two curtain panels that are 8? long, you’ll need 16? of fabric which you’ll then need to cut in half to create two 8′ panels (they might be an inch or two shorter after hemming). So getting 6 yards should be plenty to make two curtains (cut in half that makes two nine foot long panels of fabric, which leaves plenty of room for hemming with fabric to spare). Good luck!
xo,
s
steph says
Hey guys,
This is kind of random, but due to a mis-measurement (yes, I made up that word) when we put up our extra long shower curtain, it wasn’t long enough (at 84″), so I went back and got the 96″ one, and now my husband is suggesting that we sew the new one to fit where we’ve put the curved rod (we had to drill it into the wall since those aren’t tension ones) instead of taking the rod off the wall, spackling, painting and re-installing the rod higher to fit the new shower curtain. So my question is, have you guys used the Heat n’ Bond no sew stuff on anything besides cotton fabric? Because I’m apprehensive to use it on a shower curtain and fabric liner… but I’m terrible at sewing. Suggestions for dilemma? Thanks so much!!
YoungHouseLove says
We actually wouldn’t recommend iron on hem tape for a bathroom since it gets steamy and hot, and might unfold. As annoying as it sounds, it might be the fast solution to just unscrew the rod, slide the new curtain on, and screw it back in. Good luck!
xo,
s
M says
Hi,
I also appreciate your love of symmetry (and ways to “fake it”!). Just one thing though–I’m pretty sure those are Venetian blinds you’ve got there (with the slats), not Roman (which are one big piece of fabric).
YoungHouseLove says
You’re right! All fixed.
xo,
s
Charisse says
FYI the link is back up and running
teapotrose says
You guys make me smile…a lot! Those curtains are great! Have you ever sent anything in for the Nate Berkus Show House Proud segment? If not, you should. Spread the love! :)
YoungHouseLove says
We actually got to be on Nate’s show as judges of a decorating contest. We were on the whole episode and got chummy with Nate and did a segment on stage and the whole thing was amazing! Here’s that story: https://www.younghouselove.com/2010/10/this-pretty-much-made-our-year/
xoxo,
s
Jen says
do you think you could use hem tape to make a duvet cover? like taping together two flat sheets?
YoungHouseLove says
Hmm, it probably could! Duvets get more wear and tear than curtains, but if you used the heavy duty stuff and washed it according to directions it might hold up. Good luck!
xo,
s
Carrie says
I’m moving into a new place and the closet doors are super narrow and slide side to side. They’re horrible! I think I’ll have to use this trick to make them doable. Thank you for all you! PS I love the colors and fabrics in your new house’s guest room. super saturated and bold but not too loud. excellent job!
Haley says
Hey! I am making a curtain for our son’s closet and can’t seem to find a tension rod that screws in. Where did you happen to get yours? Thanks!
YoungHouseLove says
Ours was from Home Depot – it was hard to find one that screws in for sure!
xo,
s
Wendy says
Where did you get the tension rod for the closet? I want to do this with my closet, but I need a 23″ tension rod and all the ones I’ve found have a minimum width of 24″.
YoungHouseLove says
Ours was from Home Depot or Lowe’s (can’t remember which one). It was the kind that screws in for extra support (but it was still easily removable). Hope it helps!
xo,
s
Liz says
Hi! I wanted to use this method to do some smaller “cafe curtains” in our breakfast room and found the perfect fabric at Jo Ann’s today! They will remain open 95% of the time, mostly just to add a fun pop of color in the room. When I brought the sample home today and held it up to the window they were pretty translucent and wondered if they needed to be lined. It was also right when the sun was going down so was definitely the brightest part of the day.
I know you have used this method in a couple different rooms in your house and was wondering if when the fabric is pulled an bunched to the side it doesn’t look cheap/not substantial enough. They look so great in your pictures and my fabric is very similar to the pattern in Clara’s nursery, so I’m thinking it will be fine but was a little surprised how easily you could see through it in the light.
Sorry for the long post!!
YoungHouseLove says
Hmm, we’d definitely describe Clara’s fabric as “thick” (it’s indoor-outdoor material, kind of like what you see on outdoor cushions, so it’s firm and dense). which makes them very hard to see through in the window. Since yours sound a lot thinner you might want to try lining them (either with hem tape or a sewing machine or even with simple hand-stitching). Hope it helps!
xo,
s
Kelsey Geist says
Guys!
I am so happy you have this tutorial here.
I would not have been able to figure out curains without it.
So… I am almost finished DIYing my own beautiful curtains.
I just have to hem the bottom and I am finished.
I am going to send you a picture when I am done.
You cannot beleive the transformation of our master bedroom.
YoungHouseLove says
Wahoo! We’d love to see the pic!
xo,
s
C Redmond says
okay, I’m addicted to your blog (maybe not in a healthy way, either- I do have to sleep sometime)
Anyhow, I was looking at your curtain posts for a solution for my high bedroom windows- I think floor length is the solution but wanted to see some photo examples.
I googled floor length curtains on high windows. So funny, in the 1st 2 pages of google images results, YHL images appear 5 times. That’s crazy!! (I think Sherry’s “high & wide” mantra must match the tag words in my search)
Oh and funny, as well on page 5 of the google images results, I saw a little chihuahua peeking up at a plate of baked mac and cheese. And I thought, could that be Burger? No the url was maggieroseonline, however upon further inspection, in the background I recognized the red wax ‘blood’ effect on your white tapers from your Halloween post. It seems that maggierose was featuring an introduction to… guess who?… you guys. Seriously, you two are monopolizing diy home reno/decor in cyberspace.
well, off I go to declutter my closet- I planned it this week but after reading your related posts, I’m actually excited about it.
thanks for the inspiration
YoungHouseLove says
Haha that’s crazy. Burger is an internet sensation. Haha. No wonder he’s such a diva!
xo,
s
Lacye says
What’s the name of the fabric used in Clara’s nursery? The link to fabric.com is no longer working. :( Thanks!
YoungHouseLove says
So sorry we don’t know the name but it’s by Waverly I think. And it’s indoor/outdoor fabric if that helps. Good luck!
xo,
s
Shannon says
This question is a little late to this post but I was wondering if you’ve noticed any fading in the material since it’s not lined with anything? I’m planning on doing the same thing but I’m worried about the fabric fading if I don’t add any sort of backing to the other side. The fabric is a very light color, white with some blue and green pops, so I don’t think I’ll lose too much color but I don’t want the curtains to look dull in two months.
Thanks guys!!!
YoungHouseLove says
No fading yet! At least nothing noticeable at all (and we’ve had them around a year). But it’s actually indoor/outdoor fabric, so that might make it fade resistant. Hope it helps!
xo,
s
Brooke says
I’m hoping to make a couple of nursery curtains to hang in two fairly narrow windows in our nursery, and I think I’ll be using tension rods similar to your closet curtain due to the placement of the windows.
I was just wondering how you made the loop of fabric for the tension rod to go through. Did you just use another strip of Heat ‘N Bond tape?
Thanks!
YoungHouseLove says
Yup, I just ironed it to make a little pocket that the rod could slip through. Hope it helps!
xo,
s
heidi says
Do you remember what designer made that print for the curtains or the print name? I adore that print and i feel like i MUST find it
YoungHouseLove says
Sorry we don’t remember the name but it’s by Waverly I think. And it’s indoor/outdoor fabric if it helps. Good luck!
xo,
s
Kristin says
When you are using the hem tape, do you use 1 long strip per side, a strip as long as the fabric sitting on the ironing board, or break it up another way? Thanks!
YoungHouseLove says
As long as you have a strip of hem tape as long as the hem (whether it’s cut a few times or all one strip) you should be golden!
xo,
s
Sara says
I am having zero luck finding a tension rod that you can screw into the molding. Do you have a link to a similar one online? The guy at Lowe’s looked at me like I was speaking Swahili and said he’s never heard of such a thing, and I couldn’t find them at Home Depot either. Everyone seems to think I’m crazy for even suggesting that such a rod exists.
YoungHouseLove says
We recently found one at Home Depot (we got one for the new house too). They come in long plastic tube packaging. They look like they’re just a thin tension rod but there’s a small pack of screws. Hope it helps!
xo,
s
Jessica says
I have been wanting curtains in my house since we got married and moved in 4 years ago but I can never find anything I like. I love this idea and it is definately something I can do myself! My only question is do you have to use a certain kind of fabric or can you use just any kind?
YoungHouseLove says
I would use something pretty durable/not too thin, like cotton or linen or burlap or velvet. Just so it doesn’t look chincy. Although sheer fabric is really pretty too!
xo,
s
Tammy says
I love your blog and ideas, but as a professional babyproofer, I feel I need to tell you that the blinds are not child safe. Yes, the cords in 2 pieces are better than one loop, but the only safe blinds are cordless. The two cords can be tangled, and the inner cords of the blinds are very dangerous. Please have a look at this website: http://www.pfwbs.org/main/index.php/videos for videos and examples.
YoungHouseLove says
Thanks for the tips Tammy!
xo,
s
Vickii Bucy says
Hey there, just came across your site and LOVE!!!! the curtain fabric you put into your nursery. Do you happen to have the name/manufacturer of that fabric?
Thanks so much if you can help.
YoungHouseLove says
We know it’s from Waverly/P Kaufmann but don’t know the name. Hope it helps!
xo,
s
Angie Tobias says
Hey guys! Just wanted to drop by this post and let you know that I just saw a link to YHL in the Nov/Dec 2011 “natural home & garden” magazine on pg 21! You were referred to for your always-handy no
-sew curtains!
Hope you have a great weekend!
Angie
YoungHouseLove says
Thanks so much! That’s so exciting! We’ll have to check it out!
xo,
s
Liz says
Love the color scheme you used for the nursery! The curtain design is awesome! Well done! Congrats on your baby!!
Helen says
So thankful for Pinterest for directing me to your blog. I am going to remove all the yucky doors on my closets and use curtains instead. I’ve been trying to figure out how to make the standard curtain rods fit inside of the closet frame when I saw tension rods at Ross last night. Glad that you guys also thought it was a good idea! I’m hoping it’ll work out for wider closets.
Great blog, thanks so much!
Catherine says
I love your curtain fabric. My daughter’s room has soft turquoise walls and I am just redoing the texiles, but don’t want to switch the paint colour (I love it so much!). Do you remember the name of the fabric you bought? The link here is dead now. Do you know the kind of material? Cotton? Linen? It hangs very well. Thank you!
YoungHouseLove says
So sorry! It was by P Kaufmann and was outdoor fabric (I believe it’s also billed as Waverly since that’s the parent brand). Hope that helps you find it!
xo,
s
Tara T says
Ok, so I am going to try this, got the fabric, now have a question. Did you wash the fabric first? I have a 100% cotton fabric and I just need to know if I should wash it before I apply the heat n’ bond. Thanks for all your inspiration!!
YoungHouseLove says
I would wash it on cold and tumble dry low to pre-shrink it. Hope it helps!
xo,
s
Sarah says
I was going to recruit my mom to make some curtains for my nursery…but after finding this sew-free post I am ready to tackle it on my own (along with the crib skirt!). However, I was planning on lining the curtains with blackout fabric. Have you attempted this with the iron-on tape? I would love to get your thoughts/tips!
YoungHouseLove says
I haven’t actually. I worried the blackout fabric might melt (it feels sort of rubbery) when you iron it but maybe ask if it’s ironable before getting it or get a small sample and test it with hem tape? Hope it works!
xo,
s
anne says
I like so many others are just smitten with your fabric. I know it’s an older product, but I thought I would reach out to others reading your blog to see if anyone has found your fabric anywhere. I’ve gutted and am finally putting back together a cape-y farmhouse. There’s so much all at once, so I think I’m going to try your mood board approach. Wonderful blog!
YoungHouseLove says
Anyone have any info for Anne? Maybe try ebay or calling Waverly to see if they still make it?
xo,
s
Margaret says
I am in love with this fabric but cannot find it on the link. Do you know the name and or who makes it? Thank you, thank you, thank you!!!!!
YoungHouseLove says
We don’t have a link but it’s by Waverly! Hope it helps!
xo,
s
Rachel says
Just saw pictures and everything is gorgeous!! I tried clicking the link for the fabric but its not available anymore, do you by chance know the style name or anything? I was going to try and Google them.
Thanks!
YoungHouseLove says
We think it’s by that big company called Waverly so maybe that helps? Maybe try ebay since it’s a few years old?
xo,
s
Katie says
Can you please tell me the name of the fabric? I LOVE it and would like to see if I can find any thing online or elsewhere.
Thank you!
Katie
YoungHouseLove says
We think it’s by that big company called Waverly so maybe that helps? Maybe try ebay since it’s a few years old? Wish we had more info on the name/etc but it’s been a few years and it’s nowhere on the fabric since it’s from an outlet!
xo,
s
Ashley says
Hi!! I ran across your blog on Pinterest this morning while searching for a no sew curtain idea. I to have an absurdly sized window…but oddly enough I have a brand new house! I though all new houses had uniformly sized windows..lol guess not! Anyway, I needed a curtain idea since I cant find pre-mades that fit…and this seems right up my alley! Thank you!! I also am in love with your nursery and will be implementing some of your ideas (picture wall and thrift store stool) into my LO’s nursery! Keep up the great work! I will be back often!!
YoungHouseLove says
Thanks Ashley! Good luck with your curtains!
xo,
s
erica says
This tutorial is wonderful! My fiance & I are getting ready to move into our first home together :) I love sewing and creating, but my sewing machine is tucked away in a storage unit at the moment. We will be redoing our bedroom first and I am so happy to know I will be able to “pull together” curtains for our bedroom without my sewing machine! Thank YOU!! :)
nicole says
Do you hem all sides or just top and bottom?
YoungHouseLove says
Sherry hemmed all four sides.
-John